recommended oil CHEVROLET AVEO 2008 1.G Owners Manual
[x] Cancel search | Manufacturer: CHEVROLET, Model Year: 2008, Model line: AVEO, Model: CHEVROLET AVEO 2008 1.GPages: 384, PDF Size: 6.67 MB
Page 206 of 384
Before Leaving on a Long Trip
To prepare your vehicle for a long trip, consider having
it serviced by your dealer/retailer before departing.
Things to check on your own include:
•Windshield Washer Fluid:Reservoir full?
Windows clean — inside and outside?
•Wiper Blades:In good shape?
•Fuel, Engine Oil, Other Fluids:All levels checked?
•Lamps:Do they all work and are lenses clean?
•Tires:Are treads good? Are tires inflated to
recommended pressure?
•Weather and Maps:Safe to travel?
Have up-to-date maps?
Highway Hypnosis
Always be alert and pay attention to your surroundings
while driving. If you become tired or sleepy, find a
safe place to park your vehicle and rest.
Other driving tips include:
•Keep the vehicle well ventilated.
•Keep interior temperature cool.
•Keep your eyes moving — scan the road ahead
and to the sides.
•Check the rearview mirror and vehicle
instruments often.
Hill and Mountain Roads
Driving on steep hills or through mountains is different
than driving on flat or rolling terrain. Tips for driving
in these conditions include:
•Keep your vehicle serviced and in good shape.
•Check all fluid levels and brakes, tires, cooling
system, and transmission.
•Going down steep or long hills, shift to a lower gear.
{CAUTION:
If you do not shift down, the brakes could
get so hot that they would not work well.
You would then have poor braking or even
none going down a hill. You could crash.
Shift down to let the engine assist the brakes
on a steep downhill slope.
4-12
Page 229 of 384
Fuels in Foreign Countries
If you plan on driving in another country outside the
United States or Canada, the proper fuel might be hard
to find. Never use leaded gasoline or any other fuel
not recommended in the previous text on fuel. Costly
repairs caused by use of improper fuel would not
be covered by your warranty.
To check the fuel availability, ask an auto club, or
contact a major oil company that does business in the
country where you will be driving.
Filling the Tank
{CAUTION:
Fuel vapor burns violently and a fuel �re can
cause bad injuries. To help avoid injuries to
you and others, read and follow all the
instructions on the pump island. Turn off your
engine when you are refueling. Do not smoke
if you are near fuel or refueling your vehicle.
CAUTION: (Continued)
CAUTION: (Continued)
Do not use cellular phones. Keep sparks,
�ames, and smoking materials away from fuel.
Do not leave the fuel pump unattended when
refueling your vehicle. This is against the law
in some places. Do not re-enter the vehicle
while pumping fuel. Keep children away from
the fuel pump; never let children pump fuel.
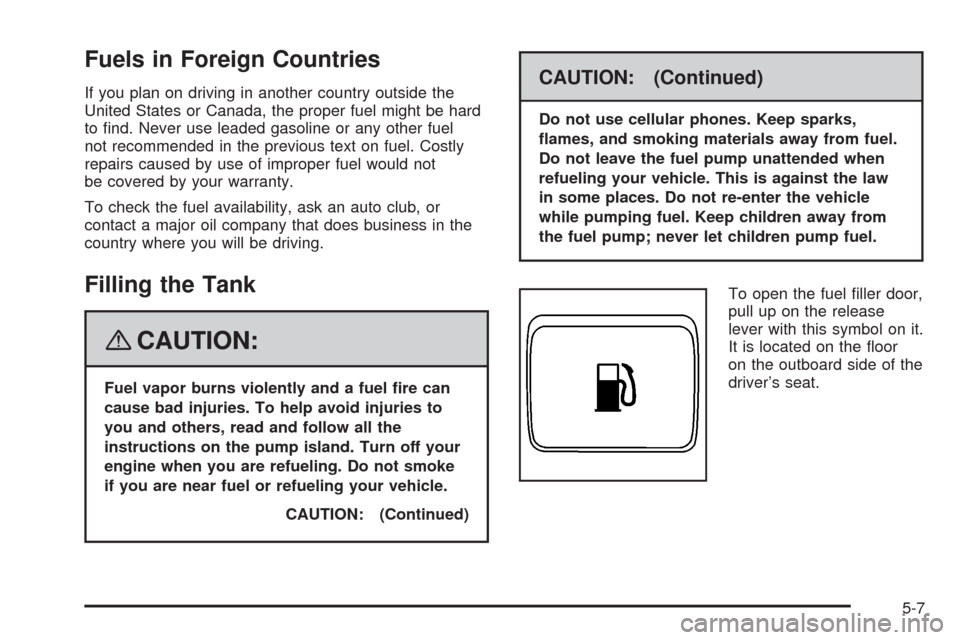
To open the fuel filler door,
pull up on the release
lever with this symbol on it.
It is located on the floor
on the outboard side of the
driver’s seat.
5-7
Page 236 of 384
Checking Engine Oil
It is a good idea to check the engine oil every time you
get fuel. In order to get an accurate reading, the oil
must be warm and the vehicle must be on level ground.
The engine oil dipstick handle is a yellow loop. See
Engine Compartment Overview on page 5-12for
the location of the engine oil dipstick.
1. Turn off the engine and give the oil several minutes
to drain back into the oil pan. If you do not do this,
the oil dipstick might not show the actual level.
2. Pull the dipstick and clean it with a paper towel or
cloth, then push it back in all the way. Remove it
again, keeping the tip down and check the level.
When to Add Engine Oil
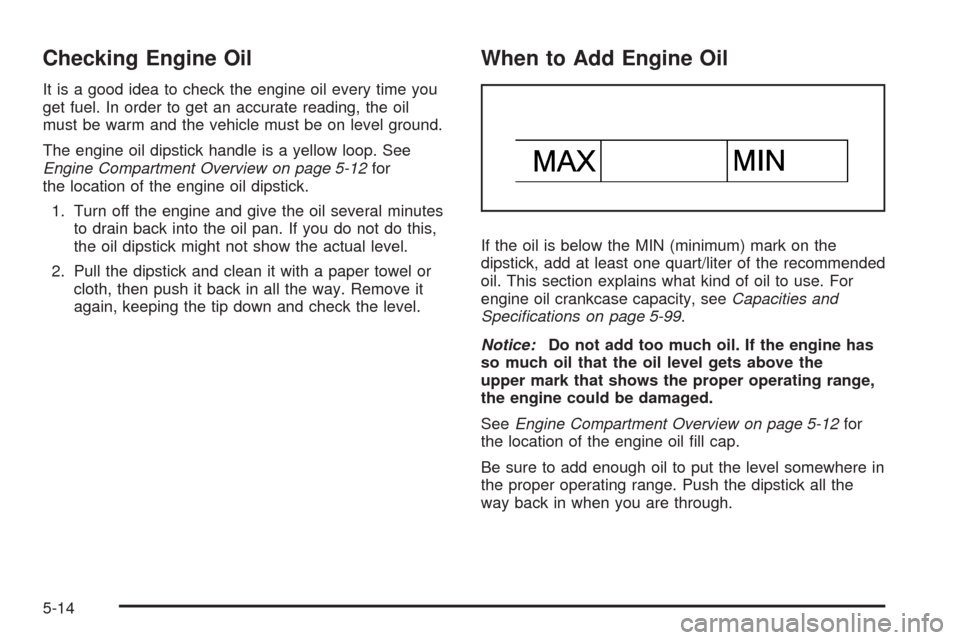
If the oil is below the MIN (minimum) mark on the
dipstick, add at least one quart/liter of the recommended
oil. This section explains what kind of oil to use. For
engine oil crankcase capacity, seeCapacities and
Specifications on page 5-99.
Notice:Do not add too much oil. If the engine has
so much oil that the oil level gets above the
upper mark that shows the proper operating range,
the engine could be damaged.
SeeEngine Compartment Overview on page 5-12for
the location of the engine oil fill cap.
Be sure to add enough oil to put the level somewhere in
the proper operating range. Push the dipstick all the
way back in when you are through.
5-14
Page 237 of 384
What Kind of Engine Oil to Use
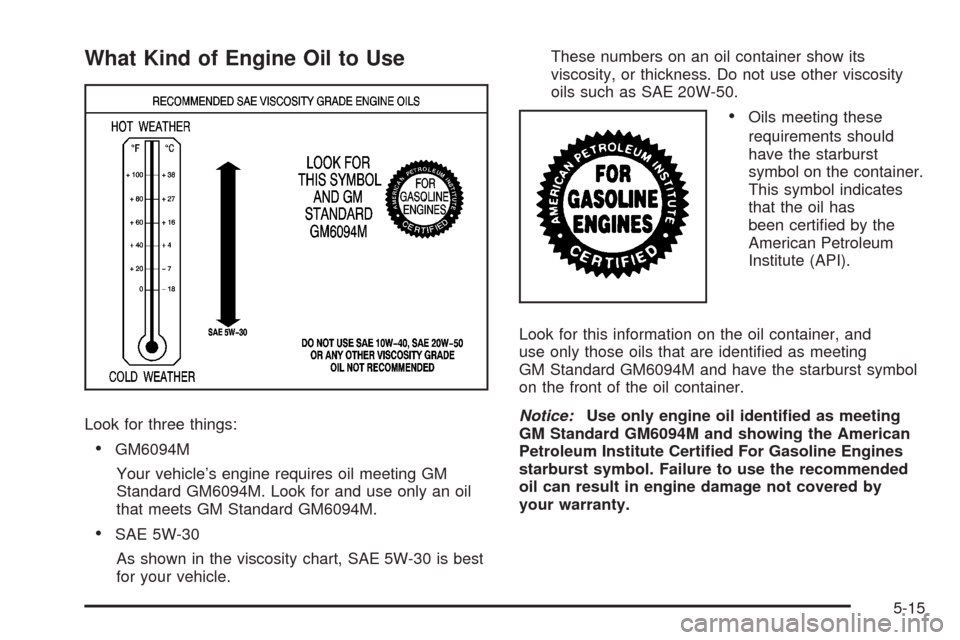
Look for three things:
•GM6094M
Your vehicle’s engine requires oil meeting GM
Standard GM6094M. Look for and use only an oil
that meets GM Standard GM6094M.
•SAE 5W-30
As shown in the viscosity chart, SAE 5W-30 is best
for your vehicle.These numbers on an oil container show its
viscosity, or thickness. Do not use other viscosity
oils such as SAE 20W-50.
•Oils meeting these
requirements should
have the starburst
symbol on the container.
This symbol indicates
that the oil has
been certified by the
American Petroleum
Institute (API).
Look for this information on the oil container, and
use only those oils that are identified as meeting
GM Standard GM6094M and have the starburst symbol
on the front of the oil container.
Notice:Use only engine oil identi�ed as meeting
GM Standard GM6094M and showing the American
Petroleum Institute Certi�ed For Gasoline Engines
starburst symbol. Failure to use the recommended
oil can result in engine damage not covered by
your warranty.
5-15
Page 238 of 384
If you are in an area of extreme cold, where the
temperature falls below−20°F (−29°C), it is
recommended that you use either an SAE 5W-30
synthetic oil or an SAE 0W-30 oil. Both provide easier
cold starting and better protection for the engine at
extremely low temperatures.
Engine Oil Additives
Do not add anything to the oil. The recommended oils
with the starburst symbol that meet GM Standard
GM6094M are all you need for good performance and
engine protection.
When to Change Engine Oil
If any one of these is true for you, use the short trip/city
maintenance schedule:
•Most trips are less than 5 miles (8 km). This is
particularly important when outside temperatures
are below freezing.
•Most trips include extensive idling, such as frequent
driving in stop-and-go traffic.
•You frequently use a carrier on top of your vehicle.
•The vehicle is used for delivery service, police,
taxi, or other commercial application.
Driving under these conditions causes engine oil to
break down sooner. If any one of these is true for your
vehicle, you need to change the oil and filter every
3,000 miles (5 000 km) or 3 months, whichever
occurs first.
If none of them is true, use the long trip/highway
maintenance schedule. Change the oil and filter every
7,500 miles (12 500 km) or 12 months, whichever occurs
first. Driving a vehicle with a fully warmed engine
under highway conditions will cause engine oil to break
down slower.
5-16
Page 245 of 384
What to Use
Use a mixture of one-half clean, drinkable water and
one-half DEX-COOL®coolant which will not damage
aluminum parts. If you use this coolant mixture, you do
not need to add anything else.
{CAUTION:
Adding only plain water to your cooling
system can be dangerous. Plain water, or
some other liquid such as alcohol, can boil
before the proper coolant mixture will. Your
vehicle’s coolant warning system is set for the
proper coolant mixture. With plain water or the
wrong mixture, your engine could get too hot
but you would not get the overheat warning.
Your engine could catch �re and you or others
could be burned. Use a 50/50 mixture of clean,
drinkable water and DEX-COOL
®coolant.Notice:If you use an improper coolant mixture, your
engine could overheat and be badly damaged. The
repair cost would not be covered by your warranty.
Too much water in the mixture can freeze and crack
the engine, radiator, heater core, and other parts.
If you have to add coolant more than four times a year,
have your dealer/retailer check your cooling system.
Notice:If you use extra inhibitors and/or additives
in your vehicle’s cooling system, you could
damage your vehicle. Use only the proper mixture
of the engine coolant listed in this manual for
the cooling system. SeePart D: Recommended
Fluids and Lubricants on page 6-23for more
information.
5-23
Page 255 of 384
It is not a good idea to top off the brake fluid. Adding
brake fluid will not correct a leak. If fluid is added when
the linings are worn, there will be too much fluid
when new brake linings are installed. Add or remove
brake fluid, as necessary, only when work is done on the
brake hydraulic system.
{CAUTION:
If your vehicle has too much brake �uid, it can
spill on the engine. The �uid will burn if the
engine is hot enough. You or others could be
burned, and your vehicle could be damaged.
Add brake �uid only when work is done on the
brake and/or clutch hydraulic system.
When the brake fluid falls to a low level, the brake
warning light will come on. SeeBrake System Warning
Light on page 3-33.
What to Add
When you do need brake fluid, use only DOT-3 brake
fluid. Use new brake fluid from a sealed container
only. SeePart D: Recommended Fluids and Lubricants
on page 6-23.Always clean the brake fluid reservoir cap and the area
around the cap before removing it. This helps keep
dirt from entering the reservoir.
{CAUTION:
With the wrong kind of �uid in the brake or
clutch hydraulic system, the brakes or clutch
might not work well. This could cause a crash.
Always use the proper brake �uid.
Notice:
Using the wrong �uid can badly damage brake
or clutch hydraulic system parts. For example,
just a few drops of mineral-based oil, such
as engine oil, in the brake or clutch hydraulic
system can damage brake or clutch hydraulic
system parts so badly that they will have
to be replaced. Do not let someone put in the
wrong kind of �uid.
If you spill brake �uid on your vehicle’s painted
surfaces, the paint �nish can be damaged.
Be careful not to spill brake �uid on your
vehicle. If you do, wash it off immediately.
SeeWashing Your Vehicle on page 5-83.
5-33
Page 301 of 384
Do not use your compact spare on other vehicles.
And do not mix your compact spare tire or wheel with
other wheels or tires. They will not fit. Keep your
spare tire and its wheel together.
Notice:Tire chains will not �t your compact spare.
Using them can damage your vehicle and can
damage the chains too. Do not use tire chains on
your compact spare.
Appearance Care
Interior Cleaning
Your vehicle’s interior will continue to look its best if it is
cleaned often. Although not always visible, dust and
dirt can accumulate on your upholstery. Dirt can damage
carpet, fabric, leather, and plastic surfaces. Regular
vacuuming is recommended to remove particles
from your upholstery. It is important to keep your
upholstery from becoming and remaining heavily soiled.
Soils should be removed as quickly as possible. Your
vehicle’s interior may experience extremes of heat
that could cause stains to set rapidly.Lighter colored interiors may require more frequent
cleaning. Use care because newspapers and garments
that transfer color to your home furnishings may also
transfer color to your vehicle’s interior.
When cleaning your vehicle’s interior, only use cleaners
specifically designed for the surfaces being cleaned.
Permanent damage may result from using cleaners on
surfaces for which they were not intended. Use glass
cleaner only on glass. Remove any accidental over-spray
from other surfaces immediately. To prevent over-spray,
apply cleaner directly to the cleaning cloth.
Notice:If you use abrasive cleaners when cleaning
glass surfaces on your vehicle, you could scratch
the glass and/or cause damage to the rear window
defogger. When cleaning the glass on your
vehicle, use only a soft cloth and glass cleaner.
Many cleaners contain solvents that may become
concentrated in your vehicle’s breathing space.
Before using cleaners, read and adhere to all safety
instructions on the label. While cleaning your vehicle’s
interior, maintain adequate ventilation by opening
your vehicle’s doors and windows.
Dust may be removed from small buttons and knobs
using a small brush with soft bristles.
5-79
Page 303 of 384
To clean, use the following instructions:
1. Saturate a lint-free, clean white cloth with water
or club soda.
2. Wring the cloth to remove excess moisture.
3. Start on the outside edge of the soil and gently rub
toward the center. Continue cleaning, using a clean
area of the cloth each time it becomes soiled.
4. Continue to gently rub the soiled area until the
cleaning cloth remains clean.
5. If the soil is not completely removed, use a mild
soap solution and repeat the cleaning process
that was used with plain water.
If any of the soil remains, a commercial fabric cleaner
or spot lifter may be necessary. When a commercial
upholstery cleaner or spot lifter is to be used, test
a small hidden area for colorfastness first. If the locally
cleaned area gives any impression that a ring
formation may result, clean the entire surface.
After the cleaning process has been completed, a paper
towel can be used to blot excess moisture from the
fabric or carpet.Leather
A soft cloth dampened with water can be used to
remove dust. If a more thorough cleaning is necessary,
a soft cloth dampened with a mild soap solution can
be used. Allow the leather to dry naturally. Do not use
heat to dry. Never use steam to clean leather. Never
use spot lifters or spot removers on leather. Many
commercial leather cleaners and coatings that are sold
to preserve and protect leather may permanently
change the appearance and feel of your leather and are
not recommended. Do not use silicone or wax-based
products, or those containing organic solvents to clean
your vehicle’s interior because they can alter the
appearance by increasing the gloss in a non-uniform
manner. Never use shoe polish on leather.
5-81
Page 306 of 384
If your vehicle has a basecoat/clearcoat paint finish, the
clearcoat gives more depth and gloss to the colored
basecoat. Always use waxes and polishes that are
non-abrasive and made for a basecoat/clearcoat
paint finish.
Notice:Machine compounding or aggressive
polishing on a basecoat/clearcoat paint �nish may
damage it. Use only non-abrasive waxes and
polishes that are made for a basecoat/clearcoat
paint �nish on your vehicle.
Foreign materials such as calcium chloride and other
salts, ice melting agents, road oil and tar, tree sap, bird
droppings, chemicals from industrial chimneys, etc.,
can damage your vehicle’s finish if they remain
on painted surfaces. Wash the vehicle as soon as
possible. If necessary, use non-abrasive cleaners that
are marked safe for painted surfaces to remove
foreign matter.
Exterior painted surfaces are subject to aging, weather
and chemical fallout that can take their toll over a
period of years. You can help to keep the paint finish
looking new by keeping your vehicle garaged or covered
whenever possible.Protecting Exterior Bright Metal Parts
Bright metal parts should be cleaned regularly to keep
their luster. Washing with water is all that is usually
needed. However, you may use chrome polish on
chrome or stainless steel trim, if necessary.
Use special care with aluminum trim. To avoid damaging
protective trim, never use auto or chrome polish,
steam or caustic soap to clean aluminum. A coating
of wax, rubbed to high polish, is recommended for
all bright metal parts.
Windshield and Wiper Blades
Clean the outside of the windshield with glass cleaner.
Clean the rubber blades using a lint free cloth or
paper towel soaked with windshield washer fluid
or a mild detergent. Wash the windshield thoroughly
when cleaning the blades. Bugs, road grime, sap,
and a buildup of vehicle wash/wax treatments may
cause wiper streaking. Replace the wiper blades if
they are worn or damaged.
Wipers can be damaged by:
•Extreme dusty conditions
•Sand and salt
•Heat and sun
•Snow and ice, without proper removal
5-84