instrument panel CHEVROLET AVEO 2009 1.G Owner's Guide
[x] Cancel search | Manufacturer: CHEVROLET, Model Year: 2009, Model line: AVEO, Model: CHEVROLET AVEO 2009 1.GPages: 354, PDF Size: 2.07 MB
Page 147 of 354
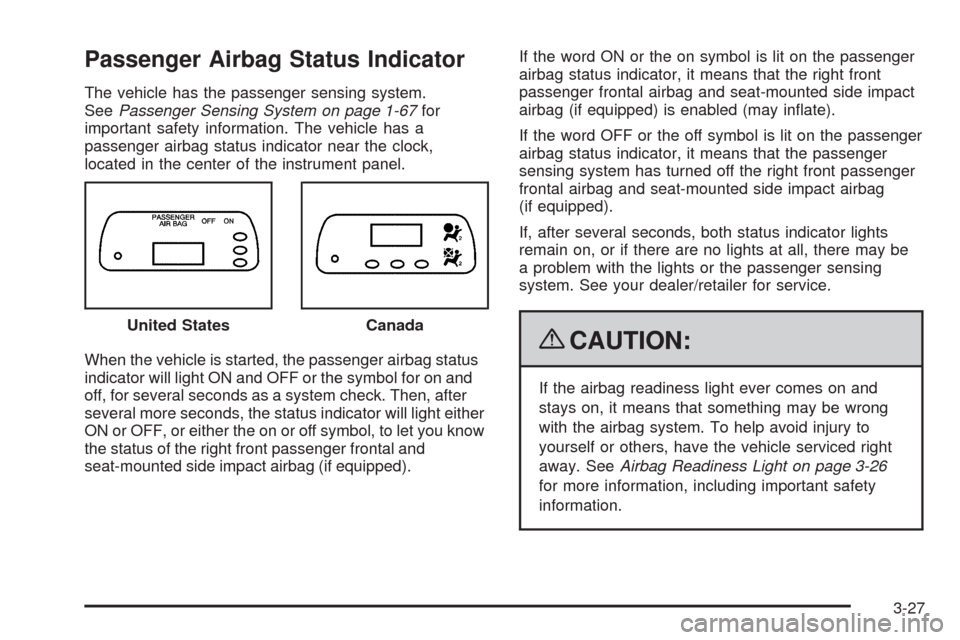
Passenger Airbag Status Indicator
The vehicle has the passenger sensing system.
SeePassenger Sensing System on page 1-67for
important safety information. The vehicle has a
passenger airbag status indicator near the clock,
located in the center of the instrument panel.
When the vehicle is started, the passenger airbag status
indicator will light ON and OFF or the symbol for on and
off, for several seconds as a system check. Then, after
several more seconds, the status indicator will light either
ON or OFF, or either the on or off symbol, to let you know
the status of the right front passenger frontal and
seat-mounted side impact airbag (if equipped).If the word ON or the on symbol is lit on the passenger
airbag status indicator, it means that the right front
passenger frontal airbag and seat-mounted side impact
airbag (if equipped) is enabled (may inate).
If the word OFF or the off symbol is lit on the passenger
airbag status indicator, it means that the passenger
sensing system has turned off the right front passenger
frontal airbag and seat-mounted side impact airbag
(if equipped).
If, after several seconds, both status indicator lights
remain on, or if there are no lights at all, there may be
a problem with the lights or the passenger sensing
system. See your dealer/retailer for service.
{CAUTION:
If the airbag readiness light ever comes on and
stays on, it means that something may be wrong
with the airbag system. To help avoid injury to
yourself or others, have the vehicle serviced right
away. SeeAirbag Readiness Light on page 3-26
for more information, including important safety
information. United States
Canada
3-27
Page 185 of 354
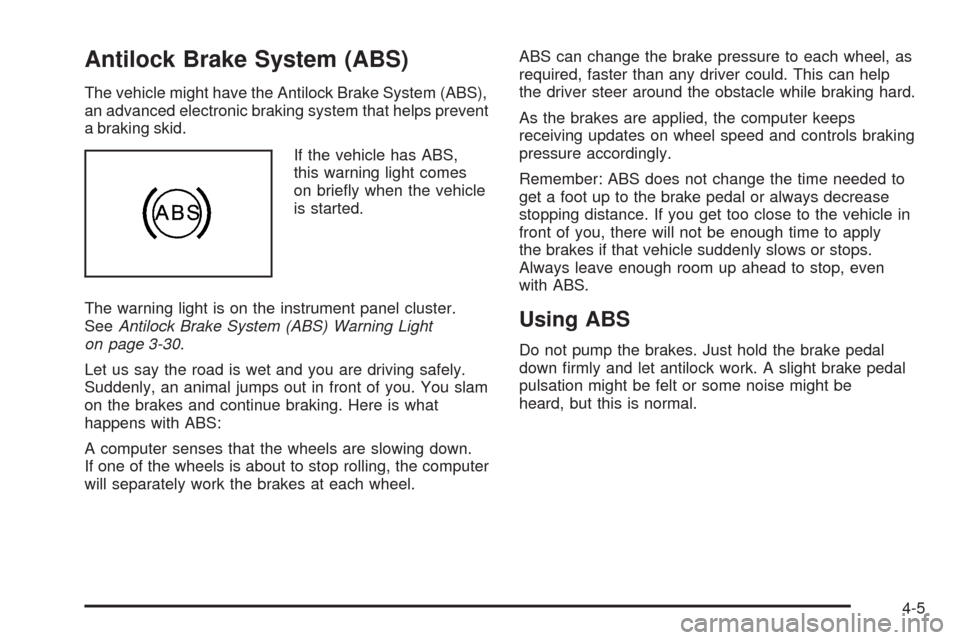
Antilock Brake System (ABS)
The vehicle might have the Antilock Brake System (ABS),
an advanced electronic braking system that helps prevent
a braking skid.
If the vehicle has ABS,
this warning light comes
on briey when the vehicle
is started.
The warning light is on the instrument panel cluster.
SeeAntilock Brake System (ABS) Warning Light
on page 3-30.
Let us say the road is wet and you are driving safely.
Suddenly, an animal jumps out in front of you. You slam
on the brakes and continue braking. Here is what
happens with ABS:
A computer senses that the wheels are slowing down.
If one of the wheels is about to stop rolling, the computer
will separately work the brakes at each wheel.ABS can change the brake pressure to each wheel, as
required, faster than any driver could. This can help
the driver steer around the obstacle while braking hard.
As the brakes are applied, the computer keeps
receiving updates on wheel speed and controls braking
pressure accordingly.
Remember: ABS does not change the time needed to
get a foot up to the brake pedal or always decrease
stopping distance. If you get too close to the vehicle in
front of you, there will not be enough time to apply
the brakes if that vehicle suddenly slows or stops.
Always leave enough room up ahead to stop, even
with ABS.
Using ABS
Do not pump the brakes. Just hold the brake pedal
down rmly and let antilock work. A slight brake pedal
pulsation might be felt or some noise might be
heard, but this is normal.
4-5
Page 194 of 354
Blizzard Conditions
Being stuck in snow can be in a serious situation.
Stay with the vehicle unless there is help nearby.
If possible, use theRoadside Assistance Program
on page 7-7. To get help and keep everyone in the
vehicle safe:
Turn on theHazard Warning Flashers on page 3-6.
Tie a red cloth to an outside mirror.
{CAUTION:
Snow can trap engine exhaust under the vehicle.
This may cause exhaust gases to get inside.
Engine exhaust contains carbon monoxide (CO)
which cannot be seen or smelled. It can cause
unconsciousness and even death.
If the vehicle is stuck in the snow:
Clear away snow from around the base of
your vehicle, especially any that is blocking
the exhaust pipe.
Check again from time to time to be sure
snow does not collect there.
CAUTION: (Continued)
CAUTION: (Continued)
Open a window about two inches (5 cm) on
the side of the vehicle that is away from the
wind to bring in fresh air.
Fully open the air outlets on or under the
instrument panel.
Adjust the Climate Control system to a setting
that circulates the air inside the vehicle and
set the fan speed to the highest setting.
See Climate Control System in the Index.
For more information about carbon monoxide,
seeEngine Exhaust on page 2-32.
Snow can trap exhaust gases under your vehicle.
This can cause deadly CO (carbon monoxide) gas
to get inside. CO could overcome you and kill you.
You cannot see it or smell it, so you might not
know it is in your vehicle. Clear away snow from
around the base of your vehicle, especially any
that is blocking the exhaust.
4-14
Page 210 of 354
Tire Pressure Monitor Operation.....................5-60
Tire Inspection and Rotation...........................5-62
When It Is Time for New Tires.......................5-63
Buying New Tires.........................................5-64
Different Size Tires and Wheels......................5-65
Uniform Tire Quality Grading..........................5-66
Wheel Alignment and Tire Balance..................5-67
Wheel Replacement......................................5-67
Tire Chains..................................................5-68
If a Tire Goes Flat........................................5-69
Changing a Flat Tire.....................................5-70
Removing the Spare Tire and Tools................5-71
Removing the Flat Tire and Installing the
Spare Tire................................................5-73
Storing a Flat or Spare Tire and Tools............5-78
Compact Spare Tire......................................5-78
Appearance Care............................................5-79
Interior Cleaning...........................................5-79
Fabric/Carpet...............................................5-80
Leather.......................................................5-81
Instrument Panel, Vinyl, and Other Plastic
Surfaces..................................................5-81
Care of Safety Belts......................................5-82
Weatherstrips...............................................5-82Washing Your Vehicle...................................5-82
Cleaning Exterior Lamps/Lenses.....................5-83
Finish Care..................................................5-83
Windshield and Wiper Blades.........................5-84
Aluminum Wheels.........................................5-84
Tires...........................................................5-85
Sheet Metal Damage.....................................5-85
Finish Damage.............................................5-85
Underbody Maintenance................................5-85
Chemical Paint Spotting.................................5-85
Vehicle Identication......................................5-86
Vehicle Identication Number (VIN).................5-86
Service Parts Identication Label.....................5-86
Electrical System............................................5-86
Add-On Electrical Equipment..........................5-86
Headlamp Wiring..........................................5-87
Windshield Wiper Fuses................................5-87
Power Windows and Other Power Options.......5-87
Fuses and Circuit Breakers............................5-87
Instrument Panel Fuse Block..........................5-88
Engine Compartment Fuse Block....................5-89
Capacities and Specications..........................5-93
Section 5 Service and Appearance Care
5-2
Page 220 of 354

Hood Release
To open the hood:
1. Pull the hood release
handle inside the
vehicle. It is located on
the lower left side of
the instrument panel.
2. Then go to the front of the vehicle and lift up on the
secondary hood release lever, located under the
front center of the hood.
3. Lift the hood and release the hood prop from its
retainer located on the underside of the hood.
5-12
Page 224 of 354
Engine Oil
If the engine oil pressure
light comes on, check the
engine oil level right away.
The oil pressure light is on the instrument panel cluster.
SeeOil Pressure Light on page 3-34. Check the
engine oil level regularly; this is an added reminder.
Checking Engine Oil
It is a good idea to check the engine oil level at each
fuel ll. In order to get an accurate reading, the oil must
be warm and the vehicle must be on level ground.
The engine oil dipstick handle is a yellow loop. See
Engine Compartment Overview on page 5-14for
the location of the engine oil dipstick.
1. Turn off the engine and give the oil several minutes
to drain back into the oil pan. If this is not done, the
oil dipstick might not show the actual level.
2. Pull the dipstick and clean it with a paper towel or
cloth, then push it back in all the way. Remove it
again, keeping the tip down and check the level.
When to Add Engine Oil
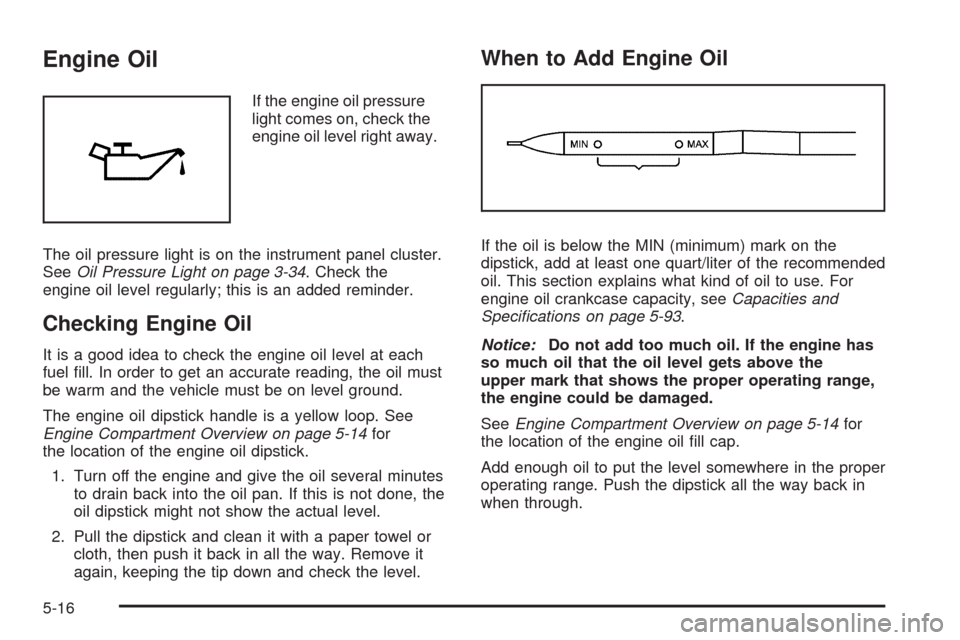
If the oil is below the MIN (minimum) mark on the
dipstick, add at least one quart/liter of the recommended
oil. This section explains what kind of oil to use. For
engine oil crankcase capacity, seeCapacities and
Specifications on page 5-93.
Notice:Do not add too much oil. If the engine has
so much oil that the oil level gets above the
upper mark that shows the proper operating range,
the engine could be damaged.
SeeEngine Compartment Overview on page 5-14for
the location of the engine oil ll cap.
Add enough oil to put the level somewhere in the proper
operating range. Push the dipstick all the way back in
when through.
5-16
Page 238 of 354
4. With the coolant surge tank pressure cap off, start
the engine and let it run until you can feel the upper
radiator hose getting hot. Watch out for the
engine cooling fan.
By this time, the coolant level inside the coolant
surge tank may be lower. If the level is lower than
the Maximum mark, add more of the proper mixture
to the coolant surge tank until the level reaches
the mark.
5. Replace the pressure cap. Be sure the pressure
cap is hand-tight and fully seated.
Notice:If the pressure cap is not tightly installed,
coolant loss and possible engine damage may
occur. Be sure the cap is properly and tightly
secured.Engine Overheating
The vehicle has an indicator to warn of the engine
overheating.
There is a coolant temperature gage on the instrument
panel cluster. SeeEngine Coolant Temperature
Gage on page 3-31.
You may decide not to lift the hood when this warning
appears, but instead get service help right away.
SeeRoadside Assistance Program on page 7-7.
If you do decide to lift the hood, make sure the vehicle
is parked on a level surface.
Then check to see if the engine cooling fan is running.
If the engine is overheating, the fan should be
running. If it is not, do not continue to run the engine
and have the vehicle serviced.
Notice:Engine damage from running the engine
without coolant is not covered by the warranty.
Notice:If the engine catches re because of being
driven with no coolant, your vehicle can be badly
damaged. The costly repairs would not be covered
by the vehicle warranty.
5-30
Page 268 of 354
Federal Communications Commission
(FCC) and Industry and Science
Canada
The Tire Pressure Monitor System (TPMS) operates on
a radio frequency and complies with Part 15 of the
FCC Rules. Operation is subject to the following two
conditions:
1. This device may not cause harmful interference.
2. This device must accept any interference received,
including interference that may cause undesired
operation.
Vehicles with TPMS operate on a radio frequency and
comply with RSS-210 of Industry and Science Canada.
Operation is subject to the following two conditions:
1. This device may not cause interference.
2. This device must accept any interference received,
including interference that may cause undesired
operation of the device.
Changes or modications to this system by other than
an authorized service facility could void authorization to
use this equipment.
Tire Pressure Monitor Operation
This vehicle may have a Tire Pressure Monitor System
(TPMS). The TPMS is designed to warn the driver when a
low tire pressure condition exists. If your vehicle has this
feature, the TPMS sensors are mounted onto each tire
and wheel assembly, excluding the spare tire and wheel
assembly. The TPMS sensors monitor the air pressure in
your vehicle’s tires and transmit tire pressure readings to
a receiver located in the vehicle.
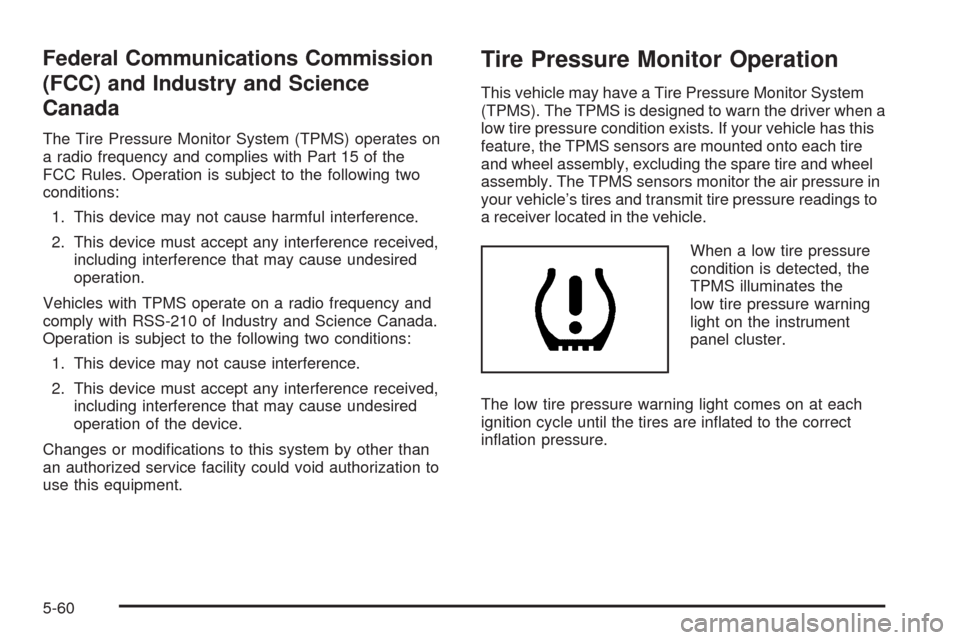
When a low tire pressure
condition is detected, the
TPMS illuminates the
low tire pressure warning
light on the instrument
panel cluster.
The low tire pressure warning light comes on at each
ignition cycle until the tires are inated to the correct
ination pressure.
5-60
Page 289 of 354

If any of the soil remains, a commercial fabric cleaner or
spot lifter may be necessary. When a commercial
upholstery cleaner or spot lifter is to be used, test a
small hidden area for colorfastness rst. If the locally
cleaned area gives any impression that a ring formation
may result, clean the entire surface.
After the cleaning process has been completed, a paper
towel can be used to blot excess moisture from the
fabric or carpet.
Leather
A soft cloth dampened with water can be used to
remove dust. If a more thorough cleaning is necessary,
a soft cloth dampened with a mild soap solution can
be used. Allow the leather to dry naturally. Do not use
heat to dry. Never use steam to clean leather. Never
use spot lifters or spot removers on leather. Many
commercial leather cleaners and coatings that are sold
to preserve and protect leather may permanently
change the appearance and feel of the leather and are
not recommended. Do not use silicone or wax-based
products, or those containing organic solvents to clean
the vehicle’s interior because they can alter the
appearance by increasing the gloss in a non-uniform
manner. Never use shoe polish on leather.
Instrument Panel, Vinyl, and Other
Plastic Surfaces
A soft cloth dampened with water may be used to
remove dust. If a more thorough cleaning is necessary,
a clean soft cloth dampened with a mild soap solution
can be used to gently remove dust and dirt. Never use
spot lifters or removers on plastic surfaces. Many
commercial cleaners and coatings that are sold to
preserve and protect soft plastic surfaces may
permanently change the appearance and feel of the
interior and are not recommended. Do not use silicone
or wax-based products, or those containing organic
solvents to clean the vehicle’s interior because they can
alter the appearance by increasing the gloss in a
non-uniform manner.
Some commercial products may increase gloss on the
instrument panel. The increase in gloss may cause
annoying reections in the windshield and even make it
difficult to see through the windshield under certain
conditions.
5-81
Page 294 of 354
Vehicle Identication
Vehicle Identication Number (VIN)
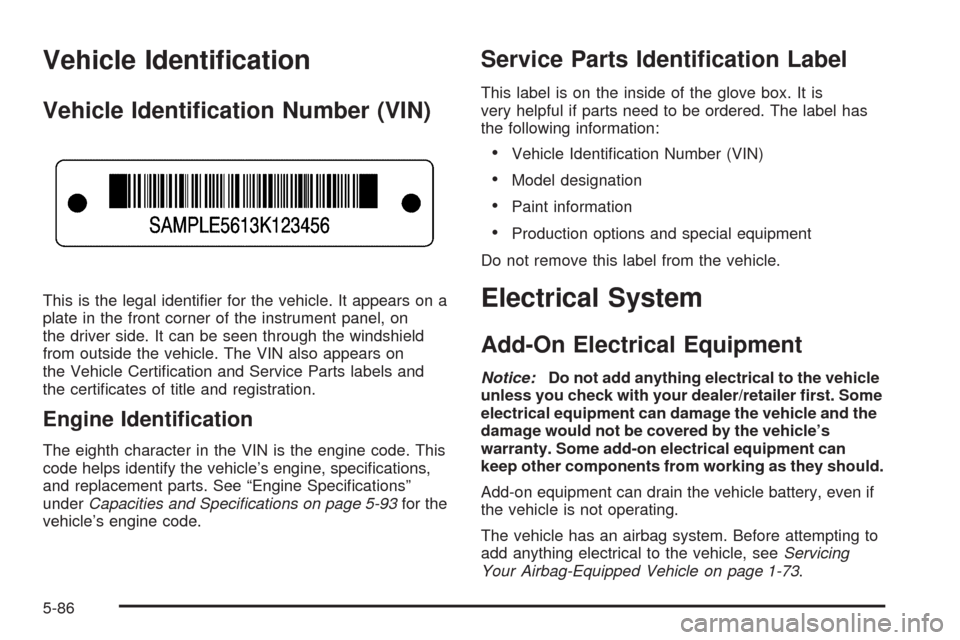
This is the legal identier for the vehicle. It appears on a
plate in the front corner of the instrument panel, on
the driver side. It can be seen through the windshield
from outside the vehicle. The VIN also appears on
the Vehicle Certication and Service Parts labels and
the certicates of title and registration.
Engine Identication
The eighth character in the VIN is the engine code. This
code helps identify the vehicle’s engine, specications,
and replacement parts. See “Engine Specications”
underCapacities and Specifications on page 5-93for the
vehicle’s engine code.
Service Parts Identication Label
This label is on the inside of the glove box. It is
very helpful if parts need to be ordered. The label has
the following information:
Vehicle Identication Number (VIN)
Model designation
Paint information
Production options and special equipment
Do not remove this label from the vehicle.
Electrical System
Add-On Electrical Equipment
Notice:Do not add anything electrical to the vehicle
unless you check with your dealer/retailer rst. Some
electrical equipment can damage the vehicle and the
damage would not be covered by the vehicle’s
warranty. Some add-on electrical equipment can
keep other components from working as they should.
Add-on equipment can drain the vehicle battery, even if
the vehicle is not operating.
The vehicle has an airbag system. Before attempting to
add anything electrical to the vehicle, seeServicing
Your Airbag-Equipped Vehicle on page 1-73.
5-86