AUX CHEVROLET BLAZER 1996 2.G Owners Manual
[x] Cancel search | Manufacturer: CHEVROLET, Model Year: 1996, Model line: BLAZER, Model: CHEVROLET BLAZER 1996 2.GPages: 392, PDF Size: 20.35 MB
Page 8 of 392
Downloaded from www.Manualslib.com manuals search engine GENERAL MOTORS, GM and the GM Emblem,
CHEVROLET, the CHEVROLET Emblem and the
name BLAZER are registered trademarks
of General
Motors Corporation.
This manual includes the latest information at the time
it
was printed. We reserve the right to make changes in the
product after that time without further notice. For
vehicles first sold in Canada, substitute the name
“General Motors
of Canada Limited” for Chevrolet
Division whenever it appears in this manual.
Please keep this manual in your vehicle,
so it will be
there if you ever need it when you’re on the road.
If you
sell
the vehicle, please leave this manual in it so the new
owner can use it.
Litho in U.S.A.
C9611
B First Edition
WE SUPPORT
VOLUNTARY TECHNICIAN
CERTIFICATION THROUGH
National Institute for
AUTOMOTIVE SERVICE EXCELLENCE
We support voluntary
technician certification.
For Canadian Owners Who Prefer a
French Language Manual:
Aux propribtaires canadiens: Vous pouvez vous
procurer
un exemplaire de ce guide en franc;ais chez
votre concessionaire ou au:
DGN Marketing Services Ltd.
1500 Bonhill Rd.
Mississauga, Ontario L5T 1C7
@Copyright General Motors Corporation 1995 All Rights Reserved
ii
Page 117 of 392
Downloaded from www.Manualslib.com manuals search engine Visor Vanity ,Mirror
Pull the sun visor down and lift the cover to expose the
vanity mirror.
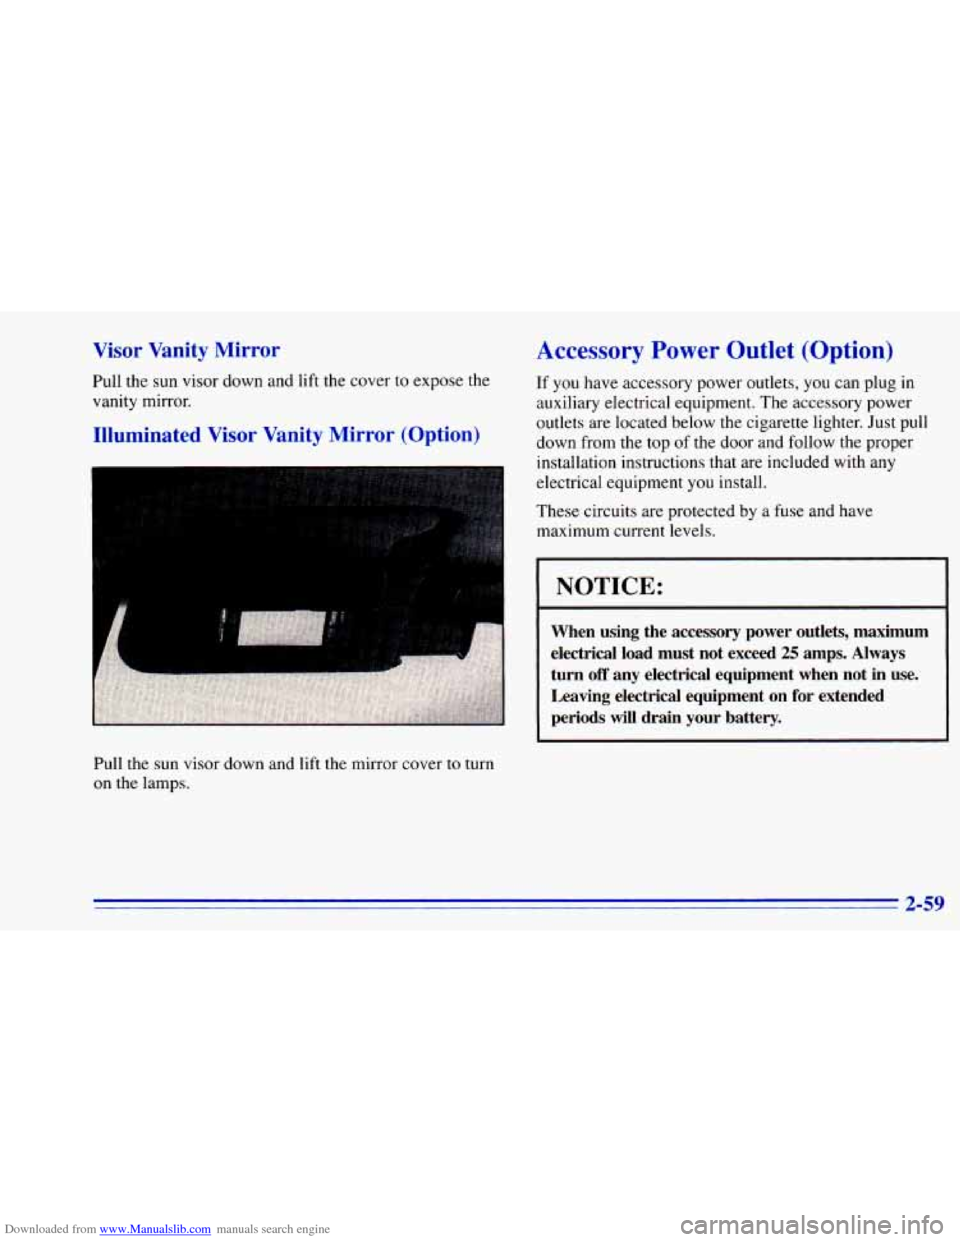
Illuminated Visor Vanity Mirror (Option)
Pull the sun visor down and lift the mirror cover to turn
on the lamps.
Accessory Power Outlet (Option)
If you have accessory power outlets, you can plug in
auxiliary electrical equipment. The accessory power
outlets are located below the cigarette lighter. Just pull
down from the top
of the door and follow the proper
installation instructions that are included with any
electrical equipment you install.
These circuits are protected by a fuse and have
maximum current levels.
1 NOTICE:
When using the accessory power outlets, maximum
electrical load must not exceed
25 amps. Always
turn
off any electrical equipment when not in use.
Leaving electrical equipment on for extended
periods will drain your battery.
2-59
Page 119 of 392
Downloaded from www.Manualslib.com manuals search engine 1. Air Vents
2. Instrument Cluster
3. Electronic Transfer Case (Option)
4. Comfort Controls
5. Glove Box
6. Ashtray
7. Cigarette Lighterpower Auxiliary Outlets (Option)
8. Storage Compartment
9. Audio System
10. Fog Lamps (Option)
1 1. Lamp Controls
12. Rear Endgate Release
13. Brake Release
14. Rear Window Washermiper
15. Rear Window Defogger (Option)
2-61
Page 210 of 392
Downloaded from www.Manualslib.com manuals search engine Maintenance When Trailer Towing
Your vehicle will need service more often when you’re
pulling
a trailer. See the Maintenance Schedule for more
on this. Things that are especially important in trailer
operation are automatic transmission fluid (don’t
overfill), engine oil, axle lubricant, belt, cooling system
and brake adjustment. Each of these is covered
in this
manual, and the Index will help you find them quickly.
If you’re trailering, it’s a good idea to review these
sections before you start your trip.
Check periodically to see that all hitch nuts and bolts
are tight.
Trailer Wiring Harness
The light duty trailer wiring is a six-wire harness
assembly. The heavy duty trailer wiring is an eight-wire
harness assembly. The harnesses are stored under
the
vehicle, along the passenger-side frame crossmember on
two-door vehicles or on the driver’s side corner frame
crossmember
on four-door vehicles. The heavy duty
trailer wiring has a 30-amp feed wire with an inline fuse
located by the junction block. See “Fuses and Circuit
Breakers” in
the Index. Both harnesses have no
connector and should be wired
by a qualified electrical technician. The technician can
use the following color code chart when connecting the
wiring harness
to your trailer.
0
0
0
0
0
0
0
0
DARK BLUE: Use for electric trailer brakes or
auxiliary wiring.
RED: Use for battery charging; it connects to the
starter solenoid (eight-wire harness
only).
LIGHT GREEN: Back-up lamps (eight-wire
harness only).
BROWN: Taillamps and parking lamps.
YELLOW Left stoplamp and turn signal.
DARK GREEN: Right stoplamp and turn signal.
WHITE (Heavy Gage): Ground wire.
WHITE (Light Gage): Auxiliary stoplamp.
Securely attach the harness
to the trailer, then tape or
strap it to your vehicle’s frame rail. Be sure you leave
it loose enough
so the wiring doesn’t bend or break,
but
not so loose that it drags on the ground. Store the
harness in its original place. Wrap the harness together
and
tie it neatly so it won’t be damaged.
4-56
Page 215 of 392
Downloaded from www.Manualslib.com manuals search engine 2. Get the vehicles close enough so the jumper cables
can reach, but be sure the vehicles aren’t touching
each other.
If they are, it could cause a ground
connection
you don’t want. You wouldn’t be able to
start your vehicle, and the bad grounding could
damage the electrical systems.
You could be injured if the vehicles roll. Set the
parking brake firmly on each vehicle. Put an
automatic transmission
in PARK (P) or a manual
transmission in NEUTRAL (N). If
you have a
four-wheel-drive vehicle with a manual transfer
case shift lever, be sure the transfer case is
not in
NEUTRAL (N).
3. Turn off the ignition on both vehicles. Unplug
unnecessary accessories plugged
into the cigarette
lighter, or accessory power outlets,
if you have this
option. Turn
off all lamps that aren’t needed as well
as radios. This will avoid sparks and help save both
batteries.
In addition, it could save your radio!
NOTICE:
If you leave your radio on, it could be badly
damaged. The repair wouldn’t be covered by
your warranty.
I A CAUTION:
If your vehicle has air conditioning, the auxiliary
electric fan under the hood can
start up even
when the engine is not running and can injure
you. Keep hands, clothing and tools away from
any underhood electric fan.
5-3
Page 225 of 392
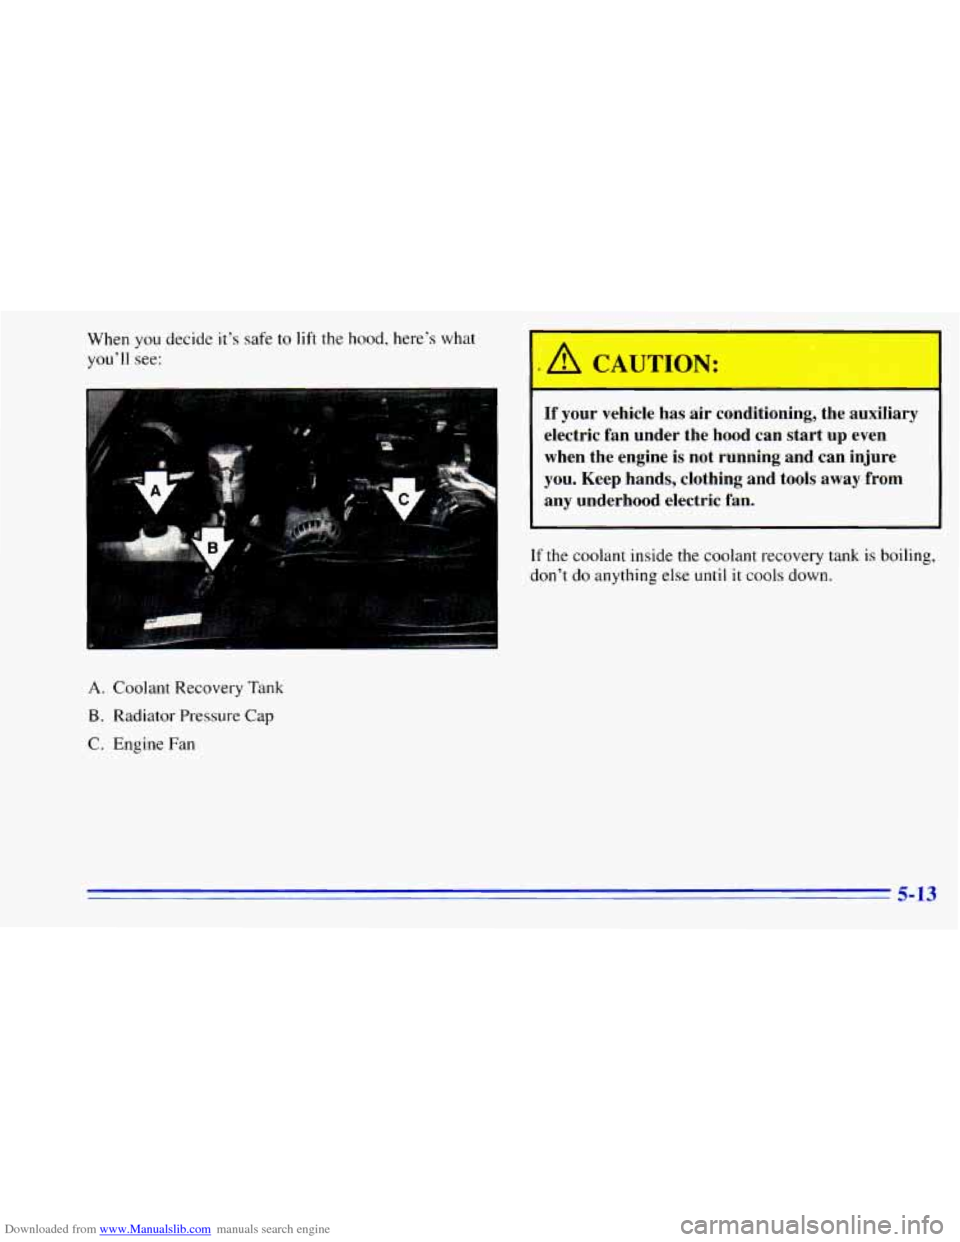
Downloaded from www.Manualslib.com manuals search engine When you decide it's safe to lift the hood, here's what
you'll see:
A. Coolant Recovery Tank
B. Radiator Pressure Cap
C. Engine Fan
If your vehicle has air conditioning, the auxiliary
electric fan under the hood can start up even
when the engine is not running and can injure
you. Keep hands, clothing and tools away from
any underhood electric fan.
If the coolant inside the coolant recovery tank is boiling,
don't
do anything else until it cools down.
5-13
Page 309 of 392
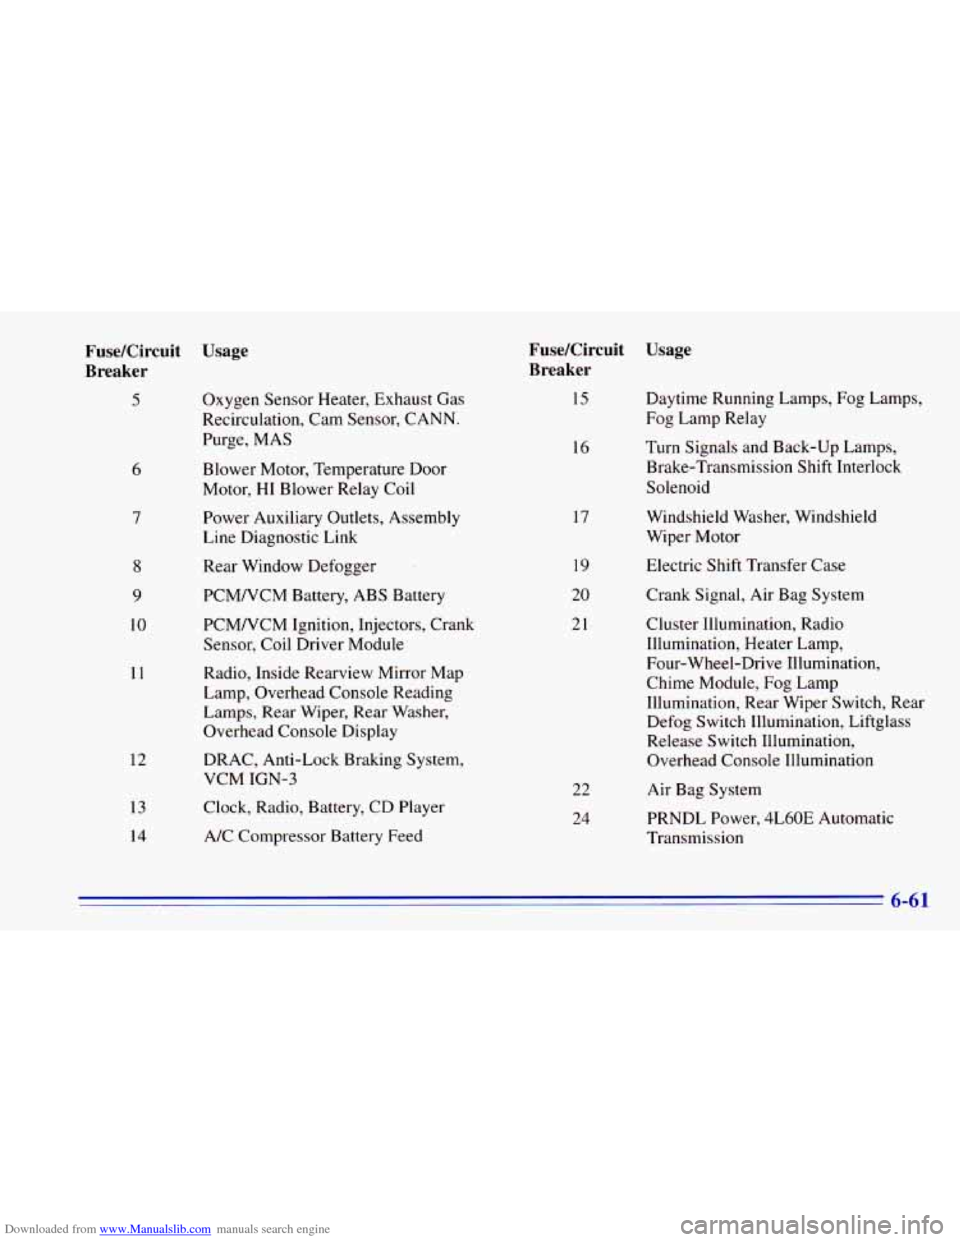
Downloaded from www.Manualslib.com manuals search engine FuseKircuit Usage
Breaker
5
7
8
9
10
11
Oxygen Sensor Heater, Exhaust Gas
Recirculation, Cam Sensor, CANN.
Purge, MAS
Blower Motor, Temperature Door
Motor, HI Blower Relay Coil
Power Auxiliary Outlets, Assembly
Line Diagnostic Link
Rear Window Defogger
PCMNCM Battery, ABS Battery
PCMNCM Ignition, Injectors, Crank
Sensor, Coil Driver Module
Radio, Inside Rearview Mirror Map
Lamp, Overhead Console Reading
Lamps, Rear Wiper, Rear Washer,
Overhead Console Display
12 DRAC, Anti-Lock Braking System, VCM IGN-3
13
14
Clock, Radio, Battery, CD Player
A/C Compressor Battery Feed
FuseKircuit Usage
Breaker
15
16
17
19
20
21
22 24 Daytime Running Lamps,
Fog Lamps,
Fog Lamp Relay
Turn Signals and Back-up Lamps,
Brake-Transmission Shift Interlock
Solenoid
Windshield Washer, Windshield
Wiper Motor
Electric Shift Transfer Case
Crank Signal, Air Bag System
Cluster Illumination, Radio
Illumination, Heater Lamp, Four-Wheel-Drive Illumination,
Chime Module, Fog Lamp
Illumination, Rear Wiper Switch, Rear
Defog Switch Illumination, Liftglass
Release Switch Illumination,
Overhead Console Illumination
Air Bag System
PRNDL Power, 4L60E Automatic
Transmission
6-61