oil CHEVROLET BLAZER 1996 2.G Owners Manual
[x] Cancel search | Manufacturer: CHEVROLET, Model Year: 1996, Model line: BLAZER, Model: CHEVROLET BLAZER 1996 2.GPages: 392, PDF Size: 20.35 MB
Page 11 of 392
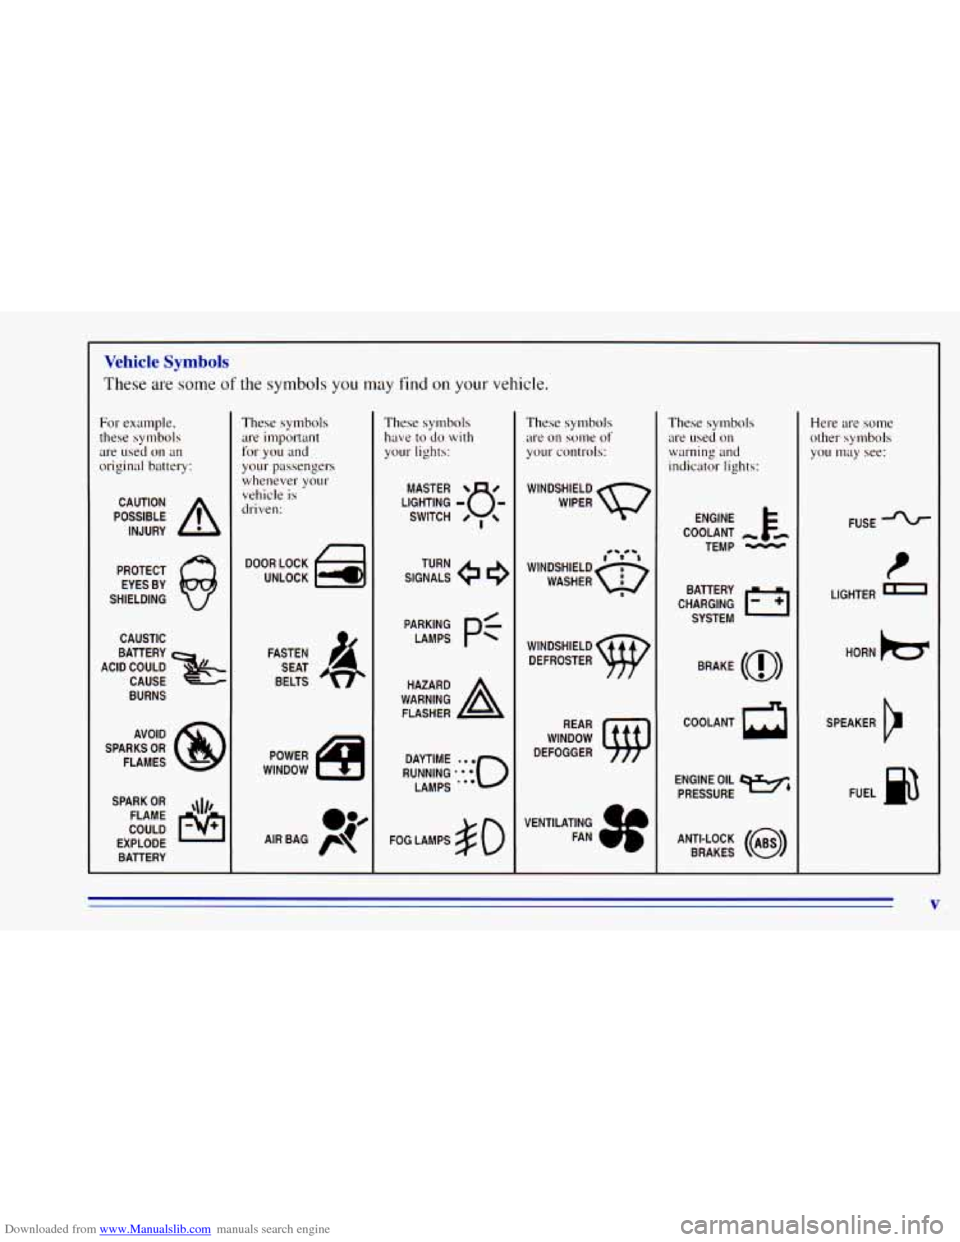
Downloaded from www.Manualslib.com manuals search engine Vehicle Symbols
These are some of the symbols you may find on your vehicle.
For example,
these symbols
are used on an
original battery:
POSSIBLE A
CAUTION
INJURY
PROTECT EYES BY
SHIELDING
CAUSTIC
BURNS AVOID
SPARKS
OR
FLAMES
SPARK
OR ,\I/,
COULD pq
FLAME
EXPLODE BATTERY
These symbols
are important
for you and
your passengers
whenever your
vehicle is
driven:
DOOR LOCK
FASTEN SEAT
BELTS
These symbols have to do
with
your lights:
SIGNALS e
TURN
FOG LAMPS
# 0
These symbols
are on some
of
yo11r controls:
WINDSHIELD
WIPER
These symbols are used on
warning and
indicator lights:
COOLANT -
TEMP -
CHARGING I-1
BATTERY
SYSTEM
BRAKE
(0)
COOLANT a
ENGINE OIL e,
PRESSURE
ANTI-LOCK
(a)
BRAKES
Here are some
other symbols
you
may see:
FUSE -%-
I
LIGHTER I
HORN )cr
SPEAKER
b
FUEL siE3
V
Page 73 of 392
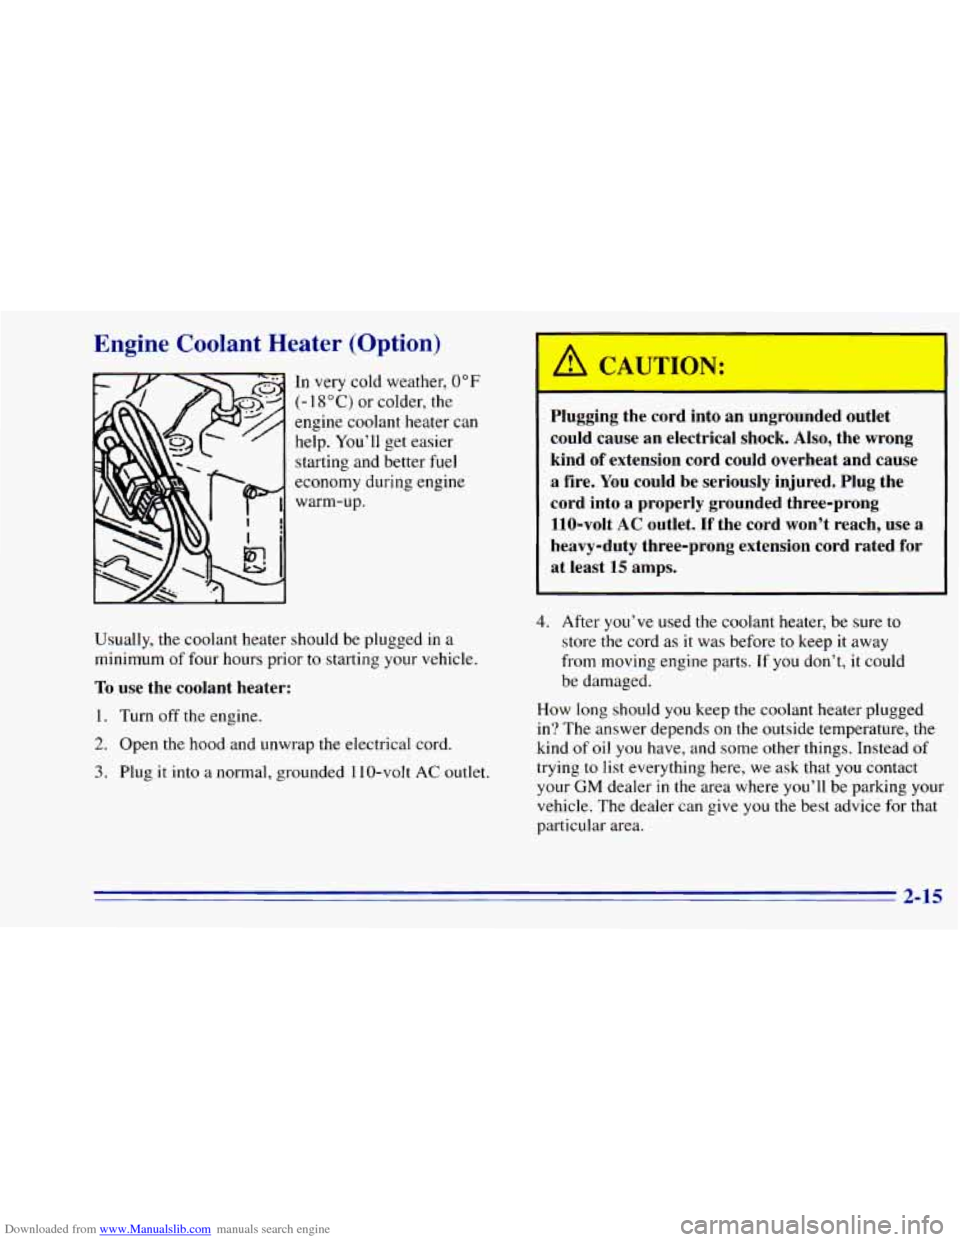
Downloaded from www.Manualslib.com manuals search engine Engine Coolant Heater (Option)
In very cold weather, 0°F
(- 1 8 O C) or colder, the
engine coolant heater can
help. You’ll get easier
starting and better
fuel
economy during engine
warm-up.
Usually, the coolant heater should be plugged
in a
minimum of four hours prior to starting your vehicle.
To use the coolant heater:
1. Turn off the engine.
2. Open the hood and unwrap the electrical cord.
3. Plug it into a normal, grounded 1 10-volt AC outlet.
-
I
A CAUTION:
Plugging the cord into an ungrounded outlet
could cause an electrical shock. Also, the wrong
kind
of extension cord could overheat and cause
a fire. You could be seriously injured. Plug the
cord into
a properly grounded three-prong
110-volt AC outlet.
If the cord won’t reach, use a
heavy-duty three-prong extension cord rated for at least
15 amps.
4. After you’ve used the coolant heater, be sure to
store the cord as
it was before to keep it away
from moving engine parts. If you don’t,
it could
be damaged.
How long should you keep the coolant heater plugged
in? The answer depends
on the outside temperature, the
kind
of oil you have, and some other things. Instead of
trying to list everything here, we ask that you contact
your
GM dealer in the area where you’ll be parking your
vehicle. The dealer can give
you the best advice for that
particular area.
2-15
Page 130 of 392
Downloaded from www.Manualslib.com manuals search engine Engine Oil Pressure Gage
OIL 0-
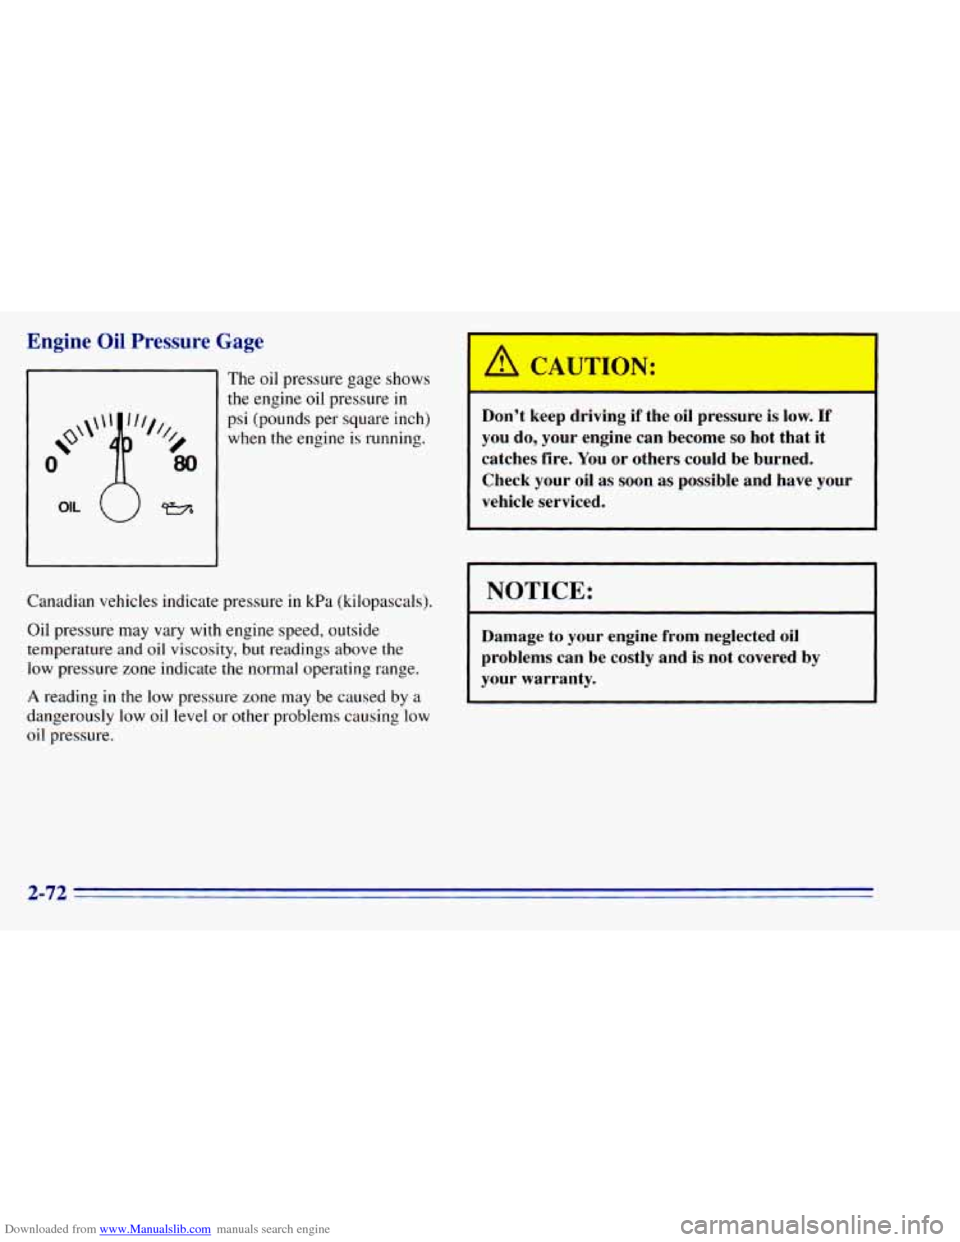
The oil pressure gage shows
the engine oil pressure in
psi (pounds per square inch)
when the engine
is running.
Canadian vehicles indicate pressure in kPa (kilopascals).
Oil pressure may vary with engine speed, outside
temperature
and oil viscosity, but readings above the
low pressure zone indicate the normal operating range.
A reading in the low pressure zone may be caused by a
dangerously
low oil level or other problems causing low
oil pressure.
CAUTION:
Don't keep driving if the oil pressure is low. If
you do, your engine can become so hot that it
catches fire. You or others could be burned.
Check your oil as soon as possible and have your
vehicle serviced.
NOTICE:
Damage to your engine from neglected oil
problems can be costly and is not covered by
your warranty.
2-72
Page 132 of 392
Downloaded from www.Manualslib.com manuals search engine Check Gages Light
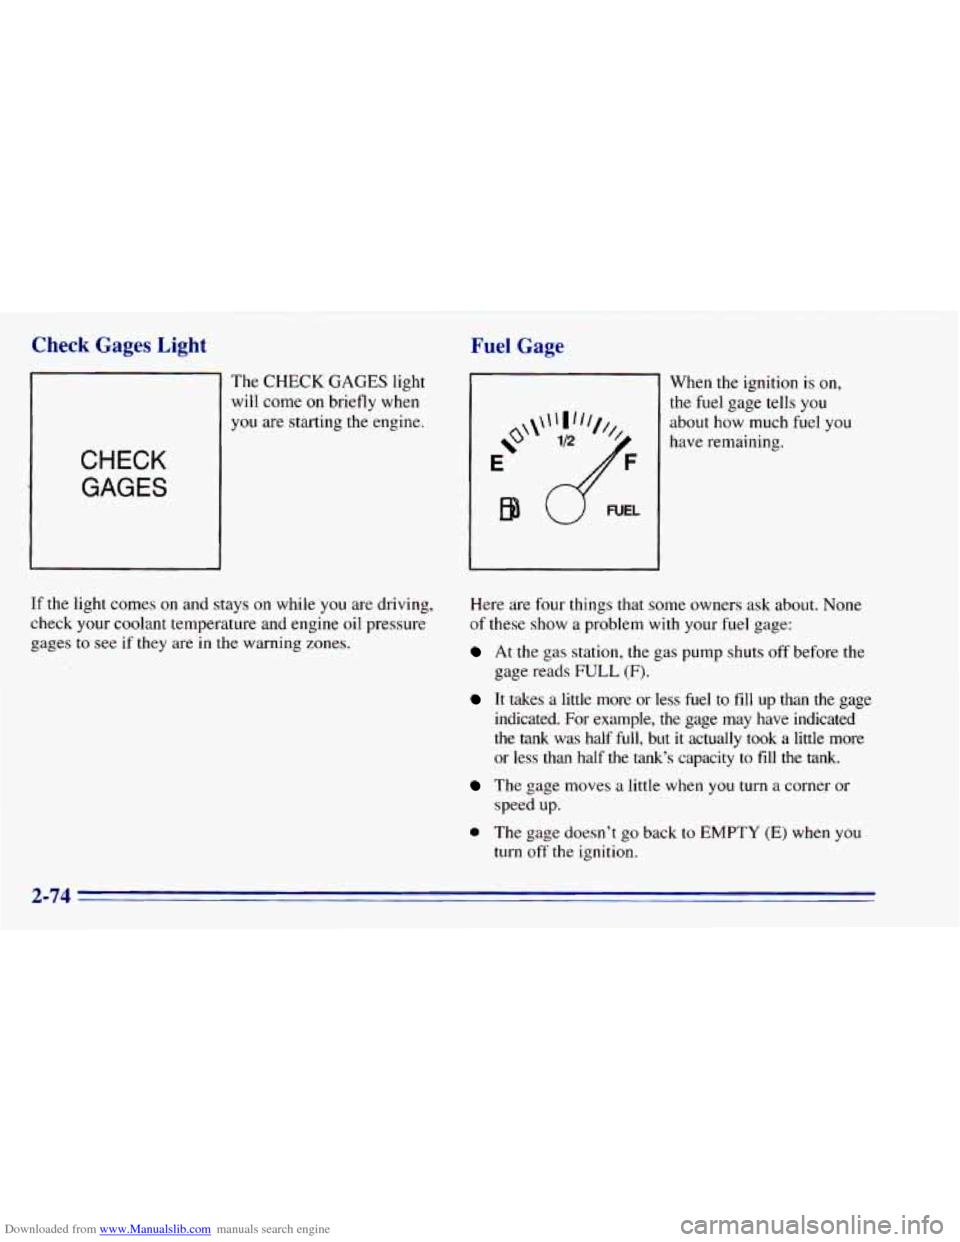
The CHECK GAGES light
will
come on briefly when
you are starting the engine.
CHECK
GAGES
If the light comes on and stays on while you are driving,
check your coolant temperature and engine oil pressure
gages to
see if they are in the warning zones.
Fuel Gage
e'
E
B9
When the ignition is on,
the fuel gage tells you
about how much fuel you
have remaining,
Here are four things that some owners ask about. None
of these show a problem with
your fuel gage:
At the gas station, the gas pump shuts off before the
gage reads
FULL (F).
It takes a little more or less fuel to fill up than the gage
indicated.
For example, the gage may have indicated
the tank was half
full, but it actually took a little more
or less than half the tank's capacity to fill the tank.
The gage moves a little when you turn a corner or
speed up.
0 The gage doesn't go back to EMPTY (E) when you
turn off the ignition,
2-74
Page 152 of 392
Downloaded from www.Manualslib.com manuals search engine Care of Your Cassette Tape Player
A tape player that is not cleaned regularly can cause
reduced sound quality, ruined cassettes or
a damaged
mechanism. Cassette tapes should be stored in their
cases away from contaminants, direct sunlight and
extreme heat. If
they aren’t, they may not operate
properly or may cause failure of the tape player.
Your tape player should be cleaned regularly after every
50 hours of use. If you notice a reduction in sound
quality, try a known good cassette
to see if the tape or
the tape player is at fault. If this other cassette has
no
improvement in sound quality, clean the tape player.
Cleaning may be done with
a scrubbing action,
non-abrasive cleaning cassette with pads which scrub
the tape head as the hubs of the cleaner cassette turn. It
is normal for the cassette
to eject while cleaning. Insert
the cassette at le.ast three times to ensure thorough
cleaning.
A scrubbing action cleaning cassette is
available through your
GM dealer.
You may also choose
a non-scrubbing action, wet-type
cleaner which uses a cassette with a fabric belt
to clean
the tape head. This type of cleaning cassette will not
eject. It may not clean as thoroughly as the scrubbing
type cleaner. Cassettes are subject
to wear and the sound quality may
degrade over time. Always make sure that the cassette
tape
is in good condition before you have your tape
player serviced.
Care of Your Compact Discs
Handle discs carefully. Store them in their original cases
or other protective cases and away from direct sunlight
and dust.
If the surface of a disc is soiled, dampen a
clean, soft cloth in a mild, neutral detergent solution and
clean it, wiping from the center
to the edge.
Be sure never to touch
the signal surface when handling
discs. Pick up discs by grasping
the outer edges or the
edge
of the hole and the outer edge.
Fixed Mast Antenna
The fixed mast antenna can withstand most car washes
without being damaged.
If the mast should ever become
slightly bent,
you can straighten it out by hand. If the
mast
is badly bent, as it might be by vandals, you should
replace
it.
Check every once in a while to be sure the mast is still
tightened to the fender.
3-18
Page 191 of 392
Downloaded from www.Manualslib.com manuals search engine Here are some things you can check before a trip:
0
a
0
0
0
0
0
Windshield Washer Fluid: Is the reservoir full?
Are all windows clean inside and outside?
Wiper Blades: Are they in good shape?
Fuel, Engine Oil, Other Fluids: Have you checked
all levels?
Lamps: Are they all working? Are the lenses clean?
Tires: They are vitally important to a safe,
trouble-free trip.
Is the tread good enough for
long-distance driving? Are the tires all inflated to the
recommended pressure?
Weather Forecasts: What’s the weather outlook
along your route? Should you delay your trip a short
time
to avoid a major storm system?
Maps: Do you have up-to-date maps?
Highway Hypnosis
Is there actually such a condition as “highway hypnosis”?
Or is
it just plain falling asleep at the wheel? Call it
highway hypnosis, lack of awareness,
or whatever.
There is something about an easy stretch
of road with the
same scenery, along with the hum of the tires on the road,
the drone
of the engine, and the rush of the wind against
the vehicle that can make
you sleepy. Don’t let it happen
to you!
If it does, your vehicle can leave the road in less
than n second, and you could crash and be injured.
What can
you do about highway hypnosis‘? First, be
aware that it can happen.
Then here are some tips:
0
0
0
Make sure your vehicle is well ventilated, with a
comfortably cool interior.
Keep your eyes moving. Scan the road ahead and
to
the sides. Check your mirrors and your instruments
frequently.
If
you get sleepy, pull off the road into a rest, service
or parking area and take a nap, get some exercise, or
both. For safety, treat drowsiness on the highway
as
an emergency.
4-37
Page 208 of 392
Downloaded from www.Manualslib.com manuals search engine On a long uphill grade, shift down and reduce your
speed to around
45 mph (70 kmh) to reduce the
possibility of engine and transmission overheating.
If you have
an automatic transmission, you should use
DRIVE (D) when towing
a trailer. Operating your
vehicle in DRIVE
(D) when towing a.trailer will
minimize heat buildup and extend the life of your
transmission. Or, if
you have a manual transmission,
it’s better not to use FIFTH
(5) gear, just drive in
FOURTH (4) gear (or, as you need to, a lower gear).
When towing at high altitude
on steep uphill grades,
consider the following: Engine coolant will boil at a
lower temperature than at normal altitudes. If you turn
your engine off immediately after towing at high altitude
on steep uphill grades, your vehicle may show signs
similar to engine overheating.
To avoid this, let the
engine run while parked (preferably on level ground)
with the automatic transmission in PARK
(P) (or the
manual transmission
out of gear and the parking brake
applied) for a few minutes before turning the engine off.
If
you do get the overheat warning, see “Engine
Overheating” in the Index.
Parking on Hills
You really should not park your vehicle, with a trailer
attached,
on a hill. If something goes wrong, your rig
could start to move. People can be injured, and both
your vehicle and the trailer can be damaged.
But
if you ever have to park your rig on a hill, here’s
how to
do it:
1.
2.
3.
4.
5.
6.
Apply your regular brakes, but don’t shift into
PARK
(P) yet, or into gear for a manual
transmission. Then turn your wheels into the
curb
if facing downhill or into traffic if facing uphill.
Have someone place chocks under the trailer wheels.
When the wheel chocks are
in place, release the
regular brakes
until the chocks absorb the load.
Reapply the regular brakes.
Then apply your
parking brake, and then shift into PARK (P), or
REVERSE
(R) for a manual transmission.
If
you have a four-wheel-drive vehicle with a
manual transfer case shift lever, be sure the transfer
case is
in a drive gear -- not in NEUTRAL (N).
Release the regular brakes.
4-54
Page 210 of 392
Downloaded from www.Manualslib.com manuals search engine Maintenance When Trailer Towing
Your vehicle will need service more often when you’re
pulling
a trailer. See the Maintenance Schedule for more
on this. Things that are especially important in trailer
operation are automatic transmission fluid (don’t
overfill), engine oil, axle lubricant, belt, cooling system
and brake adjustment. Each of these is covered
in this
manual, and the Index will help you find them quickly.
If you’re trailering, it’s a good idea to review these
sections before you start your trip.
Check periodically to see that all hitch nuts and bolts
are tight.
Trailer Wiring Harness
The light duty trailer wiring is a six-wire harness
assembly. The heavy duty trailer wiring is an eight-wire
harness assembly. The harnesses are stored under
the
vehicle, along the passenger-side frame crossmember on
two-door vehicles or on the driver’s side corner frame
crossmember
on four-door vehicles. The heavy duty
trailer wiring has a 30-amp feed wire with an inline fuse
located by the junction block. See “Fuses and Circuit
Breakers” in
the Index. Both harnesses have no
connector and should be wired
by a qualified electrical technician. The technician can
use the following color code chart when connecting the
wiring harness
to your trailer.
0
0
0
0
0
0
0
0
DARK BLUE: Use for electric trailer brakes or
auxiliary wiring.
RED: Use for battery charging; it connects to the
starter solenoid (eight-wire harness
only).
LIGHT GREEN: Back-up lamps (eight-wire
harness only).
BROWN: Taillamps and parking lamps.
YELLOW Left stoplamp and turn signal.
DARK GREEN: Right stoplamp and turn signal.
WHITE (Heavy Gage): Ground wire.
WHITE (Light Gage): Auxiliary stoplamp.
Securely attach the harness
to the trailer, then tape or
strap it to your vehicle’s frame rail. Be sure you leave
it loose enough
so the wiring doesn’t bend or break,
but
not so loose that it drags on the ground. Store the
harness in its original place. Wrap the harness together
and
tie it neatly so it won’t be damaged.
4-56
Page 225 of 392
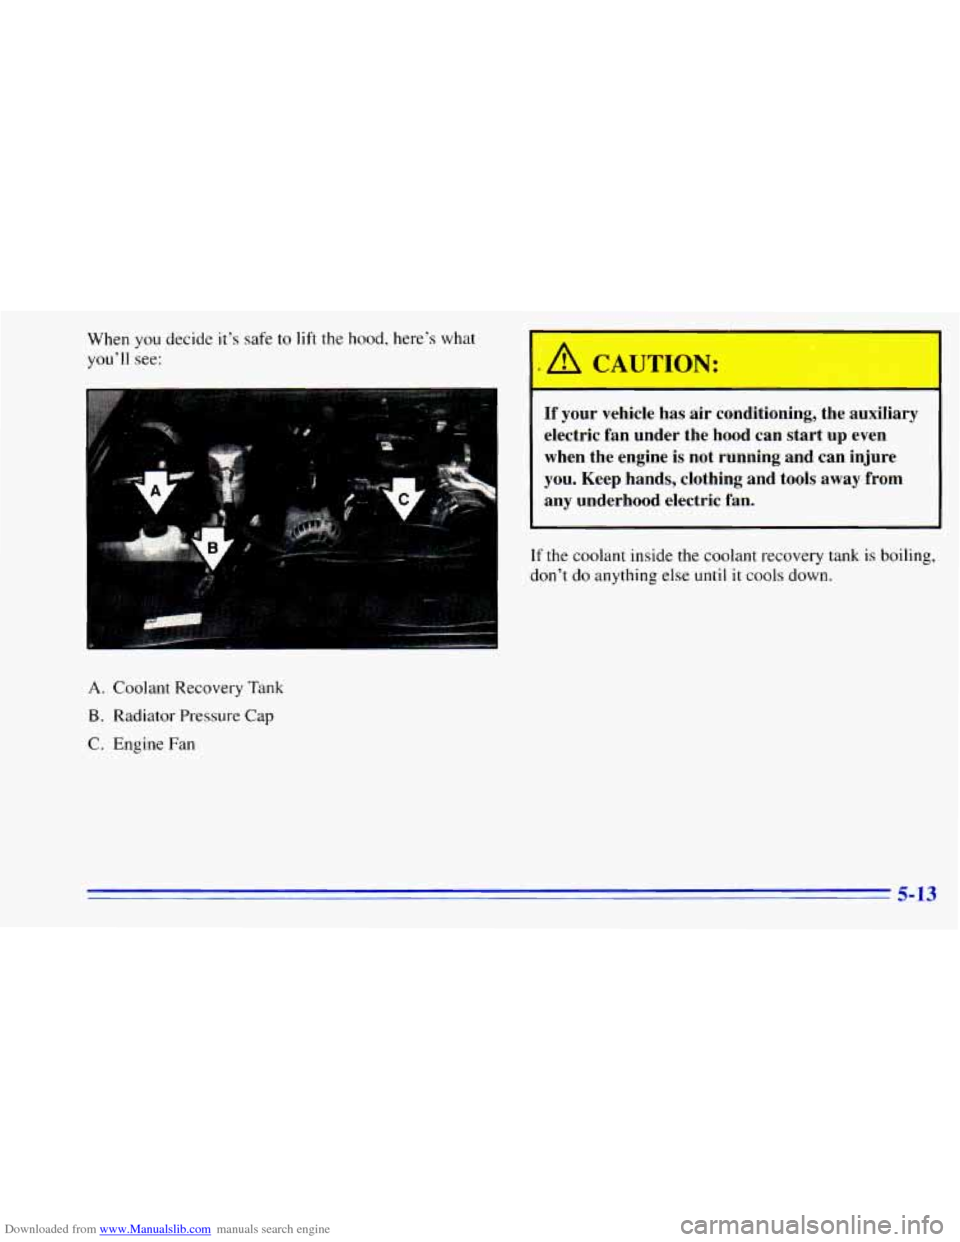
Downloaded from www.Manualslib.com manuals search engine When you decide it's safe to lift the hood, here's what
you'll see:
A. Coolant Recovery Tank
B. Radiator Pressure Cap
C. Engine Fan
If your vehicle has air conditioning, the auxiliary
electric fan under the hood can start up even
when the engine is not running and can injure
you. Keep hands, clothing and tools away from
any underhood electric fan.
If the coolant inside the coolant recovery tank is boiling,
don't
do anything else until it cools down.
5-13
Page 227 of 392
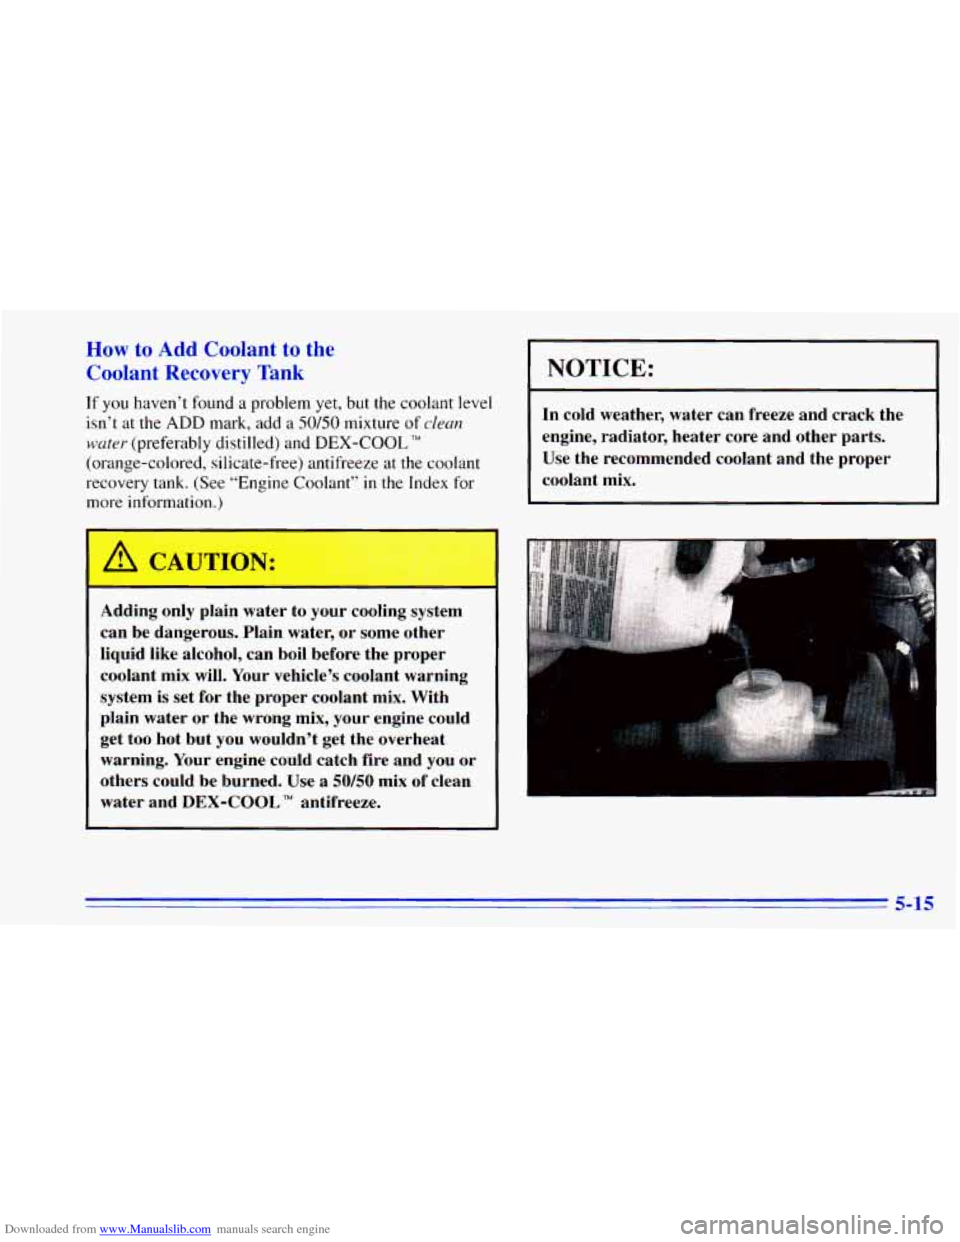
Downloaded from www.Manualslib.com manuals search engine How to Add Coolant to the
Coolant Recovery Tank
If you haven’t found a problem yet, but the coolant level
isn’t at the
ADD mark, add a 50/50 mixture of clean
water (preferably distilled) and DEX-COOL TM
(orange-colored, silicate-free) antifreeze at the coolant
recovery tank. (See “Engine Coolant”
in the Index for
more kformation
)
Adding only plain water to your cooling system
can be dangerous. Plain water, or some other
liquid like alcohol, can boil before the proper
coolant mix will. Your vehicle’s coolant warning
system is set for the proper coolant mix. With
plain water or the wrong mix, your engine could
get too hot but you wouldn’t get the overheat
warning. Your engine could catch fire and you or
others could be burned. Use
a 50/50 mix of clean
water and
DEX-COOL TM antifreeze.
1 NOTICE:
In cold weather, water can freeze and crack the
engine, radiator, heater core and other parts. Use the recommended coolant and the proper
coolant mix.
5-15