four wheel drive CHEVROLET BLAZER 2003 2.G Owners Manual
[x] Cancel search | Manufacturer: CHEVROLET, Model Year: 2003, Model line: BLAZER, Model: CHEVROLET BLAZER 2003 2.GPages: 420, PDF Size: 2.94 MB
Page 1 of 420

Seats and Restraint Systems........................... 1-1
Front Seats
............................................... 1-2
Rear Seats
............................................... 1-7
Safety Belts
.............................................. 1-9
Child Restraints
.......................................1-32
Air Bag System
.......................................1-52
Restraint System Check
............................1-58
Features and Controls..................................... 2-1
Keys
........................................................ 2-3
Doors and Locks
....................................... 2-7
Windows
.................................................2-11
Theft-Deterrent Systems
............................2-17
Starting and Operating Your Vehicle
...........2-19
Mirrors
....................................................2-41
HomeLink
žTransmitter
.............................2-44
Storage Areas
.........................................2-48
Vehicle Personalization
.............................2-61
Instrument Panel............................................. 3-1
Instrument Panel Overview
.......................... 3-2
Climate Controls
......................................3-17
Warning Lights, Gages and Indicators
.........3-21
Audio System(s)
.......................................3-37Driving Your Vehicle....................................... 4-1
Your Driving, the Road, and Your Vehicle
..... 4-2
Towing
...................................................4-45
Service and Appearance Care.......................... 5-1
Service
..................................................... 5-3
Fuel
......................................................... 5-4
Checking Things Under the Hood
................. 5-8
Rear Axle
...............................................5-45
Four-Wheel Drive
.....................................5-45
Front Axle
...............................................5-46
Bulb Replacement
....................................5-47
Windshield Wiper Blade Replacement
.........5-52
Tires
......................................................5-54
Appearance Care
.....................................5-76
Vehicle Identi®cation
.................................5-83
Electrical System
......................................5-84
Capacities and Speci®cations
.....................5-91
Normal Maintenance Replacement Parts
......5-92
Maintenance Schedule..................................... 6-1
Maintenance Schedule
................................ 6-2
Customer Assistance Information.................... 7-1
Customer Assistance Information
.................. 7-2
Reporting Safety Defects
...........................7-10
INDEX................................................................1
2003 Chevrolet Blazer Owner ManualM
Page 61 of 420

When Should an Air Bag In¯ate?
An air bag is designed to in¯ate in a moderate to severe
frontal, or near-frontal crash. The air bag will in¯ate
only if the impact speed is above the system's designed
©threshold level©. If your vehicle goes straight into a
wall that doesn't move or deform, the threshold level is
about 9 to 16 mph (14 to 26 km/h). The threshold
level can vary, however, with speci®c vehicle design, so
that it can be somewhat above or below this range. If
your vehicle strikes something that will move or deform,
such as a parked car, the threshold level will be
higher. The air bag is not designed to in¯ate in rollovers,
rear impacts, or in many side impacts because in¯ation
would not help the occupant.
In any particular crash, no one can say whether an air
bag should have in¯ated simply because of the damage
to a vehicle or because of what the repair costs were.
In¯ation is determined by the angle of the impact
and how quickly the vehicle slows down in frontal or
near-frontal impacts.
The air bag system is designed to work properly under
a wide range of conditions, including off-road usage.
Observe safe driving speeds, especially on rough
terrain. As always, wear your safety belt. See
Off-Road
Driving with Your Four-Wheel-Drive Vehicle on
page 4-15
for more tips on off-road driving.
What Makes an Air Bag In¯ate?
In an impact of sufficient severity, the air bag sensing
system detects that the vehicle is in a crash. The
sensing system triggers a release of gas from the
in¯ator, which in¯ates the air bag. The in¯ator, air bag,
and related hardware are all part of the air bag
modules inside the steering wheel and in the instrument
panel in front of the right front passenger.
How Does an Air Bag Restrain?
In moderate to severe frontal or near-frontal collisions,
even belted occupants can contact the steering wheel or
the instrument panel. Air bags supplement the
protection provided by safety belts. Air bags distribute
the force of the impact more evenly over the occupant's
upper body, stopping the occupant more gradually.
But air bags would not help you in many types of
collisions, including rollovers, rear impacts and many
side impacts, primarily because an occupant's motion is
not toward those air bags. Air bags should never be
regarded as anything more than a supplement to safety
belts, and then only in moderate to severe frontal or
near-frontal collisions.
1-55
Page 67 of 420

Keys...............................................................2-3
Remote Keyless Entry System.........................2-4
Remote Keyless Entry System Operation...........2-5
Doors and Locks.............................................2-7
Door Locks....................................................2-7
Power Door Locks..........................................2-8
Programmable Automatic Door Locks................2-8
Rear Door Security Locks..............................2-10
Lockout Protection........................................2-10
Leaving Your Vehicle....................................2-10
Windows........................................................2-11
Power Windows............................................2-12
Swing-Out Windows......................................2-13
Rear Window...............................................2-13
Sun Visors...................................................2-16
Theft-Deterrent Systems..................................2-17
Content Theft-Deterrent.................................2-17
Passlock
ž....................................................2-18
Starting and Operating Your Vehicle................2-19
New Vehicle Break-In....................................2-19
Ignition Positions..........................................2-19Starting Your Engine.....................................2-21
Engine Coolant Heater..................................2-22
Automatic Transmission Operation...................2-23
Manual Transmission Operation......................2-27
Four-Wheel Drive..........................................2-28
Parking Brake..............................................2-34
Shifting Into Park (P).....................................2-35
Shifting Out of Park (P).................................2-37
Parking Your Vehicle.....................................2-38
Parking Over Things That Burn.......................2-38
Engine Exhaust............................................2-39
Running Your Engine While You Are Parked. . . .2-39
Mirrors...........................................................2-41
Manual Rearview Mirror.................................2-41
Automatic Dimming Rearview Mirror................2-41
Outside Manual Mirror...................................2-42
Outside Power Mirrors...................................2-42
Outside Automatic Dimming Mirror..................2-43
Outside Convex Mirror...................................2-43
Outside Heated Mirrors..................................2-43
Section 2 Features and Controls
2-1
Page 90 of 420
PARK (P):This position locks your rear wheels. It's the
best position to use when you start your engine
because your vehicle can't move easily.
{CAUTION:
It is dangerous to get out of your vehicle if the
shift lever is not fully in PARK (P) with the
parking brake ®rmly set. Your vehicle can roll.
Don't leave your vehicle when the engine is
running unless you have to. If you have left the
engine running, the vehicle can move
suddenly. You or others could be injured. To
be sure your vehicle won't move, even when
you're on fairly level ground, always set your
parking brake and move the shift lever to
PARK (P). See ªShifting Into Park (P)º in the
Index. If you're pulling a trailer, see ªTowing a
Trailerº in the Index.
{CAUTION:
If you have four-wheel drive, your vehicle will
be free to roll Ð even if your shift lever is in
PARK (P) Ð if your transfer case is in
NEUTRAL. So, be sure the transfer case is in a
drive gear Ð not in NEUTRAL. See
ªFour-Wheel Drive (Automatic Transfer Case)º
in the Index. See ªShifting Into Park (P)º in
the Index.
Ensure the shift lever is fully in PARK (P) before starting
the engine. Your vehicle has an automatic transmission
shift lock control system. You have to fully apply
your regular brakes before you can shift from PARK (P)
when the ignition key is in RUN. If you cannot shift
out of PARK (P), ease pressure on the shift lever; then,
while pressing the button on the console shift lever,
push the shift lever all the way in PARK (P) as
you maintain brake application. Then move the shift
lever into the gear you wish. See
Shifting Out of Park (P)
on page 2-37.
REVERSE (R):Use this gear to back up.
2-24
Page 94 of 420
Up-Shift Light
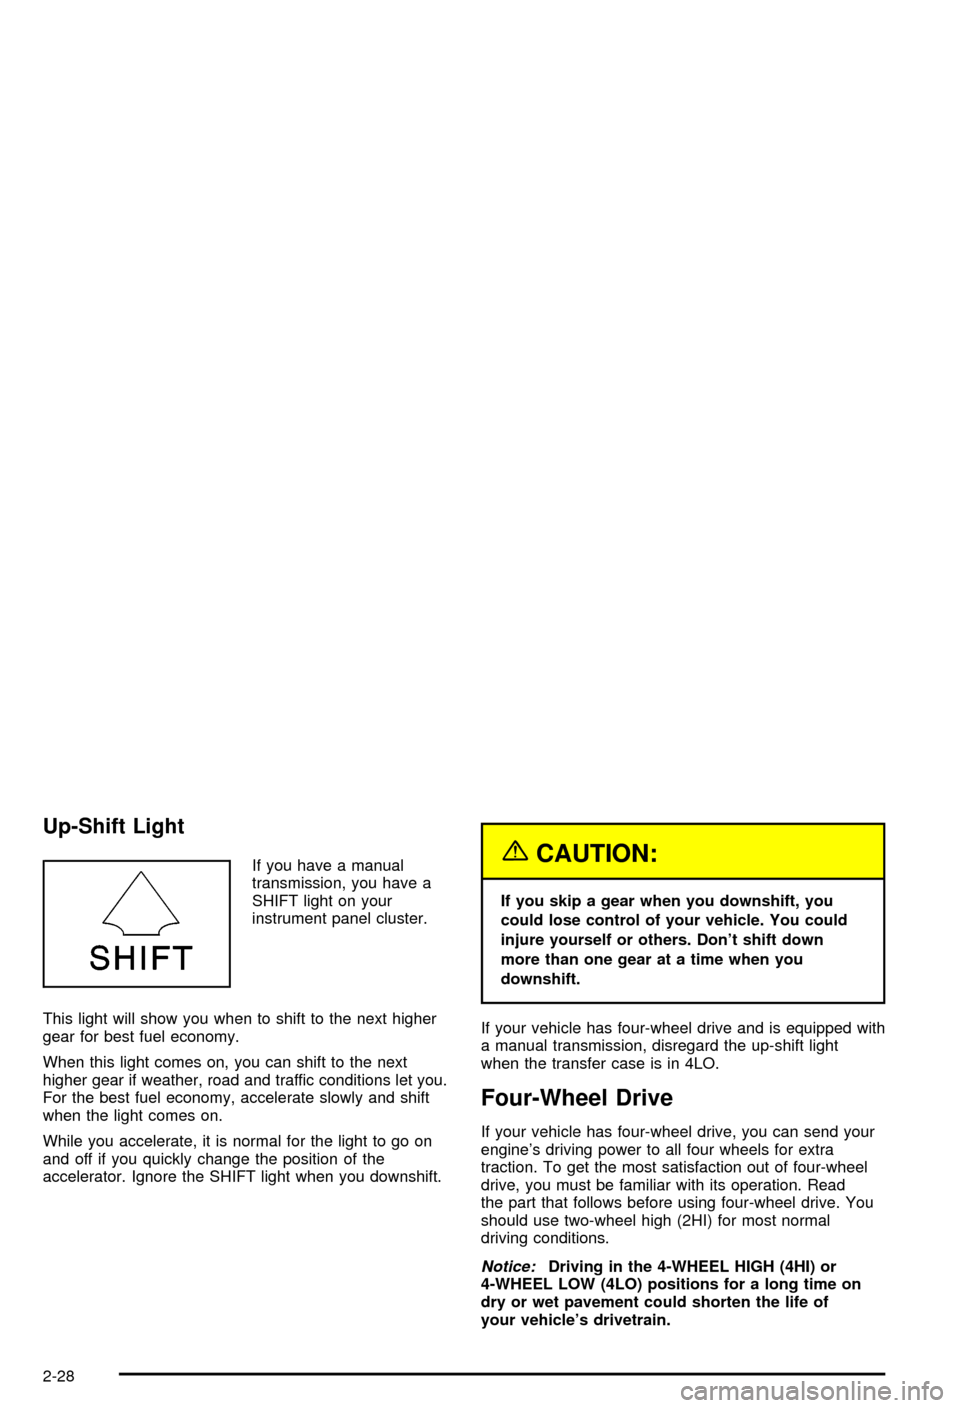
If you have a manual
transmission, you have a
SHIFT light on your
instrument panel cluster.
This light will show you when to shift to the next higher
gear for best fuel economy.
When this light comes on, you can shift to the next
higher gear if weather, road and traffic conditions let you.
For the best fuel economy, accelerate slowly and shift
when the light comes on.
While you accelerate, it is normal for the light to go on
and off if you quickly change the position of the
accelerator. Ignore the SHIFT light when you downshift.{CAUTION:
If you skip a gear when you downshift, you
could lose control of your vehicle. You could
injure yourself or others. Don't shift down
more than one gear at a time when you
downshift.
If your vehicle has four-wheel drive and is equipped with
a manual transmission, disregard the up-shift light
when the transfer case is in 4LO.
Four-Wheel Drive
If your vehicle has four-wheel drive, you can send your
engine's driving power to all four wheels for extra
traction. To get the most satisfaction out of four-wheel
drive, you must be familiar with its operation. Read
the part that follows before using four-wheel drive. You
should use two-wheel high (2HI) for most normal
driving conditions.
Notice:Driving in the 4-WHEEL HIGH (4HI) or
4-WHEEL LOW (4LO) positions for a long time on
dry or wet pavement could shorten the life of
your vehicle's drivetrain.
2-28
Page 95 of 420
Electronic Transfer Case
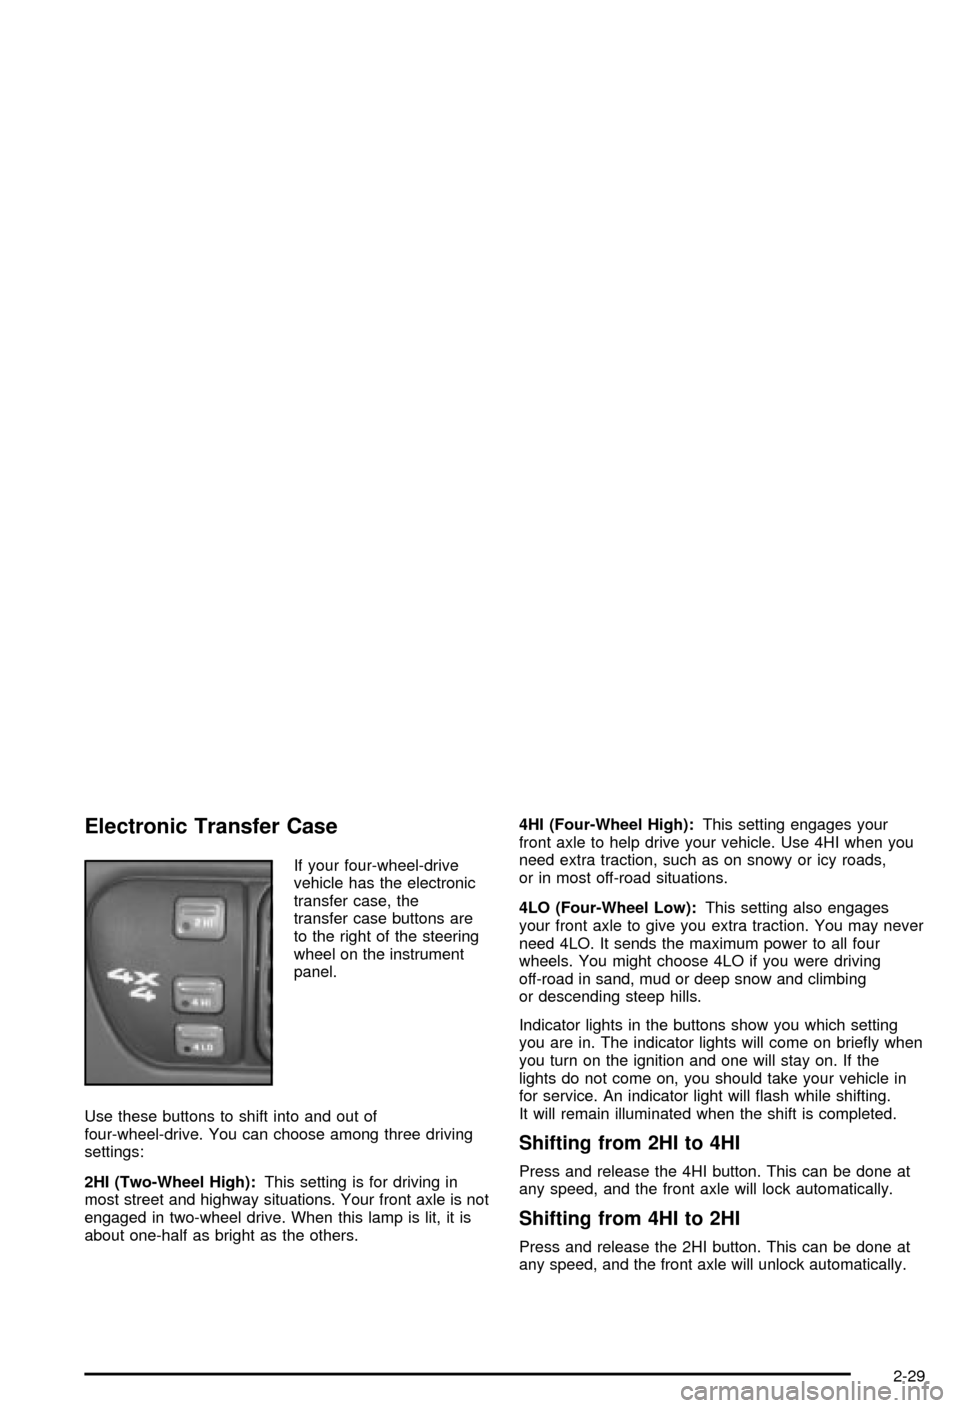
If your four-wheel-drive
vehicle has the electronic
transfer case, the
transfer case buttons are
to the right of the steering
wheel on the instrument
panel.
Use these buttons to shift into and out of
four-wheel-drive. You can choose among three driving
settings:
2HI (Two-Wheel High):This setting is for driving in
most street and highway situations. Your front axle is not
engaged in two-wheel drive. When this lamp is lit, it is
about one-half as bright as the others.4HI (Four-Wheel High):This setting engages your
front axle to help drive your vehicle. Use 4HI when you
need extra traction, such as on snowy or icy roads,
or in most off-road situations.
4LO (Four-Wheel Low):This setting also engages
your front axle to give you extra traction. You may never
need 4LO. It sends the maximum power to all four
wheels. You might choose 4LO if you were driving
off-road in sand, mud or deep snow and climbing
or descending steep hills.
Indicator lights in the buttons show you which setting
you are in. The indicator lights will come on brie¯y when
you turn on the ignition and one will stay on. If the
lights do not come on, you should take your vehicle in
for service. An indicator light will ¯ash while shifting.
It will remain illuminated when the shift is completed.
Shifting from 2HI to 4HI
Press and release the 4HI button. This can be done at
any speed, and the front axle will lock automatically.
Shifting from 4HI to 2HI
Press and release the 2HI button. This can be done at
any speed, and the front axle will unlock automatically.
2-29
Page 97 of 420
Automatic Transfer Case
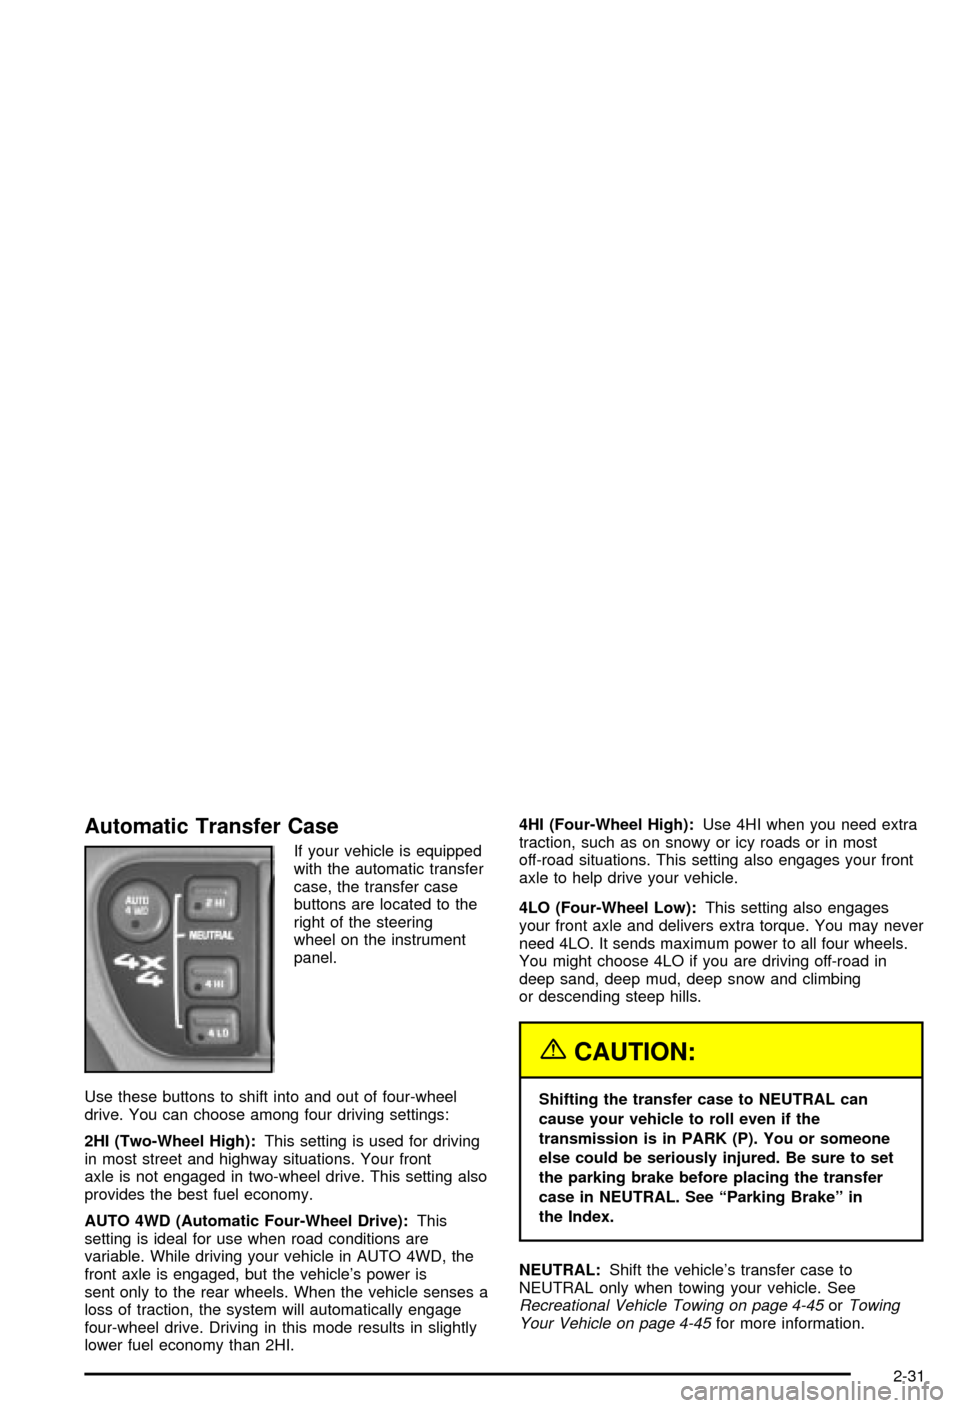
If your vehicle is equipped
with the automatic transfer
case, the transfer case
buttons are located to the
right of the steering
wheel on the instrument
panel.
Use these buttons to shift into and out of four-wheel
drive. You can choose among four driving settings:
2HI (Two-Wheel High):This setting is used for driving
in most street and highway situations. Your front
axle is not engaged in two-wheel drive. This setting also
provides the best fuel economy.
AUTO 4WD (Automatic Four-Wheel Drive):This
setting is ideal for use when road conditions are
variable. While driving your vehicle in AUTO 4WD, the
front axle is engaged, but the vehicle's power is
sent only to the rear wheels. When the vehicle senses a
loss of traction, the system will automatically engage
four-wheel drive. Driving in this mode results in slightly
lower fuel economy than 2HI.4HI (Four-Wheel High):Use 4HI when you need extra
traction, such as on snowy or icy roads or in most
off-road situations. This setting also engages your front
axle to help drive your vehicle.
4LO (Four-Wheel Low):This setting also engages
your front axle and delivers extra torque. You may never
need 4LO. It sends maximum power to all four wheels.
You might choose 4LO if you are driving off-road in
deep sand, deep mud, deep snow and climbing
or descending steep hills.
{CAUTION:
Shifting the transfer case to NEUTRAL can
cause your vehicle to roll even if the
transmission is in PARK (P). You or someone
else could be seriously injured. Be sure to set
the parking brake before placing the transfer
case in NEUTRAL. See ªParking Brakeº in
the Index.
NEUTRAL:Shift the vehicle's transfer case to
NEUTRAL only when towing your vehicle. See
Recreational Vehicle Towing on page 4-45orTowing
Your Vehicle on page 4-45for more information.
2-31
Page 98 of 420

Indicator lights in the buttons show which setting you
are in. The indicator lights will come on brie¯y when you
turn on the ignition and one will stay on. If the lights
do not come on, you should take your vehicle to your
dealer for service. An indicator light will ¯ash while
shifting the transfer case. It will remain illuminated when
the shift is complete. If for some reason the transfer
case cannot make a requested shift, it will return to the
last chosen setting.
If the SERVICE 4WD light stays on, you should take
your vehicle to your dealer for service. See
Service
Four-Wheel Drive Warning Light on page 3-34for further
information.
Shifting to 4HI or AUTO 4WD
Press and release the 4HI or AUTO 4WD button. This
can be done at any speed, and the indicator light
will ¯ash while shifting. It will remain illuminated when
the shift is complete.
Shifting to 2HI
Press and release the 2HI button. This can be done at
any speed.
Shifting to 4LO
To shift to 4LO, the vehicle's engine must be running
and the vehicle must be stopped or moving less
than 3 mph (4.8 km/h) with the transmission in
NEUTRAL (N) or with the clutch pedal pressed for
vehicles with manual transmission. The preferred
method for shifting into 4LO is to have your vehicle
moving 1 or 2 mph (1.6 to 3.2 km/h). Press and release
the 4LO button. You must wait for the 4LO indicator
light to stop ¯ashing and remain illuminated before
shifting your transmission into gear.
If the 4LO button is pressed when your vehicle is in
gear and/or moving, the 4LO indicator light will ¯ash for
30 seconds and not complete the shift unless your
vehicle is moving less than 3 mph (4.8 km/h) and the
transmission is in NEUTRAL (N) or with the clutch pedal
pressed for vehicles with manual transmission. After
30 seconds, the transfer case will return to the setting
last chosen.
2-32
Page 101 of 420
Shifting Into Park (P)
{CAUTION:
It can be dangerous to get out of your vehicle
if the shift lever is not fully in PARK (P) with
the parking brake ®rmly set. Your vehicle can
roll. If you have left the engine running, the
vehicle can move suddenly. You or others
could be injured. To be sure your vehicle won't
move, even when you're on fairly level ground,
use the steps that follow. With four-wheel
drive, your vehicle will be free to roll Ð even if
your shift lever is in PARK (P) Ð if your
transfer case is in NEUTRAL. So, be sure the
transfer case is in a drive gear Ð not in
NEUTRAL. See ªFour-Wheel Driveº in the
Index. Always put the shift lever fully in
PARK (P) with the parking brake ®rmly set. If
you're pulling a trailer, see ªTowing a Trailerº
in the Index.
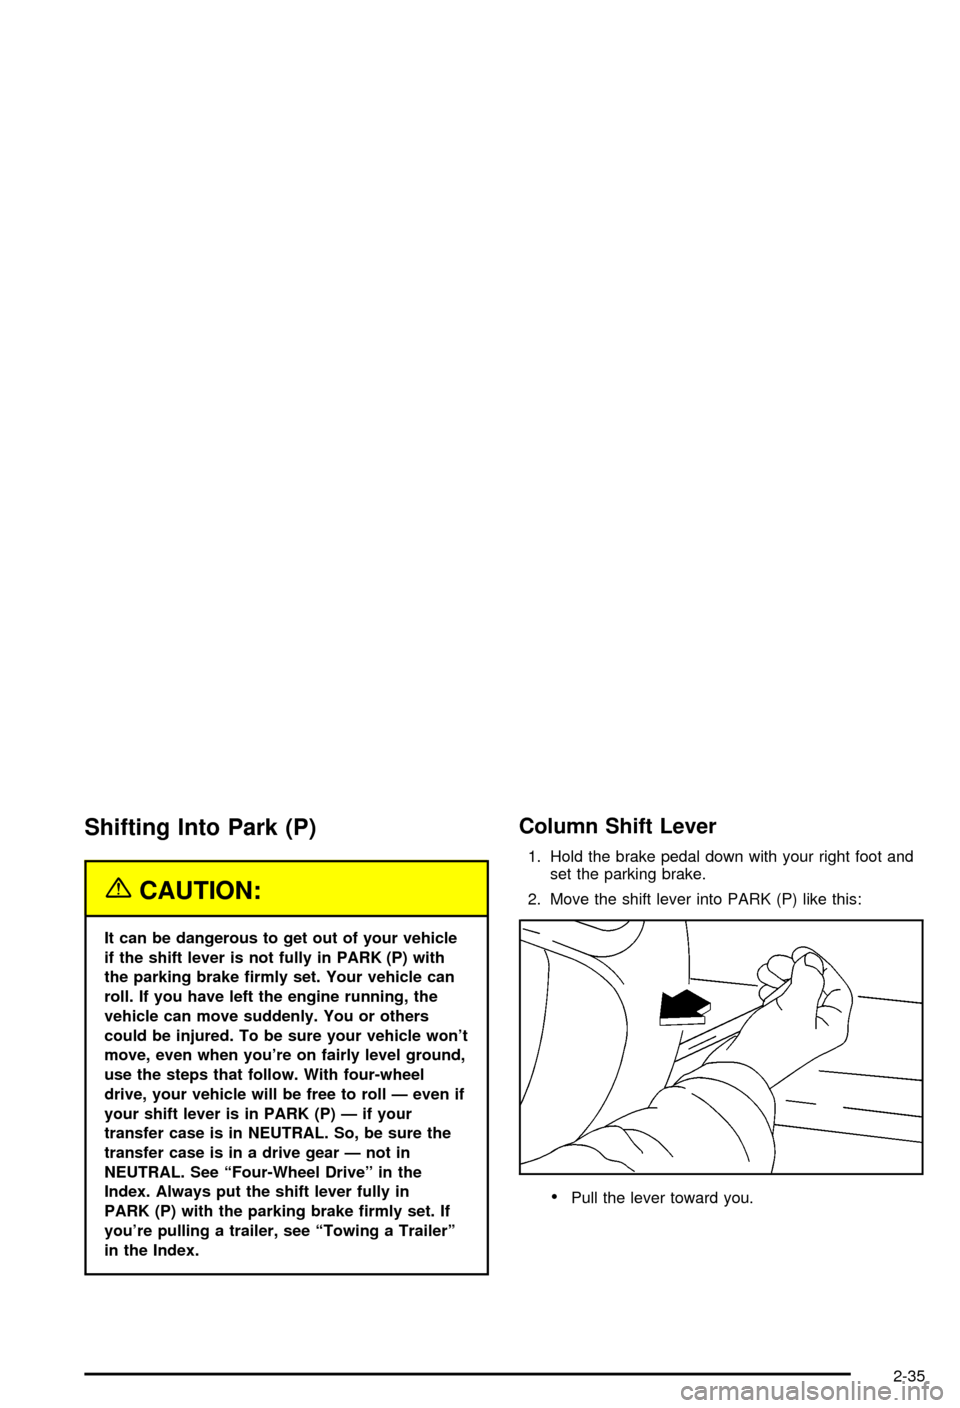
Column Shift Lever
1. Hold the brake pedal down with your right foot and
set the parking brake.
2. Move the shift lever into PARK (P) like this:
·Pull the lever toward you.
2-35
Page 103 of 420
Leaving Your Vehicle With the Engine
Running
{CAUTION:
It can be dangerous to leave your vehicle
with the engine running. Your vehicle could
move suddenly if the shift lever is not fully in
PARK (P) with the parking brake ®rmly set.
If you have four-wheel drive, your vehicle
will be free to roll ± even if your lever is in
PARK (P) ± if your transfer case is in
NEUTRAL. So be sure the transfer case is in a
drive gear ± not NEUTRAL. See ªFour-Wheel
Drive (Automatic Transfer Case)º in the Index.
And, if you leave the vehicle with the engine
running, it could overheat and even catch ®re.
You or others could be injured. Don't leave
your vehicle with the engine running unless
you have to.
If you have to leave your vehicle with the engine
running, be sure your vehicle is in PARK (P) and your
parking brake is ®rmly set before you leave it. After
you've moved the shift lever into PARK (P), holdthe regular brake pedal down. Then, see if you can
move the shift lever away from PARK (P) without ®rst
pulling it toward you (or pressing the button on a console
shift lever). If you can, it means that the shift lever
wasn't fully locked into PARK (P).
Torque Lock
If you are parking on a hill and you don't shift your
transmission into PARK (P) properly, the weight of the
vehicle may put too much force on the parking pawl in the
transmission. You may ®nd it difficult to pull the shift lever
out of PARK (P). This is called torque lock. To prevent
torque lock, set the parking brake and then shift into
PARK (P) properly before you leave the driver's seat. To
®nd out how, see
Shifting Into Park (P) on page 2-35.
When you are ready to drive, move the shift lever out of
PARK (P)
beforeyou release the parking brake.
If torque lock does occur, you may need to have another
vehicle push yours a little uphill to take some of the
pressure from the parking pawl in the transmission, so
you can pull the shift lever out of PARK (P).
Shifting Out of Park (P)
Your vehicle has an automatic transmission shift lock
control system. You have to fully apply the regular
brakes before you can shift from PARK (P) when the
ignition is in RUN. See
Automatic Transmission
Operation on page 2-23.
2-37