mirror CHEVROLET BLAZER 2005 2.G Owners Manual
[x] Cancel search | Manufacturer: CHEVROLET, Model Year: 2005, Model line: BLAZER, Model: CHEVROLET BLAZER 2005 2.GPages: 436, PDF Size: 2.55 MB
Page 1 of 436
Seats and Restraint Systems........................... 1-1
Front Seats
............................................... 1-2
Rear Seats
............................................... 1-6
Safety Belts
.............................................. 1-8
Child Restraints
.......................................1-29
Airbag System
.........................................1-50
Restraint System Check
............................1-58
Features and Controls..................................... 2-1
Keys
........................................................ 2-3
Doors and Locks
....................................... 2-8
Windows
.................................................2-15
Theft-Deterrent Systems
............................2-17
Starting and Operating Your Vehicle
...........2-19
Mirrors
....................................................2-42
HomeLink
®Transmitter
.............................2-44
Storage Areas
.........................................2-49
Sunroof
..................................................2-58
Vehicle Personalization
.............................2-60
Instrument Panel............................................. 3-1
Instrument Panel Overview
.......................... 3-4
Climate Controls
......................................3-19
Warning Lights, Gages, and Indicators
........3-21
Driver Information Center (DIC)
..................3-37
Audio System(s)
.......................................3-39Driving Your Vehicle....................................... 4-1
Your Driving, the Road, and Your Vehicle
..... 4-2
Towing
...................................................4-51
Service and Appearance Care.......................... 5-1
Service
..................................................... 5-3
Fuel
......................................................... 5-5
Checking Things Under the Hood
...............5-10
Rear Axle
...............................................5-46
Four-Wheel Drive
.....................................5-47
Front Axle
...............................................5-48
Bulb Replacement
....................................5-49
Windshield Wiper Blade Replacement
.........5-54
Tires
......................................................5-56
Appearance Care
.....................................5-86
Vehicle Identi�cation
.................................5-95
Electrical System
......................................5-96
Capacities and Speci�cations
...................5-102
Maintenance Schedule..................................... 6-1
Maintenance Schedule
................................ 6-2
Customer Assistance and Information.............. 7-1
Customer Assistance and Information
........... 7-2
Reporting Safety Defects
...........................7-10
Index................................................................ 1
2005 Chevrolet Blazer Owner ManualM
Page 67 of 436
Keys...............................................................2-3
Remote Keyless Entry System.........................2-5
Remote Keyless Entry System Operation...........2-6
Doors and Locks.............................................2-8
Door Locks....................................................2-8
Power Door Locks..........................................2-9
Programmable Automatic
Door Locks................................................2-9
Rear Door Security Locks..............................2-11
Lockout Protection........................................2-11
Liftgate/Tailgate............................................2-12
Windows........................................................2-15
Power Windows............................................2-16
Swing-Out Windows......................................2-17
Sun Visors...................................................2-17
Theft-Deterrent Systems..................................2-17
Content Theft-Deterrent.................................2-17
Passlock
®....................................................2-19
Starting and Operating Your Vehicle................2-19
New Vehicle Break-In....................................2-19
Ignition Positions..........................................2-20
Retained Accessory Power (RAP)...................2-21
Starting Your Engine.....................................2-21Engine Coolant Heater..................................2-23
Automatic Transmission Operation...................2-24
Tow/Haul Mode............................................2-27
Manual Transmission Operation......................2-28
Four-Wheel Drive..........................................2-29
Parking Brake..............................................2-36
Shifting Into Park (P)
(Automatic Transmission)............................2-37
Shifting Out of Park (P)
(Automatic Transmission)............................2-39
Parking Your Vehicle
(Manual Transmission)...............................2-39
Parking Over Things That Burn.......................2-40
Engine Exhaust............................................2-40
Running Your Engine While You Are Parked
(Automatic Transmission)............................2-41
Mirrors...........................................................2-42
Manual Rearview Mirror.................................2-42
Automatic Dimming Rearview Mirror................2-42
Outside Manual Mirror...................................2-43
Outside Power Mirrors...................................2-43
Outside Automatic Dimming Mirror..................2-44
Outside Convex Mirror...................................2-44
Outside Heated Mirrors..................................2-44
Section 2 Features and Controls
2-1
Page 108 of 436
{CAUTION:
If you have four-wheel drive, your vehicle will
be free to roll — even if your shift lever is in
PARK (P) — if your transfer case is in
NEUTRAL. So be sure the transfer case is in a
drive gear — not in NEUTRAL. SeeFour-Wheel
Drive on page 2-29.
Follow the proper steps to be sure your vehicle will not
move. SeeShifting Into Park (P) (Automatic
Transmission) on page 2-37.
If you are pulling a trailer, seeTowing a Trailer on
page 4-59.
Mirrors
Manual Rearview Mirror
Pull the tab under the mirror toward you to reduce the
glare from headlamps behind you after dark. Push
the tab away from you for normal daytime operation.
Automatic Dimming Rearview Mirror
If your vehicle has this feature, the mirror automatically
changes to reduce glare from headlamps behind
you. A photocell on the back of the mirror senses when
it is becoming dark outside. Another photocell built
into the mirror surface senses when headlamps
are behind you.
At night, when the glare is too high, the mirror will
gradually darken to reduce glare. This change may take
a few seconds. The mirror will return to its clear
daytime state when the vehicle is put into REVERSE (R)
or when the glare is reduced.
AUTO (Automatic Dimming):This button is located at
the base of the mirror. Use it to turn on the automatic
feature. The button has an indicator light to show it is on.
OFF:Press this button to turn the automatic feature off.
2-42
Page 109 of 436
Time Delay
The automatic mirror has a time delay feature which
prevents unnecessary switching from the night back to
the day position. This delay prevents rapid changing
of the mirror as you drive under lights and through traffic.
Cleaning the Photocells
Use a cotton swab and glass cleaner to clean the
photocells and mirror face when necessary.
Cleaning the Mirror
When cleaning the mirror, use a paper towel or similar
material dampened with glass cleaner. Do not spray
glass cleaner directly on the mirror as that may cause
the liquid cleaner to enter the mirror housing.
Outside Manual Mirror
Adjust your outside mirrors so you can see a little of the
side of your vehicle and the area beside and behind
your vehicle from a comfortable driving position.
You can also fold the mirrors in before entering a car
wash. Pull the mirrors in toward the vehicle. Push
the mirrors back out when �nished.
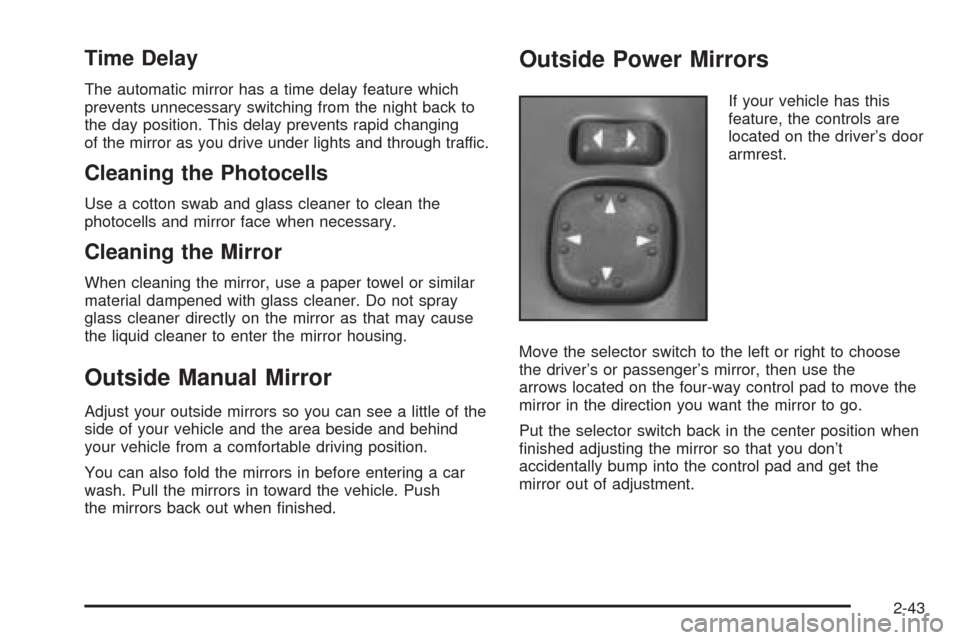
Outside Power Mirrors
If your vehicle has this
feature, the controls are
located on the driver’s door
armrest.
Move the selector switch to the left or right to choose
the driver’s or passenger’s mirror, then use the
arrows located on the four-way control pad to move the
mirror in the direction you want the mirror to go.
Put the selector switch back in the center position when
�nished adjusting the mirror so that you don’t
accidentally bump into the control pad and get the
mirror out of adjustment.
2-43
Page 110 of 436
Outside Automatic Dimming Mirror
If the vehicle has this feature, the driver’s side
outside mirror will adjust for the glare of headlamps
behind you. This feature is activated when automatic
dimming is turned on the rearview mirror. SeeAutomatic
Dimming Rearview Mirror on page 2-42.
Outside Convex Mirror
A convex mirror’s surface is curved so more can be
seen from the driver’s seat.
{CAUTION:
A convex mirror can make things (like other
vehicles) look farther away than they really are.
If you cut too sharply into the right lane, you
could hit a vehicle on your right. Check your
inside mirror or glance over your shoulder
before changing lanes.
Outside Heated Mirrors
Your vehicle may be equipped with outside heated
mirrors.
When you operate the rear window defogger, a defogger
also warms the heated outside rearview mirrors to
help clear them of ice, snow and condensation. See
“Rear Window Defogger” underClimate Control System
on page 3-19for more information.
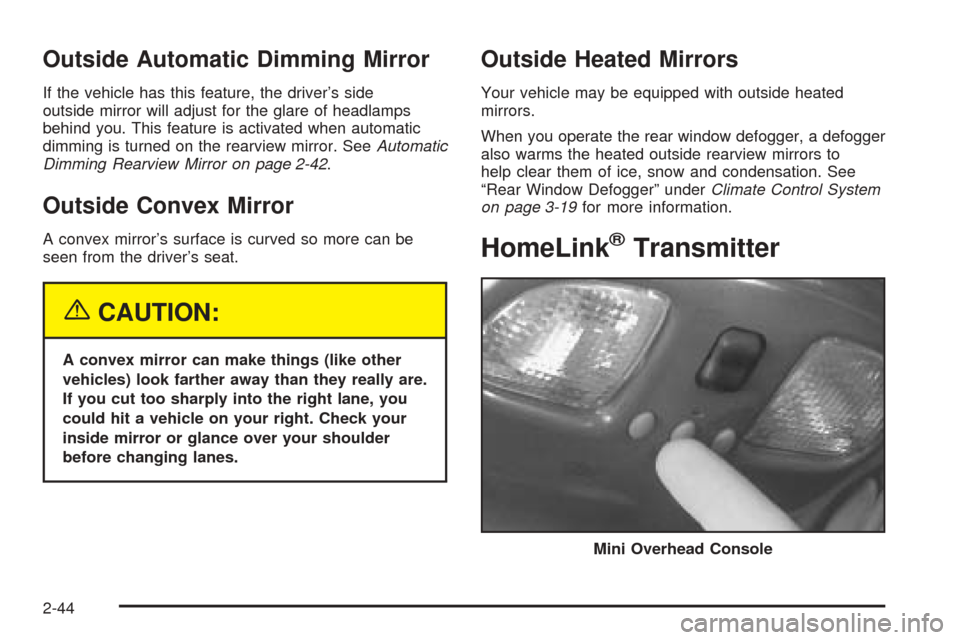
HomeLink®Transmitter
Mini Overhead Console
2-44
Page 143 of 436
Entry Lighting
Your vehicle is equipped with an illuminated entry feature.
When a door is opened, the dome lamps will come on if
the DOME OVERRIDE button is in the out position.
When the doors are closed, the lamps will stay on for a
short period of time and will turn off automatically. If
you use your keyless entry transmitter, if equipped, to
unlock your vehicle, the interior lamps will come on for a
short time whether or not the DOME OVERRIDE
button is in the out position.
Exit Lighting
With exit lighting, the interior lamps will come on when
you remove the key from the ignition to help you
see while exiting the vehicle. If the DOME OVERRIDE
button is in the out position, these lamps will stay
on for a short period of time and then will go out.
Front Reading Lamps
Press the button located near each lamp on the
overhead console to turn a reading lamp on and off.
The lamps can be swiveled to point in the desired
direction.
If you have the mini console, press the lens on each
lamp to turn it on or off.
Map Lamps
If your vehicle has front map lamps, they are located on
the inside rearview mirror. They will automatically
come on for about 40 seconds when the doors are
unlocked with the keyless entry transmitter, if equipped,
or until the ignition key is turned to RUN or
ACCESSORY. The lamps will also stay on for about
40 seconds after you exit the vehicle unless you lock the
doors with the keyless entry transmitter.
You can also turn the lamps on and off by pressing the
button near each lamp.
Battery Run-Down Protection
This feature shuts off the dome, courtesy, vanity,
reading, glove box and underhood lamps if they are left
on for more than 20 minutes when the ignition is off.
This will keep your battery from running down.
If the battery run-down protection shuts off the interior
lamps, it may be necessary to do one of the following to
return to normal operation:
Shut off all lamps and close all doors.
Turn the ignition key to RUN.
3-17
Page 146 of 436
MAX A/C (Maximum Air Conditioning):This mode
recirculates much of the air inside your vehicle so
it cools quickly. It directs most of the air through the
instrument panel vents and a small amount through the
�oor vents.
You may notice a slight change in engine performance
when the air-conditioning compressor shuts off and
turns on again. This is normal. The system is designed
to make adjustments to help with fuel economy while
still maintaining the selected temperature.
The air-conditioning system removes moisture from the
air, so you may sometimes notice a small amount of
water dripping underneath your vehicle while idling
or after turning off the engine. This is normal.
Defogging and Defrosting
Fog on the inside of windows is a result of high humidity
(moisture) condensing on the cool window glass. This
can be minimized if the climate control system is
used properly. There are two modes to clear fog or frost
from your windshield and side windows. Use the
defog mode to clear the windows of fog or moisture and
warm the passengers. Use the defrost mode to
remove fog or frost from the windshield more quickly.
For best results, clear all snow and ice from the
windshield before defrosting.
-(Defog):Use this mode to direct half the air to the
windshield and half to the �oor outlet. Close the
center outlets to help defrost the side windows more
quickly. In this mode, the system will automatically force
outside air into your vehicle and it will also run the
air-conditioning compressor, unless it falls below the
temperature at which air conditioning is effective.
1(Defrost):This mode directs most of the air to the
windshield and the side window vents, with only a
little air directed to the �oor vents. When you select this
mode, the system runs the air-conditioning compressor
unless the outside temperature is at or below freezing.
Do not drive the vehicle until all the windows are clear.
Rear Window Defogger
The rear window defogger uses a warming grid to
remove fog from the rear window.
will come on to let your know that the rear window
defogger is activated.
If your vehicle has heated outside rearview mirrors,
when the rear defogger button is pressed the mirrors will
warm to help clear any fog or frost from the surface of
the mirrors.
3-20
Page 215 of 436
Do not get too close to the vehicle you want to
pass while you are awaiting an opportunity. For one
thing, following too closely reduces your area of
vision, especially if you are following a larger
vehicle. Also, you will not have adequate space if
the vehicle ahead suddenly slows or stops.
Keep back a reasonable distance.
When it looks like a chance to pass is coming up,
start to accelerate but stay in the right lane and
do not get too close. Time your move so you will be
increasing speed as the time comes to move into
the other lane. If the way is clear to pass, you
will have a running start that more than makes up
for the distance you would lose by dropping
back. And if something happens to cause you to
cancel your pass, you need only slow down
and drop back again and wait for another
opportunity.
If other vehicles are lined up to pass a slow vehicle,
wait your turn. But take care that someone is not
trying to pass you as you pull out to pass the slow
vehicle. Remember to glance over your shoulder
and check the blind spot.
Check your mirrors, glance over your shoulder, and
start your left lane change signal before moving out
of the right lane to pass. When you are far
enough ahead of the passed vehicle to see its front
in your inside mirror, activate your right lane
change signal and move back into the right lane.
Remember that your right outside mirror is convex.
The vehicle you just passed may seem to be
farther away from you than it really is.
Try not to pass more than one vehicle at a time on
two-lane roads. Reconsider before passing the
next vehicle.
Do not overtake a slowly moving vehicle too rapidly.
Even though the brake lamps are not �ashing, it
may be slowing down or starting to turn.
If you are being passed, make it easy for the
following driver to get ahead of you. Perhaps
you can ease a little to the right.
4-13
Page 216 of 436
Loss of Control
Let us review what driving experts say about what
happens when the three control systems — brakes,
steering, and acceleration — do not have enough friction
where the tires meet the road to do what the driver
has asked.
In any emergency, do not give up. Keep trying to steer
and constantly seek an escape route or area of less
danger.
Skidding
In a skid, a driver can lose control of the vehicle.
Defensive drivers avoid most skids by taking reasonable
care suited to existing conditions, and by not overdriving
those conditions. But skids are always possible.
The three types of skids correspond to your vehicle’s
three control systems. In the braking skid, your wheels
are not rolling. In the steering or cornering skid, too much
speed or steering in a curve causes tires to slip and lose
cornering force. And in the acceleration skid, too much
throttle causes the driving wheels to spin.
A cornering skid is best handled by easing your foot off
the accelerator pedal.If your vehicle starts to slide, ease your foot off the
accelerator pedal and quickly steer the way you want
the vehicle to go. If you start steering quickly enough,
your vehicle may straighten out. Always be ready
for a second skid if it occurs.
Of course, traction is reduced when water, snow, ice,
gravel, or other material is on the road. For safety, you
will want to slow down and adjust your driving to
these conditions. It is important to slow down on slippery
surfaces because stopping distance will be longer and
vehicle control more limited.
While driving on a surface with reduced traction, try
your best to avoid sudden steering, acceleration,
or braking, including engine braking by shifting to a
lower gear. Any sudden changes could cause the tires
to slide. You may not realize the surface is slippery
until your vehicle is skidding. Learn to recognize warning
clues — such as enough water, ice, or packed snow
on the road to make a mirrored surface — and
slow down when you have any doubt.
Remember: Any anti-lock brake system (ABS) helps
avoid only the braking skid.
4-14
Page 233 of 436
Here are some tips on night driving.
Drive defensively.
Do not drink and drive.
Except vehicles with Automatic Dimming Rearview
Mirror: Adjust your inside rearview mirror to reduce
the glare from headlamps behind you.
Since you cannot see as well, you may need to
slow down and keep more space between you
and other vehicles.
Slow down, especially on higher speed roads. Your
headlamps can light up only so much road ahead.
In remote areas, watch for animals.
If you are tired, pull off the road in a safe place
and rest.
No one can see as well at night as in the daytime. But
as we get older these differences increase. A
50-year-old driver may require at least twice as much
light to see the same thing at night as a 20-year-old.
What you do in the daytime can also affect your
night vision. For example, if you spend the day in bright
sunshine you are wise to wear sunglasses. Your
eyes will have less trouble adjusting to night. But if you
are driving, do not wear sunglasses at night. They
may cut down on glare from headlamps, but they also
make a lot of things invisible.You can be temporarily blinded by approaching
headlamps. It can take a second or two, or even several
seconds, for your eyes to re-adjust to the dark. When
you are faced with severe glare, as from a driver
who does not lower the high beams, or a vehicle with
misaimed headlamps, slow down a little. Avoid
staring directly into the approaching headlamps.
Keep your windshield and all the glass on your vehicle
clean — inside and out. Glare at night is made much
worse by dirt on the glass. Even the inside of the glass
can build up a �lm caused by dust. Dirty glass makes
lights dazzle and �ash more than clean glass would,
making the pupils of your eyes contract repeatedly.
Remember that your headlamps light up far less of a
roadway when you are in a turn or curve. Keep
your eyes moving; that way, it is easier to pick out dimly
lighted objects. Just as your headlamps should be
checked regularly for proper aim, so should your eyes
be examined regularly. Some drivers suffer from
night blindness — the inability to see in dim light — and
are not even aware of it.
4-31