height adjustment CHEVROLET BLAZER 2019 Owner's Manual
[x] Cancel search | Manufacturer: CHEVROLET, Model Year: 2019, Model line: BLAZER, Model: CHEVROLET BLAZER 2019Pages: 404, PDF Size: 7.59 MB
Page 12 of 404
Chevrolet Blazer (GMNA-Localizing-U.S./Canada/Mexico-12461541) - 2019 -
CRC - 3/11/19
In Brief 11
Windows
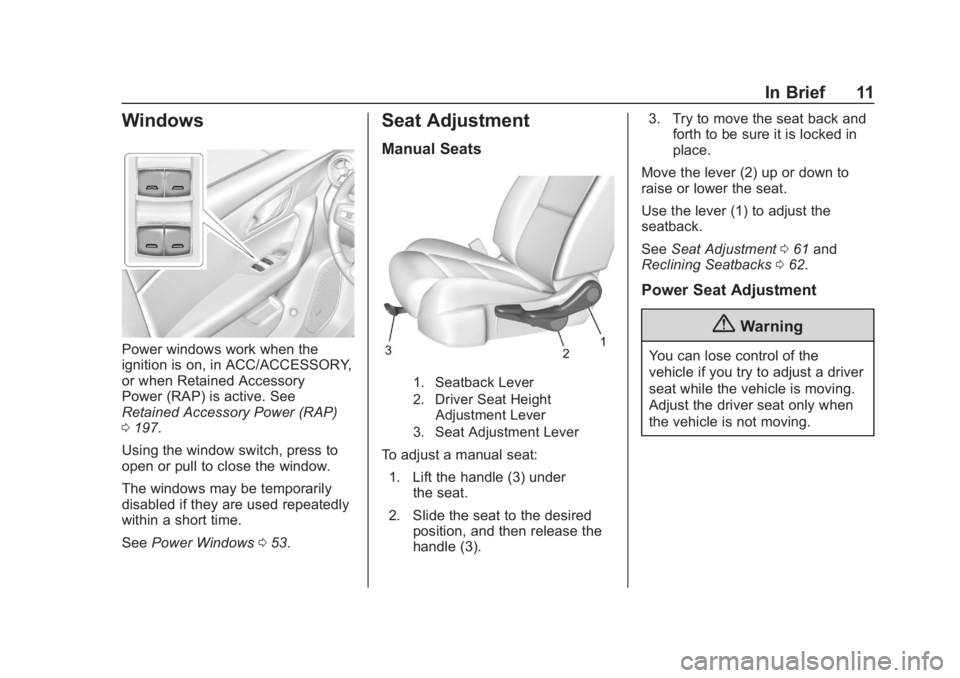
Power windows work when the
ignition is on, in ACC/ACCESSORY,
or when Retained Accessory
Power (RAP) is active. See
Retained Accessory Power (RAP)
0197.
Using the window switch, press to
open or pull to close the window.
The windows may be temporarily
disabled if they are used repeatedly
within a short time.
See Power Windows 053.
Seat Adjustment
Manual Seats
1. Seatback Lever
2. Driver Seat Height
Adjustment Lever
3. Seat Adjustment Lever
To adjust a manual seat:
1. Lift the handle (3) under the seat.
2. Slide the seat to the desired position, and then release the
handle (3). 3. Try to move the seat back and
forth to be sure it is locked in
place.
Move the lever (2) up or down to
raise or lower the seat.
Use the lever (1) to adjust the
seatback.
See Seat Adjustment 061 and
Reclining Seatbacks 062.
Power Seat Adjustment
{Warning
You can lose control of the
vehicle if you try to adjust a driver
seat while the vehicle is moving.
Adjust the driver seat only when
the vehicle is not moving.
Page 14 of 404
Chevrolet Blazer (GMNA-Localizing-U.S./Canada/Mexico-12461541) - 2019 -
CRC - 3/11/19
In Brief 13
Heated and Ventilated
Seats
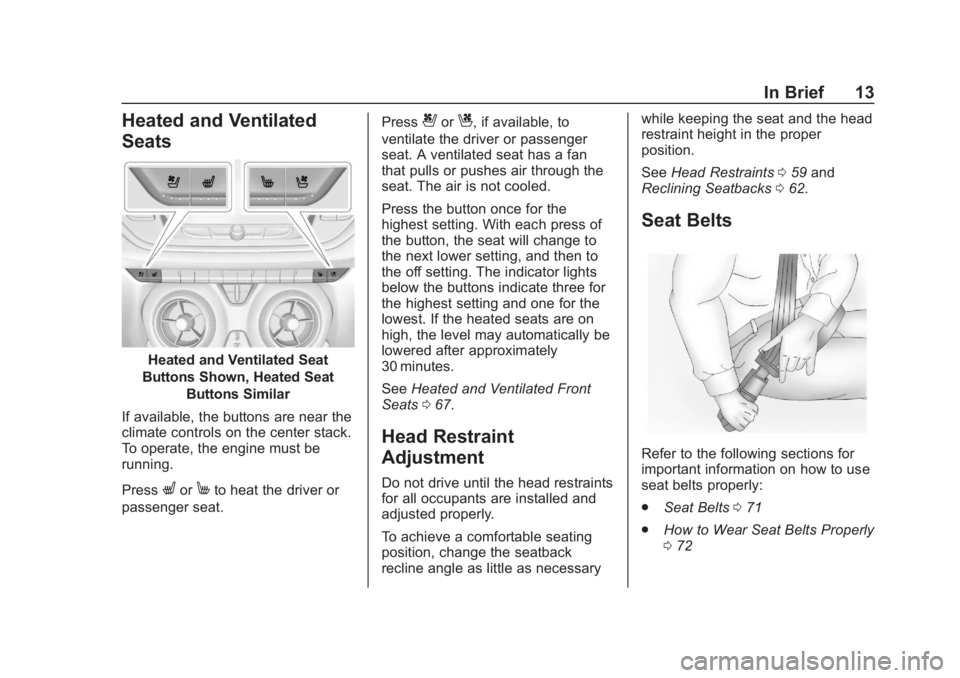
Heated and Ventilated Seat
Buttons Shown, Heated Seat Buttons Similar
If available, the buttons are near the
climate controls on the center stack.
To operate, the engine must be
running.
Press
LorMto heat the driver or
passenger seat. Press
{orC, if available, to
ventilate the driver or passenger
seat. A ventilated seat has a fan
that pulls or pushes air through the
seat. The air is not cooled.
Press the button once for the
highest setting. With each press of
the button, the seat will change to
the next lower setting, and then to
the off setting. The indicator lights
below the buttons indicate three for
the highest setting and one for the
lowest. If the heated seats are on
high, the level may automatically be
lowered after approximately
30 minutes.
See Heated and Ventilated Front
Seats 067.
Head Restraint
Adjustment
Do not drive until the head restraints
for all occupants are installed and
adjusted properly.
To achieve a comfortable seating
position, change the seatback
recline angle as little as necessary while keeping the seat and the head
restraint height in the proper
position.
See
Head Restraints 059 and
Reclining Seatbacks 062.
Seat Belts
Refer to the following sections for
important information on how to use
seat belts properly:
.
Seat Belts 071
. How to Wear Seat Belts Properly
072
Page 44 of 404
Chevrolet Blazer (GMNA-Localizing-U.S./Canada/Mexico-12461541) - 2019 -
CRC - 3/11/19
Keys, Doors, and Windows 43
sensor, the liftgate will reverse
direction and open fully. The liftgate
will remain open until it is activated
again or closed manually.
Setting the 3/4 Mode
To change the position the liftgate
stops at when opening:1. Select MAX or 3/4 mode and power open the liftgate.
2. Stop the liftgate movement at the desired height by pressing
any liftgate switch. Manually
adjust the liftgate position if
needed.
3. Press and hold
lat the
bottom of the liftgate until the
turn signals flash and a beep
sounds. This indicates the
setting has been recorded.
The liftgate cannot be set below a
minimum programmable height.
If there is no light flash or sound,
then the height adjustment may be
too low.
Manual Operation
Select OFF to manually operate the
liftgate. See “Manual Liftgate” at the
beginning of this section.
Caution
Attempting to move the liftgate
too quickly and with excessive
force may result in damage to the
vehicle.
Operate the liftgate manually with a
smooth motion and moderate
speed. The system includes a
feature that limits the manual
closing speed to protect the
components.
Hands-Free Operation
If equipped, the liftgate may be
operated with a kicking motion
under the left side of the rear
bumper at the location of the
projected logo. See "Projected
Logo" later in this section. The RKE
transmitter must be within 1 m (3 ft). The hands-free feature will not work
while the liftgate is moving. To stop
the liftgate while in motion use one
of the liftgate switches.
The hands-free feature can be
customized. See
Vehicle
Personalization 0151. Choose from
the following:
On-Open and Close : The kicking
motion is activated to both open and
close the liftgate.
On-Open Only : The kicking motion
is activated to only open the liftgate.
Off : The feature is disabled.
Page 61 of 404
Chevrolet Blazer (GMNA-Localizing-U.S./Canada/Mexico-12461541) - 2019 -
CRC - 3/11/19
60 Seats and Restraints
Rear Seats
Rear Head Restraint Adjustment
The vehicle's rear seats have
adjustable head restraints in the
outboard seating positions.
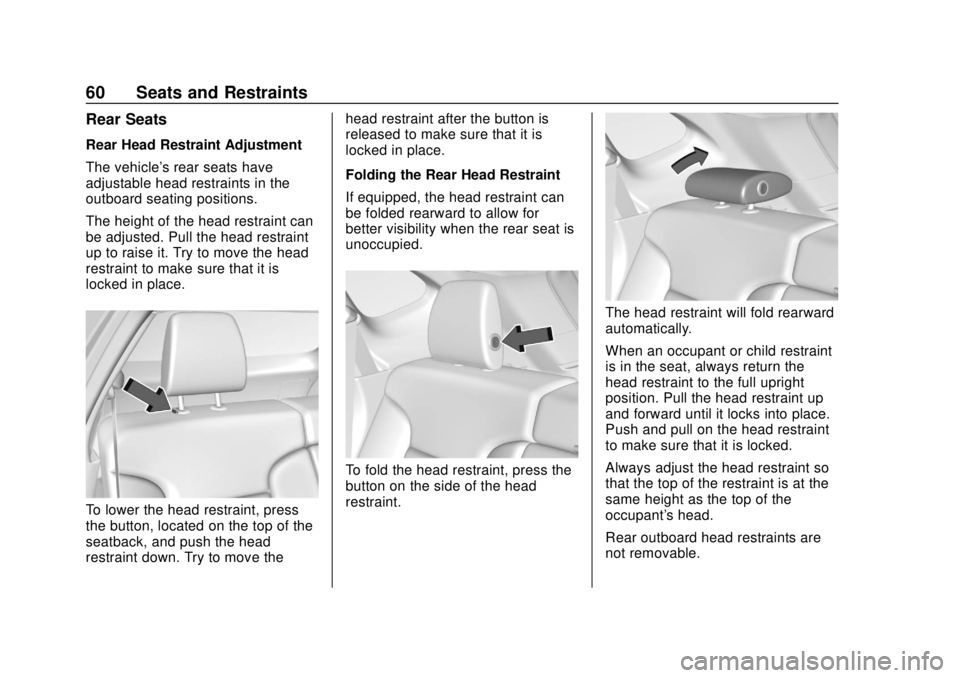
The height of the head restraint can
be adjusted. Pull the head restraint
up to raise it. Try to move the head
restraint to make sure that it is
locked in place.
To lower the head restraint, press
the button, located on the top of the
seatback, and push the head
restraint down. Try to move thehead restraint after the button is
released to make sure that it is
locked in place.
Folding the Rear Head Restraint
If equipped, the head restraint can
be folded rearward to allow for
better visibility when the rear seat is
unoccupied.
To fold the head restraint, press the
button on the side of the head
restraint.
The head restraint will fold rearward
automatically.
When an occupant or child restraint
is in the seat, always return the
head restraint to the full upright
position. Pull the head restraint up
and forward until it locks into place.
Push and pull on the head restraint
to make sure that it is locked.
Always adjust the head restraint so
that the top of the restraint is at the
same height as the top of the
occupant's head.
Rear outboard head restraints are
not removable.
Page 62 of 404
Chevrolet Blazer (GMNA-Localizing-U.S./Canada/Mexico-12461541) - 2019 -
CRC - 3/11/19
Seats and Restraints 61
Front Seats
Seat Adjustment
{Warning
You can lose control of the
vehicle if you try to adjust a driver
seat while the vehicle is moving.
Adjust the driver seat only when
the vehicle is not moving.
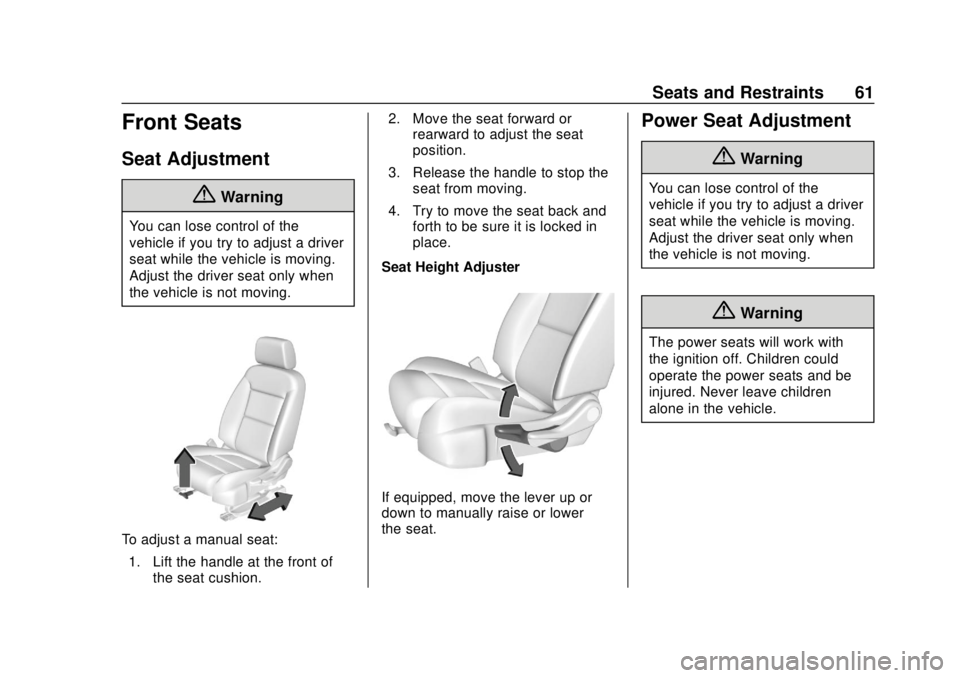
To adjust a manual seat:1. Lift the handle at the front of the seat cushion. 2. Move the seat forward or
rearward to adjust the seat
position.
3. Release the handle to stop the seat from moving.
4. Try to move the seat back and forth to be sure it is locked in
place.
Seat Height Adjuster
If equipped, move the lever up or
down to manually raise or lower
the seat.
Power Seat Adjustment
{Warning
You can lose control of the
vehicle if you try to adjust a driver
seat while the vehicle is moving.
Adjust the driver seat only when
the vehicle is not moving.
{Warning
The power seats will work with
the ignition off. Children could
operate the power seats and be
injured. Never leave children
alone in the vehicle.
Page 77 of 404
Chevrolet Blazer (GMNA-Localizing-U.S./Canada/Mexico-12461541) - 2019 -
CRC - 3/11/19
76 Seats and Restraints
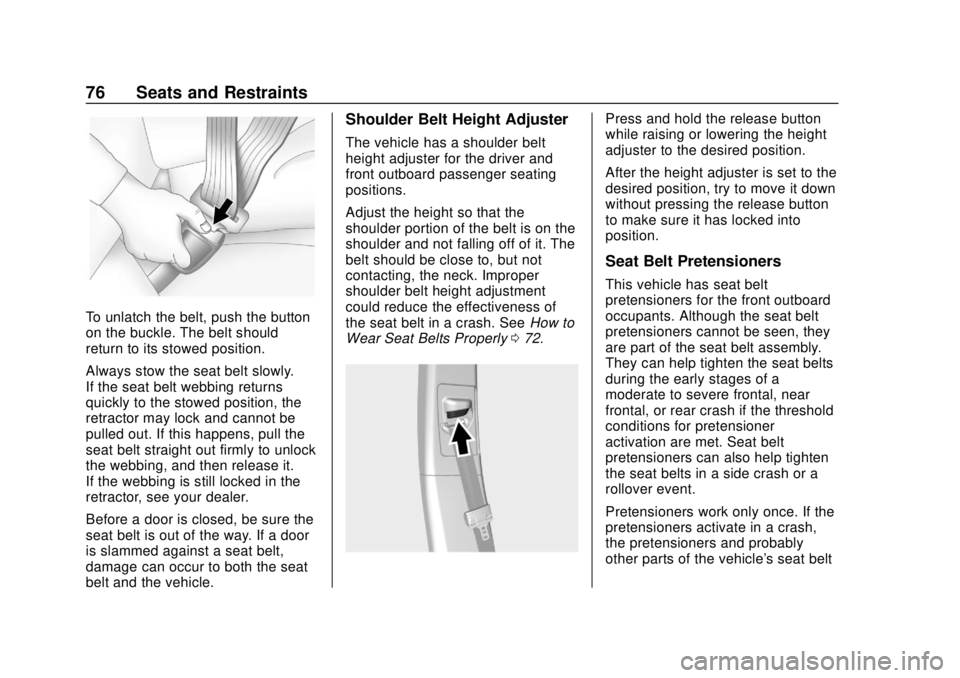
To unlatch the belt, push the button
on the buckle. The belt should
return to its stowed position.
Always stow the seat belt slowly.
If the seat belt webbing returns
quickly to the stowed position, the
retractor may lock and cannot be
pulled out. If this happens, pull the
seat belt straight out firmly to unlock
the webbing, and then release it.
If the webbing is still locked in the
retractor, see your dealer.
Before a door is closed, be sure the
seat belt is out of the way. If a door
is slammed against a seat belt,
damage can occur to both the seat
belt and the vehicle.
Shoulder Belt Height Adjuster
The vehicle has a shoulder belt
height adjuster for the driver and
front outboard passenger seating
positions.
Adjust the height so that the
shoulder portion of the belt is on the
shoulder and not falling off of it. The
belt should be close to, but not
contacting, the neck. Improper
shoulder belt height adjustment
could reduce the effectiveness of
the seat belt in a crash. SeeHow to
Wear Seat Belts Properly 072.
Press and hold the release button
while raising or lowering the height
adjuster to the desired position.
After the height adjuster is set to the
desired position, try to move it down
without pressing the release button
to make sure it has locked into
position.
Seat Belt Pretensioners
This vehicle has seat belt
pretensioners for the front outboard
occupants. Although the seat belt
pretensioners cannot be seen, they
are part of the seat belt assembly.
They can help tighten the seat belts
during the early stages of a
moderate to severe frontal, near
frontal, or rear crash if the threshold
conditions for pretensioner
activation are met. Seat belt
pretensioners can also help tighten
the seat belts in a side crash or a
rollover event.
Pretensioners work only once. If the
pretensioners activate in a crash,
the pretensioners and probably
other parts of the vehicle's seat belt
Page 253 of 404
Chevrolet Blazer (GMNA-Localizing-U.S./Canada/Mexico-12461541) - 2019 -
CRC - 3/11/19
252 Driving and Operating
To remove the hitch cover,
if equipped:1. Remove the four fasteners on the lower tabs.
2. Pull the lower edge of the cover to about a 45 degree
angle.
3. Pull the cover downward to disengage the upper
attachments.
To reinstall the hitch cover: 1. Hold the cover at a 45 degree angle to the vehicle and push
the upper tabs into the slots in
the bumper.
2. Push the bottom of the cover forward until the lower tabs line
up with the lower slots.
3. Snap the hitch cover into place by pushing the upper corners
forward.
4. Reinstall the four fasteners on the lower tabs.
Consider using mechanical sway
controls with any trailer. Ask a
trailering professional about sway controls or refer to the trailer
manufacturer's recommendations
and instructions.
Weight-Distributing Hitch
Adjustment
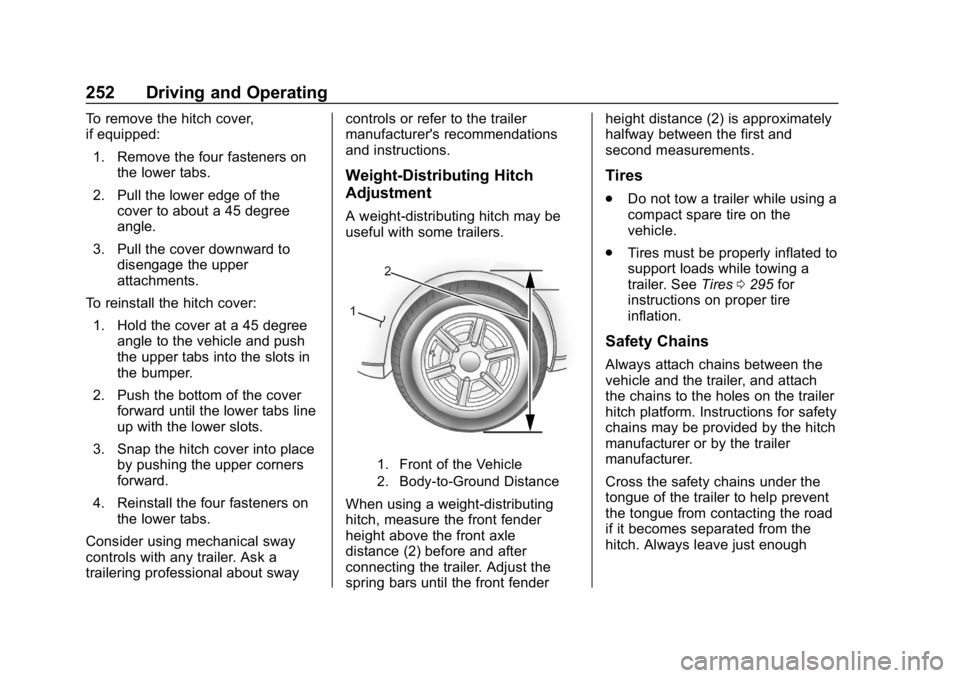
A weight-distributing hitch may be
useful with some trailers.
1. Front of the Vehicle
2. Body-to-Ground Distance
When using a weight-distributing
hitch, measure the front fender
height above the front axle
distance (2) before and after
connecting the trailer. Adjust the
spring bars until the front fenderheight distance (2) is approximately
halfway between the first and
second measurements.
Tires
.
Do not tow a trailer while using a
compact spare tire on the
vehicle.
. Tires must be properly inflated to
support loads while towing a
trailer. See Tires0295 for
instructions on proper tire
inflation.
Safety Chains
Always attach chains between the
vehicle and the trailer, and attach
the chains to the holes on the trailer
hitch platform. Instructions for safety
chains may be provided by the hitch
manufacturer or by the trailer
manufacturer.
Cross the safety chains under the
tongue of the trailer to help prevent
the tongue from contacting the road
if it becomes separated from the
hitch. Always leave just enough