center console CHEVROLET BLAZER 2021 Get To Know Guide
[x] Cancel search | Manufacturer: CHEVROLET, Model Year: 2021, Model line: BLAZER, Model: CHEVROLET BLAZER 2021Pages: 20, PDF Size: 3.73 MB
Page 5 of 20
5
KEYLESS (PUSHBUTTON) START
AUTO ENGINE STOP/START OPERATION
The Remote Keyless Entry transmitter (key fob) must be in the vehicle to turn on the ignition.
STARTING THE ENGINE
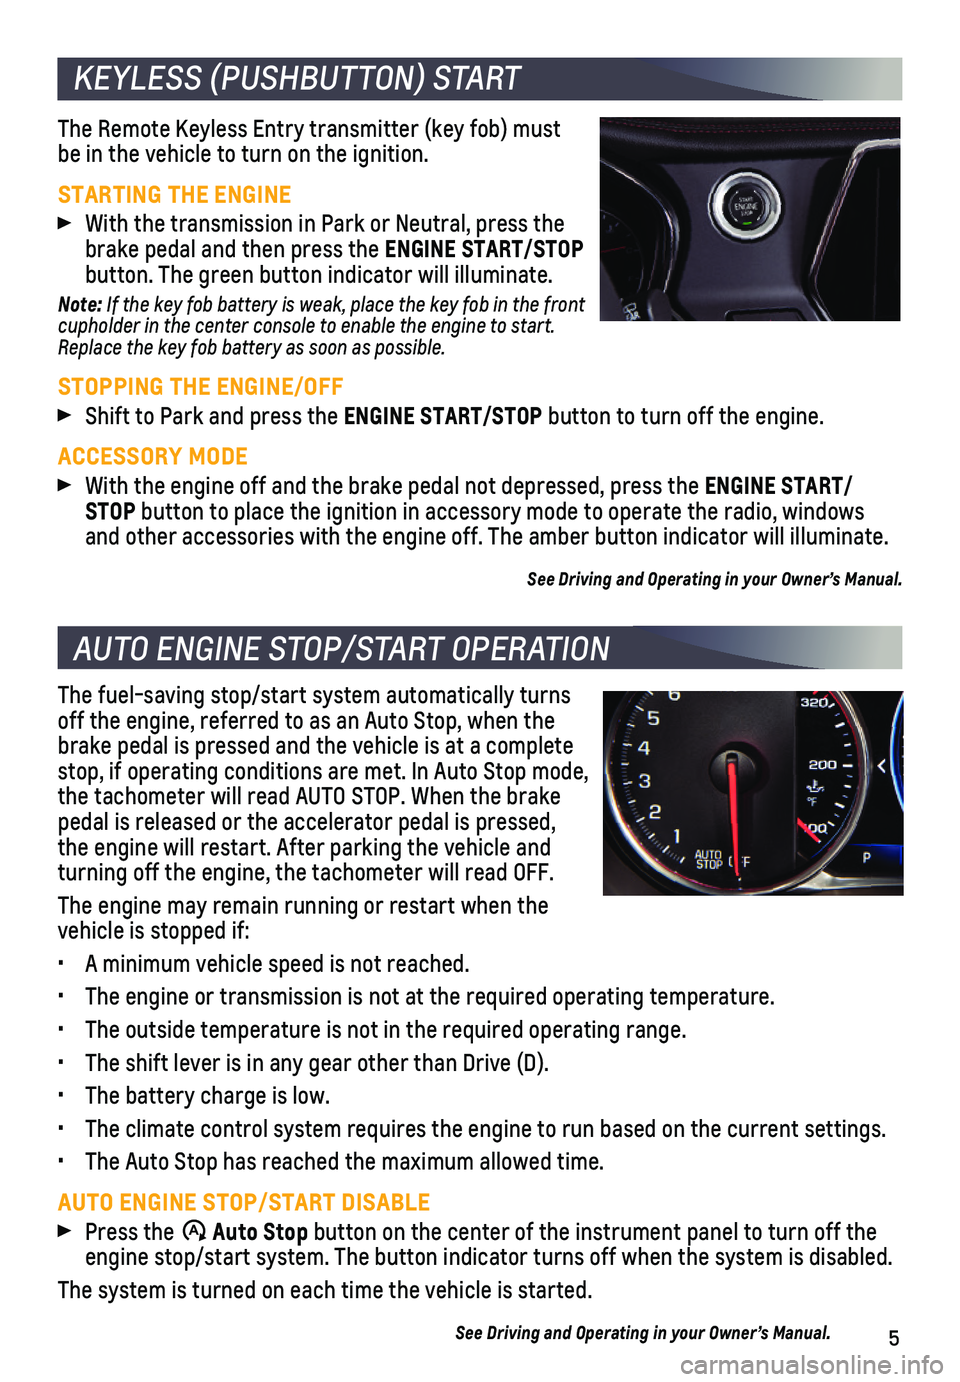
With the transmission in Park or Neutral, press the brake pedal and then press the ENGINE START/STOP button. The green button indicator will illuminate.
Note: If the key fob battery is weak, place the key fob in the front cupholder in the center console to enable the engine to start. Replace the key fob battery as soon as possible.
STOPPING THE ENGINE/OFF
Shift to Park and press the ENGINE START/STOP button to turn off the engine.
ACCESSORY MODE
With the engine off and the brake pedal not depressed, press the ENGINE START/ STOP button to place the ignition in accessory mode to operate the radio, wi\
ndows and other accessories with the engine off. The amber button indicator wi\
ll illuminate.
See Driving and Operating in your Owner’s Manual.
The fuel-saving stop/start system automatically turns off the engine, referred to as an Auto Stop, when the brake pedal is pressed and the vehicle is at a complete stop, if operating conditions are met. In Auto Stop mode, the tachometer will read AUTO STOP. When the brake pedal is released or the accelerator pedal is pressed, the engine will restart. After parking the vehicle and turning off the engine, the tachometer will read OFF.
The engine may remain running or restart when the vehicle is stopped if:
• A minimum vehicle speed is not reached.
• The engine or transmission is not at the required operating temperature.\
• The outside temperature is not in the required operating range.
• The shift lever is in any gear other than Drive (D).
• The battery charge is low.
• The climate control system requires the engine to run based on the curre\
nt settings.
• The Auto Stop has reached the maximum allowed time.
AUTO ENGINE STOP/START DISABLE
Press the �$ Auto Stop button on the center of the instrument panel to turn off the engine stop/start system. The button indicator turns off when the system\
is disabled.
The system is turned on each time the vehicle is started.
See Driving and Operating in your Owner’s Manual.
Page 8 of 20
8F Optional equipment
DRIVER INFORMATION CENTER
ELECTRIC PARKING BRAKE
UNIVERSAL REMOTE SYSTEMF
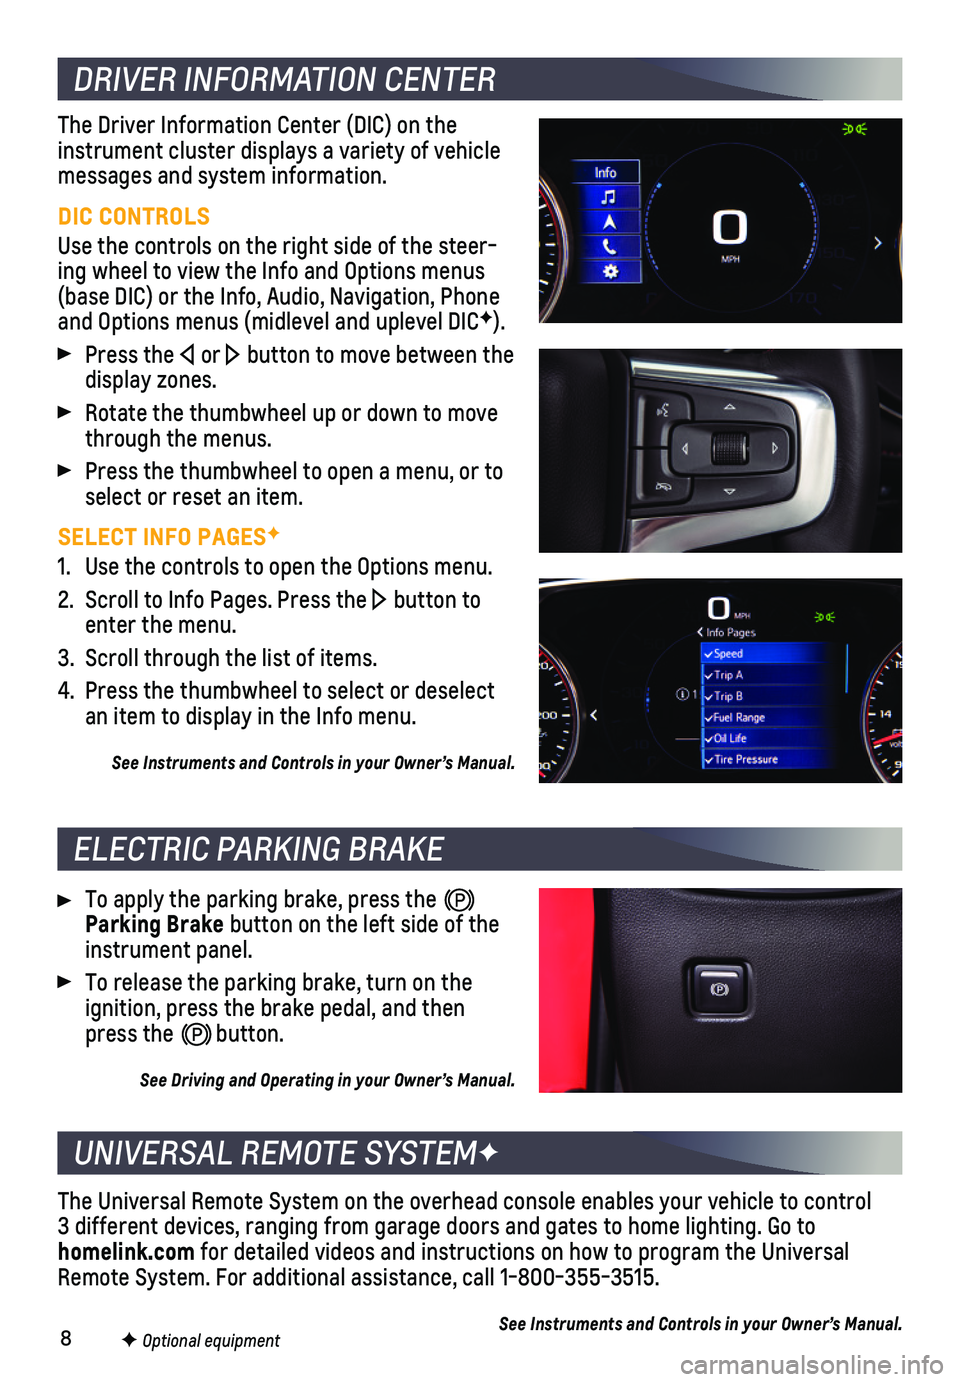
The Driver Information Center (DIC) on the instrument cluster displays a variety of vehicle messages and system information.
DIC CONTROLS
Use the controls on the right side of the steer-ing wheel to view the Info and Options menus (base DIC) or the Info, Audio, Navigation, Phone and Options menus (midlevel and uplevel DICF).
Press the or button to move between the display zones.
Rotate the thumbwheel up or down to move through the menus.
Press the thumbwheel to open a menu, or to select or reset an item.
SELECT INFO PAGESF
1. Use the controls to open the Options menu.
2. Scroll to Info Pages. Press the button to enter the menu.
3. Scroll through the list of items.
4. Press the thumbwheel to select or deselect an item to display in the Info menu.
See Instruments and Controls in your Owner’s Manual.
To apply the parking brake, press the Parking Brake button on the left side of the instrument panel.
To release the parking brake, turn on the ignition, press the brake pedal, and then press the button.
See Driving and Operating in your Owner’s Manual.
The Universal Remote System on the overhead console enables your vehicle\
to control 3 different devices, ranging from garage doors and gates to home lightin\
g. Go to homelink.com for detailed videos and instructions on how to program the Universal Remote System. For additional assistance, call 1-800-355-3515.
See Instruments and Controls in your Owner’s Manual.
Page 12 of 20
12
An iPod®, iPhone®, MP3 Player, a USB flash drive or a portable U\
SB hard drive can be
connected to the USB data ports located on the center of the instrument \
panel.
To play a device, touch Audio on the infotainment screen; and then touch\
USB from the sources list or touch More to view the USB option.
See Infotainment System in your Owner’s Manual.
With the vehicle’s available 4G LTE Wi-Fi hotspot, up to 7 devices (\
smartphones, tablets and laptops) can be connected to high-speed internet. For more informat\
ion on use and system limitations, visit my.chevrolet.com/how-to-support.
To retrieve the name and password for the hotspot, select the Wi-Fi Hots\
pot icon on the infotainment screen or go to Settings > System > Wi-Fi Hotspot.
See Infotainment System in your Owner’s Manual.
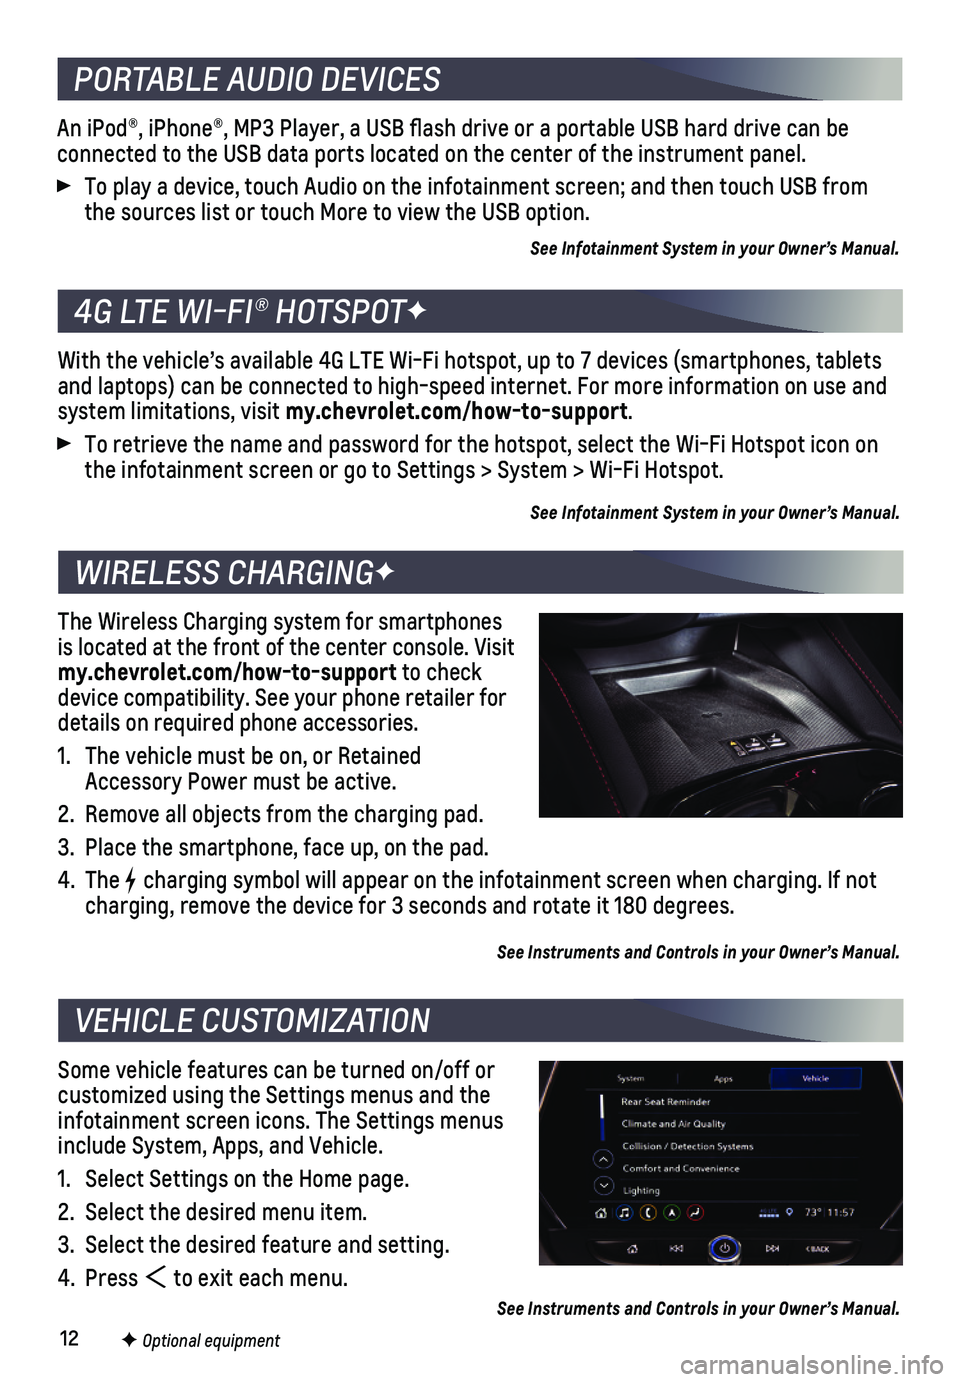
The Wireless Charging system for smartphones is located at the front of the center console. Visit my.chevrolet.com/how-to-support to check device compatibility. See your phone retailer for details on required phone accessories.
1. The vehicle must be on, or Retained Accessory Power must be active.
2. Remove all objects from the charging pad.
3. Place the smartphone, face up, on the pad.
4. The charging symbol will appear on the infotainment screen when charging. If\
not charging, remove the device for 3 seconds and rotate it 180 degrees.
See Instruments and Controls in your Owner’s Manual.
Some vehicle features can be turned on/off or customized using the Settings menus and the infotainment screen icons. The Settings menus include System, Apps, and Vehicle.
1. Select Settings on the Home page.
2. Select the desired menu item.
3. Select the desired feature and setting.
4. Press to exit each menu.
See Instruments and Controls in your Owner’s Manual.
PORTABLE AUDIO DEVICES
4G LTE WI-FI® HOTSPOTF
WIRELESS CHARGINGF
VEHICLE CUSTOMIZATION
F Optional equipment
Page 15 of 20
15
SUNROOFF
DRIVER MODE CONTROL
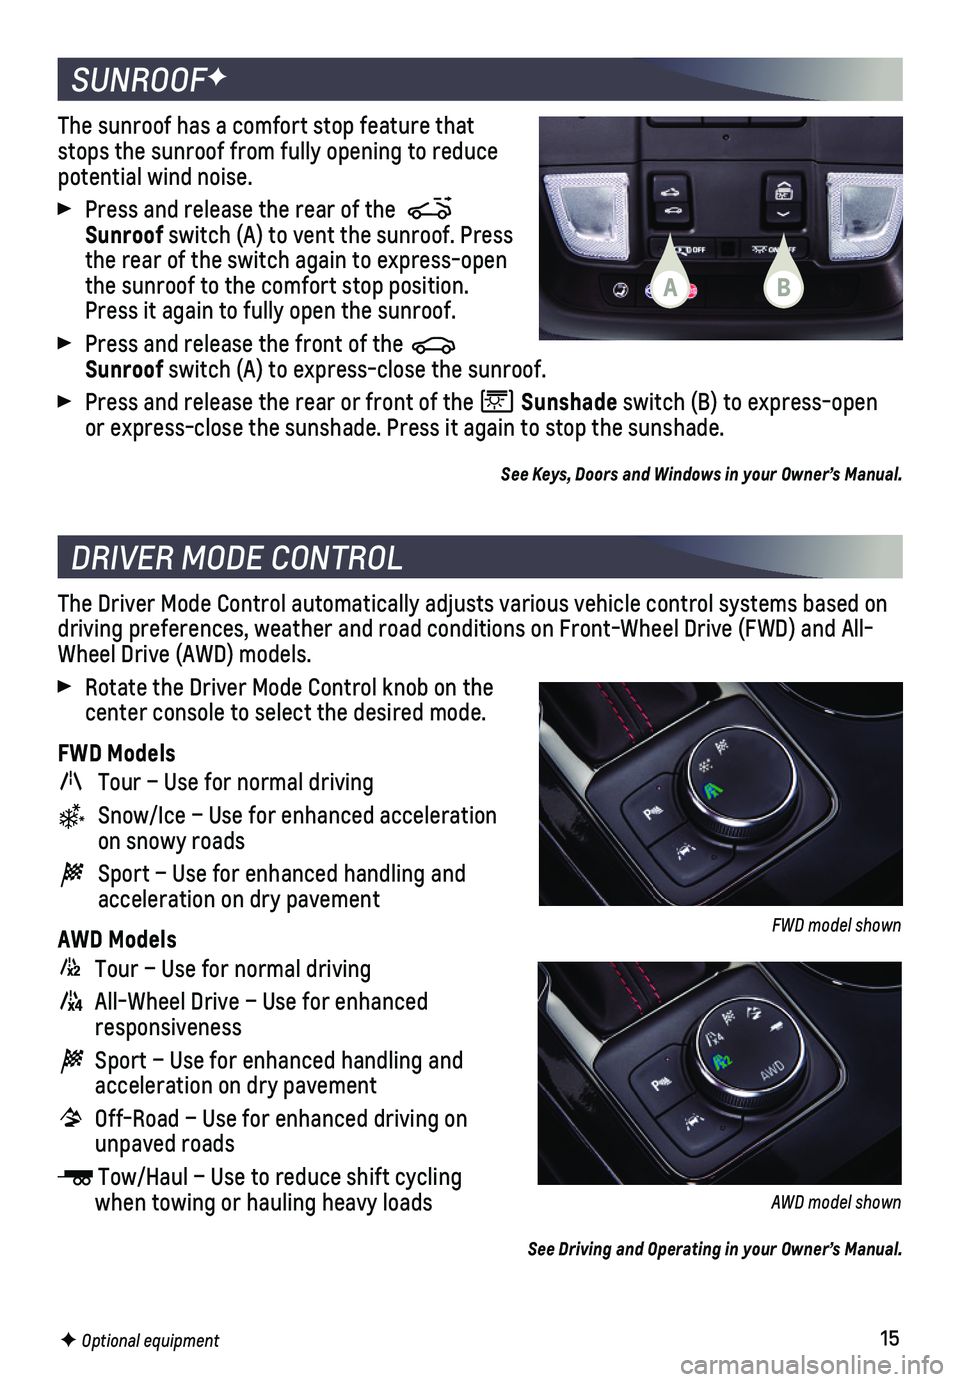
The sunroof has a comfort stop feature that stops the sunroof from fully opening to reduce potential wind noise.
Press and release the rear of the Sunroof switch (A) to vent the sunroof. Press the rear of the switch again to express-open the sunroof to the comfort stop position. Press it again to fully open the sunroof.
Press and release the front of the Sunroof switch (A) to express-close the sunroof.
Press and release the rear or front of the Sunshade switch (B) to express-open or express-close the sunshade. Press it again to stop the sunshade.
See Keys, Doors and Windows in your Owner’s Manual.
The Driver Mode Control automatically adjusts various vehicle control sy\
stems based on driving preferences, weather and road conditions on Front-Wheel Drive (\
FWD) and All-Wheel Drive (AWD) models.
Rotate the Driver Mode Control knob on the center console to select the desired mode.
FWD Models
Tour – Use for normal driving
Snow/Ice – Use for enhanced acceleration on snowy roads
Sport – Use for enhanced handling and acceleration on dry pavement
AWD Models
Tour – Use for normal driving
All-Wheel Drive – Use for enhanced responsiveness
Sport – Use for enhanced handling and acceleration on dry pavement
Off-Road – Use for enhanced driving on unpaved roads
Tow/Haul – Use to reduce shift cycling when towing or hauling heavy loads
See Driving and Operating in your Owner’s Manual.
F Optional equipment
FWD model shown
AWD model shown
AB
Page 16 of 20
16
DRIVER ASSISTANCE SYSTEMSF
Safety or driver assistance features are no substitute for the driver’\
s responsibility to operate the vehicle in a safe manner. The driver should remain attentive to traffic, surroundings and road conditions at all times. Read your Owner’s Manual for important feature limitations and information.
SAFETY ALERT SEAT – The driver’s seat pulses — left side, right side or simultan\
eously — to alert the driver of the direction of potential hazards.
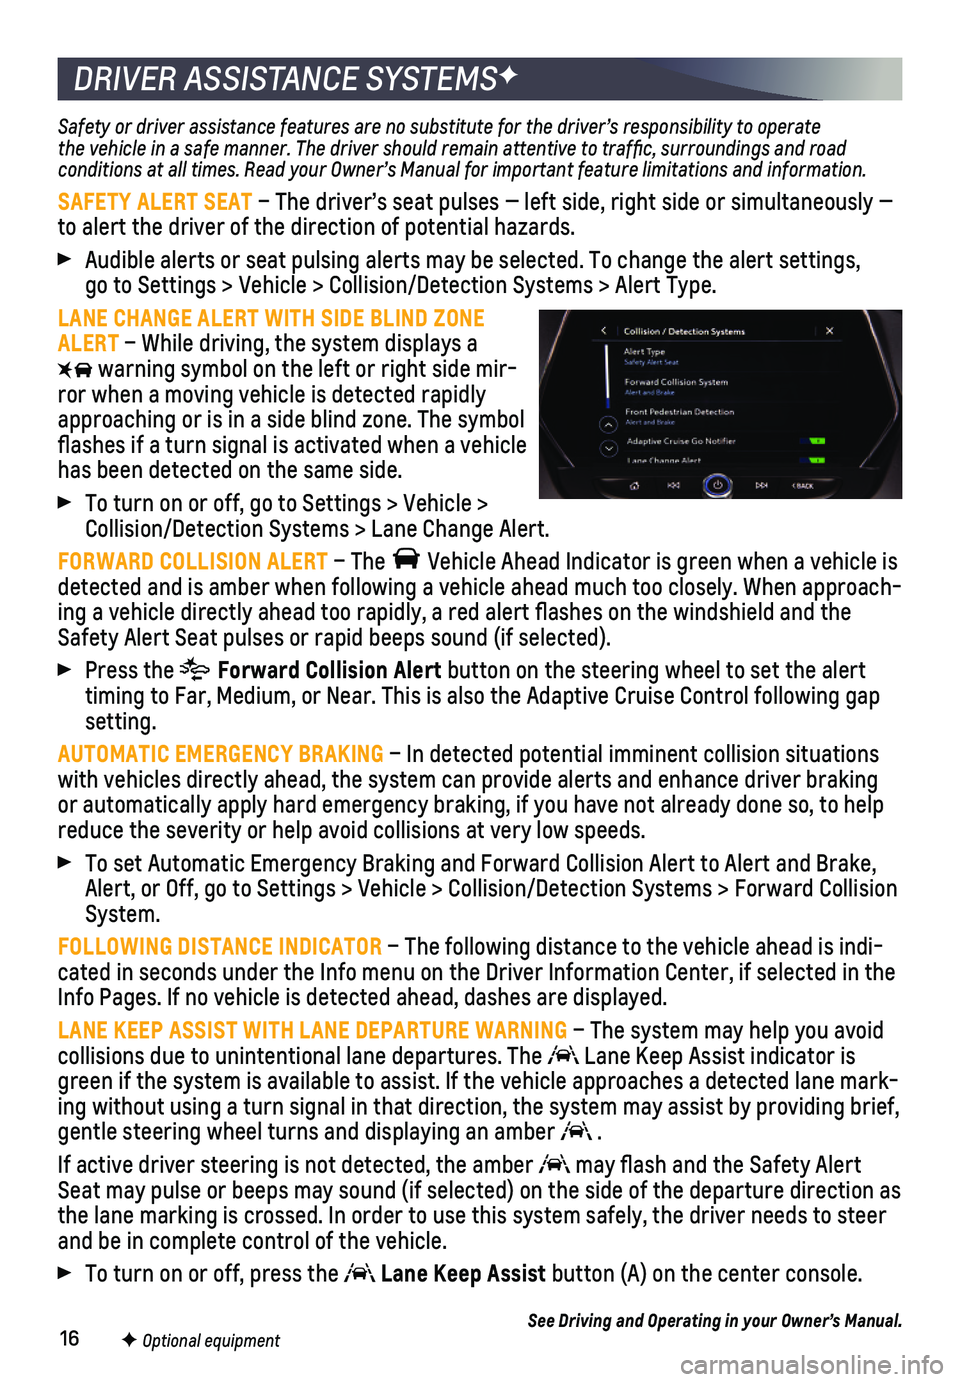
Audible alerts or seat pulsing alerts may be selected. To change the ale\
rt settings, go to Settings > Vehicle > Collision/Detection Systems > Alert Type.
LANE CHANGE ALERT WITH SIDE BLIND ZONE ALERT – While driving, the system displays a
warning symbol on the left or right side mir-ror when a moving vehicle is detected rapidly approaching or is in a side blind zone. The symbol flashes if a turn signal is
activated when a vehicle has been detected on the same side.
To turn on or off, go to Settings > Vehicle > Collision/Detection Systems > Lane Change Alert.
FORWARD COLLISION ALERT – The Vehicle Ahead Indicator is green when a vehicle is detected and is amber when following a vehicle ahead much too closely. W\
hen approach-ing a vehicle directly ahead too rapidly, a red alert flashes on the w\
indshield and the Safety Alert Seat pulses or rapid beeps sound (if selected).
Press the Forward Collision Alert button on the steering wheel to set the alert timing to Far, Medium, or Near. This is also the Adaptive Cruise Control\
following gap setting.
AUTOMATIC EMERGENCY BRAKING – In detected potential imminent collision situations with vehicles directly ahead, the system can provide alerts and enhance \
driver braking or automatically apply hard emergency braking, if you have not already d\
one so, to help reduce the severity or help avoid collisions at very low speeds.
To set Automatic Emergency Braking and Forward Collision Alert to Alert \
and Brake, Alert, or Off, go to Settings > Vehicle > Collision/Detection Systems > \
Forward Collision System.
FOLLOWING DISTANCE INDICATOR – The following distance to the vehicle ahead is indi-cated in seconds under the Info menu on the Driver Information Center, i\
f selected in the Info Pages. If no vehicle is detected ahead, dashes are displayed.
LANE KEEP ASSIST WITH LANE DEPARTURE WARNING – The system may help you avoid collisions due to unintentional lane departures. The Lane Keep Assist indicator is green if the system is available to assist. If the vehicle approaches a \
detected lane mark-ing without using a turn signal in that direction, the system may assist\
by providing brief, gentle steering wheel turns and displaying an amber .
If active driver steering is not detected, the amber may flash and the Safety Alert Seat may pulse or beeps may sound (if selected) on the side of the dep\
arture direction as the lane marking is crossed. In order to use this system safely, the dri\
ver needs to steer and be in complete control of the vehicle.
To turn on or off, press the Lane Keep Assist button (A) on the center console.
See Driving and Operating in your Owner’s Manual.F Optional equipment
Page 17 of 20
17
DRIVER ASSISTANCE SYSTEMSF
REAR VISION CAMERA/SURROUND VISIONF
FRONT PEDESTRIAN BRAKING – During daytime driving, the system detects pedestri-ans directly ahead up to a distance of approximately 131 ft. and display\
s an amber indicator. When approaching a detected pedestrian too quickly, a red ale\
rt flashes on the windshield and the Safety Alert Seat pulses or rapid beeps sound (if se\
lected). The
system may enhance driver braking or automatically apply hard emergency \
braking, if you have not already done so.
To set to Alert and Brake, Alert, or Off, go to Settings > Vehicle > Col\
lision/Detection Systems > Front Pedestrian Detection.
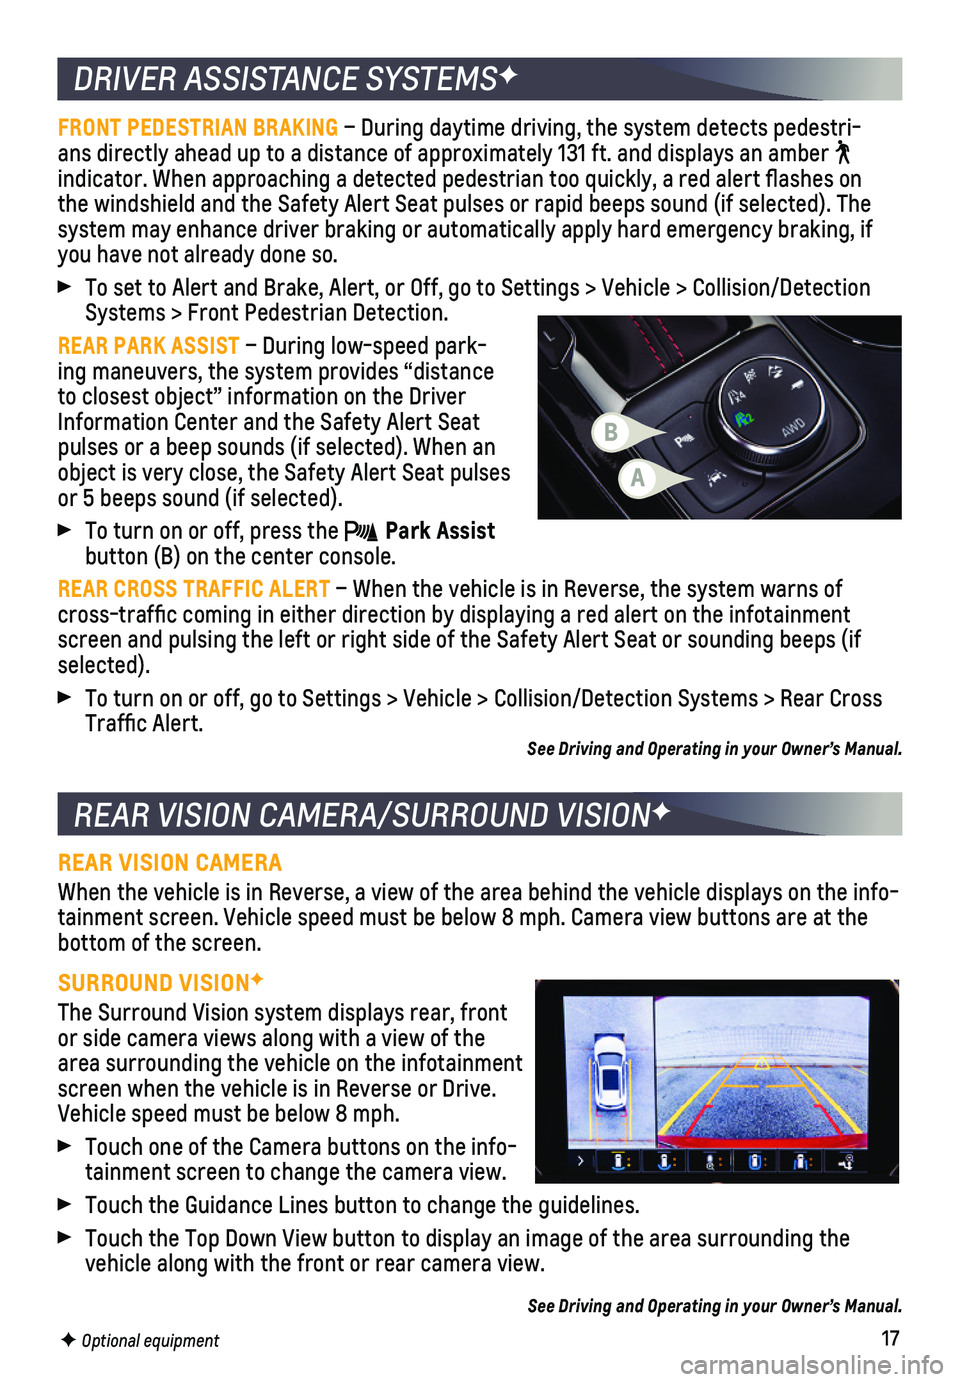
REAR PARK ASSIST – During low-speed park-ing maneuvers, the system provides “distance to closest object” information on the Driver Information Center and the Safety Alert Seat pulses or a beep sounds (if selected). When an object is very close, the Safety Alert Seat pulses or 5 beeps sound (if selected).
To turn on or off, press the Park Assist button (B) on the center console.
REAR CROSS TRAFFIC ALERT – When the vehicle is in Reverse, the system warns of cross-traffic coming in either direction by displaying a red alert on \
the infotainment screen and pulsing the left or right side of the Safety Alert Seat or so\
unding beeps (if selected).
To turn on or off, go to Settings > Vehicle > Collision/Detection System\
s > Rear Cross Traffic Alert. See Driving and Operating in your Owner’s Manual.
REAR VISION CAMERA
When the vehicle is in Reverse, a view of the area behind the vehicle di\
splays on the info-tainment screen. Vehicle speed must be below 8 mph. Camera view buttons \
are at the bottom of the screen.
SURROUND VISIONF
The Surround Vision system displays rear, front or side camera views along with a view of the area surrounding the vehicle on the infotainment screen when the vehicle is in Reverse or Drive. Vehicle speed must be below 8 mph.
Touch one of the Camera buttons on the info-tainment screen to change the camera view.
Touch the Guidance Lines button to change the guidelines.
Touch the Top Down View button to display an image of the area surroundi\
ng the vehicle along with the front or rear camera view.
See Driving and Operating in your Owner’s Manual.
F Optional equipment
A
B