Driver mode control CHEVROLET BLAZER 2021 Owner's Guide
[x] Cancel search | Manufacturer: CHEVROLET, Model Year: 2021, Model line: BLAZER, Model: CHEVROLET BLAZER 2021Pages: 380, PDF Size: 9.1 MB
Page 216 of 380
Chevrolet Blazer Owner Manual (GMNA-Localizing-U.S./Canada/Mexico-
14608203) - 2021 - CRC - 10/29/20
Driving and Operating 215
conditions. SeeDriving for Better Fuel
Economy 0188. Tour (FWD) Mode operates
in Front-Wheel Drive to improve fuel
economy.
8Sport : Sport Mode improves vehicle
handling and acceleration on dry pavement.
When active, Sport Mode modifies steering
efforts, transmission shifting, AWD torque,
suspension tuning (when properly equipped),
and StabiliTrak/Electronic Stability Control
(ESC) settings. For vehicles equipped with
AWD, choosing Sport Mode also
engages AWD.
4AWD (AWD Only) : AWD Mode
provides drive torque to all four wheels.
Select AWD to improve traction and control
on slippery road surfaces, such as gravel,
sand, wet pavement, snow, and ice. When in
AWD Mode, the AWD Mode indicator will
be on.
AWD is active in AWD, Sport, Tow/Haul, and
Off-Road Modes.
When using a compact spare tire on an
AWD vehicle, the system automatically
detects the compact spare and reduces AWD
performance to protect the system. To
restore full AWD operation and prevent excessive wear on the system, replace the
compact spare with a full-size tire as soon as
possible. See
Compact Spare Tire 0317.
6Snow/Ice (FWD Only) : Snow/Ice Mode
improves vehicle acceleration on snow and
ice covered roads by changing accelerator
pedal response.
_Tow/Haul : This feature can assist
when towing or hauling a heavy load. Use
this mode to assist in maintaining desired
vehicle speeds when driving on downhill
grades by using the engine and
transmission. When active, Tow/Haul Mode
modifies transmission shifting, steering
effort, and Trailer Sway Control. For AWD
vehicles, choosing Tow/Haul Mode also
engages AWD. See Driving Characteristics
and Towing Tips 0242.
Automatic Engine Grade Braking
Automatic Engine Grade Braking assists
when driving downhill. It maintains vehicle
speed by automatically implementing a shift
pattern that uses the engine and the
transmission to slow the vehicle. The system
will automatically command downshifts to
reduce vehicle speed. The normal shift pattern will return once the vehicle is on a
low grade or when the accelerator pedal is
pressed.
While in the Electronic Range Select (ERS)
mode, grade braking is deactivated, allowing
the driver to select a range and limiting the
highest gear available. Grade braking is
available for normal driving and in Tow/
Haul Mode.
See
Automatic Transmission 0207.
7Off-Road (AWD Only) : Use this mode
for off-road recreational driving. When
active, Off-Road Mode modifies accelerator
pedal response, ABS, TCS, and the
StabiliTrak/ESC system. Choosing Off-Road
Mode also engages AWD. For more
information on Off-Road Mode, see Off-Road
Driving 0191.
Cruise Control
{
Warning
Cruise control can be dangerous where
you cannot drive safely at a steady
speed. Do not use cruise control on
winding roads or in heavy traffic. (Continued)
Page 220 of 380
Chevrolet Blazer Owner Manual (GMNA-Localizing-U.S./Canada/Mexico-
14608203) - 2021 - CRC - 10/29/20
Driving and Operating 219
*:Press to disengage ACC without erasing
the selected set speed.
[: Press to select a following gap time
(or distance) setting for ACC of Far, Medium,
or Near.
Switching Between ACC and Regular Cruise
Control
To switch between ACC and regular cruise
control, press and hold
*. A Driver
Information Display (DIC) message displays.
See Vehicle Messages 0113.
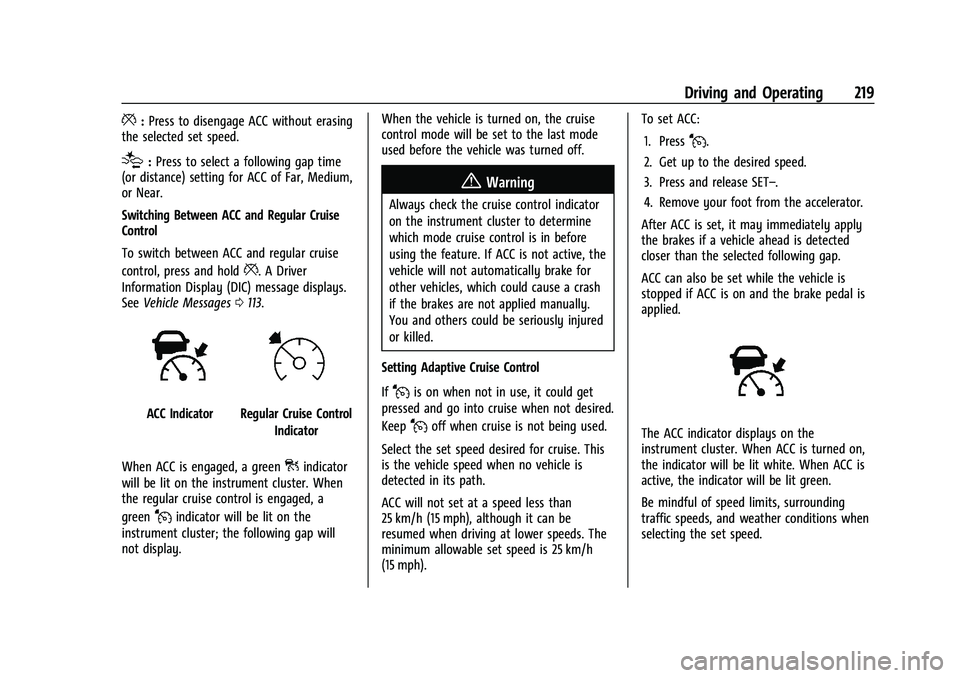
ACC IndicatorRegular Cruise Control
Indicator
When ACC is engaged, a green
]indicator
will be lit on the instrument cluster. When
the regular cruise control is engaged, a
green
Jindicator will be lit on the
instrument cluster; the following gap will
not display. When the vehicle is turned on, the cruise
control mode will be set to the last mode
used before the vehicle was turned off.
{Warning
Always check the cruise control indicator
on the instrument cluster to determine
which mode cruise control is in before
using the feature. If ACC is not active, the
vehicle will not automatically brake for
other vehicles, which could cause a crash
if the brakes are not applied manually.
You and others could be seriously injured
or killed.
Setting Adaptive Cruise Control
If
Jis on when not in use, it could get
pressed and go into cruise when not desired.
Keep
Joff when cruise is not being used.
Select the set speed desired for cruise. This
is the vehicle speed when no vehicle is
detected in its path.
ACC will not set at a speed less than
25 km/h (15 mph), although it can be
resumed when driving at lower speeds. The
minimum allowable set speed is 25 km/h
(15 mph). To set ACC:
1. Press
J.
2. Get up to the desired speed.
3. Press and release SET–.
4. Remove your foot from the accelerator.
After ACC is set, it may immediately apply
the brakes if a vehicle ahead is detected
closer than the selected following gap.
ACC can also be set while the vehicle is
stopped if ACC is on and the brake pedal is
applied.
The ACC indicator displays on the
instrument cluster. When ACC is turned on,
the indicator will be lit white. When ACC is
active, the indicator will be lit green.
Be mindful of speed limits, surrounding
traffic speeds, and weather conditions when
selecting the set speed.
Page 236 of 380
Chevrolet Blazer Owner Manual (GMNA-Localizing-U.S./Canada/Mexico-
14608203) - 2021 - CRC - 10/29/20
Driving and Operating 235
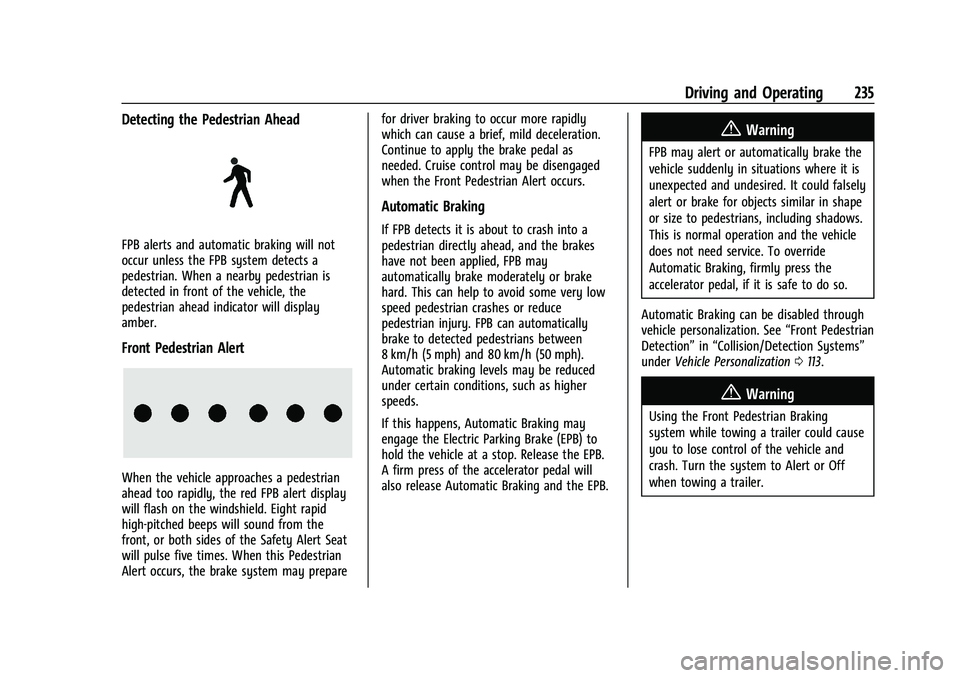
Detecting the Pedestrian Ahead
FPB alerts and automatic braking will not
occur unless the FPB system detects a
pedestrian. When a nearby pedestrian is
detected in front of the vehicle, the
pedestrian ahead indicator will display
amber.
Front Pedestrian Alert
When the vehicle approaches a pedestrian
ahead too rapidly, the red FPB alert display
will flash on the windshield. Eight rapid
high-pitched beeps will sound from the
front, or both sides of the Safety Alert Seat
will pulse five times. When this Pedestrian
Alert occurs, the brake system may preparefor driver braking to occur more rapidly
which can cause a brief, mild deceleration.
Continue to apply the brake pedal as
needed. Cruise control may be disengaged
when the Front Pedestrian Alert occurs.
Automatic Braking
If FPB detects it is about to crash into a
pedestrian directly ahead, and the brakes
have not been applied, FPB may
automatically brake moderately or brake
hard. This can help to avoid some very low
speed pedestrian crashes or reduce
pedestrian injury. FPB can automatically
brake to detected pedestrians between
8 km/h (5 mph) and 80 km/h (50 mph).
Automatic braking levels may be reduced
under certain conditions, such as higher
speeds.
If this happens, Automatic Braking may
engage the Electric Parking Brake (EPB) to
hold the vehicle at a stop. Release the EPB.
A firm press of the accelerator pedal will
also release Automatic Braking and the EPB.
{Warning
FPB may alert or automatically brake the
vehicle suddenly in situations where it is
unexpected and undesired. It could falsely
alert or brake for objects similar in shape
or size to pedestrians, including shadows.
This is normal operation and the vehicle
does not need service. To override
Automatic Braking, firmly press the
accelerator pedal, if it is safe to do so.
Automatic Braking can be disabled through
vehicle personalization. See “Front Pedestrian
Detection” in“Collision/Detection Systems”
under Vehicle Personalization 0113.
{Warning
Using the Front Pedestrian Braking
system while towing a trailer could cause
you to lose control of the vehicle and
crash. Turn the system to Alert or Off
when towing a trailer.
Page 243 of 380
Chevrolet Blazer Owner Manual (GMNA-Localizing-U.S./Canada/Mexico-
14608203) - 2021 - CRC - 10/29/20
242 Driving and Operating
Warning (Continued)
.Do not fill a container while it is
inside a vehicle, in a vehicle's trunk, in
a pickup bed, or on any surface other
than the ground.
.Bring the fill nozzle in contact with
the inside of the fill opening before
operating the nozzle. Maintain contact
until filling is complete.
.Keep sparks, flames, and smoking
materials away from fuel.
.Avoid using electronic devices while
pumping fuel.
Trailer Towing
General Towing Information
Only use towing equipment that has been
designed for the vehicle. Contact your dealer
or trailering dealer for assistance with
preparing the vehicle to tow a trailer. Read
the entire section before towing a trailer.
To tow a disabled vehicle, seeTowing the
Vehicle 0320. To tow the vehicle behind
another vehicle such as a motor home, see
Recreational Vehicle Towing 0321.
Driving Characteristics and
Towing Tips
{Warning
The driver can lose control when pulling a
trailer if the correct equipment is not
used or the vehicle is not driven properly.
For example, if the trailer is too heavy or
the trailer brakes are inadequate for the
load, the vehicle may not stop as
expected. The driver and passengers could
be seriously injured. The vehicle may also
be damaged; the resulting repairs would
not be covered by the vehicle warranty.
Pull a trailer only if all the steps in this
section have been followed. Ask your
dealer for advice and information about
towing a trailer with the vehicle.
Driving with a Trailer
Trailering is different than just driving the
vehicle by itself. Trailering means changes in
handling, acceleration, braking, durability,
and fuel economy. Successful, safe trailering
takes correct equipment, and it has to be
used properly. The following information has many
time-tested, important trailering tips and
safety rules. Many of these are important
for your safety and that of your passengers.
Read this section carefully before pulling a
trailer.
When towing a trailer:
.Become familiar with and follow all state
and local laws that apply to trailer
towing. These requirements vary from
state to state.
.State laws may require the use of
extended side view mirrors. Even if not
required, you should install extended side
view mirrors if your visibility is limited or
restricted while towing.
.Do not tow a trailer during the first
800 km (500 mi) of vehicle use to
prevent damage to the engine, axle,
or other parts.
.It is recommended to perform the first oil
change before heavy towing.
.During the first 800 km (500 mi) of trailer
towing, do not drive over 80 km/h
(50 mph) and do not make starts at full
throttle.
.Vehicles can tow in D (Drive). Tow/Haul
Mode is recommended for heavier trailers.
See
Tow/Haul Mode 0210.
Page 244 of 380
Chevrolet Blazer Owner Manual (GMNA-Localizing-U.S./Canada/Mexico-
14608203) - 2021 - CRC - 10/29/20
Driving and Operating 243
If the transmission downshifts too often,
a lower gear may be selected using
Manual Mode. SeeManual Mode0209.
If equipped, Driver Assistance Systems must
be turned off when towing a trailer:
.Adaptive Cruise Control (ACC)
.Lane Keep Assist (LKA)
.Park Assist
.Reverse Automatic Braking (RAB)
If equipped, the following driver assistance
features should be turned to alert or off
when towing a trailer:
.Automatic Emergency Braking (AEB)
.Intelligent Brake Assist (IBA)
.Front Pedestrian Braking (FPB)
If equipped with Lane Change Alert (LCA),
the LCA detection zones that extend back
from the side of the vehicle do not move
further back when a trailer is towed. Use
caution while changing lanes when towing a
trailer.
If equipped with Rear Cross Traffic Alert
(RCTA), use caution while backing up when
towing a trailer, as the RCTA detection zones
that extend out from the back of the vehicle
do not move further back when a trailer is
towed.
{Warning
To prevent serious injury or death from
carbon monoxide (CO), when towing a
trailer:
.Do not drive with the liftgate, trunk/
hatch, or rear-most window open.
.Fully open the air outlets on or under
the instrument panel.
.Adjust the climate control system to a
setting that brings in only outside air.
See “Climate Control Systems” in the
Index.
For more information about carbon
monoxide, see Engine Exhaust 0207.
Towing a trailer requires experience. The
combination of the vehicle and trailer is
longer and not as responsive as the vehicle
itself. Get used to the handling and braking
of the combination by driving on a level
road surface before driving on public roads.
The trailer structure, the tires, and the
brakes must all be rated to carry the
intended cargo. Inadequate trailer
equipment can cause the combination to
operate in an unexpected or unsafe manner. Before driving, inspect all trailer hitch parts
and attachments, safety chains, electrical
connectors, lamps, tires, and mirrors. See
Towing Equipment
0248. If the trailer has
electric brakes, start the combination
moving and then manually apply the trailer
brake controller to check that the trailer
brakes work.
During the trip, occasionally check that the
cargo and trailer are secure and that the
lamps and any trailer brakes are working.
Towing with a Stability Control System
When towing, the stability control system
might be heard. The system reacts to
vehicle movement caused by the trailer,
which mainly occurs during cornering. This is
normal when towing heavier trailers.
Following Distance
Stay at least twice as far behind the vehicle
ahead as you would when driving without a
trailer. This can help to avoid heavy braking
and sudden turns.
Passing
More passing distance is needed when
towing a trailer. The combination of the
vehicle and trailer will not accelerate as
quickly and is much longer than the vehicle
Page 251 of 380
Chevrolet Blazer Owner Manual (GMNA-Localizing-U.S./Canada/Mexico-
14608203) - 2021 - CRC - 10/29/20
250 Driving and Operating
attempt to tap into your vehicle's hydraulic
brake system. If you do, both the vehicle
antilock brakes and the trailer brakes may
not function, which could result in a crash.
Trailer Wiring Harness
Basic Trailer Wiring
The trailer wiring harness, with a seven-pin
connector, is at the rear of the vehicle and
is tied to the vehicle's frame. The harness
requires the installation of a trailer
connector, which is available through your
dealer.
Use only a round, seven-wire connector with
flat blade terminals meeting SAE J2863
specifications for proper electrical
connectivity.
The seven-wire harness contains the
following trailer circuits:
.Yellow: Left Stop/Turn Signal
.Green: Right Stop/Turn Signal
.Brown: Tail/Parking Lamps
.White: Trailer Ground
.Red: Stop Lamp Supply Voltage
.Black: Back Up Lamp Supply Voltage
.Blue: Service BrakesThe fuse for the electric trailer brake circuit
is in the engine compartment fuse block,
but the wires may not be connected. They
should be connected by your dealer or a
qualified service center. To control electric
trailer brakes, a trailer brake controller needs
to be installed on the vehicle by your dealer
or a qualified service center. See electric
brake control wiring provisions.
If a battery outside the vehicle is being
charged, place the vehicle in Tow/Haul
Mode. This will boost the vehicle system
voltage and properly charge the battery.
If the trailer is too light for Tow/Haul Mode,
turn on the non-HID only headlamps as a
second way to boost the vehicle system
voltage and charge the battery.
Electric Trailer Brake Control Wiring
Provisions
Wiring provisions for an aftermarket electric
trailer brake controller are included with the
vehicle as part of the trailer wiring package.
The harness contains the following circuits:
These wiring provisions for an electric trailer
brake controller are included with the
vehicle as part of the trailer wiring package.
The body harness, inside the front driver
side instrument panel, contains blunt cut wires below the headlamp switch for the
electric trailer brake controller. The harness
contains the following wires:
.Blue: Electric Trailer Brakes
.Blue: Battery Feed
.White/Blue: Brake Apply Signal
.Black: Ground
Refer to the aftermarket electric trailer brake
controller owner's manual to determine wire
color coding of the electric trailer brake
controller. The wire colors on the brake
controller may be different from the vehicle.
The electric trailer brake controller should be
installed by your dealer or a qualified
service center.
Trailer Lamps
Always check all trailer lamps are working at
the beginning of each trip, and periodically
on longer trips.
Turn Signals When Towing a Trailer
When properly connected, the trailer turn
signals will illuminate to indicate the vehicle
is turning, changing lanes, or stopping.
When towing a trailer, the arrows on the
instrument cluster will illuminate even if the
trailer is not properly connected or the bulbs
are burned out.
Page 252 of 380
Chevrolet Blazer Owner Manual (GMNA-Localizing-U.S./Canada/Mexico-
14608203) - 2021 - CRC - 10/29/20
Driving and Operating 251
Tow/Haul Mode
For instructions on how to enter Tow/Haul
Mode, seeDriver Mode Control 0214.
Tow/Haul assists when pulling a heavy
trailer or a large or heavy load. See Tow/
Haul Mode 0210.
Tow/Haul Mode is designed to be most
effective when the vehicle and trailer
combined weight is at least 75% of the
vehicle's Gross Combined Weight Rating
(GCWR). See “Weight of the Trailer” under
Trailer Towing 0245. Tow/Haul Mode is
most useful when towing a heavy trailer or
carrying a large or heavy load:
.Through rolling terrain.
.In stop-and-go traffic.
.In busy parking lots.
Operating the vehicle in Tow/Haul Mode
when lightly loaded or not towing will not
cause damage; however, it is not
recommended and may result in unpleasant
engine and transmission driving
characteristics and reduced fuel economy.
Trailer Sway Control (TSC)
Vehicles with StabiliTrak/Electronic Stability
Control (ESC) have a Trailer Sway Control
(TSC) feature. Trailer sway is unintended side-to-side motion of a trailer while towing.
If the vehicle is towing a trailer and the TSC
detects that sway is increasing, the vehicle
brakes are selectively applied at each wheel,
to help reduce excessive trailer sway.
If equipped with the Integrated Trailer Brake
Control (ITBC) system, and the trailer has an
electric brake system, StabiliTrak/ESC may
also apply the trailer brakes.
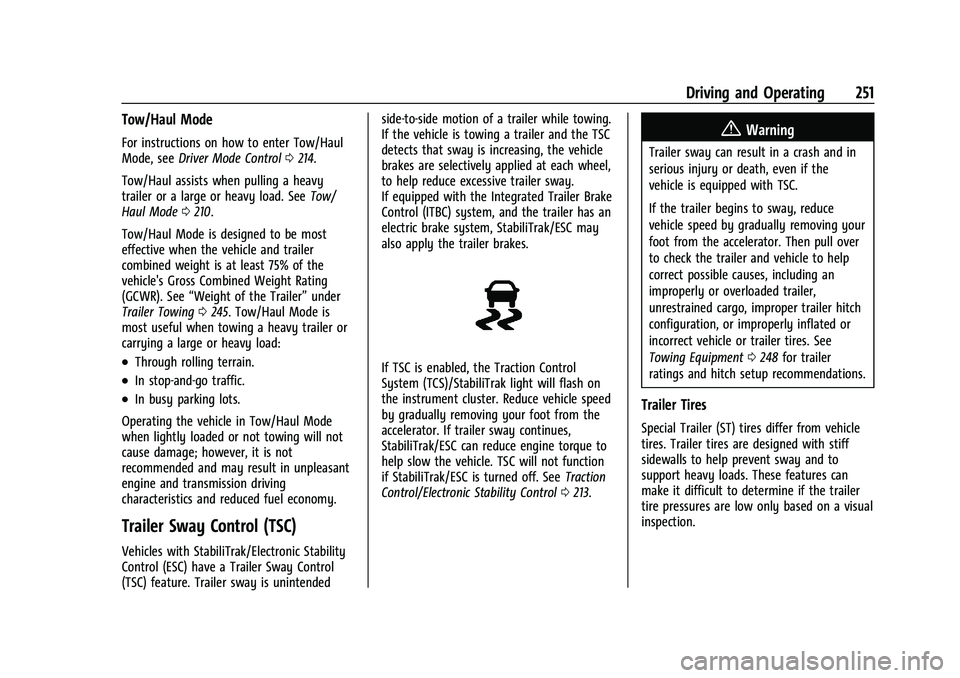
If TSC is enabled, the Traction Control
System (TCS)/StabiliTrak light will flash on
the instrument cluster. Reduce vehicle speed
by gradually removing your foot from the
accelerator. If trailer sway continues,
StabiliTrak/ESC can reduce engine torque to
help slow the vehicle. TSC will not function
if StabiliTrak/ESC is turned off. See
Traction
Control/Electronic Stability Control 0213.
{Warning
Trailer sway can result in a crash and in
serious injury or death, even if the
vehicle is equipped with TSC.
If the trailer begins to sway, reduce
vehicle speed by gradually removing your
foot from the accelerator. Then pull over
to check the trailer and vehicle to help
correct possible causes, including an
improperly or overloaded trailer,
unrestrained cargo, improper trailer hitch
configuration, or improperly inflated or
incorrect vehicle or trailer tires. See
Towing Equipment 0248 for trailer
ratings and hitch setup recommendations.
Trailer Tires
Special Trailer (ST) tires differ from vehicle
tires. Trailer tires are designed with stiff
sidewalls to help prevent sway and to
support heavy loads. These features can
make it difficult to determine if the trailer
tire pressures are low only based on a visual
inspection.
Page 272 of 380
Chevrolet Blazer Owner Manual (GMNA-Localizing-U.S./Canada/Mexico-
14608203) - 2021 - CRC - 10/29/20
Vehicle Care 271
6. Verify coolant level after the engine isshut off and the coolant is cold.
If necessary, repeat coolant fill procedure
Steps 1–6.
If the coolant still is not at the proper
level when the system cools down again,
see your dealer.
Caution
If the pressure cap is not tightly installed,
coolant loss and engine damage may
occur. Be sure the cap is properly and
tightly secured.
2.0L L4 Engine Only - Automatic Coolant
Service Fill Instructions
If equipped, this feature assists in filling and
removing air from the cooling system after
service of components or when coolant is
added after being too low.
To activate the fill and air removal process:
1. With a cold system, add coolant to the indicated mark on the surge tank.
2. Replace the cap on the surge tank.
3. Connect the vehicle to a battery charger.
4. Turn the ignition to Service Mode. See Ignition Positions 0200. 5. Turn off the air conditioning.
6. Set the parking brake.
7. At the same time, press the accelerator
and the brake for two seconds, then
release.
At the end of the cycle, check the coolant
level in the surge tank and add coolant if it
is low. Turn off the vehicle, allow the
Electronic Control Module (ECM) to go to
sleep, about two minutes, and repeat
Steps 4–7.
Listen for pump activation and movement of
the control valves while watching the level
of the coolant in the surge tank. If the tank
empties, turn the ignition off, carefully
remove the surge tank cap, refill to the
indicated mark, and repeat Steps 4–7. The
fill and air removal process will run for
approximately 10 minutes.
Engine Overheating
The vehicle has several indicators to warn of
the engine overheating.
There is an engine coolant temperature
gauge on the instrument cluster. See Engine
Coolant Temperature Gauge 096. The
vehicle may also display a message on the
Driver Information Center (DIC). If the decision is made not to lift the hood
when this warning appears, get service help
right away. See
Roadside Assistance Program
0 352.
If the decision is made to lift the hood,
make sure the vehicle is parked on a level
surface. Then check to see if the engine
cooling fan is running. If the engine is
overheating, the fan should be running. If it
is not, do not continue to run the engine.
Have the vehicle serviced.
Caution
Do not run the engine if there is a leak
in the engine cooling system. This can
cause a loss of all coolant and can
damage the system and vehicle. Have
any leaks fixed right away.
If Steam Is Coming from the Engine
Compartment
{Warning
Steam and scalding liquids from a hot
cooling system are under pressure.
Turning the pressure cap, even a little,
can cause them to come out at high (Continued)
Page 301 of 380
Chevrolet Blazer Owner Manual (GMNA-Localizing-U.S./Canada/Mexico-
14608203) - 2021 - CRC - 10/29/20
300 Vehicle Care
4. Use the DIC controls on the right side ofthe steering wheel to scroll to the Tire
Pressure screen under the DIC info page.
5. Press and hold
Vin the center of the
DIC controls.
The horn sounds twice to signal the
receiver is in relearn mode and the TIRE
LEARNING ACTIVE message displays on
the DIC display.
6. Start with the driver side front tire.
7. Place the relearn tool against the tire sidewall, near the valve stem. Then press
the button to activate the TPMS sensor.
A horn chirp confirms that the sensor
identification code has been matched to
this tire and wheel position.
8. Proceed to the passenger side front tire, and repeat the procedure in Step 7.
9. Proceed to the passenger side rear tire, and repeat the procedure in Step 7.
10. Proceed to the driver side rear tire, and repeat the procedure in Step 7. The horn
sounds two times to indicate the sensor
identification code has been matched to
the driver side rear tire, and the TPMS
sensor matching process is no longer
active. The TIRE LEARNING ACTIVE
message on the DIC display goes off. 11. Turn the vehicle off.
12. Set all four tires to the recommended air
pressure level as indicated on the Tire
and Loading Information label.
Tire Inspection
We recommend that the tires, including
the spare tire, if the vehicle has one, be
inspected for signs of wear or damage
at least once a month.
Replace the tire if:
.The indicators at three or more
places around the tire can be seen.
.There is cord or fabric showing
through the tire's rubber.
.The tread or sidewall is cracked, cut,
or snagged deep enough to show
cord or fabric.
.The tire has a bump, bulge, or split.
.The tire has a puncture, cut, or other
damage that cannot be repaired well
because of the size or location of the
damage.
Tire Rotation
Tires should be rotated every 12 000 km
(7,500 mi). See Maintenance Schedule
0 332.
Tires are rotated to achieve a more
uniform wear for all tires. The first
rotation is the most important.
Anytime unusual wear is noticed, rotate
the tires as soon as possible, check for
proper tire inflation pressure, and check
for damaged tires or wheels. If the
unusual wear continues after the
rotation, check the wheel alignment.
See When It Is Time for New Tires 0301
and
Wheel Replacement 0305.
Page 353 of 380
Chevrolet Blazer Owner Manual (GMNA-Localizing-U.S./Canada/Mexico-
14608203) - 2021 - CRC - 10/29/20
352 Customer Information
H:Manage your profile and payment
information. View your GM Rewards Card
earnings and My Chevrolet Rewards points.
F: Chat with online help representatives.
Visit my.chevrolet.com and create an
account today.
Chevrolet Owner Centre (Canada)
mychevrolet.ca
Visit the Chevrolet Owner Centre at
mychevrolet.ca (English) or my.chevrolet.ca
(French) to access similar benefits to the
U.S. site.
GM Mobility Reimbursement
Program
This program is available to qualified
applicants for cost reimbursement, up to
certain limits, of eligible aftermarket adaptive equipment required for the vehicle,
such as hand controls or a wheelchair/
scooter lift for the vehicle.
To learn about the GM Mobility program,
see www.gmmobility.com or call the GM
Mobility Assistance Center at 1-800-323-9935.
Text Telephone (TTY) users, call
1-800-833-9935.
General Motors of Canada also has a
Mobility program. See www.gm.ca, or call
1-800-GM-DRIVE (800-463-7483) for details.
TTY users call 1-800-263-3830.
Roadside Assistance Program
For U.S.-purchased vehicles, call
1-800-243-8872. (Text Telephone (TTY):
1-888-889-2438.)
For Canadian-purchased vehicles, call
1-800-268-6800.
Service is available 24 hours a day, 365 days
a year.
Calling for Assistance
When calling Roadside Assistance, have the
following information ready:
.Your name, home address, and home
telephone number
.Telephone number of your location
.Location of the vehicle
.Model, year, color, and license plate
number of the vehicle
.Odometer reading, Vehicle Identification
Number (VIN), and delivery date of the
vehicle
.Description of the problem
Coverage
Services are provided for the duration of the
vehicle’s powertrain warranty.
In the U.S., anyone driving the vehicle is
covered. In Canada, a person driving the
vehicle without permission from the owner
is not covered.
Roadside Assistance is not a part of the New
Vehicle Limited Warranty. General Motors
North America and Chevrolet reserve the
right to make any changes or discontinue
the Roadside Assistance program at any
time without notification.
General Motors North America and Chevrolet
reserve the right to limit services or
payment to an owner or driver if they
decide the claims are made too often, or the
same type of claim is made many times.