four wheel drive CHEVROLET BLAZER 2021 Owner's Manual
[x] Cancel search | Manufacturer: CHEVROLET, Model Year: 2021, Model line: BLAZER, Model: CHEVROLET BLAZER 2021Pages: 380, PDF Size: 9.1 MB
Page 113 of 380
Chevrolet Blazer Owner Manual (GMNA-Localizing-U.S./Canada/Mexico-
14608203) - 2021 - CRC - 10/29/20
112 Instruments and Controls
Oil Life :Shows an estimate of the oil's
remaining useful life. If REMAINING OIL LIFE
99% is displayed, that means 99% of the
current oil life remains.
When the remaining oil life is low, the
CHANGE ENGINE OIL SOON message will
appear on the display. The oil should be
changed as soon as possible. See Engine Oil
0 262. In addition to the engine oil life
system monitoring the oil life, additional
maintenance is recommended. See
Maintenance Schedule 0332.
The Oil Life display must be reset after each
oil change. It will not reset itself. Do not to
reset the Oil Life display at any time other
than when the oil has just been changed.
It cannot be reset accurately until the next
oil change. To reset, see Engine Oil Life
System 0264.
Air Filter Life : Shows an estimate of the
engine air filter’s remaining useful life and
the state of the system. Engine Air Filter Life
95% means 95% of the current air filter life
remains. Messages will display based on the
engine air filter life and the state of the
system. When the REPLACE AT NEXT OIL
CHANGE message displays, the engine air
filter should be replaced at the time of the
next oil change. When the REPLACE SOON message displays, the engine air filter
should be replaced at the earliest
convenience.
The Air Filter Life display must be reset after
the engine air filter replacement. To reset,
see
Engine Air Filter Life System 0265.
Tire Pressure : Shows the approximate
pressures of all four tires. Tire pressure is
displayed in either kilopascal (kPa) or in
pounds per square inch (psi). If the pressure
is low, the value for that tire is shown in
amber. See Tire Pressure Monitor System
0 296 and
Tire Pressure Monitor Operation 0297.
Best Fuel Economy : Displays average fuel
economy, the best fuel economy over the
selected distance, and a bar graph showing
instantaneous fuel economy.
Press
Tto change the selected distance.
Press and hold the thumbwheel while this
display is active to reset the best fuel
economy and average fuel economy. This
display can also be reset by selecting reset
in the menu. Top Consumers :
Shows a list of the features
that are currently impacting the fuel
economy, in order from highest to lowest.
If a feature is turned off, it will be removed
from the list.
Economy Trend : Shows history of the
Average Fuel Economy from the last 50 km
(30 mi). Each bar represents about 5 km
(3 mi) of driving. During driving the bars will
shift to always reflect the most recent
distance on the right side. Press and hold
the thumbwheel to clear the graph or press
Tto reset through the menu.
Speed Signs : Shows sign information, which
comes from a roadway database in the
onboard navigation.
Off Road : Displays vehicle pitch and roll
information, road wheel angle, and
four-wheel drive (4WD) status.
Following Distance : The following distance
to a moving vehicle ahead in your path is
indicated in following time in seconds. See
Forward Collision Alert (FCA) System 0230.
Transmission Fluid Temperature Gauge :
Shows the temperature of the automatic
transmission fluid in either degrees Celsius
(°C) or degrees Fahrenheit (°F).
Blank Page : Shows no information.
Page 118 of 380
Chevrolet Blazer Owner Manual (GMNA-Localizing-U.S./Canada/Mexico-
14608203) - 2021 - CRC - 10/29/20
Instruments and Controls 117
Remote Window Operation
This allows the windows to be opened when
pressing and holding
Kon the RKE
transmitter. See Remote Keyless Entry (RKE)
System Operation 07.
Touch Off or On.
Passive Door Unlock
This allows the selection of what doors will
unlock when using the button on the driver
door to unlock the vehicle.
Touch All Doors or Driver Door Only.
Passive Door Lock
This allows passive locking to be turned on
or off and selects feedback. See Remote
Keyless Entry (RKE) System Operation 07.
Touch Off, On with Horn Chirp, or On.
Remote Left in Vehicle Alert
This feature sounds an alert when the RKE
transmitter is left in the vehicle. This menu
also enables the Remote No Longer In
Vehicle Alert.
Touch Off or On.
Seating Position
Touch and the following may display:
.Seat Entry Memory
.Seat Exit Memory
Seat Entry Memory
This feature automatically recalls the current
driver’s previously stored 1 or 2 button
positions when the ignition is changed from
off to on or ACC/ACCESSORY. See Memory
Seats 038.
Touch On or Off.
Seat Exit Memory
This feature automatically recalls the
previously stored exit button positions when
the ignition is changed from on or ACC/
ACCESSORY to off if the driver door is open
or opened. See Memory Seats038.
Touch Off or On.
Teen Driver
See Teen Driver 0171.
Valet Mode
This will lock the infotainment system and
steering wheel controls. It may also limit
access to vehicle storage locations,
if equipped.
To enable valet mode:
1. Enter a four-digit code on the keypad. 2. Select Enter to go to the confirmation
screen.
3. Re-enter the four-digit code.
Touch Lock or Unlock to lock or unlock the
system. Touch Back to go back to the
previous menu.
Universal Remote System
See Radio Frequency Statement 0357.
Universal Remote System
Programming
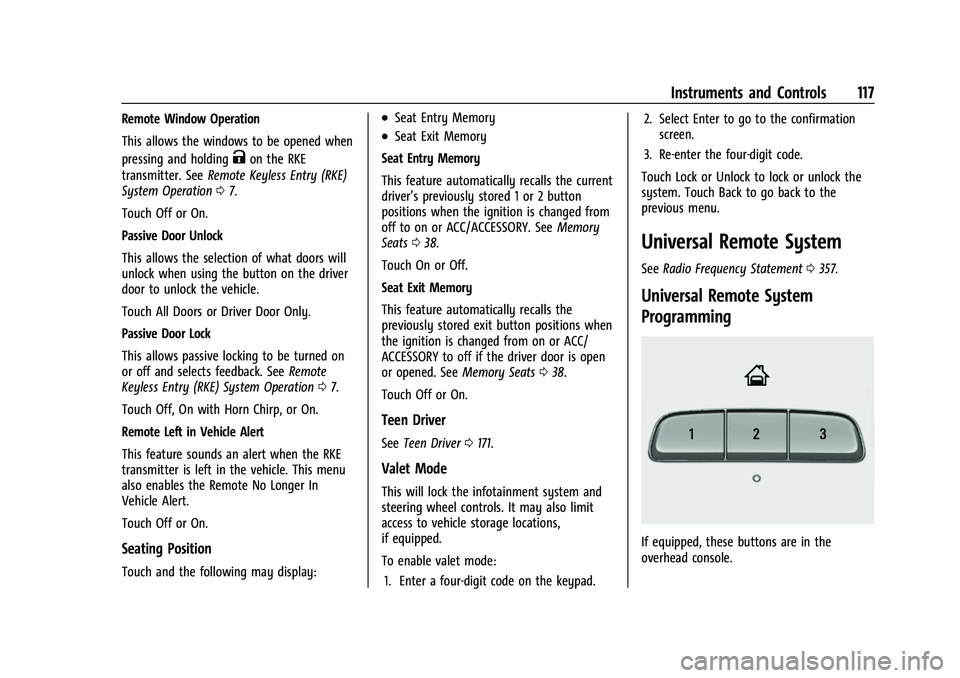
If equipped, these buttons are in the
overhead console.
Page 216 of 380
Chevrolet Blazer Owner Manual (GMNA-Localizing-U.S./Canada/Mexico-
14608203) - 2021 - CRC - 10/29/20
Driving and Operating 215
conditions. SeeDriving for Better Fuel
Economy 0188. Tour (FWD) Mode operates
in Front-Wheel Drive to improve fuel
economy.
8Sport : Sport Mode improves vehicle
handling and acceleration on dry pavement.
When active, Sport Mode modifies steering
efforts, transmission shifting, AWD torque,
suspension tuning (when properly equipped),
and StabiliTrak/Electronic Stability Control
(ESC) settings. For vehicles equipped with
AWD, choosing Sport Mode also
engages AWD.
4AWD (AWD Only) : AWD Mode
provides drive torque to all four wheels.
Select AWD to improve traction and control
on slippery road surfaces, such as gravel,
sand, wet pavement, snow, and ice. When in
AWD Mode, the AWD Mode indicator will
be on.
AWD is active in AWD, Sport, Tow/Haul, and
Off-Road Modes.
When using a compact spare tire on an
AWD vehicle, the system automatically
detects the compact spare and reduces AWD
performance to protect the system. To
restore full AWD operation and prevent excessive wear on the system, replace the
compact spare with a full-size tire as soon as
possible. See
Compact Spare Tire 0317.
6Snow/Ice (FWD Only) : Snow/Ice Mode
improves vehicle acceleration on snow and
ice covered roads by changing accelerator
pedal response.
_Tow/Haul : This feature can assist
when towing or hauling a heavy load. Use
this mode to assist in maintaining desired
vehicle speeds when driving on downhill
grades by using the engine and
transmission. When active, Tow/Haul Mode
modifies transmission shifting, steering
effort, and Trailer Sway Control. For AWD
vehicles, choosing Tow/Haul Mode also
engages AWD. See Driving Characteristics
and Towing Tips 0242.
Automatic Engine Grade Braking
Automatic Engine Grade Braking assists
when driving downhill. It maintains vehicle
speed by automatically implementing a shift
pattern that uses the engine and the
transmission to slow the vehicle. The system
will automatically command downshifts to
reduce vehicle speed. The normal shift pattern will return once the vehicle is on a
low grade or when the accelerator pedal is
pressed.
While in the Electronic Range Select (ERS)
mode, grade braking is deactivated, allowing
the driver to select a range and limiting the
highest gear available. Grade braking is
available for normal driving and in Tow/
Haul Mode.
See
Automatic Transmission 0207.
7Off-Road (AWD Only) : Use this mode
for off-road recreational driving. When
active, Off-Road Mode modifies accelerator
pedal response, ABS, TCS, and the
StabiliTrak/ESC system. Choosing Off-Road
Mode also engages AWD. For more
information on Off-Road Mode, see Off-Road
Driving 0191.
Cruise Control
{
Warning
Cruise control can be dangerous where
you cannot drive safely at a steady
speed. Do not use cruise control on
winding roads or in heavy traffic. (Continued)
Page 300 of 380
Chevrolet Blazer Owner Manual (GMNA-Localizing-U.S./Canada/Mexico-
14608203) - 2021 - CRC - 10/29/20
Vehicle Care 299
{Warning
Overinflating a tire could cause the tire
to rupture and you or others could be
injured. Do not exceed the maximum
pressure listed on the tire sidewall. See
Tire Sidewall Labeling0289 and
Vehicle Load Limits 0197.
If the tire is overinflated by more than
35 kPa (5 psi), the horn will sound multiple
times and the turn signal lamp will continue
to flash for several seconds after filling
stops. To release and correct the pressure,
while the turn signal lamp is still flashing,
briefly press the center of the valve stem.
When the recommended pressure is reached,
the horn sounds once.
If the turn signal lamp does not flash within
15 seconds after starting to inflate the tire,
the tire fill alert has not been activated or is
not working.
If the hazard warning flashers are on, the
tire fill alert visual feedback will not work
properly.
The TPMS will not activate the tire fill alert
properly under the following conditions:
.There is interference from an external
device or transmitter.
.The air pressure from the inflation device
is not sufficient to inflate the tire.
.There is a malfunction in the TPMS.
.There is a malfunction in the horn or turn
signal lamps.
.The identification code of the TPMS
sensor is not registered to the system.
.The battery of the TPMS sensor is low.
If the tire fill alert does not operate due to
TPMS interference, move the vehicle about
1 m (3 ft) back or forward and try again.
If the tire fill alert feature is not working,
use a tire pressure gauge.
TPMS Sensor Matching Process
Each TPMS sensor has a unique
identification code. The identification code
needs to be matched to a new tire/wheel
position after rotating the vehicle’s tires or
replacing one or more of the TPMS sensors.
The TPMS sensor matching process should
also be performed after replacing a spare
tire with a road tire containing the TPMS
sensor. The malfunction light and the DIC
message should go off at the next ignition
cycle. The sensors are matched to the tire/
wheel positions, using a TPMS relearn tool, in the following order: driver side front tire,
passenger side front tire, passenger side rear
tire, and driver side rear tire. See your
dealer for service or to purchase a relearn
tool. A TPMS relearn tool can also be
purchased. See Tire Pressure Monitor Sensor
Activation Tool at
www.gmtoolsandequipment.com or call
1-800-GM TOOLS (1-800-468-6657).
There are two minutes to match the first
tire/wheel position, and five minutes overall
to match all four tire/wheel positions. If it
takes longer, the matching process stops
and must be restarted.
The TPMS sensor matching process is:
1. Set the parking brake.
2. Place the vehicle in Service Mode. See Ignition Positions 0200.
3. Make sure the Tire Pressure info page option is turned on. The info pages on
the DIC can be turned on and off
through the Options menu. See Driver
Information Center (DIC) (Base and
Midlevel) 0107 or
Driver Information Center (DIC) (Uplevel)
0 110.
Page 301 of 380
Chevrolet Blazer Owner Manual (GMNA-Localizing-U.S./Canada/Mexico-
14608203) - 2021 - CRC - 10/29/20
300 Vehicle Care
4. Use the DIC controls on the right side ofthe steering wheel to scroll to the Tire
Pressure screen under the DIC info page.
5. Press and hold
Vin the center of the
DIC controls.
The horn sounds twice to signal the
receiver is in relearn mode and the TIRE
LEARNING ACTIVE message displays on
the DIC display.
6. Start with the driver side front tire.
7. Place the relearn tool against the tire sidewall, near the valve stem. Then press
the button to activate the TPMS sensor.
A horn chirp confirms that the sensor
identification code has been matched to
this tire and wheel position.
8. Proceed to the passenger side front tire, and repeat the procedure in Step 7.
9. Proceed to the passenger side rear tire, and repeat the procedure in Step 7.
10. Proceed to the driver side rear tire, and repeat the procedure in Step 7. The horn
sounds two times to indicate the sensor
identification code has been matched to
the driver side rear tire, and the TPMS
sensor matching process is no longer
active. The TIRE LEARNING ACTIVE
message on the DIC display goes off. 11. Turn the vehicle off.
12. Set all four tires to the recommended air
pressure level as indicated on the Tire
and Loading Information label.
Tire Inspection
We recommend that the tires, including
the spare tire, if the vehicle has one, be
inspected for signs of wear or damage
at least once a month.
Replace the tire if:
.The indicators at three or more
places around the tire can be seen.
.There is cord or fabric showing
through the tire's rubber.
.The tread or sidewall is cracked, cut,
or snagged deep enough to show
cord or fabric.
.The tire has a bump, bulge, or split.
.The tire has a puncture, cut, or other
damage that cannot be repaired well
because of the size or location of the
damage.
Tire Rotation
Tires should be rotated every 12 000 km
(7,500 mi). See Maintenance Schedule
0 332.
Tires are rotated to achieve a more
uniform wear for all tires. The first
rotation is the most important.
Anytime unusual wear is noticed, rotate
the tires as soon as possible, check for
proper tire inflation pressure, and check
for damaged tires or wheels. If the
unusual wear continues after the
rotation, check the wheel alignment.
See When It Is Time for New Tires 0301
and
Wheel Replacement 0305.
Page 321 of 380
Chevrolet Blazer Owner Manual (GMNA-Localizing-U.S./Canada/Mexico-
14608203) - 2021 - CRC - 10/29/20
320 Vehicle Care
5. Connect one end of the red positive (+)cable to the positive (+) terminal on the
discharged battery.
6. Connect the other end of the red positive (+) cable to the positive (+)
terminal of the good battery.
7. Connect one end of the black negative (–) cable to the negative (–)
terminal of the good battery.
8. Connect the other end of the black negative (–) cable to the remote
negative (–) terminal for the discharged
battery.
9. Start the engine in the vehicle with the good battery and run the engine at idle
speed for at least four minutes.
10. Try to start the vehicle that had the dead battery. If it will not start after a
few tries, it probably needs service.
Caution
If the jumper cables are connected or
removed in the wrong order, electrical
shorting may occur and damage the
vehicle. The repairs would not be covered
by the vehicle warranty. Always connect
(Continued)
Caution (Continued)
and remove the jumper cables in the
correct order, making sure that the cables
do not touch each other or other metal.
Jumper Cable Removal
Reverse the sequence exactly when
removing the jumper cables.
After starting the disabled vehicle and
removing the jumper cables, allow it to idle
for several minutes.
Towing the Vehicle
Caution
Incorrectly towing a disabled vehicle may
cause damage. The damage would not be
covered by the vehicle warranty. Do not
lash or hook to suspension components.
Use the proper straps around the tires to
secure the vehicle. Do not drag a locked
wheel/tire. Use tire skates or dollies
under any locked wheel/tire while
loading the vehicle. Do not use a sling
type lift to tow the vehicle. This could
damage the vehicle.
Caution
Improper use of the tow eye can damage
the vehicle. If equipped, use the tow eye
to load a disabled vehicle onto a flatbed
tow truck from a flat road surface, or to
move the vehicle a short distance. Use
caution and low speeds. The transmission
must be in (N) Neutral when moving the
vehicle.
GM recommends a flatbed tow truck to
transport a disabled vehicle. Use ramps to
help reduce approach angles, if necessary.
A towed vehicle should have its drive wheels
off the ground. Contact Roadside Assistance
or a professional towing service if the
disabled vehicle must be towed.
Page 323 of 380
Chevrolet Blazer Owner Manual (GMNA-Localizing-U.S./Canada/Mexico-
14608203) - 2021 - CRC - 10/29/20
322 Vehicle Care
Caution
If the vehicle is towed without
performing each of the steps listed under
“Dinghy Towing,”the automatic
transmission could be damaged. Be sure
to follow all steps of the dinghy towing
procedure prior to and after towing the
vehicle.
Caution
If 105 km/h (65 mph) is exceeded while
towing the vehicle, it could be damaged.
Never exceed 105 km/h (65 mph) while
towing the vehicle.
Once the destination is reached: 1. Shift the vehicle to P (Park).
2. Reconnect the negative (−) terminal connector to the 12-volt battery.
3. Start the engine and let it idle for more than three minutes before driving the
vehicle.
Caution
Too much or too little fluid can damage
the transmission. Be sure that the
transmission fluid is at the proper level
before towing with all four wheels on the
ground.
Caution
Do not tow a vehicle with the front drive
wheels on the ground if one of the front
tires is a compact spare tire. Towing with
two different tire sizes on the front of
the vehicle can cause severe damage to
the transmission.
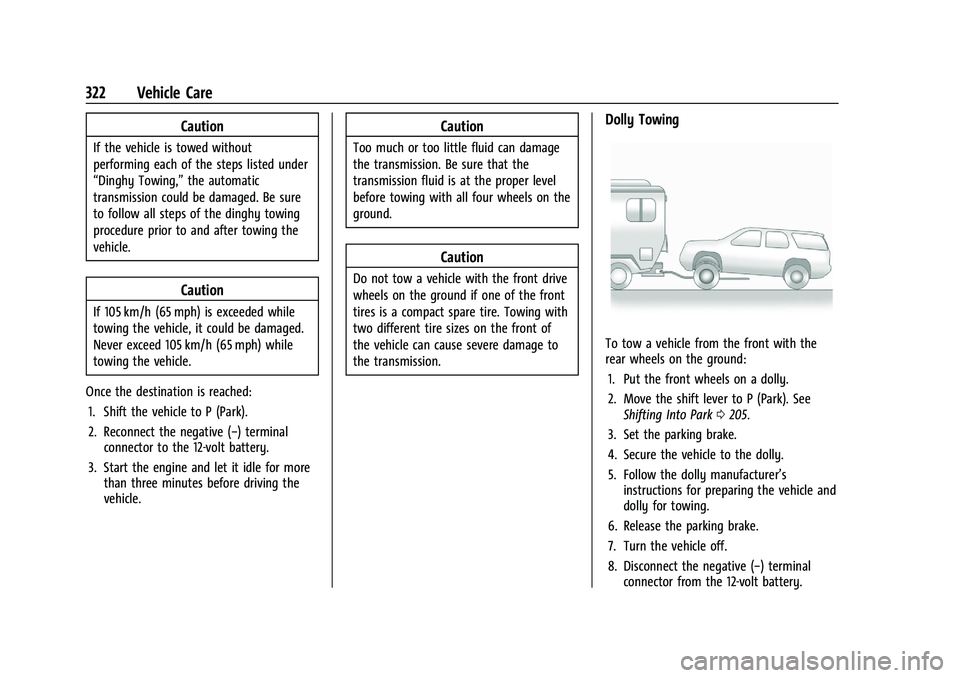
Dolly Towing
To tow a vehicle from the front with the
rear wheels on the ground:
1. Put the front wheels on a dolly.
2. Move the shift lever to P (Park). See Shifting Into Park 0205.
3. Set the parking brake.
4. Secure the vehicle to the dolly.
5. Follow the dolly manufacturer’s instructions for preparing the vehicle and
dolly for towing.
6. Release the parking brake.
7. Turn the vehicle off.
8. Disconnect the negative (−) terminal connector from the 12-volt battery.