spare wheel CHEVROLET BLAZER 2021 Owner's Manual
[x] Cancel search | Manufacturer: CHEVROLET, Model Year: 2021, Model line: BLAZER, Model: CHEVROLET BLAZER 2021Pages: 380, PDF Size: 9.1 MB
Page 192 of 380
Chevrolet Blazer Owner Manual (GMNA-Localizing-U.S./Canada/Mexico-
14608203) - 2021 - CRC - 10/29/20
Driving and Operating 191
Loss of Control
Skidding
There are three types of skids that
correspond to the vehicle's three control
systems:
.Braking Skid—wheels are not rolling.
.Steering or Cornering Skid —too much
speed or steering in a curve causes tires
to slip and lose cornering force.
.Acceleration Skid —too much throttle
causes the driving wheels to spin.
Defensive drivers avoid most skids by taking
reasonable care suited to existing conditions,
and by not overdriving those conditions. But
skids are always possible.
If the vehicle starts to slide, follow these
suggestions:
.Ease your foot off the accelerator pedal
and steer the way you want the vehicle
to go. The vehicle may straighten out. Be
ready for a second skid if it occurs.
.Slow down and adjust your driving
according to weather conditions. Stopping
distance can be longer and vehicle control
can be affected when traction is reduced
by water, snow, ice, gravel, or other
material on the road. Learn to recognize warning clues
—such as enough water,
ice, or packed snow on the road to make
a mirrored surface —and slow down
when you have any doubt.
.Try to avoid sudden steering, acceleration,
or braking, including reducing vehicle
speed by shifting to a lower gear. Any
sudden changes could cause the tires to
slide.
Remember: Antilock brakes help avoid only
the braking skid.
Off-Road Driving
All-Wheel Drive (AWD) vehicles can be used
for off-road driving. Vehicles without AWD
and vehicles not equipped with All Terrain
(AT) or On-Off Road (OOR) tires must not be
driven off-road except on a level, solid
surface. To contact the tire manufacturer for
more information about the original
equipment tires, see the warranty manual.
Controlling the vehicle is the key to
successful off-road driving. One of the best
ways to control the vehicle is to control the
speed.
{Warning
When driving off-road, bouncing and
quick changes in direction can easily
throw you out of position. This could
cause you to lose control and crash. You
and your passengers should always wear
seat belts.
Before Driving Off-Road
.Have all necessary maintenance and
service work completed.
.Fuel the vehicle, fill fluid levels, and check
inflation pressure in all tires, including the
spare, if equipped.
.Read all the information about AWD
vehicles in this manual.
.Make sure all underbody shields,
if equipped, are properly attached.
.Know the local laws that apply to off-road
driving.
To gain more ground clearance if needed, it
may be necessary to remove the front fascia
lower air dam. However, driving without the
air dam reduces fuel economy.
Page 211 of 380
Chevrolet Blazer Owner Manual (GMNA-Localizing-U.S./Canada/Mexico-
14608203) - 2021 - CRC - 10/29/20
210 Driving and Operating
speed is not reduced within the time
allowed, the lower gear range shift will not
be completed. You must further slow the
vehicle, then press−(Minus) to the desired
lower gear range.
Automatic Engine Grade Braking is not
available when the ERS is active. It is
available in D (Drive) for both normal driving
and Tow/Haul Mode. While using the ERS,
cruise control and the Tow/Haul Mode can
be used. See “Tow/Haul Mode” following.
Tow/Haul Mode
This feature can assist when towing or
hauling a heavy load. See Driver Mode
Control 0214 to activate Tow/Haul Mode.
Drive Systems
All-Wheel Drive
Vehicles with this feature can operate in
All-Wheel Drive (AWD) Mode.
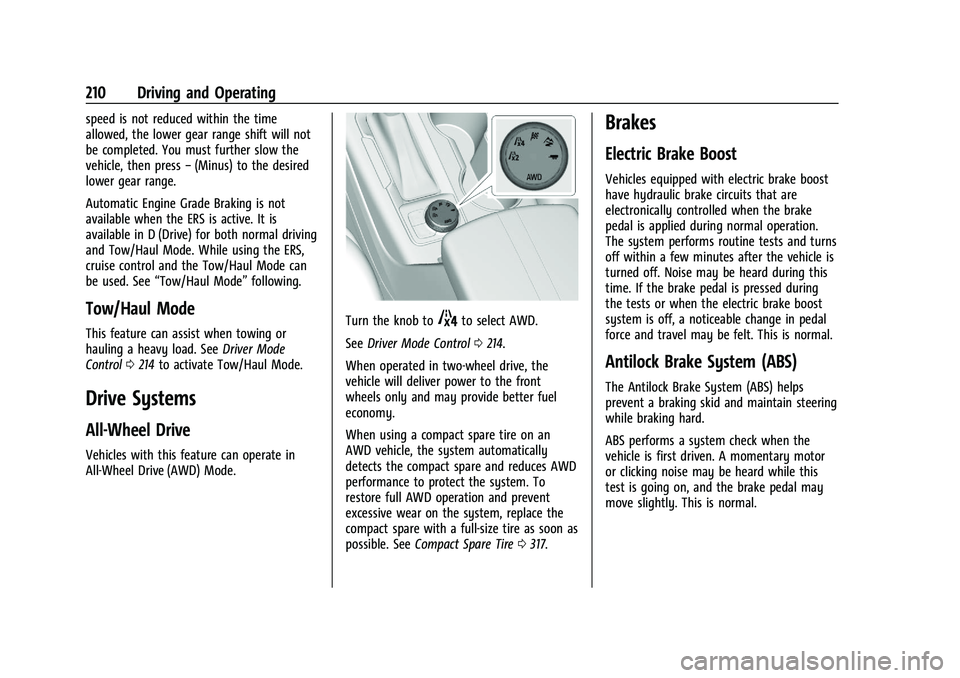
Turn the knob to4to select AWD.
See Driver Mode Control 0214.
When operated in two-wheel drive, the
vehicle will deliver power to the front
wheels only and may provide better fuel
economy.
When using a compact spare tire on an
AWD vehicle, the system automatically
detects the compact spare and reduces AWD
performance to protect the system. To
restore full AWD operation and prevent
excessive wear on the system, replace the
compact spare with a full-size tire as soon as
possible. See Compact Spare Tire 0317.
Brakes
Electric Brake Boost
Vehicles equipped with electric brake boost
have hydraulic brake circuits that are
electronically controlled when the brake
pedal is applied during normal operation.
The system performs routine tests and turns
off within a few minutes after the vehicle is
turned off. Noise may be heard during this
time. If the brake pedal is pressed during
the tests or when the electric brake boost
system is off, a noticeable change in pedal
force and travel may be felt. This is normal.
Antilock Brake System (ABS)
The Antilock Brake System (ABS) helps
prevent a braking skid and maintain steering
while braking hard.
ABS performs a system check when the
vehicle is first driven. A momentary motor
or clicking noise may be heard while this
test is going on, and the brake pedal may
move slightly. This is normal.
Page 216 of 380
Chevrolet Blazer Owner Manual (GMNA-Localizing-U.S./Canada/Mexico-
14608203) - 2021 - CRC - 10/29/20
Driving and Operating 215
conditions. SeeDriving for Better Fuel
Economy 0188. Tour (FWD) Mode operates
in Front-Wheel Drive to improve fuel
economy.
8Sport : Sport Mode improves vehicle
handling and acceleration on dry pavement.
When active, Sport Mode modifies steering
efforts, transmission shifting, AWD torque,
suspension tuning (when properly equipped),
and StabiliTrak/Electronic Stability Control
(ESC) settings. For vehicles equipped with
AWD, choosing Sport Mode also
engages AWD.
4AWD (AWD Only) : AWD Mode
provides drive torque to all four wheels.
Select AWD to improve traction and control
on slippery road surfaces, such as gravel,
sand, wet pavement, snow, and ice. When in
AWD Mode, the AWD Mode indicator will
be on.
AWD is active in AWD, Sport, Tow/Haul, and
Off-Road Modes.
When using a compact spare tire on an
AWD vehicle, the system automatically
detects the compact spare and reduces AWD
performance to protect the system. To
restore full AWD operation and prevent excessive wear on the system, replace the
compact spare with a full-size tire as soon as
possible. See
Compact Spare Tire 0317.
6Snow/Ice (FWD Only) : Snow/Ice Mode
improves vehicle acceleration on snow and
ice covered roads by changing accelerator
pedal response.
_Tow/Haul : This feature can assist
when towing or hauling a heavy load. Use
this mode to assist in maintaining desired
vehicle speeds when driving on downhill
grades by using the engine and
transmission. When active, Tow/Haul Mode
modifies transmission shifting, steering
effort, and Trailer Sway Control. For AWD
vehicles, choosing Tow/Haul Mode also
engages AWD. See Driving Characteristics
and Towing Tips 0242.
Automatic Engine Grade Braking
Automatic Engine Grade Braking assists
when driving downhill. It maintains vehicle
speed by automatically implementing a shift
pattern that uses the engine and the
transmission to slow the vehicle. The system
will automatically command downshifts to
reduce vehicle speed. The normal shift pattern will return once the vehicle is on a
low grade or when the accelerator pedal is
pressed.
While in the Electronic Range Select (ERS)
mode, grade braking is deactivated, allowing
the driver to select a range and limiting the
highest gear available. Grade braking is
available for normal driving and in Tow/
Haul Mode.
See
Automatic Transmission 0207.
7Off-Road (AWD Only) : Use this mode
for off-road recreational driving. When
active, Off-Road Mode modifies accelerator
pedal response, ABS, TCS, and the
StabiliTrak/ESC system. Choosing Off-Road
Mode also engages AWD. For more
information on Off-Road Mode, see Off-Road
Driving 0191.
Cruise Control
{
Warning
Cruise control can be dangerous where
you cannot drive safely at a steady
speed. Do not use cruise control on
winding roads or in heavy traffic. (Continued)
Page 254 of 380
Chevrolet Blazer Owner Manual (GMNA-Localizing-U.S./Canada/Mexico-
14608203) - 2021 - CRC - 10/29/20
Vehicle Care 253
Vehicle Care
General Information
General Information . . . . . . . . . . . . . . . . . . . 254
California Proposition 65 Warning . . . . . 254
California Perchlorate MaterialsRequirements . . . . . . . . . . . . . . . . . . . . . . . . 254
Accessories and Modifications . . . . . . . . . 254
Vehicle Checks
Doing Your Own Service Work . . . . . . . . . 255
Hood . . . . . . . . . . . . . . . . . . . . . . . . . . . . . . . . . . 255
Engine Compartment Overview . . . . . . . . 257
Engine Oil . . . . . . . . . . . . . . . . . . . . . . . . . . . . . 262
Engine Oil Life System . . . . . . . . . . . . . . . . 264
Automatic Transmission Fluid . . . . . . . . . 265
Engine Air Filter Life System . . . . . . . . . . 265
Engine Air Cleaner/Filter . . . . . . . . . . . . . . 265
Cooling System . . . . . . . . . . . . . . . . . . . . . . . . 267
Engine Overheating . . . . . . . . . . . . . . . . . . . . 271
Washer Fluid . . . . . . . . . . . . . . . . . . . . . . . . . . 272
Brakes . . . . . . . . . . . . . . . . . . . . . . . . . . . . . . . . . 273
Brake Fluid . . . . . . . . . . . . . . . . . . . . . . . . . . . . 273
Battery - North America . . . . . . . . . . . . . . . 274
All-Wheel Drive . . . . . . . . . . . . . . . . . . . . . . . . 275
Automatic Transmission Shift Lock Control Function Check . . . . . . . . . . . . . . 275
Park Brake and P (Park) Mechanism Check . . . . . . . . . . . . . . . . . . . . . . . . . . . . . . . . 275
Wiper Blade Replacement . . . . . . . . . . . . . 276 Windshield Replacement . . . . . . . . . . . . . . . 277
Gas Strut(s) . . . . . . . . . . . . . . . . . . . . . . . . . . . . 277
Headlamp Aiming
Front Headlamp Aiming . . . . . . . . . . . . . . . 278
Bulb Replacement
Bulb Replacement . . . . . . . . . . . . . . . . . . . . . 278
High Intensity Discharge (HID)
Lighting . . . . . . . . . . . . . . . . . . . . . . . . . . . . . 278
LED Lighting . . . . . . . . . . . . . . . . . . . . . . . . . . . 278
Back-Up Lamps . . . . . . . . . . . . . . . . . . . . . . . . 278
Electrical System
High Voltage Devices and Wiring . . . . . . 279
Electrical System Overload . . . . . . . . . . . . 279
Fuses and Circuit Breakers . . . . . . . . . . . . 280
Engine Compartment Fuse Block . . . . . . 280
Instrument Panel Fuse Block . . . . . . . . . . 284
Rear Compartment Fuse Block . . . . . . . . . 285
Wheels and Tires
Tires . . . . . . . . . . . . . . . . . . . . . . . . . . . . . . . . . . . 287
All-Season Tires . . . . . . . . . . . . . . . . . . . . . . . 288
Winter Tires . . . . . . . . . . . . . . . . . . . . . . . . . . . 288
Summer Tires . . . . . . . . . . . . . . . . . . . . . . . . . 289
Tire Sidewall Labeling . . . . . . . . . . . . . . . . . 289
Tire Designations . . . . . . . . . . . . . . . . . . . . . . 291
Tire Terminology and Definitions . . . . . . 292
Tire Pressure . . . . . . . . . . . . . . . . . . . . . . . . . . 294
Tire Pressure for High-Speed Operation . . . . . . . . . . . . . . . . . . . . . . . . . . . 295 Tire Pressure Monitor System . . . . . . . . . 296
Tire Pressure Monitor Operation . . . . . . 297
Tire Inspection . . . . . . . . . . . . . . . . . . . . . . . . 300
Tire Rotation . . . . . . . . . . . . . . . . . . . . . . . . . . 300
When It Is Time for New Tires . . . . . . . . 301
Buying New Tires . . . . . . . . . . . . . . . . . . . . . 302
Different Size Tires and Wheels . . . . . . . 303
Uniform Tire Quality Grading . . . . . . . . . 303
Wheel Alignment and Tire Balance . . . . 305
Wheel Replacement . . . . . . . . . . . . . . . . . . . 305
Tire Chains . . . . . . . . . . . . . . . . . . . . . . . . . . . . 305
If a Tire Goes Flat . . . . . . . . . . . . . . . . . . . . . 306
Tire Sealant and Compressor Kit . . . . . . . 307
Storing the Tire Sealant and
Compressor Kit . . . . . . . . . . . . . . . . . . . . . . . 313
Tire Changing . . . . . . . . . . . . . . . . . . . . . . . . . . 313
Compact Spare Tire . . . . . . . . . . . . . . . . . . . . 317
Jump Starting
Jump Starting - North America . . . . . . . . 318
Towing the Vehicle
Towing the Vehicle . . . . . . . . . . . . . . . . . . . . 320
Recreational Vehicle Towing . . . . . . . . . . . 321
Appearance Care
Exterior Care . . . . . . . . . . . . . . . . . . . . . . . . . . 323
Interior Care . . . . . . . . . . . . . . . . . . . . . . . . . . . 327
Floor Mats . . . . . . . . . . . . . . . . . . . . . . . . . . . . 329
Page 290 of 380
Chevrolet Blazer Owner Manual (GMNA-Localizing-U.S./Canada/Mexico-
14608203) - 2021 - CRC - 10/29/20
Vehicle Care 289
With winter tires, there may be decreased
dry road traction, increased road noise, and
shorter tread life. After changing to winter
tires, be alert for changes in vehicle
handling and braking.
If using winter tires:
.Use tires of the same brand and tread
type on all four wheel positions.
.Use only radial ply tires of the same size,
load range, and speed rating as the
original equipment tires.
Winter tires with the same speed rating as
the original equipment tires may not be
available for H, V, W, Y, and ZR speed rated
tires. If winter tires with a lower speed
rating are chosen, never exceed the tire's
maximum speed capability.
Summer Tires
This vehicle may come with 235/55R20 high
performance summer tires. These tires have
a special tread and compound that are
optimized for maximum dry and wet road
performance. This special tread and
compound will have decreased performance
in cold climates, and on ice and snow. It is
recommended that winter tires be installed
on the vehicle if frequent driving at temperatures below approximately 5 °C
(40 °F) or on ice or snow covered roads is
expected. See
Winter Tires0288.
Caution
High performance summer tires have
rubber compounds that lose flexibility
and may develop surface cracks in the
tread area at temperatures below −7 °C
(20 °F). Always store high performance
summer tires indoors and at
temperatures above −7 °C (20 °F) when
not in use. If the tires have been
subjected to −7 °C (20 °F) or less, let them
warm up in a heated space to at least
5 °C (40 °F) for 24 hours or more before
being installed or driving a vehicle on
which they are installed. Do not apply
heat or blow heated air directly on the
tires. Always inspect tires before use. See
Tire Inspection 0300.
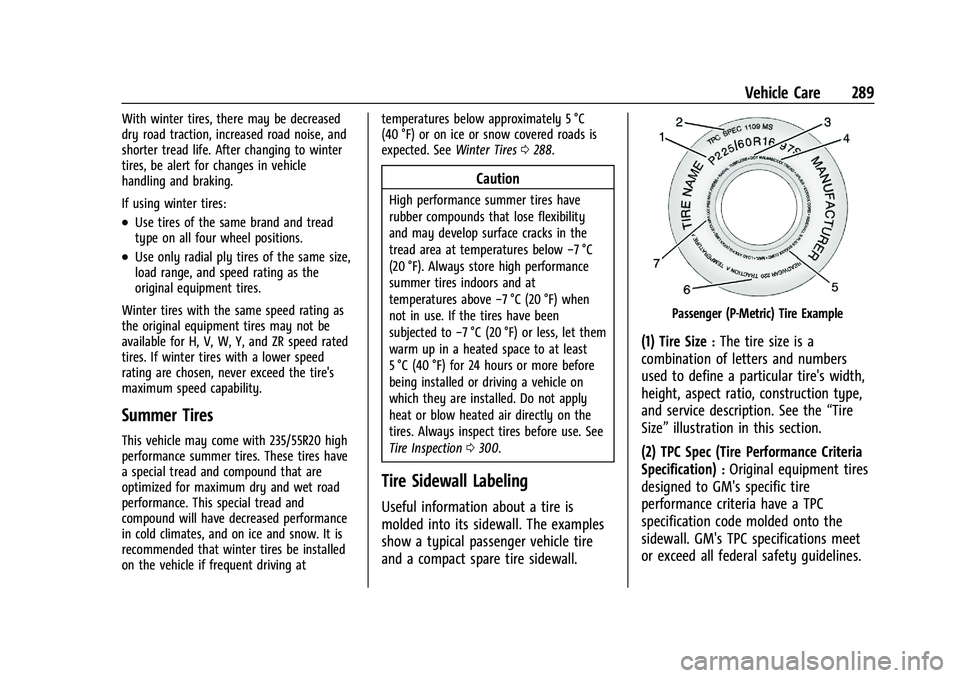
Tire Sidewall Labeling
Useful information about a tire is
molded into its sidewall. The examples
show a typical passenger vehicle tire
and a compact spare tire sidewall.
Passenger (P-Metric) Tire Example
(1) Tire Size:The tire size is a
combination of letters and numbers
used to define a particular tire's width,
height, aspect ratio, construction type,
and service description. See the “Tire
Size” illustration in this section.
(2) TPC Spec (Tire Performance Criteria
Specification)
:Original equipment tires
designed to GM's specific tire
performance criteria have a TPC
specification code molded onto the
sidewall. GM's TPC specifications meet
or exceed all federal safety guidelines.
Page 292 of 380
Chevrolet Blazer Owner Manual (GMNA-Localizing-U.S./Canada/Mexico-
14608203) - 2021 - CRC - 10/29/20
Vehicle Care 291
(4) Maximum Cold Inflation Load
Limit
:Maximum load that can be
carried and the maximum pressure
needed to support that load.
(5) Tire Inflation
:The temporary use
tire or compact spare tire should be
inflated to 420 kPa (60 psi). For more
information on tire pressure and
inflation see Tire Pressure 0294.
(6) Tire Size
:A combination of letters
and numbers define a tire's width,
height, aspect ratio, construction type,
and service description. The letter “T”as
the first character in the tire size means
the tire is for temporary use only.
(7) TPC Spec (Tire Performance Criteria
Specification)
:Original equipment tires
designed to GM's specific tire
performance criteria have a TPC
specification code molded onto the
sidewall. GM's TPC specifications meet
or exceed all federal safety guidelines.
Tire Designations
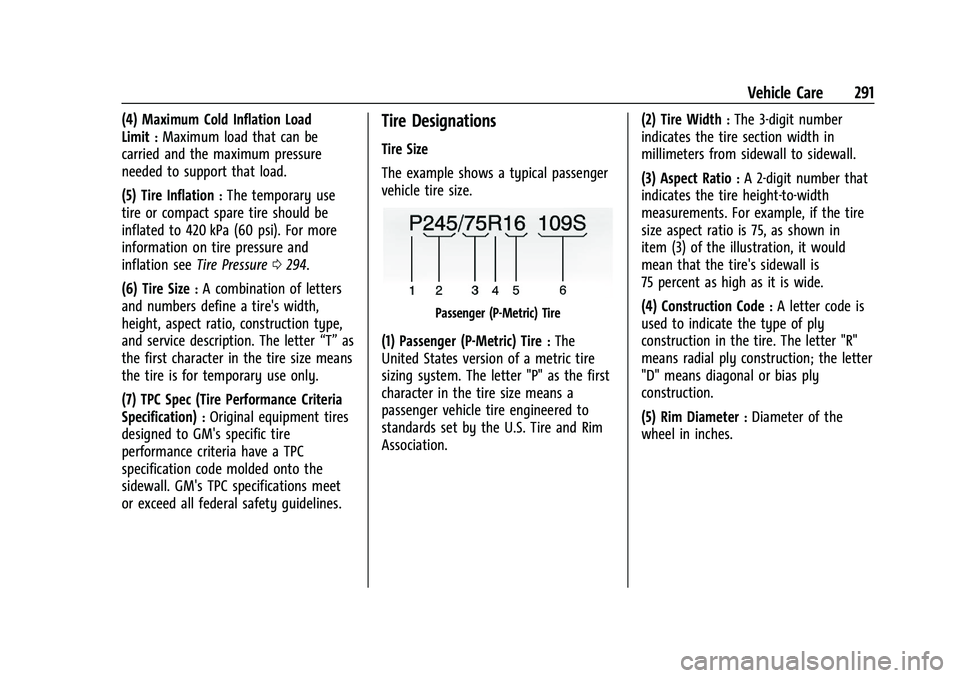
Tire Size
The example shows a typical passenger
vehicle tire size.
Passenger (P-Metric) Tire
(1) Passenger (P-Metric) Tire:The
United States version of a metric tire
sizing system. The letter "P" as the first
character in the tire size means a
passenger vehicle tire engineered to
standards set by the U.S. Tire and Rim
Association. (2) Tire Width
:The 3-digit number
indicates the tire section width in
millimeters from sidewall to sidewall.
(3) Aspect Ratio
:A 2-digit number that
indicates the tire height-to-width
measurements. For example, if the tire
size aspect ratio is 75, as shown in
item (3) of the illustration, it would
mean that the tire's sidewall is
75 percent as high as it is wide.
(4) Construction Code
:A letter code is
used to indicate the type of ply
construction in the tire. The letter "R"
means radial ply construction; the letter
"D" means diagonal or bias ply
construction.
(5) Rim Diameter
:Diameter of the
wheel in inches.
Page 298 of 380
Chevrolet Blazer Owner Manual (GMNA-Localizing-U.S./Canada/Mexico-
14608203) - 2021 - CRC - 10/29/20
Vehicle Care 297
When the malfunction indicator is
illuminated, the system may not be able to
detect or signal low tire pressure as
intended. TPMS malfunctions may occur for
a variety of reasons, including the
installation of replacement or alternate tires
or wheels on the vehicle that prevent the
TPMS from functioning properly. Always
check the TPMS malfunction telltale after
replacing one or more tires or wheels on
your vehicle to ensure that the replacement
or alternate tires and wheels allow the
TPMS to continue to function properly.
SeeTire Pressure Monitor Operation 0297.
See Radio Frequency Statement 0357.
Tire Pressure Monitor Operation
This vehicle may have a Tire Pressure
Monitor System (TPMS). The TPMS is
designed to warn the driver when a low tire
pressure condition exists. TPMS sensors are
mounted onto each tire and wheel
assembly, excluding the spare tire and
wheel assembly. The TPMS sensors monitor
the air pressure in the tires and transmit the
tire pressure readings to a receiver located
in the vehicle.
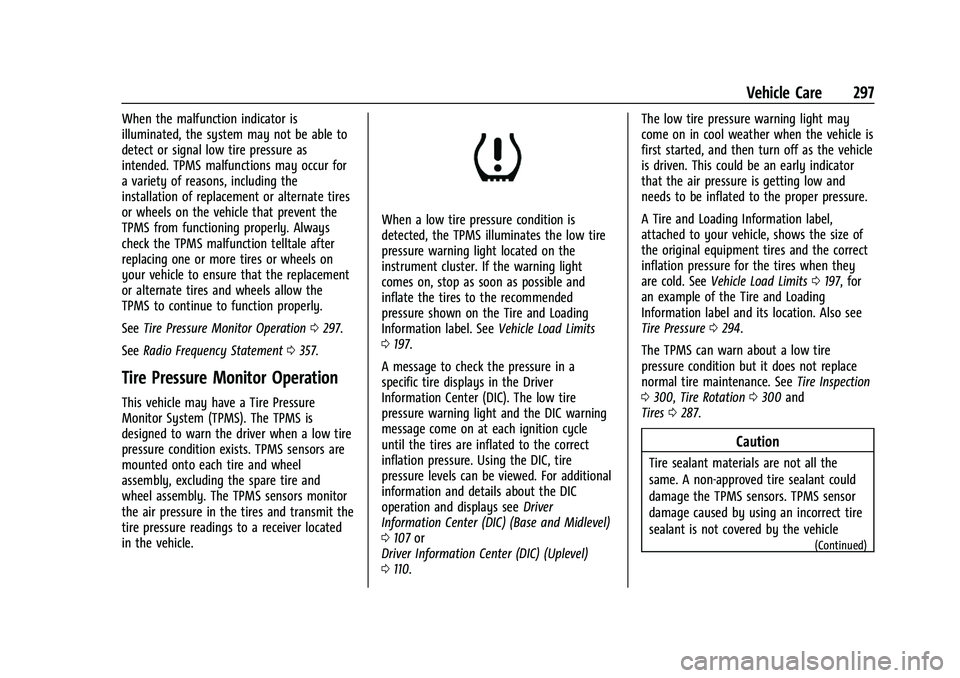
When a low tire pressure condition is
detected, the TPMS illuminates the low tire
pressure warning light located on the
instrument cluster. If the warning light
comes on, stop as soon as possible and
inflate the tires to the recommended
pressure shown on the Tire and Loading
Information label. See Vehicle Load Limits
0 197.
A message to check the pressure in a
specific tire displays in the Driver
Information Center (DIC). The low tire
pressure warning light and the DIC warning
message come on at each ignition cycle
until the tires are inflated to the correct
inflation pressure. Using the DIC, tire
pressure levels can be viewed. For additional
information and details about the DIC
operation and displays see Driver
Information Center (DIC) (Base and Midlevel)
0 107 or
Driver Information Center (DIC) (Uplevel)
0 110. The low tire pressure warning light may
come on in cool weather when the vehicle is
first started, and then turn off as the vehicle
is driven. This could be an early indicator
that the air pressure is getting low and
needs to be inflated to the proper pressure.
A Tire and Loading Information label,
attached to your vehicle, shows the size of
the original equipment tires and the correct
inflation pressure for the tires when they
are cold. See
Vehicle Load Limits 0197, for
an example of the Tire and Loading
Information label and its location. Also see
Tire Pressure 0294.
The TPMS can warn about a low tire
pressure condition but it does not replace
normal tire maintenance. See Tire Inspection
0 300, Tire Rotation 0300 and
Tires 0287.
Caution
Tire sealant materials are not all the
same. A non-approved tire sealant could
damage the TPMS sensors. TPMS sensor
damage caused by using an incorrect tire
sealant is not covered by the vehicle
(Continued)
Page 299 of 380
Chevrolet Blazer Owner Manual (GMNA-Localizing-U.S./Canada/Mexico-
14608203) - 2021 - CRC - 10/29/20
298 Vehicle Care
Caution (Continued)
warranty. Always use only the GM
approved tire sealant available through
your dealer or included in the vehicle.
Factory-installed Tire Inflator Kits use a
GM-approved liquid tire sealant. Using
non-approved tire sealants could damage the
TPMS sensors. See Tire Sealant and
Compressor Kit 0307 for information
regarding the inflator kit materials and
instructions.
TPMS Malfunction Light and Message
The TPMS will not function properly if one
or more of the TPMS sensors are missing or
inoperable. When the system detects a
malfunction, the low tire pressure warning
light flashes for about one minute and then
stays on for the remainder of the ignition
cycle. A DIC warning message also displays.
The malfunction light and DIC warning
message come on at each ignition cycle
until the problem is corrected. Some of the
conditions that can cause these to come
on are:
.One of the road tires has been replaced
with the spare tire. The spare tire does
not have a TPMS sensor. The malfunction light and DIC message should go off after
the road tire is replaced and the sensor
matching process is performed
successfully. See
“TPMS Sensor Matching
Process” later in this section.
.The TPMS sensor matching process was
not done or not completed successfully
after rotating the tires. The malfunction
light and the DIC message should go off
after successfully completing the sensor
matching process. See "TPMS Sensor
Matching Process" later in this section.
.One or more TPMS sensors are missing or
damaged. The malfunction light and the
DIC message should go off when the
TPMS sensors are installed and the sensor
matching process is performed
successfully. See your dealer for service.
.Replacement tires or wheels do not match
the original equipment tires or wheels.
Tires and wheels other than those
recommended could prevent the TPMS
from functioning properly. See Buying
New Tires 0302.
.Operating electronic devices or being near
facilities using radio wave frequencies
similar to the TPMS could cause the TPMS
sensors to malfunction. If the TPMS is not functioning properly it
cannot detect or signal a low tire pressure
condition. See your dealer for service if the
TPMS malfunction light and DIC message
come on and stay on.
Tire Fill Alert (If Equipped)
This feature provides visual and audible
alerts outside the vehicle to help when
inflating an underinflated tire to the
recommended cold tire pressure.
When the low tire pressure warning light
comes on:
1. Park the vehicle in a safe, level place.
2. Set the parking brake firmly.
3. Place the vehicle in P (Park).
4. Add air to the tire that is underinflated. The turn signal lamp will flash.
When the recommended pressure is
reached, the horn sounds once and the
turn signal lamp will stop flashing and
briefly turn solid.
Repeat these steps for all underinflated tires
that have illuminated the low tire pressure
warning light.
Page 300 of 380
Chevrolet Blazer Owner Manual (GMNA-Localizing-U.S./Canada/Mexico-
14608203) - 2021 - CRC - 10/29/20
Vehicle Care 299
{Warning
Overinflating a tire could cause the tire
to rupture and you or others could be
injured. Do not exceed the maximum
pressure listed on the tire sidewall. See
Tire Sidewall Labeling0289 and
Vehicle Load Limits 0197.
If the tire is overinflated by more than
35 kPa (5 psi), the horn will sound multiple
times and the turn signal lamp will continue
to flash for several seconds after filling
stops. To release and correct the pressure,
while the turn signal lamp is still flashing,
briefly press the center of the valve stem.
When the recommended pressure is reached,
the horn sounds once.
If the turn signal lamp does not flash within
15 seconds after starting to inflate the tire,
the tire fill alert has not been activated or is
not working.
If the hazard warning flashers are on, the
tire fill alert visual feedback will not work
properly.
The TPMS will not activate the tire fill alert
properly under the following conditions:
.There is interference from an external
device or transmitter.
.The air pressure from the inflation device
is not sufficient to inflate the tire.
.There is a malfunction in the TPMS.
.There is a malfunction in the horn or turn
signal lamps.
.The identification code of the TPMS
sensor is not registered to the system.
.The battery of the TPMS sensor is low.
If the tire fill alert does not operate due to
TPMS interference, move the vehicle about
1 m (3 ft) back or forward and try again.
If the tire fill alert feature is not working,
use a tire pressure gauge.
TPMS Sensor Matching Process
Each TPMS sensor has a unique
identification code. The identification code
needs to be matched to a new tire/wheel
position after rotating the vehicle’s tires or
replacing one or more of the TPMS sensors.
The TPMS sensor matching process should
also be performed after replacing a spare
tire with a road tire containing the TPMS
sensor. The malfunction light and the DIC
message should go off at the next ignition
cycle. The sensors are matched to the tire/
wheel positions, using a TPMS relearn tool, in the following order: driver side front tire,
passenger side front tire, passenger side rear
tire, and driver side rear tire. See your
dealer for service or to purchase a relearn
tool. A TPMS relearn tool can also be
purchased. See Tire Pressure Monitor Sensor
Activation Tool at
www.gmtoolsandequipment.com or call
1-800-GM TOOLS (1-800-468-6657).
There are two minutes to match the first
tire/wheel position, and five minutes overall
to match all four tire/wheel positions. If it
takes longer, the matching process stops
and must be restarted.
The TPMS sensor matching process is:
1. Set the parking brake.
2. Place the vehicle in Service Mode. See Ignition Positions 0200.
3. Make sure the Tire Pressure info page option is turned on. The info pages on
the DIC can be turned on and off
through the Options menu. See Driver
Information Center (DIC) (Base and
Midlevel) 0107 or
Driver Information Center (DIC) (Uplevel)
0 110.
Page 301 of 380
Chevrolet Blazer Owner Manual (GMNA-Localizing-U.S./Canada/Mexico-
14608203) - 2021 - CRC - 10/29/20
300 Vehicle Care
4. Use the DIC controls on the right side ofthe steering wheel to scroll to the Tire
Pressure screen under the DIC info page.
5. Press and hold
Vin the center of the
DIC controls.
The horn sounds twice to signal the
receiver is in relearn mode and the TIRE
LEARNING ACTIVE message displays on
the DIC display.
6. Start with the driver side front tire.
7. Place the relearn tool against the tire sidewall, near the valve stem. Then press
the button to activate the TPMS sensor.
A horn chirp confirms that the sensor
identification code has been matched to
this tire and wheel position.
8. Proceed to the passenger side front tire, and repeat the procedure in Step 7.
9. Proceed to the passenger side rear tire, and repeat the procedure in Step 7.
10. Proceed to the driver side rear tire, and repeat the procedure in Step 7. The horn
sounds two times to indicate the sensor
identification code has been matched to
the driver side rear tire, and the TPMS
sensor matching process is no longer
active. The TIRE LEARNING ACTIVE
message on the DIC display goes off. 11. Turn the vehicle off.
12. Set all four tires to the recommended air
pressure level as indicated on the Tire
and Loading Information label.
Tire Inspection
We recommend that the tires, including
the spare tire, if the vehicle has one, be
inspected for signs of wear or damage
at least once a month.
Replace the tire if:
.The indicators at three or more
places around the tire can be seen.
.There is cord or fabric showing
through the tire's rubber.
.The tread or sidewall is cracked, cut,
or snagged deep enough to show
cord or fabric.
.The tire has a bump, bulge, or split.
.The tire has a puncture, cut, or other
damage that cannot be repaired well
because of the size or location of the
damage.
Tire Rotation
Tires should be rotated every 12 000 km
(7,500 mi). See Maintenance Schedule
0 332.
Tires are rotated to achieve a more
uniform wear for all tires. The first
rotation is the most important.
Anytime unusual wear is noticed, rotate
the tires as soon as possible, check for
proper tire inflation pressure, and check
for damaged tires or wheels. If the
unusual wear continues after the
rotation, check the wheel alignment.
See When It Is Time for New Tires 0301
and
Wheel Replacement 0305.