seat CHEVROLET BOLT EV 2018 Manual Online
[x] Cancel search | Manufacturer: CHEVROLET, Model Year: 2018, Model line: BOLT EV, Model: CHEVROLET BOLT EV 2018Pages: 370, PDF Size: 5.14 MB
Page 201 of 370
Chevrolet BOLT EV Owner Manual (GMNA-Localizing-U.S./Canada/Mexico-
11434431) - 2018 - crc - 2/14/18
200 Driving and Operating
Vehicle Load Limits
It is very important to know how
much weight the vehicle can
carry. This weight is called the
vehicle capacity weight and
includes the weight of all
occupants, cargo, and all
nonfactory-installed options.
Two labels on the vehicle may
show how much weight it may
properly carry: the Tire and
Loading Information label and
the Certification label.
{Warning
Do not load the vehicle any
heavier than the Gross
Vehicle Weight Rating
(GVWR), or either the
maximum front or rear Gross
Axle Weight Rating (GAWR).
This can cause systems to
break and change the way the
vehicle handles. This could
(Continued)
Warning (Continued)
cause loss of control and a
crash. Overloading can also
reduce stopping distance,
damage the tires, and shorten
the life of the vehicle.
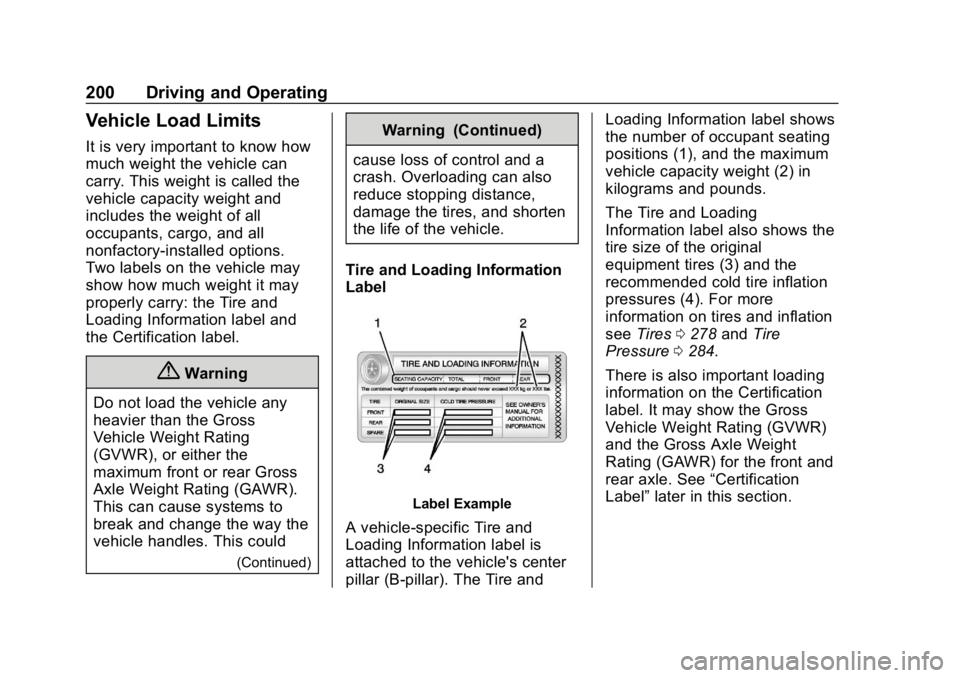
Tire and Loading Information
Label
Label Example
A vehicle-specific Tire and
Loading Information label is
attached to the vehicle's center
pillar (B-pillar). The Tire and Loading Information label shows
the number of occupant seating
positions (1), and the maximum
vehicle capacity weight (2) in
kilograms and pounds.
The Tire and Loading
Information label also shows the
tire size of the original
equipment tires (3) and the
recommended cold tire inflation
pressures (4). For more
information on tires and inflation
see
Tires 0278 andTire
Pressure 0284.
There is also important loading
information on the Certification
label. It may show the Gross
Vehicle Weight Rating (GVWR)
and the Gross Axle Weight
Rating (GAWR) for the front and
rear axle. See “Certification
Label” later in this section.
Page 203 of 370
Chevrolet BOLT EV Owner Manual (GMNA-Localizing-U.S./Canada/Mexico-
11434431) - 2018 - crc - 2/14/18
202 Driving and Operating
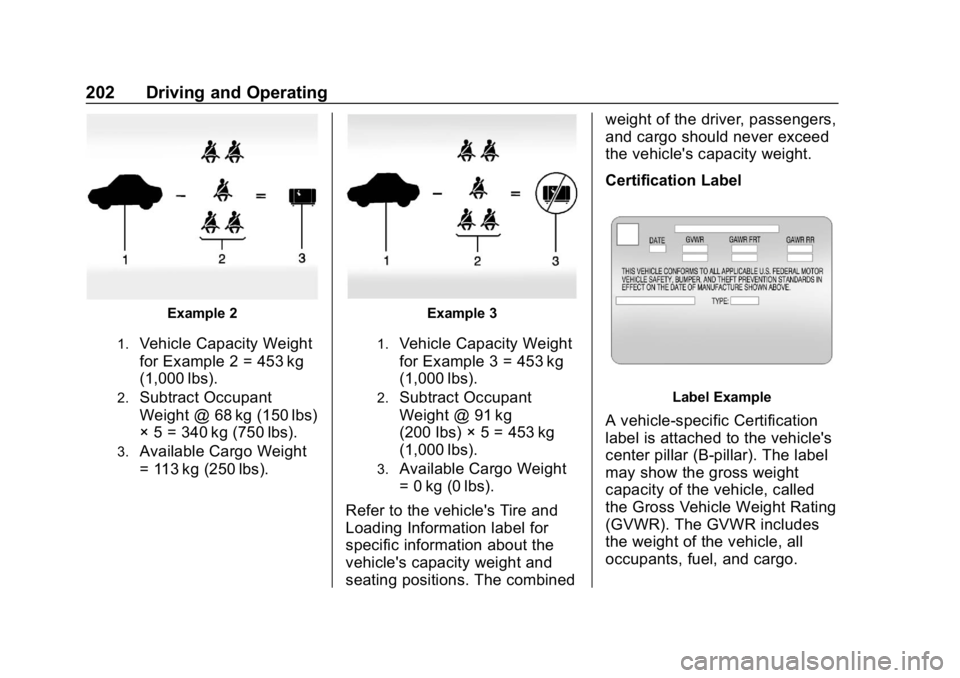
Example 2
1.Vehicle Capacity Weight
for Example 2 = 453 kg
(1,000 lbs).
2.Subtract Occupant
Weight @ 68 kg (150 lbs)
× 5 = 340 kg (750 lbs).
3.Available Cargo Weight
= 113 kg (250 lbs).
Example 3
1.Vehicle Capacity Weight
for Example 3 = 453 kg
(1,000 lbs).
2.Subtract Occupant
Weight @ 91 kg
(200 lbs) × 5 = 453 kg
(1,000 lbs).
3.Available Cargo Weight
= 0 kg (0 lbs).
Refer to the vehicle's Tire and
Loading Information label for
specific information about the
vehicle's capacity weight and
seating positions. The combined weight of the driver, passengers,
and cargo should never exceed
the vehicle's capacity weight.
Certification Label
Label Example
A vehicle-specific Certification
label is attached to the vehicle's
center pillar (B-pillar). The label
may show the gross weight
capacity of the vehicle, called
the Gross Vehicle Weight Rating
(GVWR). The GVWR includes
the weight of the vehicle, all
occupants, fuel, and cargo.
Page 204 of 370
Chevrolet BOLT EV Owner Manual (GMNA-Localizing-U.S./Canada/Mexico-
11434431) - 2018 - crc - 2/14/18
Driving and Operating 203
{Warning
Things inside the vehicle can
strike and injure people in a
sudden stop or turn, or in a
crash.
.Put things in the cargo
area of the vehicle. In the
cargo area, put them as
far forward as possible.
Try to spread the weight
evenly.
.Never stack heavier
things, like suitcases,
inside the vehicle so that
some of them are above
the tops of the seats.
(Continued)
Warning (Continued)
. Do not leave an
unsecured child restraint
in the vehicle.
.Secure loose items in the
vehicle.
.Do not leave a seat
folded down unless
needed.
Starting and
Operating
New Vehicle Break-In
Caution
Avoid making hard stops for the
first 322 km (200 mi). During this
time the new brake linings are not
yet broken in. Hard stops with
new linings can mean premature
wear and earlier replacement.
Follow this breaking-in guideline
every time you get new brake
linings. Following break-in,
vehicle speed and load can be
gradually increased.
Page 213 of 370
Chevrolet BOLT EV Owner Manual (GMNA-Localizing-U.S./Canada/Mexico-
11434431) - 2018 - crc - 2/14/18
212 Driving and Operating
L :This position reduces vehicle
speed without using the brakes. Use
L (Low) on very steep hills, in deep
snow, in mud, or in stop-and-go
traffic.
One-Pedal Driving
With One-Pedal Driving, the
accelerator pedal can be used to
control the deceleration of the
vehicle down to a complete stop.
Completely lifting off the accelerator
pedal will result in aggressive
deceleration. Slowly lifting off the
accelerator pedal will allow the
deceleration of the vehicle to be
adjusted as desired.
To use One-Pedal Driving, place the
vehicle in L (Low). Press the
accelerator pedal to the desired
speed. The deceleration provided by
One-Pedal Driving provides full
regenerative braking and helps
increase energy efficiency. The
brake lamps may come on when the
accelerator pedal is released or
during substantial deceleration from
regenerative braking. While driving on grades, One-Pedal
Driving may not be able to bring the
vehicle to a complete stop or hold
the vehicle at a stop.
If the vehicle cannot maintain the
grade while using One-Pedal
Driving, the Electric Parking
Brake (EPB) may apply to hold the
vehicle stationary. To drive again,
press the accelerator pedal, and the
EPB will automatically disengage.
One-Pedal Driving may become
disabled and the vehicle may
continue to creep forward, or if
stopped, may apply the EPB or shift
to P (Park). This can be caused by
the following:
.
The driver door is open.
. The driver seat belt is
unbuckled.
. The vehicle has remained
stationary for five minutes.
. There is a problem with the
propulsion system. Additional deceleration can be
achieved by using the Regen on
Demand paddle. See
Regenerative
Braking 0215.
Page 238 of 370
Chevrolet BOLT EV Owner Manual (GMNA-Localizing-U.S./Canada/Mexico-
11434431) - 2018 - crc - 2/14/18
Driving and Operating 237
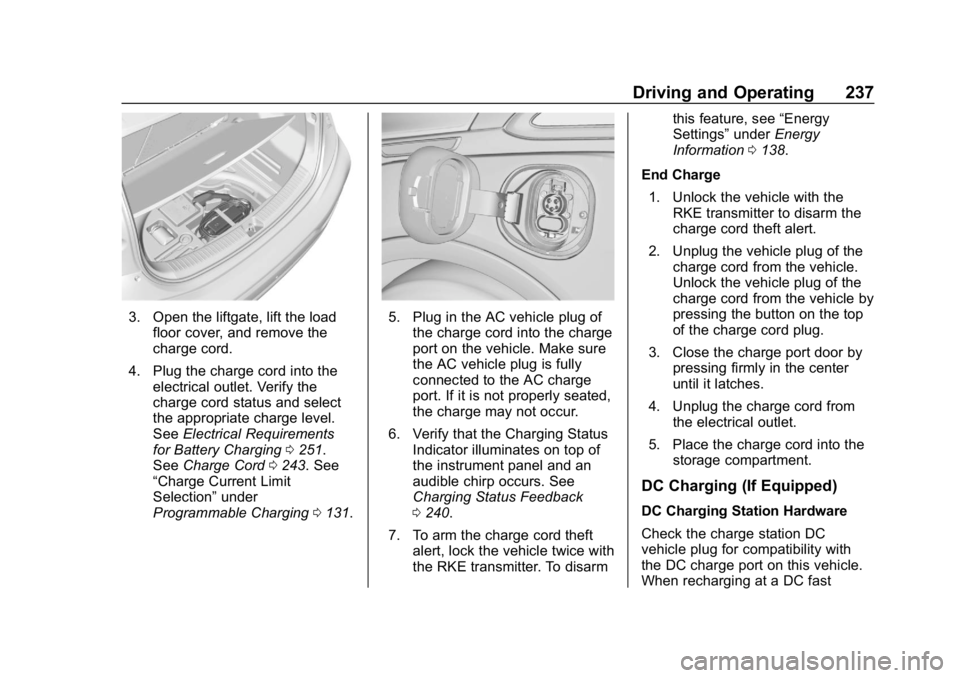
3. Open the liftgate, lift the loadfloor cover, and remove the
charge cord.
4. Plug the charge cord into the electrical outlet. Verify the
charge cord status and select
the appropriate charge level.
See Electrical Requirements
for Battery Charging 0251.
See Charge Cord 0243. See
“Charge Current Limit
Selection” under
Programmable Charging 0131.5. Plug in the AC vehicle plug of
the charge cord into the charge
port on the vehicle. Make sure
the AC vehicle plug is fully
connected to the AC charge
port. If it is not properly seated,
the charge may not occur.
6. Verify that the Charging Status Indicator illuminates on top of
the instrument panel and an
audible chirp occurs. See
Charging Status Feedback
0240.
7. To arm the charge cord theft alert, lock the vehicle twice with
the RKE transmitter. To disarm this feature, see
“Energy
Settings” underEnergy
Information 0138.
End Charge 1. Unlock the vehicle with the RKE transmitter to disarm the
charge cord theft alert.
2. Unplug the vehicle plug of the charge cord from the vehicle.
Unlock the vehicle plug of the
charge cord from the vehicle by
pressing the button on the top
of the charge cord plug.
3. Close the charge port door by pressing firmly in the center
until it latches.
4. Unplug the charge cord from the electrical outlet.
5. Place the charge cord into the storage compartment.
DC Charging (If Equipped)
DC Charging Station Hardware
Check the charge station DC
vehicle plug for compatibility with
the DC charge port on this vehicle.
When recharging at a DC fast
Page 239 of 370
Chevrolet BOLT EV Owner Manual (GMNA-Localizing-U.S./Canada/Mexico-
11434431) - 2018 - crc - 2/14/18
238 Driving and Operating
charge station, the power cable
connected to the vehicle must be
less than 10 m (33 ft) in length.
Follow the steps listed on the
charging station to perform a DC
vehicle charge.
If for any reason DC charging does
not begin or is interrupted, check
the DC charge station display for
messages. Unplug to restart the DC
charge process.
Start Charge1. Make sure the vehicle is parked.
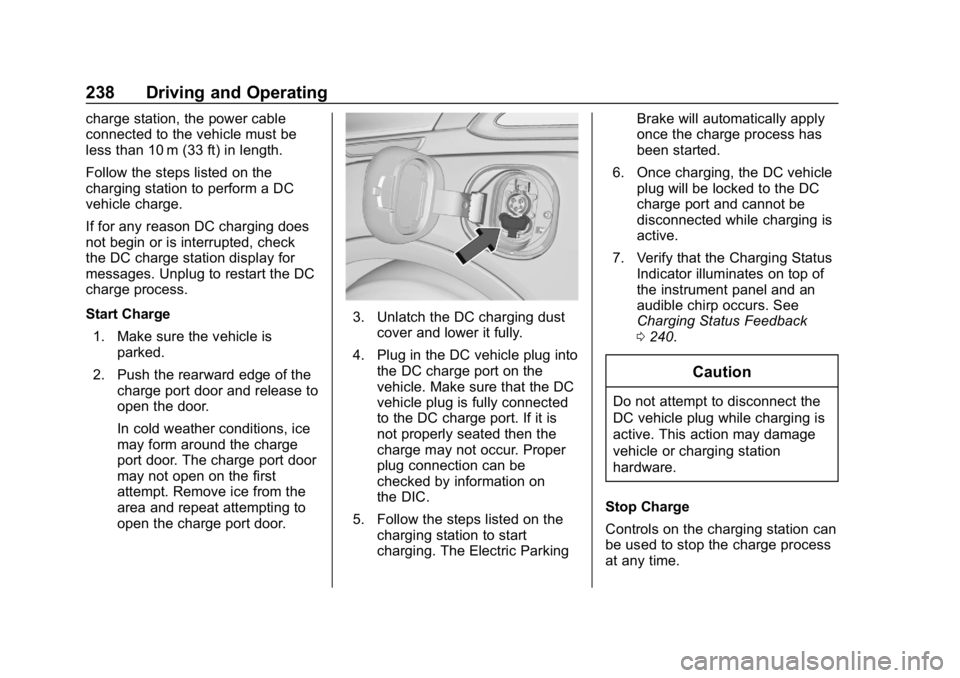
2. Push the rearward edge of the charge port door and release to
open the door.
In cold weather conditions, ice
may form around the charge
port door. The charge port door
may not open on the first
attempt. Remove ice from the
area and repeat attempting to
open the charge port door.
3. Unlatch the DC charging dustcover and lower it fully.
4. Plug in the DC vehicle plug into the DC charge port on the
vehicle. Make sure that the DC
vehicle plug is fully connected
to the DC charge port. If it is
not properly seated then the
charge may not occur. Proper
plug connection can be
checked by information on
the DIC.
5. Follow the steps listed on the charging station to start
charging. The Electric Parking Brake will automatically apply
once the charge process has
been started.
6. Once charging, the DC vehicle plug will be locked to the DC
charge port and cannot be
disconnected while charging is
active.
7. Verify that the Charging Status Indicator illuminates on top of
the instrument panel and an
audible chirp occurs. See
Charging Status Feedback
0240.
Caution
Do not attempt to disconnect the
DC vehicle plug while charging is
active. This action may damage
vehicle or charging station
hardware.
Stop Charge
Controls on the charging station can
be used to stop the charge process
at any time.
Page 249 of 370
Chevrolet BOLT EV Owner Manual (GMNA-Localizing-U.S./Canada/Mexico-
11434431) - 2018 - crc - 2/14/18
248 Driving and Operating
OPSymbol Fault/Condition/Event
(Off (No Light)nFlashing RedRb
Vehicle Fault: The charge cord ground-fault circuit interrupter
(GFCI) has tripped. Ensure that there is no physical damage
to the charge cord, and that the vehicle plug is seated
completely and making a good connection. Reset the charge
cord by unplugging it from the electrical outlet and
re-plugging it. If the fault remains, see an authorized dealer
for service.
OSolid GreennFlashing RedR m
Charge Cord Fault: The charge cord has detected a potential
problem with the charge cord. Reset the charge cord by
unplugging it from the electrical outlet and re-plugging it.
If the fault remains, see an authorized dealer for service.
If no status indicators are lit, ensure
the electrical outlet is powered.
Charge Limit Selection
Charge level selection can be made
using the Charge Mode tab on the
Charging screen on the infotainment
display. See “Charge Current Limit
Selection” underProgrammable
Charging 0131.
{Warning
Using a charge level that exceeds
the electrical circuit or electrical
outlet capacity may start a fire or
damage the electrical circuit. Use
the lowest charge level until a
qualified electrician inspects the
electrical circuit capacity. Use the
(Continued)
Warning (Continued)
lowest charge level if the
electrical circuit or electrical outlet
capacity is not known.
Page 257 of 370
Chevrolet BOLT EV Owner Manual (GMNA-Localizing-U.S./Canada/Mexico-
11434431) - 2018 - crc - 2/14/18
256 Vehicle Care
California Perchlorate
Materials Requirements
Certain types of automotive
applications, such as airbag
initiators, seat belt pretensioners,
and lithium batteries contained in
Remote Keyless Entry transmitters,
may contain perchlorate materials.
Special handling may be necessary.
For additional information, see
www.dtsc.ca.gov/hazardouswaste/
perchlorate.
Accessories and
Modifications
Adding non-dealer accessories or
making modifications to the vehicle
can affect vehicle performance and
safety, including such things as
airbags, braking, stability, ride and
handling, emissions systems,
aerodynamics, durability, and
electronic systems like antilock
brakes, traction control, and stability
control. These accessories or
modifications could even cause
malfunction or damage not covered
by the vehicle warranty.Damage to suspension components
caused by modifying vehicle height
outside of factory settings will not be
covered by the vehicle warranty.
Damage to vehicle components
resulting from modifications or the
installation or use of non-GM
certified parts, including control
module or software modifications, is
not covered under the terms of the
vehicle warranty and may affect
remaining warranty coverage for
affected parts.
GM Accessories are designed to
complement and function with other
systems on the vehicle. See your
dealer to accessorize the vehicle
using genuine GM Accessories
installed by a dealer technician.
Also, see
Adding Equipment to the
Airbag-Equipped Vehicle 081.
Vehicle Checks
Doing Your Own
Service Work
{Warning
Never try to do your own service
on high voltage battery
components. You can be injured
and the vehicle can be damaged
if you try to do your own service
work. Service and repair of these
high voltage battery components
should only be performed by a
trained dealer technician with the
proper knowledge and tools.
Exposure to high voltage can
cause shock, burns, and even
death. The high voltage
components in the vehicle can
only be serviced by technicians
with special training.
(Continued)
Page 275 of 370
Chevrolet BOLT EV Owner Manual (GMNA-Localizing-U.S./Canada/Mexico-
11434431) - 2018 - crc - 2/14/18
274 Vehicle Care
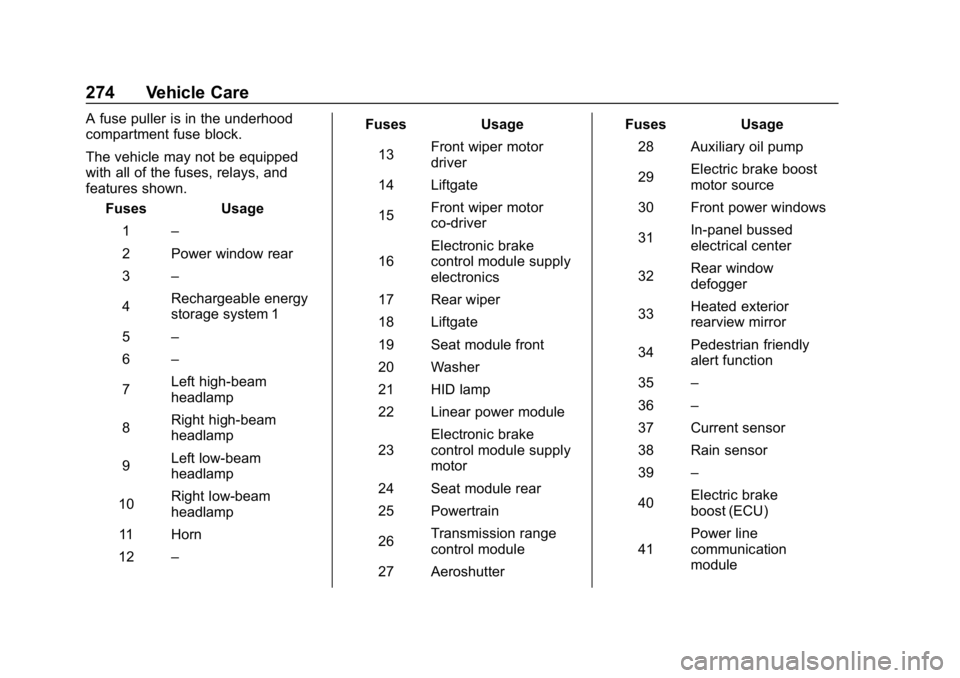
A fuse puller is in the underhood
compartment fuse block.
The vehicle may not be equipped
with all of the fuses, relays, and
features shown.Fuses Usage
1 –
2 Power window rear
3 –
4 Rechargeable energy
storage system 1
5 –
6 –
7 Left high-beam
headlamp
8 Right high-beam
headlamp
9 Left low-beam
headlamp
10 Right low-beam
headlamp
11 Horn
12 – Fuses Usage
13 Front wiper motor
driver
14 Liftgate
15 Front wiper motor
co-driver
16 Electronic brake
control module supply
electronics
17 Rear wiper
18 Liftgate
19 Seat module front
20 Washer
21 HID lamp
22 Linear power module
23 Electronic brake
control module supply
motor
24 Seat module rear
25 Powertrain
26 Transmission range
control module
27 Aeroshutter Fuses Usage
28 Auxiliary oil pump
29 Electric brake boost
motor source
30 Front power windows
31 In-panel bussed
electrical center
32 Rear window
defogger
33 Heated exterior
rearview mirror
34 Pedestrian friendly
alert function
35 –
36 –
37 Current sensor
38 Rain sensor
39 –
40 Electric brake
boost (ECU)
41 Power line
communication
module
Page 283 of 370
Chevrolet BOLT EV Owner Manual (GMNA-Localizing-U.S./Canada/Mexico-
11434431) - 2018 - crc - 2/14/18
282 Vehicle Care
is certified to carry. The speed
rating is the maximum speed a
tire is certified to carry a load.
Tire Terminology and
Definitions
Air Pressure:The amount of
air inside the tire pressing
outward on each square inch of
the tire. Air pressure is
expressed in kPa (kilopascal)
or psi (pounds per square inch).
Accessory Weight
:The
combined weight of optional
accessories. Some examples of
optional accessories are, electric
drive unit, power windows,
power seats, and air
conditioning.
Aspect Ratio
:The relationship
of a tire's height to its width. Belt
:A rubber coated layer of
cords that is located between
the plies and the tread. Cords
may be made from steel or other
reinforcing materials.
Bead
:The tire bead contains
steel wires wrapped by steel
cords that hold the tire onto
the rim.
Bias Ply Tire
:A pneumatic tire
in which the plies are laid at
alternate angles less than
90 degrees to the centerline of
the tread.
Cold Tire Pressure
:The
amount of air pressure in a tire,
measured in kPa (kilopascal)
or psi (pounds per square inch)
before a tire has built up heat
from driving. See Tire Pressure
0 284.
Curb Weight
:The weight of a
motor vehicle with standard and
optional equipment including the maximum capacity of fuel, oil,
and coolant, but without
passengers and cargo.
DOT Markings
:A code molded
into the sidewall of a tire
signifying that the tire is in
compliance with the U.S.
Department of Transportation
(DOT) Motor Vehicle Safety
Standards. The DOT code
includes the Tire Identification
Number (TIN), an alphanumeric
designator which can also
identify the tire manufacturer,
production plant, brand, and
date of production.
GAWR FRT
:Gross Axle Weight
Rating for the front axle. See
Vehicle Load Limits 0200.
GAWR RR
:Gross Axle Weight
Rating for the rear axle. See
Vehicle Load Limits 0200.
GVWR
:Gross Vehicle Weight
Rating. See Vehicle Load Limits
0 200.