length CHEVROLET BOLT EV 2019 Owner's Manual
[x] Cancel search | Manufacturer: CHEVROLET, Model Year: 2019, Model line: BOLT EV, Model: CHEVROLET BOLT EV 2019Pages: 371, PDF Size: 5.51 MB
Page 26 of 371
Chevrolet BOLT EV Owner Manual (GMNA-Localizing-U.S./Canada/Mexico-
12163003) - 2019 - crc - 5/18/18
In Brief 25
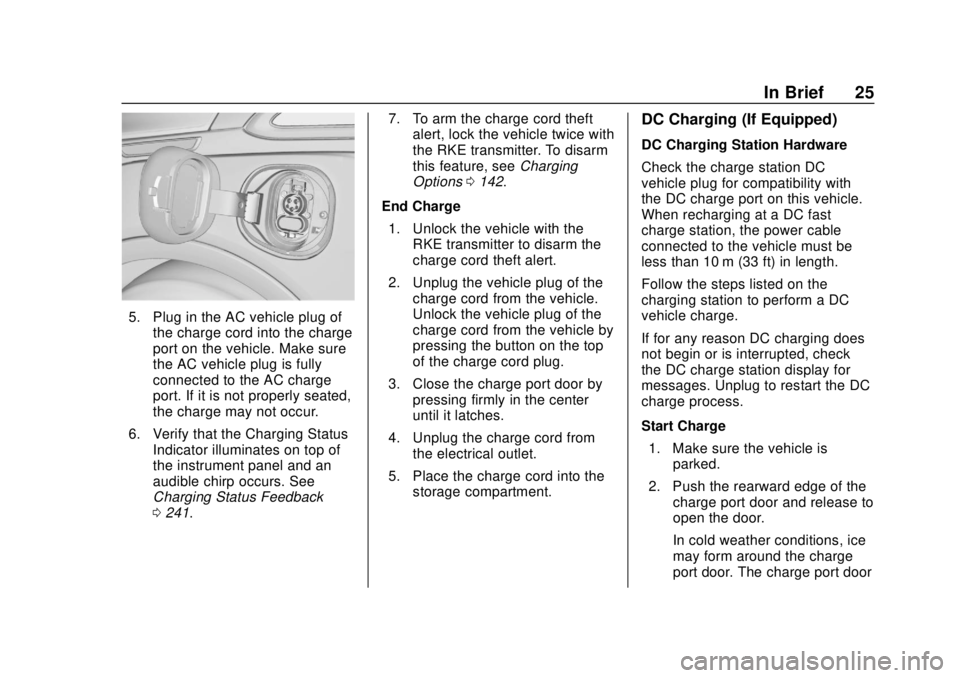
5. Plug in the AC vehicle plug ofthe charge cord into the charge
port on the vehicle. Make sure
the AC vehicle plug is fully
connected to the AC charge
port. If it is not properly seated,
the charge may not occur.
6. Verify that the Charging Status Indicator illuminates on top of
the instrument panel and an
audible chirp occurs. See
Charging Status Feedback
0241. 7. To arm the charge cord theft
alert, lock the vehicle twice with
the RKE transmitter. To disarm
this feature, see Charging
Options 0142.
End Charge 1. Unlock the vehicle with the RKE transmitter to disarm the
charge cord theft alert.
2. Unplug the vehicle plug of the charge cord from the vehicle.
Unlock the vehicle plug of the
charge cord from the vehicle by
pressing the button on the top
of the charge cord plug.
3. Close the charge port door by pressing firmly in the center
until it latches.
4. Unplug the charge cord from the electrical outlet.
5. Place the charge cord into the storage compartment.
DC Charging (If Equipped)
DC Charging Station Hardware
Check the charge station DC
vehicle plug for compatibility with
the DC charge port on this vehicle.
When recharging at a DC fast
charge station, the power cable
connected to the vehicle must be
less than 10 m (33 ft) in length.
Follow the steps listed on the
charging station to perform a DC
vehicle charge.
If for any reason DC charging does
not begin or is interrupted, check
the DC charge station display for
messages. Unplug to restart the DC
charge process.
Start Charge
1. Make sure the vehicle is parked.
2. Push the rearward edge of the charge port door and release to
open the door.
In cold weather conditions, ice
may form around the charge
port door. The charge port door
Page 85 of 371
Chevrolet BOLT EV Owner Manual (GMNA-Localizing-U.S./Canada/Mexico-
12163003) - 2019 - crc - 5/18/18
84 Seats and Restraints
Replacing Airbag System
Parts after a Crash
{Warning
A crash can damage the airbag
systems in the vehicle.
A damaged airbag system may
not properly protect you and your
passenger(s) in a crash, resulting
in serious injury or even death. To
help make sure the airbag
systems are working properly
after a crash, have them
inspected and any necessary
replacements made as soon as
possible.
If an airbag inflates, you will need to
replace airbag system parts. See
your dealer for service.
If the airbag readiness light stays on
after the vehicle is started or comes
on when you are driving, the airbag
system may not work properly. Have
the vehicle serviced right away. See
Airbag Readiness Light 0125.
Child Restraints
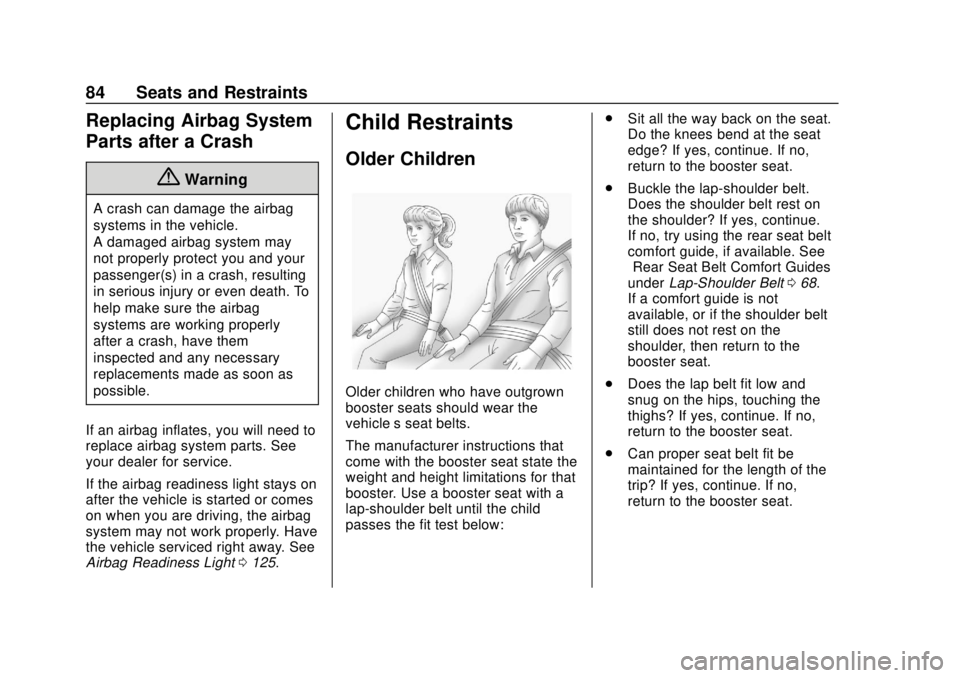
Older Children
Older children who have outgrown
booster seats should wear the
vehicle’s seat belts.
The manufacturer instructions that
come with the booster seat state the
weight and height limitations for that
booster. Use a booster seat with a
lap-shoulder belt until the child
passes the fit test below: .
Sit all the way back on the seat.
Do the knees bend at the seat
edge? If yes, continue. If no,
return to the booster seat.
. Buckle the lap-shoulder belt.
Does the shoulder belt rest on
the shoulder? If yes, continue.
If no, try using the rear seat belt
comfort guide, if available. See
“Rear Seat Belt Comfort Guides”
under Lap-Shoulder Belt 068.
If a comfort guide is not
available, or if the shoulder belt
still does not rest on the
shoulder, then return to the
booster seat.
. Does the lap belt fit low and
snug on the hips, touching the
thighs? If yes, continue. If no,
return to the booster seat.
. Can proper seat belt fit be
maintained for the length of the
trip? If yes, continue. If no,
return to the booster seat.
Page 238 of 371
Chevrolet BOLT EV Owner Manual (GMNA-Localizing-U.S./Canada/Mexico-
12163003) - 2019 - crc - 5/18/18
Driving and Operating 237
Plug-In Charging
This section explains the process
for charging the high voltage battery.
Do not allow the vehicle to remain in
temperature extremes for long
periods without being driven or
plugged in. It is recommended that
the vehicle be plugged in when
temperatures are below 0 °C (32 °F)
and above 32 °C (90 °F) to
maximize high voltage battery life.
When using a 120-volt AC electrical
outlet, it will take approximately
50 hours to charge the vehicle from
a fully depleted battery with the
12 amp AC current setting, allowing
approximately 6 km (4 mi) for every
hour of charging.
When using a 240-volt charging
station, it will take approximately
9.5 hours to charge the vehicle with
the 32 amp setting, allowing
approximately 40 km (25 mi) for
every hour of charging.Charge times will vary based on
battery condition, charge level, and
outside temperature. See
Programmable Charging
0132 for
charge mode selection.
If equipped, the vehicle can be
charged using DC charging
equipment typically found at service
stations and other public locations.
When using a DC charging station
with at least 80 kW of available
power, it will take approximately
30 minutes to recharge from a
depleted battery to an estimated
145 km (90 mi) of driving range.
This time estimate is applicable to
nominal temperature ranges. In
extreme hot or cold conditions, this
time may be lengthened. A full
charge will take additional time.
The charging system may run fans
and pumps that result in sounds
from the vehicle while it is turned
off. Additionally, clicking sounds
may be caused by the electrical
devices used while charging. The vehicle does not require indoor
charging area ventilation before,
during, or after charging.
The vehicle cannot be driven while
the charge cord is plugged into the
vehicle.
Charging Override
A CHARGING OVERRIDE/
INTERRUPTION OCCURRED
message may display to indicate
that a charging override or
interruption has occurred due to one
or more of the following events:
.
Override of the charge settings
by the owner.
. Unintended interruption of AC
power at the vehicle's
charge port.
. Interruption of charging by the
utility company.
There are several screens that will
display depending on the current
charging status. See Programmable
Charging 0132.
Page 240 of 371
Chevrolet BOLT EV Owner Manual (GMNA-Localizing-U.S./Canada/Mexico-
12163003) - 2019 - crc - 5/18/18
Driving and Operating 239
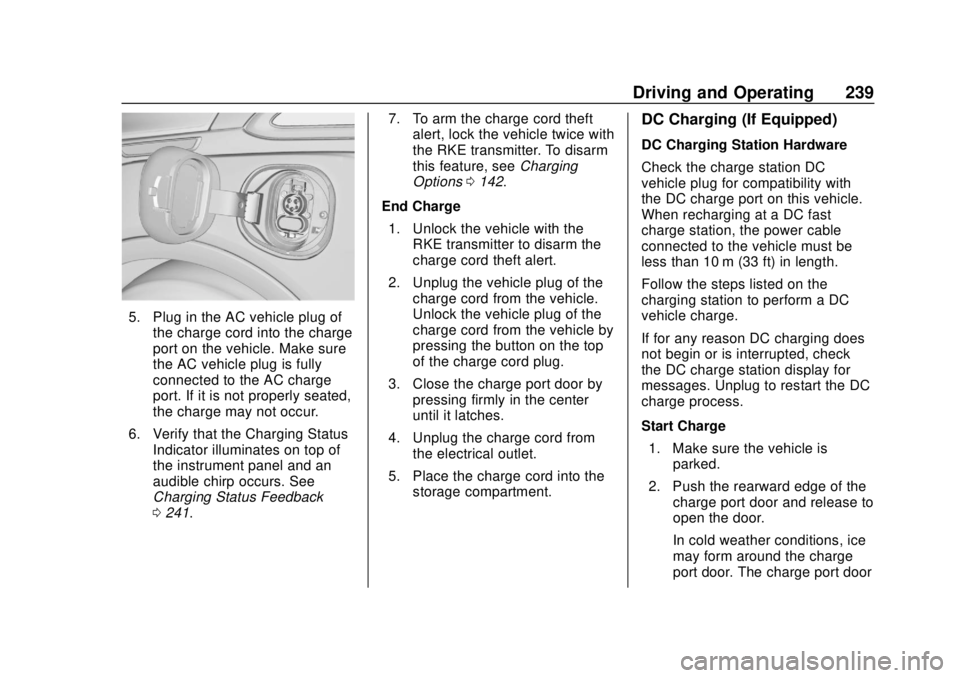
5. Plug in the AC vehicle plug ofthe charge cord into the charge
port on the vehicle. Make sure
the AC vehicle plug is fully
connected to the AC charge
port. If it is not properly seated,
the charge may not occur.
6. Verify that the Charging Status Indicator illuminates on top of
the instrument panel and an
audible chirp occurs. See
Charging Status Feedback
0241. 7. To arm the charge cord theft
alert, lock the vehicle twice with
the RKE transmitter. To disarm
this feature, see Charging
Options 0142.
End Charge 1. Unlock the vehicle with the RKE transmitter to disarm the
charge cord theft alert.
2. Unplug the vehicle plug of the charge cord from the vehicle.
Unlock the vehicle plug of the
charge cord from the vehicle by
pressing the button on the top
of the charge cord plug.
3. Close the charge port door by pressing firmly in the center
until it latches.
4. Unplug the charge cord from the electrical outlet.
5. Place the charge cord into the storage compartment.
DC Charging (If Equipped)
DC Charging Station Hardware
Check the charge station DC
vehicle plug for compatibility with
the DC charge port on this vehicle.
When recharging at a DC fast
charge station, the power cable
connected to the vehicle must be
less than 10 m (33 ft) in length.
Follow the steps listed on the
charging station to perform a DC
vehicle charge.
If for any reason DC charging does
not begin or is interrupted, check
the DC charge station display for
messages. Unplug to restart the DC
charge process.
Start Charge
1. Make sure the vehicle is parked.
2. Push the rearward edge of the charge port door and release to
open the door.
In cold weather conditions, ice
may form around the charge
port door. The charge port door
Page 253 of 371
Chevrolet BOLT EV Owner Manual (GMNA-Localizing-U.S./Canada/Mexico-
12163003) - 2019 - crc - 5/18/18
252 Driving and Operating
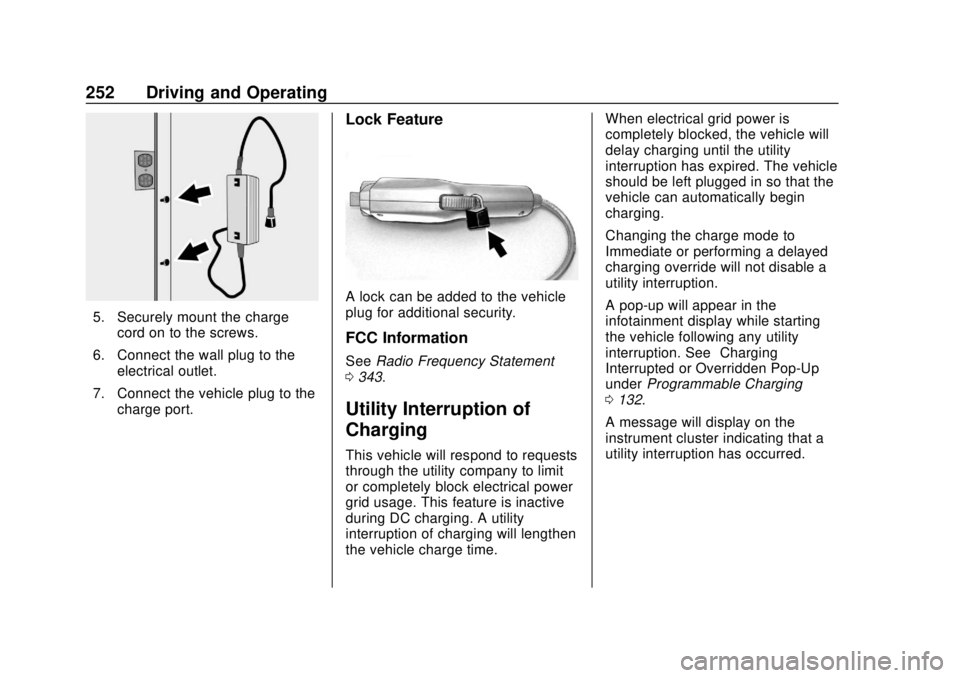
5. Securely mount the chargecord on to the screws.
6. Connect the wall plug to the electrical outlet.
7. Connect the vehicle plug to the charge port.
Lock Feature
A lock can be added to the vehicle
plug for additional security.
FCC Information
See Radio Frequency Statement
0 343.
Utility Interruption of
Charging
This vehicle will respond to requests
through the utility company to limit
or completely block electrical power
grid usage. This feature is inactive
during DC charging. A utility
interruption of charging will lengthen
the vehicle charge time. When electrical grid power is
completely blocked, the vehicle will
delay charging until the utility
interruption has expired. The vehicle
should be left plugged in so that the
vehicle can automatically begin
charging.
Changing the charge mode to
Immediate or performing a delayed
charging override will not disable a
utility interruption.
A pop-up will appear in the
infotainment display while starting
the vehicle following any utility
interruption. See
“Charging
Interrupted or Overridden Pop-Up”
under Programmable Charging
0 132.
A message will display on the
instrument cluster indicating that a
utility interruption has occurred.
Page 268 of 371
Chevrolet BOLT EV Owner Manual (GMNA-Localizing-U.S./Canada/Mexico-
12163003) - 2019 - crc - 5/18/18
Vehicle Care 267
Caution (Continued)
incorrect type of trickle charger.
An AGM/VRLA-compatible
charger must be used, with the
appropriate setting selected.
Follow the trickle charger
manufacturer instructions.
After the battery cable is
reconnected, it is possible that the
vehicle may not operate. If this
happens, the high voltage battery
may need to be charged.
Wiper Blade Replacement
Front Wiper Blade
Replacement
Windshield wiper blades should be
replaced periodically. See the
Maintenance Schedule 0323.
Replacement blades come in
different types and are removed in
different ways. For proper type and
length, see Maintenance
Replacement Parts 0329.
Caution
Allowing the wiper arm to touch
the windshield when no wiper
blade is installed could damage
the windshield. Any damage that
occurs would not be covered by
the vehicle warranty. Do not allow
the wiper arm to touch the
windshield.
To replace the windshield wiper
blade: 1. Pull the windshield wiper assembly away from the
windshield.
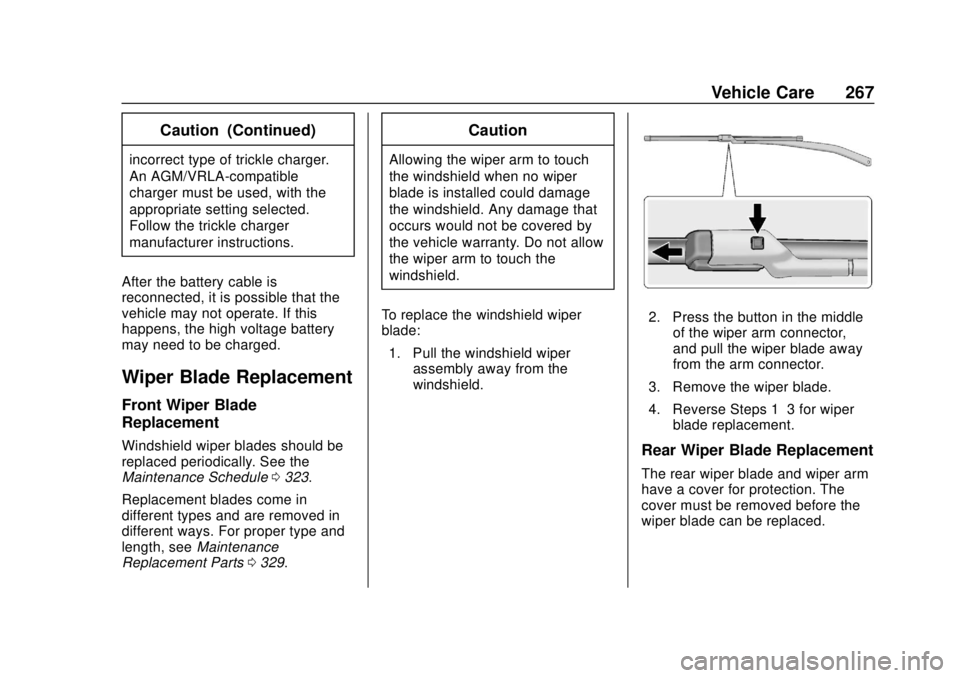
2. Press the button in the middle
of the wiper arm connector,
and pull the wiper blade away
from the arm connector.
3. Remove the wiper blade.
4. Reverse Steps 1–3 for wiper blade replacement.
Rear Wiper Blade Replacement
The rear wiper blade and wiper arm
have a cover for protection. The
cover must be removed before the
wiper blade can be replaced.