Lug nut CHEVROLET BOLT EV 2020 Owner's Manual
[x] Cancel search | Manufacturer: CHEVROLET, Model Year: 2020, Model line: BOLT EV, Model: CHEVROLET BOLT EV 2020Pages: 347, PDF Size: 5.7 MB
Page 110 of 347
Chevrolet BOLT EV Owner Manual (GMNA-Localizing-U.S./Canada/Mexico-
13556250) - 2020 - CRC - 2/11/20
Instruments and Controls 109
Departure :The vehicle will
schedule charging to complete by
the programmed departure time.
The vehicle estimates the charging
schedule based on programmed
departure times, charge rate limits,
electric rate preference and
schedule, and priority charging
settings. If there is not sufficient
time after the charge cord is
plugged in, the vehicle will not be
fully charged by the departure time.
Departure Time Entry
The Departure charge mode allows
for the departure time to be entered
to match your personal schedule.
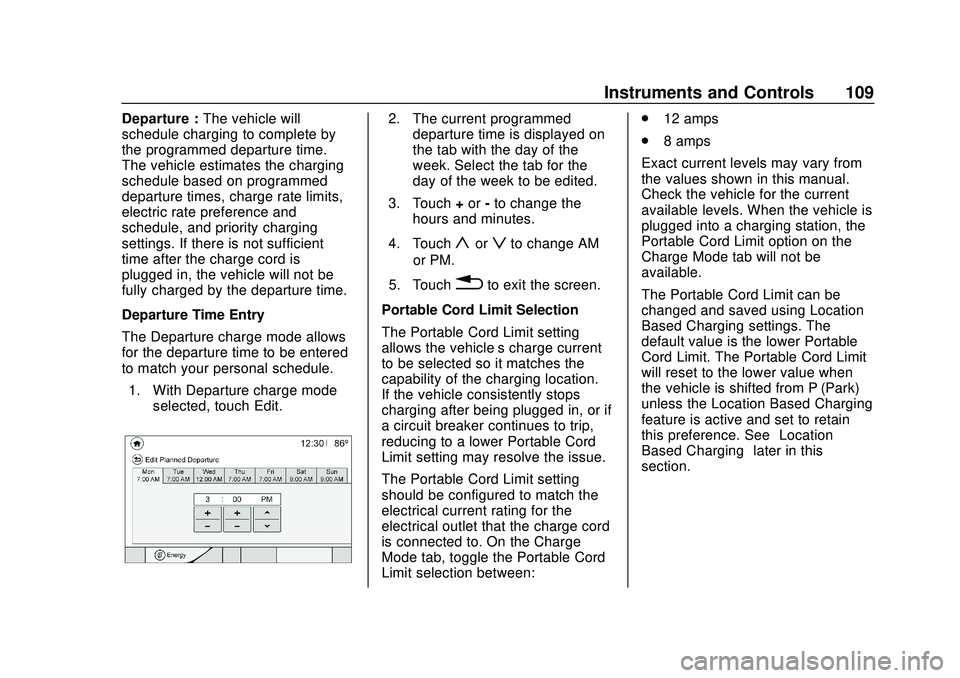
1. With Departure charge mode selected, touch Edit.2. The current programmeddeparture time is displayed on
the tab with the day of the
week. Select the tab for the
day of the week to be edited.
3. Touch +or -to change the
hours and minutes.
4. Touch
yorzto change AM
or PM.
5. Touch
0to exit the screen.
Portable Cord Limit Selection
The Portable Cord Limit setting
allows the vehicle’s charge current
to be selected so it matches the
capability of the charging location.
If the vehicle consistently stops
charging after being plugged in, or if
a circuit breaker continues to trip,
reducing to a lower Portable Cord
Limit setting may resolve the issue.
The Portable Cord Limit setting
should be configured to match the
electrical current rating for the
electrical outlet that the charge cord
is connected to. On the Charge
Mode tab, toggle the Portable Cord
Limit selection between: .
12 amps
. 8 amps
Exact current levels may vary from
the values shown in this manual.
Check the vehicle for the current
available levels. When the vehicle is
plugged into a charging station, the
Portable Cord Limit option on the
Charge Mode tab will not be
available.
The Portable Cord Limit can be
changed and saved using Location
Based Charging settings. The
default value is the lower Portable
Cord Limit. The Portable Cord Limit
will reset to the lower value when
the vehicle is shifted from P (Park)
unless the Location Based Charging
feature is active and set to retain
this preference. See “Location
Based Charging” later in this
section.
Page 173 of 347
Chevrolet BOLT EV Owner Manual (GMNA-Localizing-U.S./Canada/Mexico-
13556250) - 2020 - CRC - 2/11/20
172 Driving and Operating
Allow the vehicle to warm up for
20 minutes before driving.
If possible, use a level 2 (32 amp)
high power charge station for best
results. This allows the interior of
the vehicle and high voltage battery
to warm to optimal temperature.
Vehicle Charging/Maintenance
Charging
Keep the vehicle plugged in, even
when fully charged, to keep the
battery temperature ready for the
next drive. This is important when
outside temperatures are extremely
hot or cold.
Maintenance
Always keep the tires properly
inflated and the vehicle properly
aligned.
The weight of excess cargo in the
vehicle affects efficiency and range.
Avoid carrying more than is needed.
Avoid unnecessary use of electrical
accessories. Power used for
functions other than propelling the
vehicle will reduce EV range.Using a rooftop carrier will reduce
efficiency due to additional weight
and drag.
Distracted Driving
Distraction comes in many forms
and can take your focus from the
task of driving. Exercise good
judgment and do not let other
activities divert your attention away
from the road. Many local
governments have enacted laws
regarding driver distraction. Become
familiar with the local laws in
your area.
To avoid distracted driving, keep
your eyes on the road, keep your
hands on the steering wheel, and
focus your attention on driving.
.
Do not use a mobile phone in
demanding driving situations.
Use a hands-free method to
place or receive necessary
phone calls.
. Watch the road. Do not read,
take notes, or look up
information on mobile phones or
other electronic devices. .
Designate a front seat
passenger to handle potential
distractions.
. Become familiar with vehicle
features before driving, such as
programming favorite radio
stations and adjusting climate
control and seat settings.
Program all trip information into
any navigation device prior to
driving.
. Wait until the vehicle is parked
to retrieve items that have fallen
to the floor.
. Stop or park the vehicle to tend
to children.
. Keep pets in an appropriate
carrier or restraint.
. Avoid stressful conversations
while driving, whether with a
passenger or on a mobile
phone.
Page 215 of 347
Chevrolet BOLT EV Owner Manual (GMNA-Localizing-U.S./Canada/Mexico-
13556250) - 2020 - CRC - 2/11/20
214 Driving and Operating
Plug-In Charging
This section explains the process
for charging the high voltage battery.
Do not allow the vehicle to remain in
temperature extremes for long
periods without being driven or
plugged in. It is recommended that
the vehicle be plugged in when
temperatures are below 0 °C (32 °F)
and above 32 °C (90 °F) to
maximize high voltage battery life.
When using a 120-volt AC electrical
outlet, it will take approximately
55 hours to charge the vehicle from
a fully depleted battery with the
12 amp AC current setting, allowing
approximately 6 km (4 mi) for every
hour of charging.
When using a 240-volt charging
station, it will take approximately
10 hours to charge the vehicle with
the 32 amp setting, allowing
approximately 40 km (25 mi) for
every hour of charging.Charge times will vary based on
battery condition, charge level, and
outside temperature. See
Programmable Charging
0107 for
charge mode selection.
If equipped, the vehicle can be
charged using DC charging
equipment typically found at service
stations and other public locations.
When using a DC charging station
with at least 80 kW of available
power, it will take approximately
30 minutes to recharge from a
depleted battery to an estimated
145 km (90 mi) of driving range.
This time estimate is applicable to
nominal temperature ranges. In
extreme hot or cold conditions, this
time may be lengthened. A full
charge will take additional time.
The charging system may run fans
and pumps that result in sounds
from the vehicle while it is turned
off. Additionally, clicking sounds
may be caused by the electrical
devices used while charging.
The vehicle does not require indoor
charging area ventilation before,
during, or after charging. The vehicle cannot be driven while
the charge cord is plugged into the
vehicle.
Charging Override
A CHARGING OVERRIDE/
INTERRUPTION OCCURRED
message may display to indicate
that a charging override or
interruption has occurred due to one
or more of the following events:
.
Override of the charge settings
by the owner.
. Unintended interruption of AC
power at the vehicle's
charge port.
. Interruption of charging by the
utility company.
There are several screens that will
display depending on the current
charging status. See Programmable
Charging 0107.
A loss of AC power alert may sound
for a short time if AC power is lost
for over one minute. This sound
alert can be turned off. See Vehicle
Personalization 0121.
Page 279 of 347
Chevrolet BOLT EV Owner Manual (GMNA-Localizing-U.S./Canada/Mexico-
13556250) - 2020 - CRC - 2/11/20
278 Vehicle Care
and Compressor Kit without Sealant
to Inflate a Tire (Not Punctured)”
below.
If the tire has been separated from
the wheel, has damaged sidewalls,
or has a large puncture, the tire is
too severely damaged for the tire
sealant and compressor kit to be
effective. SeeRoadside Assistance
Program 0316.
Read and follow all of the tire
sealant and compressor kit
instructions.
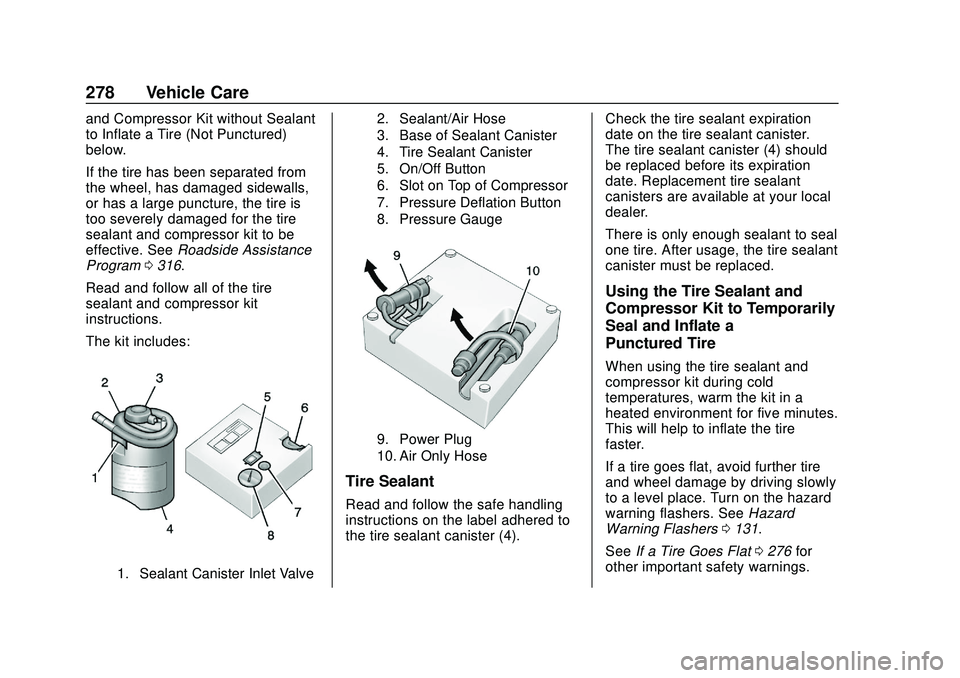
The kit includes:
1. Sealant Canister Inlet Valve 2. Sealant/Air Hose
3. Base of Sealant Canister
4. Tire Sealant Canister
5. On/Off Button
6. Slot on Top of Compressor
7. Pressure Deflation Button
8. Pressure Gauge
9. Power Plug
10. Air Only Hose
Tire Sealant
Read and follow the safe handling
instructions on the label adhered to
the tire sealant canister (4).
Check the tire sealant expiration
date on the tire sealant canister.
The tire sealant canister (4) should
be replaced before its expiration
date. Replacement tire sealant
canisters are available at your local
dealer.
There is only enough sealant to seal
one tire. After usage, the tire sealant
canister must be replaced.
Using the Tire Sealant and
Compressor Kit to Temporarily
Seal and Inflate a
Punctured Tire
When using the tire sealant and
compressor kit during cold
temperatures, warm the kit in a
heated environment for five minutes.
This will help to inflate the tire
faster.
If a tire goes flat, avoid further tire
and wheel damage by driving slowly
to a level place. Turn on the hazard
warning flashers. See
Hazard
Warning Flashers 0131.
See If a Tire Goes Flat 0276 for
other important safety warnings.
Page 281 of 347
Chevrolet BOLT EV Owner Manual (GMNA-Localizing-U.S./Canada/Mexico-
13556250) - 2020 - CRC - 2/11/20
280 Vehicle Care
9. Start the vehicle. The vehiclemust be running while using
the air compressor.
10. Press the on/off button (5) to turn the tire sealant and
compressor kit on.
The compressor will inject
sealant and air into the tire.
The pressure gauge (8) will
initially show a high pressure
while the compressor pushes
the sealant into the tire. Once
the sealant is completely
dispersed into the tire, the
pressure will quickly drop and
start to rise again as the tire
inflates with air only.
11. Inflate the tire to the recommended inflation
pressure using the pressure
gauge (8). The recommended
inflation pressure can be found
on the Tire and Loading
Information label. See Tire
Pressure 0263.
The pressure gauge (8) may
read higher than the actual tire
pressure while the compressor is on. Turn the compressor off
to get an accurate pressure
reading. The compressor may
be turned on/off until the
correct pressure is reached.
Caution
If the recommended pressure
cannot be reached after
approximately 25 minutes, the
vehicle should not be driven
farther. The tire is too severely
damaged and the tire sealant and
compressor kit cannot inflate the
tire. Remove the power plug from
the accessory power outlet and
unscrew the inflating hose from
the tire valve. See
Roadside
Assistance Program 0316.
12. Press the on/off button (5) to turn the tire sealant and
compressor kit off.
The tire is not sealed and will
continue to leak air until the
vehicle is driven and the
sealant is distributed in the tire. Therefore, Steps 13–21 must
be done immediately after
Step 12.
Be careful while handling the
tire sealant and compressor kit
as it could be warm after
usage.
13. Unplug the power plug (9) from the accessory power outlet in
the vehicle.
14. Turn the sealant/air hose (2) counterclockwise to remove it
from the tire valve stem.
15. Replace the tire valve stem cap.
16. Remove the tire sealant canister (4) from the slot on top
of the compressor (6).
17. Turn the air only hose (10) counterclockwise to remove it
from the tire sealant canister
inlet valve (1).
18. Turn the sealant/air hose (2) clockwise onto the sealant
canister inlet valve (1) to
prevent sealant leakage.
Page 284 of 347
Chevrolet BOLT EV Owner Manual (GMNA-Localizing-U.S./Canada/Mexico-
13556250) - 2020 - CRC - 2/11/20
Vehicle Care 283
Caution
If the recommended pressure
cannot be reached after
approximately 25 minutes, the
vehicle should not be driven
farther. The tire is too severely
damaged and the tire sealant and
compressor kit cannot inflate the
tire. Remove the power plug from
the accessory power outlet and
unscrew the inflating hose from
the tire valve. SeeRoadside
Assistance Program 0316.
10. Press the on/off button (5) to turn the tire sealant and
compressor kit off.
Be careful while handling the
compressor as it could be
warm after usage.
11. Unplug the power plug (9) from the accessory power outlet in
the vehicle.
12. Turn the air only hose (10) counterclockwise to remove it
from the tire valve stem. 13. Replace the tire valve
stem cap.
14. Return the air only hose (10) and power plug (9) back to
their original storage location.
15. Return the equipment to its original storage location in the
vehicle.
The tire sealant and compressor kit
has accessory adapters located in a
compartment on the bottom of its
housing that can be used to inflate
air mattresses, balls, etc.
Storing the Tire Sealant
and Compressor Kit
To access the tire sealant and
compressor kit: 1. Open the liftgate. See Liftgate
0 21.
2. Remove the load floor.
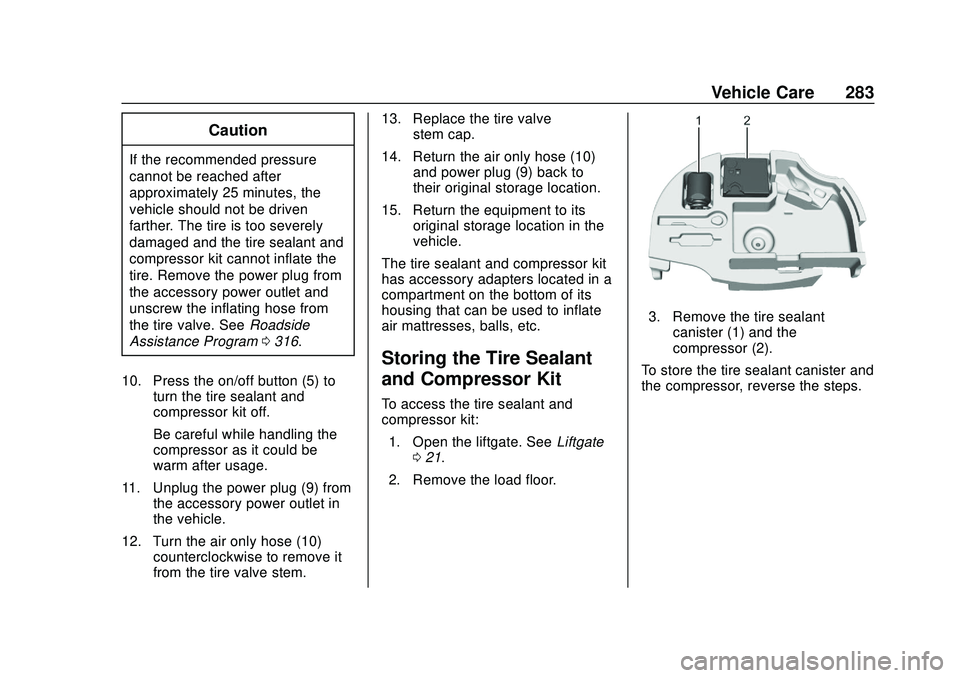
3. Remove the tire sealant canister (1) and the
compressor (2).
To store the tire sealant canister and
the compressor, reverse the steps.