run flat CHEVROLET BOLT EV 2021 Owner's Manual
[x] Cancel search | Manufacturer: CHEVROLET, Model Year: 2021, Model line: BOLT EV, Model: CHEVROLET BOLT EV 2021Pages: 293, PDF Size: 9.21 MB
Page 14 of 293

Chevrolet Bolt EV Owner Manual (GMNA-Localizing-U.S./Canada-
14637856) - 2021 - CRC - 10/2/20
Keys, Doors, and Windows 13
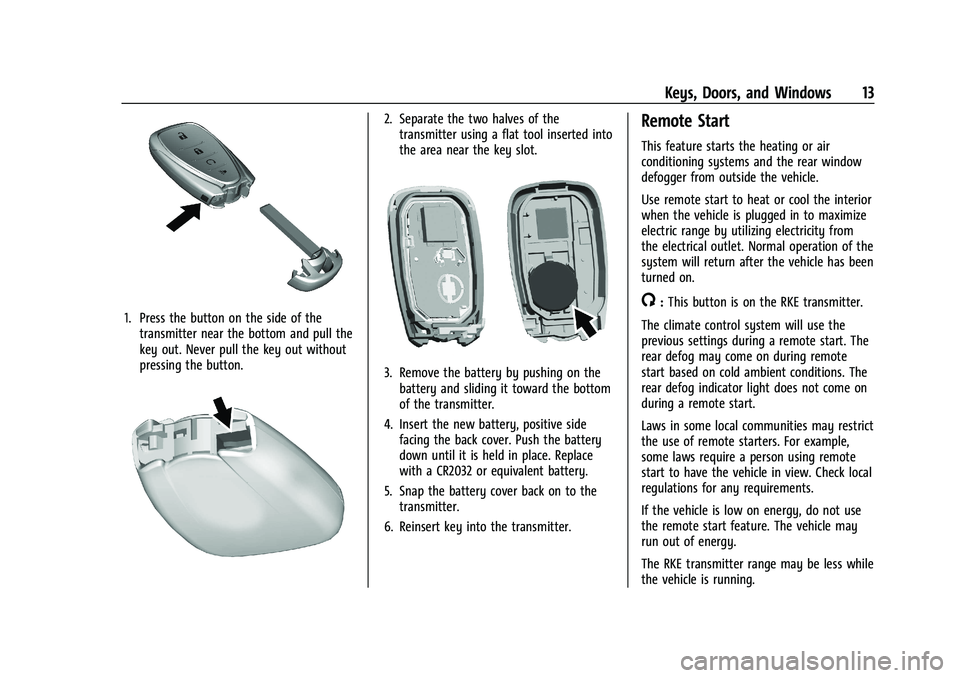
1. Press the button on the side of thetransmitter near the bottom and pull the
key out. Never pull the key out without
pressing the button.
2. Separate the two halves of thetransmitter using a flat tool inserted into
the area near the key slot.
3. Remove the battery by pushing on thebattery and sliding it toward the bottom
of the transmitter.
4. Insert the new battery, positive side facing the back cover. Push the battery
down until it is held in place. Replace
with a CR2032 or equivalent battery.
5. Snap the battery cover back on to the transmitter.
6. Reinsert key into the transmitter.
Remote Start
This feature starts the heating or air
conditioning systems and the rear window
defogger from outside the vehicle.
Use remote start to heat or cool the interior
when the vehicle is plugged in to maximize
electric range by utilizing electricity from
the electrical outlet. Normal operation of the
system will return after the vehicle has been
turned on.
/: This button is on the RKE transmitter.
The climate control system will use the
previous settings during a remote start. The
rear defog may come on during remote
start based on cold ambient conditions. The
rear defog indicator light does not come on
during a remote start.
Laws in some local communities may restrict
the use of remote starters. For example,
some laws require a person using remote
start to have the vehicle in view. Check local
regulations for any requirements.
If the vehicle is low on energy, do not use
the remote start feature. The vehicle may
run out of energy.
The RKE transmitter range may be less while
the vehicle is running.
Page 236 of 293

Chevrolet Bolt EV Owner Manual (GMNA-Localizing-U.S./Canada-
14637856) - 2021 - CRC - 10/2/20
Vehicle Care 235
If the vehicle has an accessory power
outlet, do not use the cigarette lighter.
If the vehicle only has a cigarette lighter,
use the cigarette lighter.
Do not pinch the power plug cord in the
door or window.
9. Start the vehicle. The vehicle must be running while using the air compressor.
10. Press the on/off button (5) to turn the tire sealant and compressor kit on.
The compressor will inject sealant and air
into the tire.
The pressure gauge (8) will initially show
a high pressure while the compressor
pushes the sealant into the tire. Once
the sealant is completely dispersed into
the tire, the pressure will quickly drop
and start to rise again as the tire inflates
with air only.
11. Inflate the tire to the recommended inflation pressure using the pressure
gauge (8). The recommended inflation
pressure can be found on the Tire and
Loading Information label. See Tire
Pressure 0221.
The pressure gauge (8) may read higher
than the actual tire pressure while the
compressor is on. Turn the compressor off to get an accurate pressure reading.
The compressor may be turned on/off
until the correct pressure is reached.
Caution
If the recommended pressure cannot be
reached after approximately 25 minutes,
the vehicle should not be driven farther.
The tire is too severely damaged and the
tire sealant and compressor kit cannot
inflate the tire. Remove the power plug
from the accessory power outlet and
unscrew the inflating hose from the tire
valve. See
Roadside Assistance Program
0 266.
12. Press the on/off button (5) to turn the tire sealant and compressor kit off.
The tire is not sealed and will continue
to leak air until the vehicle is driven and
the sealant is distributed in the tire.
Therefore, Steps 13–21 must be done
immediately after Step 12.
Be careful while handling the tire sealant
and compressor kit as it could be warm
after usage.
13. Unplug the power plug (9) from the accessory power outlet in the vehicle. 14. Turn the sealant/air hose (2)
counterclockwise to remove it from the
tire valve stem.
15. Replace the tire valve stem cap.
16. Remove the tire sealant canister (4) from the slot on top of the compressor (6).
17. Turn the air only hose (10) counterclockwise to remove it from the
tire sealant canister inlet valve (1).
18. Turn the sealant/air hose (2) clockwise onto the sealant canister inlet valve (1)
to prevent sealant leakage.
19. Return the air only hose (10) and power plug (9) back to their original storage
location.
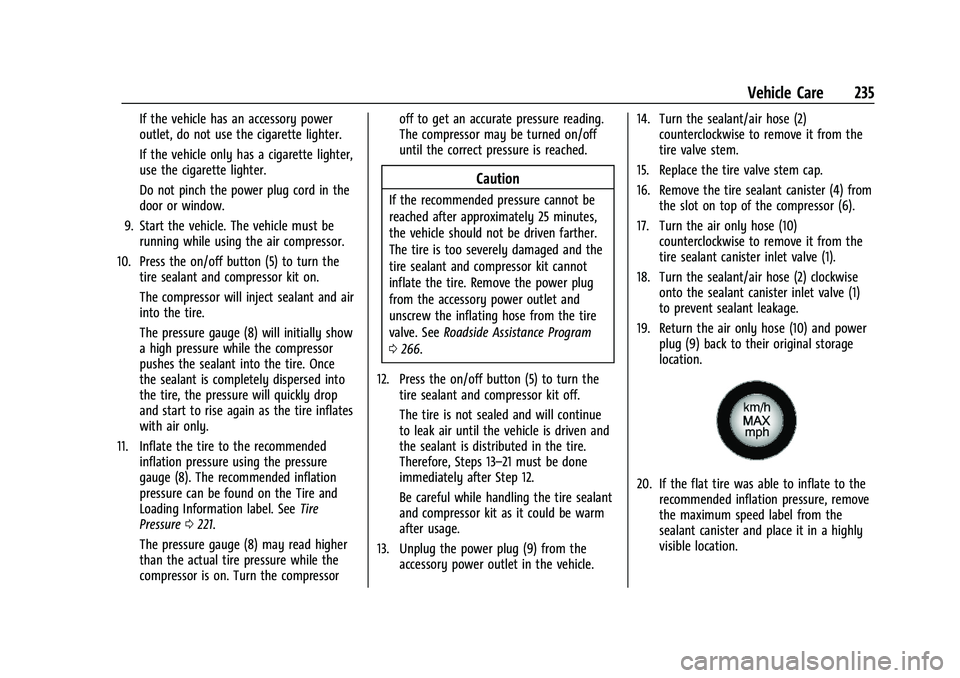
20. If the flat tire was able to inflate to therecommended inflation pressure, remove
the maximum speed label from the
sealant canister and place it in a highly
visible location.
Page 238 of 293

Chevrolet Bolt EV Owner Manual (GMNA-Localizing-U.S./Canada-
14637856) - 2021 - CRC - 10/2/20
Vehicle Care 237
1. Remove the compressor from its storagelocation. See Storing the Tire Sealant and
Compressor Kit 0238.
2. Remove the air only hose (10) and the power plug (9) from the bottom of the
compressor.
3. Place the compressor on the ground near the flat tire.
Make sure the tire valve stem is
positioned close to the ground so the
hose will reach it.
4. Remove the valve stem cap from the flat tire by turning it counterclockwise.
5. Attach the air only hose (10) to the tire valve stem by turning it clockwise until
tight.
6. Plug the power plug (9) into the accessory power outlet in the vehicle.
Unplug all items from other accessory
power outlets. See Power Outlets076.
If the vehicle has an accessory power
outlet, do not use the cigarette lighter.
If the vehicle only has a cigarette lighter,
use the cigarette lighter.
Do not pinch the power plug cord in the
door or window. 7. Start the vehicle. The vehicle must be
running while using the air compressor.
8. Press the on/off button (5) to turn the tire sealant and compressor kit on.
The compressor will inflate the tire with
air only.
9. Inflate the tire to the recommended inflation pressure using the pressure
gauge (8). The recommended inflation
pressure can be found on the Tire and
Loading Information label. See Tire
Pressure 0221.
The pressure gauge (8) may read higher
than the actual tire pressure while the
compressor is on. Turn the compressor
off to get an accurate pressure reading.
The compressor may be turned on/off
until the correct pressure is reached.
Caution
If the recommended pressure cannot be
reached after approximately 25 minutes,
the vehicle should not be driven farther.
The tire is too severely damaged and the
tire sealant and compressor kit cannot
inflate the tire. Remove the power plug
from the accessory power outlet and
(Continued)
Caution (Continued)
unscrew the inflating hose from the tire
valve. See Roadside Assistance Program
0 266.
10. Press the on/off button (5) to turn the tire sealant and compressor kit off.
Be careful while handling the compressor
as it could be warm after usage.
11. Unplug the power plug (9) from the accessory power outlet in the vehicle.
12. Turn the air only hose (10) counterclockwise to remove it from the
tire valve stem.
13. Replace the tire valve stem cap.
14. Return the air only hose (10) and power plug (9) back to their original storage
location.
15. Return the equipment to its original storage location in the vehicle.
The tire sealant and compressor kit has
accessory adapters located in a
compartment on the bottom of its housing
that can be used to inflate air mattresses,
balls, etc.
Page 286 of 293

Chevrolet Bolt EV Owner Manual (GMNA-Localizing-U.S./Canada-
14637856) - 2021 - CRC - 10/2/20
Index 285
E
Electric Drive Unit . . . . . . . . . . . . . . . . . . . . . . . 160
Electric Parking Brake . . . . . . . . . . . . . . . . . . . . 164
Electric Parking Brake Light . . . . . . . . . . . . . . . 86
Electrical Equipment, Add-On . . . . . . . . . . . . 195
Electrical Requirements for BatteryCharging . . . . . . . . . . . . . . . . . . . . . . . . . . . . . . . 194
Electrical System Fuses and Circuit Breakers . . . . . . . . . . . . . . 211
Instrument Panel Fuse Block . . . . . . . . . . . 214
Overload . . . . . . . . . . . . . . . . . . . . . . . . . . . . . . . 210
Emergency OnStar . . . . . . . . . . . . . . . . . . . . . . . . . . . . . . . . . 275
Energy Efficiency
Driving . . . . . . . . . . . . . . . . . . . . . . . . . . . . . . . . 147
Energy Information . . . . . . . . . . . . . . . . . . . . . . . 97
Engine Cooling System . . . . . . . . . . . . . . . . . . . . . . . . 201
Entry Lighting . . . . . . . . . . . . . . . . . . . . . . . . . . . . 111
Event Data Recorders . . . . . . . . . . . . . . . . . . . . 272
Exit Lighting . . . . . . . . . . . . . . . . . . . . . . . . . . . . . . 112
Extended Parking . . . . . . . . . . . . . . . . . . . . . . . . 159
Extender, Seat Belt . . . . . . . . . . . . . . . . . . . . . . . .37
Exterior Lamp Controls . . . . . . . . . . . . . . . . . . . 107
Exterior Lamps Off Reminder . . . . . . . . . . . . 108
Exterior Lighting Battery Saver . . . . . . . . . . . 112
F
Flash-to-Pass . . . . . . . . . . . . . . . . . . . . . . . . . . . . . 109
Flashers, Hazard Warning . . . . . . . . . . . . . . . . .110
Flat Tire . . . . . . . . . . . . . . . . . . . . . . . . . . . . . . . . . 232
Floor Mats . . . . . . . . . . . . . . . . . . . . . . . . . . . . . . . 250
Fluid
Brakes . . . . . . . . . . . . . . . . . . . . . . . . . . . . . . . . . 203
Washer . . . . . . . . . . . . . . . . . . . . . . . . . . . . . . . . 202
Folding Mirrors . . . . . . . . . . . . . . . . . . . . . . . . . . . 20
Forward Collision Alert (FCA) System . . . . .174
Frequency Statement Radio . . . . . . . . . . . . . . . . . . . . . . . . . . . . . . . . . . . 271
Front Pedestrian Braking (FPB) System . . . . . . . . . . . . . . . . . . . . . . . . . . . . . . . . 176
Front Seats Adjustment . . . . . . . . . . . . . . . . . . . . . . . . . . . . . 28
Heated . . . . . . . . . . . . . . . . . . . . . . . . . . . . . . . . . 29
Fuses Fuses and Circuit Breakers . . . . . . . . . . . . . . 211
Instrument Panel Fuse Block . . . . . . . . . . . 214
Underhood Compartment . . . . . . . . . . . . . . . 211
G
Gas Strut(s) . . . . . . . . . . . . . . . . . . . . . . . . . . . . . . 207
Gauges
Battery . . . . . . . . . . . . . . . . . . . . . . . . . . . . . . . . . 82
Driver Efficiency . . . . . . . . . . . . . . . . . . . . . . . . 82
Odometer . . . . . . . . . . . . . . . . . . . . . . . . . . . . . . 81 Gauges (cont'd)
Power Indicator . . . . . . . . . . . . . . . . . . . . . . . . . 83
Speedometer . . . . . . . . . . . . . . . . . . . . . . . . . . . 81
Trip Odometer . . . . . . . . . . . . . . . . . . . . . . . . . . 82
Warning Lights and Indicators . . . . . . . . . . 79
General Information Service and Maintenance . . . . . . . . . . . . . . 252
Towing . . . . . . . . . . . . . . . . . . . . . . . . . . . . . . . . 194
Vehicle Care . . . . . . . . . . . . . . . . . . . . . . . . . . . 197
GM Mobility Reimbursement Program . . . . . . . . . . . . . . . . . . . . . . . . . . . . . . . 265
H
Halogen Bulbs . . . . . . . . . . . . . . . . . . . . . . . . . . . 209
Hands-Free Phone . . . . . . . . . . . . . . . . . . . . . . . . 130
Hazard Warning Flashers . . . . . . . . . . . . . . . . .110
Head Restraints . . . . . . . . . . . . . . . . . . . . . . . . . . . 26
HeadlampsAiming . . . . . . . . . . . . . . . . . . . . . . . . . . . . . . . . 208
Automatic . . . . . . . . . . . . . . . . . . . . . . . . . . . . . 109
Bulb Replacement . . . . . . . . . . . . . . . . . . . . . . 208
Daytime Running Lamps (DRL) . . . . . . . . . 109
Flash-to-Pass . . . . . . . . . . . . . . . . . . . . . . . . . . . 109
High Intensity Discharge (HID)Lighting . . . . . . . . . . . . . . . . . . . . . . . . . . . . . . 209
High-Beam On Light . . . . . . . . . . . . . . . . . . . . 89
High/Low Beam Changer . . . . . . . . . . . . . . 108
Lamps On Reminder . . . . . . . . . . . . . . . . . . . . 89