start stop button CHEVROLET BOLT EV 2022 Owners Manual
[x] Cancel search | Manufacturer: CHEVROLET, Model Year: 2022, Model line: BOLT EV, Model: CHEVROLET BOLT EV 2022Pages: 316, PDF Size: 11.45 MB
Page 92 of 316
Chevrolet BOLT EV Owner Manual (GMNA-Localizing-U.S./Canada-
15082216) - 2022 - CRC - 6/25/21
Instruments and Controls 91
Charging Status
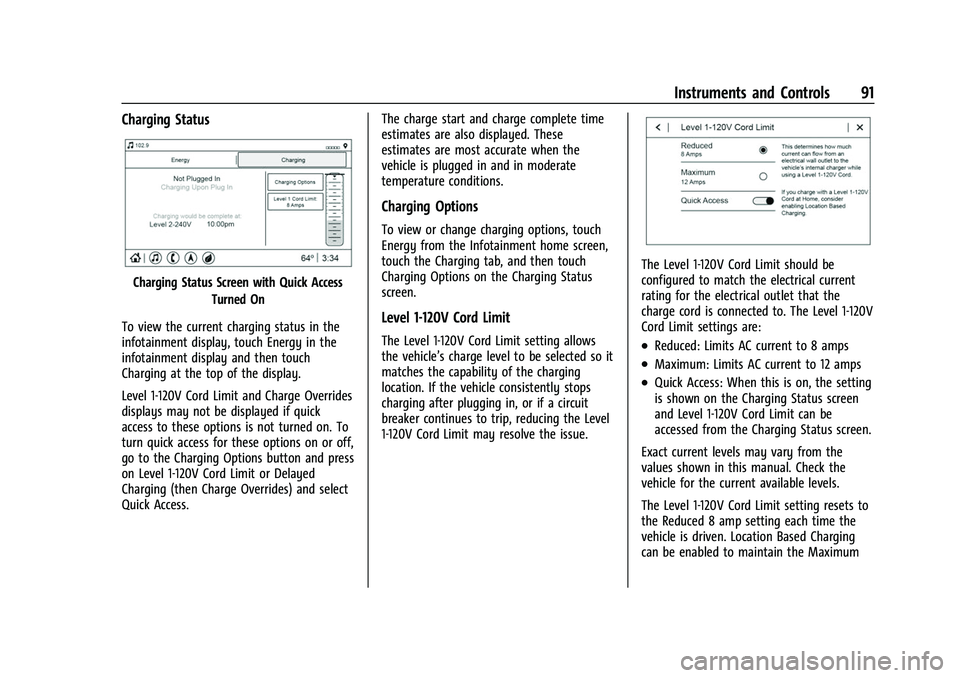
Charging Status Screen with Quick AccessTurned On
To view the current charging status in the
infotainment display, touch Energy in the
infotainment display and then touch
Charging at the top of the display.
Level 1-120V Cord Limit and Charge Overrides
displays may not be displayed if quick
access to these options is not turned on. To
turn quick access for these options on or off,
go to the Charging Options button and press
on Level 1-120V Cord Limit or Delayed
Charging (then Charge Overrides) and select
Quick Access. The charge start and charge complete time
estimates are also displayed. These
estimates are most accurate when the
vehicle is plugged in and in moderate
temperature conditions.
Charging Options
To view or change charging options, touch
Energy from the Infotainment home screen,
touch the Charging tab, and then touch
Charging Options on the Charging Status
screen.
Level 1-120V Cord Limit
The Level 1-120V Cord Limit setting allows
the vehicle’s charge level to be selected so it
matches the capability of the charging
location. If the vehicle consistently stops
charging after plugging in, or if a circuit
breaker continues to trip, reducing the Level
1-120V Cord Limit may resolve the issue.
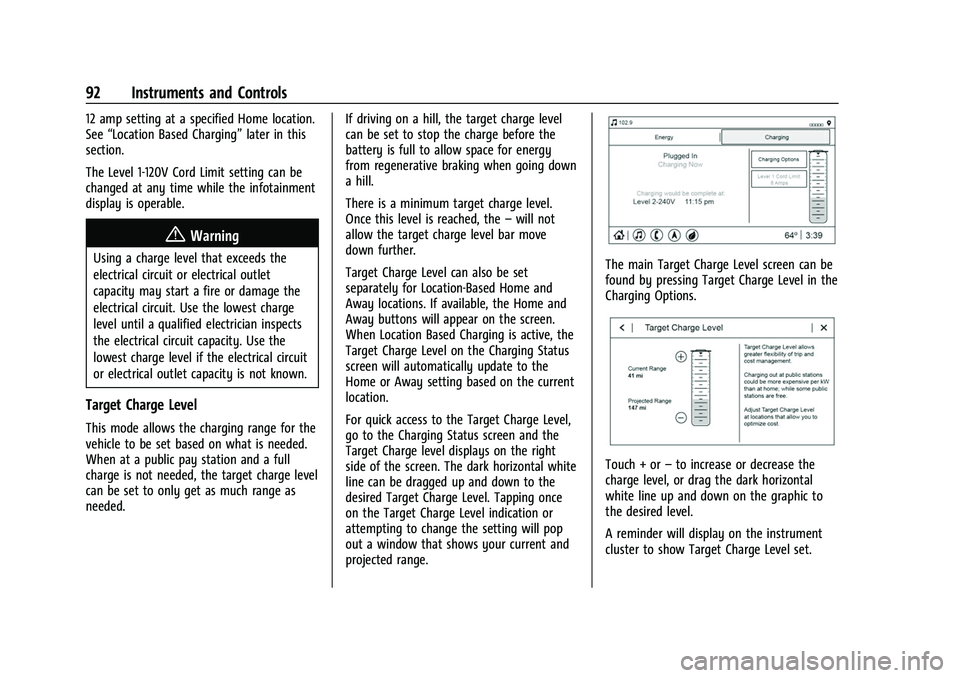
The Level 1-120V Cord Limit should be
configured to match the electrical current
rating for the electrical outlet that the
charge cord is connected to. The Level 1-120V
Cord Limit settings are:
.Reduced: Limits AC current to 8 amps
.Maximum: Limits AC current to 12 amps
.Quick Access: When this is on, the setting
is shown on the Charging Status screen
and Level 1-120V Cord Limit can be
accessed from the Charging Status screen.
Exact current levels may vary from the
values shown in this manual. Check the
vehicle for the current available levels.
The Level 1-120V Cord Limit setting resets to
the Reduced 8 amp setting each time the
vehicle is driven. Location Based Charging
can be enabled to maintain the Maximum
Page 93 of 316
Chevrolet BOLT EV Owner Manual (GMNA-Localizing-U.S./Canada-
15082216) - 2022 - CRC - 6/25/21
92 Instruments and Controls
12 amp setting at a specified Home location.
See“Location Based Charging” later in this
section.
The Level 1-120V Cord Limit setting can be
changed at any time while the infotainment
display is operable.
{Warning
Using a charge level that exceeds the
electrical circuit or electrical outlet
capacity may start a fire or damage the
electrical circuit. Use the lowest charge
level until a qualified electrician inspects
the electrical circuit capacity. Use the
lowest charge level if the electrical circuit
or electrical outlet capacity is not known.
Target Charge Level
This mode allows the charging range for the
vehicle to be set based on what is needed.
When at a public pay station and a full
charge is not needed, the target charge level
can be set to only get as much range as
needed. If driving on a hill, the target charge level
can be set to stop the charge before the
battery is full to allow space for energy
from regenerative braking when going down
a hill.
There is a minimum target charge level.
Once this level is reached, the
–will not
allow the target charge level bar move
down further.
Target Charge Level can also be set
separately for Location-Based Home and
Away locations. If available, the Home and
Away buttons will appear on the screen.
When Location Based Charging is active, the
Target Charge Level on the Charging Status
screen will automatically update to the
Home or Away setting based on the current
location.
For quick access to the Target Charge Level,
go to the Charging Status screen and the
Target Charge level displays on the right
side of the screen. The dark horizontal white
line can be dragged up and down to the
desired Target Charge Level. Tapping once
on the Target Charge Level indication or
attempting to change the setting will pop
out a window that shows your current and
projected range.
The main Target Charge Level screen can be
found by pressing Target Charge Level in the
Charging Options.
Touch + or –to increase or decrease the
charge level, or drag the dark horizontal
white line up and down on the graphic to
the desired level.
A reminder will display on the instrument
cluster to show Target Charge Level set.
Page 156 of 316
Chevrolet BOLT EV Owner Manual (GMNA-Localizing-U.S./Canada-
15082216) - 2022 - CRC - 6/25/21
Driving and Operating 155
Driving and Operating
Driving Information
Driving for Better Energy Efficiency . . . . 156
Distracted Driving . . . . . . . . . . . . . . . . . . . . . . 157
Defensive Driving . . . . . . . . . . . . . . . . . . . . . . 157
Impaired Driving . . . . . . . . . . . . . . . . . . . . . . . 158
Control of a Vehicle . . . . . . . . . . . . . . . . . . . 158
Braking . . . . . . . . . . . . . . . . . . . . . . . . . . . . . . . . 158
Steering . . . . . . . . . . . . . . . . . . . . . . . . . . . . . . . 158
Off-Road Recovery . . . . . . . . . . . . . . . . . . . . . 159
Loss of Control . . . . . . . . . . . . . . . . . . . . . . . . 159
Driving on Wet Roads . . . . . . . . . . . . . . . . . 160
Hill and Mountain Roads . . . . . . . . . . . . . . 160
Winter Driving . . . . . . . . . . . . . . . . . . . . . . . . . 161
If the Vehicle Is Stuck . . . . . . . . . . . . . . . . . 162
Vehicle Load Limits . . . . . . . . . . . . . . . . . . . . 162
Starting and Operating
New Vehicle Break-In . . . . . . . . . . . . . . . . . . 165
Power Button . . . . . . . . . . . . . . . . . . . . . . . . . . 165
Starting and Stopping the Vehicle . . . . . 166
Retained Accessory Power (RAP) . . . . . . . 167
Shifting Into Park . . . . . . . . . . . . . . . . . . . . . . 167
Shifting out of Park . . . . . . . . . . . . . . . . . . . 168
Extended Parking . . . . . . . . . . . . . . . . . . . . . . 168
Electric Vehicle Operating Modes
Driver Selected Operating Modes . . . . . . 168
Electric Drive Unit
Electric Drive Unit . . . . . . . . . . . . . . . . . . . . . 169
One-Pedal Driving . . . . . . . . . . . . . . . . . . . . . . 171
Brakes
Antilock Brake System (ABS) . . . . . . . . . . . 172
Electric Parking Brake . . . . . . . . . . . . . . . . . . 172
Brake Assist . . . . . . . . . . . . . . . . . . . . . . . . . . . . 173
Hill Start Assist (HSA) . . . . . . . . . . . . . . . . . . 174
Regenerative Braking . . . . . . . . . . . . . . . . . . 174
Ride Control Systems
Traction Control/Electronic StabilityControl . . . . . . . . . . . . . . . . . . . . . . . . . . . . . . . 175
Cruise Control
Cruise Control . . . . . . . . . . . . . . . . . . . . . . . . . 176
Adaptive Cruise Control (Camera) . . . . . . 178
Driver Assistance Systems
Driver Assistance Systems . . . . . . . . . . . . . 187
Assistance Systems for Parking orBacking . . . . . . . . . . . . . . . . . . . . . . . . . . . . . . 188
Rear Vision Camera (RVC) . . . . . . . . . . . . . 188
Surround Vision System . . . . . . . . . . . . . . . 189
Park Assist . . . . . . . . . . . . . . . . . . . . . . . . . . . . . 191
Rear Cross Traffic Alert (RCTA) System . . . . . . . . . . . . . . . . . . . . . . . . . . . . . . 192
Assistance Systems for Driving . . . . . . . . 192
Forward Collision Alert (FCA) System . . . . . . . . . . . . . . . . . . . . . . . . . . . . . . 192 Automatic Emergency Braking (AEB) . . . 194
Front Pedestrian Braking (FPB)
System . . . . . . . . . . . . . . . . . . . . . . . . . . . . . . 195
Side Blind Zone Alert (SBZA) . . . . . . . . . . . 197
Lane Change Alert (LCA) . . . . . . . . . . . . . . . 197
Lane Keep Assist (LKA) . . . . . . . . . . . . . . . . 198
Charging
When to Charge . . . . . . . . . . . . . . . . . . . . . . 200
Plug-In Charging . . . . . . . . . . . . . . . . . . . . . . 200
Delayed Charging Override . . . . . . . . . . . . 204
Charging Status Feedback . . . . . . . . . . . . . 204
Charge Cord . . . . . . . . . . . . . . . . . . . . . . . . . . . 208
Utility Interruption of Charging . . . . . . . . 214
Electrical Requirements for Battery Charging . . . . . . . . . . . . . . . . . . . . . . . . . . . . . 214
Trailer Towing
General Towing Information . . . . . . . . . . . 215
Conversions and Add-Ons
Add-On Electrical Equipment . . . . . . . . . . . 215
Page 166 of 316
Chevrolet BOLT EV Owner Manual (GMNA-Localizing-U.S./Canada-
15082216) - 2022 - CRC - 6/25/21
Driving and Operating 165
{Warning
Things inside the vehicle can strike
and injure people in a sudden stop or
turn, or in a crash.
.Put things in the cargo area of the
vehicle. In the cargo area, put
them as far forward as possible.
Try to spread the weight evenly.
.Never stack heavier things, like
suitcases, inside the vehicle so
that some of them are above the
tops of the seats.
.Do not leave an unsecured child
restraint in the vehicle.
.Secure loose items in the vehicle.
.Do not leave a seat folded down
unless needed.
Starting and Operating
New Vehicle Break-In
Caution
Avoid making hard stops for the first
322 km (200 mi). During this time the
new brake linings are not yet broken in.
Hard stops with new linings can mean
premature wear and earlier replacement.
Follow this breaking-in guideline every
time you get new brake linings.
Following break-in, vehicle speed and load
can be gradually increased.
Power Button
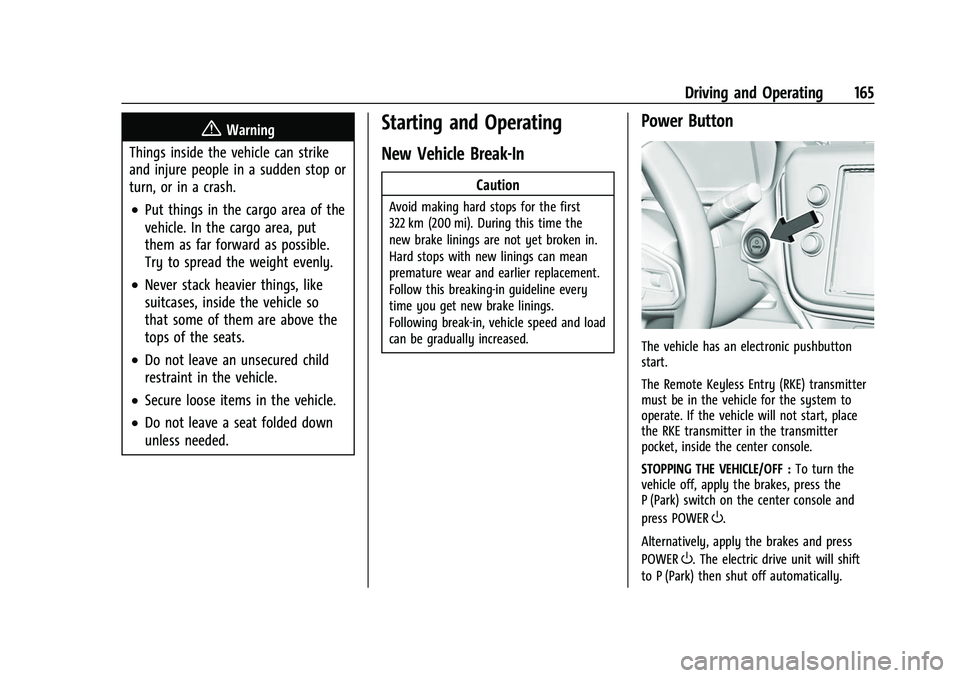
The vehicle has an electronic pushbutton
start.
The Remote Keyless Entry (RKE) transmitter
must be in the vehicle for the system to
operate. If the vehicle will not start, place
the RKE transmitter in the transmitter
pocket, inside the center console.
STOPPING THE VEHICLE/OFF : To turn the
vehicle off, apply the brakes, press the
P (Park) switch on the center console and
press POWER
O.
Alternatively, apply the brakes and press
POWER
O. The electric drive unit will shift
to P (Park) then shut off automatically.
Page 168 of 316
Chevrolet BOLT EV Owner Manual (GMNA-Localizing-U.S./Canada-
15082216) - 2022 - CRC - 6/25/21
Driving and Operating 167
The Remote Keyless Entry (RKE) transmitter
must be in the vehicle. Press the brake
pedal, then press and release POWER
O.
If the RKE transmitter is not in the vehicle
or something is interfering with the
transmitter, a message displays in the Driver
Information Center (DIC).
If the vehicle will not start due to a low RKE
transmitter battery, the vehicle can still be
driven. See Remote Keyless Entry (RKE)
System Operation 07.
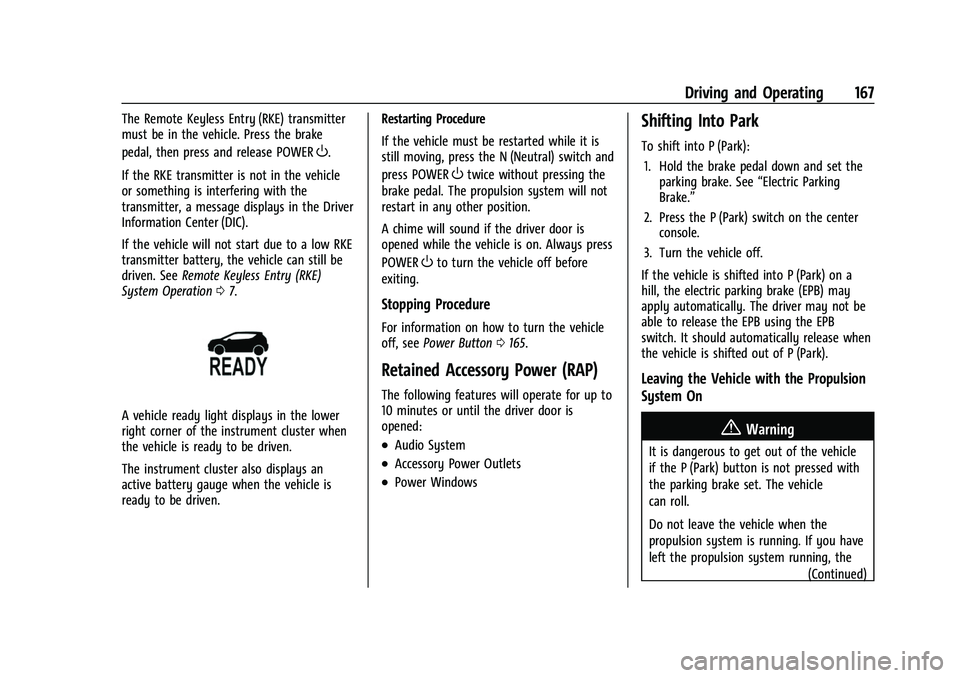
A vehicle ready light displays in the lower
right corner of the instrument cluster when
the vehicle is ready to be driven.
The instrument cluster also displays an
active battery gauge when the vehicle is
ready to be driven. Restarting Procedure
If the vehicle must be restarted while it is
still moving, press the N (Neutral) switch and
press POWER
Otwice without pressing the
brake pedal. The propulsion system will not
restart in any other position.
A chime will sound if the driver door is
opened while the vehicle is on. Always press
POWER
Oto turn the vehicle off before
exiting.
Stopping Procedure
For information on how to turn the vehicle
off, see Power Button 0165.
Retained Accessory Power (RAP)
The following features will operate for up to
10 minutes or until the driver door is
opened:
.Audio System
.Accessory Power Outlets
.Power Windows
Shifting Into Park
To shift into P (Park):
1. Hold the brake pedal down and set the parking brake. See “Electric Parking
Brake.”
2. Press the P (Park) switch on the center console.
3. Turn the vehicle off.
If the vehicle is shifted into P (Park) on a
hill, the electric parking brake (EPB) may
apply automatically. The driver may not be
able to release the EPB using the EPB
switch. It should automatically release when
the vehicle is shifted out of P (Park).
Leaving the Vehicle with the Propulsion
System On
{Warning
It is dangerous to get out of the vehicle
if the P (Park) button is not pressed with
the parking brake set. The vehicle
can roll.
Do not leave the vehicle when the
propulsion system is running. If you have
left the propulsion system running, the (Continued)
Page 204 of 316
Chevrolet BOLT EV Owner Manual (GMNA-Localizing-U.S./Canada-
15082216) - 2022 - CRC - 6/25/21
Driving and Operating 203
DC Charging (If Equipped)
DC Charging Station Hardware
Check the charge station DC vehicle plug for
compatibility with the DC charge port on
this vehicle. When recharging at a DC charge
station, the charging cable connected to the
vehicle must be less than 10 m (33 ft) in
length to meet functionality and regulatory
requirement.
Follow the steps listed on the charging
station to perform a DC vehicle charge.
If for any reason DC charging does not
begin or is interrupted, check the DC charge
station display for messages. Unplug to
restart the DC charge process.
Start Charge1. Make sure the vehicle is parked.
2. Push the rearward edge of the charge port door and release to open the door.
In cold weather conditions, ice may form
around the charge port door. The charge
port door may not open on the first
attempt. Remove ice from the area and
repeat attempting to open the charge
port door.
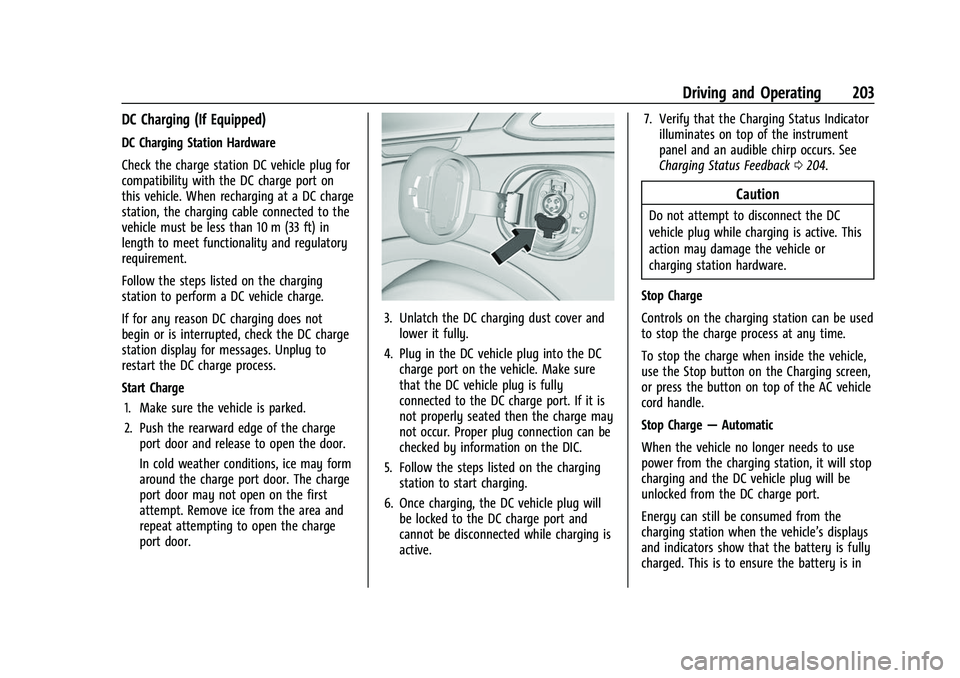
3. Unlatch the DC charging dust cover andlower it fully.
4. Plug in the DC vehicle plug into the DC charge port on the vehicle. Make sure
that the DC vehicle plug is fully
connected to the DC charge port. If it is
not properly seated then the charge may
not occur. Proper plug connection can be
checked by information on the DIC.
5. Follow the steps listed on the charging station to start charging.
6. Once charging, the DC vehicle plug will be locked to the DC charge port and
cannot be disconnected while charging is
active. 7. Verify that the Charging Status Indicator
illuminates on top of the instrument
panel and an audible chirp occurs. See
Charging Status Feedback 0204.
Caution
Do not attempt to disconnect the DC
vehicle plug while charging is active. This
action may damage the vehicle or
charging station hardware.
Stop Charge
Controls on the charging station can be used
to stop the charge process at any time.
To stop the charge when inside the vehicle,
use the Stop button on the Charging screen,
or press the button on top of the AC vehicle
cord handle.
Stop Charge —Automatic
When the vehicle no longer needs to use
power from the charging station, it will stop
charging and the DC vehicle plug will be
unlocked from the DC charge port.
Energy can still be consumed from the
charging station when the vehicle’s displays
and indicators show that the battery is fully
charged. This is to ensure the battery is in
Page 249 of 316
Chevrolet BOLT EV Owner Manual (GMNA-Localizing-U.S./Canada-
15082216) - 2022 - CRC - 6/25/21
248 Vehicle Care
cycle using POWERO. The sensors are
matched to the tire/wheel positions, using a
TPMS relearn tool, in the following order:
driver side front tire, passenger side front
tire, passenger side rear tire, and driver side
rear. See your dealer for service or to
purchase a relearn tool. A TPMS relearn tool
can also be purchased. See Tire Pressure
Monitor Sensor Activation Tool at
www.gmtoolsandequipment.com or call
1-800-GM TOOLS (1-800-468-6657).
There are two minutes to match the first
tire/wheel position, and five minutes overall
to match all four tire/wheel positions. If it
takes longer, the matching process stops
and must be restarted.
The TPMS sensor matching process is:
1. Set the parking brake.
2. Press POWER
Oto start the vehicle. See
Power Button 0165.
3. Make sure the Tire Pressure info page option is turned on. The info pages on
the DIC can be turned on and off
through the Options menu. See Driver
Information Center (DIC) 099.
4. Use the DIC controls on the right side of the steering wheel to scroll to the Tire
Pressure screen under the DIC info page. 5. Press and hold the thumbwheel in the
center of the DIC controls.
A message requesting acceptance of the
process may display.
The horn sounds twice to signal the
receiver is in relearn mode and the TIRE
LEARNING ACTIVE message displays on
the DIC screen.
6. Start with the driver side front tire.
7. Place the relearn tool against the tire sidewall, near the valve stem. Then press
the button to activate the TPMS sensor.
A horn chirp confirms that the sensor
identification code has been matched to
this tire and wheel position.
8. Proceed to the passenger side front tire, and repeat the procedure in Step 7.
9. Proceed to the passenger side rear tire, and repeat the procedure in Step 7.
10. Proceed to the driver side rear tire, and repeat the procedure in Step 7. The horn
sounds two times to indicate the sensor
identification code has been matched to
the driver side rear tire, and the TPMS
sensor matching process is no longer
active. The TIRE LEARNING ACTIVE
message on the DIC display screen
goes off. 11. Turn the vehicle off.
12. Set all four tires to the recommended air
pressure level as indicated on the Tire
and Loading Information label.
Tire Inspection
We recommend that the tires, including
the spare tire, if the vehicle has one, be
inspected for signs of wear or damage
at least once a month.
Replace the tire if:
.The indicators at three or more
places around the tire can be seen.
.There is cord or fabric showing
through the tire's rubber.
.The tread or sidewall is cracked, cut,
or snagged deep enough to show
cord or fabric.
.The tire has a bump, bulge, or split.
.The tire has a puncture, cut, or other
damage that cannot be repaired well
because of the size or location of the
damage.