ignition CHEVROLET CAMARO 1971 2.G Owners Manual
[x] Cancel search | Manufacturer: CHEVROLET, Model Year: 1971, Model line: CAMARO, Model: CHEVROLET CAMARO 1971 2.GPages: 88, PDF Size: 34.8 MB
Page 6 of 88
Downloaded from www.Manualslib.com manuals search engine BEFORE DRIVING YOUR CAR
Keys
Two separate keys are provided
for your car. Each key has a differ
ent cross section
so that it can be
inserted only in certain locks.
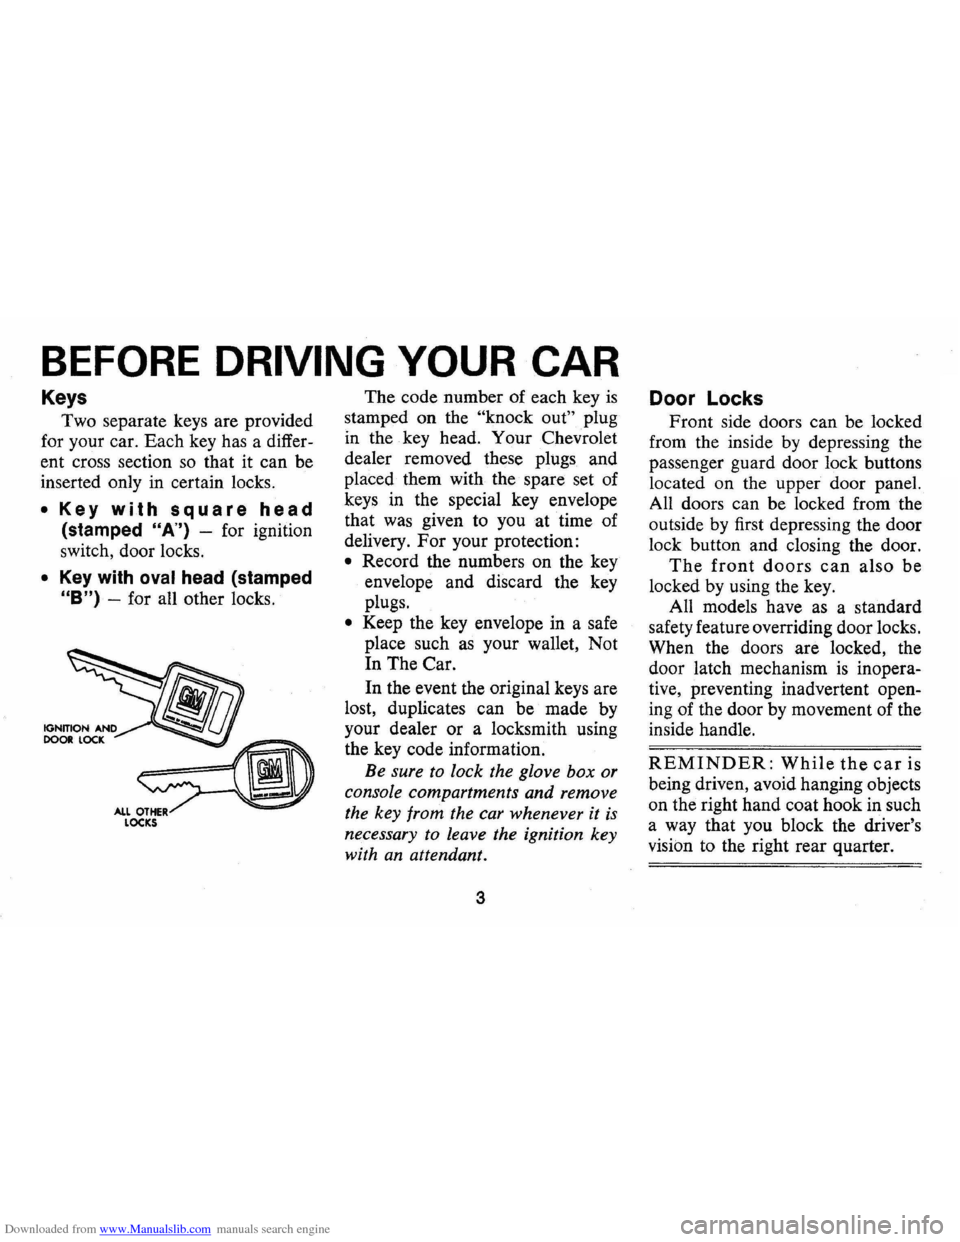
• Key with square head
(stamped "A") -for ignition
switch, door locks.
• Key with oval head (stamped
"B") -for all other locks. The
code number of each key
is
stamped on the "knock out" plug
in the key head. Your Chevrolet
dealer removed these plugs and
placed them with the spare set of
keys in the special key envelope
that was given to you at time of
delivery.
For your protection:
• Record the numbers on the key
envelope and discard the key
plugs.
• Keep the key envelope in a safe
place such
as your wallet, Not
In The Car.
In the event the original keys are
lost, duplicates can be made by
your dealer or a locksmith using
the key code information.
Be sure to lock the glove box or
console compartments and remove
the key from the car whenever it
is
necessary to leave the ignition key
with
an attendant.
3
Door Locks
Front side doors can be locked
from the inside by depressing the
passenger guard door lock buttons
located on the upper door panel.
All doors can be locked from the
outside by first depressing the door
lock button and closing the door.
The front doors can also be
locked by using the key.
All models have
as a standard
safety feature overriding door locks.
When the doors are locked, the
door latch mechanism
is inopera
tive, preventing inadvertent open
ing of the door by movement of the
inside handle.
REMINDER: While the car is
being driven, avoid hanging objects
on the right hand coat hook in such
a way that you block the driver's
vision to the right rear quarter.
Page 15 of 88
Downloaded from www.Manualslib.com manuals search engine STEERING COLUMN CONTROLS
Anti-Theft Steering
Column Lock
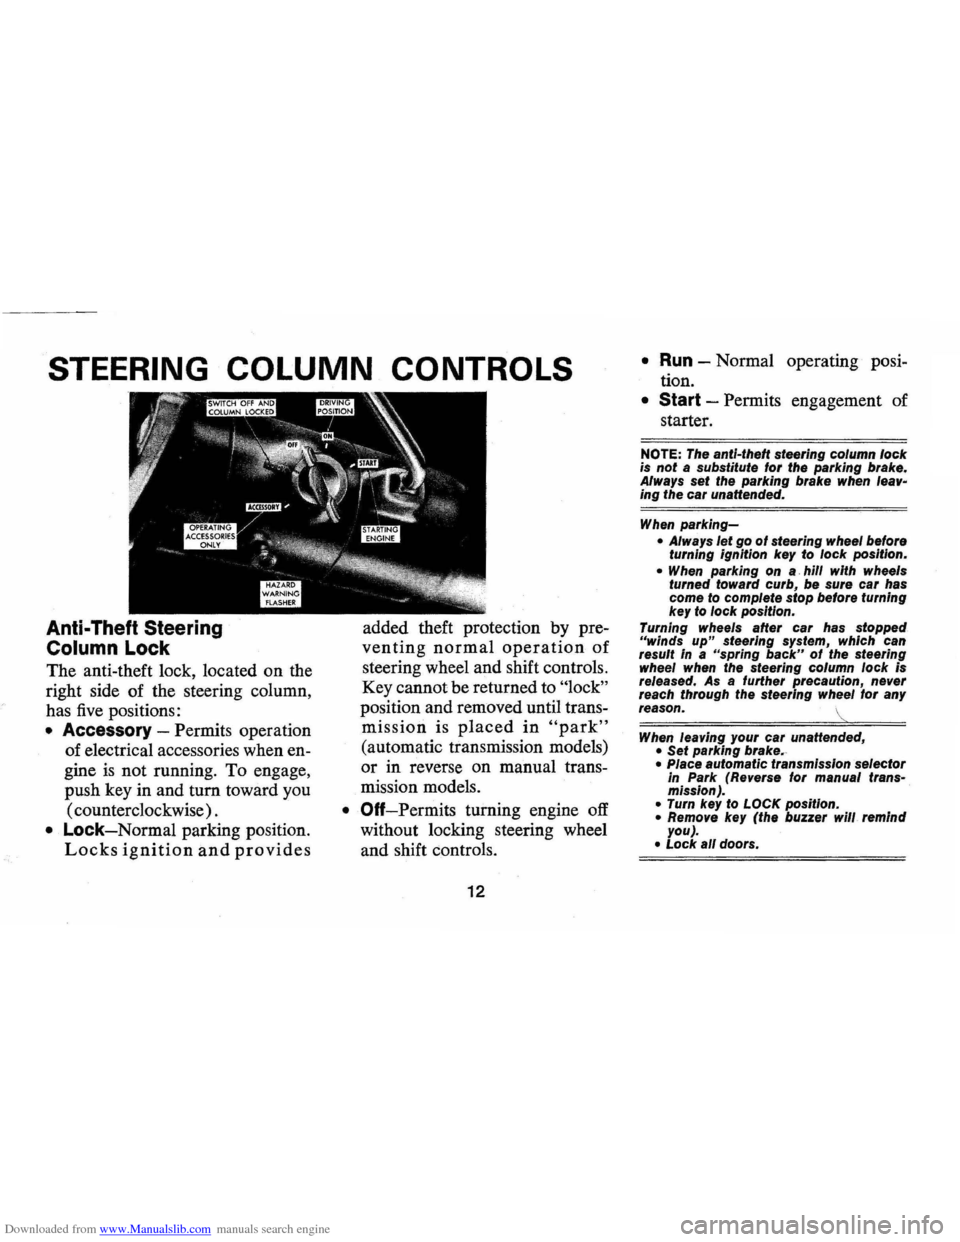
The anti-theft lock, located on the
right side of the steering column,
has
five positions:
• Accessory -Permits operation
of electrical accessories when
en
gine is not running. To engage,
push key in and
tum toward you
( counterclockwise) .
• Lock-Normal parking position.
Locks ignition and provides
added theft protection by pre
venting normal operation of
steering wheel and shift controls.
Key cannot be returned to
"lock"
position and removed until trans
mission is placed in "park"
(automatic transmission models)
or in reverse on manual
trans
mission models.
• Off-Permits turning engine off
without locking steering wheel
and shift controls.
12
• Run -Normal operating posi
tion.
• Start -Permits engagement of
starter.
NOTE: The anti-theft steering column lock is not a substitute lor the parking brake.
Always set the parking brake when leaving the car unaHended.
When parking-
• Always let go 01 steering wheel belore turning ignition key to lock position.
• When parking on a hill with wheels
turned toward curb, be sure car has
come to complete stop belore turning
key to lock position.
Turning wheels
after car has stopped "winds up" steering system, which can
result in a "spring back" 01 the steering
wheel when the steering column lock is
released. As a lurther precaution, never
reach through the steering wheel lor any
reason.
'"
When leaving your car unaHended, • Set parking brake. ·
• Place automatic transmission selector
in Park (Reverse tor manual transmission). . • Turn key to LOCK position. • Remove key (the buzzer will remind
you).
• Lock all doors.
Page 16 of 88
Downloaded from www.Manualslib.com manuals search engine Starting Engine
Automatic Transmission
Models
1. Apply the foot brake.
2. Place transmission selector
in "P" or "N" (UP" preferred).
A starter safety switch prevents
starter operation while the trans
mission selector
is in any drive
position.
(If it is necessary to
re-start the engine with the car
moving, place the selector lever
in
"N".)
3. Depress accelerator pedal and
activate starter
as outlined be
low for different conditions.
• Cold Engine -Fully de
press
accelerator pedal and
slowly release.
With foot off
the pedal,
crank the engine
by turning the ignition key
to the Start position-release
when engine starts.
If engine starts, but fails to
run, repeat this procedure.
When engine is running
smoothly, the idle speed may
be reduced by slightly de
pressing the accelerator pedal
and then slowly releasing.
• Warm Engine -Depress ac
celerator
pedal about halfway
and hold while cranking the
engine.
• Extremely Cold Weather
(Below
0° F.) Or After Car
Has Been Standing Idle
Several
Days-
Fully depress and release
accelerator pedal two
or three
times before cranking the
engine.
With foot off the ac
celerator pedal,
crank the
engine by turning the key to
the Start position and release
when engine starts.
13
Manual Transmission Models
1. Apply parking brake and shift
transmission to neutral.
2.
Hold clutch pedal to floor
throughout the starting proce
dure. A starter interlock pre
vents starter operation when
clutch
is not fully depressed.
3.
Operate accelerator pedal and
starter
as outlined in step 3
(under Automatic Transmission
Models).
Engine Flooded
Depress accelerator pedal and
hold to floor while starting until
engine
is cleared of excess fuel
and
is running smoothly. Never
"pump" the accelerator pedal.
Warm-Up
Always let the engine idle for
20 to 30 seconds after starting
and drive at moderate speeds for
several miles, especially during
cold weather.
Page 19 of 88
Downloaded from www.Manualslib.com manuals search engine Driving with Manual Transmissions
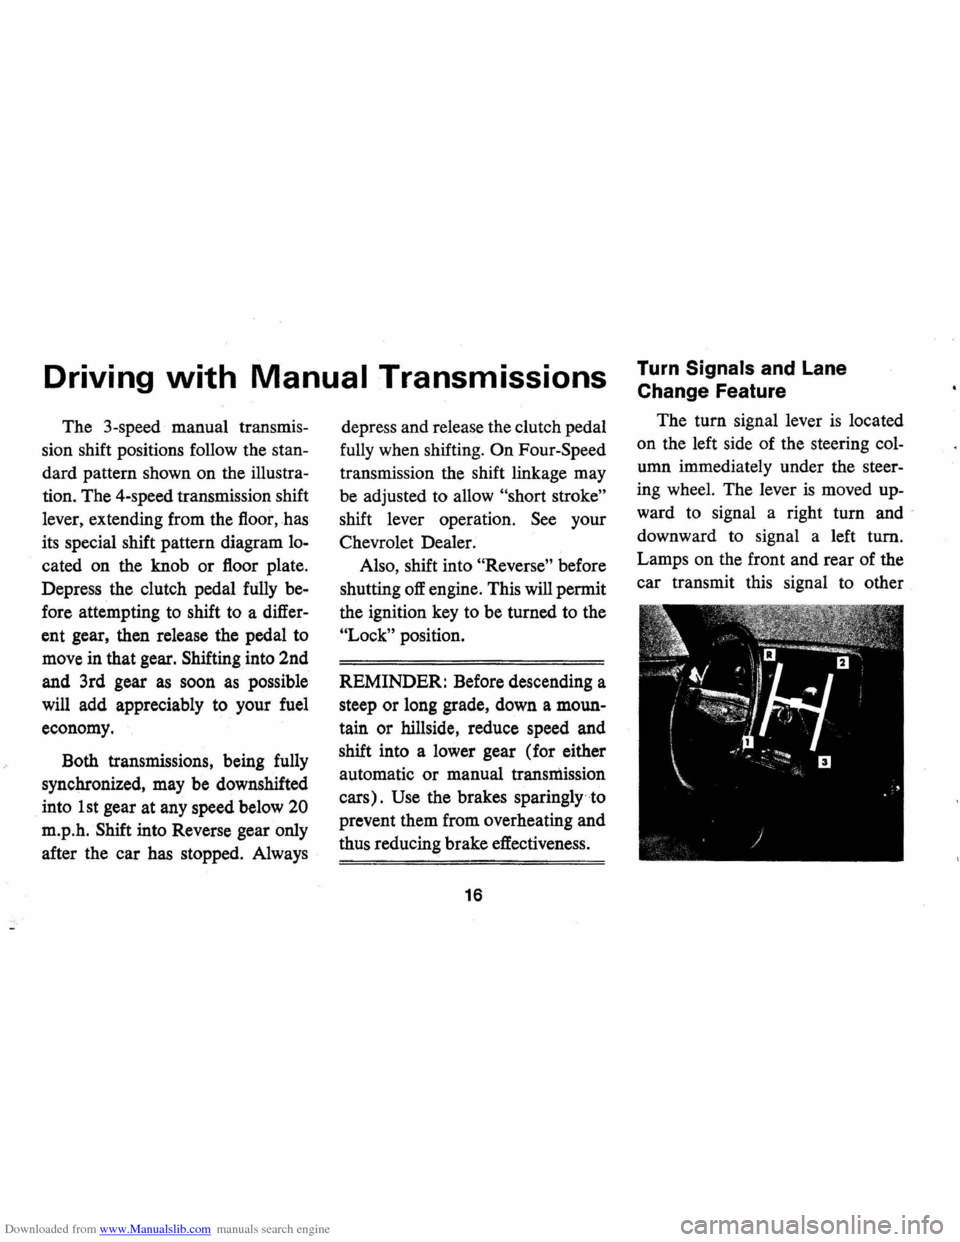
The 3-speed manual transmis
sion shift positions follow the
stan
dard pattern shown on the illustra
tion. The 4-speed transmission shift
lever, extending from the floor,has
its special shift pattern diagram
lo
cated on the knob or floor plate.
Depress the clutch pedal fully
be
fore attempting to shift to a differ
ent gear, then release the pedal to
move in that gear. Shifting into 2nd
and 3rd gear
as soon as possible
will add appreciably to your fuel
economy.
Both transmissions, being fully
synchronized, may be downshifted
into 1st gear at any speed below
20
m.p.h. Shift into Reverse gear only
after the car has stopped. Always depress
and release the clutch pedal
fully when shifting.
On Four-Speed
transmission the shift linkage may
be adjusted to allow
"short stroke"
shift lever operation. See your
Chevrolet Dealer.
Also, shift into
"Reverse" before
shutting
off engine. This will permit
the ignition key to be turned to the
"Lock" position.
REMINDER: Before descending a
steep or long grade, down a moun
tain or hillside, reduce speed and
shift into a lower gear (for either
automatic or manual transmission
cars).
Use the brakes sparingly to
prevent them from overheating and
thus reducing brake effectiveness.
16
Turn Signals and Lane
Change Feature
The turn signal lever is located
on the left side of the steering
col
umn immediately under the steer
ing wheel. The lever is moved up
ward to signal a right turn and '
downward to signal a left turn.
Lamps on the front and rear of the
car transmit this signal to other
Page 23 of 88
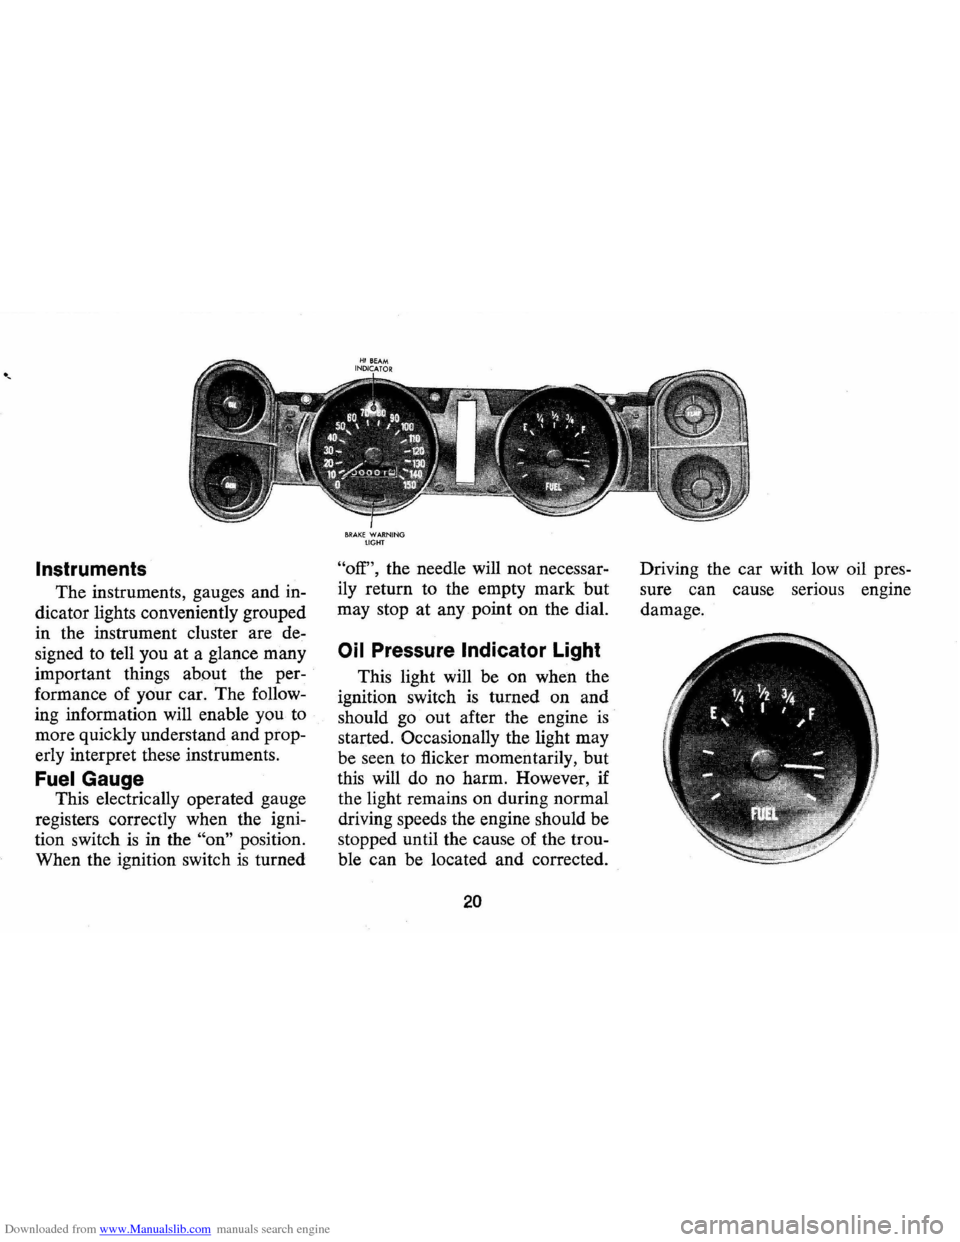
Downloaded from www.Manualslib.com manuals search engine Instruments
The instruments, gauges and in
dicator lights conveniently grouped
in the instrument cluster are de
signed to tell you at a glance many
important things about the per
formance of your car. The follow
ing information will enable you to
more quickly understand and prop
erly interpret these instruments.
Fuel Gauge
This electrically operated gauge
registers correctly when the igni
tion switch
is in the "on" position.
When the ignition switch
is turned
BRAKE WARNING liGHT
"off", the needle will not necessar
ily return to the empty mark but
may stop at any point on the dial.
Oil Pressure Indicator Light
This light will be on when the
ignition switch
is turned on and
should go out after the engine
is
started. Occasionally the light may
be seen to flicker momentarily, but
this will do no harm. However, if
the light remains on during normal
driving speeds the engine should be
stopped until the cause of the trou
ble can be located and corrected.
20
Driving the car with low oil pres
sure can cause serious engine
damage.
Page 24 of 88
Downloaded from www.Manualslib.com manuals search engine Generator Indicator Light
This light provides a quick check
on the generating system of your
car. The red light will go on when
the ignition key
is in the "on" posi
tion, but before the engine is
started. After the engine starts, the
light should go out and remain out.
If the light remains on when engine
is running, have your Authorized
Chevrolet Dealer locate and correct
the trouble
as soon as possible.
Engine Temperature
Indicator Light
This indicator light is provided
in the instrument cluster to quickly
warn of an overheated engine. With
the ignition
switGh in the START
position, the red TEMP indicator
will light to let you know that it
is
operating properly.
When the engine
is started, the
red light will go out immediately.
It will light up at no other time
unless for some reason the engine
reaches a dangerously high
oper
ating temperature. If the red light
should come on, the engine must be
stopped until the cause of the
over
heating is corrected. Glance at in
strument cluster frequently as you
drive to see if this light
is on.
Brake System Warning
Light
The service brake system is de
signed so that half of the brake sys
tem will provide some braking ac
tion in the event of a hydraulic leak
in the other half of the system.
When the brake apply system
is not
operating properly, a warning light
located at lower left of instrument
cluster (speedometer face) will
glow continuously when the
igni
tion is on after the brakes have been
firmly applied.
On cars equipped
with drum brakes, the light will go
21
out when foot is removed from
brake pedal.
• As a check on bulb condition the
light should glow with the
park
ing brake applied and the igni
tion on. (Light is also a reminder
to release parking brake.)
• Have system repaired if light
does not come on during check.
• This warning light is nota sub
stitute for the visual check of
brake fluid level required
as part
of normal maintenance.
If the light glows red:
• The parking brake is not fully re
leased or,
• The service brake system is par
tially inoperative.
What to do:
1. Check that the parking brake is
released.
2. Pull off the road and stop, care
fully-remembering that:
Page 26 of 88
Downloaded from www.Manualslib.com manuals search engine kJ
2530 35404550
15 55
10 60
5 65 RPM/IOO 70 llllD
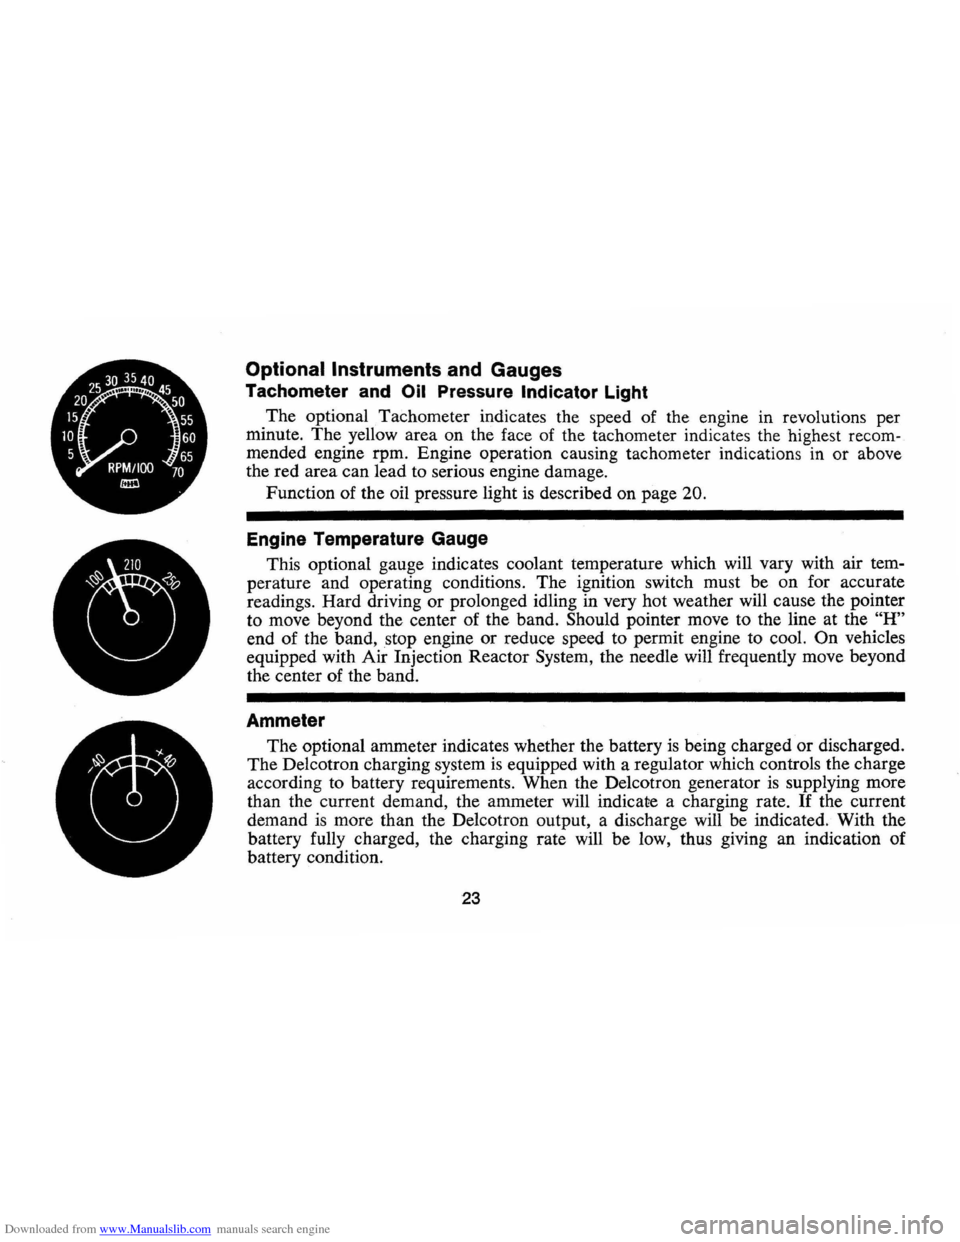
Optional Instruments and Gauges
Tachometer and Oil Pressure Indicator Light
The optional Tachometer indicates the speed of the engine in revolutions per
minute.
The yellow area on the face of the tachometer indicates the highest recom
mended engine rpm. Engine operation causing tachometer indications in or above
the red area can lead to serious engine damage.
Function of the oil pressure light is described on page
20.
Engine Temperature Gauge
This optional gauge indicates coolant temperature which will vary with air tem
perature and operating conditions. The ignition switch must be on for accurate
readings. Hard driving
or prolonged idling in very hot weather will cause the pointer
to move beyond the center of the band.
Should pointer move to the line at the "H"
end of the band, stop engine or reduce speed to permit engine to cool. On vehicles
equipped with Air Injection Reactor System, the needle will frequently move beyond
the center of the band.
Ammeter
The optional ammeter indicates whether the battery is being charged or discharged.
The Delcotron charging system is equipped with a regulator which controls the charge
according to battery requirements. When the Delcotron generator
is supplying more
than the current demand, the ammeter will indicate a charging rate.
If the current
demand
is more than the Delcotron output, a discharge will be indicated. With the
battery fully charged, the charging rate will be low, thus giving an indication of
battery condition.
23
Page 28 of 88
Downloaded from www.Manualslib.com manuals search engine end vent outlet can be adjusted to
regulate or shut
off the desired
amount of conditioned air through
these outlets.
Heater
The windshield defrosting and
defogging system assists in provid
ing good visibility through desig
nated areas of the windshield under
most inclement weather conditions.
For immediate operation of the
vehicle, the windshield should be
scraped clear.
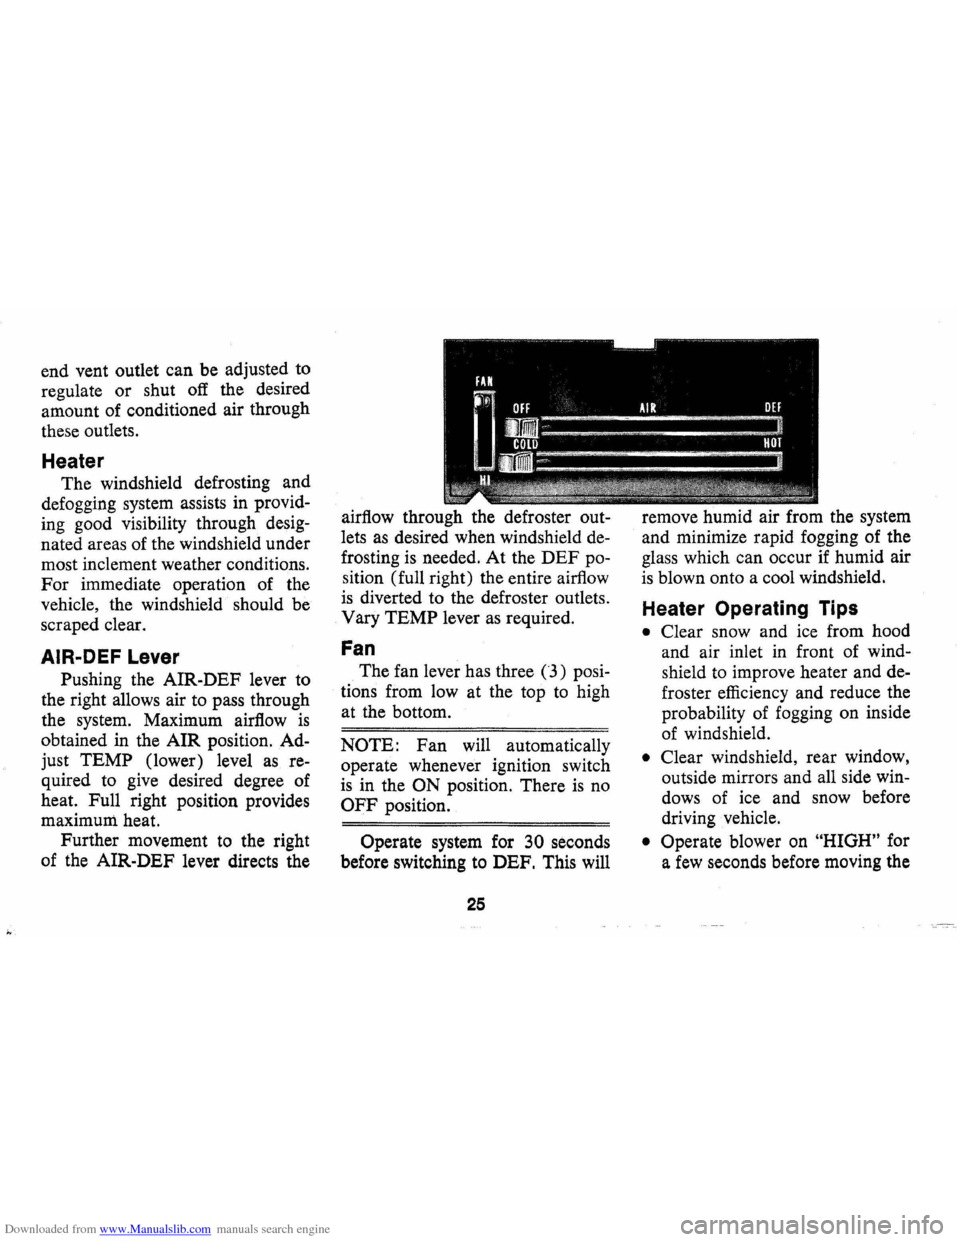
AIR-DEF Lever
Pushing the AIR-DEF lever to
the right allows air to pass through
the system. Maximum airflow
is
obtained in the AIR position. Ad
just TEMP (lower) level
as re
quired to
give desired degree of
heat. Full right position provides
maximum. heat.
Further movement to the right
of the AIR-DEF lever directs the airflow
through the defroster out
lets
as desired when windshield de
frosting is needed. At the DEF po
sition (full right) the entire airflow
is diverted to the defroster outlets.
Vary TEMP lever
as required.
Fan
The fan lever has three (3) posi
tions from low at the top
to high
at the bottom.
NOTE: Fan will automatically
operate whenever ignition switch
is in the ON position. There is no
OFF position.
Operate system for 30 seconds
before switching to DEF. This will
25
remove humid air from the system
and minimize rapid fogging of the
glass which can occur
if humid air
is blown onto a cool windshield.
Heater Operating Tips
• Clear snow and ice from hood
and air inlet in front of wind
shield to improve heater and de
froster efficiency and reduce the
probability of fogging on inside
of windshield.
• Clear windshield, rear window,
outside mirrors and all side
win
dows of ice and snow before
driving vehicle.
• Operate blower on "HIGH" for
a
few seconds before moving the
Page 30 of 88
Downloaded from www.Manualslib.com manuals search engine "
Selector (Upper Lever)
This lever provides a selection of
systems available to handle various
heating and cooling requirements
throughout the year. The positions
of the Selector lever are separated
into four (4) major operational
groups
"Off", IIAir Conditioning",
IIVent" and IIHeating". The "Air
Conditioning" and IIHeating"
groups have several positions which
improve the effectiveness of
the
system for various demands.
Fan
The fan lever has four (4) posi
tions from Lo at the top to High at
the bottom. Blower speed
is auto
matically maintained when the
ignition switch
is in the "ON" posi
tion, regardless of the position of
the selector lever. The blower re
mains
ON with the Selector lever
in the
OFF position and the igni
tion switch
ON in order to purge moisture
from the evaporator core
and distributor ducts, thereby help
ing to prevent inadvertent flash
fogging of the windows when the
system
is turned on.
Selector Lever Operation
uOFF" -Shuts the entire system off
but blower automatically remains
operative.
uMAX"-Air from the passenger
compartment is recirculated
through the system and discharged
from the upper outlets when the
temperature lever
is in "Max." cold.
(If the liTem perature" lever is
moved warmer, the system will
automatically
go on outside air.)
The
IIMax." position is used when
maximum cooling
is required under
conditions of high temperature and
humidity.
uNORMAL" -Outside air is passed
through the system and discharged
through the
Ale outlets. This posi-
27
tion is recommended for most air
conditioning situations because of
reduced blower noise and reduction
of cigarette smoke within the
ve
hicle.
uBI-LEVEL"-Outside air is passed
through the system and discharged
from both the upper and lower out
lets. This position
is recommended
for sunny cooler weather where
warm air
is required on the feet
with cooler air above to provide
comfortable breath level. Temper
ature may be adjusted
as desired.
(<> BI-Level position)
NOTE: This position will clear
fogged windows rapidly due to the
dehumidifying effect of the cooling
coils when the outside temperature
is above 30°F.
UVENT" -Air flow and tempera
ture control are the same
as "BI
Level"
except that the compressor
Page 33 of 88
Downloaded from www.Manualslib.com manuals search engine ~"'" '
l I I
adjustments. for maximum antenna
effectiveness can be made by your
Authorized Chevrolet Dealer.
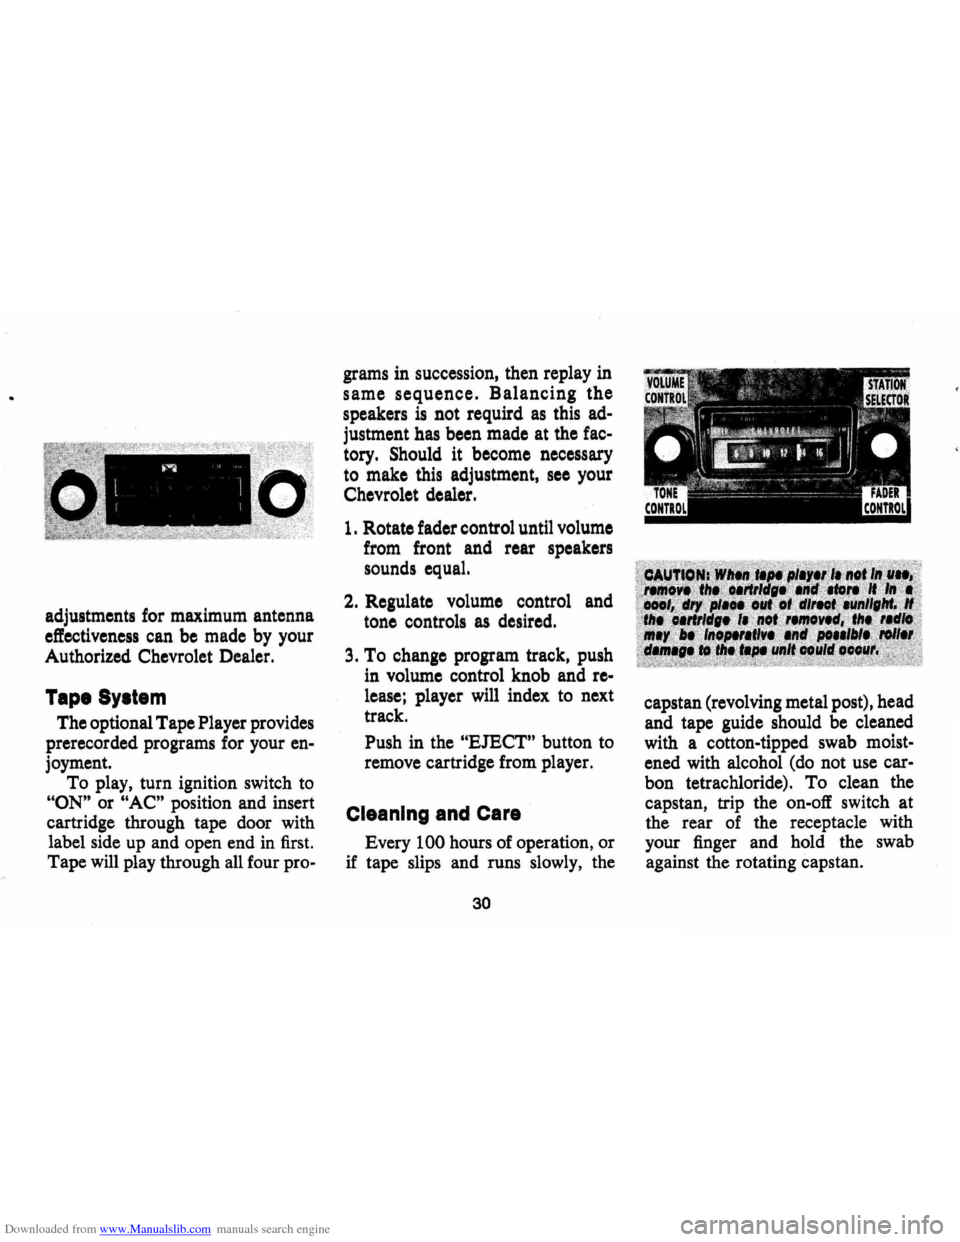
Tape SYltem
The optional Tape Player provides
prerecorded programs for your
en
joyment.
To play, turn ignition switch to
"ON" or "AC" position and insert
cartridge through tape door with
label side up and open end in
first.
Tape will play through all four pro- grams
in succession, then replay in
same
sequence. Balancing the
speakers is not requird as this ad
justment has been made at the fac
tory. Should it become necessary
to make this adjustment,
sec your
Chevrolet dealer.
1. Rotate fader control until volume
from front and rear speakers
sounds equal.
2. Regulate volume control and
tone controls
as desired.
3. To change program track, push
in volume control knob and
re
lease; player will index to next
track.
Push in the
"EJECT" button to
remove cartridge from player.
Cleaning and Care
Every 100 hours of operation, or
if tape slips and runs slowly, the
30
capstan (revolving metal post), head
and tape guide should be cleaned
with a cotton-tipped swab moist
ened with alcohol (do not use
car
bon tetrachloride). To clean the
capstan, trip the on-off switch at
the rear of the receptacle with
your finger and hold the swab
against the rotating capstan.