fuel CHEVROLET CAMARO 1973 2.G Owners Manual
[x] Cancel search | Manufacturer: CHEVROLET, Model Year: 1973, Model line: CAMARO, Model: CHEVROLET CAMARO 1973 2.GPages: 84, PDF Size: 32.64 MB
Page 14 of 84
Downloaded from www.Manualslib.com manuals search engine Break-in Schedule
In addition to the new car
break-in instructions in this man
ual, it
is recommended that your
new Camaro be operated for
500
miles before trailer towing. If it is
necessary to tow during this period,
avoid speeds over
50 MPH and full
throttle starts. The same precau
tions should be observed whenever
a new engine, transmission
or axle
is installed in your car.
Operation in Foreign Countries
Your Camaro is designed to op
erate on fuel of approximately
91
research octane number or higher,
sold in the United
States and Can
ada.
If you plan to operate your
Camaro outside the continental
limits of the United
States or Can
ada, there
is a possibility that the
best fuels available in some coun
tries are
so low in anti-knock
quality that excessive knocking
and serious engine damage may
result from their
use. To minimize
this possibility, write to Chevrolet
Motor Division, Service Depart- ment,
Detroit, Michigan 48202
(or in Canada write to General
Motors of Canada Limited,
Owner
Relations Department, Oshawa,
Ontario),
giving:
• The vehicle identification num
ber ( on plate on instrument
panel ahead of the steering
wheel and visible through the
windshield, or from registration
slip or title).
• The country or countries in
which you plan to travel.
You
will be furnished informa-
11
tion on the quality of fuels avail
able in the countries in which you
plan to travel.
It is recommended
that you not operate your Camaro
in any country not having fuels
meeting the requirements
of your
Camaro engine. Engine modifica
tions are not available to compen
sate for low anti-knock quality
fuels. Operation of your car under
conditions of continuous
or exces
sive knocking constitutes misuse
of the engine for which the Chev
rolet Division
is not responsible
under the terms of the Chevrolet
New Vehicle Warranty.
Page 18 of 84
Downloaded from www.Manualslib.com manuals search engine proper gear position before re
leasing the clutch pedal.)
3.
Operate accelerator pedal and
starter
as outlined in step 3
(under Automatic Transmission
Models).
Engine Flooded
Depress accelerator pedal and
hold to floor while starting until
engine
is cleared of excess fuel and
is
running smoothly. Never
"pump" the accelerator pedal.
Warm-Up
Always let the engine idle for 20
to 30 seconds after starting and
drive at moderate speeds for several
miles, especially during cold
weather.
Driving with the Chevrolet Automatic Transmissions
The Turbo Hydra-Matic 350
and 400 are completely automatic
transmISSIons. All replace the
standard clutch and transmission.
Turbo Hydra-Malic 350
and 400
After starting the engine with the
selector lever in N (Neutral) or P
(Park) position select the range de
sired (see table) and depress the accelerator.
A gradual start with a
steady increase in accelerator pres
sure will result in best possible fuel
economy. Rapid acceleration for
fast starts will result in greater
fuel consumption.
Automatic transmission shift
quadrants of all GM cars continue
the uniform sequence of selector
positions. This particularly benefits
multicar families and those who
occasionally drive other cars. Shift
15
indicators are arranged with "Park"
position at one end, followed in se
quence by "Reverse", "Neutral"
and the forward driving ranges.
All automatic transmissions are
equipped with a starter safety
switch designed to permit starting
the engine only when the trans
mission
is in the "Park" or "Neu
tral"
position. For additional
engine braking effect,
as sometimes
needed in mountainous driving,
Page 26 of 84
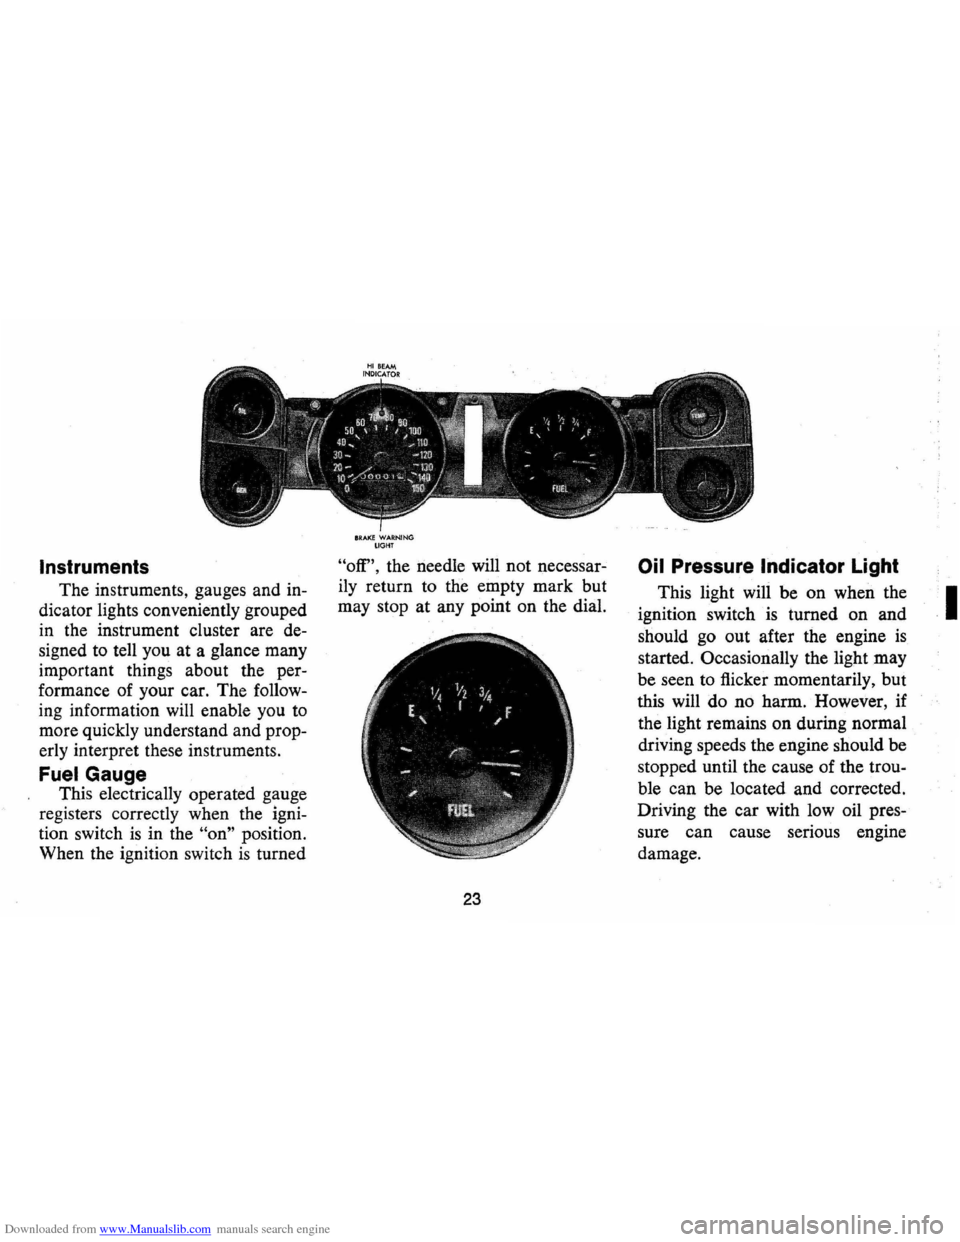
Downloaded from www.Manualslib.com manuals search engine Instruments
The instruments, gauges and in
dicator lights conveniently grouped
in the instrument cluster are de
signed to tell you at a glance many
important things about the per
formance of your car. The follow
ing information will enable you to
more quickly understand and prop
erly interpret these instruments .
Fuel Gauge
This electrically operated gauge
registers correctly when the igni
tion switch
is in the "on" position.
When the ignition switch
is turned
SRAKE WARNING UGHT
"off", the needle will not necessar
ily return to the empty mark but
may stop at any point on the dial.
23
Oil Pressure Indicator Light
This light will be on when the
ignition switch
is turned on and
should
go out after the engine is
started. Occasionally the light may
be seen to flicker momentarily, but
this will do no harm. However, if
the light remains on during normal
driving speeds the engine should be
stopped until the cause of the trou
ble can be located and corrected.
Driving the car with low oil pres
sure can cause serious engine
damage.
I
Page 48 of 84
Downloaded from www.Manualslib.com manuals search engine SERVICE AND MAINTENANCE
The time or mileage intervals on
the following pages are intended
as
a guide for establishing regular
maintenance and lubrication
periods for your car. Sustained
heavy duty
or high speed operations
or operation under adverse condi
tions may necessitate more frequent
servicing. To determine specific
recommendations for conditions
under which you use your car, con-
Fuel
Requirements
Your Camaro is designed to op
erate on a good quality fuel of
ap
proximately 91 Research Octane
Number or higher, commonly sold
in the United
States and Canada.
Use of a fuel which is too low in
suIt your Authorized Chevrolet
Dealer.
Maintenance Schedule
For owner convenience, a sep
arate maintenance folder has been
provided with your car which con
tains a complete schedule and
brief explanation of the safety,
emission control, lubrication and
anti-knock quality will result
in
"spark knock", a metallic rapping
noise generated during the
com
bustion process. It should be noted
that Research
Octane Number
does not completely describe fuel
octane quality. Therefore ,
if you
hear knock in your engine you
may wish
to try a different gaso
line.
If knocking persists consult
45
general maintenance it requires.
The maintenance folder informa
tion
is supplemented by this sec
tion of the
Owner's Manual, as
well as the separate emission con
trol systems folder also furnished
with your car. Read all three
pub
lications for a full understanding
of vehicle maintenance require
ments.
your authorized Chevrolet dealer.
In any case, continuous
or exces-
sive knocking may result in engine
.1
damage and constitutes misuse of
the engine for which Chevrolet
Motor Division
is not responsible
under the terms of the
New Vehi-
cle Warranty.
General Motors recommends
the
use of unleaded or low-lead (0
Page 49 of 84
Downloaded from www.Manualslib.com manuals search engine to 0.5 grams per gallon) gasolines
to minimize emissions
or hydro
carbons and particulates.
If un
leaded or low-lead gasolines are
not available, gasolines containing
more than
0.5 grams per gallon
may be used.
In states using the Gasoline
Performance and Information
Sys
tem of fuel designation, unleaded
or low-lead fuels having an anti
knock designation of
"2" or higher
are recommended.
Gas Cap-The fuel tank filler cap
has a new two-step removal and
installation procedure plus a pres
sure-vacuum safety relief valve. It
is equipped with a double set of
locking tangs.
To remove:
• Rotate cap one-half turn coun
terclockwise to clear the first set
of tangs from the slots inside the
filler neck. This will allow any
residual pressure to escape.
• Pull the cap outward and rotate
one-quarter turn counterclock
wise to clear second set of tangs
and remove the cap.
• To install, reverse this procedure.
NOTE: If this cap requires a re
placement, only a cap with these
same features should be used. Fail
ure
to use the correct cap can re
sult in a serious malfunction of the
system. Correct replacement caps
may be obtained from your Au
thorized Chevrolet Dealer.
Engine Oil and Filter
Recommendations
• Use only SE engine oil.
• Change oil each 4 months or
6,000 miles. If more than 6,000
miles are driven in a 4-month
period, change oil each
6,000
miles.
46
• Change oil each 2 months or
3,000 miles, whichever occurs
first, under
th~ following con
ditions:
- driving in dusty conditions,
- trailer pulling,
- extensive idling,
- short-trip operation at freez-
ing temperatures (engine not
thoroughly warmed-up).
• Operation in dust storms may
require an immediate oil change.
• Replace the oil filter at the first
oil change, and every second oil
change thereafter. AC oil filters
provide excellent engine pro
tection.
See your Chevrolet dealer for ad
vice on the frequency of oil and
filter changes under unusual driv
ing conditions.
The above recommendations ap
ply to the first change
as well as
subsequent oil changes. The oil
change interval for your Camaro
Page 50 of 84
Downloaded from www.Manualslib.com manuals search engine engine is based on the use of SE oils
and quality oil filters.
Oil change in
tervals longer than those listed
above will seriously reduce engine
life and may affect Chevrolet obli
gation under the provisions of the
New Vehicle Warranty.
A high quality
SE oil was in
stalled in your engine at the fac
tory.
It is not necessary to change
this factory-installed oil prior to the
recommended normal change pe
riod. However, check the oil level
more frequently during the break
in period since higher oil consump
tion
is normal until the piston rings
become seated.
NOTE: Non-detergent and other
low quality oils are specifically
not recommended.
Only the use
of
SE engine oils and proper oil
and filter change intervals assure
you of continued proper lubrica
tion of your Camaro engine.
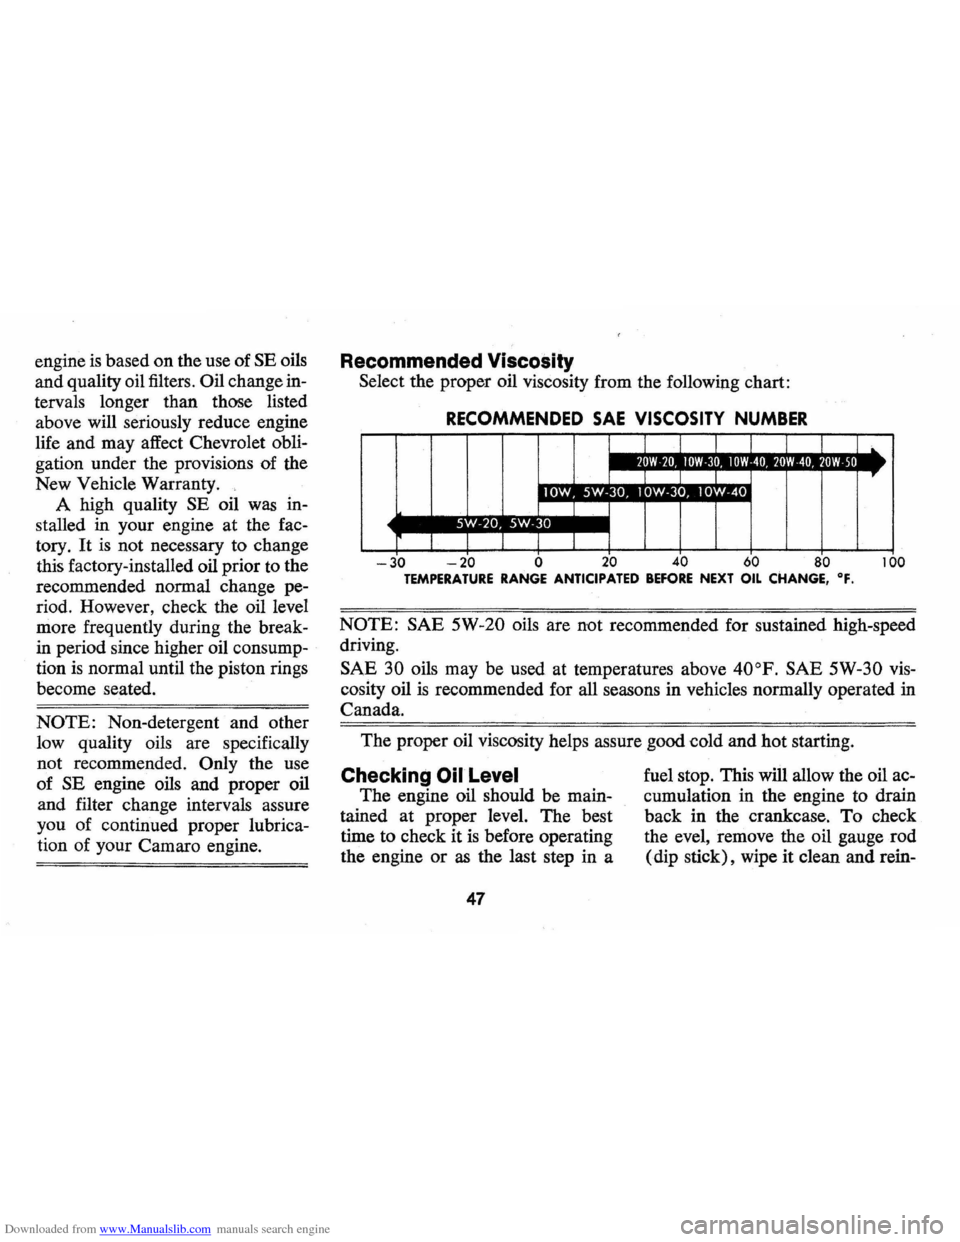
Recommended Viscosity
Select the proper oil viscosity from the following chart:
RECOMMENDED SAE VISCOSITY NUMBER
I I _111'1.11 11II'laU.III'11 .. 1_111'.'l!! :1. 11'1&'1_
I I
. I
I r I
-30 -20 0 20 40 60 80 100 TEMPERATURE RANGE ANTICIPATED BEFORE NEXT OIL CHANGE, OF.
NOTE: SAE 5W-20 oils are not recommended for sustained high-speed
driving.
SAE 30 oils may be used at temperatures above 40oP. SAE 5W-30 vis
cosity oil is recommended for all seasons in vehicles normally operated in
Canada.
The proper oil viscosity helps assure good cold and hot starting.
Checking Oil Level
The engine oil should be main
tained at proper level. The best
time to check it
is before operating
the engine
or as the last step in a
47
fuel stop. This will allow the oil ac
cumulation in the engine to drain
back in the crankcase. To check
the
eve!, remove the oil gauge rod
(dip stick), wipe it clean and rein-
Page 59 of 84
Downloaded from www.Manualslib.com manuals search engine Tire Care
Tires should be checked regu
larly for proper inflation pressure,
wear, and damage. The following
information will assist you in prop
erly caring for your tires:
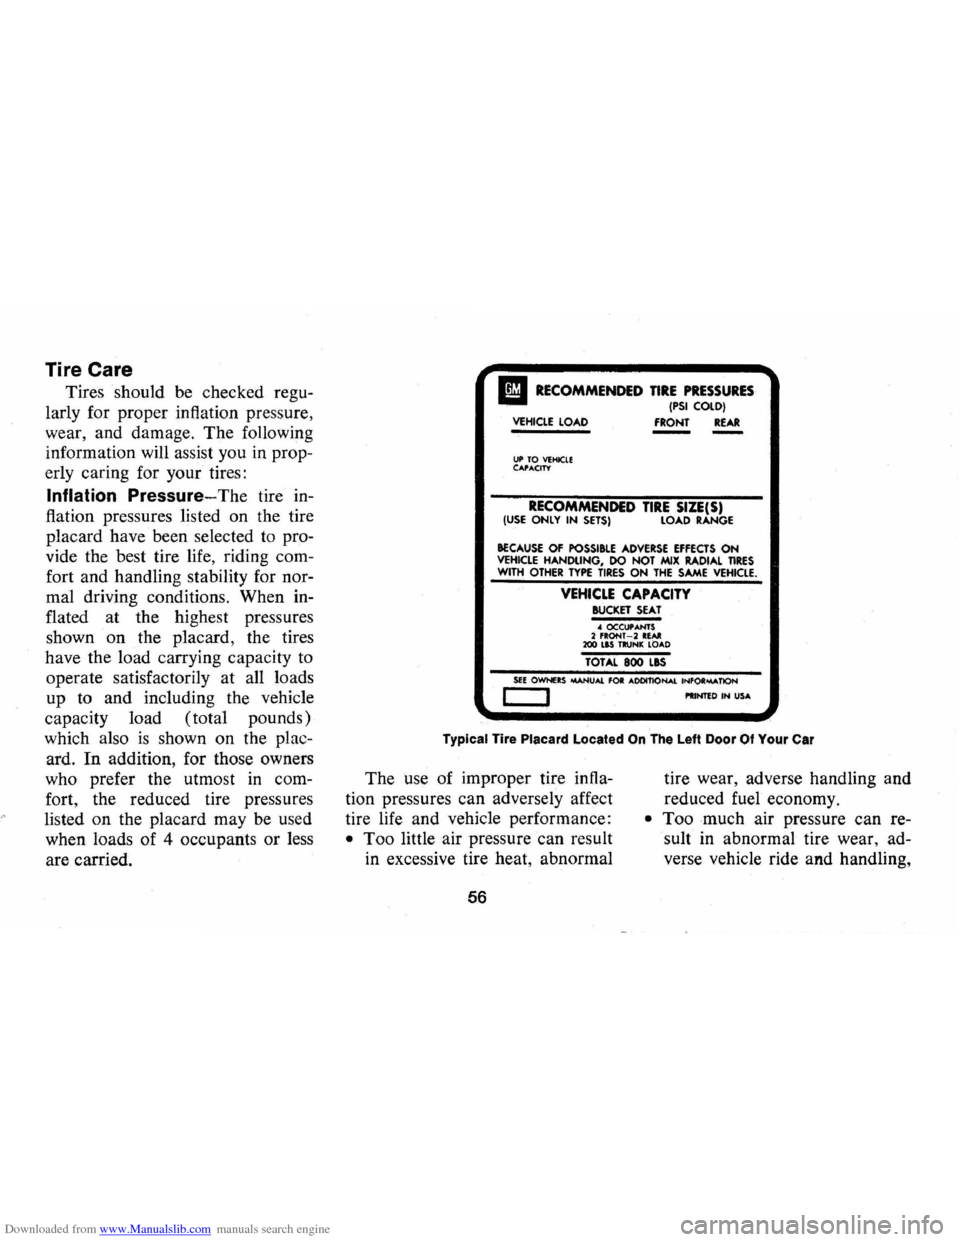
Inflation
Pressure-The tire in
flation pressures listed on the tire
placard have been selected to pro
vide the best tire life, riding com
fort and handling stability for nor
mal driving conditions. When in
flated at the highest pressures
shown
on the placard, the tires
have the load carrying capacity to
operate satisfactorily at all loads
up to and including the vehicle
capacity load (total pounds)
which also
is shown on the plac
ard.
In addition, for those owners
who prefer the utmost
in com
fort , the reduced tire pressures
listed on the placard may be used
when loads of 4 occupants or less
are carried.
II RECOMMENDED TIRE PRESSURES . (PSI COlD) VEHICLE LOAD
FRONT REAR
UP TO VEHICLE C"',"'CITY
RECOMMENDED TIRE SIZE(S) (USE ONLY IN SETS) LOAD RANGE
BECAUSE OF POSSI&lE ADVERSE EFFECTS ON VEHICLE HANDliNG, DO NOT MIX RADIAL TIRES WITH OTHER TYPE TIRES ON THE SAME VEHICLE.
VEHICLE CAPACITY BUCKET SEAT ~ OCCU,""NTS 2 fRONT -2 RE .... 200 lIS TRUNK lO ... D
TOTAL 800 lIS
SEE OWNERS oAANU"" fOR ... OOITlONAl INfOR""'TlON c::=:J I'IINTED IN US ...
Typical Tire Placard Located On The Left Door Of Your Car
The use of improper tire infla
tion pressures can adversely affect
tire life and vehicle performance:
• Too little air pressure can result
in excessive tire heat, abnormal
56 tire
wear, adverse handling and
reduced fuel economy.
• Too much air pressure can re
sult in abnormal tire wear, ad
verse vehicle ride and handling,
Page 64 of 84

Downloaded from www.Manualslib.com manuals search engine However, this warranty is void if
any inflator containing sealants
is
used. Approved inflation gases are
air, carbon dioxide, nitrogen, and
Freon 22.
Underbody Maintenance
The effects of salt and other
corrosive materials used for ice
and snow removal and dust con
trol can result in accelerated rust
ing and deterioration of under
body component s such
as brake
and fuel lines, frame, underbody
floor pan, exhaust system, brac
kets, parking brake cables. These
corrosive effects, however , can be
reduced
by periodic flushing of the underbody
with plain water. In
geographic areas having a heavy
concentration of such corrosive
materials, it
is recommended that
the complete underbody be in
spected and flushed at least
once
each year, preferably after a win
ter's exposure.
Particular attention
should be given to cleaning out
underbody members where dirt
and other foreign materials may
have collected .
If desired, your Chevrolet deal
er can perform
this service for
you. In addition , he can provide
recommendations on undercoat
ing materials which will help pro
tect your vehicle from corrosion.
61
Battery Care (Energizer)
Check fluid level monthly utiliz
ing the level indicator cap marked
"Delco Eye". If the transparent eye
within the cap glows, fluid level
is
low. Add only colorless, odorless
drinking water or distilled water to
bring level to split ring in filler
opening.
Page 66 of 84
Downloaded from www.Manualslib.com manuals search engine The chart on the previous page, and the, information on the pages
which follow, contains information designed to aid the average
driver to discover, and possibly correct, conditions resulting in minor
mechanical difficulties
in his car. The chart, designed to point out
possible solutions to several
of the most common automotive malfunctions and point out a logical checking sequence, will lead step
by step to the most
likely causes and corrective procedures. If, after
making the checks and adjustments suggested, the source of the
trouble
has not been found and corrected, it is strongly recom
mended that an Authorized Chevrolet Dealer inspect the vehicle and make whatever repairs or adjustments are necessary.
FUEL SYSTEM AND ENGINE
If the ignition switch will cause the engine to "turn over" or
"crank" but the car will not start, check Steps A through 0 below.
NOTE: If continual ··f1ooding··, of the carburetor is evidenced by a
carburetor wet with fuel or black exhaust smoke, perform the
operation suggested in paragraph D only.
(A) The first and most obvious, and one of the most frequently
overlooked, items to check when
you have difficulty in starting your car is the amount of fuel in the
tank. Make it a habit to check the
FUEL GAUGE regularly and most
especially at a time when the engine will "turn over" but will not
start.
(8)
If the fuel tank is not empty,
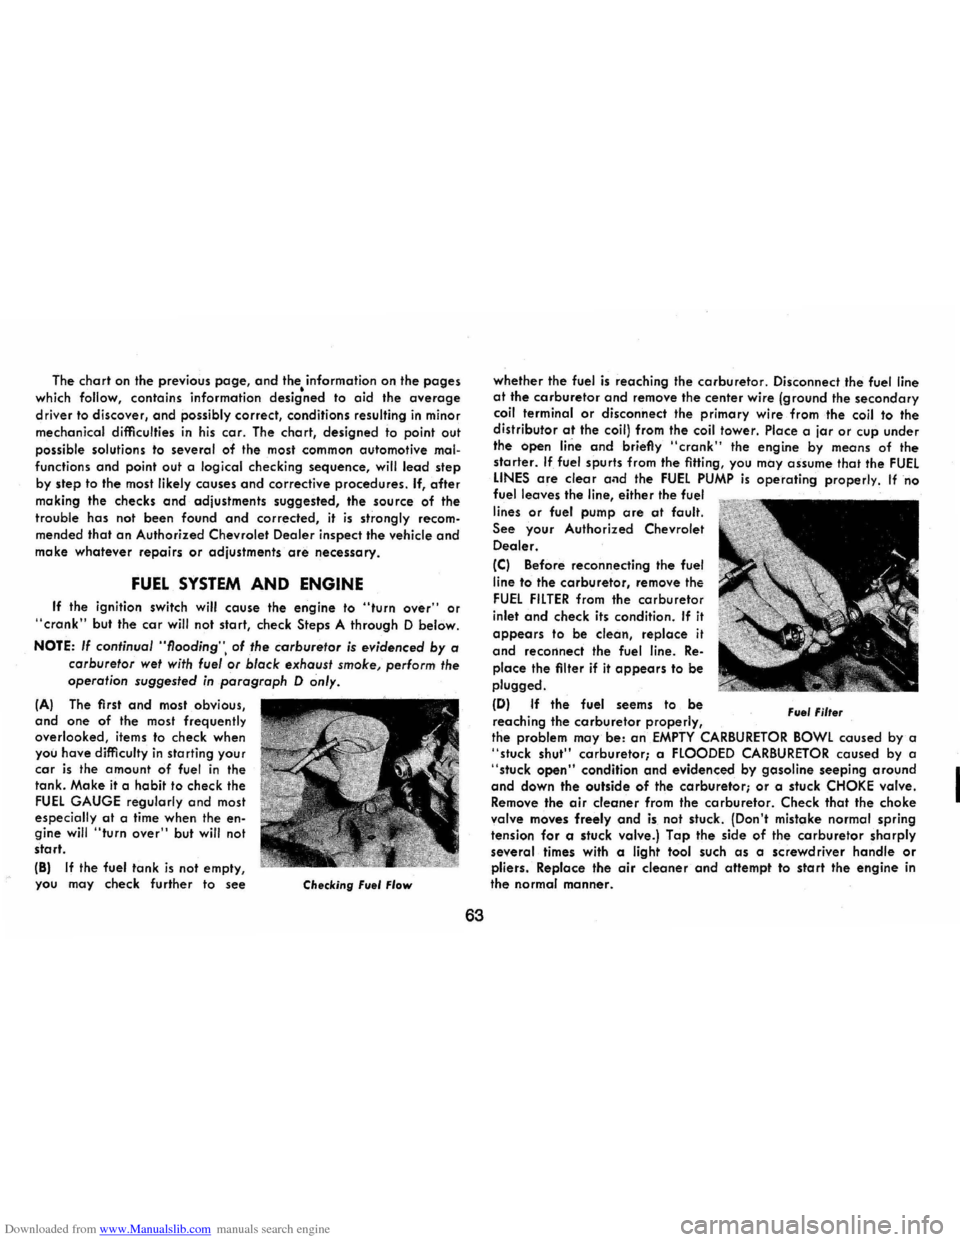
you may check further to see
Checking Fuel Flow
63
whether the fuel is reaching the carburetor. Disconnect .the fuel line at the carburetor and remove the center wire (ground the secondary coil terminal or disconnect the primary wire from the coil to the
distributor at the coil) from the coil tower. Place a jar or cup under
the open line and briefly "crank" the engine by means of the
starter. If fuel spurts from the fitting, you may assume that the FUEL LINES are clear and the FUEL PUMP is operating properly. If no
fuel leaves the line, either the fuel
lines
or fuel pump are at fault.
See your Authorized Chevrolet
Dealer.
(C) Before reconnecting the fuel
line to the carburetor, remove
the
FUEL FILTER from the carburetor
inlet and check its condition. If it
appears to be clean, replace it
and recorinect the fuel line. Re
place the filter if it appears to be
plugged.
(D) If the fuel seems to be
reaching the carburetor properly, Fuel Filter
the problem may be: an EMPTY CARBURETOR BOWL caused by a "stuck shut" carburetor; a FLOODED CARBURETOR caused by a "stuck open" condition and evidenced by gasoline seeping around and down the outside of the carburetor; or a stuck CHOKE valve.
Remove the air cleaner from the carburetor. Check that the choke
valve moves freely and is not stuck. (Don't mistake normal spring
tension for a stuck valve.) Tap the side of the carburetor sharply
several times with a light tool such as a screwdriver handle or pliers. Replace the air cleaner and attempt to start the engine in the normal manner.
I
Page 67 of 84
Downloaded from www.Manualslib.com manuals search engine IE) If the car will start but stalls when hot or has a rough idle,
you can suspect a faulty IDLE ADJUSTMENT, a malfunctioning AUTOMATIC CHOKE or an extremely dirty and blocked AIR CLEANER ELEMENT. Replace paper element air cleaner if necessary. Idle adjustment or automatic choke service (other than that outlined in paragraph 0 above) should be performed by your
Chevrolet Dealer.
If the above Fuel System checks and the checks suggested under the Electrical System following do not correct the malfunction, it is recommended that you return to your Authorized Chevrolet Dealer
for further checks, adjustments or repairs.
ELECTRICAL SYSTEM If, when the ignition key is turned to "Start", the engine will not
turn over, you have good reason to suspect electrical trouble. NOTE: Never remove Delcotron bat lead without first disconnecting
battery ground cable.
IF) When there is no response at all to attempts to start the car, check the obvious-your AUTOMATIC TRANSMISSION SELECTOR LEVER must be in Neutral or Park position (manual transmission
must have clutch depressed all the way to floor) before the engine can be started. Turning the IGNITION SWITCH rapidly back and forth several times will sometimes correct a poor internal switch
contact.
IG) The BATIERY may be discharged. If so, lights will be dim and the horn will have a poor tone if it will blow at all.
Usually a garage recharge will be necessary to return the battery to operation. Occasionally, however, a long drive will recharge the battery. NOTE: If the battery is determined to be dead, and for no apparent reason, have your Authorized Chevrolet Dealer check the
battery, the GENERATOR and the VOLTAGE REGULATOR.
GENERATOR trouble should already have been indicated by the generator indicator light on the instrument panel.
64
POOR BATIERY CONNECTIONS may be suspected if the car has operated properly a short time before and now not even the horn
will operate. Check both ends of both battery cables. If the connections are corroded, a car may sometimes be restored to operation by removing all cable ends, scraping all contacting surfaces
clean with a pen knife, and reassembling. If the cables are broken,
they must be replaced. The power supply should now be restored
unless the battery is dead.
IH) If, however, the lights and horn work properly but the starter will still not turn over, check the STARTER connections. A "click" from the starter solenoid indicates that the wiring to the starter is properly installed. If the wiring seems to be clean and tightly in
stalled, the trouble is probably in the starter itself and should be referred to your Authorized Chevrolet Dealer.
When the engine will
"turn over" but will not start, the foilowing
items may be checked along with the Fuel Systems Checks listed
previously.
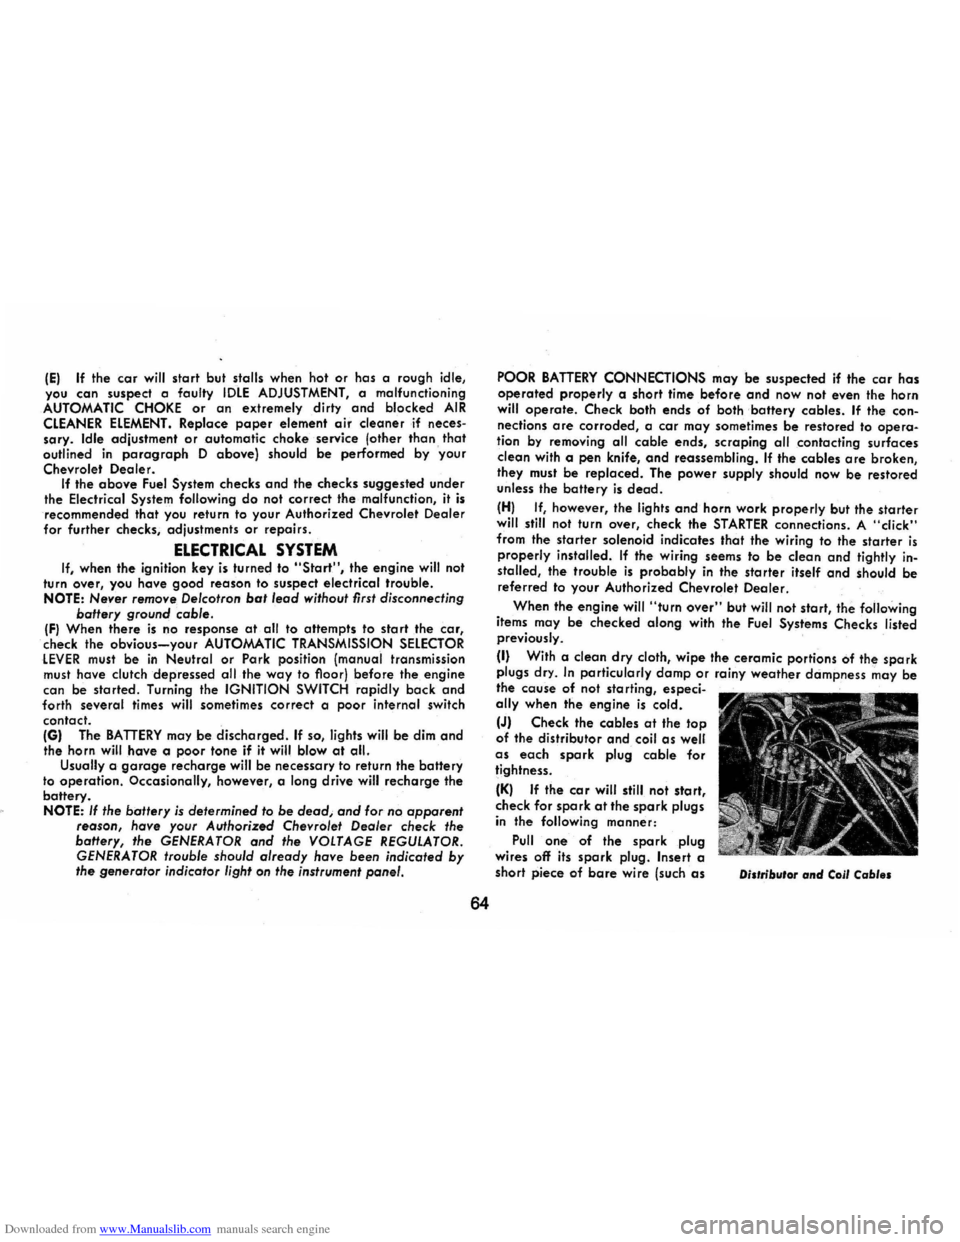
II) With a clean dry cloth, wipe the ceramic portions of the spark plugs dry. In particularly damp or rainy weather dampness may be
the cause of not sta rting, especi
ally when the engine is cold.
IJ) Check the cables at the top of the distributor and coil as well as each spark plug cable for
tightness.
IK) If the co r will still not sta rt,
check for spark at the spark plugs in the following manner:
Pull one of the spark plug
wires off its spark plug. Insert a
short piece of bare wire (such as Di.,ribu'or and Coil Cab I ••