ABS CHEVROLET CAMARO 1997 4.G Owners Manual
[x] Cancel search | Manufacturer: CHEVROLET, Model Year: 1997, Model line: CAMARO, Model: CHEVROLET CAMARO 1997 4.GPages: 404, PDF Size: 20.96 MB
Page 66 of 404
Downloaded from www.Manualslib.com manuals search engine Passive Arming
If the ignition was just turned off and a door was
opened, the system will arm
six seconds after all doors
are closed, whether or not you lock them. In all other
cases, the
system will wait 30 seconds after all doors are
closed before arming, allowing you time to get into the
vehicle and put the key in the ignition. The parking
lamps will flash when the system arms. Passive arming
is not enabled from the factory.
Disarming the System
There are two ways to disarm the system:
1. Press the UNLOCK button on the key chain transmitter.
If the horn chirps two or three times when you unlock the
car, the alarm sounded in your absence. Two chirps
means that the shock sensor was set
off and three chirps
means that a door
or the hatch was opened.
2. Turn the ignition to the RUN position with the
proper key.
For more information on customizing the features
mentioned here, see “Feature Customization”
in the Index.
lhrning Off the Alarm
If you started the alarm by pressing the panic button on
the key chain transmitter, you must either push that button again or
turn the ignition switch to the ON
position
to stop the alarm.
If the alarm is sounding due
to the shock sensor or a
door or hatch opening, it can be turned off by either
turning the ignition switch with a proper key inserted or
by pressing any button
on the key chain transmitter. If
you use your key chain transmitter to silence the alarm,
additional things will happen depending upon which
button
you press.
0
0
0
0
Pressing the UNLOCK button will turn the alarm
off, unlock the driver’s door and disarm the system.
Pressing the
LOCK button will turn the alarm off,
keep the doors locked and keep the system armed.
Pressing the trunk symbol button twice within five
seconds will turn the alarm off and will unlock and
disarm the hatch only.
Pressing the panic button will turn the alarm off,
keep the doors locked and keep the system armed.
If the alarm is sounding because an incorrect ignition
key was used, press any button on the key chain
transmitter
to turn the alarm off.
The alarm will stop by itself after two minutes.
2-16
Page 121 of 404
Downloaded from www.Manualslib.com manuals search engine Raising Your Convertible Top
1. Park on a level surface. Set the parking brake firmly.
If you have an automatic transmission, shift into
PARK (P).
If you have a manual transmission, shift
into REVERSE
(R). The ignition must be in the
ACC
or RUN position or RAP must be on. Then
lower both sun visors and lower both windows at
least
3 inches (8 cm). If the boot cover is in place, it
must be removed first.
3. Install the middle secuon of the cover by sliding the
tabs into the slots on the right side cover. Lower the
cover and engage the latch.
4. Close the trunk.
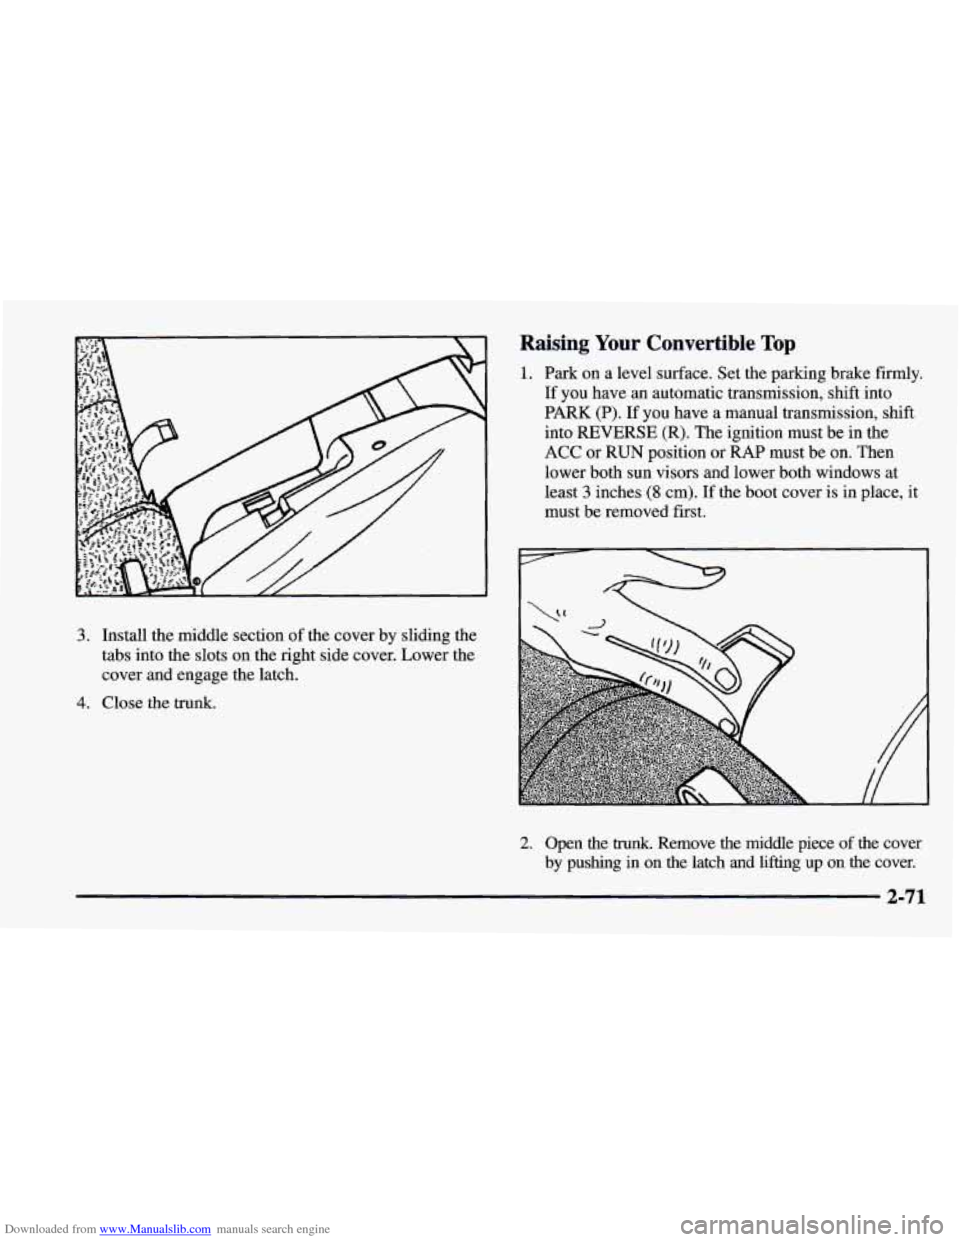
2. Open the trunk. Remove the middle piece of the cover
by pushing in on the latch and lifting up on the cover.
2-71
Page 129 of 404
Downloaded from www.Manualslib.com manuals search engine Voltmeter
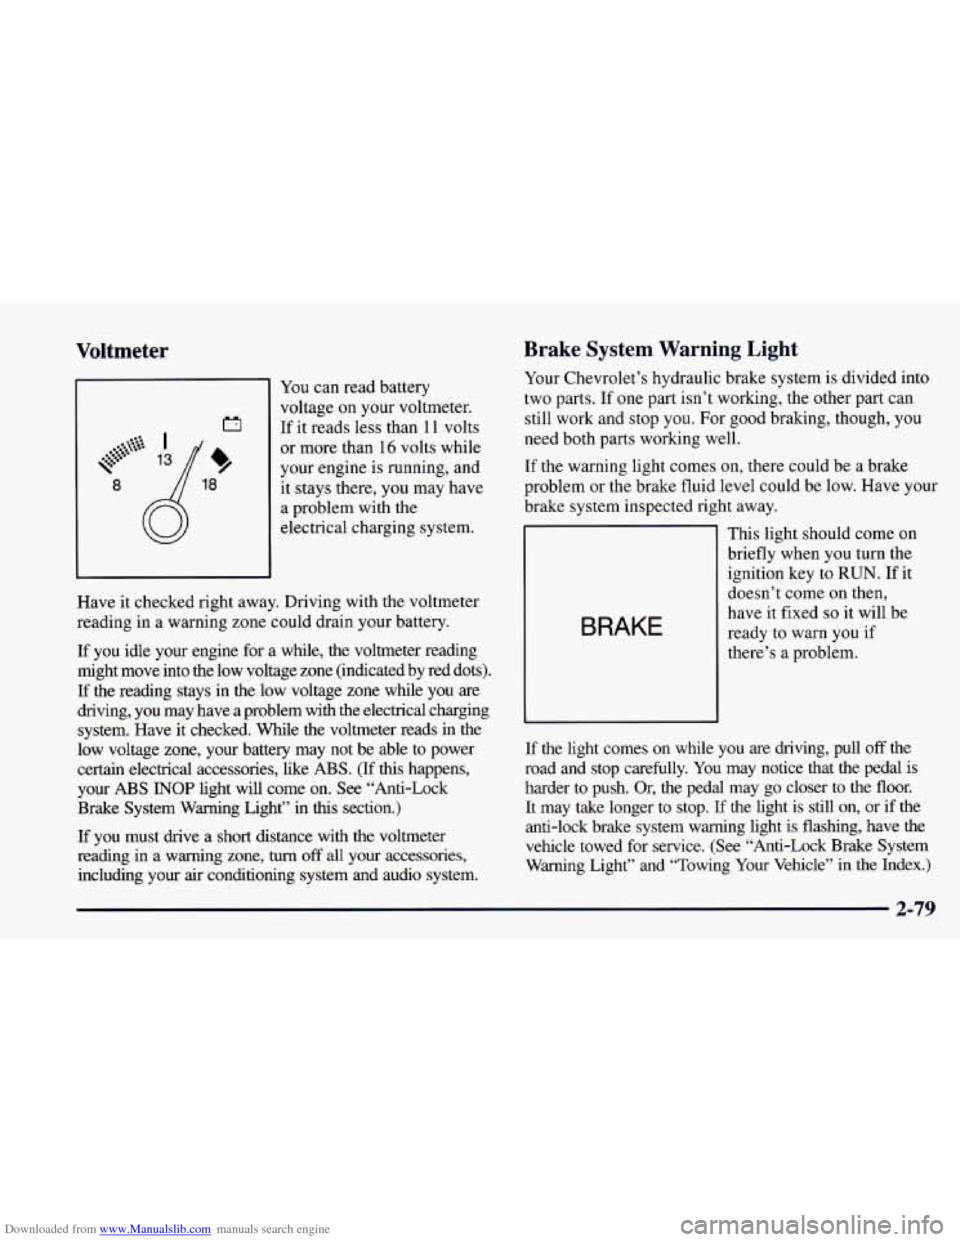
You can read battery
voltage on your voltmeter.
If it reads less than 11 volts
or more than 16 volts while
your engine is running, and
it stays there, you may have
a problem with the
electrical charging system.
Have it checked right away. Driving with the voltmeter
reading in
a warning zone could drain your battery.
If you idle your engine for a while, the voltmeter reading
might move into the low voltage zone (indicated by red dots).
If the reading stays in the low voltage zone while you are
driving, you may have a problem with the electrical charging
system. Have it checked. While
the voltmeter reads in the
low voltage zone, your battery may not be able to power
certain electrical accessories, like
ABS. (If this happens,
your
ABS INOP light will come on. See “Anti-Lock
Brake System Warning Light” in
this section.)
If you must drive a short distance with the voltmeter
reading in a warning zone, turn
off all your accessories,
including your air conditioning system and audio system.
Brake System Warning Light
Your Chevrolet’s hydraulic brake system is divided into
two parts. If
one part isn’t working, the other part can
still work and stop you. For good braking, though, you
need both parts working well.
If the warning light comes on, there could be a brake
problem or the brake fluid level could be low. Have your
brake system inspected right away.
BRAKE
This light should come on
briefly when you turn the
ignition key to
RUN. If it
doesn’t come on then,
have it fixed
so it will be
ready to warn you if
there’s a problem.
If the light comes on while you are driving, pull
off the
road and stop carefully. You may notice that the pedal
is
harder to push. Or, the pedal may go closer to the floor.
It may take longer to stop. If the light is still on, or if the
anti-lock brake system warning light is flashing, have the
vehicle towed for service. (See “Anti-Lock Brake System
Warning Light” and “Towing Your Vehicle” in the Index.)\
2-79
Page 130 of 404
Downloaded from www.Manualslib.com manuals search engine Your brake system may not be working properly
if the brake system warning light is on. Driving
with the brake system warning light on can lead
to an accident.
If the light is still on or if the
anti-lock brake system warning light is flashing
after you’ve pulled off the road and stopped
carefully, have the vehicle towed for service.
Anti-Lock Brake System Warning Light
ABS
INOP
With the anti-lock brake
system, this light will come
on when you start your
engine and it will stay
on for three seconds.
That’s normal.
When the ignition is on, the brake system warning light
will also come on when you
set your parking brake. The
light will stay
on if your parking brake doesn’t release
fully. If it stays on after your parking brake is
fully
released, it means you have a brake problem. If
the light flashes when you’re driving, you don’t have
anti-lock brakes and there could be
a problem with your
regular brakes. Pull
off the road and stop carefully. You
may notice that the pedal is harder to push. Or, the pedal
may go closer to
the floor. It may take longer to stop.
Have
the vehicle towed for service. (See “Towing Your
Vehicle”
in the Index.)
2-80
Page 171 of 404
Downloaded from www.Manualslib.com manuals search engine Anti-Lock Brakes (ABS)
Your vehicle has anti-lock brakes (ABS). ABS is an
advanced electronic braking system that will help
prevent a braking skid.
When you start your engine, or when you begin to drive
away, your anti-lock brake system will check itself. You
may hear
a momentary motor or clicking noise while
this test is going on, and
you may even notice that your
brake pedal moves a little. This
is normal.
ABS
INOP
If there’s a problem with the
anti-lock brake system, this
warning light will stay
on or
flash. See “Anti-Lock
Brake System Warning
Light” in the Index.
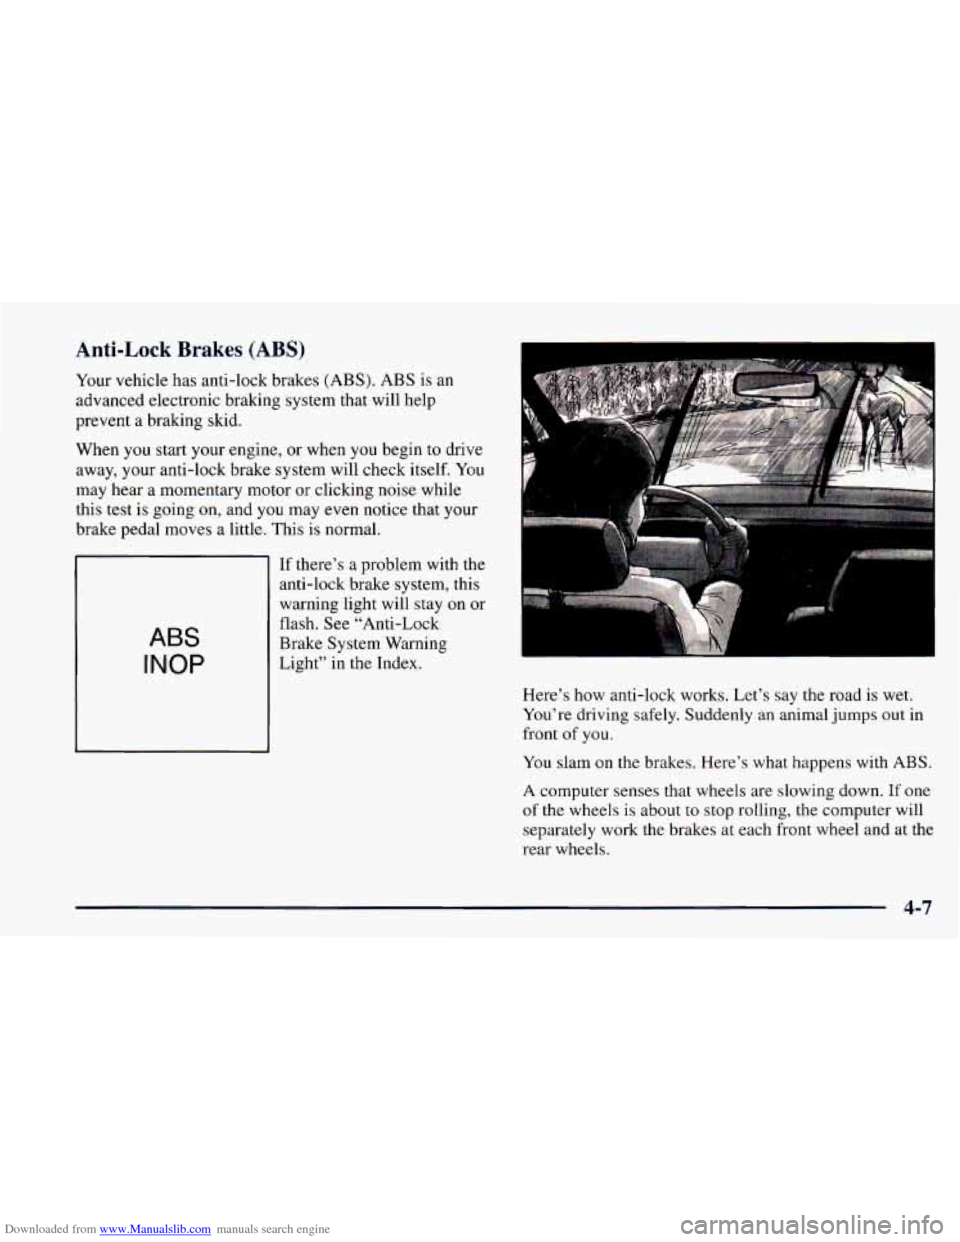
Here’s how anti-lock works. Let’s say the road is wet.
You’re driving safely. Suddenly an animal jumps out in
front of you.
You slam on the brakes. Here’s what happens with ABS.
A computer senses that wheels are slowing down. If one
of the wheels is about to stop rolling, the computer will
separately work the brakes at each front wheel and at the
rear wheels.
4-7
Page 179 of 404
Downloaded from www.Manualslib.com manuals search engine Loss of Control
Let’s review what driving experts say about what
happens when the three control systems (brakes, steering
and acceleration) don’t have enough friction where
the
tires meet the road to do what the driver has asked.
In any emergency, don’t give up. Keep trying to steer and
constantly seek an escape route or area of less danger.
Skidding
In a skid, a driver can lose control of the vehicle.
Defensive drivers avoid most skids by taking reasonable
care suited
to existing conditions, and by not “overdriving”
those conditions. But skids are always possible.
The three types of skids correspond to your Chevrolet’s
three control systems. In the braking skid, your wheels
aren’t rolling. In the steering or cornering skid, too
much speed or steering in a curve causes tires
to slip and
lose cornering force. And
in the acceleration skid, too
much throttle causes the driving wheels to spin.
A cornering skid
is best handled by easing your foot off
the accelerator pedal.
If you have the ASR system, remember: It helps avoid
only the acceleration skid. If
you do not have
ASR, or if the system is off, then an
acceleration skid is also best handled by easing your
foot off the accelerator pedal.
If your vehicle starts to slide, ease your foot off the
accelerator pedal and quickly steer the way you want the
vehicle to go. If
you start steering quickly enough, your
vehicle may straighten out. Always be ready for a
second skid
if it occurs.
Of course, traction is reduced when water, snow, ice,
gravel or other material is on
the road. For safety, you’ll
want to slow down and adjust your driving to these
conditions. It is important
to slow down on slippery
surfaces because stopping distance will be longer and
vehicle control more limited.
While driving on a surface with reduced traction, try
your best to avoid sudden steering, acceleration or
braking (including engine braking by shifting to a
lower gear). Any sudden changes could cause the tires
to slide.
You may not realize the surface is slippery until
your vehicle is skidding. Learn to recognize warning
clues
-- such as enough water, ice or packed snow on
the road to make a “mirrored surface” -- and slow down
when
you have any doubt.
Remember: Any anti-lock brake system
(ABS) helps
avoid
only the braking skid.
4-15
Page 203 of 404
Downloaded from www.Manualslib.com manuals search engine Parking on Hills
You really should not park your vehicle, with a trailer
attached, on
a hill. If something goes wrong, your rig
could start
to move. People can be injured, and both
your vehicle and the trailer can be damaged.
But if you ever have to park your rig on a hill, here’s
how to do it:
1.
2.
3.
4.
5.
Apply your regular brakes, but don’t shift
into PARK (P)
yet, or into gear for a
manual transmission.
Have someone place chocks under the trailer wheels.
When the wheel chocks are
in place, release the
regular brakes. Then apply your parking brakes
until the chocks absorb the load.
Reapply the regular brakes. Then apply your parking
brake and then shift to PARK(P) or REVERSE (R)
for a manual transmission.
Release the regular brakes.
When You Are Ready to Leave After
Parking on
a Hill
1. Apply your regular brakes and hold the pedal down
while you:
Start your engine;
0 Shift into a gear; and
0 Release the parking brake.
2. Let up on the brake pedal.
3. Drive slowly until the trailer is clear of the chocks.
4. Stop and have someone pick up and store the chocks.
Maintenance When Trailer Towing
Your vehicle will need service more often when you’re
pulling
a trailer. See the Maintenance Schedule for
more on this. Things that are especially important
in
trailer operation are automatic transmission fluid (don’t
overfill), engine oil, axle lubricant, belt, cooling system
and brake adjustment. Each
of these is covered in this
manual, and the Index will help
you find them quickly.
If you’re trailering, it’s a good idea to review these
sections before you start your trip.
Check periodically
to see that all hitch nuts and bolts
are tight.
4-39
Page 215 of 404
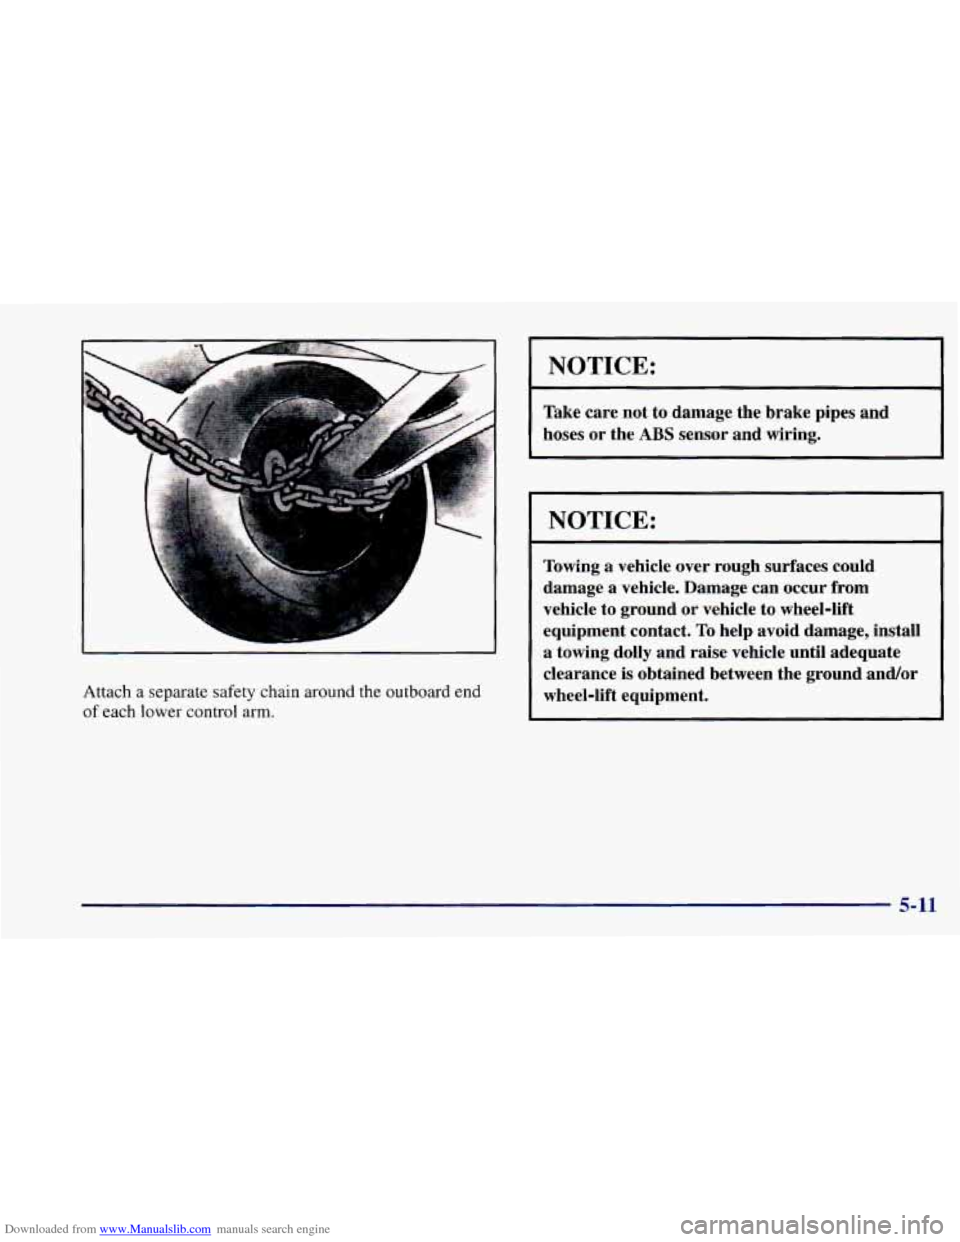
Downloaded from www.Manualslib.com manuals search engine Attach a separate safety chain around the outboard end
of each lower control arm.
NOTICE: I
Take care not to damage the brake pipes and
hoses
or the ABS sensor and wiring.
NOTICE:
Towing a vehicle over rough surfaces could
damage a vehicle, Damage can occur from
vehicle to ground or vehicle to wheel-lift
equipment contact,
To help avoid damage, install
a towing dolly and raise vehicle until adequate
clearance
is obtained between the ground and/or
wheel-lift equipment.
5-11
Page 290 of 404
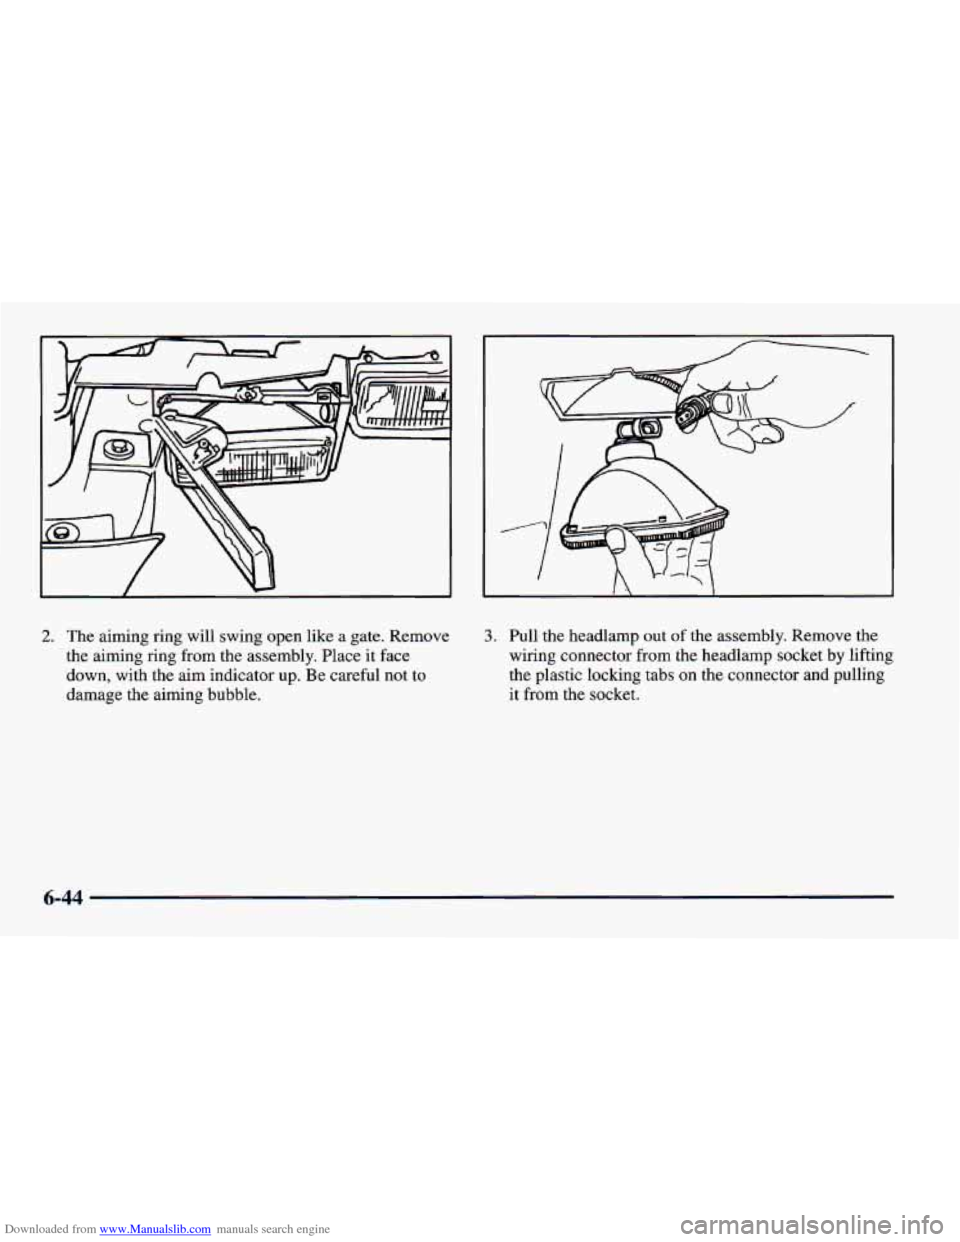
Downloaded from www.Manualslib.com manuals search engine 2. The aiming ring will swing open like a gate. Remove
the aiming ring from the assembly. Place it face
down, with the aim indicator up.
Be careful not to
damage the aiming bubble.
3. Pull the headlamp out of the assembly. Remove the
wiring connector from the headlamp socket by lifting
the plastic locking tabs on the connector and pulling
it from the socket.
6-44
Page 291 of 404
Downloaded from www.Manualslib.com manuals search engine 4. Check the new headlamp again. The number on the
lamp must match the number
of the headlamp being
replaced. The letter
U or L must also match.
5. Plug the wiring connector into the headlamp socket.
6. Place the new headlamp in the headlamp assembly.
Snap
the locking tabs onto the socket.
The socket must be pointing in the same direction
the socket
on the burned out bulb was.
7. Insert the tabs on the aiming ring into the tabs in the
8. Hold the aiming ring closed, insert the screws at the
end
of the ring. Tighten the screws until the aiming
ring touches the plastic nuts on both the top and
bottom.
Do not overtighten. Do not damage the
vertical aiming bubble.
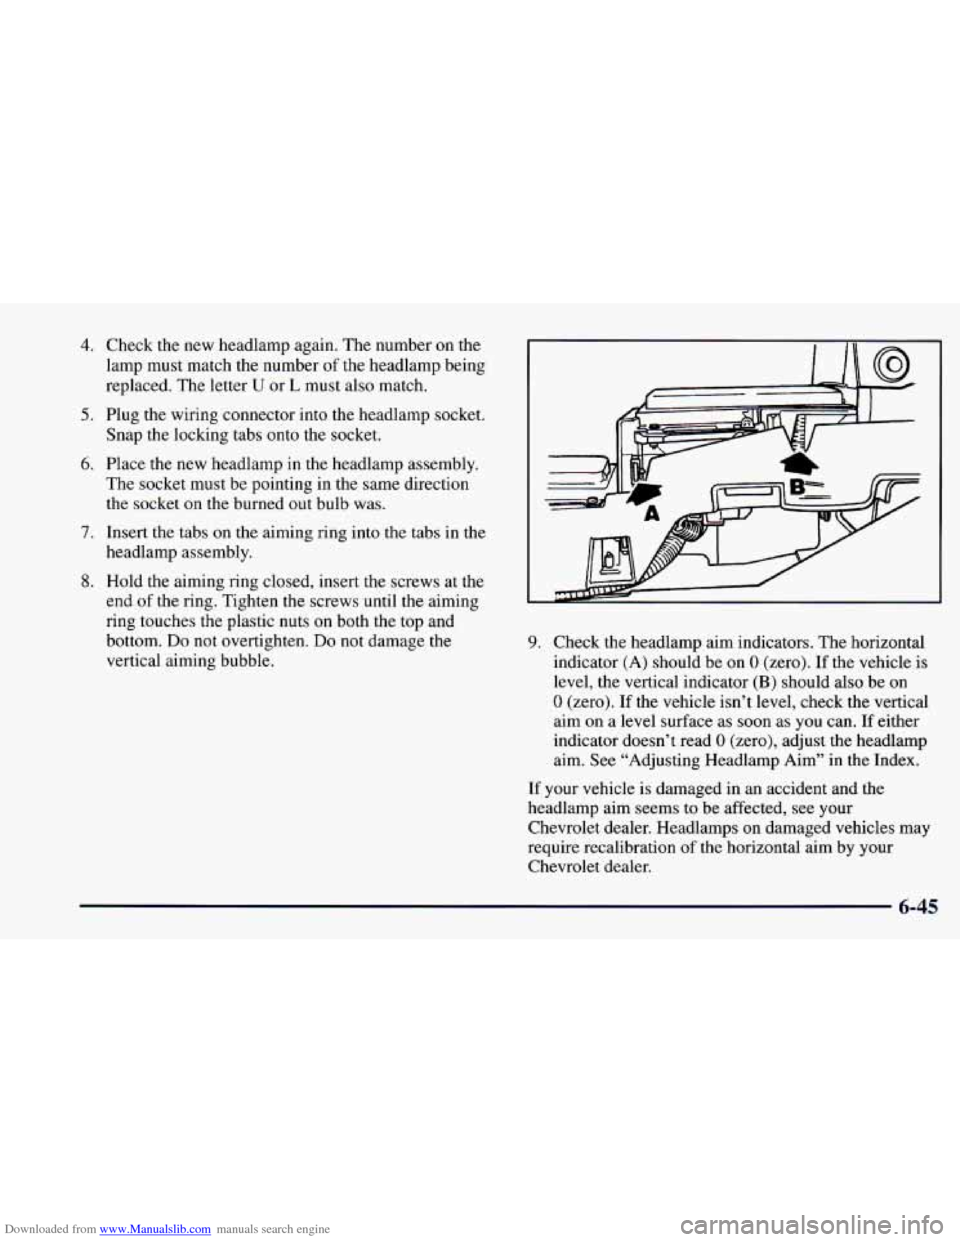
headlamp assembly. 9. Check the
headlamp aim indicators. The horizontal
indicator
(A) should be on 0 (zero). If the vehicle is
level, the vertical indicator
(B) should also be on
0 (zero). If the vehicle isn’t level, check the vertical
aim on a level surface as soon as you can.
If either
indicator doesn’t read
0 (zero), adjust the headlamp
aim. See “Adjusting Headlamp Aim’’ in the Index.
If your vehicle is damaged in an accident and the
headlamp aim seems to be affected, see your
Chevrolet dealer. Headlamps on damaged vehicles may
require recalibration of the horizontal aim by your
Chevrolet dealer.
6-45