bulb CHEVROLET CAMARO 1997 4.G Owners Manual
[x] Cancel search | Manufacturer: CHEVROLET, Model Year: 1997, Model line: CAMARO, Model: CHEVROLET CAMARO 1997 4.GPages: 404, PDF Size: 20.96 MB
Page 96 of 404
Downloaded from www.Manualslib.com manuals search engine As you signal a turn or a lane change, if the arrows don’t
flash but just stay on
as you signal a turn or lane change,
a signal bulb
may be burned out and other drivers won’t
see your turn signal.
If a bulb is burned out, replace it to help avoid an
accident. If the arrows don’t go on at all when
you
signal a turn, check the fuse (see “Fuses and Circuit
Breakers” in the Index).
Headlamp High/Low Beam Changer
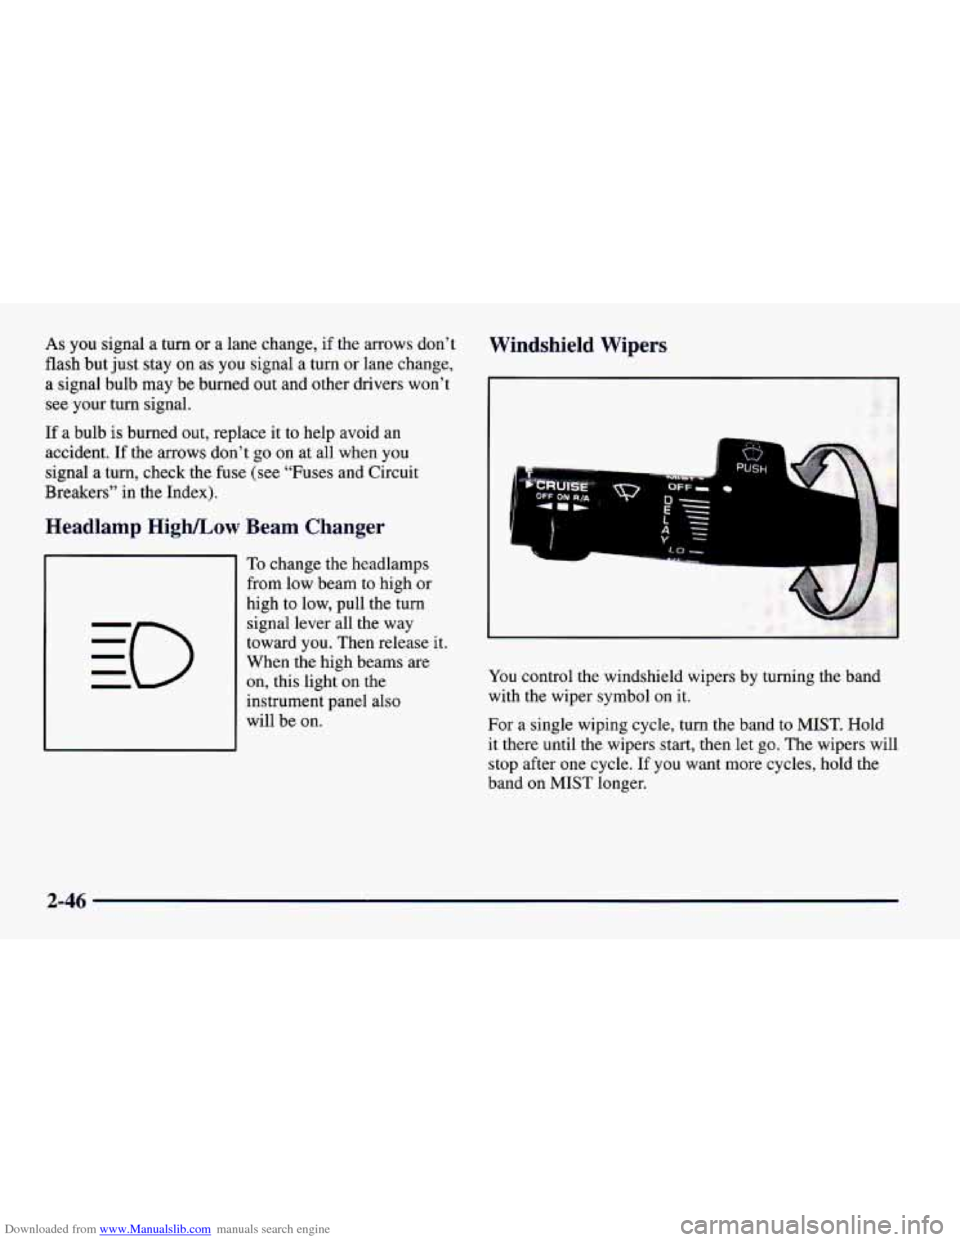
To change the headlamps
from low beam to high or
high to low, pull the turn
signal lever all the way
toward you. Then release it.
When the high beams are
on, this light on the
instrument panel also
will be on.
Windshield Wipers
You control the windshield wipers by turning the band
with
the wiper symbol on it.
For a single wiping cycle, turn the band to
MIST. Hold
it there until the wipers start, then let go. The wipers will
stop after one cycle. If you want more cycles, hold the
band on MIST longer.
2-46
Page 202 of 404
Downloaded from www.Manualslib.com manuals search engine Making firns
I NOTICE:
Making very sharp turns while trailering could cause the trailer to come in contact with the
vehicle. Your vehicle could be damaged. Avoid
making very sharp turns while trailering.
When you’re turning with a trailer, make wider
turns than normal.
Do this so your trailer won’t
strike soft shoulders, curbs, road signs, trees or other
objects. Avoid jerky or sudden maneuvers. Signal well
in advance.
%rn Signals When Towing a Trailer
When you tow a trailer, your vehicle may need a
different turn signal flasher and/or extra wiring. Check
with your Chevrolet dealer. The green arrows
on your
instrument panel will flash whenever
you signal a turn
or lane change. Properly hooked up, the trailer lamps
will also flash, telling other drivers you’re about to turn,
change lanes or stop. When
towing
a trailer, the green arrows on your
instrument panel will flash for turns even if the bulbs on
the trailer are burned out. Thus, you may think drivers
behind
you are seeing your signal when they are not. It’s
important
to check occasionally to be sure the trailer
bulbs are still working.
Driving On Grades
Reduce speed and shift to a lower gear before you
start down a long or steep downgrade. If you don’t shift
down, you might have to
use your brakes so much that
they would get hot and no longer work well.
On a long uphill grade, shift down and reduce your
speed
to around 45 mph (70 km/h) to reduce the
possibility of engine and transmission overheating.
If
you are towing a trailer and you have an automatic
transmission with overdrive,
you may prefer to drive in
DRIVE
(D) instead of AUTOMATIC OVERDRIVE (@)
(or, as you need to, a lower gear). Or, if you have a
manual transmission with FIFTH (5) or SIXTH (6) gear
and
you are towing a trailer it is better not to use
FIFTH
(5) or SIXTH (6) gear. Just drive in FOURTH
(4) gear (FIFTH (5) gear if you have a six-speed manual
transmission) (or, as
you need to, a lower gear).
4-38
Page 247 of 404
Downloaded from www.Manualslib.com manuals search engine 0 Section 6 Service and Appearance Care
Here you will find information about the care of your Chevrolet. This section begins with service and fuel
information, and then it shows how to check important fluid and lubricant levels. There is also technical information
about
your vehicle, and a part devoted to its appearance care.
6- 2
6-3'
6-5
6-6
6-8
6- 12
6-18
6-2
1
6-25 6-28
6-32
6-33
6-35
6-39
6-40 Service
Fuel
Fuels
in Foreign Countries
Filling Your Tank
Checking Things Under
the Hood
Engine Oil
Air Cleaner Automatic Transmission Fluid
Manual Transmission Fluid
Engine Coolant
Power Steering Fluid
Windshield Washer Fluid
Brakes
Battery
Bulb Replacement
6-50
6-58
6-59
6-62
6-62
6-63
6-65
6-66
6-67
6-68
6-68 6-68
6-74
6-74
6-76 Tires
Appearance Care
Cleaning the Inside of Your Chevrolet
Care of Safety Belts
Glass
Cleaning the Outside of Your Chevrolet
Aluminum or Chrome Wheels
Underbody Maintenance
Appearance Care Materials Chart
Vehicle Identification Number (VIN)
Service
Parts Identification Label
Electrical System
Replacement Bulbs
Capacities and Specifications
Air Conditioning Refrigerants
Page 286 of 404
Downloaded from www.Manualslib.com manuals search engine Bulb Replacement
For the proper type of replacement bulb, see
“Replacement Bulbs”
in the Index.
Halogen Bulbs
Halogen bulbs have pressurized gas inside and
can burst if you drop or scratch the bulb. You or
others could be injured. Be sure to read and
follow the instructions on the bulb package.
Headlamp Aiming
Your vehicle has the 55 x 135 mini-quad headlamp
system. These headlamps have horizontal and vertical
aim indicators. The aim has been pre-set at the factory
and should need
no further adjustment.
If your vehicle is damaged in an accident and the
headlamp aim seems to be affected, see your
Chevrolet dealer. Headlamps on damaged vehicles may
require recalibration of the horizontal aim by your
Chevrolet dealer.
To check the aim, the vehicle should be properly
prepared as follows:
0
0
0
0
0
The vehicle must have all four tires on a perfectly
level surface.
The vehicle should not have any snow, ice or mud
attached to it.
There should not be any cargo or loading of the
vehicle, except it should have a full tank
of gas and
one person or
160 lbs. (75 kg) on the driver’s seat.
Tires should be properly inflated.
The horizontal indicator should read
“0.”
6-40
Page 289 of 404
Downloaded from www.Manualslib.com manuals search engine Headlamps
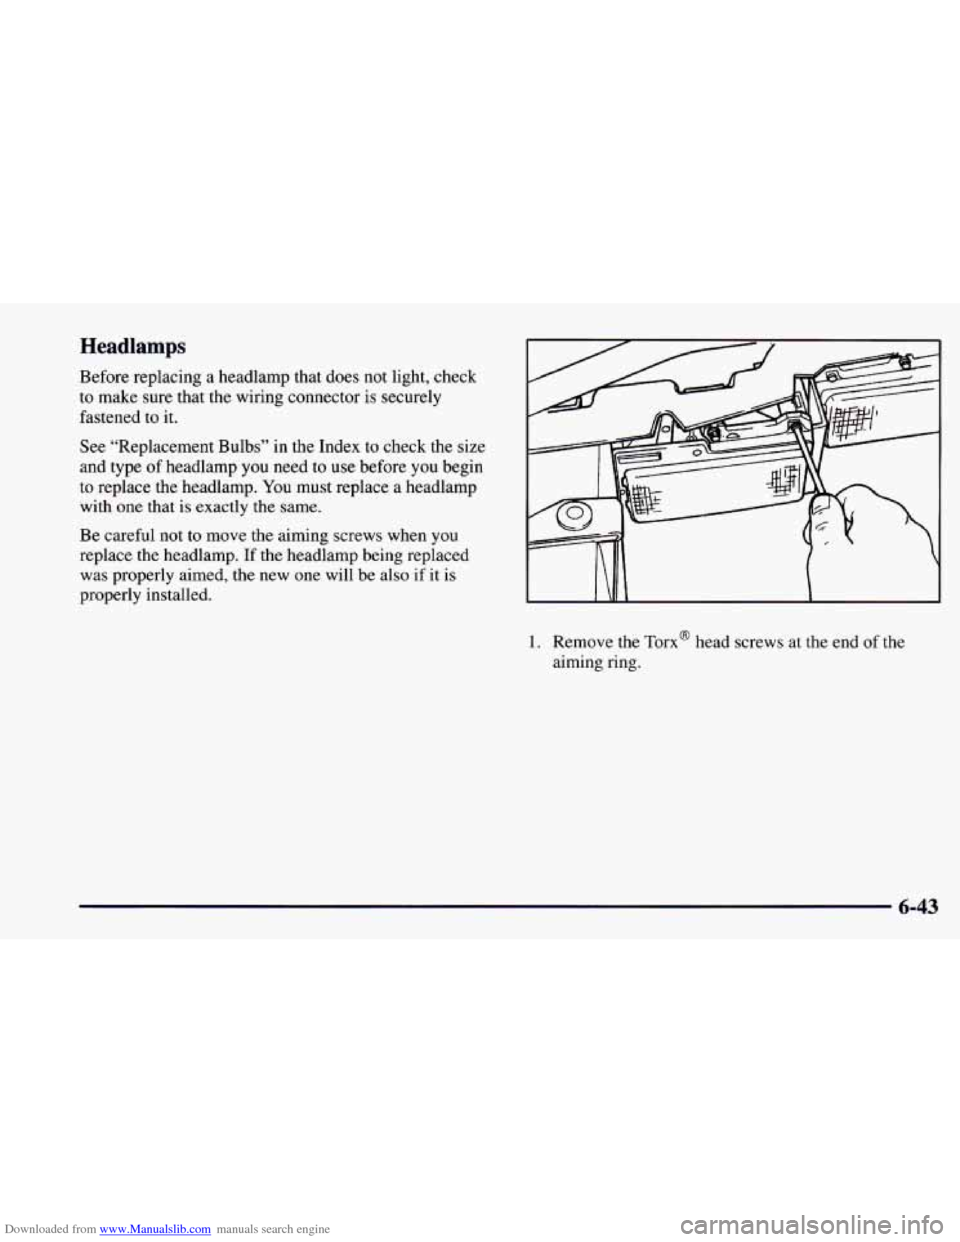
Before replacing a headlamp that does not light, check
to make sure that the wiring connector is securely
fastened to it.
See “Replacement Bulbs” in the Index to check the size
and type
of headlamp you need to use before you begin
to replace the headlamp. You must replace a headlamp
with
one that is exactly the same.
Be careful not to move the aiming screws when you
replace the headlamp.
If the headlamp being replaced
was properly aimed, the new one will be also if it
is
properly installed.
1. Remove the Tom@ head screws at the end of the
aiming ring.
6-43
Page 291 of 404
Downloaded from www.Manualslib.com manuals search engine 4. Check the new headlamp again. The number on the
lamp must match the number
of the headlamp being
replaced. The letter
U or L must also match.
5. Plug the wiring connector into the headlamp socket.
6. Place the new headlamp in the headlamp assembly.
Snap
the locking tabs onto the socket.
The socket must be pointing in the same direction
the socket
on the burned out bulb was.
7. Insert the tabs on the aiming ring into the tabs in the
8. Hold the aiming ring closed, insert the screws at the
end
of the ring. Tighten the screws until the aiming
ring touches the plastic nuts on both the top and
bottom.
Do not overtighten. Do not damage the
vertical aiming bubble.
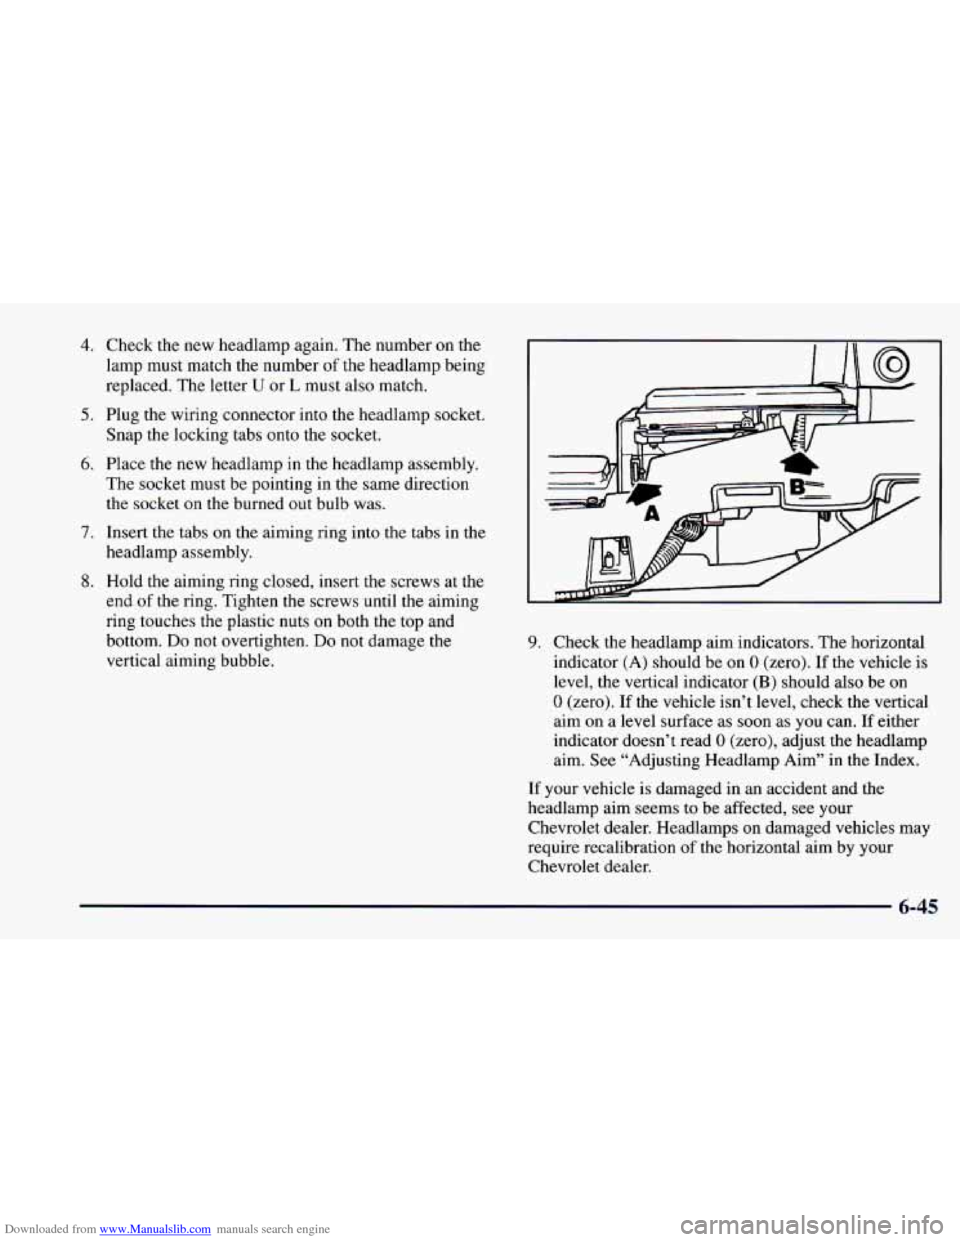
headlamp assembly. 9. Check the
headlamp aim indicators. The horizontal
indicator
(A) should be on 0 (zero). If the vehicle is
level, the vertical indicator
(B) should also be on
0 (zero). If the vehicle isn’t level, check the vertical
aim on a level surface as soon as you can.
If either
indicator doesn’t read
0 (zero), adjust the headlamp
aim. See “Adjusting Headlamp Aim’’ in the Index.
If your vehicle is damaged in an accident and the
headlamp aim seems to be affected, see your
Chevrolet dealer. Headlamps on damaged vehicles may
require recalibration of the horizontal aim by your
Chevrolet dealer.
6-45
Page 292 of 404
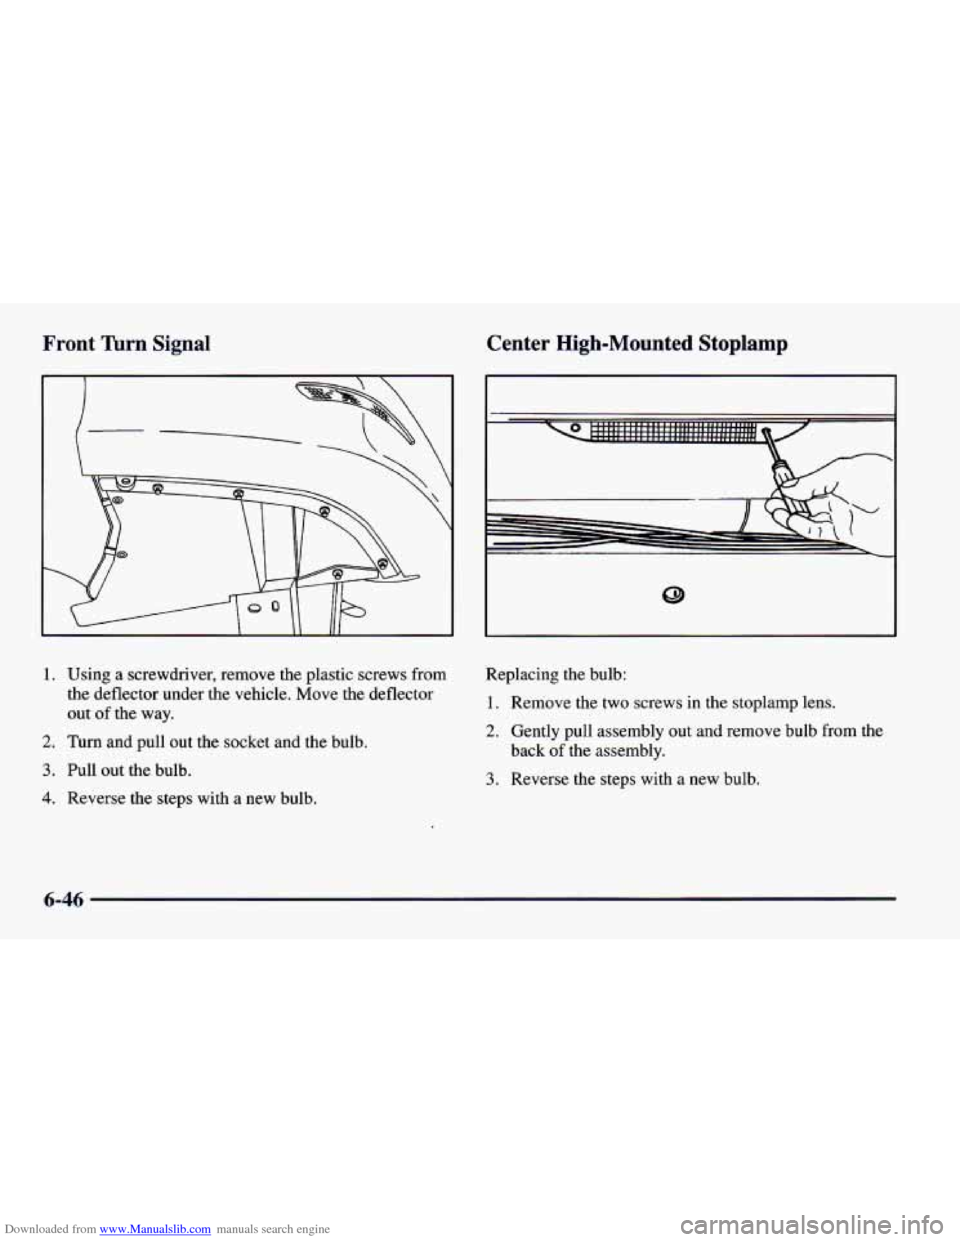
Downloaded from www.Manualslib.com manuals search engine Front Turn Signal Center High-Mounted Stoplamp
1. Using a screwdriver, remove the plastic screws from
the deflector under the vehicle. Move the deflector
out
of the way.
2. Turn and pull out the socket and the bulb.
3. Pull out the bulb.
4. Reverse the steps with a new bulb. Replacing
the bulb:
1. Remove the two screws in the stoplamp lens.
2. Gently pull assembly out and remove bulb from the
3. Reverse the steps with a new bulb.
back
of the
assembly.
6-46
Page 293 of 404
Downloaded from www.Manualslib.com manuals search engine Rear Lamps
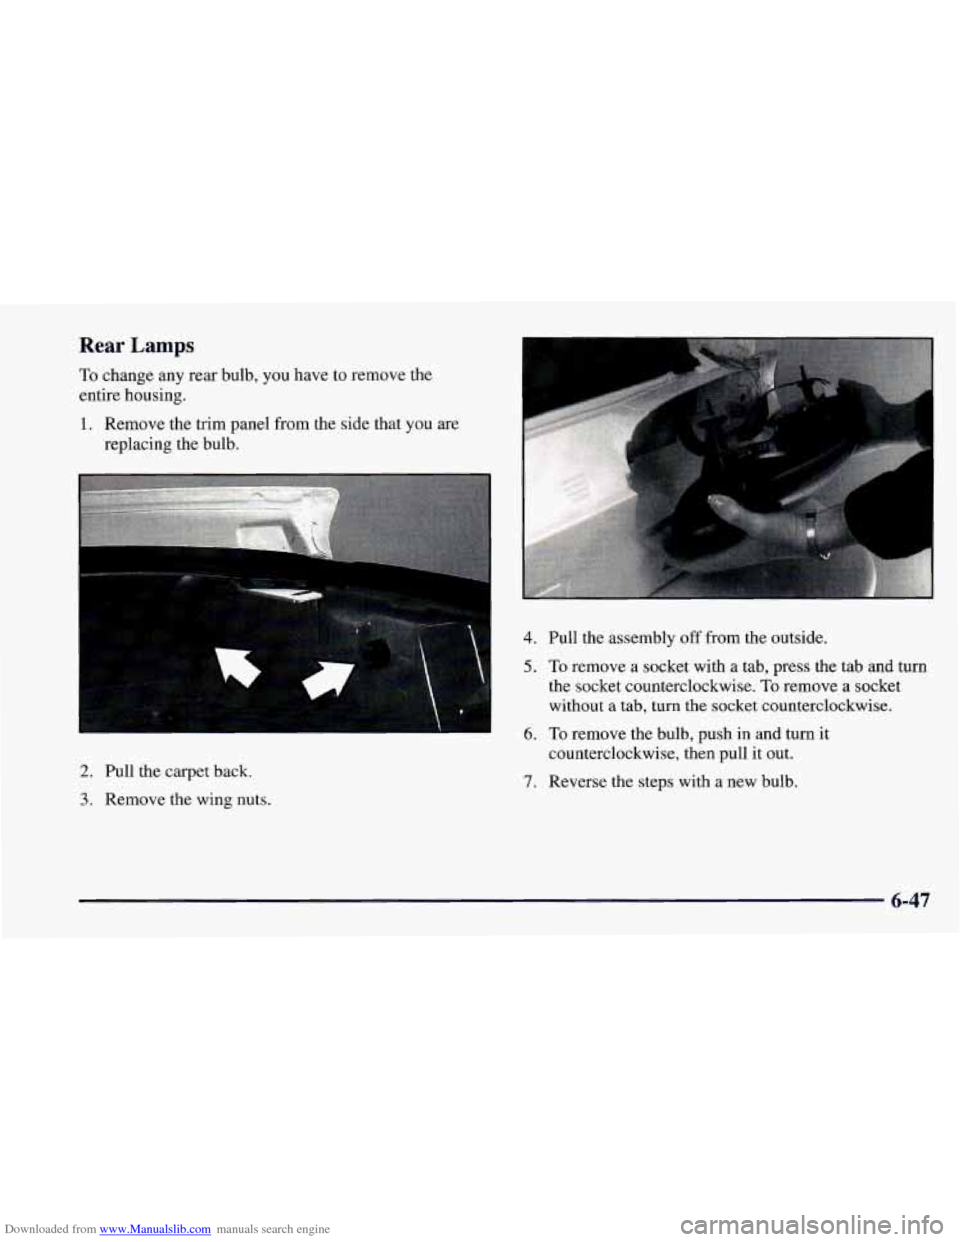
To change any rear bulb, you have to remove the
entire housing.
1. Remove the trim panel from the side that you are
replacing the bulb.
2. Pull the carpet back.
3. Remove the wing nuts.
I
4.
5.
6.
7.
Pull the assembly off from the outside.
To remove a socket with a tab, press the tab and turn
the socket counterclockwise.
To remove a socket
without a tab, turn the socket counterclockwise.
To remove the bulb, push in and turn it
counterclockwise, then pull it out.
Reverse the steps with a new bulb.
6-47
Page 294 of 404
Downloaded from www.Manualslib.com manuals search engine Rear Sidemarker
c
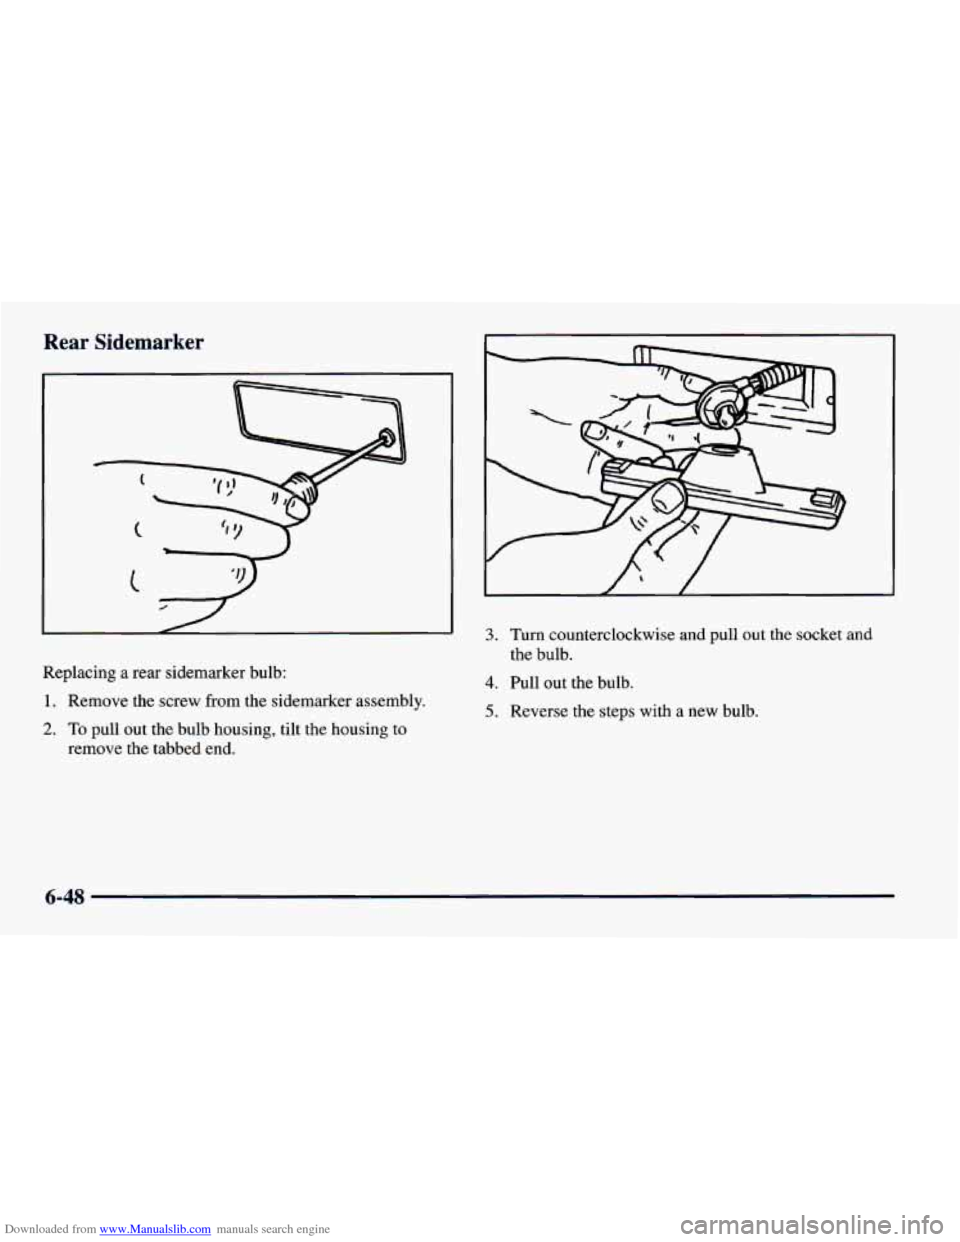
Replacing a rear sidemarker bulb:
1. Remove the screw from the sidemarker assembly.
2. To pull out the bulb housing, tilt the housing to
remove the tabbed end.
3. Turn counterclockwise and pull out the socket and
4. Pull out the bulb. the bulb.
5. Reverse the steps with a new bulb.
6-48
Page 320 of 404
Downloaded from www.Manualslib.com manuals search engine Replacement Bulbs
Back-up ............................... 1141
Center High-Mounted Stoplamp
............. 92 1
Front Parking and Turn Signal ............. 3 157K
Headlamp (Low-Beam) ................. H-435 1
Headlamp (High-Beam)
................ H-4352
Sidemarker
.............................. 194
Tail Only
............................... 194
Tail/Stop/Turn
.......................... 2057
Capacities and Specifications
Engine
Type VIN Engine Code
K ...................... V6
VIN Engine Code P
...................... V8
Fuel Delivery
.................... Fuel Injection
Valve Arrangement
.................... In-Head
Piston Displacement VIN Engine Code
K ............ 23 1 CID (3800)
VIN Engine Code P ............ 350 CID (5.7L)
VIN Engine Code K .............. 1-6-5-4-3-2
VIN Engine Code P ........... 1-8-4-3-6-5-7-2
Wheel Nut Torque ........... 100 lb-ft (140 N-m)
Thermostat Temperature Specification
180°F (82°C)
Windshield Wiper Blade Replacement
Type
................................. hook
Length ................... 24 inches (610 mm)
Firing Order
6-74