warning light CHEVROLET CAMARO 2010 5.G Owner's Manual
[x] Cancel search | Manufacturer: CHEVROLET, Model Year: 2010, Model line: CAMARO, Model: CHEVROLET CAMARO 2010 5.GPages: 378, PDF Size: 5.75 MB
Page 132 of 378
Black plate (2,1)Chevrolet Camaro Owner Manual - 2010
5-2 Lighting
AUTO (Automatic):Turns the
headlamps on automatically at
normal brightness, together with
the following:
.Parking Lamps
.Taillamps
.Sidemarker Lamps
.License Plate Lamps
.Instrument Panel Lights
AUTO also controls the Daytime
Running Lamps (DRL), see Daytime
Running Lamps (DRL)
on
page 5‑3.
; (Parking Lamps): Turns the
parking lamps on together with the
following:
.Taillamps
.Sidemarker Lamps
.License Plate Lamps
.Instrument Panel Lights A warning chime sounds if the
driver's door is opened when the
ignition switch is off and the parking
lamps are on.
2
(Headlamps): Turns the
headlamps on together with the
following lamps listed below.
.Parking Lamps
.Taillamps
.Sidemarker Lamps
.License Plate Lamps
.Instrument Panel Lights
A warning chime sounds if the
driver's door is opened when the
ignition switch is off and the
headlamps are on. #
(Front Fog Lamps): Push the
fog lamps button in to turn the fog
lamps on or off. The fog lamps
come on together with the following:
.Parking Lamps
.Taillamps
.Sidemarker Lamps
.License Plate Lamps
.Instrument Panel Lights
See Front Fog Lamps
on
page 5‑5.
Page 134 of 378
Black plate (4,1)Chevrolet Camaro Owner Manual - 2010
5-4 Lighting
Automatic Headlamp
System
When it is dark enough outside and
the headlamp switch is in AUTO,
the automatic headlamp system will
turn on the headlamps at the normal
brightness along with other lamps
such as the taillamps, sidemarker,
parking lamps, license plate lamps,
and the instrument panel lights.
The radio lights will also be dim.
To turn off the automatic headlamp
system, turn the exterior lamps
switch to the off position and then
release. For vehicles first sold in
Canada, the transmission must be
in the P (Park) position, before the
automatic headlamp system can be
turned off.The vehicle has a light sensor
located on the top of the instrument
panel. Do not cover this sensor or
the system will come on whenever
the ignition is on.
The system may also turn on the
headlamps when driving through a
parking garage, heavy overcast
weather, or a tunnel. This is normal.
There is a delay in the transition
between the daytime and nighttime
operation of the Daytime Running
Lamps (DRL) and the automatic
headlamp systems so that driving
under bridges or bright overhead
street lights does not affect the
system. The DRL and automatic
headlamp system will only be
affected when the light sensor sees
a change in lighting lasting longer
than the delay.If the vehicle is started in a dark
garage, the automatic headlamp
system comes on immediately. If it
is light outside when the vehicle
leaves the garage, there will be a
slight delay before the automatic
headlamp system changes to
the DRL. During that delay, the
instrument panel cluster may not be
as bright as usual. Make sure the
instrument panel brightness control
is in the full bright position. See
Instrument Panel Illumination
Control on page 5‑6.
Hazard Warning Flashers
|
Hazard Warning Flasher:
Press this button located on the
instrument panel near the audio
system, to make the front and rear
turn signal lamps flash on and off.
This warns others that you are
having trouble. Press again to turn
the flashers off.
Page 180 of 378
Black plate (4,1)Chevrolet Camaro Owner Manual - 2010
8-4 Driving and Operating
Medical research shows that
alcohol in a person's system
can make crash injuries worse,
especially injuries to the brain,
spinal cord, or heart. This means
that when anyone who has been
drinking—driver or passenger —is
in a crash, that person's chance of
being killed or permanently disabled
is higher than if the person had not
been drinking.
Control of a Vehicle
The following three systems
help to control the vehicle while
driving —brakes, steering, and
accelerator. At times, as when
driving on snow or ice, it is easy to
ask more of those control systems
than the tires and road can provide.
Meaning, you can lose control of the
vehicle. See StabiliTrak System
on
page 8‑35.
Adding non‐dealer/non‐retailer
accessories can affect vehicle
performance. See Accessories and
Modifications on page 9‑4.
Braking
See Brake System Warning Lighton page 4‑23.
Braking action involves perception
time and reaction time. Deciding
to push the brake pedal is
perception time. Actually doing
it is reaction time.
Average reaction time is about
three‐fourths of a second. But that
is only an average. It might be less
with one driver and as long as
two or three seconds or more with
another. Age, physical condition,
alertness, coordination, and
eyesight all play a part. So do
alcohol, drugs, and frustration. But
even in three‐fourths of a second,
a vehicle moving at 100 km/h
(60 mph) travels 20 m (66 ft).
That could be a lot of distance
in an emergency, so keeping
enough space between the
vehicle and others is important. And, of course, actual stopping
distances vary greatly with the
surface of the road, whether it is
pavement or gravel; the condition
of the road, whether it is wet, dry,
or icy; tire tread; the condition of the
brakes; the weight of the vehicle;
and the amount of brake force
applied.
Avoid needless heavy
braking. Some people drive in
spurts
—heavy acceleration
followed by heavy braking —rather
than keeping pace with traffic.
This is a mistake. The brakes
might not have time to cool between
hard stops. The brakes will wear
out much faster with a lot of heavy
braking. Keeping pace with the
traffic and allowing realistic following
distances eliminates a lot of
unnecessary braking. That means
better braking and longer brake life.
Page 184 of 378
Black plate (8,1)Chevrolet Camaro Owner Manual - 2010
8-8 Driving and Operating
After conversion to the high
performance brake fluid,
follow the brake fluid service
recommendations outlined by the
fluid manufacturer. Do not use
silicone or DOT‐5 brake fluids.
If the vehicle is used for racing,
competitive driving, sustained high
speed , or events that generate
excessive wheel slip, the rear axle
fluid temperatures will be higher
than would occur in normal driving.
We recommend that the rear axle
fluid be drained and refilled with
new fluid after every six hours
of racing or competitive driving.
SeeRecommended Fluids and
Lubricants
on page 10‑8for what
fluid to use.
Regularly inspect the driveshaft/
propshaft couplings and halfshaft
boots for cracking or grease
leakage. It is not recommended that
the vehicle be used for ongoing race
track/competitive driving.
Driving on Wet Roads
Rain and wet roads can reduce
vehicle traction and affect your
ability to stop and accelerate.
Always drive slower in these types
of driving conditions and avoid
driving through large puddles and
deep‐standing or flowing water.
{WARNING
Wet brakes can cause crashes.
They might not work as well in
a quick stop and could cause
pulling to one side. You could
lose control of the vehicle.
After driving through a large
puddle of water or a car/vehicle
wash, lightly apply the brake
pedal until the brakes work
normally.
(Continued)
WARNING (Continued)
Flowing or rushing water creates
strong forces. Driving through
flowing water could cause your
vehicle to be carried away. If this
happens, you and other vehicle
occupants could drown. Do not
ignore police warnings and be
very cautious about trying to drive
through flowing water.
Hydroplaning
Hydroplaning is dangerous. Water
can build up under your vehicle's
tires so they actually ride on the
water. This can happen if the road is
wet enough and you are going fast
enough. When your vehicle is
hydroplaning, it has little or no
contact with the road.
There is no hard and fast rule about
hydroplaning. The best advice is to
slow down when the road is wet.
Page 187 of 378
Black plate (11,1)Chevrolet Camaro Owner Manual - 2010
Driving and Operating 8-11
WARNING (Continued)
If the vehicle is stuck in the snow:
.Clear away snow from around
the base of your vehicle,
especially any that is blocking
the exhaust pipe.
.Check again from time to
time to be sure snow does
not collect there.
.Open a window about 5 cm
(2 in) on the side of the
vehicle that is away from the
wind to bring in fresh air.
.Fully open the air outlets on
or under the instrument
panel.
.Adjust the climate control
system to a setting that
circulates the air inside
the vehicle and set the fan
speed to the highest setting.
See Climate Control System
in the Index.(Continued)
WARNING (Continued)
For more information about
carbon monoxide, see Engine
Exhaust on page 8‑25.
Snow can trap exhaust gases
under your vehicle. This can
cause deadly CO (Carbon
Monoxide) gas to get inside. CO
could overcome you and kill you.
You cannot see it or smell it, so
you might not know it is in your
vehicle. Clear away snow from
around the base of your vehicle,
especially any that is blocking the
exhaust.
Run the engine for short periods
only as needed to keep warm, but
be careful. To save fuel, run the engine for only
short periods as needed to warm
the vehicle and then shut the engine
off and close the window most of
the way to save heat. Repeat this
until help arrives but only when you
feel really uncomfortable from the
cold. Moving about to keep warm
also helps.
If it takes some time for help to
arrive, now and then when you run
the engine, push the accelerator
pedal slightly so the engine runs
faster than the idle speed. This
keeps the battery charged to restart
the vehicle and to signal for help
with the headlamps. Do this as little
as possible to save fuel.
Page 188 of 378
Black plate (12,1)Chevrolet Camaro Owner Manual - 2010
8-12 Driving and Operating
If the Vehicle is Stuck
Slowly and cautiously spin the
wheels to free the vehicle when
stuck in sand, mud, ice, or snow.
If stuck too severely for the traction
system to free the vehicle, turn the
traction system off and use the
rocking method.
{WARNING
If the vehicle's tires spin at high
speed, they can explode, and
you or others could be injured.
The vehicle can overheat,
causing an engine compartment
fire or other damage. Spin the
wheels as little as possible and
avoid going above 55 km/h
(35 mph) as shown on the
speedometer.
For information about using tire
chains on the vehicle, see Tire
Chains on page 9‑71.
Rocking the Vehicle to Get
it Out
Turn the steering wheel left and
right to clear the area around the
front wheels. Turn off any traction
system. Shift back and forth
between R (Reverse) and a forward
gear, or with a manual transmission,
between 1 (First) or 2 (Second) and
R (Reverse), spinning the wheels
as little as possible. To prevent
transmission wear, wait until the
wheels stop spinning before shifting
gears. Release the accelerator
pedal while shifting, and press
lightly on the accelerator pedal
when the transmission is in gear.
Slowly spinning the wheels in the
forward and reverse directions
causes a rocking motion that could
free the vehicle. If that does not
get the vehicle out after a few tries,
it might need to be towed out. If the
vehicle does need to be towed out,
see Towing the Vehicle
on
page 9‑90.
Vehicle Load Limits
It is very important to know how
much weight the vehicle can
carry. This weight is called the
vehicle capacity weight and
includes the weight of all
occupants, cargo and all
nonfactory‐installed options.
Two labels on the vehicle
show how much weight it may
properly carry, the Tire and
Loading Information label
and the Certification label.
{WARNING
Do not load the vehicle any
heavier than the Gross
Vehicle Weight Rating
(GVWR), or either the
maximum front or rear Gross
Axle Weight Rating (GAWR).
If you do, parts on the vehicle
can break, and it can change
(Continued)
Page 194 of 378
Black plate (18,1)Chevrolet Camaro Owner Manual - 2010
8-18 Driving and Operating
Ignition Positions
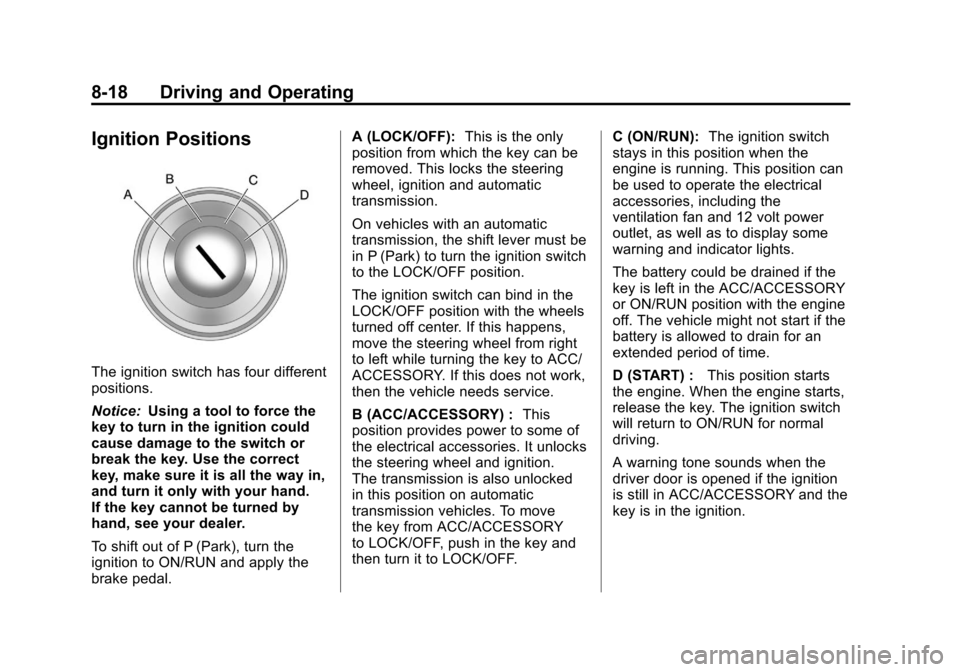
The ignition switch has four different
positions.
Notice:Using a tool to force the
key to turn in the ignition could
cause damage to the switch or
break the key. Use the correct
key, make sure it is all the way in,
and turn it only with your hand.
If the key cannot be turned by
hand, see your dealer.
To shift out of P (Park), turn the
ignition to ON/RUN and apply the
brake pedal. A (LOCK/OFF):
This is the only
position from which the key can be
removed. This locks the steering
wheel, ignition and automatic
transmission.
On vehicles with an automatic
transmission, the shift lever must be
in P (Park) to turn the ignition switch
to the LOCK/OFF position.
The ignition switch can bind in the
LOCK/OFF position with the wheels
turned off center. If this happens,
move the steering wheel from right
to left while turning the key to ACC/
ACCESSORY. If this does not work,
then the vehicle needs service.
B (ACC/ACCESSORY) : This
position provides power to some of
the electrical accessories. It unlocks
the steering wheel and ignition.
The transmission is also unlocked
in this position on automatic
transmission vehicles. To move
the key from ACC/ACCESSORY
to LOCK/OFF, push in the key and
then turn it to LOCK/OFF. C (ON/RUN):
The ignition switch
stays in this position when the
engine is running. This position can
be used to operate the electrical
accessories, including the
ventilation fan and 12 volt power
outlet, as well as to display some
warning and indicator lights.
The battery could be drained if the
key is left in the ACC/ACCESSORY
or ON/RUN position with the engine
off. The vehicle might not start if the
battery is allowed to drain for an
extended period of time.
D (START) : This position starts
the engine. When the engine starts,
release the key. The ignition switch
will return to ON/RUN for normal
driving.
A warning tone sounds when the
driver door is opened if the ignition
is still in ACC/ACCESSORY and the
key is in the ignition.
Page 207 of 378
Black plate (31,1)Chevrolet Camaro Owner Manual - 2010
Driving and Operating 8-31
R (Reverse):To back up, press
down the clutch pedal and shift
into R (Reverse). On V8 models,
apply pressure to get the lever
past 5 (Fifth) and 6 (Sixth) into
R (Reverse). Let up on the clutch
pedal slowly while pressing the
accelerator pedal.
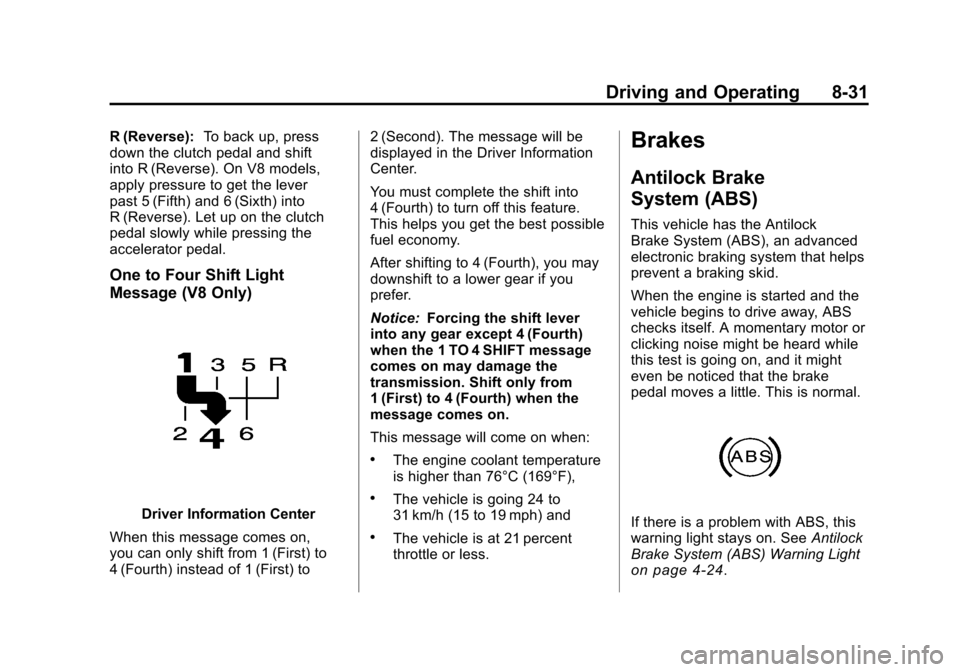
One to Four Shift Light
Message (V8 Only)
Driver Information Center
When this message comes on,
you can only shift from 1 (First) to
4 (Fourth) instead of 1 (First) to 2 (Second). The message will be
displayed in the Driver Information
Center.
You must complete the shift into
4 (Fourth) to turn off this feature.
This helps you get the best possible
fuel economy.
After shifting to 4 (Fourth), you may
downshift to a lower gear if you
prefer.
Notice:
Forcing the shift lever
into any gear except 4 (Fourth)
when the 1 TO 4 SHIFT message
comes on may damage the
transmission. Shift only from
1 (First) to 4 (Fourth) when the
message comes on.
This message will come on when:
.The engine coolant temperature
is higher than 76°C (169°F),
.The vehicle is going 24 to
31 km/h (15 to 19 mph) and
.The vehicle is at 21 percent
throttle or less.
Brakes
Antilock Brake
System (ABS)
This vehicle has the Antilock
Brake System (ABS), an advanced
electronic braking system that helps
prevent a braking skid.
When the engine is started and the
vehicle begins to drive away, ABS
checks itself. A momentary motor or
clicking noise might be heard while
this test is going on, and it might
even be noticed that the brake
pedal moves a little. This is normal.
If there is a problem with ABS, this
warning light stays on. See Antilock
Brake System (ABS) Warning Light
on page 4‑24.
Page 208 of 378
Black plate (32,1)Chevrolet Camaro Owner Manual - 2010
8-32 Driving and Operating
If driving safely on a wet road
and it becomes necessary to slam
on the brakes and continue braking
to avoid a sudden obstacle, a
computer senses that the wheels
are slowing down. If one of the
wheels is about to stop rolling,
the computer will separately work
the brakes at each wheel.
ABS can change the brake pressure
to each wheel, as required, faster
than any driver could. This can help
the driver steer around the obstacle
while braking hard.
As the brakes are applied, the
computer keeps receiving updates
on wheel speed and controls
braking pressure accordingly.
Remember: ABS does not change
the time needed to get a foot up to
the brake pedal or always decreasestopping distance. If you get too
close to the vehicle in front of you,
there will not be enough time to
apply the brakes if that vehicle
suddenly slows or stops. Always
leave enough room up ahead to
stop, even with ABS.
Using ABS
Do not pump the brakes. Just hold
the brake pedal down firmly and let
ABS work. You might hear the ABS
pump or motor operating and feel
the brake pedal pulsate, but this is
normal.
Braking in Emergencies
ABS allows the driver to steer and
brake at the same time. In many
emergencies, steering can help
more than even the very best
braking.
Parking Brake
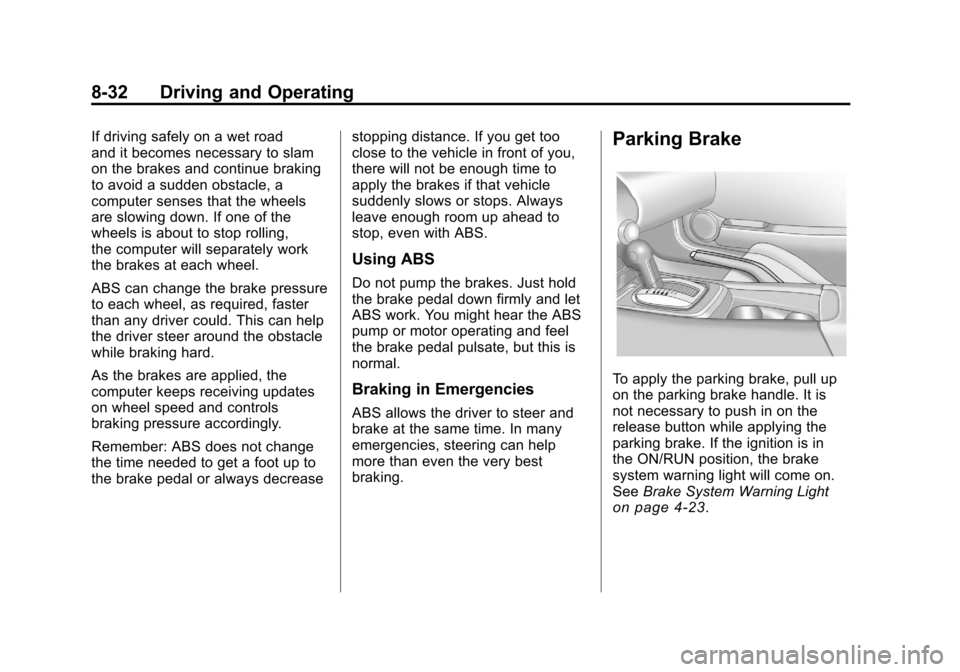
To apply the parking brake, pull up
on the parking brake handle. It is
not necessary to push in on the
release button while applying the
parking brake. If the ignition is in
the ON/RUN position, the brake
system warning light will come on.
See
Brake System Warning Light
on page 4‑23.
Page 209 of 378
Black plate (33,1)Chevrolet Camaro Owner Manual - 2010
Driving and Operating 8-33
To release the parking brake:
1. Hold the brake pedal down.
2. Pull the parking brake handle upuntil you can press the release
button.
3. Hold the release button in as you move the brake handle all
the way down.
Notice: Driving with the parking
brake on can overheat the brake
system and cause premature
wear or damage to brake system
parts. Make sure that the parking
brake is fully released and the
brake warning light is off before
driving. Driving with the parking brake
applied will cause a warning chime
to sound and the Park Brake
message to appear in the DIC.
The message will remain on until:
.the parking brake is released
.the vehicle comes to a stop.
If you are towing a trailer and you
are parking on a hill, see Driving
Characteristics and Towing Tips
on
page 8‑49.
Brake Assist
This vehicle has a brake assist
feature designed to assist the
driver in stopping or decreasing
vehicle speed in emergency driving
conditions. This feature uses the
stability system hydraulic brake control module to supplement
the power brake system under
conditions where the driver has
quickly and forcefully applied the
brake pedal in an attempt to quickly
stop or slow down the vehicle.
The stability system hydraulic brake
control module increases brake
pressure at each corner of the
vehicle until the ABS activates.
Minor brake pedal pulsation or
pedal movement during this time
is normal and the driver should
continue to apply the brake pedal
as the driving situation dictates.
The brake assist feature will
automatically disengage when
the brake pedal is released or
brake pedal pressure is quickly
decreased.