fuse CHEVROLET CAMARO 2010 5.G Owners Manual
[x] Cancel search | Manufacturer: CHEVROLET, Model Year: 2010, Model line: CAMARO, Model: CHEVROLET CAMARO 2010 5.GPages: 378, PDF Size: 5.75 MB
Page 5 of 378
Black plate (5,1)Chevrolet Camaro Owner Manual - 2010
Introduction v
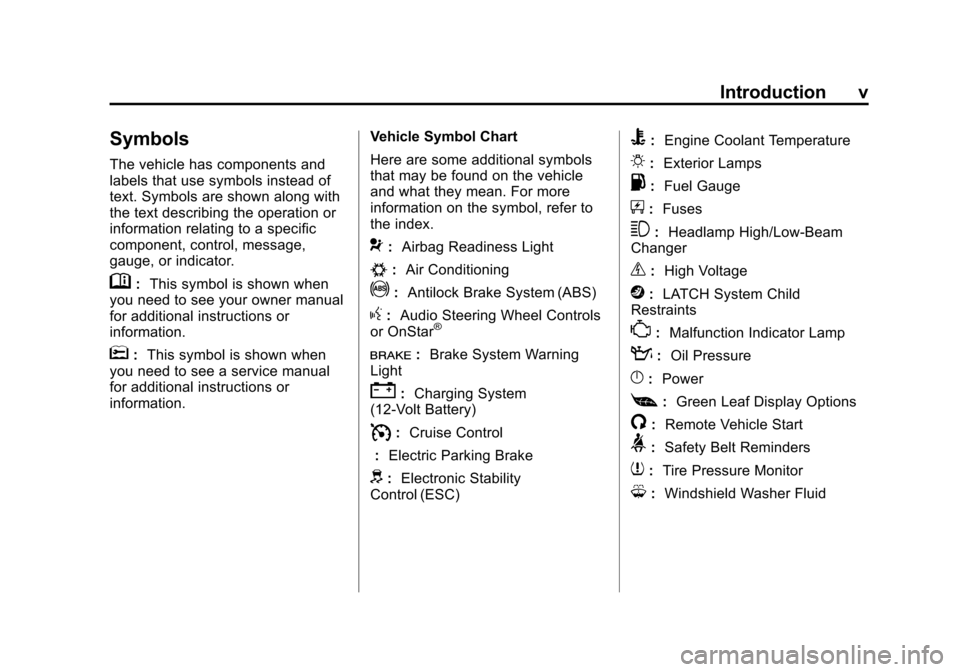
Symbols
The vehicle has components and
labels that use symbols instead of
text. Symbols are shown along with
the text describing the operation or
information relating to a specific
component, control, message,
gauge, or indicator.
M:This symbol is shown when
you need to see your owner manual
for additional instructions or
information.
*: This symbol is shown when
you need to see a service manual
for additional instructions or
information. Vehicle Symbol Chart
Here are some additional symbols
that may be found on the vehicle
and what they mean. For more
information on the symbol, refer to
the index.
9:
Airbag Readiness Light
#:Air Conditioning
!:Antilock Brake System (ABS)
g:Audio Steering Wheel Controls
or OnStar®
I: Brake System Warning
Light
": Charging System
(12‐Volt Battery)
I: Cruise Control
: Electric Parking Brake
d:Electronic Stability
Control (ESC)
B: Engine Coolant Temperature
O:Exterior Lamps
.:Fuel Gauge
+:Fuses
3: Headlamp High/Low-Beam
Changer
_: High Voltage
j:LATCH System Child
Restraints
*: Malfunction Indicator Lamp
::Oil Pressure
}:Power
[:Green Leaf Display Options
/: Remote Vehicle Start
>:Safety Belt Reminders
7:Tire Pressure Monitor
M:Windshield Washer Fluid
Page 27 of 378
Black plate (3,1)Chevrolet Camaro Owner Manual - 2010
Seats and Restraints 2-3
Front Seats
Seat Adjustment
{WARNING
You can lose control of the
vehicle if you try to adjust a
manual driver seat while the
vehicle is moving. The sudden
movement could startle and
confuse you, or make you push a
pedal when you do not want to.
Adjust the driver seat only when
the vehicle is not moving.
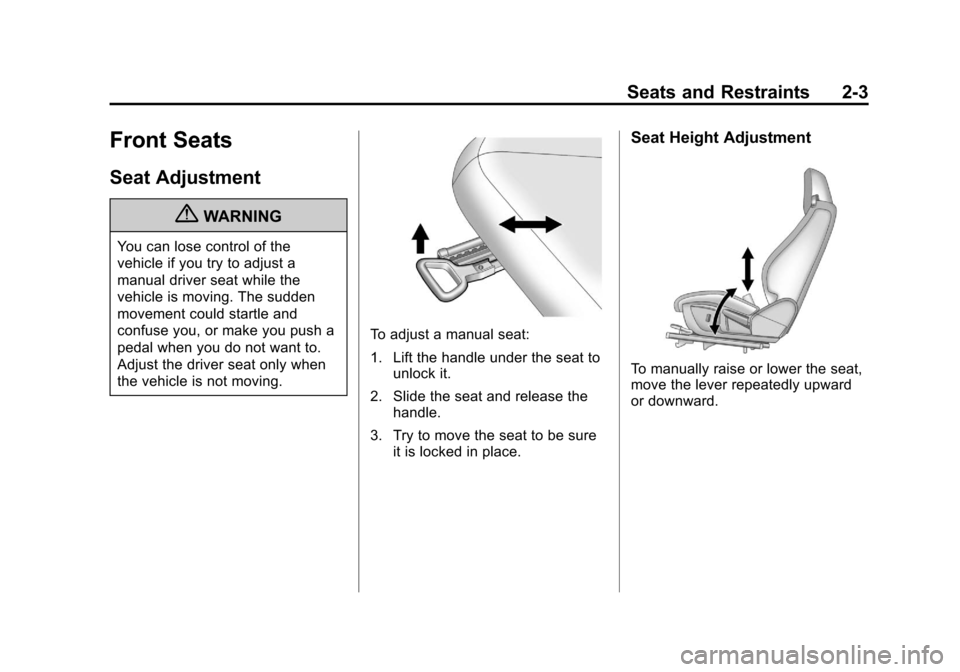
To adjust a manual seat:
1. Lift the handle under the seat tounlock it.
2. Slide the seat and release the handle.
3. Try to move the seat to be sure it is locked in place.
Seat Height Adjustment
To manually raise or lower the seat,
move the lever repeatedly upward
or downward.
Page 28 of 378
Black plate (4,1)Chevrolet Camaro Owner Manual - 2010
2-4 Seats and Restraints
Power Seat Adjustment
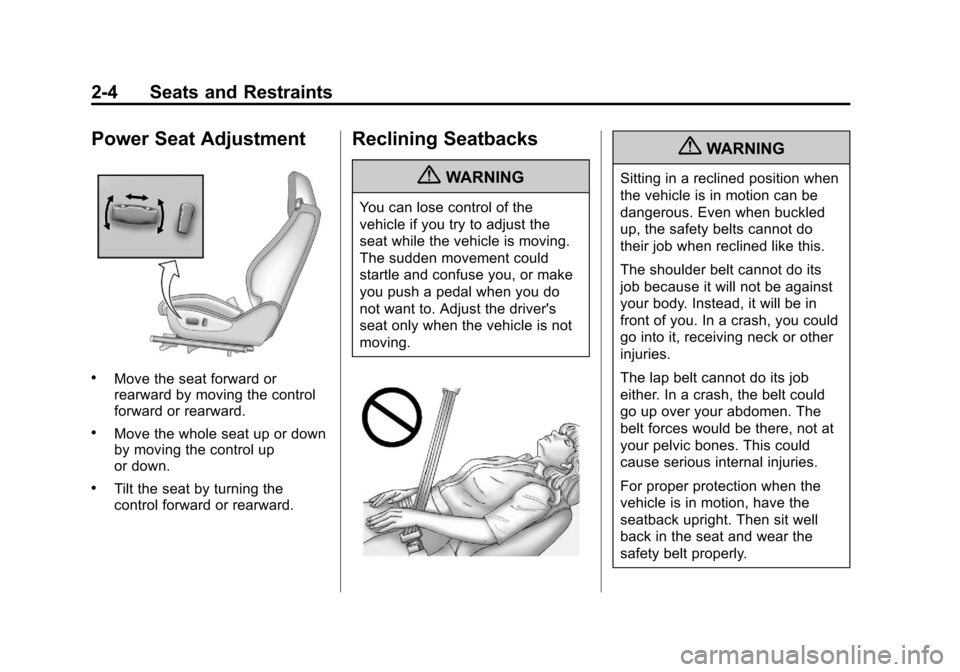
.Move the seat forward or
rearward by moving the control
forward or rearward.
.Move the whole seat up or down
by moving the control up
or down.
.Tilt the seat by turning the
control forward or rearward.
Reclining Seatbacks
{WARNING
You can lose control of the
vehicle if you try to adjust the
seat while the vehicle is moving.
The sudden movement could
startle and confuse you, or make
you push a pedal when you do
not want to. Adjust the driver's
seat only when the vehicle is not
moving.
{WARNING
Sitting in a reclined position when
the vehicle is in motion can be
dangerous. Even when buckled
up, the safety belts cannot do
their job when reclined like this.
The shoulder belt cannot do its
job because it will not be against
your body. Instead, it will be in
front of you. In a crash, you could
go into it, receiving neck or other
injuries.
The lap belt cannot do its job
either. In a crash, the belt could
go up over your abdomen. The
belt forces would be there, not at
your pelvic bones. This could
cause serious internal injuries.
For proper protection when the
vehicle is in motion, have the
seatback upright. Then sit well
back in the seat and wear the
safety belt properly.
Page 91 of 378
Black plate (9,1)Chevrolet Camaro Owner Manual - 2010
Instruments and Controls 4-9
Setting the Time and Date
1. Press the CONFIG button.
2. Select Time and Date Settings.
3. Select Set Time or Set Date.
4. Turn the MENU/SELECT knob toadjust the highlighted value.
5. Press the MENU/SELECT knob to select the next value.
6. To save the time or date and return to the Time and Date
Settings menu, press the
0BACK button at any time or
press MENU/SELECT knob after
adjusting the minutes or year.
Setting the 12/24 Hour Format
1. Press the CONFIG button.
2. Select Time and Date Settings.
3. Highlight 12/24 Hour Format.
4. Press the MENU/SELECT knob to select the 12 hour or 24 hour
display format.
Setting the Month & Day
Format
1. Press the CONFIG button.
2. Select Time and Date Settings.
3. Highlight Month & Day Format.
4. Press the MENU/SELECT knobto select MM/DD (month/day) or
DD/MM (day/month).
Setting the Auto Time Adjust
1. Press the CONFIG button.
2. Select Time and Date Settings.
3. Highlight Auto Time Adjust.
4. Press the MENU/SELECT knobto turn Auto Time Adjust on
or off.
Power Outlets
The vehicle has two accessory
power outlets; one is located below
the climate control system and the
other is inside the center storage
console.
The accessory power outlets do not
work when the key is removed from
the ignition and the driver door is
opened, this helps to preserve the
battery life of the vehicle.
Certain power accessory plugs may
not be compatible to the accessory
power outlet and could result in
blown vehicle or adapter fuses.
If you experience a problem,
see your dealer for additional
information on the accessory
power plugs.
Page 92 of 378
Black plate (10,1)Chevrolet Camaro Owner Manual - 2010
4-10 Instruments and Controls
Notice:Adding any electrical
equipment to the vehicle can
damage it or keep other
components from working as
they should. The repairs would
not be covered by the vehicle
warranty. Each outlet is rated
to a maximum output of 120W.
Usage of equipment exceeding
an amperage rating of 20A may
require fuse replacement. Check
with your dealer before adding
electrical equipment.
When adding electrical equipment,
be sure to follow the proper
installation instructions included
with the equipment.
Notice: Improper use of the
power outlet can cause damage
not covered by the vehicle
warranty. Do not hang any type
of accessory or accessory
bracket from the plug because
the power outlets are designed
for accessory power plugs only.Warning Lights,
Gauges, and
Indicators
Warning lights and gauges can
signal that something is wrong
before it becomes serious enough
to cause an expensive repair or
replacement. Paying attention to the
warning lights and gauges could
prevent injury.
Warning lights come on when there
could be a problem with a vehicle
function. Some warning lights come
on briefly when the engine is started
to indicate they are working. Gauges can indicate when there
could be a problem with a vehicle
function. Often gauges and warning
lights work together to indicate a
problem with the vehicle.
When one of the warning lights
comes on and stays on while
driving, or when one of the gauges
shows there may be a problem,
check the section that explains what
to do. Follow this manual's advice.
Waiting to do repairs can be costly
and even dangerous.
Page 135 of 378
Black plate (5,1)Chevrolet Camaro Owner Manual - 2010
Lighting 5-5
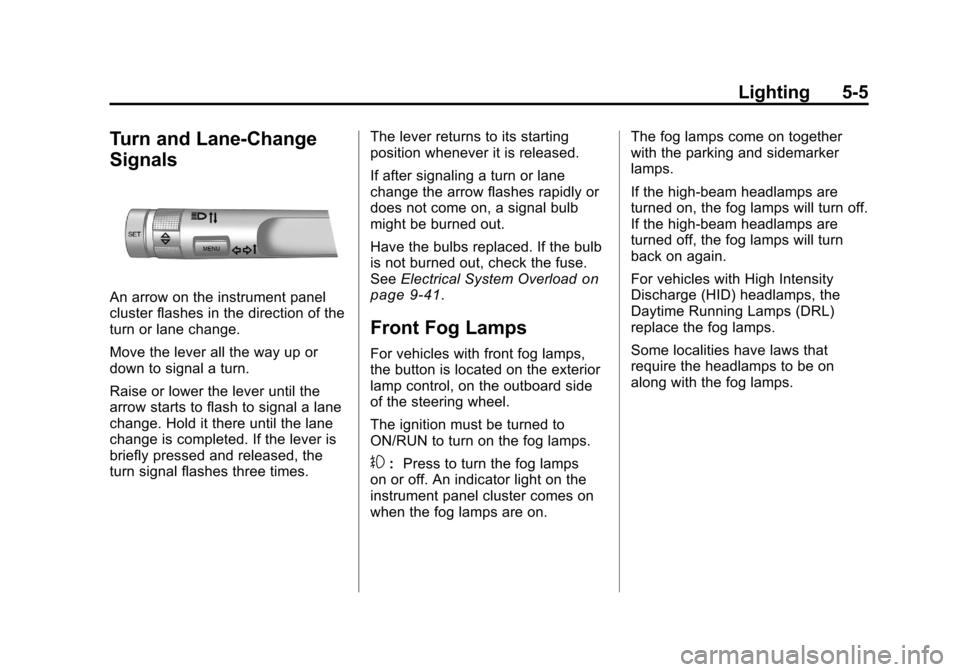
Turn and Lane-Change
Signals
An arrow on the instrument panel
cluster flashes in the direction of the
turn or lane change.
Move the lever all the way up or
down to signal a turn.
Raise or lower the lever until the
arrow starts to flash to signal a lane
change. Hold it there until the lane
change is completed. If the lever is
briefly pressed and released, the
turn signal flashes three times.The lever returns to its starting
position whenever it is released.
If after signaling a turn or lane
change the arrow flashes rapidly or
does not come on, a signal bulb
might be burned out.
Have the bulbs replaced. If the bulb
is not burned out, check the fuse.
See
Electrical System Overload
on
page 9‑41.
Front Fog Lamps
For vehicles with front fog lamps,
the button is located on the exterior
lamp control, on the outboard side
of the steering wheel.
The ignition must be turned to
ON/RUN to turn on the fog lamps.
#: Press to turn the fog lamps
on or off. An indicator light on the
instrument panel cluster comes on
when the fog lamps are on. The fog lamps come on together
with the parking and sidemarker
lamps.
If the high‐beam headlamps are
turned on, the fog lamps will turn off.
If the high‐beam headlamps are
turned off, the fog lamps will turn
back on again.
For vehicles with High Intensity
Discharge (HID) headlamps, the
Daytime Running Lamps (DRL)
replace the fog lamps.
Some localities have laws that
require the headlamps to be on
along with the fog lamps.
Page 197 of 378
Black plate (21,1)Chevrolet Camaro Owner Manual - 2010
Driving and Operating 8-21
Engine Heater
The engine coolant heater,
if available, can help in cold weather
conditions at or below 0°F (−18°C)
for easier starting and better fuel
economy during engine warm-up.
Plug in the coolant heater at least
four hours before starting the
vehicle. An internal thermostat in
the plug-end of the cord will prevent
engine coolant heater operation at
temperatures above 0°F (−18°C).
To Use The Engine Coolant
Heater
1. Turn off the engine.
2. Open the hood and unwrap theelectrical cord.
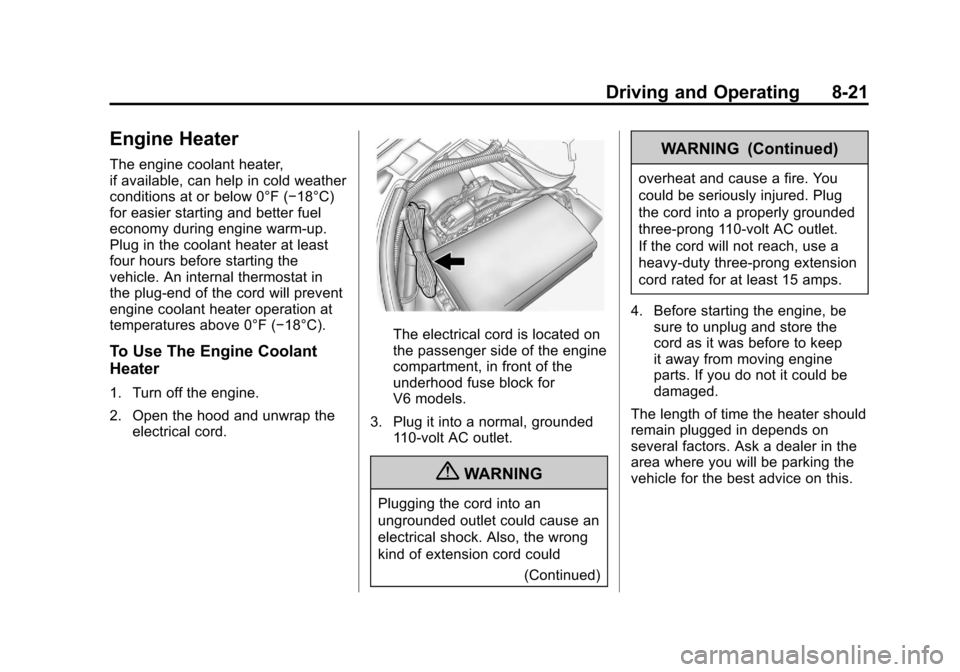
The electrical cord is located on
the passenger side of the engine
compartment, in front of the
underhood fuse block for
V6 models.
3. Plug it into a normal, grounded 110-volt AC outlet.
{WARNING
Plugging the cord into an
ungrounded outlet could cause an
electrical shock. Also, the wrong
kind of extension cord could
(Continued)
WARNING (Continued)
overheat and cause a fire. You
could be seriously injured. Plug
the cord into a properly grounded
three-prong 110-volt AC outlet.
If the cord will not reach, use a
heavy-duty three-prong extension
cord rated for at least 15 amps.
4. Before starting the engine, be sure to unplug and store the
cord as it was before to keep
it away from moving engine
parts. If you do not it could be
damaged.
The length of time the heater should
remain plugged in depends on
several factors. Ask a dealer in the
area where you will be parking the
vehicle for the best advice on this.
Page 234 of 378
Black plate (2,1)Chevrolet Camaro Owner Manual - 2010
9-2 Vehicle Care
Electrical System
Electrical SystemOverload . . . . . . . . . . . . . . . . . . . 9-41
Fuses and Circuit Breakers . . . . . . . . . . . . . . . . . . . 9-42
Engine Compartment Fuse
Block . . . . . . . . . . . . . . . . . . . . . . . 9-42
Instrument Panel Fuse Block . . . . . . . . . . . . . . . . . . . . . . . 9-45
Rear Compartment Fuse Block . . . . . . . . . . . . . . . . . . . . . . . 9-47
Wheels and Tires
Tires . . . . . . . . . . . . . . . . . . . . . . . . . 9-49
Winter Tires . . . . . . . . . . . . . . . . . . 9-49
Tire Sidewall Labeling . . . . . . . 9-50
Tire Designations . . . . . . . . . . . . 9-52
Tire Terminology andDefinitions . . . . . . . . . . . . . . . . . . 9-53
Tire Pressure . . . . . . . . . . . . . . . . 9-56 Tire Pressure for High-Speed
Operation . . . . . . . . . . . . . . . . . . 9-58
Tire Pressure Monitor System . . . . . . . . . . . . . . . . . . . . . 9-58
Tire Pressure Monitor
Operation . . . . . . . . . . . . . . . . . . 9-60
Tire Inspection . . . . . . . . . . . . . . . 9-63
Tire Rotation . . . . . . . . . . . . . . . . . 9-63
When It Is Time for New Tires . . . . . . . . . . . . . . . . . . . . . . . 9-64
Buying New Tires . . . . . . . . . . . . 9-65
Different Size Tires and Wheels . . . . . . . . . . . . . . . . . . . . . 9-67
Uniform Tire Quality Grading . . . . . . . . . . . . . . . . . . . . 9-67
Wheel Alignment and Tire Balance . . . . . . . . . . . . . . . . . . . . 9-69
Wheel Replacement . . . . . . . . . 9-69
Tire Chains . . . . . . . . . . . . . . . . . . 9-71 If a Tire Goes Flat . . . . . . . . . . . 9-71
Tire Sealant and
Compressor Kit . . . . . . . . . . . . . 9-73
Storing the Tire Sealant and Compressor Kit . . . . . . . . . . . . . 9-79
Tire Changing . . . . . . . . . . . . . . . 9-79
Compact Spare Tire . . . . . . . . . 9-85
Jump Starting
Jump Starting . . . . . . . . . . . . . . . . 9-86
Towing
Towing the Vehicle . . . . . . . . . . . 9-90
Recreational Vehicle Towing . . . . . . . . . . . . . . . . . . . . . 9-90
Appearance Care
Exterior Care . . . . . . . . . . . . . . . . 9-90
Interior Care . . . . . . . . . . . . . . . . . 9-95
Page 236 of 378
Black plate (4,1)Chevrolet Camaro Owner Manual - 2010
9-4 Vehicle Care
Accessories and
Modifications
Adding non‐dealer accessories
to the vehicle can affect vehicle
performance and safety, including
such things as airbags, braking,
stability, ride and handling,
emissions systems, aerodynamics,
durability, and electronic systems
like antilock brakes, traction control,
and stability control. Some of these
accessories could even cause
malfunction or damage not covered
by the vehicle warranty.
Damage to vehicle components
resulting from the installation or use
of non‐GM certified parts, including
control module modifications, is notcovered under the terms of the
vehicle warranty and may affect
remaining warranty coverage for
affected parts.
GM Accessories are designed to
complement and function with other
systems on the vehicle. Your GM
dealer can accessorize the vehicle
using genuine GM Accessories.
When you go to your GM dealer
and ask for GM Accessories, you
will know that GM-trained and
supported service technicians will
perform the work using genuine GM
Accessories.
Also, see
Adding Equipment to the
Airbag-Equipped Vehicle
on
page 2‑34.
Vehicle Checks
Doing Your Own
Service Work
{WARNING
You can be injured and the
vehicle could be damaged if you
try to do service work on a vehicle
without knowing enough about it.
.Be sure you have sufficient
knowledge, experience,
the proper replacement
parts, and tools before
attempting any vehicle
maintenance task.
.Be sure to use the proper
nuts, bolts, and other
fasteners. English and metric
fasteners can be easily
confused. If the wrong
fasteners are used, parts
can later break or fall off.
You could be hurt.
Page 239 of 378

Black plate (7,1)Chevrolet Camaro Owner Manual - 2010
Vehicle Care 9-7
A. Underhood Electrical Center.See Engine Compartment Fuse
Block on page 9‑42.
B. Engine Coolant Recovery Bottle and Cap. See Engine Coolant
on page 9‑18.
C. Engine Cover on page 9‑9.
D. Engine Cooling Fans (Out of View). See Cooling System
on
page 9‑17.
E. Radiator Fill Cap (Out of View). See Engine Coolant
on
page 9‑18.
F. Power Steering Reservoir and Cap (Out of View). See Power
Steering Fluid on page 9‑25.
G. Engine Oil Fill Cap. See Engine
Oil on page 9‑10. H. Engine Oil Dipstick (Out of
View). See Engine Oil
on
page 9‑10.
I. Brake Master Cylinder and Hydraulic Clutch (if equipped
with manual transmission)
Reservoir. See Brakes
on
page 9‑27or Hydraulic Clutchon page 9‑15.
J. Remote Positive (+) Terminal. See Battery on page 9‑29.
K. Engine Air Cleaner/Filter
on
page 9‑15.
L. Windshield Washer Fluid Reservoir. See Washer Fluid
on
page 9‑26.