battery CHEVROLET CAMARO 2011 5.G Owners Manual
[x] Cancel search | Manufacturer: CHEVROLET, Model Year: 2011, Model line: CAMARO, Model: CHEVROLET CAMARO 2011 5.GPages: 414, PDF Size: 6.24 MB
Page 22 of 414
Black plate (16,1)Chevrolet Camaro Owner Manual - 2011
1-16 In Brief
Vehicle Personalization
Some vehicle features can be
programmed by using the audio
system controls. These features
include:
.Climate and Air Quality
.Comfort and Convenience
.Collision/Detection Systems
.Language
.Lighting
.Power Door Locks
.Remote Lock/Unlock/Start
See Vehicle Personalization on
page 5‑42.
Ultrasonic Parking Assist
Ultrasonic Rear Parking Assist
(URPA) uses sensors on the rear
bumper to detect objects while
parking the vehicle. It operates at
speeds less than 8 km/h (5 mph).
URPA uses audio beeps to provide
distance and system information.
Keep the sensors on the vehicle's
rear bumper clean to ensure proper
operation.
The system can be disabled by
pressing the park assist button
located next to the radio.
See Ultrasonic Parking Assist on
page 9‑46 for more information.
Power Outlets
The vehicle has two accessory
power outlets; one is located below
the climate control system and the
other is inside the center storage
console. They can be used to plug
in electrical equipment, such as a
cell phone or an MP3 player.
The accessory power outlets do not
work when the key is removed from
the ignition and the driver door is
opened. This helps to preserve the
battery life of the vehicle.
SeePower Outlets on page 5‑5.
Page 27 of 414
Black plate (21,1)Chevrolet Camaro Owner Manual - 2011
In Brief 1-21
How OnStar Service Works
Q:Push this blue button to
connect to a specially trained
OnStar Advisor to verify your
account information and to
answer questions.
]: Push this red emergency
button to get priority help from
specially trained OnStar Emergency
Advisors.
X: Push this button for hands‐free,
voice‐activated calling and to give
voice commands for Hands‐Free
Calling and Turn‐by‐Turn
Navigation.
Automatic Crash Response,
Emergency Services, Crisis Assist,
Stolen Vehicle Assistance, Vehicle
Diagnostics, Remote Door Unlock,
Roadside Assistance, Turn‐by‐Turn
Navigation, and Hands‐Free Calling
are available on most vehicles. Not all OnStar services are
available on all vehicles. For more
information, see the OnStar Owner's
Guide; visit www.onstar.com (U.S.)
or www.onstar.ca (Canada);
contact OnStar at 1-888-4-ONSTAR
(1‐888‐466‐7827) or TTY
1‐877‐248‐2080; or push the
Q
button to speak with an OnStar
Advisor 24 hours a day, 7 days
a week.
For a full description of OnStar
services and system limitations,
see the OnStar Owner's Guide in
the glove box.
OnStar service is subject to the
OnStar Terms and Conditions
included in the OnStar Glove
Box Kit.
OnStar service requires wireless
communication networks and the
Global Positioning System (GPS)
satellite network. Not all OnStar
services are available everywhere
or on all vehicles at all times.OnStar service can’t work unless
the vehicle is in a place where
OnStar has an agreement with
a wireless service provider for
service in that area, and the
wireless service provider has
coverage, network capacity,
reception, and technology
compatible with OnStar service.
Service involving location
information about the vehicle
can’t work unless GPS signals
are available, unobstructed,
and compatible with the OnStar
hardware. The vehicle has to have
a working electrical system and
adequate battery power for the
OnStar equipment to operate.
OnStar service may not work if the
OnStar equipment isn’t properly
installed or you haven’t maintained
it and the vehicle is in good working
order and in compliance with
all government regulations.
Page 31 of 414
Black plate (3,1)Chevrolet Camaro Owner Manual - 2011
Keys, Doors and Windows 2-3
Remote Keyless Entry
(RKE) System
SeeRadio Frequency Statement on
page 13‑19 for information
regarding Part 15 of the Federal
Communications Commission
(FCC) rules and Industry Canada
Standards RSS-210/220/310.
If there is a decrease in the RKE
operating range:
.Check the distance.
The transmitter may be
too far from the vehicle.
.Check the location. Other
vehicles or objects may be
blocking the signal.
.Check the transmitter's battery.
See “Battery Replacement” later
in this section.
.If the transmitter is still not
working correctly, see your
dealer or a qualified technician
for service.
Remote Keyless Entry
(RKE) System Operation
The Remote Keyless Entry (RKE)
transmitter will work up to 20 m
(65 ft) away from the vehicle.
Other conditions can affect the
performance of the transmitter.
See Remote Keyless Entry (RKE)
System on page 2‑3.
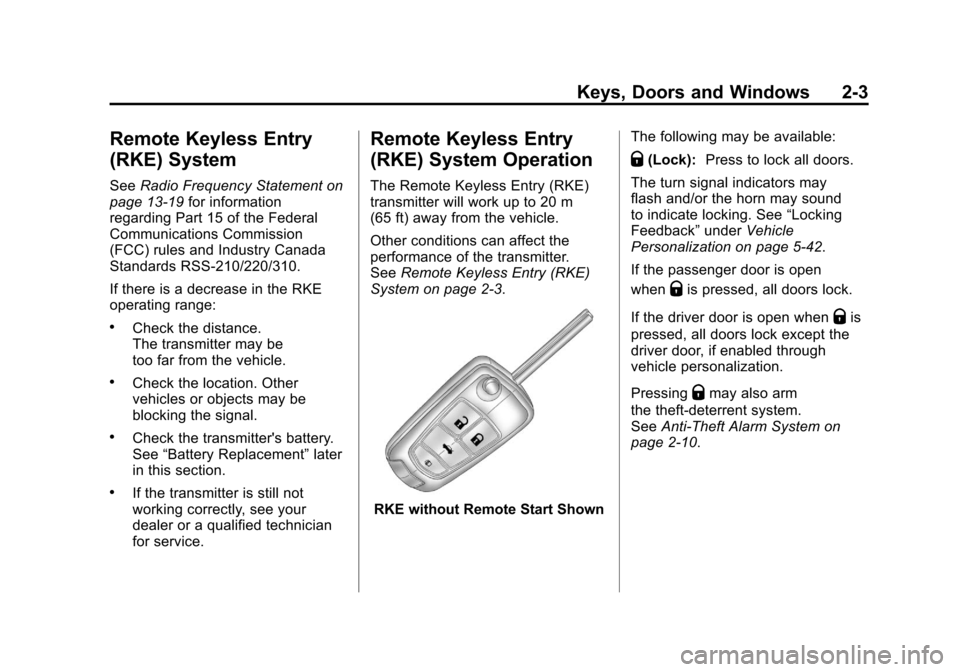
RKE without Remote Start Shown The following may be available:
Q(Lock):
Press to lock all doors.
The turn signal indicators may
flash and/or the horn may sound
to indicate locking. See “Locking
Feedback” underVehicle
Personalization on page 5‑42.
If the passenger door is open
when
Qis pressed, all doors lock.
If the driver door is open when
Qis
pressed, all doors lock except the
driver door, if enabled through
vehicle personalization.
Pressing
Qmay also arm
the theft-deterrent system.
See Anti-Theft Alarm System on
page 2‑10.
Page 33 of 414
Black plate (5,1)Chevrolet Camaro Owner Manual - 2011
Keys, Doors and Windows 2-5
Battery Replacement
The battery is not rechargeable.
To replace the battery:
1. Extend the key blade and openthe battery cover on the back of
the transmitter by prying with
finger.
2. Remove the used battery by pushing on battery and sliding
toward the key blade.
3. Insert the new battery, positive side facing up. Push the battery
down to until it is held in place.
Replace with a CR2032 or
equivalent battery.
4. Snap the battery cover back on to the transmitter.
Remote Vehicle Start
Your vehicle may have this feature
which allows you to start the engine
from outside the vehicle.
/(Remote Vehicle Start):
This button will be on the RKE
transmitter if you have remote start.
During a remote start the climate
control system will turn on with
the fan speed, air delivery mode,
and temperature settings that the
system was set to when the vehicle
was last turned off. If the fan is
set to O (Off), the climate control
system will not turn on. Laws in some local communities
may restrict the use of remote
starters. For example, some laws
may require a person using remote
start to have the vehicle in view.
Check local regulations for any
requirements.
There are other conditions which
can affect the performance of the
transmitter. See
Remote Keyless
Entry (RKE) System on page 2‑3
for additional information.
Page 45 of 414
Black plate (17,1)Chevrolet Camaro Owner Manual - 2011
Keys, Doors and Windows 2-17
Express Window Anti-Pinch
Override
The anti-pinch feature can
be overridden by holding the
window switch all the way down.
The window will lower for as long
as the switch is held. Once the
switch is released, the express
mode is re-activated. In this mode,
the window can still close on an
object in its path. Use care when
using the override mode.
Programming the Power
Windows
If the battery on the vehicle has
been recharged, disconnected,
or is not working, you will need to
reprogram each front power window
for the express-up feature to work.
Before reprogramming, replace or
recharge the vehicle's battery.To program each front window,
follow these steps:
1. With the ignition in ON/RUN or
ACC/ACCESSORY, or when
Retained Accessory Power
(RAP) is active, close all doors.
2. Press and hold the power window switch until the window
is fully open.
3. Pull the power window switch up until the window is fully closed.
4. Continue holding the switch up for approximately two seconds
after the window is completely
closed.
The window is now reprogrammed.
Repeat the process for the other
window.
Sun Visors
Pull the sun visor toward you or
move it to the side to reduce glare.
Roof
Sunroof
On vehicles with a sunroof, the
switch is located on the overhead
console.
The sunroof only operates
when the ignition is in ON/RUN or
ACC/ACCESSORY, or if Retained
Accessory Power (RAP) is active.
See Retained Accessory Power
(RAP) on page 9‑24.
Page 82 of 414
Black plate (36,1)Chevrolet Camaro Owner Manual - 2011
3-36 Seats and Restraints
Servicing the
Airbag-Equipped Vehicle
Airbags affect how the vehicle
should be serviced. There are
parts of the airbag system in
several places around the vehicle.
Your dealer and the service manual
have information about servicing
the vehicle and the airbag system.
To purchase a service manual, see
Service Publications Ordering
Information on page 13‑15.
{WARNING
For up to 10 seconds after the
ignition is turned off and the
battery is disconnected, an airbag
can still inflate during improper
service. You can be injured if you
are close to an airbag when it
inflates. Avoid yellow connectors.
They are probably part of the
airbag system. Be sure to follow
proper service procedures, and
make sure the person performing
work for you is qualified to do so.
Adding Equipment to the
Airbag-Equipped Vehicle
Q: Is there anything I might addto or change about the vehicle
that could keep the airbags
from working properly?
A: Yes. If you add things that
change the vehicle's frame,
bumper system, height, front end
or side sheet metal, they may
keep the airbag system from
working properly. Changing or
moving any parts of the front
seats, safety belts, the airbag
sensing and diagnostic module,
steering wheel, instrument
panel, roof-rail airbag modules,
ceiling headliner or pillar garnish
trim, front sensors, side impact
sensors, or airbag wiring can
affect the operation of the airbag
system.
Page 107 of 414
Black plate (1,1)Chevrolet Camaro Owner Manual - 2011
Instruments and Controls 5-1
Instruments and
Controls
Controls
Steering Wheel Adjustment . . . 5-2
Steering Wheel Controls . . . . . . 5-2
Horn . . . . . . . . . . . . . . . . . . . . . . . . . . 5-3
Windshield Wiper/Washer . . . . . 5-3
Compass . . . . . . . . . . . . . . . . . . . . . 5-4
Clock . . . . . . . . . . . . . . . . . . . . . . . . . 5-4
Power Outlets . . . . . . . . . . . . . . . . . 5-5
Warning Lights, Gauges, and
Indicators
Warning Lights, Gauges, andIndicators . . . . . . . . . . . . . . . . . . . . 5-6
Instrument Cluster . . . . . . . . . . . . 5-7
Speedometer . . . . . . . . . . . . . . . . . 5-8
Odometer . . . . . . . . . . . . . . . . . . . . . 5-8
Trip Odometer . . . . . . . . . . . . . . . . . 5-8
Tachometer . . . . . . . . . . . . . . . . . . . 5-8
Fuel Gauge . . . . . . . . . . . . . . . . . . . 5-8
Engine Oil Pressure Gauge . . . 5-9
Engine Oil Temperature Gauge . . . . . . . . . . . . . . . . . . . . . . 5-11 Engine Coolant Temperature
Gauge . . . . . . . . . . . . . . . . . . . . . . 5-11
Transmission Temperature Gauge . . . . . . . . . . . . . . . . . . . . . . 5-12
Voltmeter Gauge . . . . . . . . . . . . . 5-13
Safety Belt Reminders . . . . . . . 5-14
Airbag Readiness Light . . . . . . 5-15
Passenger Airbag Status
Indicator . . . . . . . . . . . . . . . . . . . . 5-16
Charging System Light . . . . . . 5-17
Malfunction Indicator Lamp . . . . . . . . . . . . . 5-18
Brake System Warning Light . . . . . . . . . . . . . . . . . . . . . . . 5-20
Antilock Brake System (ABS) Warning Light . . . . . . . . . . . . . . 5-21
Traction Off Light . . . . . . . . . . . . 5-22
Traction Control System (TCS)/StabiliTrak
®Light . . . . 5-22
Traction Control System (TCS) OFF/StabiliTrak
®OFF
Light . . . . . . . . . . . . . . . . . . . . . . . 5-23
Tire Pressure Light . . . . . . . . . . 5-23
Engine Oil Pressure Light . . . . 5-24
Immobilizer Light . . . . . . . . . . . . 5-24
Front Fog Lamp Light . . . . . . . . 5-25
Taillamp Indicator Light . . . . . . 5-25
Cruise Control Light . . . . . . . . . 5-25
Information Displays
Driver Information Center (DIC) . . . . . . . . . . . . . . . 5-25
Head-Up Display (HUD) . . . . . 5-29
Vehicle Messages
Vehicle Messages . . . . . . . . . . . 5-34
Battery Voltage and Charging Messages . . . . . . . . . . . . . . . . . . 5-34
Brake System Messages . . . . 5-34
Compass Messages . . . . . . . . . 5-35
Cruise Control Messages . . . . 5-35
Door Ajar Messages . . . . . . . . . 5-35
Engine Cooling System Messages . . . . . . . . . . . . . . . . . . 5-35
Engine Oil Messages . . . . . . . . 5-36
Engine Power Messages . . . . 5-37
Fuel System Messages . . . . . . 5-37
Key and Lock Messages . . . . . 5-37
Lamp Messages . . . . . . . . . . . . . 5-37
Object Detection System Messages . . . . . . . . . . . . . . . . . . 5-38
Ride Control System Messages . . . . . . . . . . . . . . . . . . 5-38
Airbag System Messages . . . . 5-39
Safety Belt Messages . . . . . . . 5-39
Anti-Theft Alarm System Messages . . . . . . . . . . . . . . . . . . 5-39
Service Vehicle Messages . . . 5-39
Page 111 of 414
Black plate (5,1)Chevrolet Camaro Owner Manual - 2011
Instruments and Controls 5-5
Setting the Time and Date
1. Press the CONFIG button.
2. Select Time and Date Settings.
3. Select Set Time or Set Date.
4. Turn the MENU/SELECT knob toadjust the highlighted value.
5. Press the MENU/SELECT knob to select the next value.
6. To save the time or date and return to the Time and
Date Settings menu, press
the
0BACK button at any time
or press the MENU/SELECT
knob after adjusting the minutes
or year.
Setting the 12/24 Hour Format
1. Press the CONFIG button.
2. Select Time and Date Settings.
3. Highlight 12/24 Hour Format.
4. Press the MENU/SELECT knob to select the 12 hour or 24 hour
display format.
Setting the Month & Day
Format
1. Press the CONFIG button.
2. Select Time and Date Settings.
3. Highlight Month & Day Format.
4. Press the MENU/SELECT knobto select MM/DD (month/day) or
DD/MM (day/month).
Setting the Auto Time Adjust
1. Press the CONFIG button.
2. Select Time and Date Settings.
3. Highlight Auto Time Adjust.
4. Press the MENU/SELECT knobto turn Auto Time Adjust on
or off.
Power Outlets
The vehicle has two accessory
power outlets; one is located below
the climate control system and the
other is inside the center storage
console. They can be used to plug
in electrical equipment, such as a
cell phone or an MP3 player.
The accessory power outlets do not
work when the key is removed from
the ignition and the driver door is
opened. This helps to preserve the
battery life of the vehicle.
Page 119 of 414
Black plate (13,1)Chevrolet Camaro Owner Manual - 2011
Instruments and Controls 5-13
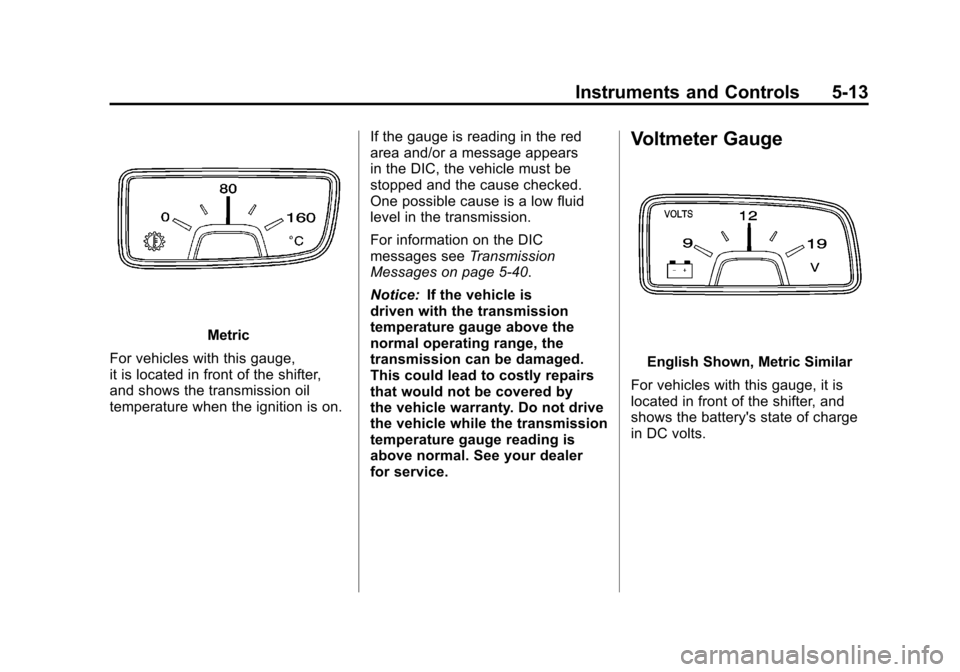
Metric
For vehicles with this gauge,
it is located in front of the shifter,
and shows the transmission oil
temperature when the ignition is on. If the gauge is reading in the red
area and/or a message appears
in the DIC, the vehicle must be
stopped and the cause checked.
One possible cause is a low fluid
level in the transmission.
For information on the DIC
messages see
Transmission
Messages on page 5‑40.
Notice: If the vehicle is
driven with the transmission
temperature gauge above the
normal operating range, the
transmission can be damaged.
This could lead to costly repairs
that would not be covered by
the vehicle warranty. Do not drive
the vehicle while the transmission
temperature gauge reading is
above normal. See your dealer
for service.
Voltmeter Gauge
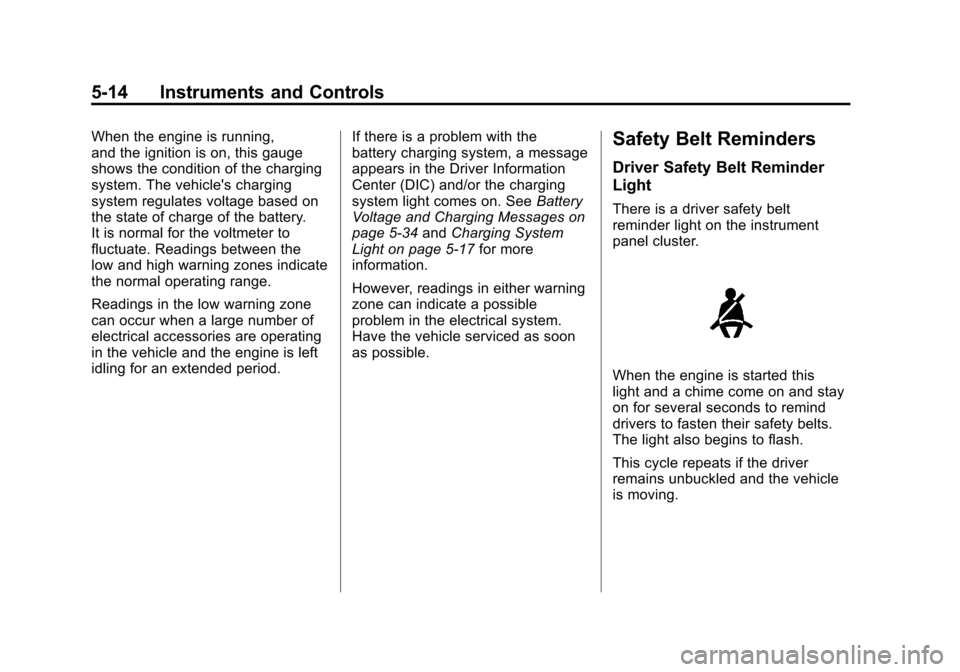
English Shown, Metric Similar
For vehicles with this gauge, it is
located in front of the shifter, and
shows the battery's state of charge
in DC volts.
Page 120 of 414
Black plate (14,1)Chevrolet Camaro Owner Manual - 2011
5-14 Instruments and Controls
When the engine is running,
and the ignition is on, this gauge
shows the condition of the charging
system. The vehicle's charging
system regulates voltage based on
the state of charge of the battery.
It is normal for the voltmeter to
fluctuate. Readings between the
low and high warning zones indicate
the normal operating range.
Readings in the low warning zone
can occur when a large number of
electrical accessories are operating
in the vehicle and the engine is left
idling for an extended period.If there is a problem with the
battery charging system, a message
appears in the Driver Information
Center (DIC) and/or the charging
system light comes on. See
Battery
Voltage and Charging Messages on
page 5‑34 andCharging System
Light on page 5‑17 for more
information.
However, readings in either warning
zone can indicate a possible
problem in the electrical system.
Have the vehicle serviced as soon
as possible.Safety Belt Reminders
Driver Safety Belt Reminder
Light
There is a driver safety belt
reminder light on the instrument
panel cluster.
When the engine is started this
light and a chime come on and stay
on for several seconds to remind
drivers to fasten their safety belts.
The light also begins to flash.
This cycle repeats if the driver
remains unbuckled and the vehicle
is moving.