buttons CHEVROLET CAMARO 2011 5.G Owners Manual
[x] Cancel search | Manufacturer: CHEVROLET, Model Year: 2011, Model line: CAMARO, Model: CHEVROLET CAMARO 2011 5.GPages: 414, PDF Size: 6.24 MB
Page 9 of 414

Black plate (3,1)Chevrolet Camaro Owner Manual - 2011
In Brief 1-3
A.Air Vents on page 8‑4.
B. Driver Shift Controls (If Equipped). See Automatic
Transmission on page 9‑30.
C. Instrument Cluster on page 5‑7.
D. Windshield Wiper/Washer on
page 5‑3.
E. Infotainment on page 7‑1.
F. Turn and Lane‐Change Lever. See Turn and Lane-Change
Signals on page 6‑5.
Headlamp High/Low-Beam
Changer on page 6‑2.
Flash-to-Pass on page 6‑3.
Driver Information Center
(DIC) Buttons (If Equipped).
See Driver Information Center
(DIC) on page 5‑25. G. Data Link Connector (DLC)
(Out of View). See Malfunction
Indicator Lamp on page 5‑18.
H. Cruise Control on page 9‑43.
I. Exterior Lamp Controls on
page 6‑1.
Front Fog Lamps on page 6‑5
(If Equipped).
Instrument Panel Illumination
Control on page 6‑6.
J. Steering Wheel Adjustment on
page 5‑2.
K. Horn on page 5‑3.
L. Steering Wheel Controls on
page 5‑2.
M. Head-Up Display (HUD) on
page 5‑29 (If Equipped). N.
Climate Control Systems on
page 8‑1.
O. Transmission Temperature
Gauge on page 5‑12.
Voltmeter Gauge on page 5‑13.
Engine Oil Temperature Gauge
on page 5‑11.
Engine Oil Pressure Gauge on
page 5‑9.
P. Shift Lever. See Shifting Into
Park (Automatic Transmission)
on page 9‑24.
Q. Power Outlets on page 5‑5.
R. Hazard Warning Flashers on
page 6‑5.
Power Door Locks on page 2‑8.
S. Glove Box on page 4‑1.
Page 15 of 414
Black plate (9,1)Chevrolet Camaro Owner Manual - 2011
In Brief 1-9
Steering Wheel
Adjustment
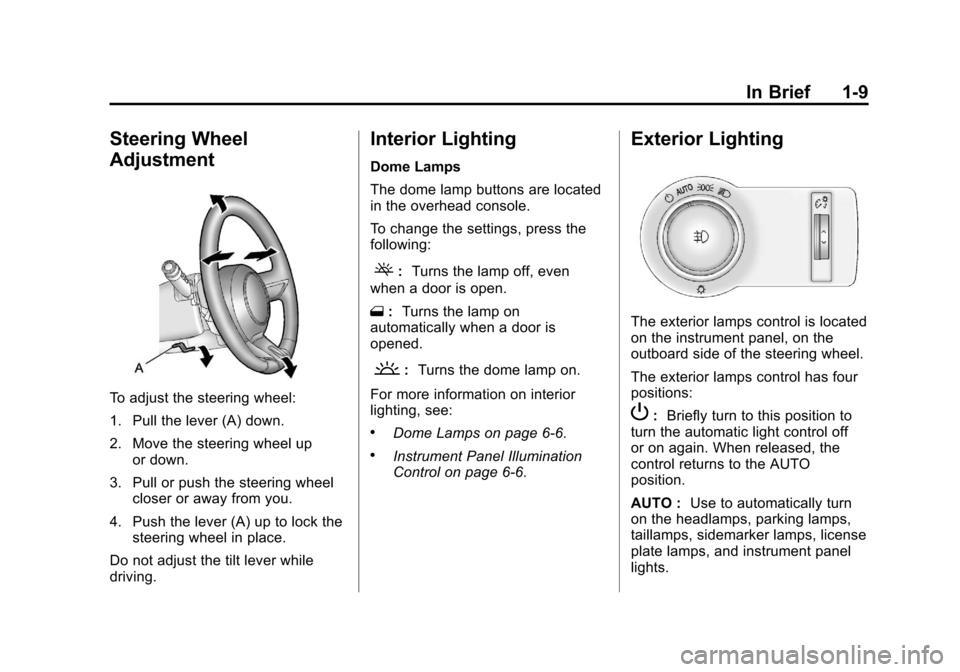
To adjust the steering wheel:
1. Pull the lever (A) down.
2. Move the steering wheel upor down.
3. Pull or push the steering wheel closer or away from you.
4. Push the lever (A) up to lock the steering wheel in place.
Do not adjust the tilt lever while
driving.
Interior Lighting
Dome Lamps
The dome lamp buttons are located
in the overhead console.
To change the settings, press the
following:
(: Turns the lamp off, even
when a door is open.
1 :Turns the lamp on
automatically when a door is
opened.
': Turns the dome lamp on.
For more information on interior
lighting, see:
.Dome Lamps on page 6‑6.
.Instrument Panel Illumination
Control on page 6‑6.
Exterior Lighting
The exterior lamps control is located
on the instrument panel, on the
outboard side of the steering wheel.
The exterior lamps control has four
positions:
P: Briefly turn to this position to
turn the automatic light control off
or on again. When released, the
control returns to the AUTO
position.
AUTO : Use to automatically turn
on the headlamps, parking lamps,
taillamps, sidemarker lamps, license
plate lamps, and instrument panel
lights.
Page 18 of 414
Black plate (12,1)Chevrolet Camaro Owner Manual - 2011
1-12 In Brief
Manual Transmission
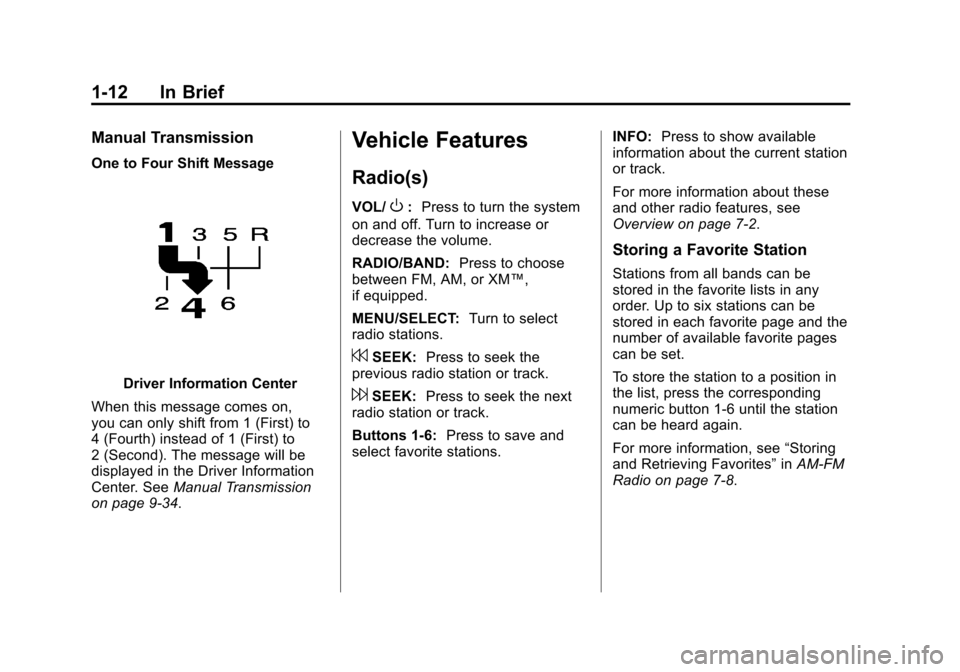
One to Four Shift Message
Driver Information Center
When this message comes on,
you can only shift from 1 (First) to
4 (Fourth) instead of 1 (First) to
2 (Second). The message will be
displayed in the Driver Information
Center. See Manual Transmission
on page 9‑34.
Vehicle Features
Radio(s)
VOL/O: Press to turn the system
on and off. Turn to increase or
decrease the volume.
RADIO/BAND: Press to choose
between FM, AM, or XM™,
if equipped.
MENU/SELECT: Turn to select
radio stations.
7SEEK: Press to seek the
previous radio station or track.
6SEEK: Press to seek the next
radio station or track.
Buttons 1‐6: Press to save and
select favorite stations. INFO:
Press to show available
information about the current station
or track.
For more information about these
and other radio features, see
Overview on page 7‑2.
Storing a Favorite Station
Stations from all bands can be
stored in the favorite lists in any
order. Up to six stations can be
stored in each favorite page and the
number of available favorite pages
can be set.
To store the station to a position in
the list, press the corresponding
numeric button 1‐6 until the station
can be heard again.
For more information, see “Storing
and Retrieving Favorites” inAM-FM
Radio on page 7‑8.
Page 21 of 414
Black plate (15,1)Chevrolet Camaro Owner Manual - 2011
In Brief 1-15
Cruise Control
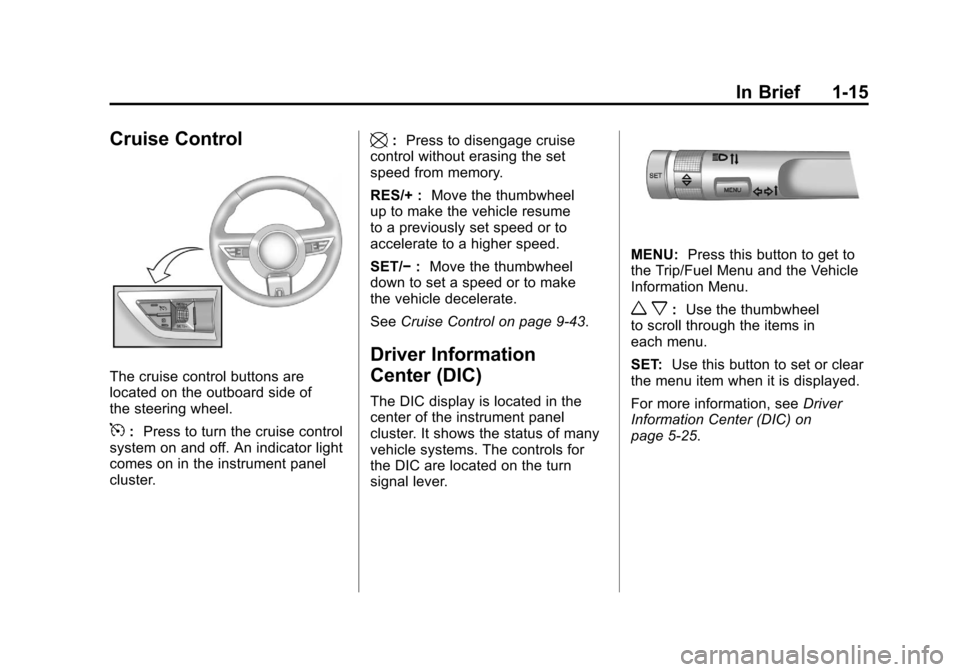
The cruise control buttons are
located on the outboard side of
the steering wheel.
5:Press to turn the cruise control
system on and off. An indicator light
comes on in the instrument panel
cluster.
\: Press to disengage cruise
control without erasing the set
speed from memory.
RES/+ : Move the thumbwheel
up to make the vehicle resume
to a previously set speed or to
accelerate to a higher speed.
SET/− :Move the thumbwheel
down to set a speed or to make
the vehicle decelerate.
See Cruise Control on page 9‑43.
Driver Information
Center (DIC)
The DIC display is located in the
center of the instrument panel
cluster. It shows the status of many
vehicle systems. The controls for
the DIC are located on the turn
signal lever.
MENU: Press this button to get to
the Trip/Fuel Menu and the Vehicle
Information Menu.
w x: Use the thumbwheel
to scroll through the items in
each menu.
SET: Use this button to set or clear
the menu item when it is displayed.
For more information, see Driver
Information Center (DIC) on
page 5‑25.
Page 28 of 414
Black plate (22,1)Chevrolet Camaro Owner Manual - 2011
1-22 In Brief
If you try to add, connect, or modify
any equipment or software in the
vehicle, OnStar service may not
work. Other problems OnStar can’t
control may prevent service to you,
such as hills, tall buildings, tunnels,
weather, electrical system design
and architecture of the vehicle,
damage to important parts of the
vehicle in a crash, or wireless phone
network congestion or jamming.
SeeRadio Frequency Statement on
page 13‑19 for information
regarding Part 15 of the Federal
Communications Commission
(FCC) rules and Industry Canada
Standards RSS-210/220/310.OnStar Steering Wheel
Controls
This vehicle may have
a
b g/$ iTalk/Mute button
that can be used to interact
with OnStar Hands-Free calling.
See Steering Wheel Controls on
page 5‑2 for more information.
On some vehicles, the
$ ibutton
can be used to dial numbers into
voice mail systems, or to dial phone
extensions. See the OnStar Owner's
Guide for more information.
Your Responsibility
Increase the volume of the radio
if the OnStar Advisor cannot be
heard.
If the light next to the OnStar
buttons is red, the system may
not be functioning properly. Push
the
Qbutton and request a vehicle
diagnostic check. If the light
appears clear (no light appears),
your OnStar subscription has
expired and all services have been
deactivated. Push the
Qbutton to
confirm that the OnStar equipment
is active.
Page 42 of 414
Black plate (14,1)Chevrolet Camaro Owner Manual - 2011
2-14 Keys, Doors and Windows
Heated Mirrors
For vehicles with heated mirrors:
<(Rear Window Defogger):
Press to heat the mirrors.
See “Rear Window Defogger”
under Climate Control Systems on
page 8‑1 for more information.
Automatic Dimming
Mirror
If the vehicle is equipped with an
automatic dimming outside mirror
on the driver side, the mirror will
adjust for the glare of headlamps
behind you.
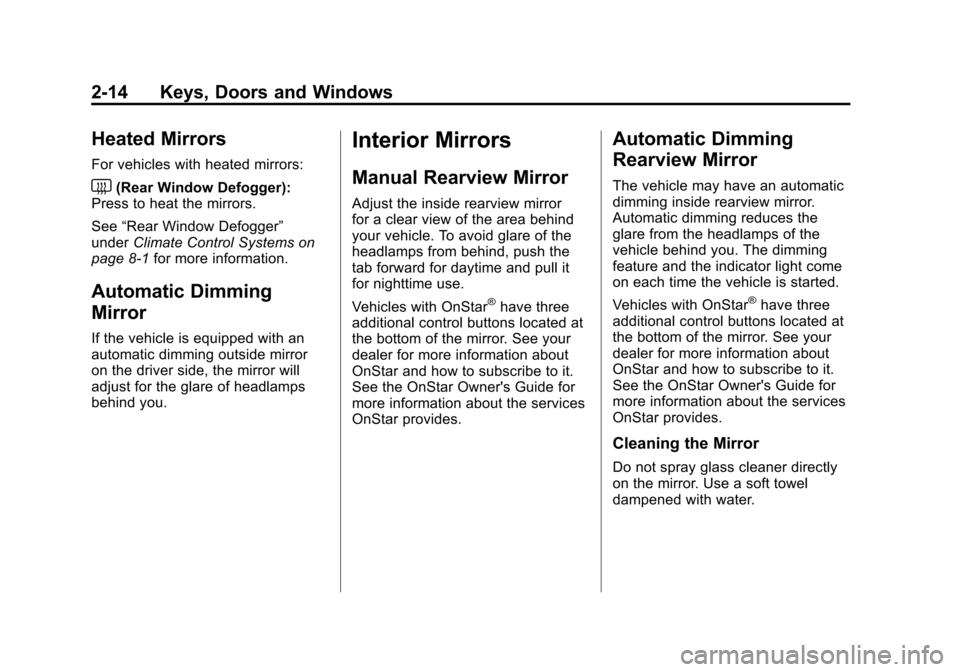
Interior Mirrors
Manual Rearview Mirror
Adjust the inside rearview mirror
for a clear view of the area behind
your vehicle. To avoid glare of the
headlamps from behind, push the
tab forward for daytime and pull it
for nighttime use.
Vehicles with OnStar
®have three
additional control buttons located at
the bottom of the mirror. See your
dealer for more information about
OnStar and how to subscribe to it.
See the OnStar Owner's Guide for
more information about the services
OnStar provides.
Automatic Dimming
Rearview Mirror
The vehicle may have an automatic
dimming inside rearview mirror.
Automatic dimming reduces the
glare from the headlamps of the
vehicle behind you. The dimming
feature and the indicator light come
on each time the vehicle is started.
Vehicles with OnStar
®have three
additional control buttons located at
the bottom of the mirror. See your
dealer for more information about
OnStar and how to subscribe to it.
See the OnStar Owner's Guide for
more information about the services
OnStar provides.
Cleaning the Mirror
Do not spray glass cleaner directly
on the mirror. Use a soft towel
dampened with water.
Page 132 of 414
Black plate (26,1)Chevrolet Camaro Owner Manual - 2011
5-26 Instruments and Controls
DIC Operation and Displays
The DIC has different displays
which can be accessed by using
the DIC buttons on the turn signal
lever located on the left side of the
steering wheel. The DIC displays
trip, fuel, vehicle system information,
and warning messages if a system
problem is detected.
The bottom of the DIC display
shows what position the shift lever
is in (Automatic Transmission Only),
the odometer, and the direction the
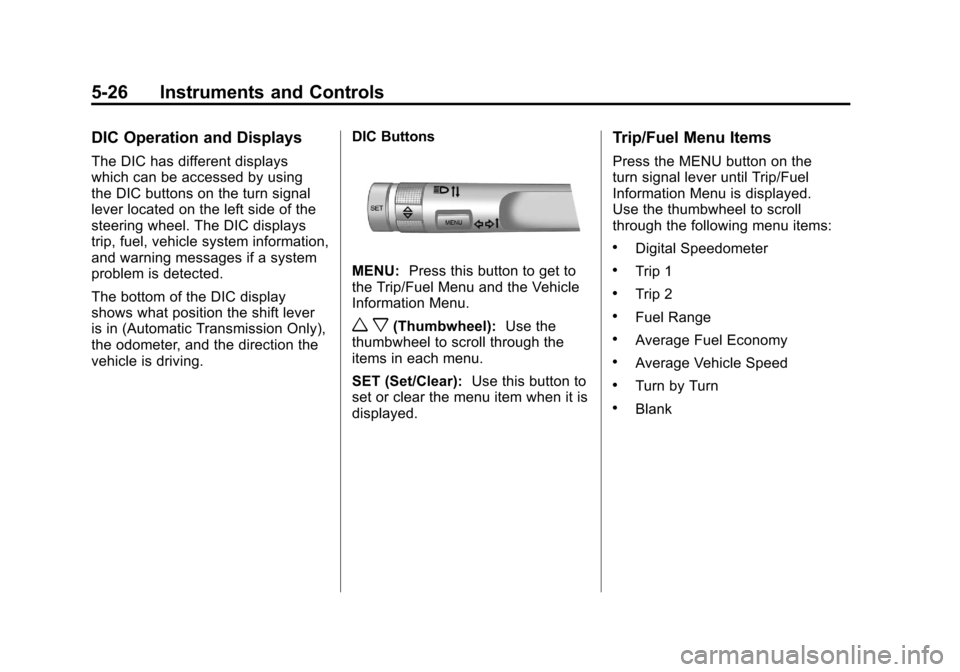
vehicle is driving.DIC Buttons
MENU:
Press this button to get to
the Trip/Fuel Menu and the Vehicle
Information Menu.
w x(Thumbwheel): Use the
thumbwheel to scroll through the
items in each menu.
SET (Set/Clear): Use this button to
set or clear the menu item when it is
displayed.
Trip/Fuel Menu Items
Press the MENU button on the
turn signal lever until Trip/Fuel
Information Menu is displayed.
Use the thumbwheel to scroll
through the following menu items:
.Digital Speedometer
.Trip 1
.Trip 2
.Fuel Range
.Average Fuel Economy
.Average Vehicle Speed
.Turn by Turn
.Blank
Page 152 of 414
Black plate (46,1)Chevrolet Camaro Owner Manual - 2011
5-46 Instruments and Controls
Universal Remote
System
SeeRadio Frequency Statement on
page 13‑19 for information
regarding Part 15 of the Federal
Communications Commission
(FCC) rules and Industry Canada
Standards RSS-210/220/310.
Universal Remote System
Programming
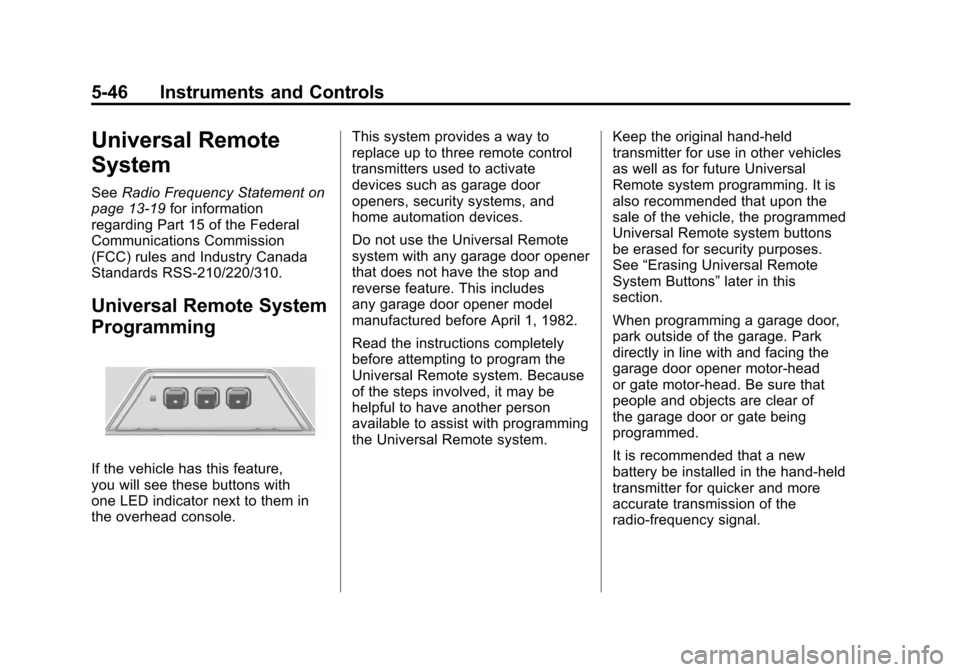
If the vehicle has this feature,
you will see these buttons with
one LED indicator next to them in
the overhead console. This system provides a way to
replace up to three remote control
transmitters used to activate
devices such as garage door
openers, security systems, and
home automation devices.
Do not use the Universal Remote
system with any garage door opener
that does not have the stop and
reverse feature. This includes
any garage door opener model
manufactured before April 1, 1982.
Read the instructions completely
before attempting to program the
Universal Remote system. Because
of the steps involved, it may be
helpful to have another person
available to assist with programming
the Universal Remote system.
Keep the original hand-held
transmitter for use in other vehicles
as well as for future Universal
Remote system programming. It is
also recommended that upon the
sale of the vehicle, the programmed
Universal Remote system buttons
be erased for security purposes.
See
“Erasing Universal Remote
System Buttons” later in this
section.
When programming a garage door,
park outside of the garage. Park
directly in line with and facing the
garage door opener motor-head
or gate motor-head. Be sure that
people and objects are clear of
the garage door or gate being
programmed.
It is recommended that a new
battery be installed in the hand-held
transmitter for quicker and more
accurate transmission of the
radio-frequency signal.
Page 153 of 414
Black plate (47,1)Chevrolet Camaro Owner Manual - 2011
Instruments and Controls 5-47
Programming the Universal
Remote System
For questions or help programming
the Universal Remote system,
call 1‐800‐355‐3515 or go to
www.homelink.com.
Programming a garage door opener
involves time-sensitive actions, so
read the entire procedure before
starting. Otherwise, the device will
time out and the procedure will have
to be repeated.
To program up to three devices:
1. Hold the end of the hand-heldtransmitter about 3 to 8 cm
(1 to 3 in) away from the
Universal Remote system
buttons while keeping the
indicator light in view.
The hand-held transmitter
was supplied by the
manufacturer of the garage
door opener receiver
(motor-head unit). 2. At the same time, press
and hold both the hand-held
transmitter button and one of the
three Universal Remote system
buttons to be used to operate
the garage door. Do not release
the Universal Remote system
button or the hand-held
transmitter button until the
indicator light changes from
a slowly to a rapidly flashing
light. You now may release
both buttons.
Some entry gates and garage
door openers may require
substitution of Step 2 with
the procedure noted in “Gate
Operator and Canadian
Programming” later in this
section. 3. Press and hold for five seconds
the newly trained Universal
Remote system button
(the button selected in Step 2)
while observing the indicator
light and garage door activation.
.If the indicator light stays on
continuously or the garage
door starts to move when
the Universal Remote
system button is pressed
and released, then the
programming is complete.
There is no need to
continue programming
Steps 4 through 6.
Page 154 of 414
Black plate (48,1)Chevrolet Camaro Owner Manual - 2011
5-48 Instruments and Controls
.If the Universal Remote
system indicator light blinks
rapidly for two seconds,
then turns to a constant
light and the garage door
does not move, continue
with programming Steps 4
through 6.
It may be helpful to have
another person assist with
the remaining Steps 4
through 6.
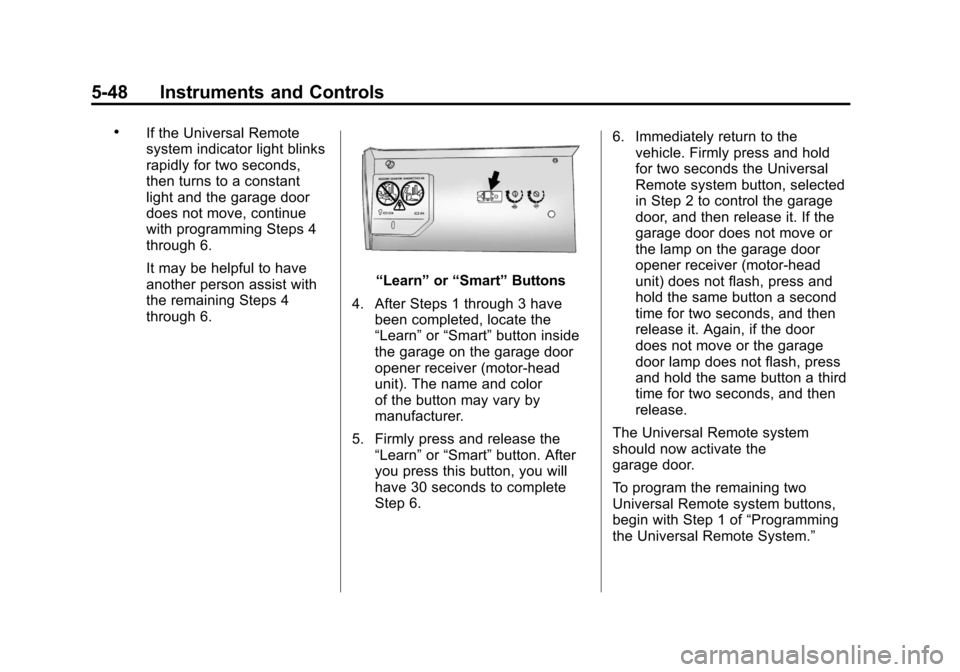
“Learn”or“Smart” Buttons
4. After Steps 1 through 3 have been completed, locate the
“Learn” or“Smart” button inside
the garage on the garage door
opener receiver (motor-head
unit). The name and color
of the button may vary by
manufacturer.
5. Firmly press and release the “Learn” or“Smart” button. After
you press this button, you will
have 30 seconds to complete
Step 6. 6. Immediately return to the
vehicle. Firmly press and hold
for two seconds the Universal
Remote system button, selected
in Step 2 to control the garage
door, and then release it. If the
garage door does not move or
the lamp on the garage door
opener receiver (motor-head
unit) does not flash, press and
hold the same button a second
time for two seconds, and then
release it. Again, if the door
does not move or the garage
door lamp does not flash, press
and hold the same button a third
time for two seconds, and then
release.
The Universal Remote system
should now activate the
garage door.
To program the remaining two
Universal Remote system buttons,
begin with Step 1 of “Programming
the Universal Remote System.”