instrument cluster CHEVROLET CAMARO 2013 5.G User Guide
[x] Cancel search | Manufacturer: CHEVROLET, Model Year: 2013, Model line: CAMARO, Model: CHEVROLET CAMARO 2013 5.GPages: 404, PDF Size: 5.45 MB
Page 152 of 404
Black plate (2,1)Chevrolet Camaro Owner Manual (Include Mex) - 2012
6-2 Lighting
;(Parking Lamps):Turns the
parking lamps on together with the
following:
.Taillamps
.Sidemarker Lamps
.License Plate Lamps
.Instrument Panel Lights
A warning chime sounds if the driver
door is opened when the ignition
switch is off and the parking lamps
are on.
5(Headlamps): Turns the
headlamps on together with the
lamps listed below.
.Parking Lamps
.Taillamps
.Sidemarker Lamps
.License Plate Lamps
.Instrument Panel Lights A warning chime sounds if the driver
door is opened when the ignition
switch is off and the headlamps
are on.
#(Front Fog Lamps):
Turns the
fog lamps on or off. The fog lamps
come on together with the following:
.Parking Lamps
.Taillamps
.Sidemarker Lamps
.License Plate Lamps
.Instrument Panel Lights
See Front Fog Lamps on page 6‑5.
Headlamp High/
Low-Beam Changer
Push the turn signal/lane change
lever away from you and release, to
turn the high beams on. To return to
low beams, push the lever again or
pull it toward you and release.
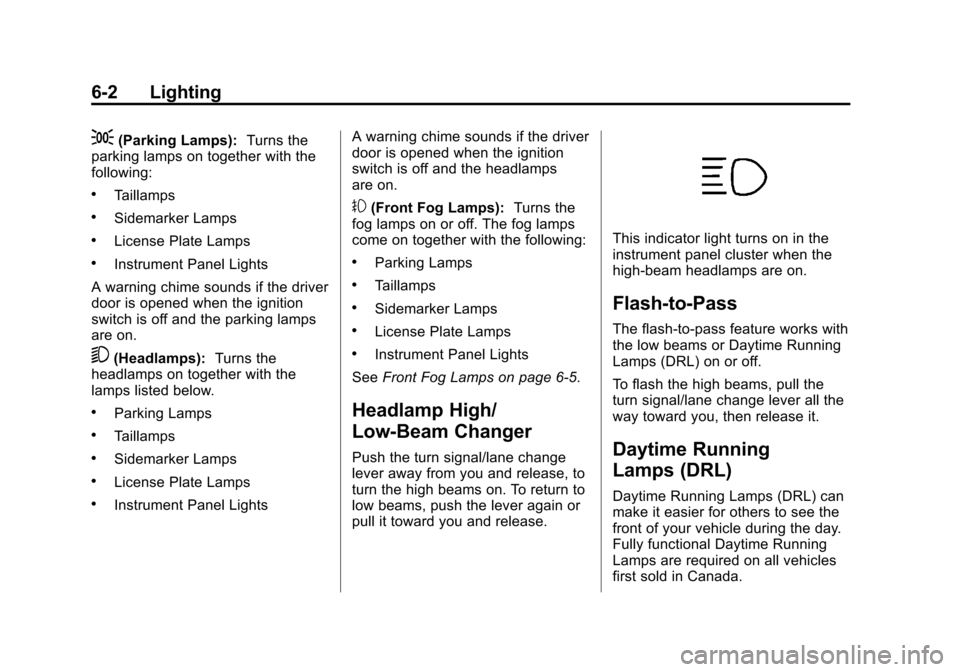
This indicator light turns on in the
instrument panel cluster when the
high‐beam headlamps are on.
Flash-to-Pass
The flash‐to‐pass feature works with
the low beams or Daytime Running
Lamps (DRL) on or off.
To flash the high beams, pull the
turn signal/lane change lever all the
way toward you, then release it.
Daytime Running
Lamps (DRL)
Daytime Running Lamps (DRL) can
make it easier for others to see the
front of your vehicle during the day.
Fully functional Daytime Running
Lamps are required on all vehicles
first sold in Canada.
Page 154 of 404

Black plate (4,1)Chevrolet Camaro Owner Manual (Include Mex) - 2012
6-4 Lighting
There is a delay in the transition
between the daytime and nighttime
operation of the Daytime Running
Lamps (DRL) and the automatic
headlamp systems so that driving
under bridges or bright overhead
street lights does not affect the
system. The DRL and automatic
headlamp system will only be
affected when the light sensor sees
a change in lighting lasting longer
than the delay.
If the vehicle is started in a dark
garage, the automatic headlamp
system comes on immediately. If it
is light outside when the vehicle
leaves the garage, there will be a
slight delay before the automatic
headlamp system changes to
the DRL. During that delay, the
instrument panel cluster may not be
as bright as usual. Make sure the
instrument panel brightness control
is in the full bright position. See
Instrument Panel Illumination
Control on page 6‑5.Hazard Warning Flashers
|Hazard Warning Flasher:
Press this button to make the front
and rear turn signal lamps flash on
and off. This warns others that you
are having trouble. Press again to
turn the flashers off.
Turn and Lane-Change
Signals
An arrow on the instrument panel
cluster flashes in the direction of the
turn or lane change.
Move the lever all the way up or
down to signal a turn.
Raise or lower the lever until the
arrow starts to flash to signal a lane
change. Hold it there until the lane
change is completed. If the lever is
briefly pressed and released, the
turn signal flashes three times.
The lever returns to its starting
position whenever it is released.
If after signaling a turn or lane
change the arrow flashes rapidly or
does not come on, a signal bulb
might be burned out.
Page 155 of 404
Black plate (5,1)Chevrolet Camaro Owner Manual (Include Mex) - 2012
Lighting 6-5
Have the bulbs replaced. If the bulb
is not burned out, check the fuse.
SeeElectrical System Overload on
page 10‑39.
Front Fog Lamps
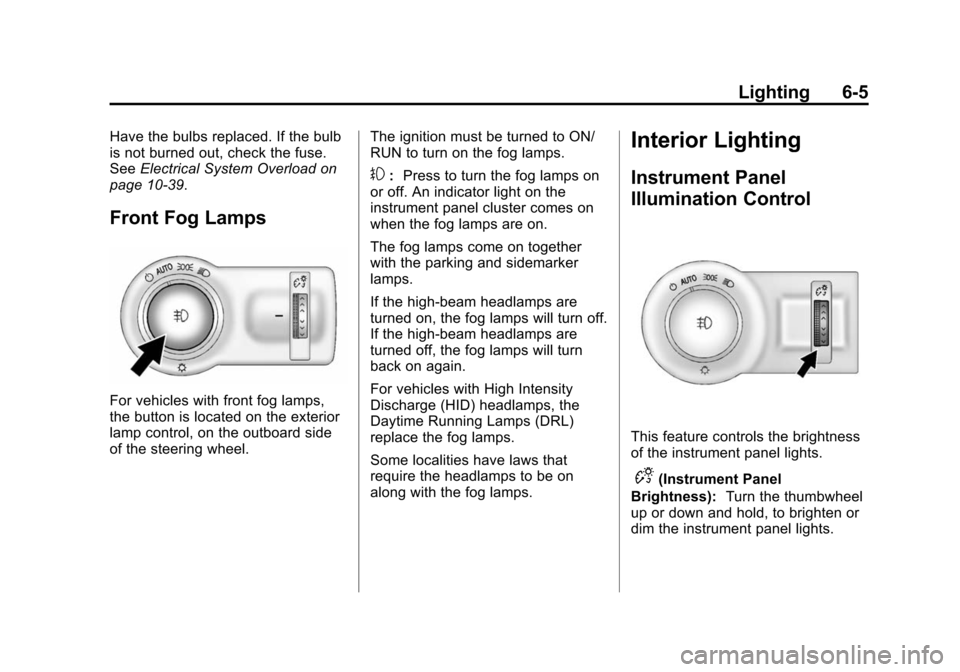
For vehicles with front fog lamps,
the button is located on the exterior
lamp control, on the outboard side
of the steering wheel. The ignition must be turned to ON/
RUN to turn on the fog lamps.
#:
Press to turn the fog lamps on
or off. An indicator light on the
instrument panel cluster comes on
when the fog lamps are on.
The fog lamps come on together
with the parking and sidemarker
lamps.
If the high‐beam headlamps are
turned on, the fog lamps will turn off.
If the high‐beam headlamps are
turned off, the fog lamps will turn
back on again.
For vehicles with High Intensity
Discharge (HID) headlamps, the
Daytime Running Lamps (DRL)
replace the fog lamps.
Some localities have laws that
require the headlamps to be on
along with the fog lamps.
Interior Lighting
Instrument Panel
Illumination Control
This feature controls the brightness
of the instrument panel lights.
D(Instrument Panel
Brightness): Turn the thumbwheel
up or down and hold, to brighten or
dim the instrument panel lights.
Page 230 of 404
Black plate (36,1)Chevrolet Camaro Owner Manual (Include Mex) - 2012
9-36 Driving and Operating
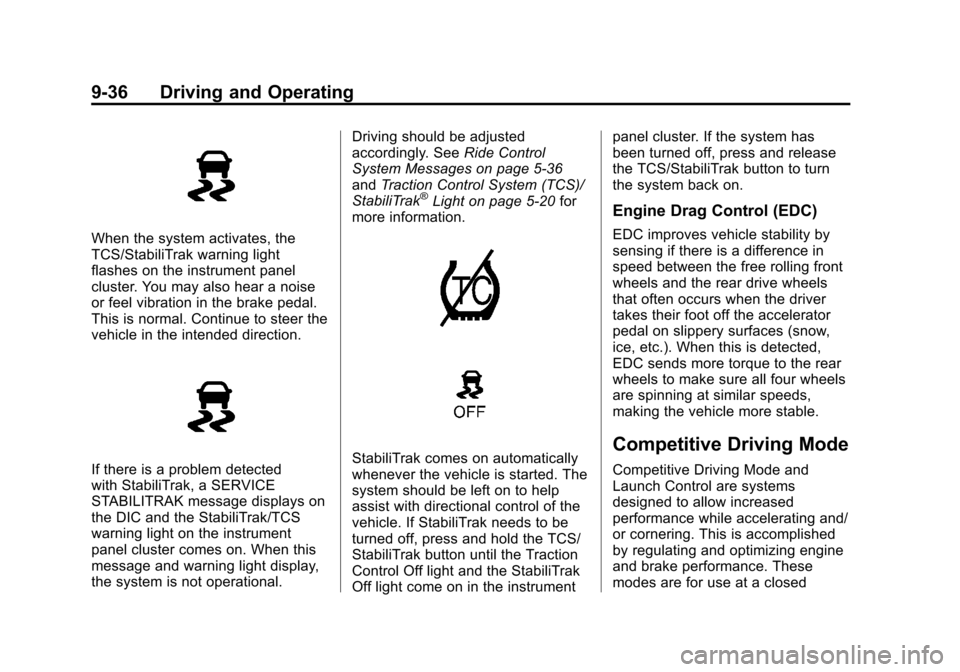
When the system activates, the
TCS/StabiliTrak warning light
flashes on the instrument panel
cluster. You may also hear a noise
or feel vibration in the brake pedal.
This is normal. Continue to steer the
vehicle in the intended direction.
If there is a problem detected
with StabiliTrak, a SERVICE
STABILITRAK message displays on
the DIC and the StabiliTrak/TCS
warning light on the instrument
panel cluster comes on. When this
message and warning light display,
the system is not operational.Driving should be adjusted
accordingly. See
Ride Control
System Messages on page 5‑36
and Traction Control System (TCS)/
StabiliTrak
®Light on page 5‑20 for
more information.
StabiliTrak comes on automatically
whenever the vehicle is started. The
system should be left on to help
assist with directional control of the
vehicle. If StabiliTrak needs to be
turned off, press and hold the TCS/
StabiliTrak button until the Traction
Control Off light and the StabiliTrak
Off light come on in the instrument panel cluster. If the system has
been turned off, press and release
the TCS/StabiliTrak button to turn
the system back on.
Engine Drag Control (EDC)
EDC improves vehicle stability by
sensing if there is a difference in
speed between the free rolling front
wheels and the rear drive wheels
that often occurs when the driver
takes their foot off the accelerator
pedal on slippery surfaces (snow,
ice, etc.). When this is detected,
EDC sends more torque to the rear
wheels to make sure all four wheels
are spinning at similar speeds,
making the vehicle more stable.
Competitive Driving Mode
Competitive Driving Mode and
Launch Control are systems
designed to allow increased
performance while accelerating and/
or cornering. This is accomplished
by regulating and optimizing engine
and brake performance. These
modes are for use at a closed
Page 233 of 404
Black plate (39,1)Chevrolet Camaro Owner Manual (Include Mex) - 2012
Driving and Operating 9-39
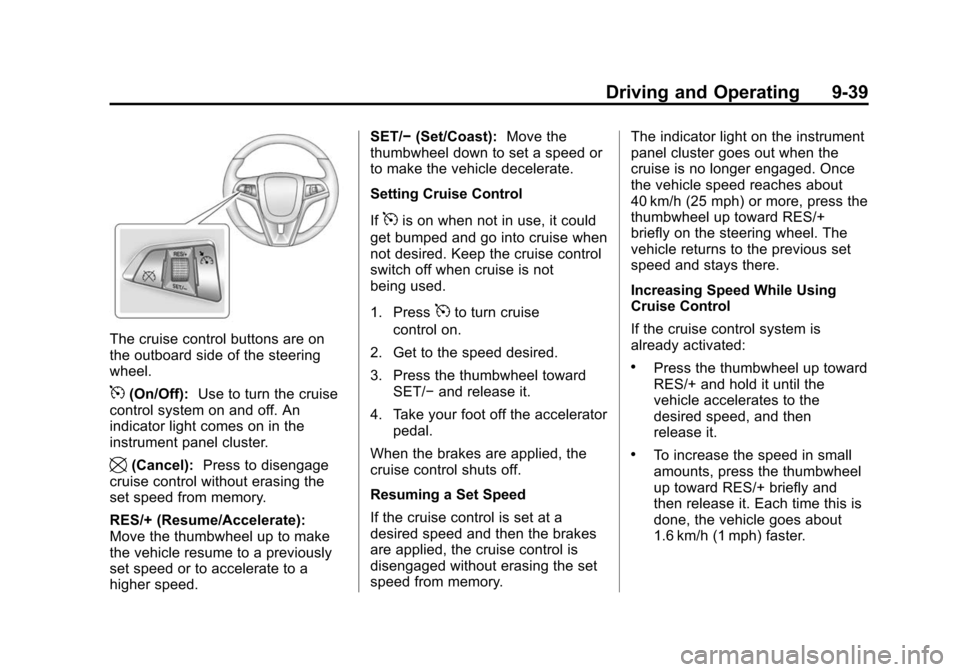
The cruise control buttons are on
the outboard side of the steering
wheel.
5(On/Off):Use to turn the cruise
control system on and off. An
indicator light comes on in the
instrument panel cluster.
\(Cancel): Press to disengage
cruise control without erasing the
set speed from memory.
RES/+ (Resume/Accelerate):
Move the thumbwheel up to make
the vehicle resume to a previously
set speed or to accelerate to a
higher speed. SET/−
(Set/Coast): Move the
thumbwheel down to set a speed or
to make the vehicle decelerate.
Setting Cruise Control
If
5is on when not in use, it could
get bumped and go into cruise when
not desired. Keep the cruise control
switch off when cruise is not
being used.
1. Press
5to turn cruise
control on.
2. Get to the speed desired.
3. Press the thumbwheel toward SET/− and release it.
4. Take your foot off the accelerator pedal.
When the brakes are applied, the
cruise control shuts off.
Resuming a Set Speed
If the cruise control is set at a
desired speed and then the brakes
are applied, the cruise control is
disengaged without erasing the set
speed from memory. The indicator light on the instrument
panel cluster goes out when the
cruise is no longer engaged. Once
the vehicle speed reaches about
40 km/h (25 mph) or more, press the
thumbwheel up toward RES/+
briefly on the steering wheel. The
vehicle returns to the previous set
speed and stays there.
Increasing Speed While Using
Cruise Control
If the cruise control system is
already activated:
.Press the thumbwheel up toward
RES/+ and hold it until the
vehicle accelerates to the
desired speed, and then
release it.
.To increase the speed in small
amounts, press the thumbwheel
up toward RES/+ briefly and
then release it. Each time this is
done, the vehicle goes about
1.6 km/h (1 mph) faster.
Page 234 of 404

Black plate (40,1)Chevrolet Camaro Owner Manual (Include Mex) - 2012
9-40 Driving and Operating
Reducing Speed While Using
Cruise Control
If the cruise control system is
already activated:
.Press the thumbwheel toward
SET/−and hold until the desired
lower speed is reached, then
release it.
.To slow down in small amounts,
press the thumbwheel toward
SET/− briefly. Each time this is
done, the vehicle goes about
1.6 km/h (1 mph) slower.
Passing Another Vehicle While
Using Cruise Control
Use the accelerator pedal to
increase the vehicle speed. When
you take your foot off the pedal, the
vehicle will slow down to the
previous set cruise control speed.
Using Cruise Control on Hills
How well the cruise control works
on hills depends upon the vehicle's
speed, load, and the steepness of
the hills. When going up steep hills, you might have to step on the
accelerator pedal to maintain the
vehicle speed. When going
downhill, you might have to brake or
shift to a lower gear to maintain the
vehicle speed. When the brakes are
applied the cruise control is
disengaged.
Ending Cruise Control
There are three ways to end the
cruise control:
.To disengage cruise control,
step lightly on the brake pedal or
clutch. The indicator light on the
instrument panel cluster
goes out.
.Press\on the steering wheel.
.To turn off cruise control, press5on the steering wheel.
Erasing Speed Memory
The cruise control set speed is
erased from memory if
5is pressed
or if the vehicle is turned off.
Object Detection
Systems
Ultrasonic Parking Assist
For vehicles with the Ultrasonic
Rear Parking Assist (URPA) system,
it assists the driver with parking
and avoiding objects while in
R (Reverse). URPA operates at
speeds less than 8 km/h (5 mph).
The sensors on the rear bumper
detect objects up to 2.5 m (8 ft)
behind the vehicle, and at least
20 cm (8 in) off the ground.
{WARNING
The URPA system does not
detect pedestrians, bicyclists,
animals, or any other objects
located below the bumper or that
are too close or too far from the
vehicle. To prevent injury, death,
or vehicle damage, even with
(Continued)
Page 292 of 404
Black plate (44,1)Chevrolet Camaro Owner Manual (Include Mex) - 2012
10-44 Vehicle Care
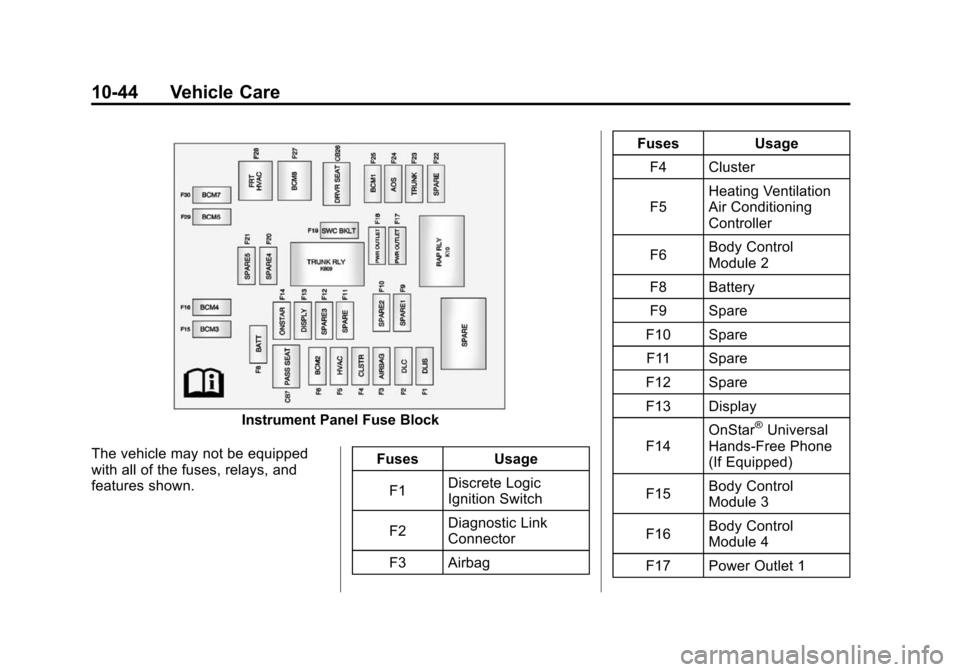
Instrument Panel Fuse Block
The vehicle may not be equipped
with all of the fuses, relays, and
features shown. Fuses Usage
F1 Discrete Logic
Ignition Switch
F2 Diagnostic Link
Connector
F3 Airbag Fuses Usage
F4 Cluster
F5 Heating Ventilation
Air Conditioning
Controller
F6 Body Control
Module 2
F8 Battery
F9 Spare
F10 Spare
F11 Spare
F12 Spare
F13 Display
F14 OnStar®Universal
Hands‐Free Phone
(If Equipped)
F15 Body Control
Module 3
F16 Body Control
Module 4
F17 Power Outlet 1
Page 305 of 404
Black plate (57,1)Chevrolet Camaro Owner Manual (Include Mex) - 2012
Vehicle Care 10-57
Tire Pressure Monitor
Operation
This vehicle may have a Tire
Pressure Monitor System (TPMS).
The TPMS is designed to warn the
driver when a low tire pressure
condition exists. TPMS sensors are
mounted onto each tire and wheel
assembly, excluding the spare tire
and wheel assembly, if the vehicle
has one. The TPMS sensors
monitor the air pressure in the tires
and transmit the tire pressure
readings to a receiver located
in the vehicle.
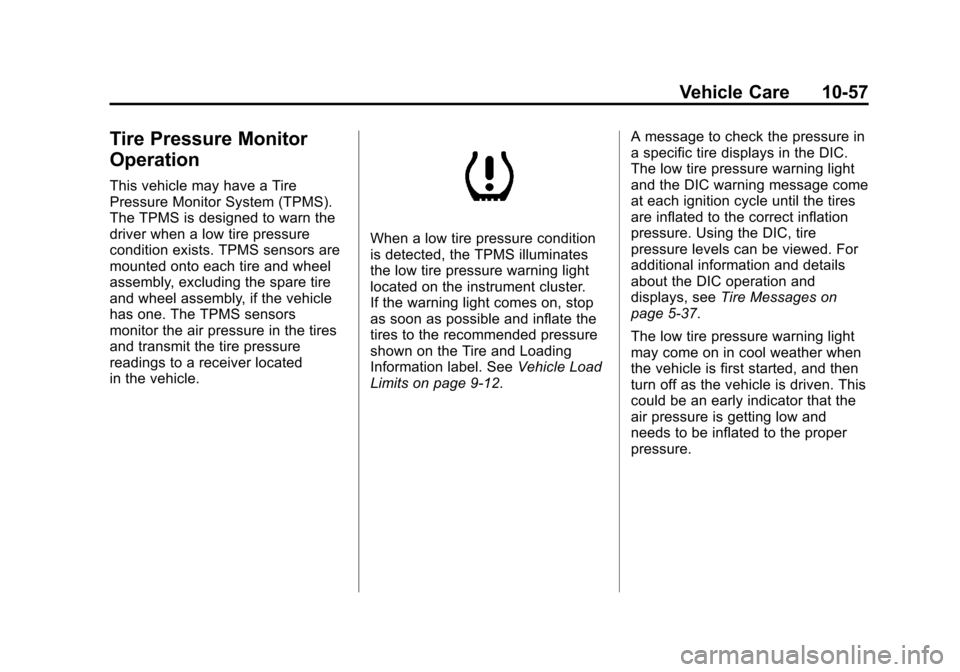
When a low tire pressure condition
is detected, the TPMS illuminates
the low tire pressure warning light
located on the instrument cluster.
If the warning light comes on, stop
as soon as possible and inflate the
tires to the recommended pressure
shown on the Tire and Loading
Information label. SeeVehicle Load
Limits on page 9‑12. A message to check the pressure in
a specific tire displays in the DIC.
The low tire pressure warning light
and the DIC warning message come
at each ignition cycle until the tires
are inflated to the correct inflation
pressure. Using the DIC, tire
pressure levels can be viewed. For
additional information and details
about the DIC operation and
displays, see
Tire Messages on
page 5‑37.
The low tire pressure warning light
may come on in cool weather when
the vehicle is first started, and then
turn off as the vehicle is driven. This
could be an early indicator that the
air pressure is getting low and
needs to be inflated to the proper
pressure.
Page 339 of 404
Black plate (91,1)Chevrolet Camaro Owner Manual (Include Mex) - 2012
Vehicle Care 10-91
Original manufacturer replacement
parts will provide the corrosion
protection while maintaining the
vehicle warranty.
Finish Damage
Quickly repair minor chips and
scratches with touch-up materials
available from your dealer to avoid
corrosion. Larger areas of finish
damage can be corrected in your
dealer's body and paint shop.
Chemical Paint Spotting
Airborne pollutants can fall upon
and attack painted vehicle surfaces
cuasing blotchy, ring-shaped
discolorations, and small, irregular
dark spots etched into the paint
surface.
Interior Care
To prevent dirt particle abrasions,
regularly clean the vehicle's interior.
Immediately remove any soils. Note
that newspapers or dark garments
that can transfer color to home
furnishings can also permanently
transfer color to the vehicle's
interior.
Use a soft bristle brush to remove
dust from knobs and crevices on the
instrument cluster. Using a mild
soap solution, immediately remove
hand lotions, sunscreen, and insect
repellant from all interior surfaces or
permanent damage may result.
Your dealer may have products for
cleaning the interior. Use cleaners
specifically designed for the
surfaces being cleaned to prevent
permanent damage. To prevent
overspray, apply all cleaners directly
to the cleaning cloth. Cleaners
should be removed quickly. Never
allow cleaners to remain on the
surface being cleaned for extended
periods of time.Cleaners may contain solvents that
can become concentrated in the
interior. Before using cleaners, read
and adhere to all safety instructions
on the label. While cleaning the
interior, maintain adequate
ventilation by opening the doors and
windows.
To prevent damage, do not clean
the interior using the following
cleaners or techniques:
.Never use a razor or any other
sharp object to remove a soil
from any interior surface.
.Never use a brush with stiff
bristles.
.Never rub any surface
aggressively or with excessive
pressure.
.Do not use laundry detergents or
dishwashing soaps with
degreasers. For liquid cleaners,
use approximately 20 drops per
3.78L (1 gal) of water.
Page 352 of 404
Black plate (10,1)Chevrolet Camaro Owner Manual (Include Mex) - 2012
11-10 Service and Maintenance
Battery
The battery supplies power to start
the engine and operate any
additional electrical accessories.
.To avoid break‐down or failure to
start the vehicle, maintain a
battery with full cranking power.
.Trained dealer technicians have
the diagnostic equipment to test
the battery and ensure that the
connections and cables are
corrosion‐free.
Belts
.Belts may need replacing if they
squeak or show signs of
cracking or splitting.
.Trained dealer technicians
can inspect the belts and
recommend replacement
when necessary. Brakes
Brakes stop the vehicle and are
crucial to safe driving.
.Signs of brake wear may include
chirping, grinding, or squealing
noises, or difficulty stopping.
.Trained dealer technicians have
access to tools and equipment
to inspect the brakes and
recommend quality parts
engineered for the vehicle.
Fluids
Proper fluid levels and approved
fluids protect the vehicle’s systems
and components. See
Recommended Fluids and
Lubricants on page 11‑13 for GM
approved fluids.
.Engine oil and windshield
washer fluid levels should be
checked at every fuel fill.
.Instrument cluster lights may
come on to indicate that fluids
may be low and need to be
filled. Hoses
Hoses transport fluids and should
be regularly inspected to ensure
that there are no cracks or leaks.
With a multi‐point inspection, your
dealer can inspect the hoses and
advise if replacement is needed.
Lamps
Properly working headlamps,
taillamps, and brake lamps are
important to see and be seen on
the road.
.Signs that the headlamps need
attention include dimming, failure
to light, cracking, or damage.
The brake lamps need to be
checked periodically to ensure
that they light when braking.
.With a multi‐point inspection,
your dealer can check the lamps
and note any concerns.