air condition CHEVROLET CAMARO 2013 5.G Owners Manual
[x] Cancel search | Manufacturer: CHEVROLET, Model Year: 2013, Model line: CAMARO, Model: CHEVROLET CAMARO 2013 5.GPages: 404, PDF Size: 5.45 MB
Page 5 of 404

Black plate (5,1)Chevrolet Camaro Owner Manual (Include Mex) - 2012
Introduction v
Vehicle Symbol Chart
Here are some additional symbols
that may be found on the vehicle
and what they mean. For more
information on the symbol, refer to
the Index.
9:Airbag Readiness Light
#:Air Conditioning
!:Antilock Brake System (ABS)
%:Audio Steering Wheel Controls
or OnStar®
$: Brake System Warning Light
":Charging System
I:Cruise Control
B: Engine Coolant Temperature
O:Exterior Lamps
#:Fog Lamps
.: Fuel Gauge
+:Fuses
3: Headlamp High/Low-Beam
Changer
j: LATCH System Child
Restraints
*: Malfunction Indicator Lamp
::Oil Pressure
}:Power
/:Remote Vehicle Start
>:Safety Belt Reminders
7:Tire Pressure Monitor
d:Traction Control/Stabilitrak®
M:Windshield Washer Fluid
Page 13 of 404
Black plate (7,1)Chevrolet Camaro Owner Manual (Include Mex) - 2012
In Brief 1-7
For more information seeHead
Restraints on page 3‑2 andSeat
Adjustment on page 3‑3.
Safety Belts
Refer to the following sections for
important information on how to use
safety belts properly:
.Safety Belts on page 3‑8.
.How to Wear Safety Belts
Properly on page 3‑9.
.Lap-Shoulder Belt on page 3‑10.
.Lower Anchors and Tethers for
Children (LATCH System) on
page 3‑39.
Passenger Sensing
System
United States
Canada and Mexico
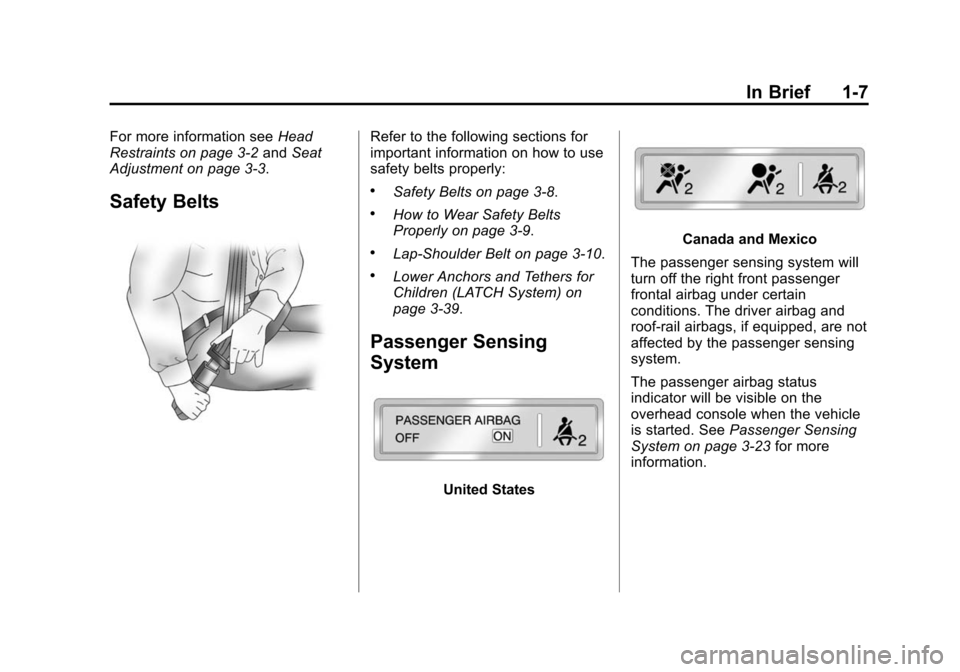
The passenger sensing system will
turn off the right front passenger
frontal airbag under certain
conditions. The driver airbag and
roof‐rail airbags, if equipped, are not
affected by the passenger sensing
system.
The passenger airbag status
indicator will be visible on the
overhead console when the vehicle
is started. See Passenger Sensing
System on page 3‑23 for more
information.
Page 17 of 404
Black plate (11,1)Chevrolet Camaro Owner Manual (Include Mex) - 2012
In Brief 1-11
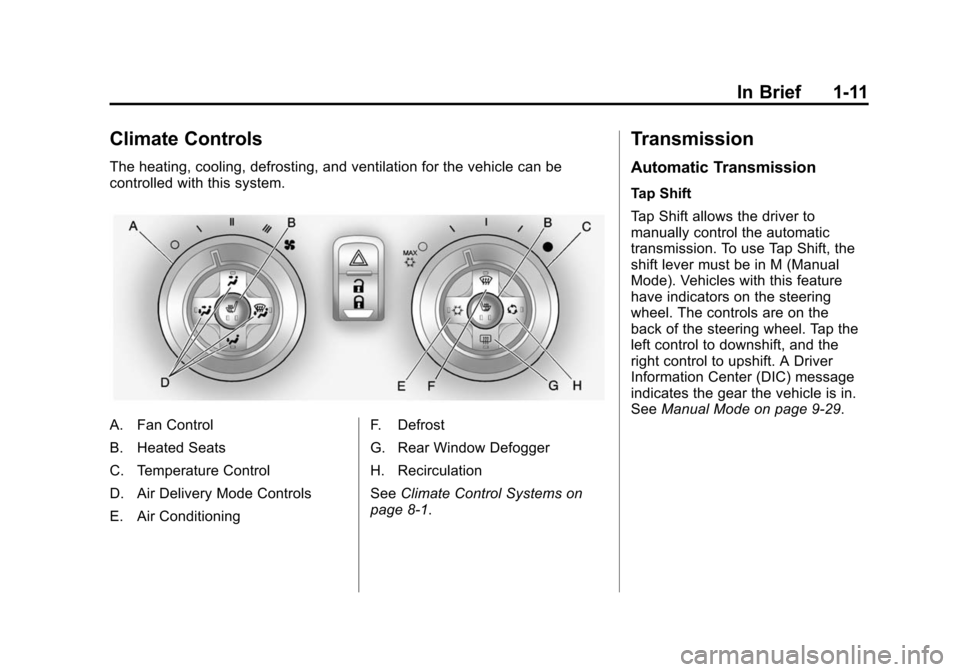
Climate Controls
The heating, cooling, defrosting, and ventilation for the vehicle can be
controlled with this system.
A. Fan Control
B. Heated Seats
C. Temperature Control
D. Air Delivery Mode Controls
E. Air ConditioningF. Defrost
G. Rear Window Defogger
H. Recirculation
See
Climate Control Systems on
page 8‑1.
Transmission
Automatic Transmission
Tap Shift
Tap Shift allows the driver to
manually control the automatic
transmission. To use Tap Shift, the
shift lever must be in M (Manual
Mode). Vehicles with this feature
have indicators on the steering
wheel. The controls are on the
back of the steering wheel. Tap the
left control to downshift, and the
right control to upshift. A Driver
Information Center (DIC) message
indicates the gear the vehicle is in.
See Manual Mode on page 9‑29.
Page 31 of 404
Black plate (5,1)Chevrolet Camaro Owner Manual (Include Mex) - 2012
Keys, Doors, and Windows 2-5
Remote Vehicle Start
Your vehicle may have this feature
which allows you to start the engine
from outside the vehicle.
/(Remote Vehicle Start):This
button will be on the RKE
transmitter if you have remote start.
During a remote start the climate
control system will turn on with the
fan speed, air delivery mode, and
temperature settings that the system
was set to when the vehicle was
last turned off. If the fan is set to O
(Off), the climate control system will
not turn on.
Laws in some local communities
may restrict the use of remote
starters. For example, some laws
may require a person using remote
start to have the vehicle in view.
Check local regulations for any
requirements. There are other conditions which
can affect the performance of the
transmitter. See
Remote Keyless
Entry (RKE) System on page 2‑3 for
additional information.
Starting the Vehicle
To start the engine using the remote
start feature:
1. Aim the Remote Keyless Entry transmitter at the vehicle.
2. Press and release
Q.
3. Immediately after completing Step 2, press and hold
/until
the turn signal lamps flash, or for
about two seconds if the vehicle
is not in view.
When the engine starts, the
parking lamps will turn on and
remain on as long as the engine
is running. The vehicle's doors
will be locked and the climate
control system may come on. The engine will continue to run
for 10 minutes. Repeat the steps
for a 10-minute time extension.
Remote start can be extended
only once.
Insert the key and turn it to ON/RUN
before driving.
Extending Engine Run Time
For a 10-minute extension, repeat
Steps 1 through 3 while the engine
is still running. The remote start can
only be extended once.
When the remote start is extended,
the second 10 minutes will start
immediately.
For example, if the vehicle has been
running for 5 minutes, and
10 minutes are added, the engine
will run for a total of 15 minutes.
A maximum of two remote starts or
remote start attempts are allowed
between ignition cycles.
Page 44 of 404
Black plate (18,1)Chevrolet Camaro Owner Manual (Include Mex) - 2012
2-18 Keys, Doors, and Windows
Convertible Top
Power Operation
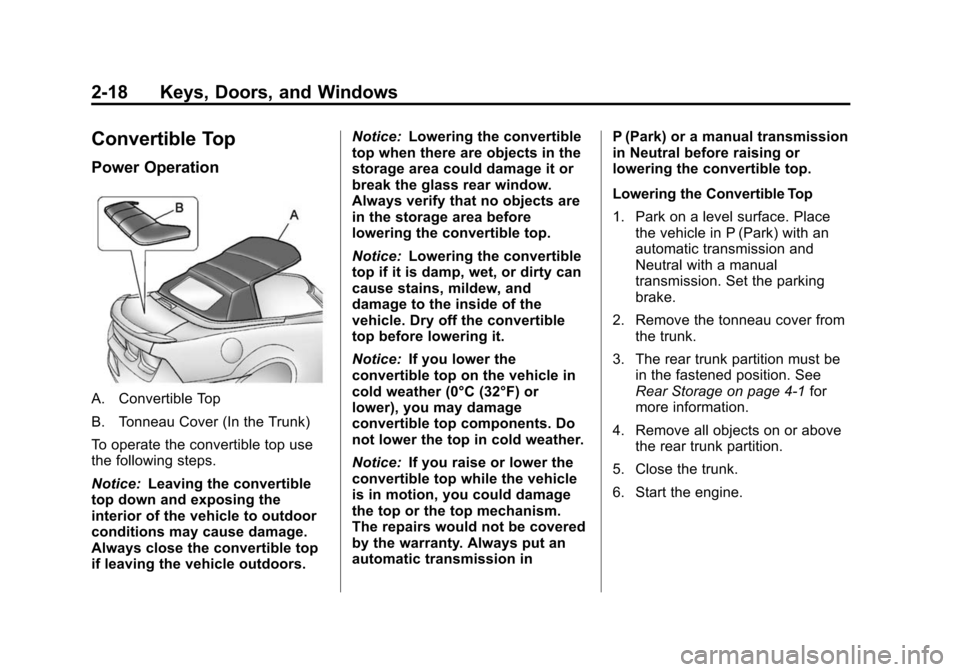
A. Convertible Top
B. Tonneau Cover (In the Trunk)
To operate the convertible top use
the following steps.
Notice:Leaving the convertible
top down and exposing the
interior of the vehicle to outdoor
conditions may cause damage.
Always close the convertible top
if leaving the vehicle outdoors. Notice:
Lowering the convertible
top when there are objects in the
storage area could damage it or
break the glass rear window.
Always verify that no objects are
in the storage area before
lowering the convertible top.
Notice: Lowering the convertible
top if it is damp, wet, or dirty can
cause stains, mildew, and
damage to the inside of the
vehicle. Dry off the convertible
top before lowering it.
Notice: If you lower the
convertible top on the vehicle in
cold weather (0°C (32°F) or
lower), you may damage
convertible top components. Do
not lower the top in cold weather.
Notice: If you raise or lower the
convertible top while the vehicle
is in motion, you could damage
the top or the top mechanism.
The repairs would not be covered
by the warranty. Always put an
automatic transmission in P (Park) or a manual transmission
in Neutral before raising or
lowering the convertible top.
Lowering the Convertible Top
1. Park on a level surface. Place
the vehicle in P (Park) with an
automatic transmission and
Neutral with a manual
transmission. Set the parking
brake.
2. Remove the tonneau cover from the trunk.
3. The rear trunk partition must be in the fastened position. See
Rear Storage on page 4‑1 for
more information.
4. Remove all objects on or above the rear trunk partition.
5. Close the trunk.
6. Start the engine.
Page 45 of 404
Black plate (19,1)Chevrolet Camaro Owner Manual (Include Mex) - 2012
Keys, Doors, and Windows 2-19
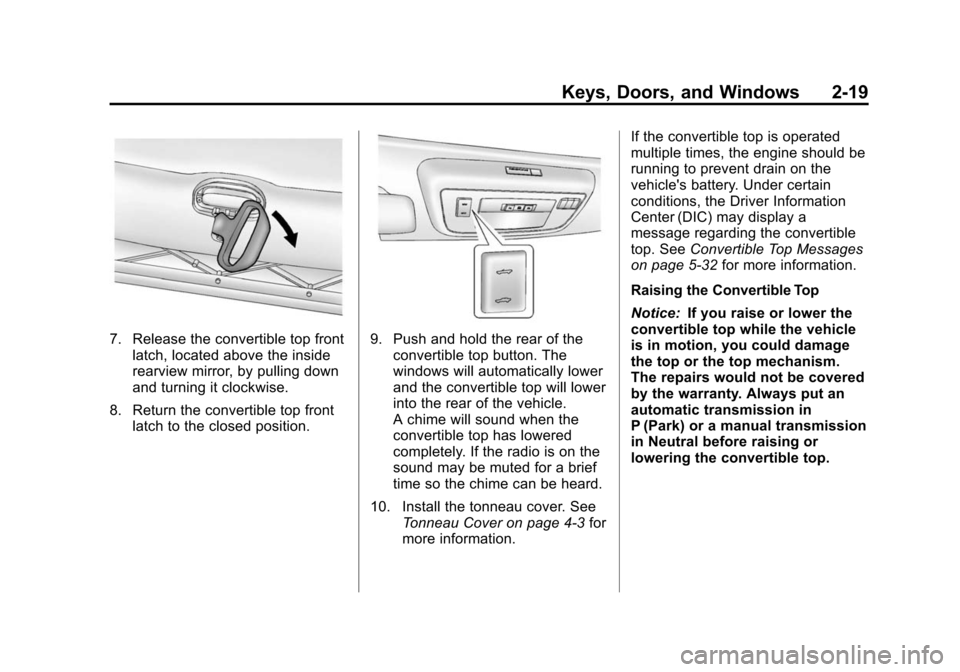
7. Release the convertible top frontlatch, located above the inside
rearview mirror, by pulling down
and turning it clockwise.
8. Return the convertible top front latch to the closed position.9. Push and hold the rear of the
convertible top button. The
windows will automatically lower
and the convertible top will lower
into the rear of the vehicle.
A chime will sound when the
convertible top has lowered
completely. If the radio is on the
sound may be muted for a brief
time so the chime can be heard.
10. Install the tonneau cover. See Tonneau Cover on page 4‑3 for
more information. If the convertible top is operated
multiple times, the engine should be
running to prevent drain on the
vehicle's battery. Under certain
conditions, the Driver Information
Center (DIC) may display a
message regarding the convertible
top. See
Convertible Top Messages
on page 5‑32 for more information.
Raising the Convertible Top
Notice: If you raise or lower the
convertible top while the vehicle
is in motion, you could damage
the top or the top mechanism.
The repairs would not be covered
by the warranty. Always put an
automatic transmission in
P (Park) or a manual transmission
in Neutral before raising or
lowering the convertible top.
Page 60 of 404
Black plate (12,1)Chevrolet Camaro Owner Manual (Include Mex) - 2012
3-12 Seats and Restraints
Before a door is closed, be sure the
safety belt is out of the way. If a
door is slammed against a safety
belt, damage can occur to both the
safety belt and the vehicle.
Safety Belt Pretensioners
This vehicle has safety belt
pretensioners for the front outboard
occupants. Although the safety belt
pretensioners cannot be seen, they
are part of the safety belt assembly.
They can help tighten the safety
belts during the early stages of a
moderate to severe frontal or near
frontal crash if the threshold
conditions for pretensioner
activation are met. And, if the
vehicle has side impact airbags,
safety belt pretensioners can help
tighten the safety belts in a side
crash.Pretensioners work only once. If the
pretensioners activate in a crash,
the pretensioners and probably
other parts of the vehicle's safety
belt system will need to be replaced.
See
Replacing Safety Belt System
Parts after a Crash on page 3‑15.Rear Safety Belt Comfort
Guides
Rear shoulder belt comfort guides
may provide added safety belt
comfort for older children who have
outgrown booster seats and for
some adults. When installed on a
shoulder belt, the comfort guide
positions the shoulder belt away
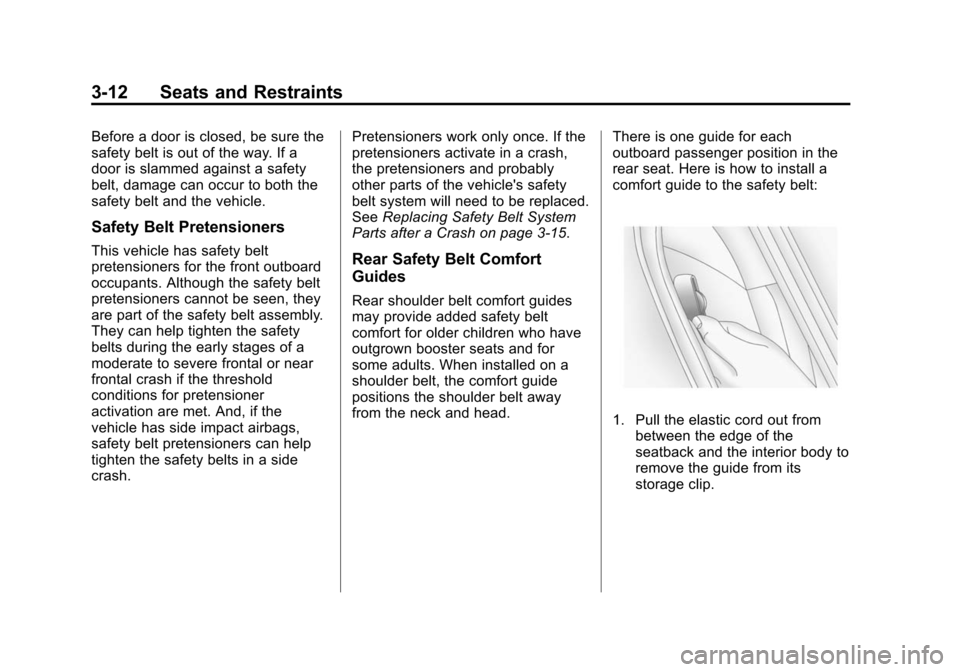
from the neck and head. There is one guide for each
outboard passenger position in the
rear seat. Here is how to install a
comfort guide to the safety belt:
1. Pull the elastic cord out from
between the edge of the
seatback and the interior body to
remove the guide from its
storage clip.
Page 72 of 404

Black plate (24,1)Chevrolet Camaro Owner Manual (Include Mex) - 2012
3-24 Seats and Restraints
Canada and Mexico
The words ON and OFF, or the
symbol for on and off, will be visible
during the system check. If you are
using remote start, if equipped, to
start the vehicle from a distance,
you may not see the system check.
When the system check is
complete, either the word ON or
OFF, or the symbol for on or off, will
be visible. See Passenger Airbag
Status Indicator on page 5‑15.
The passenger sensing system will
turn off the right front passenger
frontal airbag under certain
conditions. The driver airbags and
roof‐rail airbags (if equipped) are not
affected by the passenger sensing
system. The passenger sensing system
works with sensors that are part of
the right front passenger seat. The
sensors are designed to detect the
presence of a properly seated
occupant and determine if the right
front passenger frontal airbag
should be enabled (may inflate)
or not.
According to accident statistics,
children are safer when properly
secured in a rear seat in the correct
child restraint for their weight
and size.
We recommend that children be
secured in a rear seat, including: an
infant or a child riding in a
rear-facing child restraint; a child
riding in a forward-facing child seat;
an older child riding in a booster
seat; and children, who are large
enough, using safety belts.
A label on the sun visor says,
“Never put a rear-facing child seat in
the front.”
This is because the risk to
the rear-facing child is so great if the
airbag deploys.{WARNING
A child in a rear-facing child
restraint can be seriously injured
or killed if the right front
passenger airbag inflates. This is
because the back of the
rear-facing child restraint would
be very close to the inflating
airbag. A child in a forward-facing
child restraint can be seriously
injured or killed if the right front
passenger airbag inflates and the
passenger seat is in a forward
position.
Even if the passenger sensing
system has turned off the right
front passenger frontal airbag, no
system is fail-safe. No one can
guarantee that an airbag will not
(Continued)
Page 94 of 404
Black plate (46,1)Chevrolet Camaro Owner Manual (Include Mex) - 2012
3-46 Seats and Restraints
6. If the child restraint has a toptether, follow the child restraint
manufacturer's instructions
regarding the use of the top
tether. See Lower Anchors and
Tethers for Children (LATCH
System) on page 3‑39 for more
information.
7. Before placing a child in the child restraint, make sure it is
securely held in place. To check,
grasp the child restraint at the
safety belt path and attempt to
move it side to side and back
and forth. When the child
restraint is properly installed,
there should be no more than
2.5 cm (1 in) of movement.
To remove the child restraint,
unbuckle the vehicle safety belt and
let it return to the stowed position.
If the top tether is attached to a top
tether anchor, disconnect it.Securing Child Restraints
(Right Front
Passenger Seat)
This vehicle has airbags. A rear
seat is a safer place to secure a
forward-facing child restraint. See
Where to Put the Restraint on
page 3‑37
In addition, the vehicle has a
passenger sensing system which is
designed to turn off the right front
passenger frontal airbag under
certain conditions. See Passenger
Sensing System on page 3‑23 and
Passenger Airbag Status Indicator
on page 5‑15 for more information,
including important safety
information.
A label on the sun visor says,
“Never put a rear-facing child seat in
the front.” This is because the risk to
the rear-facing child is so great if the
airbag deploys.
{WARNING
A child in a rear-facing child
restraint can be seriously injured
or killed if the right front
passenger airbag inflates. This is
because the back of the
rear-facing child restraint would
be very close to the inflating
airbag. A child in a forward-facing
child restraint can be seriously
injured or killed if the right front
passenger airbag inflates and the
passenger seat is in a forward
position.
Even if the passenger sensing
system has turned off the right
front passenger frontal airbag, no
system is fail-safe. No one can
guarantee that an airbag will not
deploy under some unusual
circumstance, even though it is
turned off.
(Continued)
Page 120 of 404
Black plate (16,1)Chevrolet Camaro Owner Manual (Include Mex) - 2012
5-16 Instruments and Controls
a check to show the light is working.
It should go out when the engine is
started.
If the light stays on, or comes on
while driving, there may be a
problem with the electrical charging
system. Have it checked by your
dealer. Driving while this light is on
could drain the battery.
When this light comes on, the Driver
Information Center (DIC) also
displays a message.
SeeBattery Voltage and Charging
Messages on page 5‑31.
If a short distance must be driven
with the light on, be sure to turn off
all accessories, such as the radio
and air conditioner.
Malfunction
Indicator Lamp
A computer system called OBD II
(On-Board Diagnostics-Second
Generation) monitors the operation
of the vehicle to ensure emissions
are at acceptable levels, to produce a cleaner environment. This light
comes on when the vehicle is
placed in ON/RUN, as a check to
show it is working. If it does not,
have the vehicle serviced by your
dealer. See
Ignition Positions on
page 9‑16 for more information.
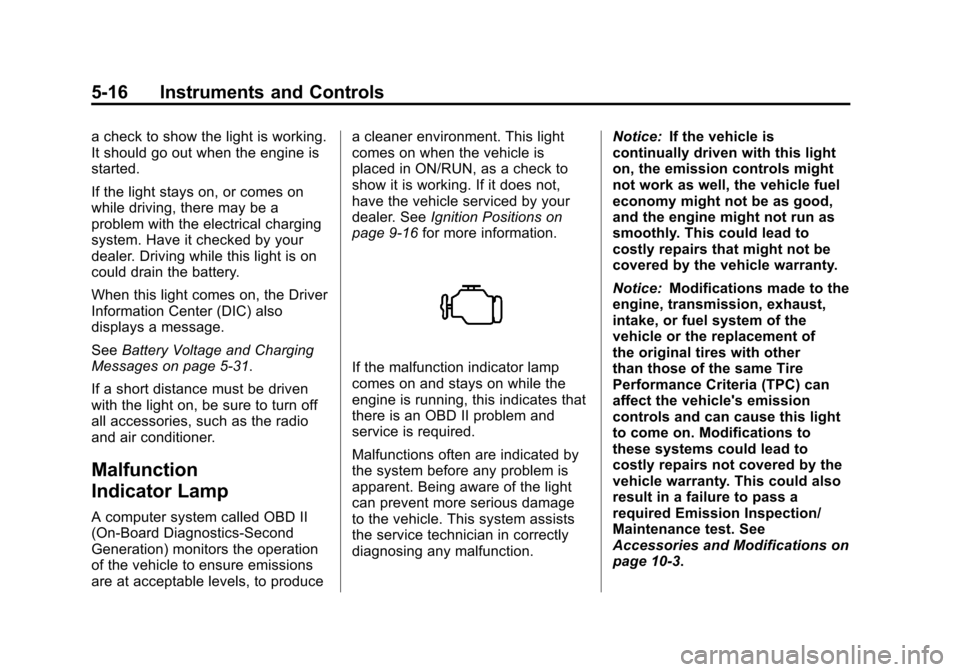
If the malfunction indicator lamp
comes on and stays on while the
engine is running, this indicates that
there is an OBD II problem and
service is required.
Malfunctions often are indicated by
the system before any problem is
apparent. Being aware of the light
can prevent more serious damage
to the vehicle. This system assists
the service technician in correctly
diagnosing any malfunction. Notice:
If the vehicle is
continually driven with this light
on, the emission controls might
not work as well, the vehicle fuel
economy might not be as good,
and the engine might not run as
smoothly. This could lead to
costly repairs that might not be
covered by the vehicle warranty.
Notice: Modifications made to the
engine, transmission, exhaust,
intake, or fuel system of the
vehicle or the replacement of
the original tires with other
than those of the same Tire
Performance Criteria (TPC) can
affect the vehicle's emission
controls and can cause this light
to come on. Modifications to
these systems could lead to
costly repairs not covered by the
vehicle warranty. This could also
result in a failure to pass a
required Emission Inspection/
Maintenance test. See
Accessories and Modifications on
page 10‑3.