service indicator CHEVROLET CAMARO 2019 User Guide
[x] Cancel search | Manufacturer: CHEVROLET, Model Year: 2019, Model line: CAMARO, Model: CHEVROLET CAMARO 2019Pages: 375, PDF Size: 6.16 MB
Page 132 of 375
Chevrolet Camaro Owner Manual (GMNA-Localizing-U.S./Canada/Mexico-
12461811) - 2019 - crc - 11/5/18
Instruments and Controls 131
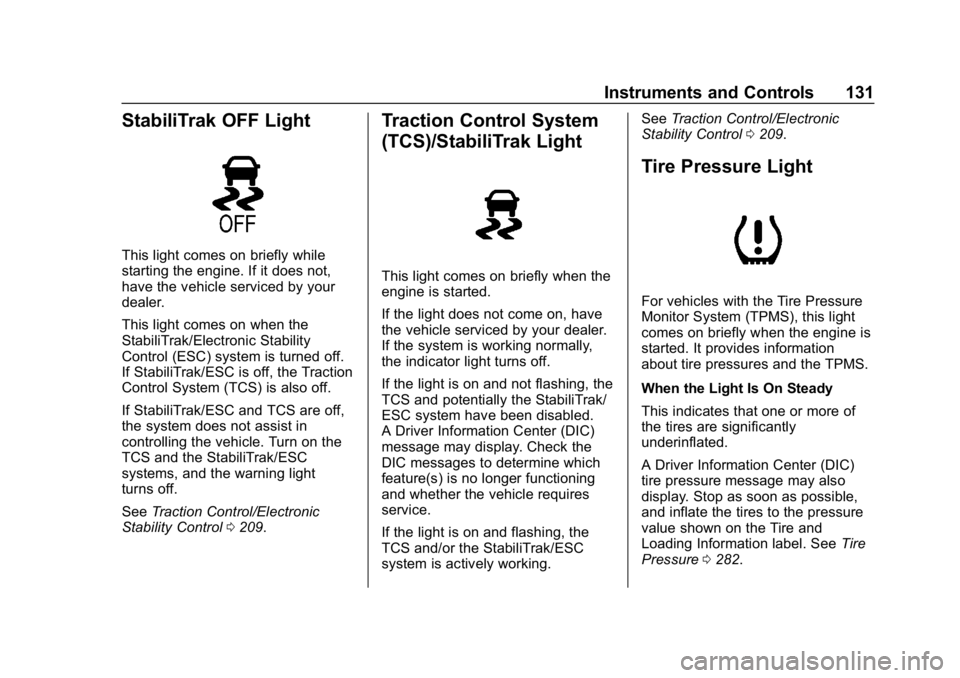
StabiliTrak OFF Light
This light comes on briefly while
starting the engine. If it does not,
have the vehicle serviced by your
dealer.
This light comes on when the
StabiliTrak/Electronic Stability
Control (ESC) system is turned off.
If StabiliTrak/ESC is off, the Traction
Control System (TCS) is also off.
If StabiliTrak/ESC and TCS are off,
the system does not assist in
controlling the vehicle. Turn on the
TCS and the StabiliTrak/ESC
systems, and the warning light
turns off.
SeeTraction Control/Electronic
Stability Control 0209.
Traction Control System
(TCS)/StabiliTrak Light
This light comes on briefly when the
engine is started.
If the light does not come on, have
the vehicle serviced by your dealer.
If the system is working normally,
the indicator light turns off.
If the light is on and not flashing, the
TCS and potentially the StabiliTrak/
ESC system have been disabled.
A Driver Information Center (DIC)
message may display. Check the
DIC messages to determine which
feature(s) is no longer functioning
and whether the vehicle requires
service.
If the light is on and flashing, the
TCS and/or the StabiliTrak/ESC
system is actively working. See
Traction Control/Electronic
Stability Control 0209.
Tire Pressure Light
For vehicles with the Tire Pressure
Monitor System (TPMS), this light
comes on briefly when the engine is
started. It provides information
about tire pressures and the TPMS.
When the Light Is On Steady
This indicates that one or more of
the tires are significantly
underinflated.
A Driver Information Center (DIC)
tire pressure message may also
display. Stop as soon as possible,
and inflate the tires to the pressure
value shown on the Tire and
Loading Information label. See Tire
Pressure 0282.
Page 133 of 375
Chevrolet Camaro Owner Manual (GMNA-Localizing-U.S./Canada/Mexico-
12461811) - 2019 - crc - 11/5/18
132 Instruments and Controls
When the Light Flashes First and
Then Is On Steady
If the light flashes for about a minute
and then stays on, there may be a
problem with the TPMS. If the
problem is not corrected, the light
will come on at every ignition cycle.
SeeTire Pressure Monitor
Operation 0284.
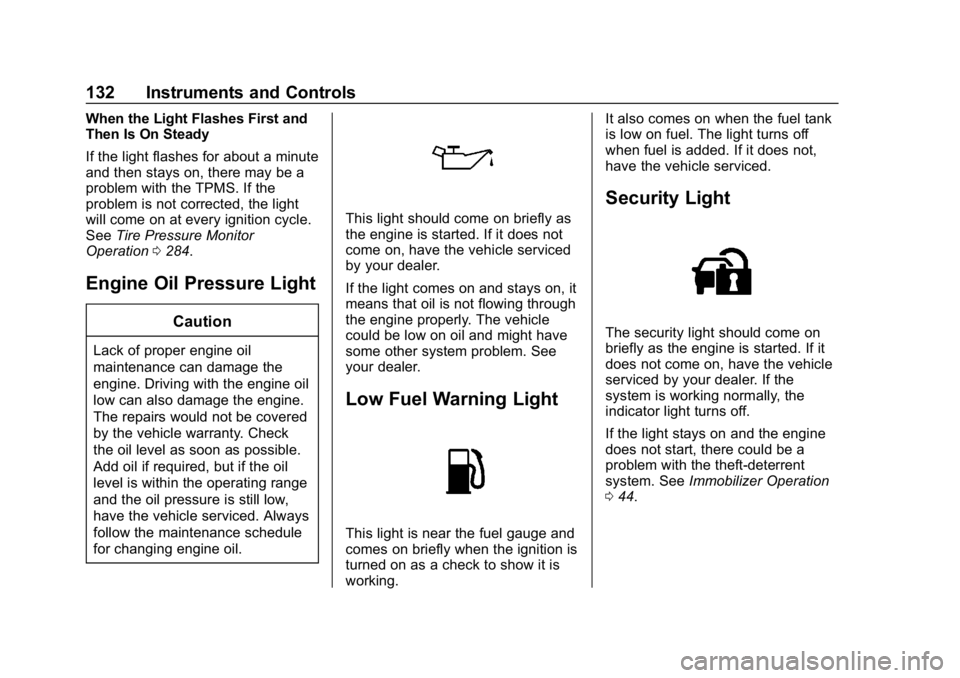
Engine Oil Pressure Light
Caution
Lack of proper engine oil
maintenance can damage the
engine. Driving with the engine oil
low can also damage the engine.
The repairs would not be covered
by the vehicle warranty. Check
the oil level as soon as possible.
Add oil if required, but if the oil
level is within the operating range
and the oil pressure is still low,
have the vehicle serviced. Always
follow the maintenance schedule
for changing engine oil.
This light should come on briefly as
the engine is started. If it does not
come on, have the vehicle serviced
by your dealer.
If the light comes on and stays on, it
means that oil is not flowing through
the engine properly. The vehicle
could be low on oil and might have
some other system problem. See
your dealer.
Low Fuel Warning Light
This light is near the fuel gauge and
comes on briefly when the ignition is
turned on as a check to show it is
working. It also comes on when the fuel tank
is low on fuel. The light turns off
when fuel is added. If it does not,
have the vehicle serviced.
Security Light
The security light should come on
briefly as the engine is started. If it
does not come on, have the vehicle
serviced by your dealer. If the
system is working normally, the
indicator light turns off.
If the light stays on and the engine
does not start, there could be a
problem with the theft-deterrent
system. See
Immobilizer Operation
0 44.
Page 193 of 375
Chevrolet Camaro Owner Manual (GMNA-Localizing-U.S./Canada/Mexico-
12461811) - 2019 - crc - 11/5/18
192 Driving and Operating
{Warning
Turning off the vehicle while
moving may cause loss of power
assist in the brake and steering
systems and disable the airbags.
While driving, only shut the
vehicle off in an emergency.
If the vehicle cannot be pulled over,
and must be shut off while driving,
press and hold ENGINE START/
STOP for longer than two seconds,
or press twice within five seconds.
ACC/ACCESSORY (Amber
Indicator Light) : This mode allows
the use of some electrical
accessories when the engine is off.
With the ignition off, pressing the
button one time without the brake
pedal applied will place the ignition
system in ACC/ACCESSORY.
The ignition will switch from ACC/
ACCESSORY to OFF after
five minutes to prevent battery
rundown. ON/RUN/START (Green Indicator
Light) :
This mode is for driving and
starting. With the ignition off, and
the brake pedal applied, pressing
the button once will place the
ignition system in ON/RUN/START.
Once engine cranking begins,
release the button. Engine cranking
will continue until the engine starts.
See Starting the Engine 0192. The
ignition will then remain on.
Service Mode
This power mode is available for
service and diagnostics, and to
verify the proper operation of the
malfunction indicator lamp as may
be required for emission inspection
purposes. With the vehicle off, and
the brake pedal not applied,
pressing and holding ENGINE
START/STOP for more than
five seconds will place the vehicle in
Service Mode. The instruments and
audio systems will operate as they
do in ON/RUN, but the vehicle will
not be able to be driven. The engine
will not start in Service Mode. Press
the button again to turn the
vehicle off.
Starting the Engine
Place the transmission in the
proper gear.
Caution
If you add electrical parts or
accessories, you could change
the way the engine operates. Any
resulting damage would not be
covered by the vehicle warranty.
See Add-On Electrical Equipment
0 233.
Automatic Transmission
Move the shift lever to P (Park) or
N (Neutral). To restart the vehicle
when it is already moving, use
N (Neutral) only.
Caution
Do not try to shift to P (Park) if the
vehicle is moving. If you do, you
could damage the transmission.
Shift to P (Park) only when the
vehicle is stopped.
Page 207 of 375
Chevrolet Camaro Owner Manual (GMNA-Localizing-U.S./Canada/Mexico-
12461811) - 2019 - crc - 11/5/18
206 Driving and Operating
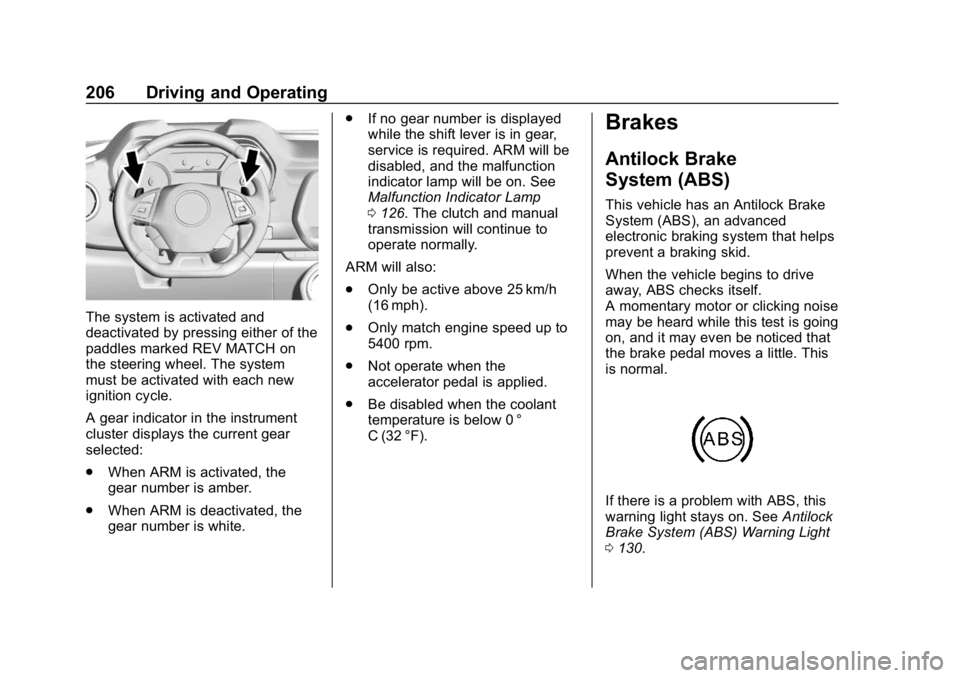
The system is activated and
deactivated by pressing either of the
paddles marked REV MATCH on
the steering wheel. The system
must be activated with each new
ignition cycle.
A gear indicator in the instrument
cluster displays the current gear
selected:
.When ARM is activated, the
gear number is amber.
. When ARM is deactivated, the
gear number is white. .
If no gear number is displayed
while the shift lever is in gear,
service is required. ARM will be
disabled, and the malfunction
indicator lamp will be on. See
Malfunction Indicator Lamp
0126. The clutch and manual
transmission will continue to
operate normally.
ARM will also:
. Only be active above 25 km/h
(16 mph).
. Only match engine speed up to
5400 rpm.
. Not operate when the
accelerator pedal is applied.
. Be disabled when the coolant
temperature is below 0 °
C (32 °F).
Brakes
Antilock Brake
System (ABS)
This vehicle has an Antilock Brake
System (ABS), an advanced
electronic braking system that helps
prevent a braking skid.
When the vehicle begins to drive
away, ABS checks itself.
A momentary motor or clicking noise
may be heard while this test is going
on, and it may even be noticed that
the brake pedal moves a little. This
is normal.
If there is a problem with ABS, this
warning light stays on. See Antilock
Brake System (ABS) Warning Light
0 130.
Page 234 of 375
Chevrolet Camaro Owner Manual (GMNA-Localizing-U.S./Canada/Mexico-
12461811) - 2019 - crc - 11/5/18
Driving and Operating 233
Conversions and
Add-Ons
Add-On Electrical
Equipment
{Warning
The Data Link Connector (DLC) is
used for vehicle service and
Emission Inspection/Maintenance
testing. SeeMalfunction Indicator
Lamp 0126. A device connected
to the DLC —such as an
aftermarket fleet or
driver-behavior tracking device —
may interfere with vehicle
systems. This could affect vehicle
operation and cause a crash.
Such devices may also access
information stored in the vehicle’s
systems.
Caution
Some electrical equipment can
damage the vehicle or cause
components to not work and
would not be covered by the
vehicle warranty. Always check
with your dealer before adding
electrical equipment.
Add-on equipment can drain the
vehicle's 12-volt battery, even if the
vehicle is not operating.
The vehicle has an airbag system.
Before attempting to add anything
electrical to the vehicle, see
Servicing the Airbag-Equipped
Vehicle 086 and Adding Equipment
to the Airbag-Equipped Vehicle
0 86.
Page 256 of 375
Chevrolet Camaro Owner Manual (GMNA-Localizing-U.S./Canada/Mexico-
12461811) - 2019 - crc - 11/5/18
Vehicle Care 255
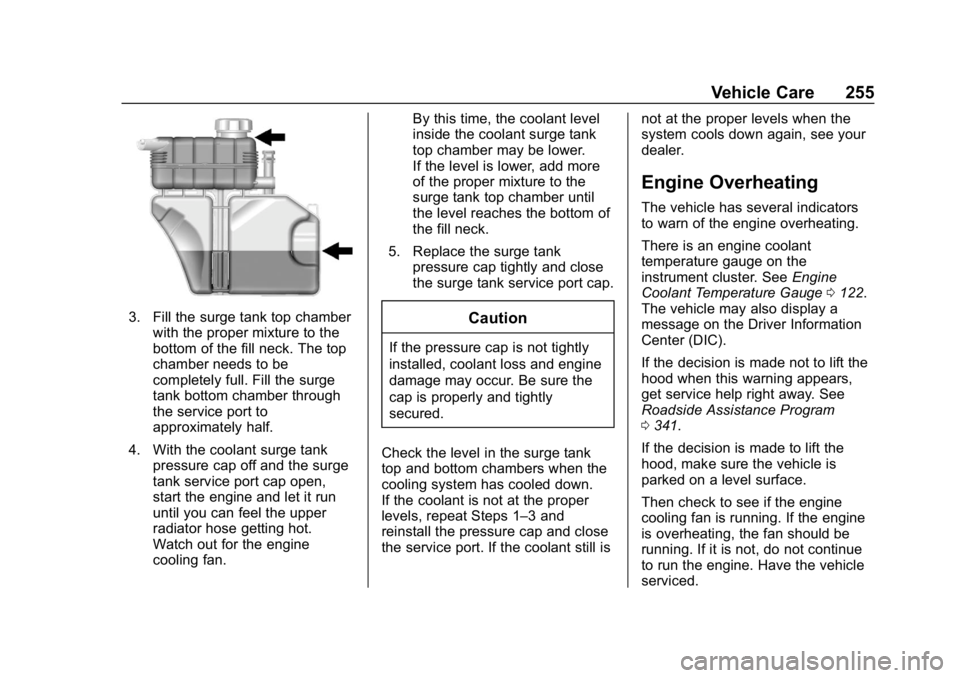
3. Fill the surge tank top chamberwith the proper mixture to the
bottom of the fill neck. The top
chamber needs to be
completely full. Fill the surge
tank bottom chamber through
the service port to
approximately half.
4. With the coolant surge tank pressure cap off and the surge
tank service port cap open,
start the engine and let it run
until you can feel the upper
radiator hose getting hot.
Watch out for the engine
cooling fan. By this time, the coolant level
inside the coolant surge tank
top chamber may be lower.
If the level is lower, add more
of the proper mixture to the
surge tank top chamber until
the level reaches the bottom of
the fill neck.
5. Replace the surge tank pressure cap tightly and close
the surge tank service port cap.Caution
If the pressure cap is not tightly
installed, coolant loss and engine
damage may occur. Be sure the
cap is properly and tightly
secured.
Check the level in the surge tank
top and bottom chambers when the
cooling system has cooled down.
If the coolant is not at the proper
levels, repeat Steps 1–3 and
reinstall the pressure cap and close
the service port. If the coolant still is not at the proper levels when the
system cools down again, see your
dealer.
Engine Overheating
The vehicle has several indicators
to warn of the engine overheating.
There is an engine coolant
temperature gauge on the
instrument cluster. See
Engine
Coolant Temperature Gauge 0122.
The vehicle may also display a
message on the Driver Information
Center (DIC).
If the decision is made not to lift the
hood when this warning appears,
get service help right away. See
Roadside Assistance Program
0 341.
If the decision is made to lift the
hood, make sure the vehicle is
parked on a level surface.
Then check to see if the engine
cooling fan is running. If the engine
is overheating, the fan should be
running. If it is not, do not continue
to run the engine. Have the vehicle
serviced.
Page 288 of 375
Chevrolet Camaro Owner Manual (GMNA-Localizing-U.S./Canada/Mexico-
12461811) - 2019 - crc - 11/5/18
Vehicle Care 287
www.gmtoolsandequipment.com or
call 1-800-GM TOOLS
(1-800-468-6657).
There are two minutes to match the
first tire/wheel position, and
five minutes overall to match all four
tire/wheel positions. If it takes
longer, the matching process stops
and must be restarted.
The TPMS sensor matching
process is:1. Set the parking brake.
2. Place the vehicle in Service Mode. See Ignition Positions
0 191.
3. Make sure the Tire Pressure info display option is turned on.
The info displays on the DIC
can be turned on and off
through the Options menu. See
Driver Information Center (DIC)
0133.
4. Use the five-way DIC control on the right side of the steering
wheel to scroll to the Tire Pressure screen under the DIC
info page. See
Driver
Information Center (DIC) 0133.
5. Press and hold SEL in the center of the five-way DIC
control.
The horn sounds twice to
signal the receiver is in relearn
mode and the TIRE
LEARNING ACTIVE message
displays on the DIC screen.
6. Start with the driver side front tire.
7. Place the relearn tool against the tire sidewall, near the valve
stem. Then press the button to
activate the TPMS sensor.
A horn chirp confirms that the
sensor identification code has
been matched to this tire and
wheel position.
8. Proceed to the passenger side front tire, and repeat Step 7.
9. Proceed to the passenger side rear tire, and repeat Step 7. 10. Proceed to the driver side rear
tire, and repeat Step 7. The
horn sounds two times to
indicate the sensor
identification code has been
matched to the driver side rear
tire, and the TPMS sensor
matching process is no longer
active. The TIRE LEARNING
ACTIVE message on the DIC
display screen goes off.
11. Turn the vehicle off.
12. Set all four tires to the recommended air pressure
level as indicated on the Tire
and Loading Information label.
Tire Inspection
We recommend that the tires,
including the spare tire, if the
vehicle has one, be inspected
for signs of wear or damage at
least once a month.
Replace the tire if:
.The indicators at three or
more places around the tire
can be seen.
Page 328 of 375
Chevrolet Camaro Owner Manual (GMNA-Localizing-U.S./Canada/Mexico-
12461811) - 2019 - crc - 11/5/18
Service and Maintenance 327
Lamps
Properly working headlamps,
taillamps, and brake lamps are
important to see and be seen on
the road.
.Signs that the headlamps need
attention include dimming, failure
to light, cracking, or damage.
The brake lamps need to be
checked periodically to ensure
that they light when braking.
. With a multi-point inspection,
your dealer can check the lamps
and note any concerns.
Shocks and Struts
Shocks and struts help aid in control
for a smoother ride.
. Signs of wear may include
steering wheel vibration, bounce/
sway while braking, longer
stopping distance, or uneven
tire wear.
. As part of the multi-point
inspection, trained dealer
technicians can visually inspect
the shocks and struts for signs of leaking, blown seals,
or damage, and can advise
when service is needed.
Tires
Tires need to be properly inflated,
rotated, and balanced. Maintaining
the tires can save money and fuel,
and can reduce the risk of tire
failure.
. Signs that the tires need to be
replaced include three or more
visible treadwear indicators; cord
or fabric showing through the
rubber; cracks or cuts in the
tread or sidewall; or a bulge or
split in the tire.
. Trained dealer technicians can
inspect and recommend the right
tires. Your dealer can also
provide tire/wheel balancing
services to ensure smooth
vehicle operation at all speeds.
Your dealer sells and services
name brand tires. Vehicle Care
To help keep the vehicle looking like
new, vehicle care products are
available from your dealer. For
information on how to clean and
protect the vehicle’s interior and
exterior, see
Interior Care 0313 and
Exterior Care 0308.
Wheel Alignment
Wheel alignment is critical for
ensuring that the tires deliver
optimal wear and performance.
. Signs that the alignment may
need to be adjusted include
pulling, improper vehicle
handling, or unusual tire wear.
. Your dealer has the required
equipment to ensure proper
wheel alignment.
Windshield
For safety, appearance, and the
best viewing, keep the windshield
clean and clear.
. Signs of damage include
scratches, cracks, and chips.
Page 368 of 375

Chevrolet Camaro Owner Manual (GMNA-Localizing-U.S./Canada/Mexico-
12461811) - 2019 - crc - 11/5/18
Index 367
G
Gas Strut(s) . . . . . . . . . . . . . . . . . . . . 263
GaugesBoost . . . . . . . . . . . . . . . . . . . . . . . . . 121
Engine CoolantTemperature . . . . . . . . . . . . . . . . 122
Engine Oil Pressure . . . . . . . . . . 121
Fuel . . . . . . . . . . . . . . . . . . . . . . . . . . .119
Odometer . . . . . . . . . . . . . . . . . . . . . .119
Speedometer . . . . . . . . . . . . . . . . . .119
Tachometer . . . . . . . . . . . . . . . . . . . .119
Trip Odometer . . . . . . . . . . . . . . . . .119
Voltmeter . . . . . . . . . . . . . . . . . . . . . 123
Warning Lights and Indicators . . . . . . . . . . . . . . . . . . . .114
General Information Service and Maintenance . . . . . 318
Towing . . . . . . . . . . . . . . . . . . . . . . . . 232
Vehicle Care . . . . . . . . . . . . . . . . . . 235
Glove Box . . . . . . . . . . . . . . . . . . . . . . 106
GM Mobility Reimbursement Program . . . . . . . . . . . . . . . . . . . . . . . 341
H
Halogen Bulbs . . . . . . . . . . . . . . . . . . 265
Hazard Warning Flashers . . . . . . . 149
Head Restraints . . . . . . . . . . . . . . . . . 60
Head-up Display . . . . . . . . . . . . . . . . 137 Headlamps
Aiming . . . . . . . . . . . . . . . . . . . . . . . . 264
Automatic . . . . . . . . . . . . . . . . . . . . . 148
Bulb Replacement . . . . . . . . . . . . 265
Daytime Running
Lamps (DRL) . . . . . . . . . . . . . . . . 148
Flash-to-Pass . . . . . . . . . . . . . . . . . 148
High Intensity Discharge
(HID) Lighting . . . . . . . . . . . . . . . 265
High-Beam On Light . . . . . . . . . . 133
High/Low Beam Changer . . . . . 147
Lamps On Reminder . . . . . . . . . 133
Heated Steering Wheel . . . . . . . . . . . . . . . 109
Heated and Ventilated Front Seats . . . . . . . . . . . . . . . . . . . . . . . . . . 66
Heated Mirrors . . . . . . . . . . . . . . . . . . . 45
Heater Engine . . . . . . . . . . . . . . . . . . . . . . . . 194
Heating . . . . . . . . . . . . . . . . . . . . 160, 163
High-Beam On Light . . . . . . . . . . . . 133
High-Speed Operation . . . . . . . . . . 283
Hill and Mountain Roads . . . . . . . . 184
Hill Start Assist (HSA) . . . . . . . . . . 209
Hood . . . . . . . . . . . . . . . . . . . . . . . . . . . 237
Horn . . . . . . . . . . . . . . . . . . . . . . . . . . . . 109
How to Wear Seat Belts Properly . . . . . . . . . . . . . . . . . . . . . . . . 69 HVAC . . . . . . . . . . . . . . . . . . . . . . 160, 163
Hydraulic Clutch . . . . . . . . . . . . . . . . 248
I
Ignition Positions . . . . . . . . . . . . . . . 191
Immobilizer . . . . . . . . . . . . . . . . . . . . . . 43
Indicator
Vehicle Ahead . . . . . . . . . . . . . . . . 130
Infants and Young Children, Restraints . . . . . . . . . . . . . . . . . . . . . . 89
Information Publication Ordering . . . . . . . . . . 346
Infotainment . . . . . . . . . . . . . . . . . . . . 154
Infotainment System . . . . . . . . . . . . 350
Instrument Cluster . . . . . . . . . . . . . . 115
Interior Lamps . . . . . . . . . . . . . . . . . . 151
Interior Rearview Mirrors . . . . . . . . . 46
Introduction . . . . . . . . . . . . . . . . . . . . . . . 2
J
Jump Starting - North America . . . . . . . . . . . . . . . . . . . . . . . 303
K
Keyless Entry
Remote (RKE) System . . . . . . . . . 27
Keys . . . . . . . . . . . . . . . . . . . . . . . . . . . . . 26
Page 369 of 375

Chevrolet Camaro Owner Manual (GMNA-Localizing-U.S./Canada/Mexico-
12461811) - 2019 - crc - 11/5/18
368 Index
L
Labeling, Tire Sidewall . . . . . . . . . . 277
LampsDaytime Running (DRL) . . . . . . 148
Exterior Controls . . . . . . . . . . . . . . 147
Exterior Lighting BatterySaver . . . . . . . . . . . . . . . . . . . . . . . 152
Interior . . . . . . . . . . . . . . . . . . . . . . . . 151
License Plate . . . . . . . . . . . . . . . . . 266
Malfunction Indicator (Check Engine) . . . . . . . . . . . . . 126
On Reminder . . . . . . . . . . . . . . . . . 133
Reading . . . . . . . . . . . . . . . . . . . . . . 151
Lane Change Alert (LCA) . . . . . . . 226
Lap-Shoulder Belt . . . . . . . . . . . . . . . 71
LATCH System
Replacing Parts after aCrash . . . . . . . . . . . . . . . . . . . . . . . 100
LATCH, Lower Anchors and
Tethers for Children . . . . . . . . . . . . 94
Latches, Seatback . . . . . . . . . . . . . . . 65
LED Lighting . . . . . . . . . . . . . . . . . . . . 265
Lighting Entry . . . . . . . . . . . . . . . . . . . . . . . . . 151
Exit . . . . . . . . . . . . . . . . . . . . . . . . . . . 151
Illumination Control . . . . . . . . . . . 150
LED . . . . . . . . . . . . . . . . . . . . . . . . . . 265
Theater Dimming . . . . . . . . . . . . . 152 Lights
Airbag Readiness . . . . . . . . . . . . . 125
Antilock Brake System
(ABS) Warning . . . . . . . . . . . . . . 130
Brake System Warning . . . . . . . 128
Charging System . . . . . . . . . . . . . 126
Check Engine (Malfunction Indicator) . . . . . . . . . . . . . . . . . . . . 126
Cruise Control . . . . . . . . . . . . . . . . 133
Door Ajar . . . . . . . . . . . . . . . . . . . . . 133
Electric Parking Brake . . . . . . . . 129
Engine Oil Pressure . . . . . . . . . . 132
Flash-to-Pass . . . . . . . . . . . . . . . . . 148
High-Beam On . . . . . . . . . . . . . . . . 133
High/Low Beam Changer . . . . . 147
Low Fuel Warning . . . . . . . . . . . . 132
Seat Belt Reminders . . . . . . . . . . 124
Security . . . . . . . . . . . . . . . . . . . . . . 132
Service Electric Parking Brake . . . . . . . . . . . . . . . . . . . . . . . 129
StabiliTrak OFF . . . . . . . . . . . . . . . 131
Tire Pressure . . . . . . . . . . . . . . . . . 131
Traction Control System
(TCS)/StabiliTrak . . . . . . . . . . . . 131
Traction Off . . . . . . . . . . . . . . . . . . . 130
Limited-Slip Rear Axle . . . . . . . . . . 217
Locks Automatic Door . . . . . . . . . . . . . . . . . 39 Locks (cont'd)
Delayed Locking . . . . . . . . . . . . . . . . 38
Door . . . . . . . . . . . . . . . . . . . . . . . . . . . . 36
Lockout Protection . . . . . . . . . . . . . . 39
Power Door . . . . . . . . . . . . . . . . . . . . . 38
Loss of Control . . . . . . . . . . . . . . . . . 173
Low Fuel Warning Light . . . . . . . . . 132
Low-Profile Tires . . . . . . . . . . . . . . . . 276
Lower Anchors and Tethers for Children (LATCH
System) . . . . . . . . . . . . . . . . . . . . . . . . 94
M
MaintenanceRecords . . . . . . . . . . . . . . . . . . . . . . 332
Maintenance and Care Additional . . . . . . . . . . . . . . . . . . . . . 326
Maintenance Schedule . . . . . . . . . 320 Recommended Fluids and
Lubricants . . . . . . . . . . . . . . . . . . . 329
Malfunction Indicator Lamp . . . . . 126
Manual Mode . . . . . . . . . . . . . . . . . . . 201
Manual Transmission . . . . . . . . . . . 203 Fluid . . . . . . . . . . . . . . . . . . . . . . . . . . 248
Matching Active Rev . . . . . . . . . . . . . . . . . . . . 205
Memory Features . . . . . . . . . . . . . . . . 11
Memory Seats . . . . . . . . . . . . . . . . . . . 62