tow CHEVROLET CAMARO 2020 Get To Know Guide
[x] Cancel search | Manufacturer: CHEVROLET, Model Year: 2020, Model line: CAMARO, Model: CHEVROLET CAMARO 2020Pages: 361, PDF Size: 3.27 MB
Page 94 of 361
Chevrolet Camaro Owner Manual (GMNA-Localizing-U.S./Canada/Mexico-
13556304) - 2020 - CRC - 9/3/19
Instruments and Controls 93
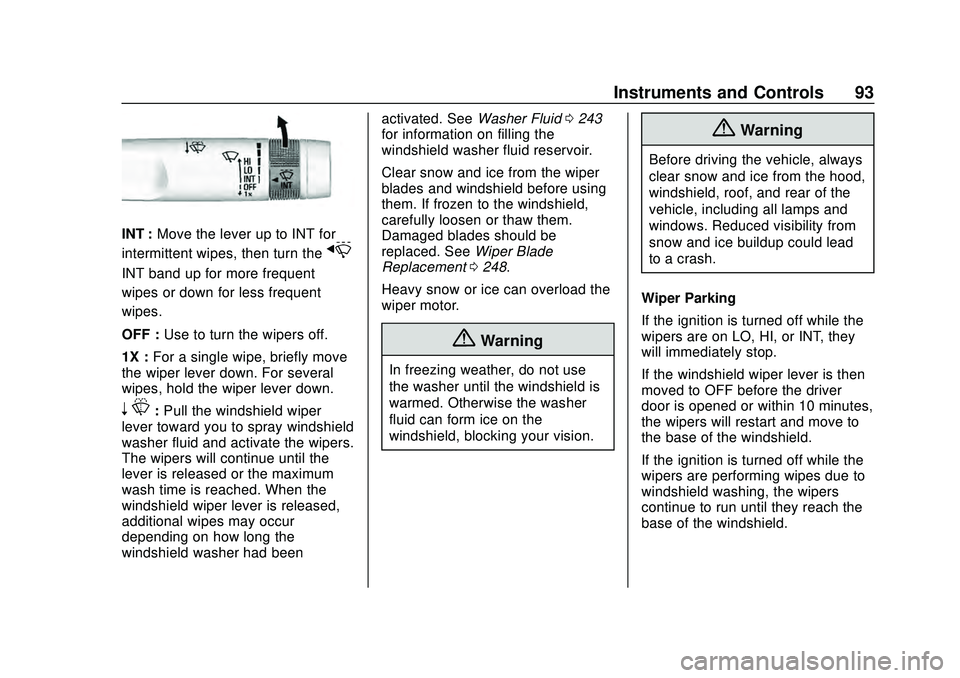
INT :Move the lever up to INT for
intermittent wipes, then turn the
x
INT band up for more frequent
wipes or down for less frequent
wipes.
OFF : Use to turn the wipers off.
1X : For a single wipe, briefly move
the wiper lever down. For several
wipes, hold the wiper lever down.
n L: Pull the windshield wiper
lever toward you to spray windshield
washer fluid and activate the wipers.
The wipers will continue until the
lever is released or the maximum
wash time is reached. When the
windshield wiper lever is released,
additional wipes may occur
depending on how long the
windshield washer had been activated. See
Washer Fluid0243
for information on filling the
windshield washer fluid reservoir.
Clear snow and ice from the wiper
blades and windshield before using
them. If frozen to the windshield,
carefully loosen or thaw them.
Damaged blades should be
replaced. See Wiper Blade
Replacement 0248.
Heavy snow or ice can overload the
wiper motor.
{Warning
In freezing weather, do not use
the washer until the windshield is
warmed. Otherwise the washer
fluid can form ice on the
windshield, blocking your vision.
{Warning
Before driving the vehicle, always
clear snow and ice from the hood,
windshield, roof, and rear of the
vehicle, including all lamps and
windows. Reduced visibility from
snow and ice buildup could lead
to a crash.
Wiper Parking
If the ignition is turned off while the
wipers are on LO, HI, or INT, they
will immediately stop.
If the windshield wiper lever is then
moved to OFF before the driver
door is opened or within 10 minutes,
the wipers will restart and move to
the base of the windshield.
If the ignition is turned off while the
wipers are performing wipes due to
windshield washing, the wipers
continue to run until they reach the
base of the windshield.
Page 113 of 361
Chevrolet Camaro Owner Manual (GMNA-Localizing-U.S./Canada/Mexico-
13556304) - 2020 - CRC - 9/3/19
112 Instruments and Controls
before the system is ready for
inspection. This can happen if
the 12-volt battery has recently
been replaced or run down, or if
the vehicle has been recently
serviced.
See your dealer if the vehicle will
not pass or cannot be made ready
for the test.
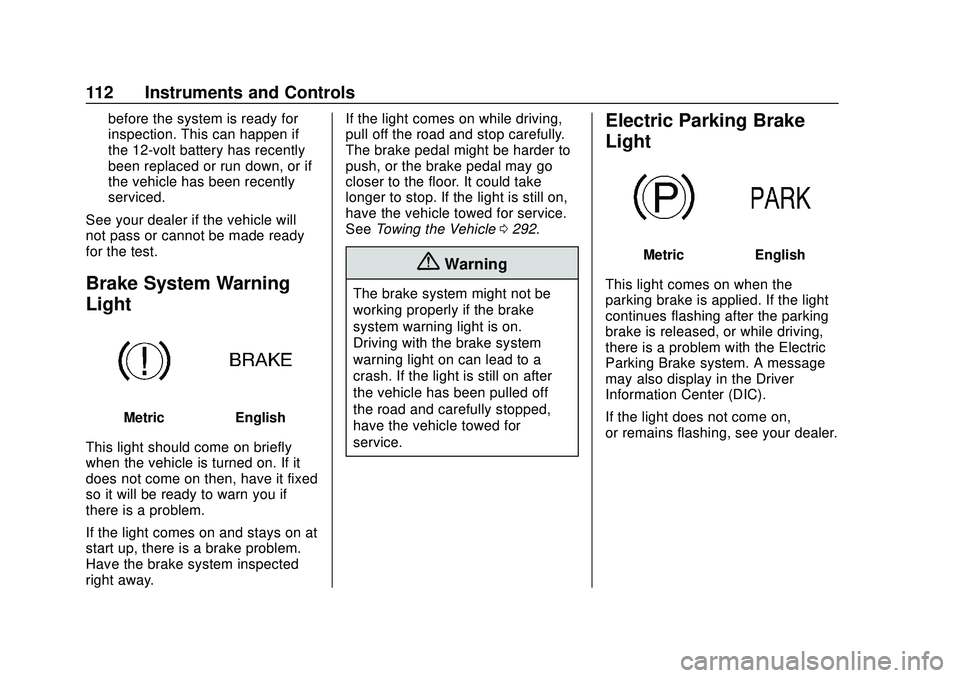
Brake System Warning
Light
MetricEnglish
This light should come on briefly
when the vehicle is turned on. If it
does not come on then, have it fixed
so it will be ready to warn you if
there is a problem.
If the light comes on and stays on at
start up, there is a brake problem.
Have the brake system inspected
right away. If the light comes on while driving,
pull off the road and stop carefully.
The brake pedal might be harder to
push, or the brake pedal may go
closer to the floor. It could take
longer to stop. If the light is still on,
have the vehicle towed for service.
See
Towing the Vehicle 0292.
{Warning
The brake system might not be
working properly if the brake
system warning light is on.
Driving with the brake system
warning light on can lead to a
crash. If the light is still on after
the vehicle has been pulled off
the road and carefully stopped,
have the vehicle towed for
service.
Electric Parking Brake
Light
MetricEnglish
This light comes on when the
parking brake is applied. If the light
continues flashing after the parking
brake is released, or while driving,
there is a problem with the Electric
Parking Brake system. A message
may also display in the Driver
Information Center (DIC).
If the light does not come on,
or remains flashing, see your dealer.
Page 121 of 361
Chevrolet Camaro Owner Manual (GMNA-Localizing-U.S./Canada/Mexico-
13556304) - 2020 - CRC - 9/3/19
120 Instruments and Controls
timer, highlight Reset on the
performance timer menu and press
SEL. This display is available in the
Performance app on the uplevel
cluster.
Lap Timer (Base Cluster) :Use to
start, stop, or reset the lap timer.
A stopwatch icon will be displayed
when the lap timer is active. Press
SEL while the Lap Timer page is
active to start the timer. If the lamp
timer is active, pressing SEL on any
page will stop the current lap timer
and start a new lap. Also, pressing
and holding SEL on any page will
stop the lap timer. This display is
available in the Performance app on
the uplevel cluster.
G-Force (Base Cluster) : Gives the
driver an indication of the vehicle
performance in cornering. The
G-force is displayed in the center of
the DIC as a numerical value. This
display is available in the
Performance app on the uplevel
cluster. Transmission Fluid Temperature
(Base Cluster) :
Shows the
temperature of the transmission fluid
in either degrees Celsius (°C) or
degrees Fahrenheit (°F). This
display is available in the
Performance app on the uplevel
cluster.
Blank : Shows no information.
Head-Up Display (HUD)
{Warning
If the HUD image is too bright or
too high in your field of view, it
may take you more time to see
things you need to see when it is
dark outside. Be sure to keep the
HUD image dim and placed low in
your field of view.
If equipped with HUD, some
information concerning the
operation of the vehicle is projected
onto the windshield. The HUD information appears as an
image focused out toward the front
of the vehicle.
Caution
If you try to use the HUD image
as a parking aid, you may
misjudge the distance and
damage your vehicle. Do not use
the HUD image as a parking aid.
The HUD information can be
displayed in various languages. The
speedometer reading and other
numerical values can be displayed
in either English or metric units.
The language of the HUD
information displayed can be
changed. The speedometer reading
and other numerical values can be
displayed in either English or metric
units.
The language selection is changed
through the radio and the units of
measurement is changed through
the instrument cluster. See
Page 131 of 361
Chevrolet Camaro Owner Manual (GMNA-Localizing-U.S./Canada/Mexico-
13556304) - 2020 - CRC - 9/3/19
130 Lighting
Lighting
Exterior Lighting
Exterior Lamp Controls . . . . . . . 130
Headlamp High/Low-BeamChanger . . . . . . . . . . . . . . . . . . . . 130
Flash-to-Pass . . . . . . . . . . . . . . . . 131
Daytime Running Lamps (DRL) . . . . . . . . . . . . . . . 131
Automatic Headlamp System . . . . . . . . . . . . . . . . . . . . . . 131
Hazard Warning Flashers . . . . . 132
Turn and Lane-Change Signals . . . . . . . . . . . . . . . . . . . . . . 133
Interior Lighting
Instrument Panel IlluminationControl . . . . . . . . . . . . . . . . . . . . . . 133
Interior Lamps . . . . . . . . . . . . . . . . 134
Reading Lamps . . . . . . . . . . . . . . 134
Lighting Features
Entry Lighting . . . . . . . . . . . . . . . . 134
Exit Lighting . . . . . . . . . . . . . . . . . . 134
Theater Dimming . . . . . . . . . . . . . 135
Battery Load Management . . . 135
Battery Power Protection . . . . . 135
Exterior Lighting Battery Saver . . . . . . . . . . . . . . . . . . . . . . . 135
Exterior Lighting
Exterior Lamp Controls
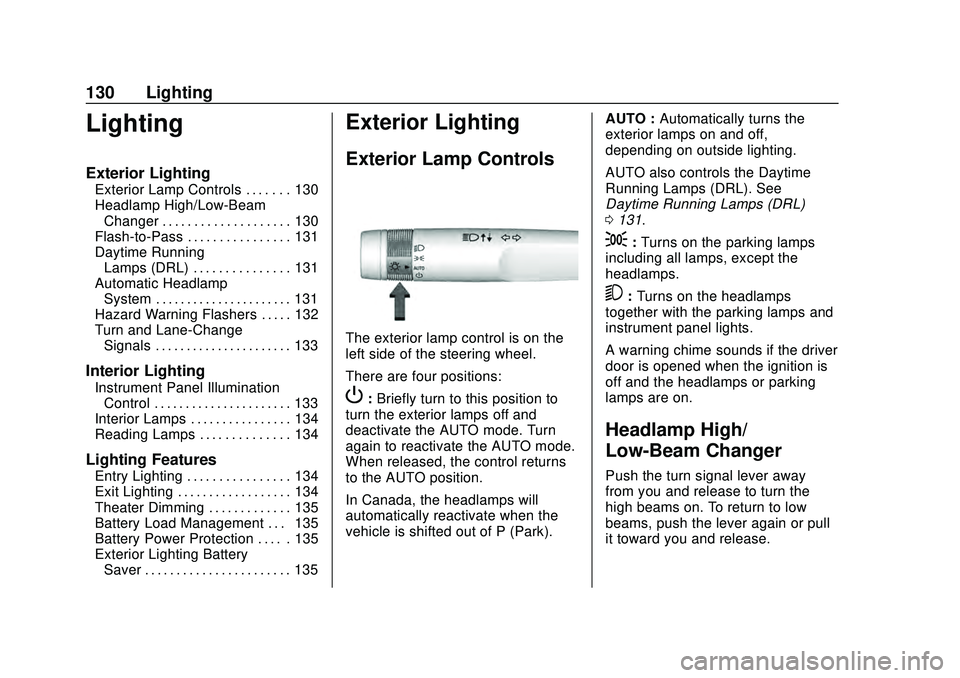
The exterior lamp control is on the
left side of the steering wheel.
There are four positions:
P: Briefly turn to this position to
turn the exterior lamps off and
deactivate the AUTO mode. Turn
again to reactivate the AUTO mode.
When released, the control returns
to the AUTO position.
In Canada, the headlamps will
automatically reactivate when the
vehicle is shifted out of P (Park). AUTO :
Automatically turns the
exterior lamps on and off,
depending on outside lighting.
AUTO also controls the Daytime
Running Lamps (DRL). See
Daytime Running Lamps (DRL)
0 131.
;:Turns on the parking lamps
including all lamps, except the
headlamps.
5: Turns on the headlamps
together with the parking lamps and
instrument panel lights.
A warning chime sounds if the driver
door is opened when the ignition is
off and the headlamps or parking
lamps are on.
Headlamp High/
Low-Beam Changer
Push the turn signal lever away
from you and release to turn the
high beams on. To return to low
beams, push the lever again or pull
it toward you and release.
Page 132 of 361
Chevrolet Camaro Owner Manual (GMNA-Localizing-U.S./Canada/Mexico-
13556304) - 2020 - CRC - 9/3/19
Lighting 131
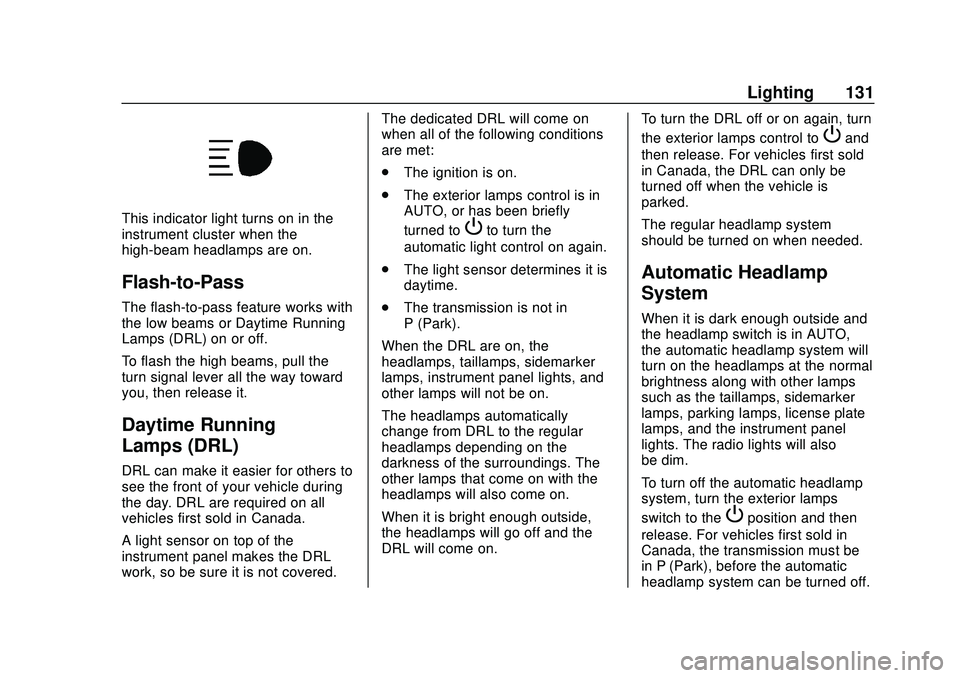
This indicator light turns on in the
instrument cluster when the
high-beam headlamps are on.
Flash-to-Pass
The flash-to-pass feature works with
the low beams or Daytime Running
Lamps (DRL) on or off.
To flash the high beams, pull the
turn signal lever all the way toward
you, then release it.
Daytime Running
Lamps (DRL)
DRL can make it easier for others to
see the front of your vehicle during
the day. DRL are required on all
vehicles first sold in Canada.
A light sensor on top of the
instrument panel makes the DRL
work, so be sure it is not covered.The dedicated DRL will come on
when all of the following conditions
are met:
.
The ignition is on.
. The exterior lamps control is in
AUTO, or has been briefly
turned to
Pto turn the
automatic light control on again.
. The light sensor determines it is
daytime.
. The transmission is not in
P (Park).
When the DRL are on, the
headlamps, taillamps, sidemarker
lamps, instrument panel lights, and
other lamps will not be on.
The headlamps automatically
change from DRL to the regular
headlamps depending on the
darkness of the surroundings. The
other lamps that come on with the
headlamps will also come on.
When it is bright enough outside,
the headlamps will go off and the
DRL will come on. To turn the DRL off or on again, turn
the exterior lamps control to
Pand
then release. For vehicles first sold
in Canada, the DRL can only be
turned off when the vehicle is
parked.
The regular headlamp system
should be turned on when needed.
Automatic Headlamp
System
When it is dark enough outside and
the headlamp switch is in AUTO,
the automatic headlamp system will
turn on the headlamps at the normal
brightness along with other lamps
such as the taillamps, sidemarker
lamps, parking lamps, license plate
lamps, and the instrument panel
lights. The radio lights will also
be dim.
To turn off the automatic headlamp
system, turn the exterior lamps
switch to the
Pposition and then
release. For vehicles first sold in
Canada, the transmission must be
in P (Park), before the automatic
headlamp system can be turned off.
Page 151 of 361
Chevrolet Camaro Owner Manual (GMNA-Localizing-U.S./Canada/Mexico-
13556304) - 2020 - CRC - 9/3/19
150 Climate Controls
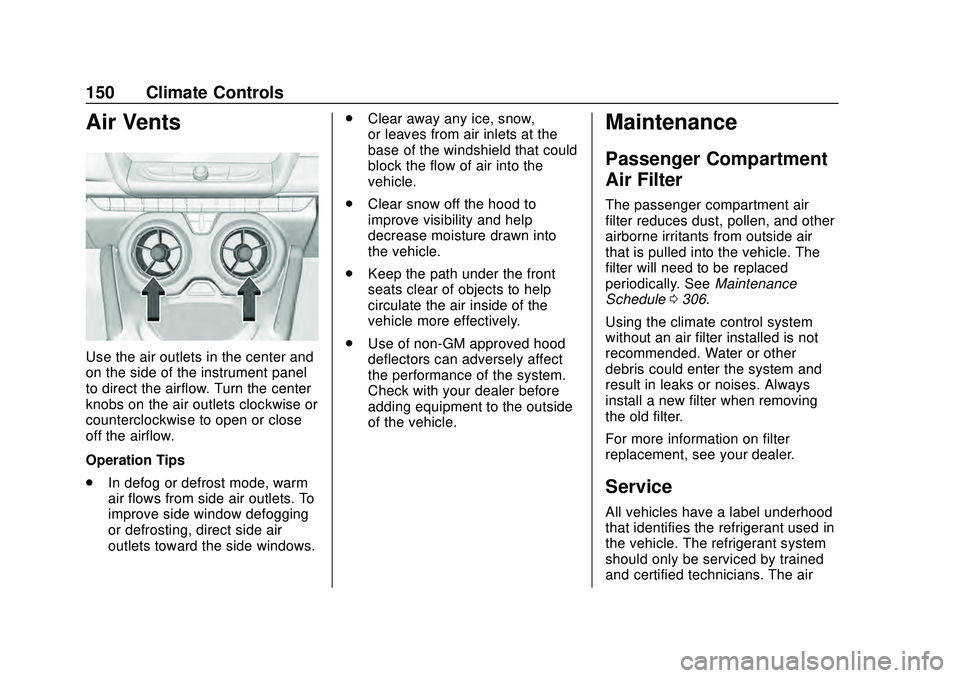
Air Vents
Use the air outlets in the center and
on the side of the instrument panel
to direct the airflow. Turn the center
knobs on the air outlets clockwise or
counterclockwise to open or close
off the airflow.
Operation Tips
.In defog or defrost mode, warm
air flows from side air outlets. To
improve side window defogging
or defrosting, direct side air
outlets toward the side windows. .
Clear away any ice, snow,
or leaves from air inlets at the
base of the windshield that could
block the flow of air into the
vehicle.
. Clear snow off the hood to
improve visibility and help
decrease moisture drawn into
the vehicle.
. Keep the path under the front
seats clear of objects to help
circulate the air inside of the
vehicle more effectively.
. Use of non-GM approved hood
deflectors can adversely affect
the performance of the system.
Check with your dealer before
adding equipment to the outside
of the vehicle.
Maintenance
Passenger Compartment
Air Filter
The passenger compartment air
filter reduces dust, pollen, and other
airborne irritants from outside air
that is pulled into the vehicle. The
filter will need to be replaced
periodically. See Maintenance
Schedule 0306.
Using the climate control system
without an air filter installed is not
recommended. Water or other
debris could enter the system and
result in leaks or noises. Always
install a new filter when removing
the old filter.
For more information on filter
replacement, see your dealer.
Service
All vehicles have a label underhood
that identifies the refrigerant used in
the vehicle. The refrigerant system
should only be serviced by trained
and certified technicians. The air
Page 154 of 361
Chevrolet Camaro Owner Manual (GMNA-Localizing-U.S./Canada/Mexico-
13556304) - 2020 - CRC - 9/3/19
Driving and Operating 153
Prohibited Fuels . . . . . . . . . . . . . . 214
Fuels in Foreign Countries . . . 214
Fuel Additives . . . . . . . . . . . . . . . . 215
Filling the Tank . . . . . . . . . . . . . . . 215
Filling a Portable FuelContainer . . . . . . . . . . . . . . . . . . . 217
Trailer Towing
General TowingInformation . . . . . . . . . . . . . . . . . . 217
Conversions and Add-Ons
Add-On ElectricalEquipment . . . . . . . . . . . . . . . . . . 218
Driving Information
Driving for Better Fuel
Economy
Driving habits can affect fuel
mileage. Here are some driving tips
to get the best fuel economy
possible.
. Set the climate controls to the
desired temperature after the
engine is started, or turn them
off when not required.
. Avoid fast starts and accelerate
smoothly.
. Brake gradually and avoid
abrupt stops.
. Avoid idling the engine for long
periods of time.
. When road and weather
conditions are appropriate, use
cruise control.
. Always follow posted speed
limits or drive more slowly when
conditions require.
. Keep vehicle tires properly
inflated. .
Combine several trips into a
single trip.
. Replace the vehicle's tires with
the same TPC Spec number
molded into the tire's sidewall
near the size.
. Follow recommended scheduled
maintenance.
Distracted Driving
Distraction comes in many forms
and can take your focus from the
task of driving. Exercise good
judgment and do not let other
activities divert your attention away
from the road. Many local
governments have enacted laws
regarding driver distraction. Become
familiar with the local laws in
your area.
To avoid distracted driving, keep
your eyes on the road, keep your
hands on the steering wheel, and
focus your attention on driving.
Page 171 of 361
Chevrolet Camaro Owner Manual (GMNA-Localizing-U.S./Canada/Mexico-
13556304) - 2020 - CRC - 9/3/19
170 Driving and Operating
Warning (Continued)
engine compartment fire or other
damage. Spin the wheels as little
as possible and avoid going
above 56 km/h (35 mph).
Rocking the Vehicle to Get
it Out
Turn the steering wheel left and
right to clear the area around the
front wheels. Turn off any traction
system. Shift back and forth
between R (Reverse) and a low
forward gear, spinning the wheels
as little as possible. To prevent
transmission wear, wait until the
wheels stop spinning before shifting
gears. Release the accelerator
pedal while shifting, and press
lightly on the accelerator pedal
when the transmission is in gear.
Slowly spinning the wheels in the
forward and reverse directions
causes a rocking motion that could
free the vehicle. If that does not get
the vehicle out after a few tries, itmight need to be towed out. If the
vehicle does need to be towed out,
see
Towing the Vehicle 0292.
Vehicle Load Limits
It is very important to know how
much weight the vehicle can
carry. This weight is called the
vehicle capacity weight and
includes the weight of all
occupants, cargo, and all
nonfactory-installed options.
Two labels on the vehicle may
show how much weight it may
properly carry: the Tire and
Loading Information label and
the Certification label.
{Warning
Do not load the vehicle any
heavier than the Gross
Vehicle Weight Rating
(GVWR), or either the
maximum front or rear Gross
Axle Weight Rating (GAWR).
(Continued)
Warning (Continued)
This can cause systems to
break and change the way the
vehicle handles. This could
cause loss of control and a
crash. Overloading can also
reduce stopping distance,
damage the tires, and shorten
the life of the vehicle.
Page 172 of 361
Chevrolet Camaro Owner Manual (GMNA-Localizing-U.S./Canada/Mexico-
13556304) - 2020 - CRC - 9/3/19
Driving and Operating 171
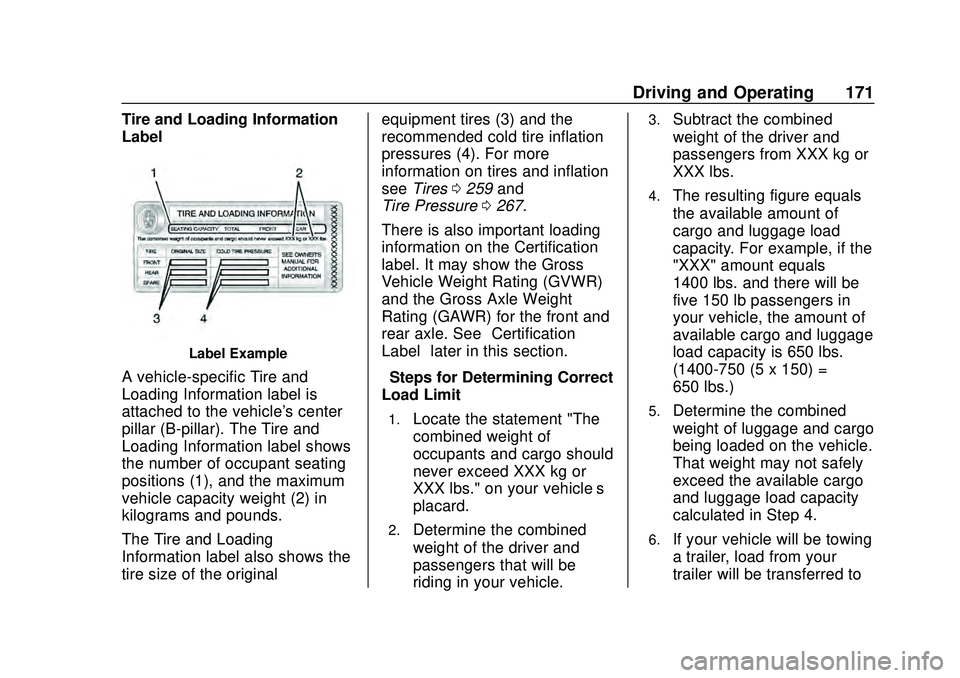
Tire and Loading Information
Label
Label Example
A vehicle-specific Tire and
Loading Information label is
attached to the vehicle's center
pillar (B-pillar). The Tire and
Loading Information label shows
the number of occupant seating
positions (1), and the maximum
vehicle capacity weight (2) in
kilograms and pounds.
The Tire and Loading
Information label also shows the
tire size of the originalequipment tires (3) and the
recommended cold tire inflation
pressures (4). For more
information on tires and inflation
see
Tires 0259 and
Tire Pressure 0267.
There is also important loading
information on the Certification
label. It may show the Gross
Vehicle Weight Rating (GVWR)
and the Gross Axle Weight
Rating (GAWR) for the front and
rear axle. See “Certification
Label” later in this section.
“Steps for Determining Correct
Load Limit–
1.Locate the statement "The
combined weight of
occupants and cargo should
never exceed XXX kg or
XXX lbs." on your vehicle’s
placard.
2.Determine the combined
weight of the driver and
passengers that will be
riding in your vehicle.
3.Subtract the combined
weight of the driver and
passengers from XXX kg or
XXX lbs.
4.The resulting figure equals
the available amount of
cargo and luggage load
capacity. For example, if the
"XXX" amount equals
1400 lbs. and there will be
five 150 lb passengers in
your vehicle, the amount of
available cargo and luggage
load capacity is 650 lbs.
(1400-750 (5 x 150) =
650 lbs.)
5.Determine the combined
weight of luggage and cargo
being loaded on the vehicle.
That weight may not safely
exceed the available cargo
and luggage load capacity
calculated in Step 4.
6.If your vehicle will be towing
a trailer, load from your
trailer will be transferred to
Page 173 of 361

Chevrolet Camaro Owner Manual (GMNA-Localizing-U.S./Canada/Mexico-
13556304) - 2020 - CRC - 9/3/19
172 Driving and Operating
your vehicle. Consult this
manual to determine how
this reduces the available
cargo and luggage load
capacity of your vehicle.”
This vehicle is neither designed
nor intended to tow a trailer.
Example 1
1.Vehicle Capacity Weight
for Example 1 = 453 kg
(1,000 lbs).
2.Subtract Occupant
Weight @ 68 kg (150 lbs)
× 2 = 136 kg (300 lbs).
3.Available Occupant and
Cargo Weight = 317 kg
(700 lbs).
Example 2
1.Vehicle Capacity Weight
for Example 2 = 453 kg
(1,000 lbs).
2.Subtract Occupant
Weight @ 68 kg (150 lbs)
× 5 = 340 kg (750 lbs).
3.Available Cargo Weight
= 113 kg (250 lbs).
Example 3
1.Vehicle Capacity Weight
for Example 3 = 453 kg
(1,000 lbs).
2.Subtract Occupant
Weight @ 91 kg
(200 lbs) × 5 = 453 kg
(1,000 lbs).
3.Available Cargo Weight
= 0 kg (0 lbs).
Refer to the vehicle's Tire and
Loading Information label for
specific information about the
vehicle's capacity weight and
seating positions. The combined