ECO mode CHEVROLET CAMARO 2021 Owner's Guide
[x] Cancel search | Manufacturer: CHEVROLET, Model Year: 2021, Model line: CAMARO, Model: CHEVROLET CAMARO 2021Pages: 354, PDF Size: 8.86 MB
Page 187 of 354
Chevrolet Camaro Owner Manual (GMNA-Localizing-U.S./Canada/Mexico-
14583589) - 2021 - CRC - 10/1/20
186 Driving and Operating
3.6L (LGX) V6 Engine
Change the engine oil to 0W-40 or 5W-40
that meets the dexos2 specification. If this
oil is not available, the following oil can be
used as an alternative: Valvoline SYNPOWER
MST 5W-40.
For LS/LT 1LE, add 0.9 L (1.0 qt) of oil over
the nominal fill level for a track event. After
the competitive driving, remove the excess
oil so that the level on the dipstick is not
above the upper mark that shows the
proper operating range.
During track usage, do not follow the Engine
Oil Life System status. Change the engine oil
after four hours of accumulative track usage.
Fuel
Use premium unleaded gasoline with a
posted octane rating of 93 at a track event.
Unleaded gasoline with a posted octane
rating of 91 may be used, but performance
will be degraded.
Automatic Transmission Fluid
Have the transmission fluid set to the track
specific oil level prior to track usage.
Transmission fluid should be changed afterevery 15 hours of track usage. Any
transmission level set or change should be
performed at your dealer.
Manual Transmission Fluid
Manual transmission fluid should be
changed after every 15 hours of track usage.
Rear Axle Fluid
Axles must have 2 400 km (1,500 mi) before
being used in track driving.
The rear axle fluid temperatures may be
higher than when driving in severe
conditions. Drain and refill with new fluid
after the first racing or competitive driving
event, and then after every 24 hours of
racing or competitive driving. See
Recommended Fluids and Lubricants
0313.
Caution
During a first time track or racing event,
high rear axle temperatures can occur.
Damage could be caused to the rear axle
and would not be covered by the vehicle
warranty. Do not drive as long or as fast
the first time the vehicle is driven on the
track or raced.
Brake Fluid
For track events or competitive driving, it is
recommended that the brake fluid be
replaced with a high performance brake fluid
that has a dry boiling point greater than
279 °C (534 °F). After conversion to the high
performance brake fluid, follow the brake
fluid service recommendations outlined by
the fluid manufacturer. Do not use silicone
or DOT-5 brake fluids.
Brake Burnishing
To prepare the Camaro brake systems for
track events and racing, complete the
appropriate high performance brake
burnishing procedure described below.
New brake pads must be burnished before
racing or competitive driving.
Caution
These procedures are specific to the
Camaro LT with Y4Q Heavy Duty Cooling
System and J55 brakes, SS, ZL1, and
models equipped with the 1LE track
package. This procedure should not be
run on other Camaro models equipped
(Continued)
Page 200 of 354
Chevrolet Camaro Owner Manual (GMNA-Localizing-U.S./Canada/Mexico-
14583589) - 2021 - CRC - 10/1/20
Driving and Operating 199
Starting and Operating
New Vehicle Break-In
Caution
Follow these recommended guidelines
during the first 2 414 km (1,500 mi) of
driving this vehicle. Parts have a break-in
period and performance will be better in
the long run.
.Avoid full throttle starts and abrupt
stops.
.Do not exceed 4000 engine rpm.
.Avoid driving at any one constant
speed, fast or slow.
.Do not drive above
129 km/h (80 mph).
.Avoid downshifting to brake or slow
the vehicle when the engine speed
will exceed 4000 rpm.
.Do not let the engine labor. Never lug
the engine in high gear at low speeds.
With a manual transmission, shift to
the next lower gear. This rule applies
at all times, not just during the
break-in period.
(Continued)
Caution (Continued)
.Do not participate in racing events,
sport driving schools, or similar
activities during this break-in period.
.Check engine oil with every refueling
and add if necessary. Oil and fuel
consumption may be higher than
normal during the first
2 414 km (1,500 mi).
.To break in new tires, drive at
moderate speeds and avoid hard
cornering for the first 322 km (200 mi).
New tires do not have maximum
traction and may tend to slip.
.New brake linings also need a break-in
period. Avoid making hard stops
during the first 322 km (200 mi). This
is recommended every time brake
linings are replaced.
.Should the vehicle be used for racing
or competitive driving (after break-in),
the rear axle lubricant must be
replaced beforehand.
See Track Events and Competitive Driving
0 185.
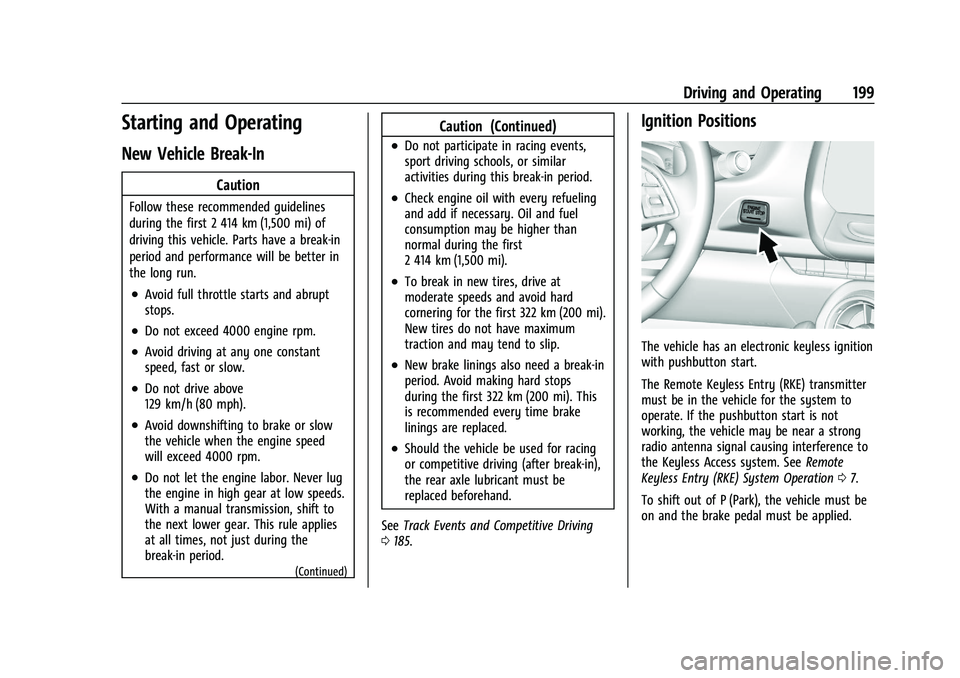
Ignition Positions
The vehicle has an electronic keyless ignition
with pushbutton start.
The Remote Keyless Entry (RKE) transmitter
must be in the vehicle for the system to
operate. If the pushbutton start is not
working, the vehicle may be near a strong
radio antenna signal causing interference to
the Keyless Access system. See Remote
Keyless Entry (RKE) System Operation 07.
To shift out of P (Park), the vehicle must be
on and the brake pedal must be applied.
Page 201 of 354

Chevrolet Camaro Owner Manual (GMNA-Localizing-U.S./Canada/Mexico-
14583589) - 2021 - CRC - 10/1/20
200 Driving and Operating
Stopping the Engine/OFF (No Indicator
Lights) :When the vehicle is stopped, press
ENGINE START/STOP once to turn the
engine off.
If the vehicle is in P (Park), the ignition will
turn off, and Retained Accessory Power (RAP)
will remain active. See Retained Accessory
Power (RAP) 0203.
Automatic Transmission
If the vehicle is not in P (Park), the ignition
will return to ACC/ACCESSORY and display a
message in the Driver Information Center
(DIC). When the vehicle is shifted into
P (Park), the ignition system will turn OFF.
Manual Transmission
If the vehicle is stationary, the ignition will
turn off, and Retained Accessory Power (RAP)
will remain active. See Retained Accessory
Power (RAP) 0203.
Do not turn the engine off when the vehicle
is moving. This will cause a loss of power
assist in the brake and steering systems and
disable the airbags.
If the vehicle must be shut off in an
emergency: 1. Brake using a firm and steady pressure.
Do not pump the brakes repeatedly. This
may deplete power assist, requiring
increased brake pedal force.
2. Shift the vehicle to N (Neutral). This can be done while the vehicle is moving.
After shifting to N (Neutral), firmly apply
the brakes and steer the vehicle to a
safe location.
3. Come to a complete stop. Shift to P (Park) with an automatic transmission,
or Neutral with a manual transmission.
Turn the ignition off.
4. Set the parking brake. See Electric
Parking Brake 0213.
{Warning
Turning off the vehicle while moving may
cause loss of power assist in the brake
and steering systems and disable the
airbags. While driving, only shut the
vehicle off in an emergency.
If the vehicle cannot be pulled over, and
must be shut off while driving, press and
hold ENGINE START/STOP for longer than
two seconds, or press twice within
five seconds. ACC/ACCESSORY (Amber Indicator Light) :
This mode allows the use of some electrical
accessories when the engine is off.
With the ignition off, pressing the button
one time without the brake pedal applied
will place the ignition system in ACC/
ACCESSORY.
The ignition will switch from ACC/
ACCESSORY to OFF after five minutes to
prevent battery rundown.
ON/RUN/START (Green Indicator Light) :
This
mode is for driving and starting. With the
ignition off, and the brake pedal applied,
pressing the button once will place the
ignition system in ON/RUN/START. Once
engine cranking begins, release the button.
Engine cranking will continue until the
engine starts. See Starting the Engine 0201.
The ignition will then remain on.
Service Mode
This power mode is available for service and
diagnostics, and to verify the proper
operation of the malfunction indicator lamp
as may be required for emission inspection
purposes. With the vehicle off, and the
brake pedal not applied, pressing and
holding ENGINE START/STOP for more than
five seconds will place the vehicle in Service
Page 202 of 354
Chevrolet Camaro Owner Manual (GMNA-Localizing-U.S./Canada/Mexico-
14583589) - 2021 - CRC - 10/1/20
Driving and Operating 201
Mode. The instruments and audio systems
will operate as they do in ON/RUN, but the
vehicle will not be able to be driven. The
engine will not start in Service Mode. Press
the button again to turn the vehicle off.
Starting the Engine
Place the transmission in the proper gear.
Caution
If you add electrical parts or accessories,
you could change the way the engine
operates. Any resulting damage would
not be covered by the vehicle warranty.
SeeAdd-On Electrical Equipment 0233.
Automatic Transmission
Move the shift lever to P (Park) or
N (Neutral). To restart the vehicle when it is
already moving, use N (Neutral) only.
Caution
Do not try to shift to P (Park) if the
vehicle is moving. If you do, you could
damage the transmission. Shift to P (Park)
only when the vehicle is stopped. Manual Transmission
The shift lever should be in Neutral and the
parking brake engaged. Hold the clutch
pedal down to the floor, press the brake
pedal, and start the engine.
Starting the Vehicle
The RKE transmitter must be inside the
vehicle for the ignition to work.
Cell phone chargers can interfere with the
operation of the Keyless Access system.
Battery chargers should not be plugged in
when starting or turning off the engine.
To start the vehicle:
1. For vehicles with an automatic transmission, press the brake pedal, then
press ENGINE START/STOP on the
instrument panel. For a manual
transmission, place the shift lever in
Neutral with the parking brake engaged.
Hold the clutch pedal down to the floor,
press the brake pedal, then press ENGINE
START/STOP.
If there is no RKE transmitter in the
vehicle or if there is something causing
interference with it, the Driver
Information Center (DIC) will display a
message. 2. When the engine begins cranking, let go
of the button and the engine cranks
automatically until it starts. If the
battery in the RKE transmitter is weak,
the DIC will display a message. The
vehicle can still be driven.
See “Starting the Vehicle with a Low
Transmitter Battery” underRemote
Keyless Entry (RKE) System Operation 07
. If the RKE transmitter battery is dead,
insert it into the rear cupholder to
enable engine starting.
3. Do not race the engine immediately after starting it. Operate the engine and
transmission gently until the oil warms
up and lubricates all moving parts.
4. If the engine does not start and no DIC message is displayed, wait 15 seconds
before trying again to let the cranking
motor cool down.
If the engine does not start after five to
10 seconds, especially in very cold
weather (below −18 °C or 0 °F), it could
be flooded with too much gasoline. Try
pushing the accelerator pedal all the way
to the floor while cranking for up to
15 seconds maximum. Wait at least
15 seconds between each try, to allow
the cranking motor to cool down. When
Page 206 of 354

Chevrolet Camaro Owner Manual (GMNA-Localizing-U.S./Canada/Mexico-
14583589) - 2021 - CRC - 10/1/20
Driving and Operating 205
Parking (Manual Transmission)
{Warning
If the vehicle has a manual transmission,
never get out of the vehicle without first
moving the shift lever into 1st or
R (Reverse), setting the parking brake and
turning the ignition off. The vehicle can
roll, which could cause serious injury or
death.
Parking over Things That Burn
{Warning
Things that can burn could touch hot
exhaust parts under the vehicle and
ignite. Do not park over papers, leaves,
dry grass, or other things that can burn.
Active Fuel Management
Vehicles with V6 and V8 engines and an
automatic transmission have Active Fuel
Management. This system allows the engine
to operate on either all or four of its
cylinders, depending on the driving
conditions.When less power is required, such as
cruising at a constant vehicle speed, the
system will operate in four cylinder mode,
allowing the vehicle to achieve better fuel
economy. When greater power demands are
required, such as accelerating from a stop,
passing, or merging onto a freeway, the
system will maintain full-cylinder operation.
Extended Parking
It is best not to park with the vehicle
running. If the vehicle is left running, be
sure it will not move and there is adequate
ventilation. See
Shifting Into Park 0203 and
Engine Exhaust 0205.
If the vehicle is left parked and running with
the Remote Keyless Entry (RKE) transmitter
outside the vehicle, it will continue to run
for up to half an hour.
If the vehicle is left parked and running with
the RKE transmitter inside the vehicle, it will
continue to run for up to an hour.
The vehicle could turn off sooner if it is
parked on a hill, due to lack of
available fuel.
Automatic Transmission
The timer will reset if the vehicle is taken
out of P (Park) while it is running. Manual Transmission
The timer will reset if vehicle speed exceeds
4 km/h (2.5 mph).
Engine Exhaust
{
Warning
Engine exhaust contains carbon monoxide
(CO), which cannot be seen or smelled.
Exposure to CO can cause
unconsciousness and even death.
Exhaust may enter the vehicle if:
.The vehicle idles in areas with poor
ventilation (parking garages, tunnels,
deep snow that may block underbody
airflow or tail pipes).
.The exhaust smells or sounds strange
or different.
.The exhaust system leaks due to
corrosion or damage.
.The vehicle exhaust system has been
modified, damaged, or improperly
repaired. (Continued)
Page 210 of 354

Chevrolet Camaro Owner Manual (GMNA-Localizing-U.S./Canada/Mexico-
14583589) - 2021 - CRC - 10/1/20
Driving and Operating 209
the steering wheel. The paddles are on the
back of the steering wheel. Tap the left
paddle (−) to downshift, and the right
paddle (+) to upshift. The Driver Information
Center (DIC) display indicates the gear the
vehicle is in.
Holding the left paddle for an extended time
will downshift the transmission to the
lowest available gear.
While in Manual Mode, the transmission will
prevent shifting to a lower gear if the
engine speed is too high. If the tap down
−(Minus) paddle is held while the vehicle
slows down, the M in the DIC will flash, and
the downshift will be allowed when vehicle
speed is low enough. Continuing to hold the
tap down −(Minus) paddle will not cause
the transmission to continue downshifting.
Each downshift must be requested
separately by releasing and reapplying the
tap down −(Minus) paddle.
Head-Up Display (HUD)
Vehicles equipped with a Head-Up Display
(HUD) may also have performance shift
timing lights across the top of the display. The rows of lights get closer together as the
maximum shift point gets closer. Shift the
transmission before the lights come together
in the display. Shift immediately if the lights
are flashing.
See
Head-Up Display (HUD) 0100.
Temporary Tap Shift Mode allows brief
entry into Tap Shift Mode while in D (Drive).
Tapping either the upshift or downshift
control will place the transmission in Tap
Shift Mode. Exit Tap Shift Mode by holding
the upshift control for two seconds. The
system will return to automatic shifting
after seven seconds of driving at a steady
speed, or when the vehicle comes to a stop.
This may be used for sport driving or when
climbing or descending hills, to stay in gear
longer, or to downshift for more power or
engine braking. The transmission will only
allow you to shift into gears appropriate for
the vehicle speed and engine revolutions per
minute (rpm). The transmission will not
automatically shift to the next higher gear if
the engine rpm is too high. If shifting is
prevented for any reason, the gear displayed
in the DIC will blink several times, indicating
that the transmission has not shifted gears. While in the Tap Shift Mode, the
transmission will not automatically
downshift on hard acceleration.
Manual Transmission
Shift Pattern
–V8 Engine
Page 218 of 354

Chevrolet Camaro Owner Manual (GMNA-Localizing-U.S./Canada/Mexico-
14583589) - 2021 - CRC - 10/1/20
Driving and Operating 217
Tour Mode
Use for normal city and highway driving to
provide a smooth, soft ride. This setting
provides a balanced setting between comfort
and handling. This is the standard mode.
Sport Mode
Use where road conditions or personal
preference demand a more controlled
response.
When Sport Mode is selected, the
transmission may downshift to a lower gear
for better performance. The transmission
will continue to shift automatically but can
hold a lower gear longer than it would in
the Tour Mode based on braking, throttle
input, and vehicle lateral acceleration. See
Automatic Transmission0206. The steering
will change to provide more precise control.
If the vehicle has Magnetic Ride Control, the
suspension will change to provide better
cornering performance. If the vehicle is
equipped with Active Exhaust, the exhaust
valves will open earlier and more often.
Competitive Driving Mode can be accessed
through this mode by pressing
Yon the
console twice. This Competitive Driving Mode is only on SS,
1LE, and ZL1 vehicles. For example, a vehicle
with a V6 engine and automatic
transmission will have Sport Mode, but will
not be able to access Competitive
Driving Mode.
Snow/Ice Mode
If equipped, use when more traction is
needed during slippery conditions. The
automatic transmission will upshift normally
when the vehicle is moving. The acceleration
will adjust to help provide a smoother
launch. The automatic transmission will also
shift differently to assist in maintaining
traction.
This feature is not intended for use when
the vehicle is stuck in sand, mud, ice, snow,
or gravel. If the vehicle becomes stuck, see
If
the Vehicle Is Stuck 0195.
Track Mode
If equipped, use when maximum vehicle
handling is desired.
When Track Mode is selected, the
transmission may downshift to a lower gear
for better performance. The automatic
transmission and steering will function
similar to Sport Mode.
The accelerator pedal is adjusted to give
maximum control during the highest level of
spirited driving. The Magnetic Ride Control
will be set to the optimum level for vehicle
responsiveness. If the vehicle is equipped
with Active Exhaust, the exhaust valves will
open. Performance Traction Management
(PTM) can be accessed through this mode by
pressing
Yon the console twice.
There are attributes that vary by mode
shown below. Not all vehicles have all
features, depending on the vehicle options.
Page 222 of 354
Chevrolet Camaro Owner Manual (GMNA-Localizing-U.S./Canada/Mexico-
14583589) - 2021 - CRC - 10/1/20
Driving and Operating 221
{Warning
Cruise control can be dangerous where
you cannot drive safely at a steady
speed. Do not use cruise control on
winding roads or in heavy traffic.
Cruise control can be dangerous on
slippery roads. On such roads, fast
changes in tire traction can cause
excessive wheel slip, and you could lose
control. Do not use cruise control on
slippery roads.
If equipped with a manual transmission, the
cruise control will remain active when the
gears are shifted. The cruise is disengaged if
the clutch is pressed for several seconds.
If the StabiliTrak/Electronic Stability Control
(ESC) system begins to limit wheel spin
while using cruise control, the cruise control
automatically disengages. See Traction
Control/Electronic Stability Control 0214.
When road conditions allow you to safely
use it again, cruise control can be turned
back on.
Cruise control will disengage if either TCS or
StabiliTrak/ESC is turned off. Cruise control is not available when using
Competitive Driving Mode, if equipped. See
Competitive Driving Mode (SS, ZL1 and 1LE
Models Only)
0219.
If the brakes are applied, cruise control
disengages.
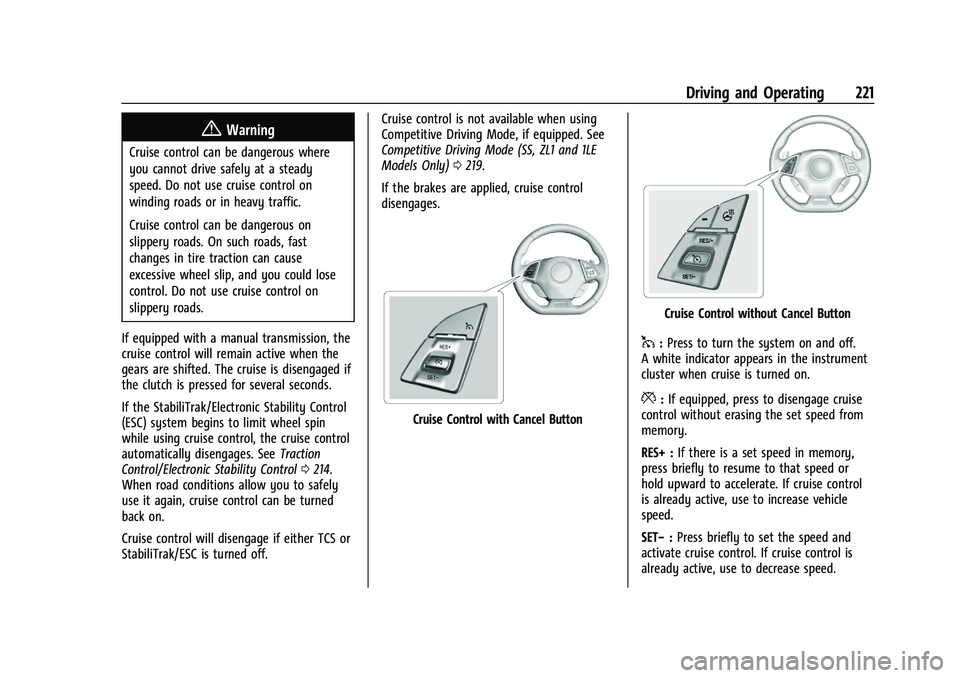
Cruise Control with Cancel Button
Cruise Control without Cancel Button
1: Press to turn the system on and off.
A white indicator appears in the instrument
cluster when cruise is turned on.
*: If equipped, press to disengage cruise
control without erasing the set speed from
memory.
RES+ : If there is a set speed in memory,
press briefly to resume to that speed or
hold upward to accelerate. If cruise control
is already active, use to increase vehicle
speed.
SET− :Press briefly to set the speed and
activate cruise control. If cruise control is
already active, use to decrease speed.
Page 273 of 354
Chevrolet Camaro Owner Manual (GMNA-Localizing-U.S./Canada/Mexico-
14583589) - 2021 - CRC - 10/1/20
272 Vehicle Care
designator which can also identify the
tire manufacturer, production plant,
brand, and date of production.
GVWR
:Gross Vehicle Weight Rating.
See Vehicle Load Limits 0196.
GAWR FRT
:Gross Axle Weight Rating
for the front axle. See Vehicle Load
Limits 0196.
GAWR RR
:Gross Axle Weight Rating
for the rear axle. See Vehicle Load
Limits 0196.
Intended Outboard Sidewall
:The side
of an asymmetrical tire that must
always face outward when mounted on
a vehicle.
Kilopascal (kPa)
:The metric unit for air
pressure.
Light Truck (LT-Metric) Tire
:A tire used
on light duty trucks and some
multipurpose passenger vehicles.
Load Index
:An assigned number
ranging from 1 to 279 that corresponds
to the load carrying capacity of a tire. Maximum Inflation Pressure
:The
maximum air pressure to which a cold
tire can be inflated. The maximum air
pressure is molded onto the sidewall.
Maximum Load Rating
:The load rating
for a tire at the maximum permissible
inflation pressure for that tire.
Maximum Loaded Vehicle Weight
:The
sum of curb weight, accessory weight,
vehicle capacity weight, and production
options weight.
Normal Occupant Weight
:The number
of occupants a vehicle is designed to
seat multiplied by 68 kg (150 lb). See
Vehicle Load Limits 0196.
Occupant Distribution
:Designated
seating positions.
Outward Facing Sidewall
:The side of
an asymmetrical tire that has a
particular side that faces outward when
mounted on a vehicle. The side of the
tire that contains a whitewall, bears
white lettering, or bears manufacturer,
brand, and/or model name molding that is higher or deeper than the same
moldings on the other sidewall of
the tire.
Passenger (P-Metric) Tire
:A tire used
on passenger cars and some light duty
trucks and multipurpose vehicles.
Recommended Inflation Pressure
:
Vehicle manufacturer's recommended
tire inflation pressure as shown on the
tire placard. See Tire Pressure0273 and
Vehicle Load Limits 0196.
Radial Ply Tire
:A pneumatic tire in
which the ply cords that extend to the
beads are laid at 90 degrees to the
centerline of the tread.
Rim
:A metal support for a tire and
upon which the tire beads are seated.
Sidewall
:The portion of a tire between
the tread and the bead.
Speed Rating
:An alphanumeric code
assigned to a tire indicating the
maximum speed at which a tire can
operate.
Page 279 of 354

Chevrolet Camaro Owner Manual (GMNA-Localizing-U.S./Canada/Mexico-
14583589) - 2021 - CRC - 10/1/20
278 Vehicle Care
briefly press the center of the valve stem.
When the recommended pressure is reached,
the horn sounds once.
If the turn signal lamp does not flash within
15 seconds after starting to inflate the tire,
the tire fill alert has not been activated or is
not working.
If the hazard warning flashers are on, the
tire fill alert visual feedback will not work
properly.
The TPMS will not activate the tire fill alert
properly under the following conditions:
.There is interference from an external
device or transmitter.
.The air pressure from the inflation device
is not sufficient to inflate the tire.
.There is a malfunction in the TPMS.
.There is a malfunction in the horn or turn
signal lamps.
.The identification code of the TPMS
sensor is not registered to the system.
.The battery of the TPMS sensor is low.
If the tire fill alert does not operate due to
TPMS interference, move the vehicle about
1 m (3 ft) back or forward and try again.
If the tire fill alert feature is not working,
use a tire pressure gauge.
TPMS Sensor Matching Process
Each TPMS sensor has a unique
identification code. The identification code
needs to be matched to a new tire/wheel
position after rotating the vehicle’s tires or
replacing one or more of the TPMS sensors.
The TPMS sensor matching process should
also be performed after replacing a spare
tire with a road tire containing the TPMS
sensor. The malfunction light and the DIC
message should go off at the next ignition
cycle. The sensors are matched to the tire/
wheel positions, using a TPMS relearn tool,
in the following order: driver side front tire,
passenger side front tire, passenger side rear
tire, and driver side rear. See your dealer for
service or to purchase a relearn tool.
A TPMS relearn tool can also be purchased.
See Tire Pressure Monitor Sensor Activation
Tool at www.gmtoolsandequipment.com or
call 1-800-GM TOOLS (1-800-468-6657).
There are two minutes to match the first
tire/wheel position, and five minutes overall
to match all four tire/wheel positions. If it
takes longer, the matching process stops
and must be restarted.
The TPMS sensor matching process is: 1. Set the parking brake. 2. Place the vehicle in Service Mode. See
Ignition Positions 0199.
3. Make sure the Tire Pressure info display option is turned on. The info displays on
the DIC can be turned on and off
through the Options menu. See Driver
Information Center (DIC) 097.
4. Use the five-way DIC control on the right side of the steering wheel to scroll to
the Tire Pressure screen under the DIC
info page. See Driver Information Center
(DIC) 097.
5. Press and hold SEL in the center of the five-way DIC control.
The horn sounds twice to signal the
receiver is in relearn mode and the TIRE
LEARNING ACTIVE message displays on
the DIC screen.
6. Start with the driver side front tire.
7. Place the relearn tool against the tire sidewall, near the valve stem. Then press
the button to activate the TPMS sensor.
A horn chirp confirms that the sensor
identification code has been matched to
this tire and wheel position.
8. Proceed to the passenger side front tire, and repeat Step 7.