parking brake CHEVROLET CAMARO 2023 Owners Manual
[x] Cancel search | Manufacturer: CHEVROLET, Model Year: 2023, Model line: CAMARO, Model: CHEVROLET CAMARO 2023Pages: 345, PDF Size: 16.19 MB
Page 6 of 345
Chevrolet Camaro Owner Manual (GMNA-Localizing-U.S./Canada/Mexico-
16408685) - 2023 - CRC - 3/28/22
Introduction 5
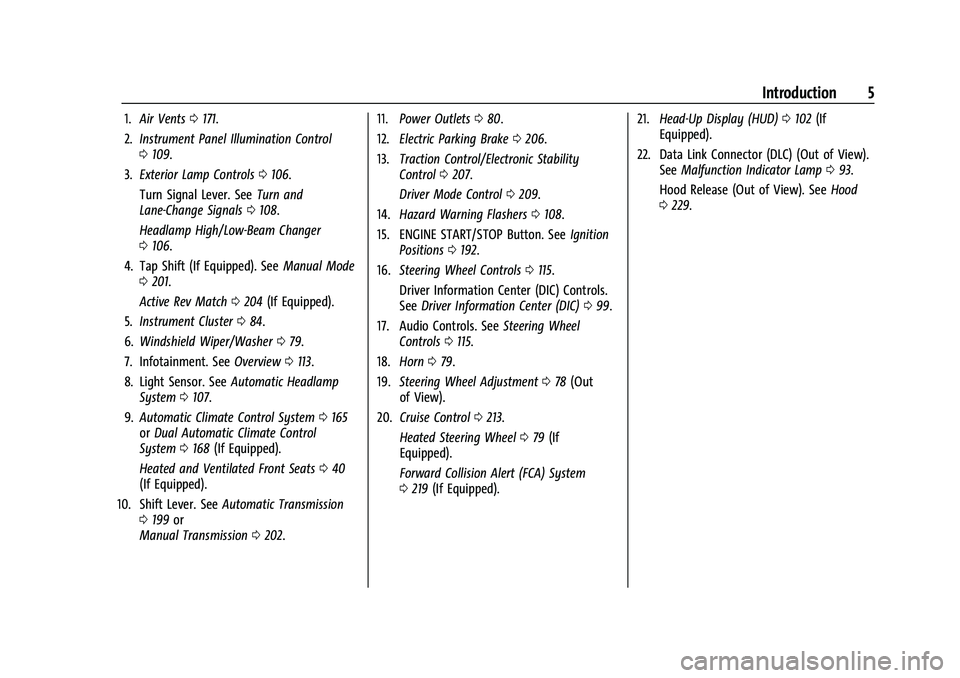
1.Air Vents 0171.
2. Instrument Panel Illumination Control
0109.
3. Exterior Lamp Controls 0106.
Turn Signal Lever. See Turn and
Lane-Change Signals 0108.
Headlamp High/Low-Beam Changer
0 106.
4. Tap Shift (If Equipped). See Manual Mode
0 201.
Active Rev Match 0204 (If Equipped).
5. Instrument Cluster 084.
6. Windshield Wiper/Washer 079.
7. Infotainment. See Overview0113.
8. Light Sensor. See Automatic Headlamp
System 0107.
9. Automatic Climate Control System 0165
or Dual Automatic Climate Control
System 0168 (If Equipped).
Heated and Ventilated Front Seats 040
(If Equipped).
10. Shift Lever. See Automatic Transmission
0 199 or
Manual Transmission 0202. 11.
Power Outlets 080.
12. Electric Parking Brake 0206.
13. Traction Control/Electronic Stability
Control 0207.
Driver Mode Control 0209.
14. Hazard Warning Flashers 0108.
15. ENGINE START/STOP Button. See Ignition
Positions 0192.
16. Steering Wheel Controls 0115.
Driver Information Center (DIC) Controls.
See Driver Information Center (DIC) 099.
17. Audio Controls. See Steering Wheel
Controls 0115.
18. Horn 079.
19. Steering Wheel Adjustment 078 (Out
of View).
20. Cruise Control 0213.
Heated Steering Wheel 079 (If
Equipped).
Forward Collision Alert (FCA) System
0 219 (If Equipped). 21.
Head-Up Display (HUD) 0102 (If
Equipped).
22. Data Link Connector (DLC) (Out of View). SeeMalfunction Indicator Lamp 093.
Hood Release (Out of View). See Hood
0 229.
Page 20 of 345
Chevrolet Camaro Owner Manual (GMNA-Localizing-U.S./Canada/Mexico-
16408685) - 2023 - CRC - 3/28/22
Keys, Doors, and Windows 19
.Press the touch pad in the area above the
license plate after unlocking all doors.
.For Keyless Access, press the touch pad in
the area above the license plate when the
remote key is within 1 m (3 ft) of the rear
of the vehicle.
For automatic transmissions, the vehicle
must be in P (Park). For manual
transmissions, the vehicle must be off,
or stationary with the parking brake set.
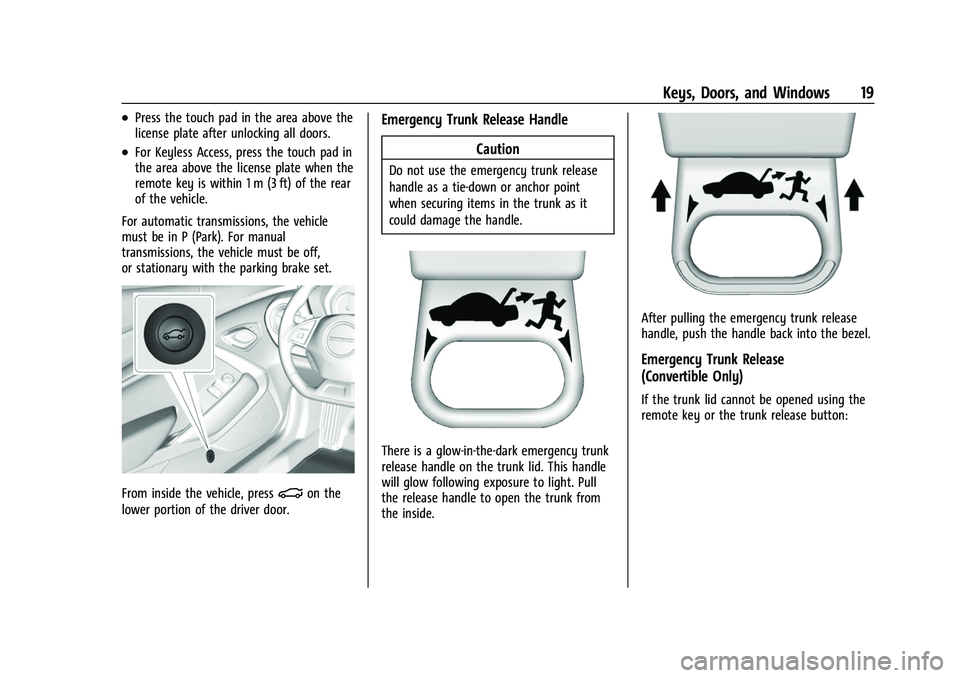
From inside the vehicle, press|on the
lower portion of the driver door.
Emergency Trunk Release Handle
Caution
Do not use the emergency trunk release
handle as a tie-down or anchor point
when securing items in the trunk as it
could damage the handle.
There is a glow-in-the-dark emergency trunk
release handle on the trunk lid. This handle
will glow following exposure to light. Pull
the release handle to open the trunk from
the inside.
After pulling the emergency trunk release
handle, push the handle back into the bezel.
Emergency Trunk Release
(Convertible Only)
If the trunk lid cannot be opened using the
remote key or the trunk release button:
Page 40 of 345
Chevrolet Camaro Owner Manual (GMNA-Localizing-U.S./Canada/Mexico-
16408685) - 2023 - CRC - 3/28/22
Seats and Restraints 39
If manual transmission equipped, Manual
Memory recall movement for 1, 2, or
B
buttons may be initiated and will complete
to the saved memory position if the vehicle
parking brake is set or released.
Enabling Automatic Recalls
.Seat Entry Memory moves the driver seat
to the selected 1 or 2 position when the
vehicle is started. Select Settings > Vehicle
> Seating Position > Seat Entry Memory >
ON or OFF. See“Auto Seat Entry Memory
Recall” later in this section.
.Seat Exit Memory moves the driver seat
to the preferred exit position of the
B
button when the vehicle is turned off and
the door is opened. Select Settings >
Vehicle > Seating Position > Seat Exit
Memory > ON or OFF. See “Auto Seat Exit
Memory Recall” later in this section.
Auto Seat Entry Memory Recall
Seat Entry Memory will automatically begin
movement to the seating positions of the 1
or 2 button corresponding to the driver’s
remote key number 1 or 2 detected by the
vehicle when:
.The vehicle is turned ON.
.Seating positions have been previously
saved to the same 1 or 2 button. See
“Saving Seating Positions” previously in
this section.
.Seat Entry Memory is enabled. See
“Enabling Automatic Recalls” previously in
this section.
.The shift lever is in P (Park).
.If manual transmission equipped, the
parking brake must be set.
Seat Entry Memory Recall will continue if
the vehicle is shifted out of P (Park) prior to
reaching the saved memory position.
If manual transmission equipped, Seat Entry
Memory Recall will continue if the parking
brake is released prior to reaching the saved
memory position.
If the saved memory seat position does not
automatically recall, verify the recall is
enabled. See “Enabling Automatic Recalls”
previously in this section.
If the memory seat recalls to the wrong
position, the driver’s remote key number 1
or 2 may not match the memory button
number positions they were saved to. Try
the other remote key or try saving the positions to the other 1 or 2 memory
button. See
“Saving Seating Positions”
previously in this section.
Automatic Seat Entry Memory recalls are
only available for driver’s remote key
numbers 1 and 2. Remote key 3–8 will not
provide Seat Entry Memory recalls.
Auto Seat Exit Memory Recall
Seat Exit Memory will begin movement to
the seating position of the
B
button when:
.The vehicle is turned off and the driver
door is open or opened within a
short time.
.A seating position has been previously
been saved to the
Bmemory button.
See “Saving Seating Positions” previously
in this section.
.Seat Exit Memory is enabled. See
“Enabling Automatic Recalls” previously in
this section.
.The shift lever is in P (Park).
.If manual transmission equipped, the
parking brake must be set.
Seat Exit Memory recall will continue if the
vehicle is shifted out of P (Park) prior to
reaching the saved memory position.
Page 41 of 345
Chevrolet Camaro Owner Manual (GMNA-Localizing-U.S./Canada/Mexico-
16408685) - 2023 - CRC - 3/28/22
40 Seats and Restraints
If manual transmission equipped, Seat Exit
Memory will continue if the parking brake is
released prior to reaching the save memory
position.
Seat Exit Memory is not linked to the
driver’s remote key. The seating position
saved to
Bis used for all drivers.
Cancel Memory Seating Recalls
.During any memory recall:
Press a power seat control
Press SET memory button
.During Manual memory recall:
Release 1, 2, or
Bmemory button
.During Auto Seat Entry Memory Recall:
Turn vehicle off
Press SET, 1, 2, or
Bmemory buttons
.During Auto Seat Exit Memory Recall:
Press SET, 1, 2, or
Bmemory buttons
Obstructions
If something has blocked the seat while
recalling a memory position, the recall may
stop. Remove the obstruction and try the
recall again. If the memory position still
does not recall, see your dealer.
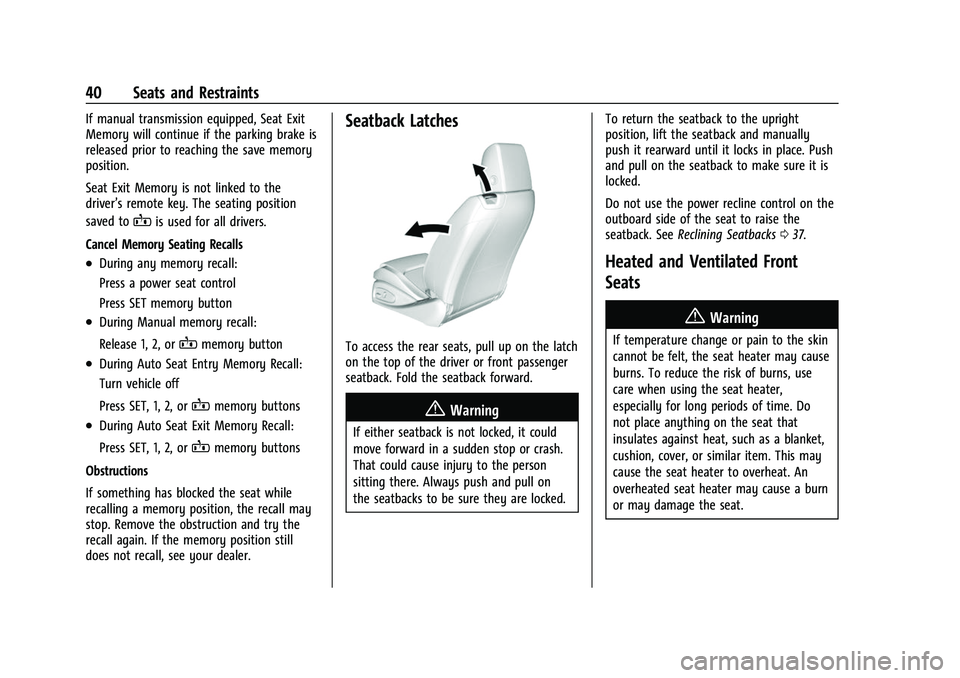
Seatback Latches
To access the rear seats, pull up on the latch
on the top of the driver or front passenger
seatback. Fold the seatback forward.
{Warning
If either seatback is not locked, it could
move forward in a sudden stop or crash.
That could cause injury to the person
sitting there. Always push and pull on
the seatbacks to be sure they are locked. To return the seatback to the upright
position, lift the seatback and manually
push it rearward until it locks in place. Push
and pull on the seatback to make sure it is
locked.
Do not use the power recline control on the
outboard side of the seat to raise the
seatback. See
Reclining Seatbacks 037.
Heated and Ventilated Front
Seats
{Warning
If temperature change or pain to the skin
cannot be felt, the seat heater may cause
burns. To reduce the risk of burns, use
care when using the seat heater,
especially for long periods of time. Do
not place anything on the seat that
insulates against heat, such as a blanket,
cushion, cover, or similar item. This may
cause the seat heater to overheat. An
overheated seat heater may cause a burn
or may damage the seat.
Page 79 of 345
Chevrolet Camaro Owner Manual (GMNA-Localizing-U.S./Canada/Mexico-
16408685) - 2023 - CRC - 3/28/22
78 Instruments and Controls
Instruments and Controls
Controls
Steering Wheel Adjustment . . . . . . . . . . . . 78
Heated Steering Wheel . . . . . . . . . . . . . . . . . 79
Horn . . . . . . . . . . . . . . . . . . . . . . . . . . . . . . . . . . . 79
Windshield Wiper/Washer . . . . . . . . . . . . . . 79
Compass . . . . . . . . . . . . . . . . . . . . . . . . . . . . . . . 80
Clock . . . . . . . . . . . . . . . . . . . . . . . . . . . . . . . . . . . 80
Power Outlets . . . . . . . . . . . . . . . . . . . . . . . . . . 80
Wireless Charging . . . . . . . . . . . . . . . . . . . . . . 81
Warning Lights, Gauges, and Indicators
Warning Lights, Gauges, andIndicators . . . . . . . . . . . . . . . . . . . . . . . . . . . . . 83
Instrument Cluster . . . . . . . . . . . . . . . . . . . . . 84
Speedometer . . . . . . . . . . . . . . . . . . . . . . . . . . . 87
Odometer . . . . . . . . . . . . . . . . . . . . . . . . . . . . . . 88
Trip Odometer . . . . . . . . . . . . . . . . . . . . . . . . . 88
Tachometer . . . . . . . . . . . . . . . . . . . . . . . . . . . . 88
Fuel Gauge . . . . . . . . . . . . . . . . . . . . . . . . . . . . . 88
Boost Gauge (Uplevel Cluster Only) . . . . 89
Engine Oil Pressure Gauge (Uplevel Cluster Only) . . . . . . . . . . . . . . . . . . . . . . . . . 89
Engine Coolant Temperature Gauge . . . . 90
Voltmeter Gauge (Uplevel Cluster Only) . . . . . . . . . . . . . . . . . . . . . . . . . . 91
Seat Belt Reminders . . . . . . . . . . . . . . . . . . . . 91
Airbag Readiness Light . . . . . . . . . . . . . . . . . 92
Passenger Airbag Status Indicator . . . . . . 92 Charging System Light . . . . . . . . . . . . . . . . . 93
Malfunction Indicator Lamp . . . . . . . . . . . . 93
Brake System Warning Light . . . . . . . . . . . 95
Electric Parking Brake Light . . . . . . . . . . . . . 95
Service Electric Parking Brake Light . . . . . 95
Antilock Brake System (ABS) Warning
Light . . . . . . . . . . . . . . . . . . . . . . . . . . . . . . . . . 96
Performance Shifting Light . . . . . . . . . . . . . 96
Vehicle Ahead Indicator . . . . . . . . . . . . . . . . 96
Traction Off Light . . . . . . . . . . . . . . . . . . . . . . 96
StabiliTrak OFF Light . . . . . . . . . . . . . . . . . . . . 97
Traction Control System (TCS)/StabiliTrak Light . . . . . . . . . . . . . . . . . . . . . . . . . . . . . . . . . . 97
Tire Pressure Light . . . . . . . . . . . . . . . . . . . . . . 97
Engine Oil Pressure Light . . . . . . . . . . . . . . . 98
Low Fuel Warning Light . . . . . . . . . . . . . . . . 98
Security Light . . . . . . . . . . . . . . . . . . . . . . . . . . 98
High-Beam On Light . . . . . . . . . . . . . . . . . . . . 99
Lamps On Reminder . . . . . . . . . . . . . . . . . . . . 99
Cruise Control Light . . . . . . . . . . . . . . . . . . . . 99
Door Ajar Light . . . . . . . . . . . . . . . . . . . . . . . . . 99
Information Displays
Driver Information Center (DIC) . . . . . . . . 99
Head-Up Display (HUD) . . . . . . . . . . . . . . . . 102
Vehicle Messages
Vehicle Messages . . . . . . . . . . . . . . . . . . . . . . 105
Engine Power Messages . . . . . . . . . . . . . . . 105
Vehicle Speed Messages . . . . . . . . . . . . . . . 105
Controls
Steering Wheel Adjustment
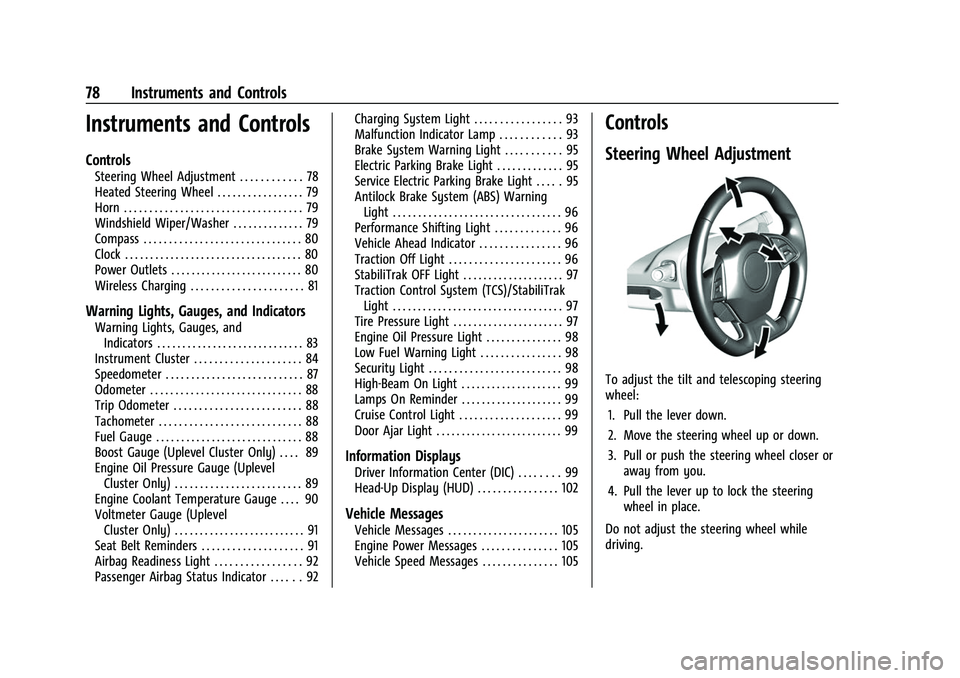
To adjust the tilt and telescoping steering
wheel:
1. Pull the lever down.
2. Move the steering wheel up or down.
3. Pull or push the steering wheel closer or away from you.
4. Pull the lever up to lock the steering wheel in place.
Do not adjust the steering wheel while
driving.
Page 96 of 345
Chevrolet Camaro Owner Manual (GMNA-Localizing-U.S./Canada/Mexico-
16408685) - 2023 - CRC - 3/28/22
Instruments and Controls 95
operation. SeeAdd-On Electrical Equipment
0 226. See your dealer if assistance is
needed.
The vehicle may not pass inspection if:
.The light is on when the engine is
running.
.The light does not come on when the
ignition is in Service Mode.
.Critical emission control systems have not
been completely diagnosed. If this
happens, the vehicle would not be ready
for inspection and might require
several days of routine driving before the
system is ready for inspection. This can
happen if the 12-volt battery has recently
been replaced or run down, or if the
vehicle has been recently serviced.
See your dealer if the vehicle will not pass
or cannot be made ready for the test.
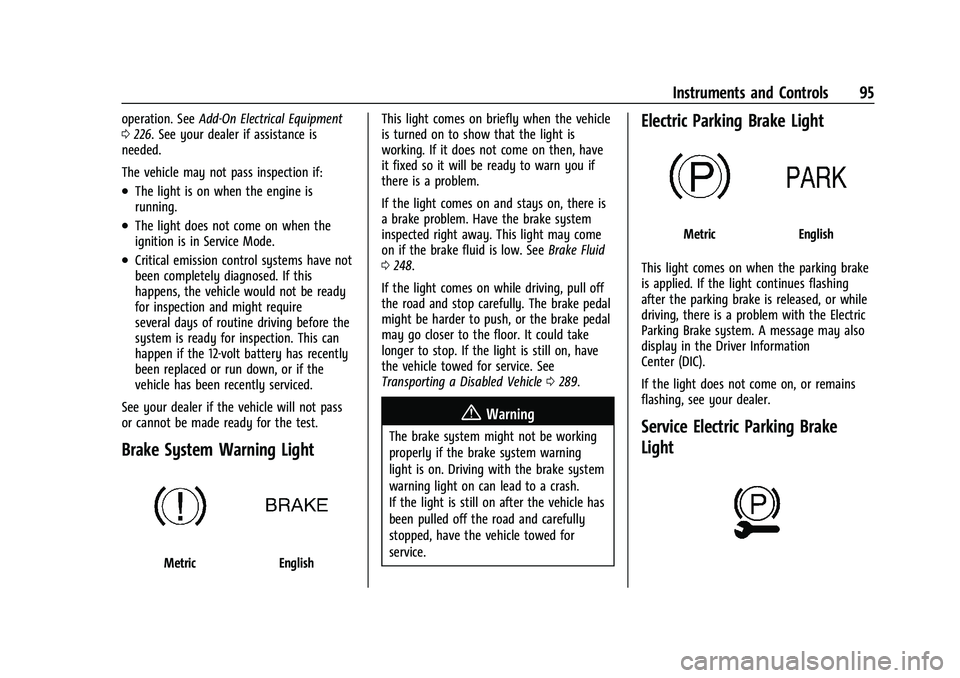
Brake System Warning Light
MetricEnglish This light comes on briefly when the vehicle
is turned on to show that the light is
working. If it does not come on then, have
it fixed so it will be ready to warn you if
there is a problem.
If the light comes on and stays on, there is
a brake problem. Have the brake system
inspected right away. This light may come
on if the brake fluid is low. See
Brake Fluid
0 248.
If the light comes on while driving, pull off
the road and stop carefully. The brake pedal
might be harder to push, or the brake pedal
may go closer to the floor. It could take
longer to stop. If the light is still on, have
the vehicle towed for service. See
Transporting a Disabled Vehicle 0289.
{Warning
The brake system might not be working
properly if the brake system warning
light is on. Driving with the brake system
warning light on can lead to a crash.
If the light is still on after the vehicle has
been pulled off the road and carefully
stopped, have the vehicle towed for
service.
Electric Parking Brake Light
MetricEnglish
This light comes on when the parking brake
is applied. If the light continues flashing
after the parking brake is released, or while
driving, there is a problem with the Electric
Parking Brake system. A message may also
display in the Driver Information
Center (DIC).
If the light does not come on, or remains
flashing, see your dealer.
Service Electric Parking Brake
Light
Page 97 of 345
Chevrolet Camaro Owner Manual (GMNA-Localizing-U.S./Canada/Mexico-
16408685) - 2023 - CRC - 3/28/22
96 Instruments and Controls
This light should come on briefly when the
vehicle is turned on. If it does not come on,
have it fixed so it will be ready to warn if
there is a problem.
If this light stays on or comes on while
driving, there is a problem with the Electric
Parking Brake (EPB). Take the vehicle to a
dealer as soon as possible. In addition to the
parking brake, other safety functions that
utilize the EPB may also be degraded.
A message may also display in the Driver
Information Center (DIC). SeeElectric Parking
Brake 0206.
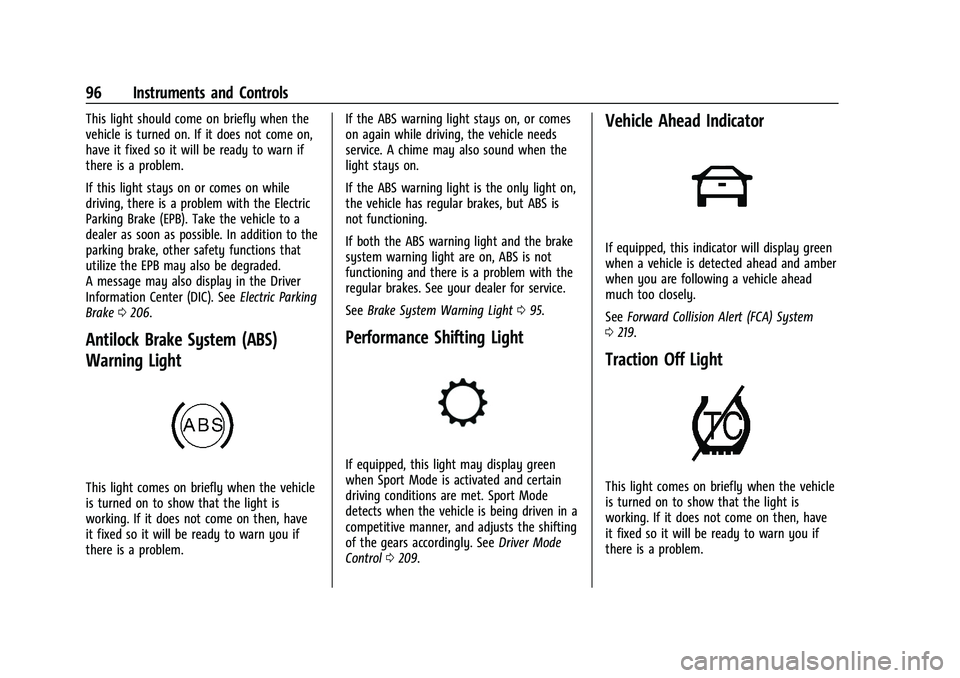
Antilock Brake System (ABS)
Warning Light
This light comes on briefly when the vehicle
is turned on to show that the light is
working. If it does not come on then, have
it fixed so it will be ready to warn you if
there is a problem. If the ABS warning light stays on, or comes
on again while driving, the vehicle needs
service. A chime may also sound when the
light stays on.
If the ABS warning light is the only light on,
the vehicle has regular brakes, but ABS is
not functioning.
If both the ABS warning light and the brake
system warning light are on, ABS is not
functioning and there is a problem with the
regular brakes. See your dealer for service.
See
Brake System Warning Light 095.
Performance Shifting Light
If equipped, this light may display green
when Sport Mode is activated and certain
driving conditions are met. Sport Mode
detects when the vehicle is being driven in a
competitive manner, and adjusts the shifting
of the gears accordingly. See Driver Mode
Control 0209.
Vehicle Ahead Indicator
If equipped, this indicator will display green
when a vehicle is detected ahead and amber
when you are following a vehicle ahead
much too closely.
See Forward Collision Alert (FCA) System
0 219.
Traction Off Light
This light comes on briefly when the vehicle
is turned on to show that the light is
working. If it does not come on then, have
it fixed so it will be ready to warn you if
there is a problem.
Page 157 of 345
Chevrolet Camaro Owner Manual (GMNA-Localizing-U.S./Canada/Mexico-
16408685) - 2023 - CRC - 3/28/22
156 Infotainment System
.Access or delete Report Card data.
Set up/Add keys to activate Teen Driver and
assign restrictions to the key:
Any vehicle key can be registered, up to a
maximum of eight keys. Label the key to
tell it apart from the other keys.
For a pushbutton start system: 1. Start the vehicle.
2. For automatic transmissions, the vehicle must be in P (Park). For manual
transmissions, the vehicle must be
stopped with the parking brake set.
3. From the Settings menu, touch Vehicle and then Teen Driver.
4. Enter the PIN.
5. Place the remote key you wish to register in the transmitter pocket. The
key does not need to be the one that
started the vehicle. See Remote Key
Operation 07for transmitter pocket
location.
6. From the Teen Driver menu, touch Setup Keys or Add/Remove Teen Driver Keys.
.If the remote key has not previously
been registered, the option to add
the key displays. Touch Add and a
confirmation message displays. Teen Driver restrictions will be applied
whenever this remote key is used to
operate the vehicle.
.If the remote key has already been
registered, the option to remove the
key displays. If Remove is touched,
the remote key is no longer
registered. A confirmation message
displays, and Teen Driver restrictions
will not be applied if this remote key
is used to operate the vehicle.
In vehicles with a pushbutton start system,
if a Teen Driver and a non-Teen Driver key
are both present at start up, the vehicle will
recognize the non-Teen Driver key to start
the vehicle. The Teen Driver settings will not
be active.
For a keyed ignition system: 1. Start the vehicle.
2. For automatic transmissions, the vehicle must be in P (Park). For manual
transmissions, the vehicle must be
stopped with the parking brake set.
3. From the Settings menu, touch Vehicle and then Teen Driver.
4. Enter the PIN. 5. Touch Setup Keys or Add/Remove Teen
Driver Keys. The system displays
instructions for registering or
unregistering a key. A confirmation
message displays.
Manage Settings or Teen Driver Settings
Depending on the options of your vehicle,
the following menu items may be displayed:
Buckle to Drive : When turned ON, Buckle to
Drive prevents the driver from shifting out
of P (Park) for a period of time after the
brake pedal is pressed if the driver, or on
some vehicles the detected passenger, has
not buckled their seat belt. On some
vehicles, Buckle to Drive is always ON when
Teen Driver is active and is not configurable.
Audio Volume Limit : Allows a maximum
audio volume to be set. Turn the audio
volume limit on or off. Use the arrows to
choose the maximum allowable level for the
audio volume. On some infotainment
systems, touch Set Audio Volume Limit to
choose the maximum allowable audio
volume level.
Set Audio Volume Limit : Use the arrows to
choose the maximum allowable level for the
audio volume.
Page 174 of 345
Chevrolet Camaro Owner Manual (GMNA-Localizing-U.S./Canada/Mexico-
16408685) - 2023 - CRC - 3/28/22
Driving and Operating 173
Driving and Operating
Driving Information
Driving for Better Fuel Economy . . . . . . . 174
Distracted Driving . . . . . . . . . . . . . . . . . . . . . 174
Defensive Driving . . . . . . . . . . . . . . . . . . . . . . 175
Impaired Driving . . . . . . . . . . . . . . . . . . . . . . . 175
Control of a Vehicle . . . . . . . . . . . . . . . . . . . . 175
Braking . . . . . . . . . . . . . . . . . . . . . . . . . . . . . . . . 175
Steering . . . . . . . . . . . . . . . . . . . . . . . . . . . . . . . 176
Off-Road Recovery . . . . . . . . . . . . . . . . . . . . . 176
Loss of Control . . . . . . . . . . . . . . . . . . . . . . . . . 177
Track Events and CompetitiveDriving . . . . . . . . . . . . . . . . . . . . . . . . . . . . . . . 177
Driving on Wet Roads . . . . . . . . . . . . . . . . . 186
Hill and Mountain Roads . . . . . . . . . . . . . . 186
Winter Driving . . . . . . . . . . . . . . . . . . . . . . . . . 187
If the Vehicle Is Stuck . . . . . . . . . . . . . . . . . 188
Vehicle Load Limits . . . . . . . . . . . . . . . . . . . . 188
Starting and Operating
New Vehicle Break-In . . . . . . . . . . . . . . . . . . 191
Ignition Positions . . . . . . . . . . . . . . . . . . . . . . 192
Starting the Engine . . . . . . . . . . . . . . . . . . . . 193
Engine Heater . . . . . . . . . . . . . . . . . . . . . . . . . 195
Retained Accessory Power (RAP) . . . . . . . 196
Shifting Into Park . . . . . . . . . . . . . . . . . . . . . 196
Shifting out of Park . . . . . . . . . . . . . . . . . . . 197 Parking (Manual Transmission) . . . . . . . . 198
Parking over Things That Burn . . . . . . . . 198
Active Fuel Management . . . . . . . . . . . . . . 198
Extended Parking . . . . . . . . . . . . . . . . . . . . . . 198
Engine Exhaust
Engine Exhaust . . . . . . . . . . . . . . . . . . . . . . . . 198
Running the Vehicle While Parked . . . . . 199
Automatic Transmission
Automatic Transmission . . . . . . . . . . . . . . . 199
Manual Mode . . . . . . . . . . . . . . . . . . . . . . . . . 201
Manual Transmission
Manual Transmission . . . . . . . . . . . . . . . . . . 202
Active Rev Match . . . . . . . . . . . . . . . . . . . . . 204
Brakes
Antilock Brake System (ABS) . . . . . . . . . . 205
Electric Parking Brake . . . . . . . . . . . . . . . . . 206
Brake Assist . . . . . . . . . . . . . . . . . . . . . . . . . . . 207
Hill Start Assist (HSA) . . . . . . . . . . . . . . . . . 207
Ride Control Systems
Traction Control/Electronic Stability
Control . . . . . . . . . . . . . . . . . . . . . . . . . . . . . . 207
Driver Mode Control . . . . . . . . . . . . . . . . . . 209
Competitive Driving Mode (SS, ZL1 and 1LE Models Only) . . . . . . . . . . . . . . . . . . . . . 212
Limited-Slip Rear Axle . . . . . . . . . . . . . . . . . . 213
Cruise Control
Cruise Control . . . . . . . . . . . . . . . . . . . . . . . . . . 213
Driver Assistance Systems
Driver Assistance Systems . . . . . . . . . . . . . 216
Assistance Systems for Parking or Backing . . . . . . . . . . . . . . . . . . . . . . . . . . . . . . 217
Rear Vision Camera (RVC) . . . . . . . . . . . . . . 217
Park Assist . . . . . . . . . . . . . . . . . . . . . . . . . . . . . 218
Rear Cross Traffic Alert (RCTA) System . . . . . . . . . . . . . . . . . . . . . . . . . . . . . . 219
Forward Collision Alert (FCA) System . . . . . . . . . . . . . . . . . . . . . . . . . . . . . . 219
Side Blind Zone Alert (SBZA) . . . . . . . . . . 220
Lane Change Alert (LCA) . . . . . . . . . . . . . . . 221
Fuel
Top Tier Fuel . . . . . . . . . . . . . . . . . . . . . . . . . . 222
Recommended Fuel (3.6L V6 Engine) . . . . . . . . . . . . . . . . . . . . . . . . . . . 223
Recommended Fuel (2.0L L4 Turbo Engine and 6.2L V8 Engine) . . . . . . . . . . 223
Recommended Fuel (6.2L V8 Supercharged Engine) . . . . . . . . . . . . . . . . 223
Prohibited Fuels . . . . . . . . . . . . . . . . . . . . . . . 224
Fuels in Foreign Countries . . . . . . . . . . . . . 224
Fuel Additives . . . . . . . . . . . . . . . . . . . . . . . . . 224
Filling the Tank . . . . . . . . . . . . . . . . . . . . . . . . 224
Filling a Portable Fuel Container . . . . . . . 226
Page 177 of 345
Chevrolet Camaro Owner Manual (GMNA-Localizing-U.S./Canada/Mexico-
16408685) - 2023 - CRC - 3/28/22
176 Driving and Operating
applied. Once the power assist is used up, it
can take longer to stop and the brake pedal
will be harder to push.
Steering
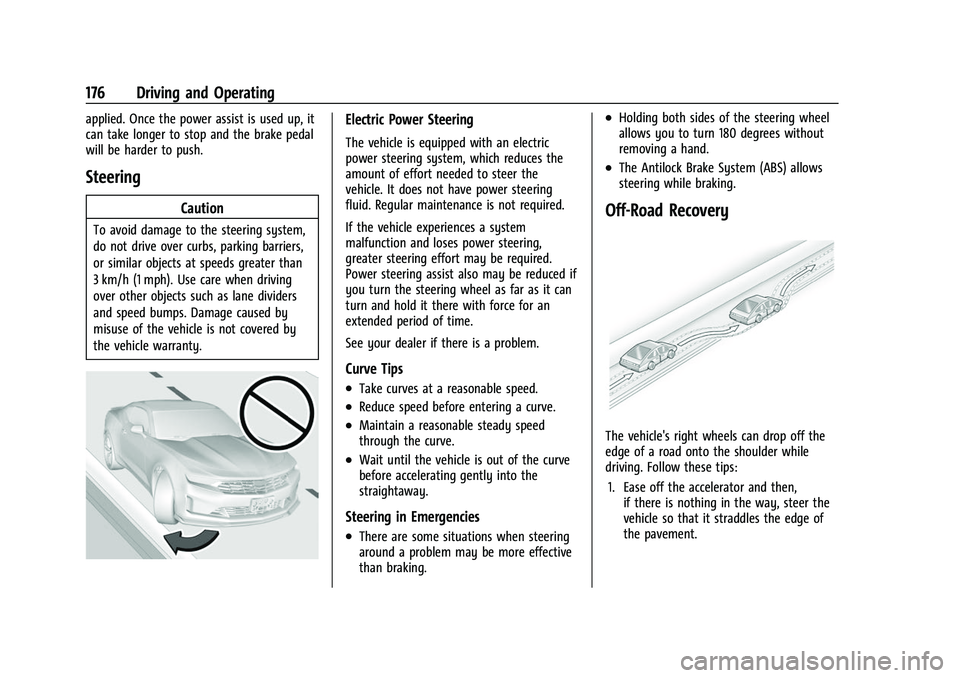
Caution
To avoid damage to the steering system,
do not drive over curbs, parking barriers,
or similar objects at speeds greater than
3 km/h (1 mph). Use care when driving
over other objects such as lane dividers
and speed bumps. Damage caused by
misuse of the vehicle is not covered by
the vehicle warranty.
Electric Power Steering
The vehicle is equipped with an electric
power steering system, which reduces the
amount of effort needed to steer the
vehicle. It does not have power steering
fluid. Regular maintenance is not required.
If the vehicle experiences a system
malfunction and loses power steering,
greater steering effort may be required.
Power steering assist also may be reduced if
you turn the steering wheel as far as it can
turn and hold it there with force for an
extended period of time.
See your dealer if there is a problem.
Curve Tips
.Take curves at a reasonable speed.
.Reduce speed before entering a curve.
.Maintain a reasonable steady speed
through the curve.
.Wait until the vehicle is out of the curve
before accelerating gently into the
straightaway.
Steering in Emergencies
.There are some situations when steering
around a problem may be more effective
than braking.
.Holding both sides of the steering wheel
allows you to turn 180 degrees without
removing a hand.
.The Antilock Brake System (ABS) allows
steering while braking.
Off-Road Recovery
The vehicle's right wheels can drop off the
edge of a road onto the shoulder while
driving. Follow these tips:1. Ease off the accelerator and then, if there is nothing in the way, steer the
vehicle so that it straddles the edge of
the pavement.