clock CHEVROLET CAPTIVA SPORT 2014 User Guide
[x] Cancel search | Manufacturer: CHEVROLET, Model Year: 2014, Model line: CAPTIVA SPORT, Model: CHEVROLET CAPTIVA SPORT 2014Pages: 382, PDF Size: 4.12 MB
Page 231 of 382
Black plate (39,1)Chevrolet Captiva Sport Owner Manual (GMNA-Localizing-U.S./Mexico-
6014141) - 2014 - crc - 8/13/13
Driving and Operating 9-39
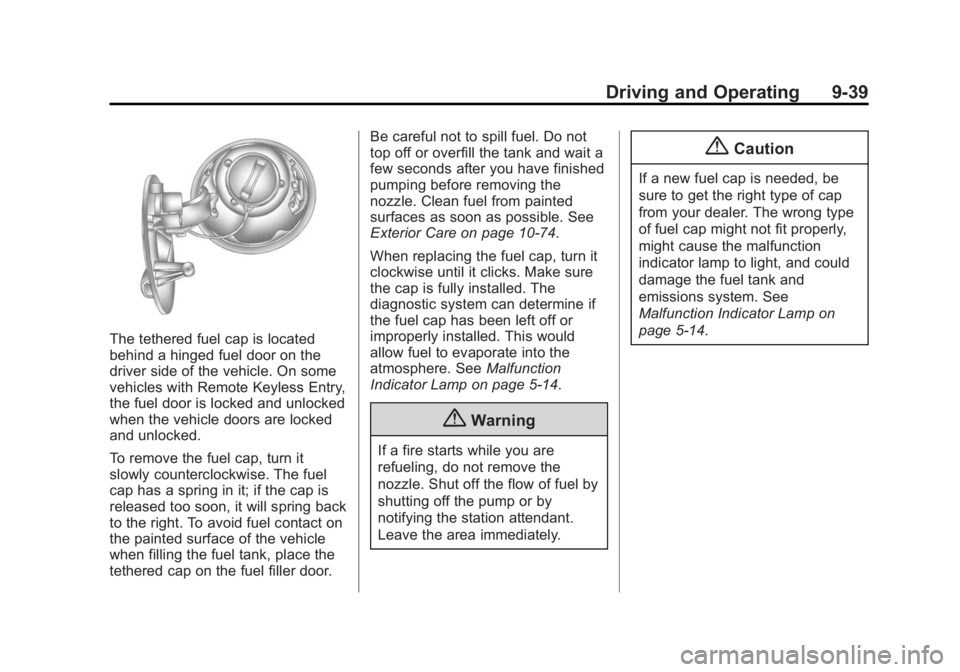
The tethered fuel cap is located
behind a hinged fuel door on the
driver side of the vehicle. On some
vehicles with Remote Keyless Entry,
the fuel door is locked and unlocked
when the vehicle doors are locked
and unlocked.
To remove the fuel cap, turn it
slowly counterclockwise. The fuel
cap has a spring in it; if the cap is
released too soon, it will spring back
to the right. To avoid fuel contact on
the painted surface of the vehicle
when filling the fuel tank, place the
tethered cap on the fuel filler door.Be careful not to spill fuel. Do not
top off or overfill the tank and wait a
few seconds after you have finished
pumping before removing the
nozzle. Clean fuel from painted
surfaces as soon as possible. See
Exterior Care on page 10-74.
When replacing the fuel cap, turn it
clockwise until it clicks. Make sure
the cap is fully installed. The
diagnostic system can determine if
the fuel cap has been left off or
improperly installed. This would
allow fuel to evaporate into the
atmosphere. See
Malfunction
Indicator Lamp on page 5-14.
{Warning
If a fire starts while you are
refueling, do not remove the
nozzle. Shut off the flow of fuel by
shutting off the pump or by
notifying the station attendant.
Leave the area immediately.
{Caution
If a new fuel cap is needed, be
sure to get the right type of cap
from your dealer. The wrong type
of fuel cap might not fit properly,
might cause the malfunction
indicator lamp to light, and could
damage the fuel tank and
emissions system. See
Malfunction Indicator Lamp on
page 5-14.
Page 258 of 382
Black plate (18,1)Chevrolet Captiva Sport Owner Manual (GMNA-Localizing-U.S./Mexico-
6014141) - 2014 - crc - 8/13/13
10-18 Vehicle Care
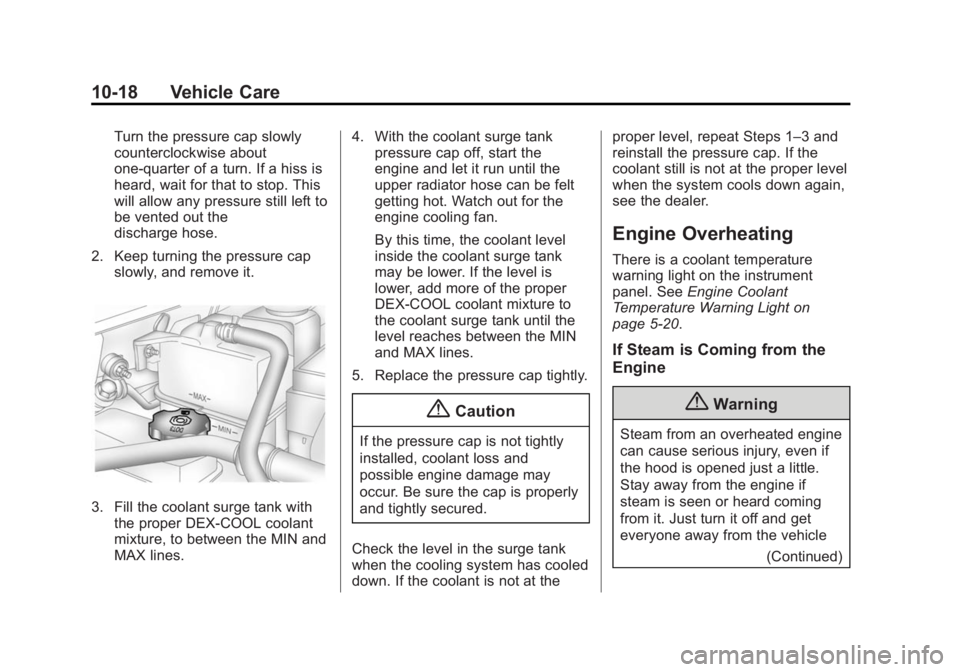
Turn the pressure cap slowly
counterclockwise about
one-quarter of a turn. If a hiss is
heard, wait for that to stop. This
will allow any pressure still left to
be vented out the
discharge hose.
2. Keep turning the pressure cap slowly, and remove it.
3. Fill the coolant surge tank with
the proper DEX-COOL coolant
mixture, to between the MIN and
MAX lines. 4. With the coolant surge tank
pressure cap off, start the
engine and let it run until the
upper radiator hose can be felt
getting hot. Watch out for the
engine cooling fan.
By this time, the coolant level
inside the coolant surge tank
may be lower. If the level is
lower, add more of the proper
DEX-COOL coolant mixture to
the coolant surge tank until the
level reaches between the MIN
and MAX lines.
5. Replace the pressure cap tightly.
{Caution
If the pressure cap is not tightly
installed, coolant loss and
possible engine damage may
occur. Be sure the cap is properly
and tightly secured.
Check the level in the surge tank
when the cooling system has cooled
down. If the coolant is not at the proper level, repeat Steps 1–3 and
reinstall the pressure cap. If the
coolant still is not at the proper level
when the system cools down again,
see the dealer.
Engine Overheating
There is a coolant temperature
warning light on the instrument
panel. See
Engine Coolant
Temperature Warning Light on
page 5-20.
If Steam is Coming from the
Engine
{Warning
Steam from an overheated engine
can cause serious injury, even if
the hood is opened just a little.
Stay away from the engine if
steam is seen or heard coming
from it. Just turn it off and get
everyone away from the vehicle
(Continued)
Page 268 of 382

Black plate (28,1)Chevrolet Captiva Sport Owner Manual (GMNA-Localizing-U.S./Mexico-
6014141) - 2014 - crc - 8/13/13
10-28 Vehicle Care
5. Disconnect the electricalconnector from the bulb
assembly.
6. Turn the bulb assembly counterclockwise to remove it
from the housing.
7. Replace the old bulb with a new one.
8. Reverse Steps 1–6 to reinstall.
Fog Lamps
To replace the front fog lamp bulb:
1. Locate the fog lamp located under the front fascia. 2. Remove the bulb by turning it
counterclockwise and pulling it
straight out of the assembly.
3. Disconnect the electrical connector from the fog lamp bulb
assembly.
4. Install the new bulb by turning it clockwise into the assembly.
5. Reconnect the electrical connector.
Front Turn Signal and
Parking Lamps
To replace a front turn signal or
parking lamp bulb:
1. Follow Steps 1–4 underHeadlamps on page 10-27 to
access the front turn signal or
parking lamp.
2. Turn the bulb to be replaced
counterclockwise to remove it
from the headlamp assembly.
3. Pull the bulb out of the bulb socket assembly.
4. Push the new bulb into the bulb socket assembly.
5. Insert the bulb assembly into the headlamp assembly.
6. Turn the bulb assembly clockwise until seated.
7. Reverse the steps to reinstall the headlamp assembly.
Page 269 of 382

Black plate (29,1)Chevrolet Captiva Sport Owner Manual (GMNA-Localizing-U.S./Mexico-
6014141) - 2014 - crc - 8/13/13
Vehicle Care 10-29
Taillamps, Turn Signal,
Stoplamps, and Back-Up
Lamps
To replace one of these bulbs:
1. Back-Up Lamp
2. Turn Signal Lamp
3. Stoplamp/Taillamp
4. Taillamp
1. Open the liftgate. SeeLiftgate
on page 2-8.
2. Remove the two screws holding in the taillamp assembly.
3. Slide the taillamp assembly rearward and away from the
vehicle.
4. Turn the bulb socket being replaced counterclockwise to
disconnect it.
5. Pull the bulb out of the bulb socket.
6. Push the new bulb into the bulb socket.
7. Reverse Steps 2–4 to reinstall the taillamp assembly.
License Plate Lamp
To replace one of these bulbs:
1. Remove the two screws holdingeach of the license plate lamps
to the fascia.
2. Turn and pull the license plate
lamp forward through the fascia
opening.
3. Turn the bulb socket counterclockwise and pull the
bulb straight out of the socket.
Page 270 of 382

Black plate (30,1)Chevrolet Captiva Sport Owner Manual (GMNA-Localizing-U.S./Mexico-
6014141) - 2014 - crc - 8/13/13
10-30 Vehicle Care
4. Push the new bulb into the bulbsocket and turn it clockwise to
lock it into place.
5. Push and turn the license plate lamp back through the fascia
opening.
6. Reinstall the two screws holding the license plate lamp to the
fascia.Replacement Bulbs
Exterior Lamp Bulb Number
Back-Up Lamp 921
Front Fog Lamp H11
Front Turn Signal/
Parking Lamp 3157K
Headlamps High-Beam 9005 or HB3
Low-Beam/DRL 9006 or HB4
License Plate Lamp 168LL
Rear Stoplamp, and
Taillamp 7443
Rear Turn
Signal Lamp 3757 NAK
For replacement bulbs not listed
here, contact your dealer.
Electrical System
Electrical System
Overload
The vehicle has fuses and circuit
breakers to protect against an
electrical system overload.
When the current electrical load is
too heavy, the circuit breaker opens
and closes, protecting the circuit
until the current load returns to
normal or the problem is fixed. This
greatly reduces the chance of circuit
overload and fire caused by
electrical problems.
Fuses and circuit breakers protect
power devices in the vehicle.
Replace a bad fuse with a new one
of the identical size and rating.
If there is a problem on the road and
a fuse needs to be replaced, the
same amperage fuse can be
borrowed. Choose some feature of
the vehicle that is not needed to use
and replace it as soon as possible.
Page 300 of 382

Black plate (60,1)Chevrolet Captiva Sport Owner Manual (GMNA-Localizing-U.S./Mexico-
6014141) - 2014 - crc - 8/13/13
10-60 Vehicle Care
5. Remove the wheel retainer boltholding down the spare tire by
turning it counterclockwise.
6. Remove the compact spare tire. See Compact Spare Tire on
page 10-65 for more information.
The tools are located between the
compact spare tire and the liftgate.
To access the tools:
1. Tool Bag
2. Wing-bolt
3. Jack 1. Remove the wing-bolt (2) from
the jack.
2. Remove the jack (3) and tool bag (1).
3. Remove the straps holding the bag containing the wheel wrench
and extension jack handle, if the
vehicle has one.
Remove the wheel wrench and
extension jack handle, if the
vehicle has one, from the bag.
Removing the Flat Tire and
Installing the Spare Tire
1. Do a safety check before
proceeding. See If a Tire Goes
Flat on page 10-57 for more
information.
2. Use the wheel wrench to loosen
all the wheel nuts. Do not
remove them yet.
Page 302 of 382

Black plate (62,1)Chevrolet Captiva Sport Owner Manual (GMNA-Localizing-U.S./Mexico-
6014141) - 2014 - crc - 8/13/13
10-62 Vehicle Care
4. If you have a coin/pierce jack,attach the jack handle extension
to the jack by sliding the hook
through the end of the jack and
insert the other end of the jack
handle into the wrench.
If you have a hex-head jack,
attach the jack lift-assist tool by
placing the hex of the jack
lift-assist tool over the hex head
of the jack.
Coin/Pierce Jack and Wrench
Hex Head Jack and Wrench
5. Raise the vehicle by turning the jack handle clockwise. Raise the
vehicle far enough off the
ground so there is enough room
for the road tire to be removed.
6. Remove all of the wheel nuts.
7. Remove the flat tire.
8. Remove any rust or dirt from the wheel bolts, mounting surfaces
and spare wheel.
{Warning
Rust or dirt on a wheel, or on the
parts to which it is fastened, can
make wheel nuts become loose
after time. The wheel could come
off and cause an accident. When
changing a wheel, remove any
rust or dirt from places where the
wheel attaches to the vehicle. In
an emergency, a cloth or a paper
towel can be used; however, use
a scraper or wire brush later to
remove all rust or dirt.
9. Place the compact spare tire on the wheel-mounting surface.
10. Reinstall the wheel nuts. Tighten each nut by hand until
the wheel is held against
the hub.
Page 303 of 382

Black plate (63,1)Chevrolet Captiva Sport Owner Manual (GMNA-Localizing-U.S./Mexico-
6014141) - 2014 - crc - 8/13/13
Vehicle Care 10-63
{Warning
Never use oil or grease on bolts
or nuts because the nuts might
come loose. The vehicle's wheel
could fall off, causing a crash.
11. Lower the vehicle by turning the jack handle
counterclockwise.
12. Tighten the wheel nuts firmly ina crisscross sequence, as
shown.
{Warning
Wheel nuts that are improperly or
incorrectly tightened can cause
the wheels to become loose or
come off. The wheel nuts should
be tightened with a torque wrench
to the proper torque specification
after replacing. Follow the torque
specification supplied by the
aftermarket manufacturer when
using accessory locking wheel
nuts. See Capacities and
Specifications on page 12-2 for
original equipment wheel nut
torque specifications.
{Caution
Improperly tightened wheel nuts
can lead to brake pulsation and
rotor damage. To avoid expensive
brake repairs, evenly tighten the
wheel nuts in the proper
(Continued)
Caution (Continued)
sequence and to the proper
torque specification. See
Capacities and Specifications for
the wheel nut torque specification.
13. Lower the jack all the way and remove the jack from under the
vehicle.
14. Tighten the bolts firmly with the wheel wrench.
When reinstalling full plastic covers
or center caps, tighten all the plastic
caps hand snug, then tighten with
the wheel wrench an additional
one-quarter of a turn.
{Caution
Wheel covers will not fit on the
vehicle's compact spare. If you try
to put a wheel cover on the
compact spare, the cover or the
spare could be damaged.
Page 305 of 382

Black plate (65,1)Chevrolet Captiva Sport Owner Manual (GMNA-Localizing-U.S./Mexico-
6014141) - 2014 - crc - 8/13/13
Vehicle Care 10-65
After
5. Remove the disk from the retainer bolt. Turn the disk over
and place it back on the
retainer bolt.
Return the disk back to its
original position after removing
the flat tire from the spare tire
compartment and before storing
the spare tire.6. Place the wheel retainer boltonto the wheel stow rod and
tighten by turning it clockwise.
The compact spare is for temporary
use only. Replace the compact
spare tire with a full-size tire as
soon as possible.
Compact Spare Tire
{Warning
Driving with more than one
compact spare tire at a time could
result in loss of braking and
handling. This could lead to a
crash and you or others could be
injured. Use only one compact
spare tire at a time.
If this vehicle has a compact spare
tire, it was fully inflated when new;
however, it can lose air over time.
Check the inflation pressure
regularly. It should be 420 kPa
(60 psi).
Stop as soon as possible and check
that the spare tire is correctly
inflated after being installed on the
vehicle. The compact spare tire is
designed for temporary use only.
The vehicle will perform differently
with the spare tire installed and it is
recommended that the vehicle
speed be limited to 80 km/h
Page 372 of 382
Black plate (2,1)Chevrolet Captiva Sport Owner Manual (GMNA-Localizing-U.S./Mexico-
6014141) - 2014 - crc - 8/13/13
i-2 INDEX
B
Battery . . . . . . . . . . . . . . . . . . . . . . . 10-23Jump Starting . . . . . . . . . . . . . . . 10-66
Load Management . . . . . . . . . . . . . 6-6
Power Protection . . . . . . . . . . . . . . 6-6
Blade Replacement, Wiper . . . 10-25
Bluetooth Overview . . . . . . . . . . . . . . . . . . . . . 7-24
Brake System Warning Light . . . . . . . . 5-16
Brakes . . . . . . . . . . . . . . . . . . . . . . . . 10-21
Antilock . . . . . . . . . . . . . . . . . . . . . . . 9-25
Fluid . . . . . . . . . . . . . . . . . . . . . . . . 10-22
Parking . . . . . . . . . . . . . . . . . . . . . . . 9-26
System Messages . . . . . . . . . . . . 5-29
Braking . . . . . . . . . . . . . . . . . . . . . . . . . 9-4
Break-In, New Vehicle . . . . . . . . . 9-14
Bulb Replacement . . . . . . . . . . . . 10-30
Fog Lamps . . . . . . . . . . . . . 6-4, 10-28
Front Turn Signal andParking Lamps . . . . . . . . . . . . 10-28
Halogen Bulbs . . . . . . . . . . . . . . 10-27
Headlamp Aiming . . . . . . . . . . . 10-27 Bulb Replacement (cont'd)
Headlamps . . . . . . . . . . . . . . . . . 10-27
License Plate Lamps . . . . . . . 10-29
Taillamps, Turn Signal,
Stoplamps, and
Back-up Lamps . . . . . . . . . . . 10-29
Buying New Tires . . . . . . . . . . . . . 10-52
C
Calibration . . . . . . . . . . . . . . . . . . . . . . 5-4
California Fuel Requirements . . . . . . . . . . . 9-36
Camera Rear Vision (RVC) . . . . . . . . . . . . 9-34
Capacities and Specifications . . . . . . . . . . . . . . . . 12-2
Carbon Monoxide Engine Exhaust . . . . . . . . . . . . . . . 9-20
Liftgate . . . . . . . . . . . . . . . . . . . . . . . . 2-8
Winter Driving . . . . . . . . . . . . . . . . . 9-8
Cargo Cover . . . . . . . . . . . . . . . . . . . . . . . . . . 4-2
Management System . . . . . . . . . . 4-2
Tie-Downs . . . . . . . . . . . . . . . . . . . . . 4-2
Cautions, Danger, and
Warnings . . . . . . . . . . . . . . . . . . . . . . . . iii CD Player . . . . . . . . . . . . . . . . . . . . . 7-11
Center Console Storage . . . . . . . . 4-2
Chains, Tire . . . . . . . . . . . . . . . . . . 10-57
Charging System Light . . . . . . . . 5-13
Check
Engine Light . . . . . . . . . . . . . . . . . . 5-14
IgnitionTransmission Lock . . . . . . . . 10-25
Child Restraints Infants and YoungChildren . . . . . . . . . . . . . . . . . . . . . 3-32
Lower Anchors and Tethers for Children . . . . . . . . . 3-38
Older Children . . . . . . . . . . . . . . . . 3-30
Securing . . . . . . . . . . . . . . . . 3-44, 3-46
Systems . . . . . . . . . . . . . . . . . . . . . . 3-35
Circuit Breakers . . . . . . . . . . . . . . 10-31
Cleaning Exterior Care . . . . . . . . . . . . . . . 10-74
Interior Care . . . . . . . . . . . . . . . . 10-78
Climate Control Systems . . . . . . . 8-1
Air Conditioning . . . . . . . . . . . . . . . 8-1
Automatic . . . . . . . . . . . . . . . . . . . . . . 8-5
Heating . . . . . . . . . . . . . . . . . . . . . . . . 8-1
Clock . . . . . . . . . . . . . . . . . . . . . . . . . . . 5-6
Cluster, Instrument . . . . . . . . . . . . . 5-9