ABS CHEVROLET CAPTIVA SPORT 2014 Owner's Manual
[x] Cancel search | Manufacturer: CHEVROLET, Model Year: 2014, Model line: CAPTIVA SPORT, Model: CHEVROLET CAPTIVA SPORT 2014Pages: 382, PDF Size: 4.12 MB
Page 4 of 382
Black plate (4,1)Chevrolet Captiva Sport Owner Manual (GMNA-Localizing-U.S./Mexico-
6014141) - 2014 - crc - 8/13/13
iv Introduction
{Warning
Text marked{Warning provides
information on risk of accident or
injury. Disregarding this
information may lead to injury.
{Caution
Text marked{Caution provides
information that may indicate a
hazard that could result in injury
or death. It could also result in
possible damage to the vehicle.
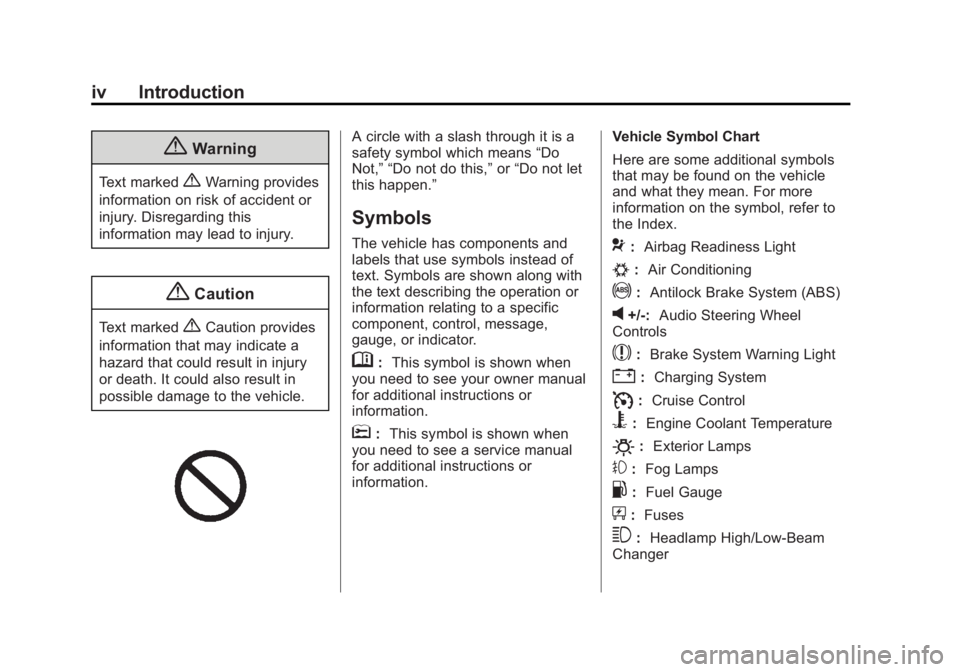
A circle with a slash through it is a
safety symbol which means “Do
Not,” “Do not do this,” or“Do not let
this happen.”
Symbols
The vehicle has components and
labels that use symbols instead of
text. Symbols are shown along with
the text describing the operation or
information relating to a specific
component, control, message,
gauge, or indicator.
M: This symbol is shown when
you need to see your owner manual
for additional instructions or
information.
*: This symbol is shown when
you need to see a service manual
for additional instructions or
information. Vehicle Symbol Chart
Here are some additional symbols
that may be found on the vehicle
and what they mean. For more
information on the symbol, refer to
the Index.
9:
Airbag Readiness Light
#:Air Conditioning
!:Antilock Brake System (ABS)
v+/-: Audio Steering Wheel
Controls
$: Brake System Warning Light
":Charging System
I:Cruise Control
B: Engine Coolant Temperature
O:Exterior Lamps
#:Fog Lamps
.: Fuel Gauge
+:Fuses
3: Headlamp High/Low-Beam
Changer
Page 22 of 382
Black plate (16,1)Chevrolet Captiva Sport Owner Manual (GMNA-Localizing-U.S./Mexico-
6014141) - 2014 - crc - 8/13/13
1-16 In Brief
2. Press the plus/minus buttonlocated on the shift lever, to
increase or decrease the gear
range available.
See Manual Mode on page 9-23.Vehicle Features
Radio(s)
O
:Press to turn the system on
and off. Turn to increase or
decrease the volume.
BAND: Press to choose between
FM, AM, or SiriusXM
®, if equipped.
f: Select radio stations.
©SEEK or¨SEEK: Seek or scan
stations.
4(Information): If equipped with
XM, MP3, WMA, or RDS features,
press to display additional text
information related to the current
FM-RDS or SiriusXM station, or CD,
MP3, or WMA song. Song title
information will be displayed on the
top line of the display while the artist
information will be displayed on the
bottom line, if the information is
available during XM, CD, MP3,
or WMA playback. When
information is not available, "No
Info" displays. For more information about these
and other radio features, see
Operation on page 7-4.
Storing a Favorite Station
A maximum of 36 stations can be
stored as favorites using the six
softkeys below the radio station
frequency tabs and by using the
radio FAV button. Press FAV to go
through up to six pages of favorites,
each having six favorite stations
available per page. Each page of
favorites can contain any
combination of AM, FM, or SiriusXM
stations.
See
Operation on page 7-4.
Setting the Clock
To set the time and date:
1. Turn the ignition key to ACC/
ACCESSORY or ON/RUN.
2. Press
Oto turn the radio on.
3. Press
Hand HR, MIN, MM, DD,
and YYYY (hour, minute, month,
day, and year) display.
Page 99 of 382
Black plate (1,1)Chevrolet Captiva Sport Owner Manual (GMNA-Localizing-U.S./Mexico-
6014141) - 2014 - crc - 8/13/13
Instruments and Controls 5-1
Instruments and
Controls
Controls
Steering Wheel Adjustment . . . 5-2
Steering Wheel Controls . . . . . . 5-2
Horn . . . . . . . . . . . . . . . . . . . . . . . . . . 5-3
Windshield Wiper/Washer . . . . . 5-3
Rear Window Wiper/Washer . . . . . . . . . . . . . . . . . . . . . . 5-4
Compass . . . . . . . . . . . . . . . . . . . . . 5-4
Clock . . . . . . . . . . . . . . . . . . . . . . . . . 5-6
Power Outlets . . . . . . . . . . . . . . . . . 5-7
Warning Lights, Gauges, and
Indicators
Warning Lights, Gauges, and Indicators . . . . . . . . . . . . . . . . . . . . 5-8
Instrument Cluster . . . . . . . . . . . . 5-9
Speedometer . . . . . . . . . . . . . . . . 5-10
Odometer . . . . . . . . . . . . . . . . . . . . 5-10
Trip Odometer . . . . . . . . . . . . . . . 5-10
Tachometer . . . . . . . . . . . . . . . . . . 5-10
Fuel Gauge . . . . . . . . . . . . . . . . . . 5-10
Safety Belt Reminders . . . . . . . 5-11
Airbag Readiness Light . . . . . . 5-12 Passenger Airbag Status
Indicator . . . . . . . . . . . . . . . . . . . . 5-13
Charging System Light . . . . . . 5-13
Malfunction Indicator Lamp . . . . . . . . . . . . . 5-14
Service Vehicle Soon Light . . . . . . . . . . . . . . . . . . . . . . . 5-16
Brake System Warning Light . . . . . . . . . . . . . . . . . . . . . . . 5-16
Electric Parking Brake Light . . . . . . . . . . . . . . . . . . . . . . . 5-17
Antilock Brake System (ABS) Warning Light . . . . . . . . . . . . . . 5-18
All-Wheel-Drive Light . . . . . . . . 5-19
Power Steering Warning Light . . . . . . . . . . . . . . . . . . . . . . . 5-19
StabiliTrak
®Indicator Light . . . 5-19
Traction Control System (TCS) Warning Light . . . . . . . 5-20
Engine Coolant Temperature Warning Light . . . . . . . . . . . . . . 5-20
Tire Pressure Light . . . . . . . . . . 5-21
Fuel Economy Light . . . . . . . . . 5-21
Low Fuel Warning Light . . . . . . 5-21
Security Light . . . . . . . . . . . . . . . . 5-21
Reduced Engine Power Light . . . . . . . . . . . . . . . . . . . . . . . 5-22
High-Beam On Light . . . . . . . . . 5-22
Front Fog Lamp Light . . . . . . . . 5-22 Low Washer Fluid Warning
Light . . . . . . . . . . . . . . . . . . . . . . . 5-23
Cruise Control Light . . . . . . . . . 5-23
Door Ajar Light . . . . . . . . . . . . . . 5-23
Gate Ajar Light . . . . . . . . . . . . . . 5-23
Information Displays
Driver Information Center (DIC) . . . . . . . . . . . . . . . 5-24
Vehicle Messages
Vehicle Messages . . . . . . . . . . . 5-28
Brake System Messages . . . . 5-29
Compass Messages . . . . . . . . . 5-29
Cruise Control Messages . . . . 5-30
Door Ajar Messages . . . . . . . . . 5-30
Engine Cooling SystemMessages . . . . . . . . . . . . . . . . . . 5-30
Engine Oil Messages . . . . . . . . 5-31
Engine Power Messages . . . . 5-32
Fuel System Messages . . . . . . 5-32
Key and Lock Messages . . . . . 5-32
Lamp Messages . . . . . . . . . . . . . 5-32
Object Detection System Messages . . . . . . . . . . . . . . . . . . 5-33
Ride Control System Messages . . . . . . . . . . . . . . . . . . 5-33
Airbag System Messages . . . . 5-34
Service Vehicle Messages . . . 5-34
Page 104 of 382
Black plate (6,1)Chevrolet Captiva Sport Owner Manual (GMNA-Localizing-U.S./Mexico-
6014141) - 2014 - crc - 8/13/13
5-6 Instruments and Controls
note pad holder, or any other
magnetic item. Turn off the vehicle,
move the magnetic item, then turn
on the vehicle and calibrate the
compass.
To calibrate the compass, use the
following procedure:
Compass Calibration Procedure
1. Before calibrating the compass,make sure the compass is set to
the variance zone in which the
vehicle is located. See
“Compass Variance (Zone)
Procedure” earlier in this
section.
Do not operate any switches
such as window, sunroof,
climate controls, seats, etc.
during the calibration procedure.
2. Press the vehicle information button until PRESS
VTO
CALIBRATE COMPASS
displays.
3. Press the set/reset button to start the compass calibration. 4. The DIC will display
CALIBRATING COMPASS:
TURN IN CIRCLES. Drive the
vehicle in tight circles at less
than 8 km/h (5 mph) to complete
the calibration. The DIC will
display COMPASS
CALIBRATION COMPLETE for a
few seconds when the
calibration is complete. The DIC
display will then return to the
previous menu.
Clock
To set the time and date:
1. Turn the ignition key to ACC/ACCESSORY or ON/RUN.
Press
Oto turn the radio on.
2. Press
Hand HR, MIN, MM, DD,
and YYYY (hour, minute, month,
day, and year) display.
3. Press the softkey below any one of the tabs to be changed. 4. To increase the time or date do
one of the following:
.Press the softkey below the
selected tab.
.Press¨SEEK, or\FWD.
.Turnfclockwise.
5. To decrease the time or date do one of the following:
.Press©SEEK orsREV.
.Turnfcounterclockwise.
The date does not automatically
display. To see the date press
H
while the radio is on. The date with
display times out after a few
seconds and goes back to the
normal radio and time display.
Page 116 of 382
Black plate (18,1)Chevrolet Captiva Sport Owner Manual (GMNA-Localizing-U.S./Mexico-
6014141) - 2014 - crc - 8/13/13
5-18 Instruments and Controls
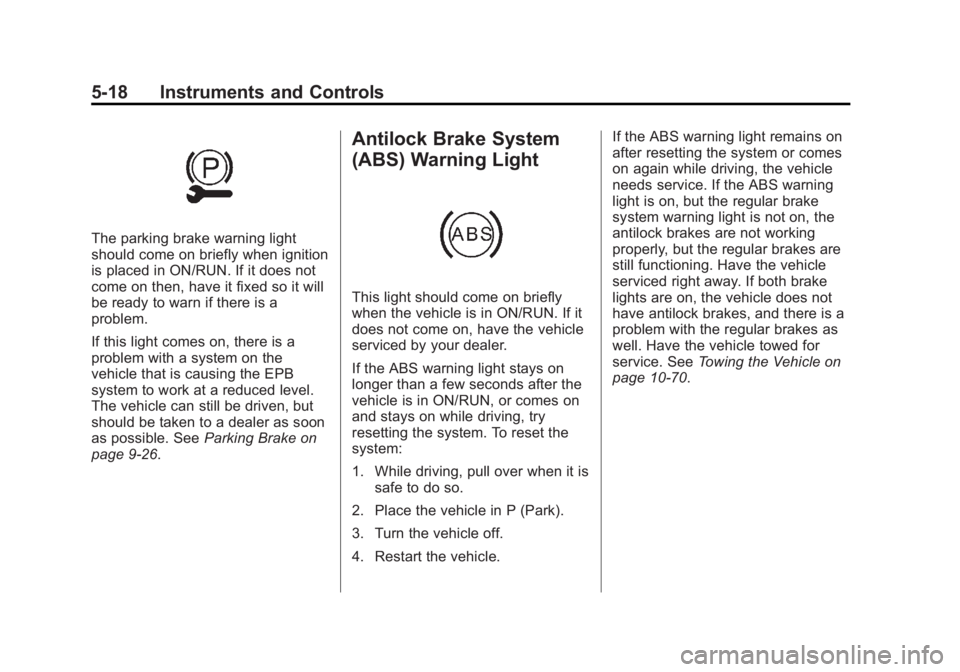
The parking brake warning light
should come on briefly when ignition
is placed in ON/RUN. If it does not
come on then, have it fixed so it will
be ready to warn if there is a
problem.
If this light comes on, there is a
problem with a system on the
vehicle that is causing the EPB
system to work at a reduced level.
The vehicle can still be driven, but
should be taken to a dealer as soon
as possible. SeeParking Brake on
page 9-26.
Antilock Brake System
(ABS) Warning Light
This light should come on briefly
when the vehicle is in ON/RUN. If it
does not come on, have the vehicle
serviced by your dealer.
If the ABS warning light stays on
longer than a few seconds after the
vehicle is in ON/RUN, or comes on
and stays on while driving, try
resetting the system. To reset the
system:
1. While driving, pull over when it is
safe to do so.
2. Place the vehicle in P (Park).
3. Turn the vehicle off.
4. Restart the vehicle. If the ABS warning light remains on
after resetting the system or comes
on again while driving, the vehicle
needs service. If the ABS warning
light is on, but the regular brake
system warning light is not on, the
antilock brakes are not working
properly, but the regular brakes are
still functioning. Have the vehicle
serviced right away. If both brake
lights are on, the vehicle does not
have antilock brakes, and there is a
problem with the regular brakes as
well. Have the vehicle towed for
service. See
Towing the Vehicle on
page 10-70.
Page 156 of 382
Black plate (6,1)Chevrolet Captiva Sport Owner Manual (GMNA-Localizing-U.S./Mexico-
6014141) - 2014 - crc - 8/13/13
7-6 Infotainment System
To scan stations, press and hold
either button for a few seconds until
a beep sounds. The radio goes to a
station, plays for a few seconds,
then goes to the next station. Press
either button again to stop scanning.
The radio only seeks and scans
stations with a strong signal that are
in the selected band.
Storing a Radio Station as a
Favorite
Drivers are encouraged to set up
their radio station favorites while the
vehicle is in P (Park). Tune to
favorite stations using the presets,
favorites button, and steering wheel
controls. SeeSteering Wheel
Controls on page 5-2.
FAV (Favorites): A maximum of
36 stations can be stored as
favorites using the six softkeys
below the radio station frequency
tabs and by using the radio FAV
button. Press FAV to go through up
to six pages of favorites, each
having six favorite stations available
per page. Each page of favorites can contain any combination of AM,
FM, or SiriusXM stations (if
equipped).
The balance/fade and tone settings
that were previously adjusted, are
stored with the favorite stations.
To store a station as a favorite:
1. Tune to a radio station.
2. Press FAV to display the page
where to store the station.
3. Press and hold one of the six pushbuttons until a beep
sounds. When that pushbutton is
pressed and released, the
station that was set returns.
4. Repeat the steps for each radio station to be stored as a favorite.
To set up the number of favorites
pages:
1. Press MENU to display the radio setup menu.
2. Press the pushbutton below the FAV 1-6 label. 3. Select the desired number of
favorites pages by pressing the
pushbutton below the displayed
page numbers.
4. Press FAV, or let the menu time out, to return to the original main
radio screen showing the radio
station frequency labels and to
begin the process of
programming favorites for the
chosen number of numbered
pages.Satellite Radio
If equipped with a SiriusXM®
Satellite Radio tuner and a valid
SiriusXM Satellite subscription can
receive SiriusXM programming.
SiriusXM Satellite Radio
Service
SiriusXM is a satellite radio service
based in the 48 contiguous United
States and 10 Canadian provinces.
SiriusXM Satellite Radio has a wide
variety of programming and
commercial-free music, coast to
Page 157 of 382
Black plate (7,1)Chevrolet Captiva Sport Owner Manual (GMNA-Localizing-U.S./Mexico-
6014141) - 2014 - crc - 8/13/13
Infotainment System 7-7
coast, and in digital-quality sound.
A service fee is required to receive
the SiriusXM service. For more
information, contact SiriusXM at
www.siriusxm.com or
1-866-635-2349 (U.S) and
www.xmradio.ca or call
1-877-209-0079 (Canada).
Finding a Station
BAND:Press to switch between
AM, FM, or SiriusXM. The selection
displays.
f(Tune): Turn to select radio
stations.
©SEEK or¨SEEK: Press to go to
the previous or to the next station
and stay there.
To scan stations, press and hold
©
SEEK or¨SEEK until a beep
sounds. The radio goes to a station,
plays for a few seconds, then goes
to the next station. Press either
arrow again to stop scanning.
Finding a Category (CAT)
Station
CAT (Category): The CAT button is
used to find SiriusXM stations when
the radio is in the XM mode. To find
SiriusXM channels within a desired
category:
1. Press BAND until the XM frequency displays.
2. Press CAT to display the category tabs.
3. To navigate through the categories, do one of the
following:
.Press the CAT button.
.Press thesREV or\
FWD button.
.Turn thefknob.
4. To tune to a station in the selected category, do one of the
following:
.Turn thefknob.
.Press the pushbutton below
the right or left arrows on
the display.
.Press the©SEEK or¨
SEEK button.
5. To exit the category search mode, press the FAV button or
the BAND button to display the
favorites again.
Removing SiriusXM Categories
Undesired SiriusXM categories can
be removed through the setup
menu. To remove an undesired
category:
1. Press the MENU button.
2. Press the pushbutton below the XM CAT label.
3. Turn the
fknob, then press the
©SEEK or¨SEEK button or thesREV or\FWD button to
display the category to be
removed.
Page 164 of 382
Black plate (14,1)Chevrolet Captiva Sport Owner Manual (GMNA-Localizing-U.S./Mexico-
6014141) - 2014 - crc - 8/13/13
7-14 Infotainment System
Tracks are played in the following
order:
.Play begins from the first track in
the first playlist and continues
sequentially through all tracks in
each playlist. When the last
track of the last playlist has
played, play continues from the
first track of the first playlist.
.Play begins from the first track in
the first folder and continues
sequentially through all tracks in
each folder. When the last track
of the last folder has played,
play continues from the first
track of the first folder.
File System and Naming
The song name that displays is the
song name contained in the ID3 tag.
If the song name is not present in
the ID3 tag, then the radio displays
the file name without the extension
(such as .mp3) as the track name.
Track names longer than 32
characters or 4 pages are
shortened. The display does not show parts of words on the last
page of text and the extension of
the file name is not displayed.
Preprogrammed Playlists
CDs that have preprogrammed
playlists that were created using
WinAmp
®, MusicMatch®, or Real
Jukebox®software can be
accessed; however, there is no
playlist editing capability using the
radio. These playlists are treated as
special folders containing
compressed audio song files.
Playlists that have an .m3u or .pls
file extension and are stored on a
USB device may be supported by
the radio with a USB port.
Playlists can be changed by using
the softkeys below the
S cand
c Ttabs, thefknob, the©SEEK
button, or the
¨SEEK button. An
MP3 CD-R or CD-RW that has been
recorded without using file folders
can be played. If a CD-R or CD-RW
contains more than the maximum of
50 folders, 15 playlists, and 512 folders and files, the player
allows access and navigates up to
the maximum, but all items over the
maximum are not accessible.
Playing an MP3
4(Information):
Press to display
additional text information related to
the current song. If information is
available, the song title information
displays on the top line of the
display and artist information
displays on the bottom line. When
information is not available, NO
INFO displays.
f(Tune): Turn to select MP3 files
on the CD currently playing.
©SEEK: Press to go to the start of
the track, if more than 10 seconds
have played. Press and hold or
press multiple times to continue
moving backward through tracks.
¨SEEK: Press to go to the next
track. Press and hold or press
multiple times to continue moving
forward through tracks.
Page 193 of 382
Black plate (1,1)Chevrolet Captiva Sport Owner Manual (GMNA-Localizing-U.S./Mexico-
6014141) - 2014 - crc - 8/13/13
Driving and Operating 9-1
Driving and
Operating
Driving Information
Driver Behavior . . . . . . . . . . . . . . . 9-2
Driving Environment . . . . . . . . . . 9-2
Vehicle Design . . . . . . . . . . . . . . . . 9-2
Distracted Driving . . . . . . . . . . . . . 9-2
Defensive Driving . . . . . . . . . . . . . 9-3
Drunk Driving . . . . . . . . . . . . . . . . . 9-3
Control of a Vehicle . . . . . . . . . . . 9-4
Braking . . . . . . . . . . . . . . . . . . . . . . . 9-4
Steering . . . . . . . . . . . . . . . . . . . . . . . 9-4
Off-Road Recovery . . . . . . . . . . . . 9-5
Loss of Control . . . . . . . . . . . . . . . . 9-5
Driving on Wet Roads . . . . . . . . . 9-6
Highway Hypnosis . . . . . . . . . . . . 9-7
Hill and Mountain Roads . . . . . . 9-7
Winter Driving . . . . . . . . . . . . . . . . . 9-8
If the Vehicle Is Stuck . . . . . . . . . 9-9
Vehicle Load Limits . . . . . . . . . . 9-10
Starting and Operating
New Vehicle Break-In . . . . . . . . 9-14
Ignition Positions . . . . . . . . . . . . 9-15
Starting the Engine . . . . . . . . . . 9-17Retained Accessory
Power (RAP) . . . . . . . . . . . . . . . 9-18
Shifting Into Park . . . . . . . . . . . . 9-18
Shifting out of Park . . . . . . . . . . 9-19
Parking over Things That Burn . . . . . . . . . . . . . . . . . . 9-20
Engine Exhaust
Engine Exhaust . . . . . . . . . . . . . . 9-20
Running the Vehicle WhileParked . . . . . . . . . . . . . . . . . . . . . 9-21
Automatic Transmission
Automatic Transmission . . . . . 9-21
Manual Mode . . . . . . . . . . . . . . . . 9-23
Fuel Economy Mode . . . . . . . . . 9-24
Drive Systems
All-Wheel Drive . . . . . . . . . . . . . . 9-25
Brakes
Antilock BrakeSystem (ABS) . . . . . . . . . . . . . . 9-25
Parking Brake . . . . . . . . . . . . . . . 9-26
Ride Control Systems
Traction Control/Electronic Stability Control . . . . . . . . . . . . 9-28
Cruise Control
Cruise Control . . . . . . . . . . . . . . . 9-30
Driver Assistance Systems
Ultrasonic Parking Assist . . . . 9-32
Rear VisionCamera (RVC) . . . . . . . . . . . . . 9-34
Fuel
Fuel . . . . . . . . . . . . . . . . . . . . . . . . . 9-35
Recommended Fuel . . . . . . . . . 9-36
Gasoline Specifications . . . . . . 9-36
California FuelRequirements . . . . . . . . . . . . . . 9-36
Fuels in Foreign Countries . . . 9-37
Fuel Additives . . . . . . . . . . . . . . . 9-37
E85 or FlexFuel . . . . . . . . . . . . . . 9-37
Filling the Tank . . . . . . . . . . . . . . 9-38
Filling a Portable Fuel Container . . . . . . . . . . . . . . . . . . . 9-40
Trailer Towing
General TowingInformation . . . . . . . . . . . . . . . . . 9-40
Driving Characteristics and Towing Tips . . . . . . . . . . . . . . . . 9-41
Trailer Towing . . . . . . . . . . . . . . . . 9-44
Towing Equipment . . . . . . . . . . . 9-46
Conversions and Add-Ons
Add-On Electrical Equipment . . . . . . . . . . . . . . . . . 9-47
Page 197 of 382
Black plate (5,1)Chevrolet Captiva Sport Owner Manual (GMNA-Localizing-U.S./Mexico-
6014141) - 2014 - crc - 8/13/13
Driving and Operating 9-5
Curve Tips
.Take curves at a reasonable
speed.
.Reduce speed before entering a
curve.
.Maintain a reasonable steady
speed through the curve.
.Wait until the vehicle is out of
the curve before accelerating
gently into the straightaway.
Steering in Emergencies
.There are some situations when
steering around a problem may
be more effective than braking.
.Holding both sides of the
steering wheel allows you to turn
180 degrees without removing
a hand.
.Antilock Brake System (ABS)
allows steering while braking.
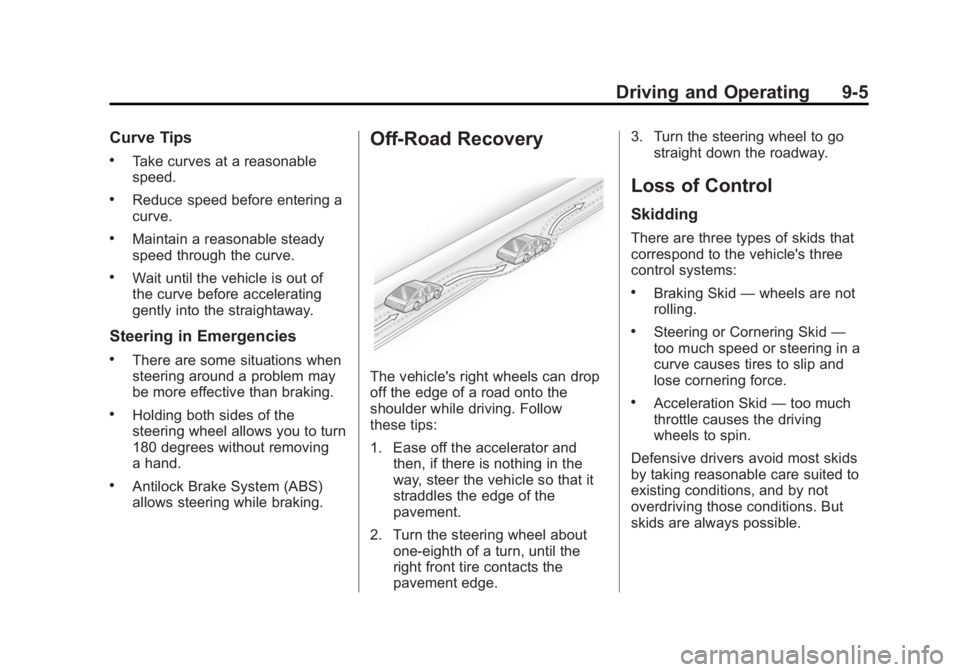
Off-Road Recovery
The vehicle's right wheels can drop
off the edge of a road onto the
shoulder while driving. Follow
these tips:
1. Ease off the accelerator andthen, if there is nothing in the
way, steer the vehicle so that it
straddles the edge of the
pavement.
2. Turn the steering wheel about one-eighth of a turn, until the
right front tire contacts the
pavement edge. 3. Turn the steering wheel to go
straight down the roadway.
Loss of Control
Skidding
There are three types of skids that
correspond to the vehicle's three
control systems:
.Braking Skid —wheels are not
rolling.
.Steering or Cornering Skid —
too much speed or steering in a
curve causes tires to slip and
lose cornering force.
.Acceleration Skid —too much
throttle causes the driving
wheels to spin.
Defensive drivers avoid most skids
by taking reasonable care suited to
existing conditions, and by not
overdriving those conditions. But
skids are always possible.