oil change CHEVROLET CAVALIER 1984 1.G Owners Manual
[x] Cancel search | Manufacturer: CHEVROLET, Model Year: 1984, Model line: CAVALIER, Model: CHEVROLET CAVALIER 1984 1.GPages: 105, PDF Size: 24.23 MB
Page 17 of 105
Downloaded from www.Manualslib.com manuals search engine SECTION 2
STARTING AND OPERATING
ENGINE EXHAUST GAS CAUTION
(CARBON MONOXIDE)
CAUTION:-Do not breathe exhaust gas because it contains carbon monoxide, which by itself has no color crador. Carbon monoxide is a
dangerous gas. It can cause unconsciousness and can be lethal.
If at any time you think exhaust fumes are entering the vehicle, have the cause
determined and corrected as soon as possible. If you must drive under these conditions, drive only with ALL windows lully OPEN.
Protect against carbon monoxide entry into the vehicle body. The best way is
to keep the engine exhaust system,
vehicle body and body ventilation system
properly maintained. We recommend that the exhaust system and body be
inspected by a competent technician:
• each time the vehicle is raised for an oil change;
• whenever a change is noticed in the sound, of the exhaust system;
• whenever the exhaust system, underbody or rear of the vehicle is damaged
or becomes corroded.
See your Maintenance Schedule folder for parts requiring inspection.
To allow proper operation of your vehicle's ventilation system, keep the air inlet
grille in front of the windshield clear of snow, leaves or other obstructions at all
times.
DO NOT PARK WITH THE ENGINE RUNNING OR IDLE THIS VEHICLE FOR
MORE
THAN 10 MINUTES WITH THE VENTILATION SYSTEM CONTROL
SWITCH
IN THE "OFF" POSITION. EVEN WITH THE VENTILATION SYSTEM ON, RUNNING THE ENGINE WHILE PARKED OR STOPPED FOR LONGER
PERIODS OF TIME IS NOT
RECOMMENDED. ENTRY OF CARBON
MONOXIDE INTO THE CAR BODY IS POSSiBlE WITH A POORLY REPAIRED, DAMAGED, OR CORRODED EXHAUST SYSTEM OR BODY.
Do not run the engine in CONFINED areas (such as garages or next to a
building) any more than needed to move the vehicle. When the
vehicle has to
be stopped
in an UNCONFINED area with the engine running for any more
than a few minutes, take the following steps:
A. Adjust the heating or cooling system to force outside air into the vehicle as
follows:
1. On vehicles not equipped with air conditioning, set the fan to
intermediate or high speed and the upper control lever to any position.
2. On vehicles equipped with air conditioning, set the fan to an
intermediate or high speed and the upper control lever to any position
except
"OFF" or "MAX."
B. Keep the exhaust tailpipe area clear of snow and other material to help
reduce the buildup of exhaust gases under the vehicle. This is particularly
important when parked in blizzard conditions.
2-1
Page 18 of 105
Downloaded from www.Manualslib.com manuals search engine Driving with the trunk lid, hatchback or liftgate on station wagon models open is not recommended. Under some conditions, exhaust gases may be drawn
into the vehicle. If the trunk lid, hatchback or liftback must remain open for
some reason while moving, or if electrical wiring or other cable connections to a trailer must pass through the seal between the trunk lid, hatchback or liftback
and the body, follow these precautions:
• Close all windows.
• Adjust the heating or cooling system to force outside air into the vehicle as
described abcve, but set the fan to high speed.
• On vehicles with outside air vents in or under the instrument panel, open the vents fully.
NEW VEHICLE "BREAK-IN" PERIOD
You can drive your new vehicle from its very first mile/kilometer without
following a formal "break-in" schedule. However, there are things you can do during the first few hundred miles/kilometers of driving that will add to the
future performance and economy of your vehicle.
We recommend you limit your speed during the first 500 miles (800 kilometers)
to a maximum of 55 mph (90 km/h); but do not drive for long periods at any
one constant speed, either fast or slow. During this time, avoid full throttle
starts and, if possible, avoid hard stops especially during the first 200 miles (320 kilometers) of driving.
Always drive at moderate speed until the engine has completely warmed up.
I! you plan to use your new vehicle for trailer towing, see the following.
TRAILER TOWING
This car is designed and intended to be used mainly to carry people. Towing a
trailer
will affect handling, durability and economy. Your safety and satisfaction
depend upon proper use of correct equipment. Also, you should avoid
overloads and other abusive use.
The maximum loaded trailer weight you can pull with your vehicle depends on
your intended use
and what special equipment has been installed on it.
Information on trailer towing ability, special equipment required, and optional
equipment available should be obtained from your dealer. Ask for the trailering brochure. Or, write: Consumer Relations Department, Chevrolet Motor
Division, Warren, Michigan 48090.
(In Canada, write to General Motors of
Canada Limited, Customer Services Department, Oshawa, Ontario L lJ 5Z6.)
Tires
When towing trailers, be sure your tires are properly inflated to the inflation pressure shown on the Tire Placard on the driver's door.
The allowable passenger and cargo load for this vehicle, also shown on the
Tire
Placard, is reduced by the trailer tongue weight whenever the trailer is
attached to the vehicle. See "Service and Maintenance," Section 5 for more tire information.
Maintenance
More frequent service is required when using your vehicle to pull a trailer. See
the Maintenance Schedule folder for Automatic Transaxle Fluid and Engine Oil change requirements for trailering.
2-2
Page 25 of 105
Downloaded from www.Manualslib.com manuals search engine • Lane Change Signal -In some turns, such as changing lanes, the steering wheel tS not turned far enough to cancel the turn signal. For convenience, you can flash the turn signal by moving the lever part way (to the first stop)
and holding it there. The lever will return to horizontal when you release it.
A green light on the instrument panel is designed to flash to tell you that the
front
and rear turn signal lights are working. If the light stays on, but does not flash, check for burned-out turn signal bulbs. If the green light does not come
on when
you move the lever, check the fuse and indicator bulb.
However, if you ordered a trailertowing·optiOil.·in which extra wiring was added to attach the trailer lighting, a different type of flasher was installed. In this
case, the green light will continue to flash even if a turn signal bulb burns out.
Therefore, you must regularly look at the front
and rear turn signal lights to be
sure they are working.
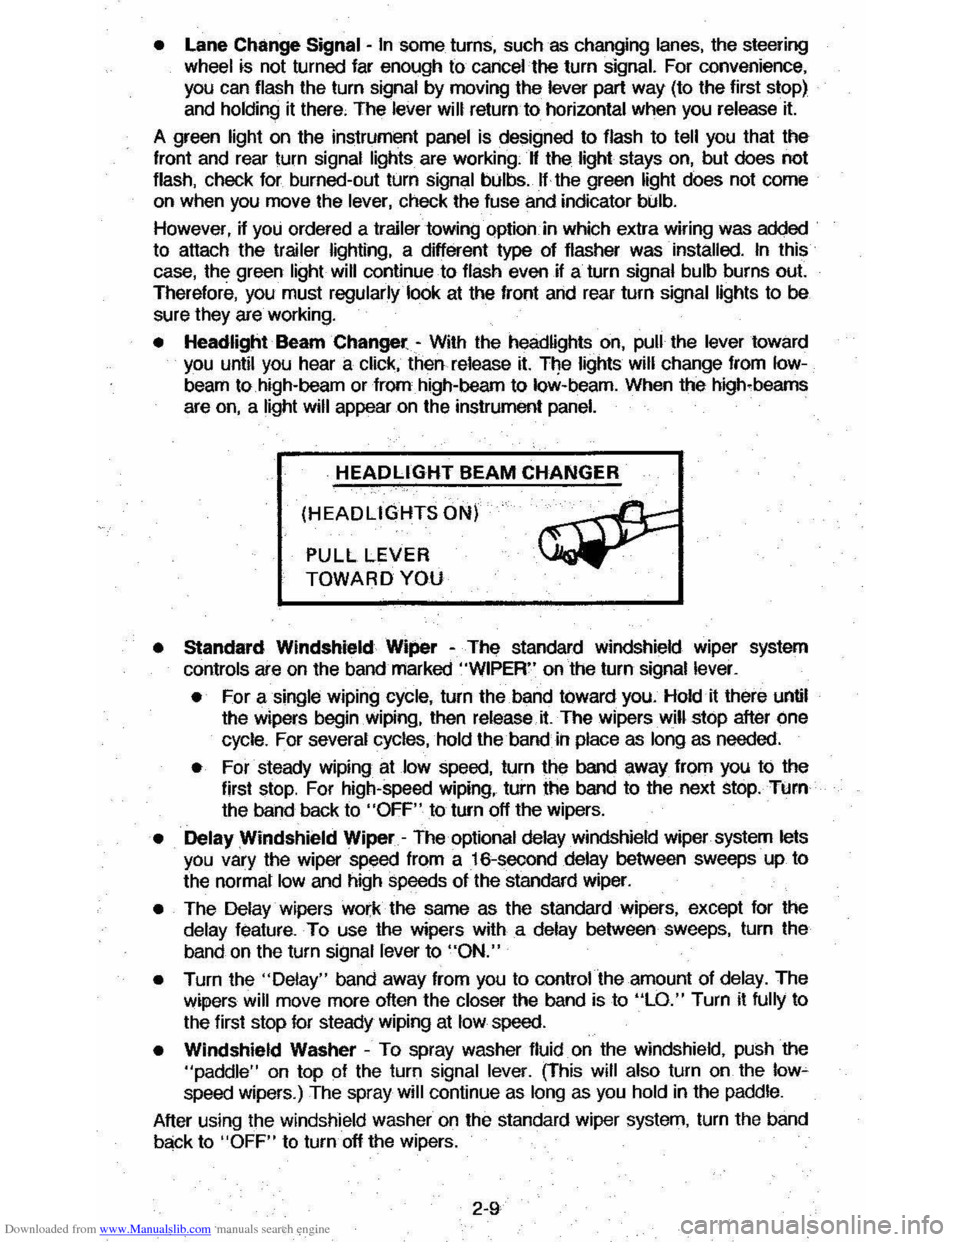
• Headlight Beam Changer -With the headlights on, pull the lever toward you until you hear a click, then release it. The lights will change from Iow
beam to high-beam or from high-beam to low-beam. When the high-beams
are
on, a light will appear on the instrument panel.
HEADLIGHT BEAM CHANGER
(HEADLIGHTS ON)
PULL LEVER
TOWARD YOU
• Standard Windshield Wiper -The standard Windshield wiper system
con
ols are on the band marked "WIPER" on the turn signal lever.
• For a single wiping cycle, turn the band toward you. Hold it there until
the wipers begin
Wiping, then release.it. The wipers will stop after one
cycle. For several cycles, hold the band in place as long as needed.
• For steady wiping at low speed, turn the band away from you to the
first stop. For high-speed wiping, turn the band to the next stop. Turn
the band back to
"OFF" to turn off the wipers.
• Delay Windshield Wiper -The optional delay windshield wiper system lets you vary the wiper speed from a 16-second delay between sweeps up to
the normal
low and high speeds of the standard wiper.
• The Delay wipers work the same as the standard wipers, except for the
delay feature. To use the wipers with a delay between sweeps, turn the
band on the turn signal lever to
"ON."
• Turn the "Delay" band away from you to control the amount of delay. The
wipers will move more often the closer the band is to "LO." Turn it fully to
the first stop for steady wiping at
low speed.
• Windshield Washer -To spray washer fluid on the windshield, pUSh the "paddle" on top of the turn signal lever. (This will also turn on the low~ speed wipers.) The spray will continue as long as you hold in the paddle.
After using the windshield washer
on the standard wiper system, turn the band
back to "OFF" to turn off the wipers.
2-9
Page 40 of 105
Downloaded from www.Manualslib.com manuals search engine Engine Coolant Temperature Gage
This optional gage is located in the instrument cluster. If the gage shows that
an overheat condition exists-as indicated by pointer moving beyond the
center of the band immediate action by the driver is required. If an overheat
condition is shown, see "Engine
Cooling System Overheating" in "In Case of
Emergency,"
Section 3 of this manual. The coolant temperature indication will VaIY with air temperature and operating conditions. The ignition must be in
"Run" for accurate readings. Prolonged driving or idling in very hot weather
may cause the pointer to move beyond the center of the gage. Make a practice
of scanning this and other gages
while driving, especially in hot weather and!
or when the
vehicle is under load.
CAUTION: II the Engine Coolant Temperature Gage shows an overheat condition or you have other reason to suspect the engine may be overheating, continued operation of the engine EVEN FOR A SHORT TIME may result in a fire and the risk of personal injury and/or severe vehicle damage. Take immediate action as outlined under "Engine Cooling System Overheating" in "In Case of Emergency," Section 3.
Oil Pressure Gage
The oil pressure gage indicates the pressure at which oil is being delivered to
the vaIiOUS paIls of the engine requiring lubrication. Pressures registered by
the gage may
vBIY according to outside air temperatures or weight of oil being
used. Oil pressure of a cold engine being operated at a given speed will be
somewhat higher than when the engine is at normal operating temperature at
the
SaIne speed. Prolonged high speed operation on a hot day at the given
speed will
resuH in somewhatlower oil pressure readings. Readings of 205 to
275 kPa
(30 to 40 psi) may be considered normal during moderate road
speeds of 35 to 40 mph (55 to 60 km!h) with the engine at proper operating
temperature. Gage readings which are consistently high
or low under these conditions may indicate lubrication system and/ or engine malfunction.
Light Switch
The three· position light switch controls the headlights, taillights, paIking lights,
sidemaIker lights,
instrument lights and dome lights.
Instrument light intensity can be varied by turning knob clockwise or
counterclockwise. Full counterclockwise position turns on interior light.
The headlight circuit is protected by a circuit breaker in the
light switch. An overload on the breaker will cause the lights to "flicker" on and off. If this
condition
develops, have your headlight wiring checked immediately. The
headlight beaIn changer is located in the Turn Signal Lever; for operation see
Section 2 under heading "Turn Signal and Muiji-Function Lever."·
Headlight High Beam Indicator Light
The headlights of your vehicle have. high and low beams to provide you with
proper nighttime visibility for most driving conditions. The
"low" beams are
used during most city driving. The
"high" beams are especially useful when
driving on daIk roads since they provide long range illumination. The headlight
beam indicator light (located on the speedometer face) will be ON whenever
the high beams or "brights" are in use. The turn
signal lever controls the
headlight beaIns and is described in "Steering Column Controls."
2-24
Page 67 of 105
Downloaded from www.Manualslib.com manuals search engine SECTION 4
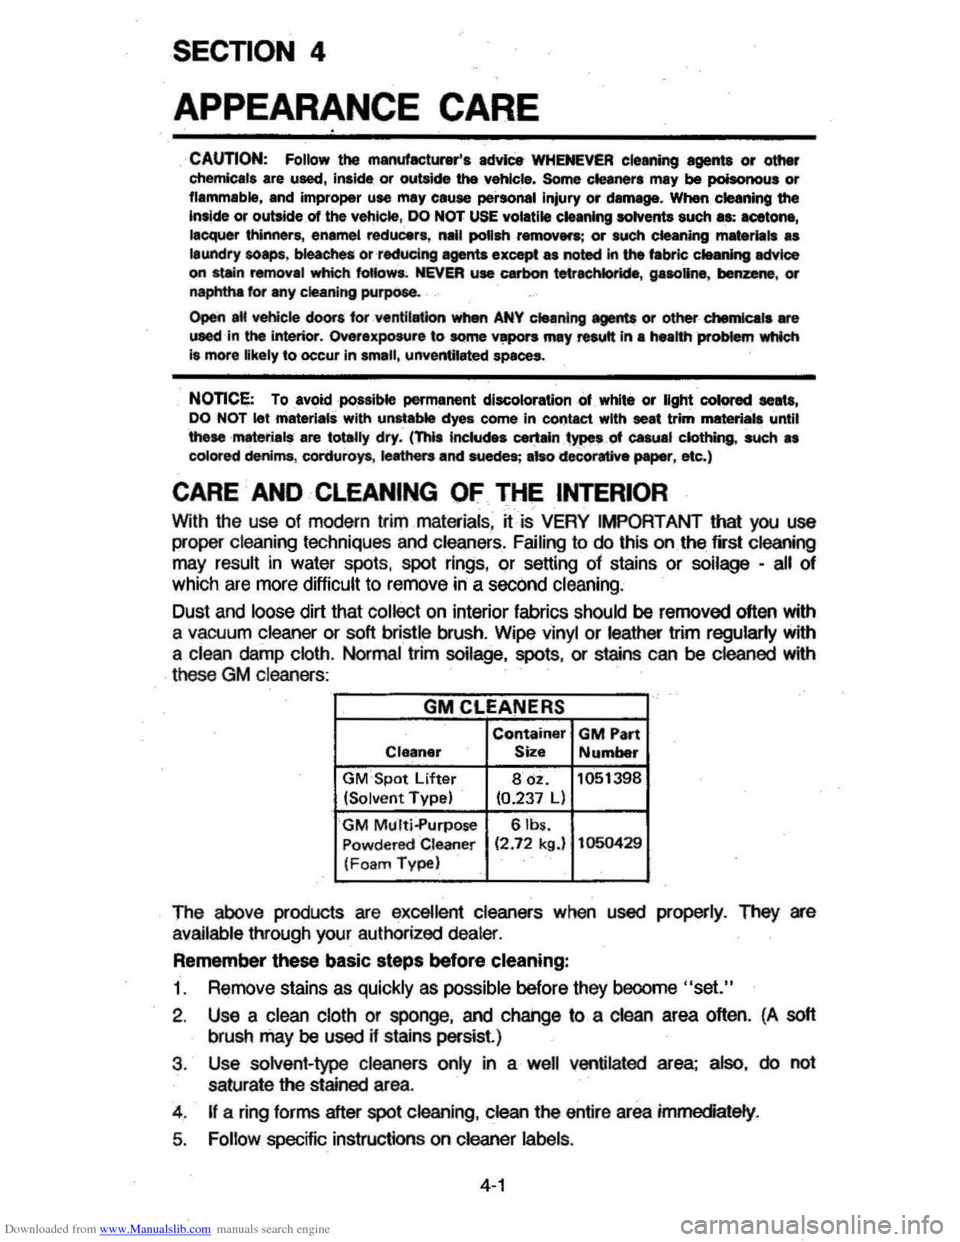
APPEARANCE CARE
CAUTION: Follow the manufacturer'. advic:e WHENEVER cleaning agents or other chemicals are used, inside, or outaide the vehicle. Some clelner. may be poisonous or flammable, and improper UM may cause personal injury or daf1lllge. When cleaning the Inaide or outsideot the vehic~, DO NOT USE volatile cleaning aolYents such Ia: acetone, lacquer thinners, enamel reducers, nail poUsh removers; or such cleaning mmeriliis .. laundry soaps, bleaches or redudng agents except as noted In the fIIbric clHning MtYlce on stein removal which: faNow. . NEVER use carbon tetrlChlorkle, gasoline, benzene, or naphtha for any cleaning purpose .
()pen aM vehicle doors tor ventlillUon when ANY c5unlng agenu or other -chemk:ata _. uaed In the interior. Overexposure to some YIjIpOI'S may Nautt In a health -probtem which I. more likely to occur in small, unvent8ated spaces.
NonCE: Toavoidpoasible permanent discoloration ,Of, white or light COlored leN, DO NOT let triaterials with un .. able dyes come in contact with seat trim material, until
these rMterials are totally dry. (ThIs Includes cet:t-~YP8' of casual clothing. such •• colored denims, corduroys , IeMhers and suedes; alsodecorltive paper, etc.)
CARE AND CLEANING OF THE INTERIOR
With the use of modern trim materials, ~ is VERY IMPORTANT that you use
proper cleaning techniques and cleaners. Failing to do this on the fi'st cleaning may result in water spots, spot rings, or setting of stains or soilage -all of
which are more difficult to remove in a second cleaning :
Dust
and loose dirt that collect on interior fabrics should be removed often with
a vacuum
cleaner or soft bristle brush. Wipe vinyl or leather trim regularly with
a clean damp cloth. Normal trim soilage, spots, or stains can be cleaned with
these
GM c leaners :
GMCLEANERS
Container GM Part Cleaner Size Number
GM"Spot Lifter 80z. 1051398 (Solv en t Type) 10.237 L)
GM Multj-Purpose SIbs. P owdered Clean er 12.72 kg.} 1050429 (Foa m Type)
The above products are excellent cleaners when used properly. Tlley are
available through your authorized
dealer.
Remember these basic steps before cleaning:
t. Remove stains as quickly as possible before they beoome "set."
2. Use a clean Cloth or sponge, and change to a clean area often. (A soft
brush may be used if stains persist.)
3 . Use solvent-type cleaners
only in a well ventilated area; also, do not
saturate the stained area.
4 .
If a ring forms after spot cleaning , clean the entire area immediately .
5. Follow specific instruction s on cleaner labels.
4-1
Page 77 of 105
Downloaded from www.Manualslib.com manuals search engine Choosing Oil Viscosity
Engine oil viscosity (thickness) has an effect on fuel economy. Lower viscosity
engine oils can provide better fuel economy; however, higher temperature
weather conditions require higher viscosity engine oils for satisfactory
lubrication.
Using oils of any viscosity other than those viscosities
recommended
could result in engine damage.
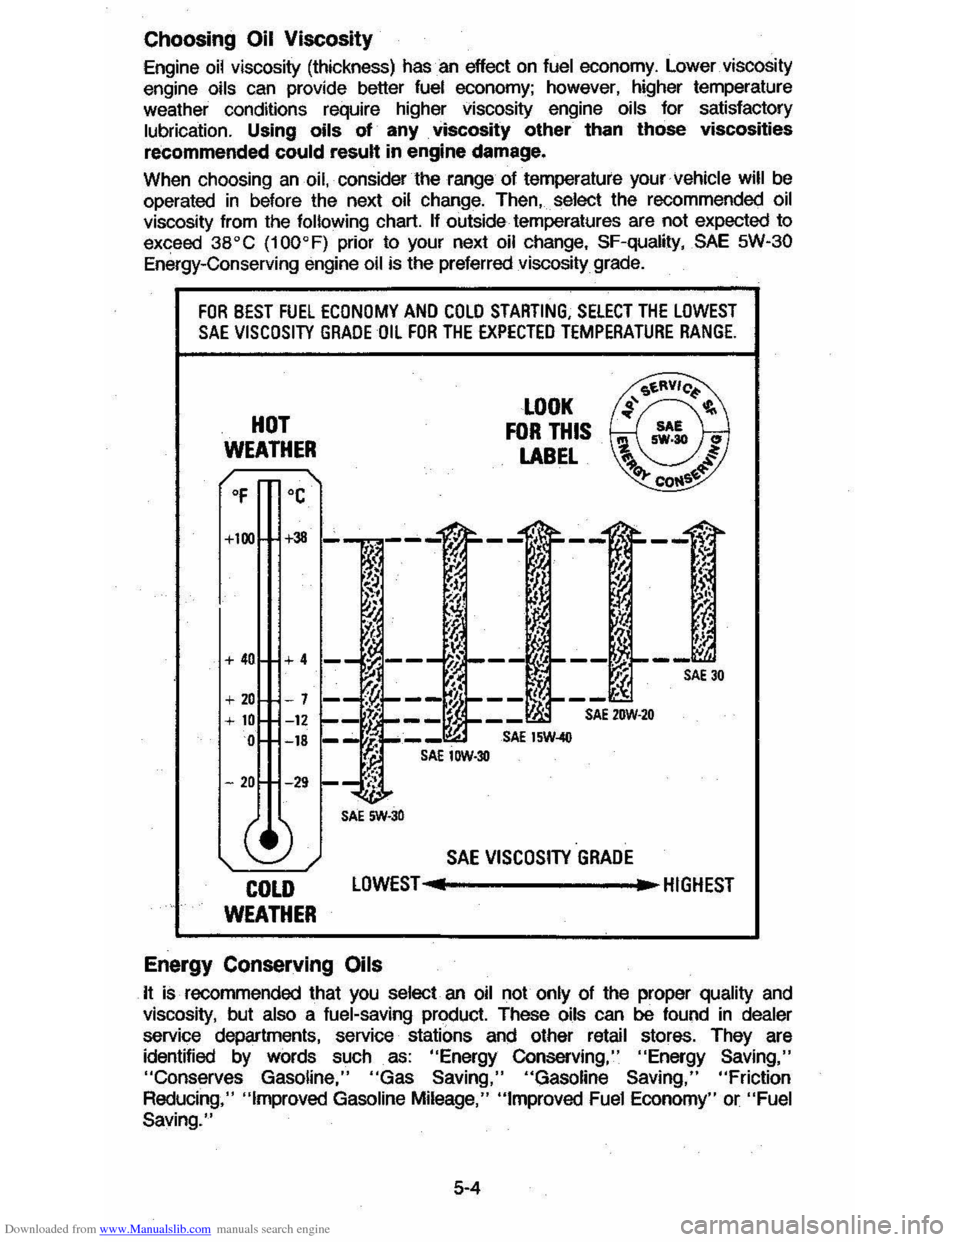
When choosing an oil, consider the range of temperature your Vehicle will be
operated in before the next oil change. Then, select the recommended oil viscosity from the following chart. If outside temperatures are not expected to
exceed
38°C (100°F) prior to your next oil change, SF-quality, SAE 5W-30
Energy-Conserving engine oil is the preferred viscosity grade.
FOR BEST FUEL ECONOMY AND COLD STARTING, SELECT THE LOWEST SAE VISCOSITY GRADE OIL FOR THE EXPECTED TEMPERATURE RANGE.
HOT
WEATHER
OF °C
+100 +38
+ 40 +4 -
+ 20 + 10 0
-
20 -29 I-
(!)
COLD
WEATHER
1
:t~ ~!
i ,
SAE SW·30
SAE IOW·30
LOOK
FOR THIS
LABEL
SAE 15W-40
SAE VISCOSITY GRADE
LOWEST .. • HIGHEST
Energy Conserving Oils
It is recommended that you select an oil not only of the proper quality and
viscosity, but also a fuel-saving product. These oils can be found in dealer
service departments, service stations and other retail stores. They are
identified
by words such as: "Energy Conserving," "Energy Saving,"
"Conserves Gasoline,"
"Gas Saving," "Gasoline Saving," "Friction
Reducing," "Improved Gasoline Mileage," "Improved Fuel Economy" Or "Fuel
Saving."
5-4
Page 78 of 105
Downloaded from www.Manualslib.com manuals search engine Oil Identification Logo
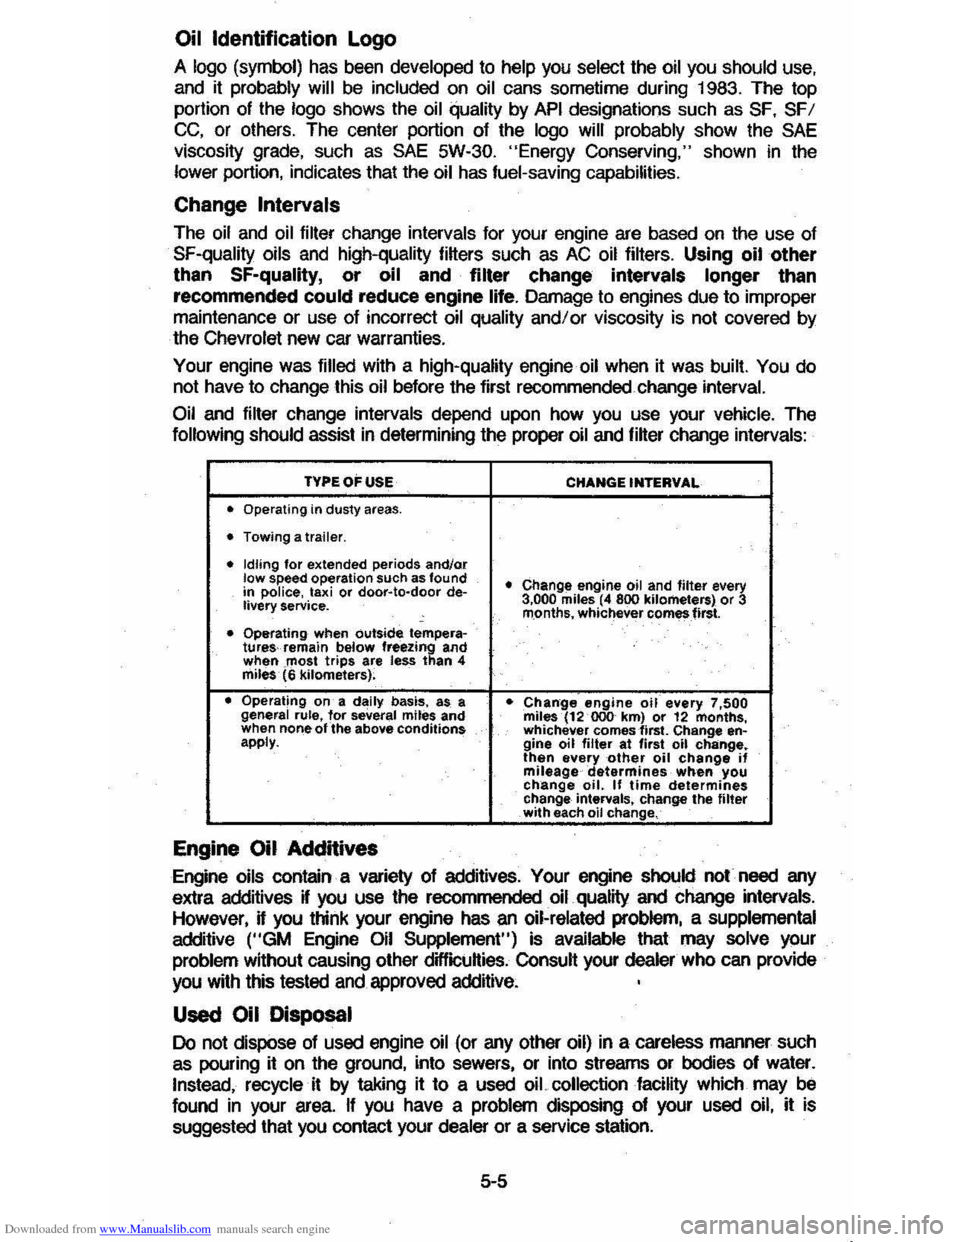
A logo (symbol) has been developed to help you select the oil you should use,
and it probably will be included on oil cans sometime during 1983. The top
portion of the logo shows the oil quality by API designations such as SF, SFI
CC, or others. The center portion of the logo will probably show the SAE
viscosity grade, such as SAE 5W-30. "Energy Conserving," shown in the lower portion, indicates that the oil has fuel-saving capabilities.
Change Intervals
The oil and oil filter change intervals for your engine are based on the use of
SF-quality oils and high-quality fi~ers such as AC oil filters. Using oil other
than SF-quality, or oil and filter change intervals longer than
recommended could reduce engine life. Damage to engines due to improper
maintenance or use of incorrect
oil quality and/ or viscosity is not covered by
the Chevrolet new car warranties.
Your engine was
filled with a high-quality engine oil when it was built. You do
not have to change this oil before the first recommended change interval.
Oil
and filter change intervals depend upon how you use your vehicle. The
following should assist in determining the proper oil and fi~er change intervals:
TVPEOFUSE CHANGE INTERVAL
• Operating
in dusty areas.
• Towing a trailer.
• Idling for extended periods andlor low speed operation such as found • Change engine oil and filter every
in police, taxi or door-Ie-door de-livery service. 3,000 miles (4 800 kilometers) or 3
rn.onths, whichever comes first.
• Operating when outside tempera-tures-remain below freezing and when most trips are less than 4 miles' (6 kilometers)~
• Operating on a daily basis, as a • Chan:ge engine oil every 7,500 general rule, for several miles and miles (12 000-km) or 12 months,
when none of the above conditions whichev.er comes first. Change en·
apply. gine oil filter at first oil change. then every other oil change if mileage determines· when you change oil. If time determines change intervals, change the filter with each oil change.
Engine Oil Additives
Engine oils contain a variety of additives. Your engine should not need any
extra additives
K you use the recommended oil quality and change intervals. However, H you think your engine has an oil-related problem, a supplemental
additive ("GM Engine Oil Supplement") is available that may solve your problem without causing other difficuHies. Consu~ your dealer who can provide
you
w~h this tested and approved additive.
Used Oil Disposal
Do not dispose of used engine oil (or any other oil) in a careless manner such
as pouring it on the ground, into sewers, or into streams or bodies of water.
Instead, recycle it by taking it to a used oiL collection facility which may be
found
in your area. If you have a problem disposing of your used oil, it is
suggested that you contact your
dealer or a service station.
5-5
Page 79 of 105
Downloaded from www.Manualslib.com manuals search engine AUTOMATIC TRANSAXLE FLUID RECOMMENDATIONS
Use the Proper Fluid
Use only automatic transmission fluid labeled DEXRON'" II. You can buy this
fluid from your dealer or other service outlets.
Check the Fluid Level with Care
Check the automatic transaxle fluid level at each engine oil change. Driving
with too much or too
little fluid can damage the transaxle.
To check the fluid
level, first set the parking brake, then start the engine in
"P"(Park), and let idle for two minutes . You must check the fluid level with the
engine running at slow
idle and the vehicle level.
You cannot read the correct fluid level if you have just driven the vehicle for a
long time at high speed, in city traffic in hot weather, or if the vehicle has been
pulling a trailer. Wait
until the fluid has cooled down (about 30 minutes).
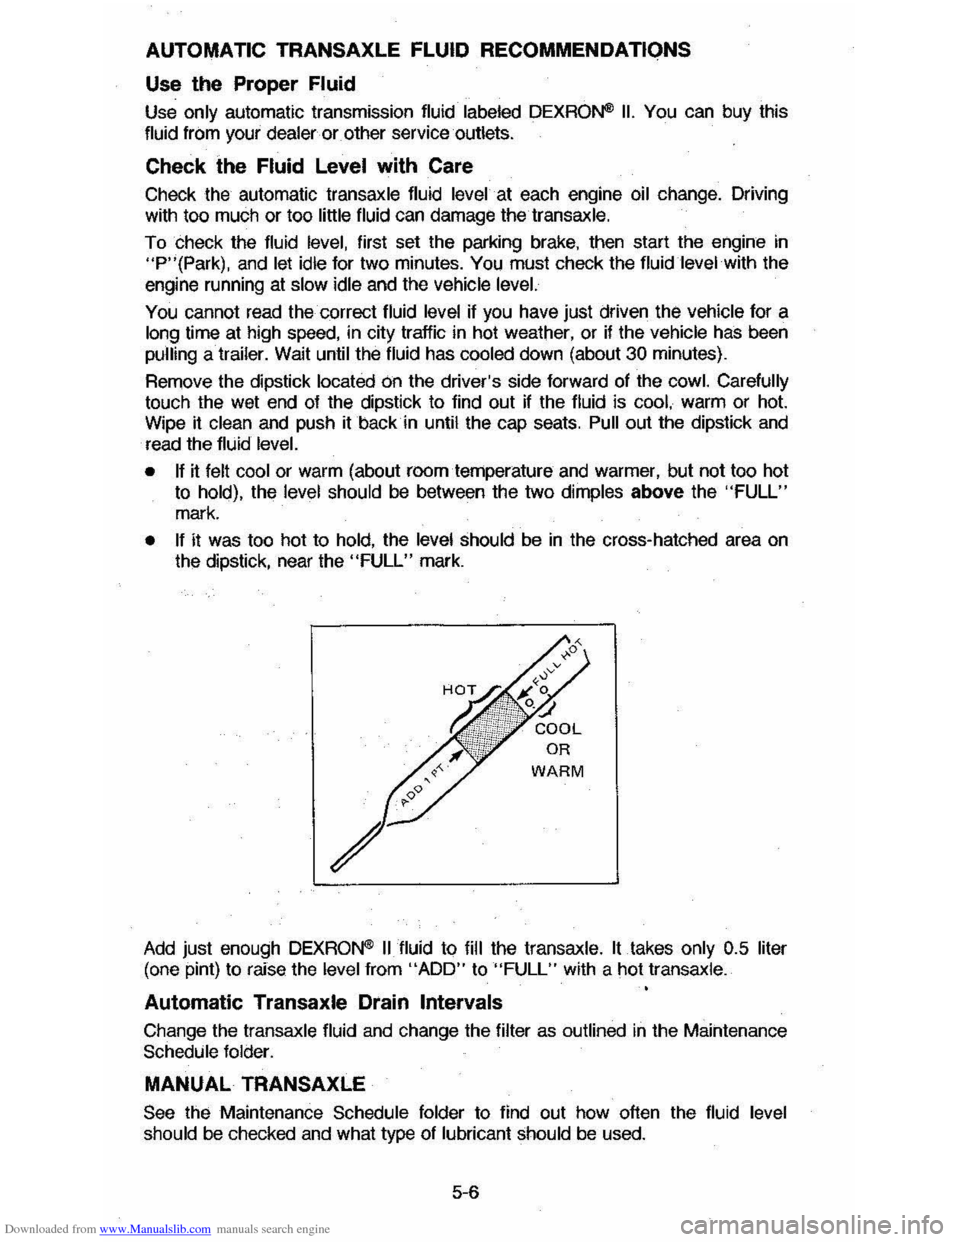
Remove the dipstick located
On the driver's side forward of the cowl. Carefully
touch the wet end of the dipstick to find out if the fluid is cool, warm or hot. Wipe it clean and push it back in until the cap seats. Pull out the dipstick and
read the fluid level.
• If it felt cool or warm (about roomternperature and warmer, but not too hot
to hold), the level should be between the two dimples above the "FULL"
mark.
• If it was too hot to hold, the level should be in the cross-hatched area on the dipstick, near the "FULL" mark.
Add just enough DEXRON'" II fluid to fill the transaxle. It takes only 0.5 liter
(one pint) to raise the level from "ADD" to "FULL" with a hot transaxle.
Automatic Transaxle Drain Intervals
Change the transaxle fluid and change the filter as outlined in the Maintenance Schedule folder.
MANUAL TRANSAXLE
See the Maintenance Schedule folder to find out how often the fluid level should be checked and what type of lubricant should be used.
5-6
Page 81 of 105
Downloaded from www.Manualslib.com manuals search engine The cooting system was filled at the factory with a quality coolant that meets
GM Specifications.
~ is important to use proper coolant to prevent damage to
cooling system components . Coolants meeting GM Specification 1825-M or
those specially formulated for aluminum co"1JOflent protection should be used.
The cooling system is designed to use coolant (a mixture of ethylene glycol ,
corrosion inhibitors and water) rather than plain water. The coolant solution
must be used year round
to provide:
• freezing protection down to -37'C (-34'F),
• boiling protection up to 128 'C (262'F),
• protection against rust and corrosion in the cooling system,
• the proper engine temperature for efficient operation and emission control,
and
• proper operation of the coolant temperature light or gage .
See the Maintenance Schedule folder to find out when the coolant must be
replaced . Note that changing the coolant is needed
to make certain that all
parts
of the cooling system work well.
.-~~~~--~-.
CooUng System Care
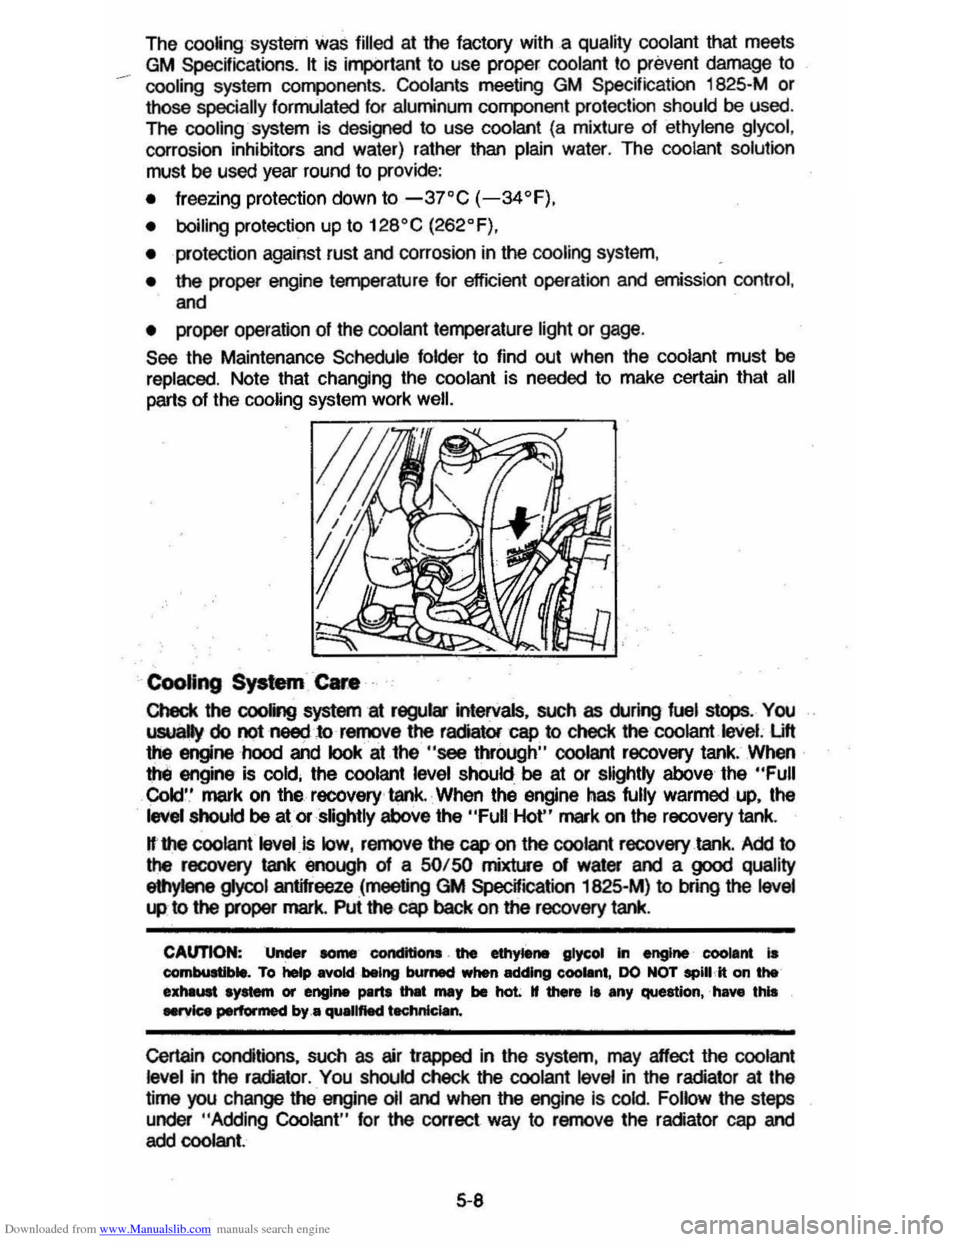
Check the cooling system at regular intervals, such as during fuel sI
Cold' .' mark on the recovery ' tank. When the engine has fully warmed up, the
level should be at or slightly above the "Full Hot" mark on the recovery tank.
H·the coolant level is low, remove the cap on the coolant recovery tank. Add to the recovery tank enough of a SO/ SO mixture 01 water and a good quality
eIIlyIene gIyool antifreeze (meeting GM SpecWication 1825-M) to bfing the level
"" to the proper mark. Pui the cap back on the recovery tank.
CAUTION: Under some' condttlons . the ethytene glycol In engine' coolant is combultlble. To help Rold being burMCf when adding eoollnt, DO NOT spill It on the exhliUlt system or engine ~rtI tMt mIIy be haL tf there It any question,' have this .....,ice performed by .• quallftecl t.chnlclan.
Certain conditions, such as air trapped in the system, may effect the coolant level in the radiator . You should check the coolant level in the radiator at the
time you change the engine 011 and when the engine Is cold. Follow the steps
under
"Adding Coolant" for the correct way to remove the radiator cap and add coolant.
5-8
Page 82 of 105
Downloaded from www.Manualslib.com manuals search engine If you have to add coolant more than four times a year (either to the recovery
tank or to the radiator), or if
coolant is dirty or discolored, see your dealer for a cooling system check.
NOTICE: rr you use the proper quality antifreeze, there is no need to add extra inhibitors or additives which claim to improve the system. They may be harmful to the proper operation of the system.
Adding Coolant
CAUTION: To help avoid the danger of being burned, do not remove the radiator cap while the engine and radiator are stili hot. Scalding fluid and steam can be blown out under pressure if the cap is taken off too soon.
1. When the engine is cool, remove the radiator cap.
• Turn the cap slowly to the left until it reaches a "stop." Do not press
down
while turning the cap.
• Wait until any remaining pressure (indicated by a hissing sound) is relieved, then press down on the cap and continue turning it to the left.
2. Add enough water and ethylene glycol anmreeze (meeting GM Specification 1825-M) to provide the required cooling, freezing and
corrosion protection. Use a solution that is at least 50 percent antifreeze
but no more than 70 percent antHreeze. Fill the radiator to the base of the
filler neck and fill the coolahUocave,y lank to at or above the "Full Hot" mark. Put the recovery tank cap back on.
3. Run the engine, with the radiator cap removed, until the upper radiator
hose is
hot. With the engine idling, add coolant to the radiator until it
reaches
the bottom of the filler neck. Install the radiator cap, making sure
the arrows on the cap line up with the overflow tube on the radiator filler
neck.
II is Ihe owner's responsibility 10:
• Maintain cooling system freeze protection at -37°G (-34°F) to ensUre
protection against corrosion and loss of coolant from boiling. (A SO/SO mixture of water and ethylene glycol antifreeze will provide freeze
protection to -37°G or -34°F.) You should do this even if you don't
expect freezing temperatures. Periodic
replacement of coolant is needed to replace the anti-corrosion additives that wear out with use. Coolant that
has become dark in color shows that it needs to be changed for this reason.
• Add ethylene glycol base antifreeze that meets GM SpecHication 1825-M
when antifreeze has to be added because of coolant loss or for more
protection against freezing at temperatures less than stated.
NOTICE: Do not use methanol-base antifreeze, or alcohol, . or plain water alone, in your vehicle at anytime. They will boil ata lower point than that at which the "TEMP" light (or temperature gage) will warn of overheating, and they do not provide proper protection against corrosion.
Thermostat
The engine coolant temperature is controlled by a thermostat. It stops coolant
flow through the radiator until a preset temperature is reached. This thermostat
is installed in the engine coolant oullet on the engine block. The same
thermostat is used in both winter and summer. When a replacement is needed, AG-Oelco paris are recommended.
5-9