door lock CHEVROLET CAVALIER 1993 1.G User Guide
[x] Cancel search | Manufacturer: CHEVROLET, Model Year: 1993, Model line: CAVALIER, Model: CHEVROLET CAVALIER 1993 1.GPages: 308, PDF Size: 15.62 MB
Page 55 of 308
Downloaded from www.Manualslib.com manuals search engine Theft
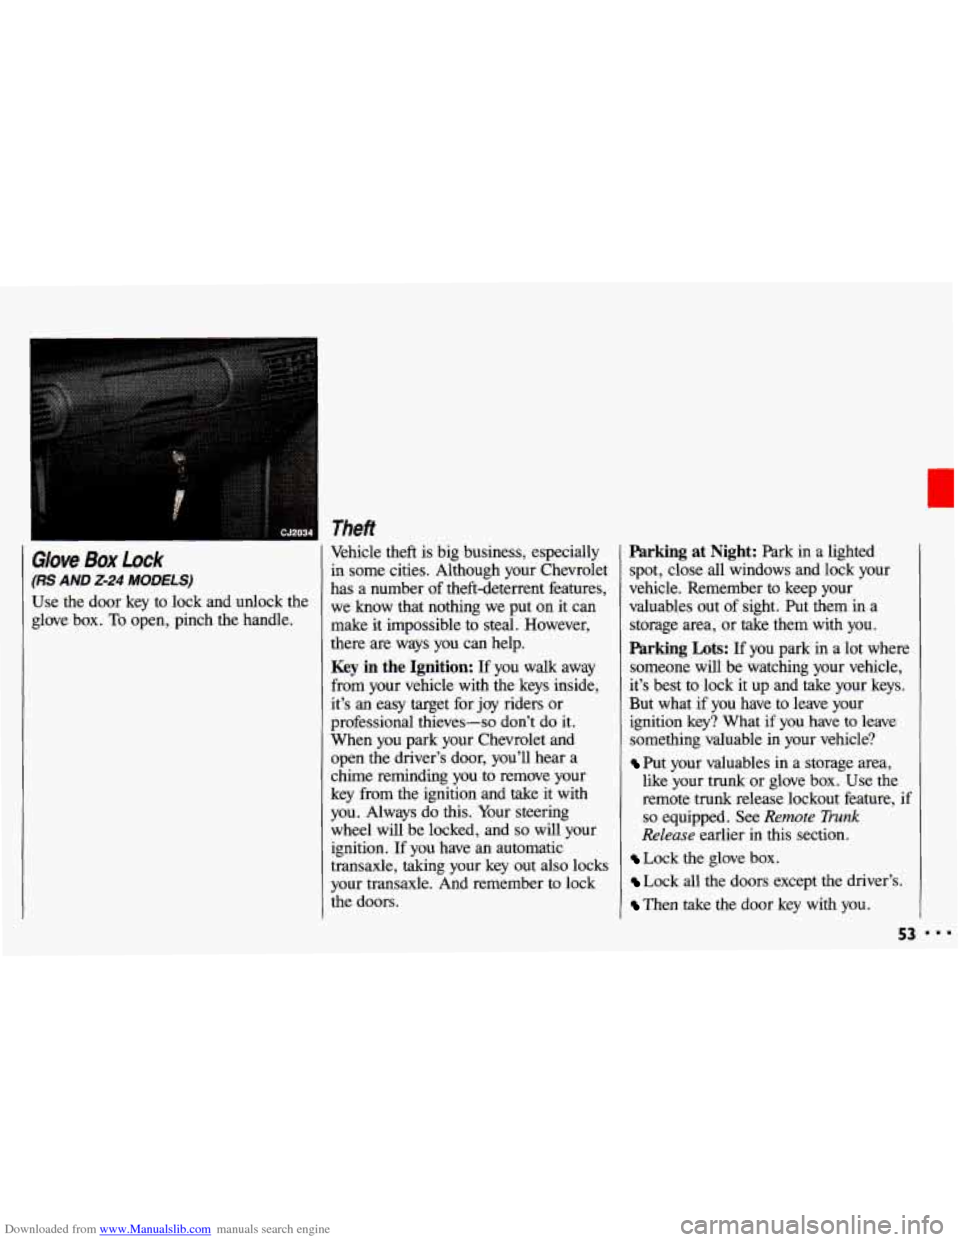
Glove Box Lock
(RS AND 2-24 MODELS)
Use the door key to lock and unlock the
glove box.
To open, pinch the handle, Vehicle theft
is big business, especially
in some cities. Although your Chevrolet
has a number of theft-deterrent features,
we know that nothing we put on it can
make it impossible to steal. However,
there are ways you can help.
Key in the Ignition: If you walk away
from your vehicle with the keys inside,
it’s an easy target for joy riders or
professional thieves-so don’t do it.
When you park your Chevrolet and
open the driver’s door, you’ll hear a
chime reminding you
to remove your
key from the ignition and take
it with
you. Always do this. Your steering
wheel will be locked, and
so will your
ignition. If you have an automatic
transaxle, taking your key out also locks
your transaxle. And remember to lock
the doors.
Parking at Night: Park in a lighted
spot, close all windows and lock your
vehicle. Remember to keep your
valuables out of sight. Put them in a
storage area, or take them with you.
Parking Lots: If you park in a lot where
someone will be watching your vehicle,
it’s best
to lock it up and take your keys.
But what if you have to leave your
ignition key? What if you have to leave
something valuable in your vehicle?
Put your valuables in a storage area,
like your trunk or glove box. Use the
remote trunk release lockout feature,
if
so equipped. See Remote Trunk
Release earlier in this section.
Lock the glove box.
Lock all the doors except the driver’s.
Then take the door key with you.
53
Page 57 of 308
Downloaded from www.Manualslib.com manuals search engine Ignition Switch
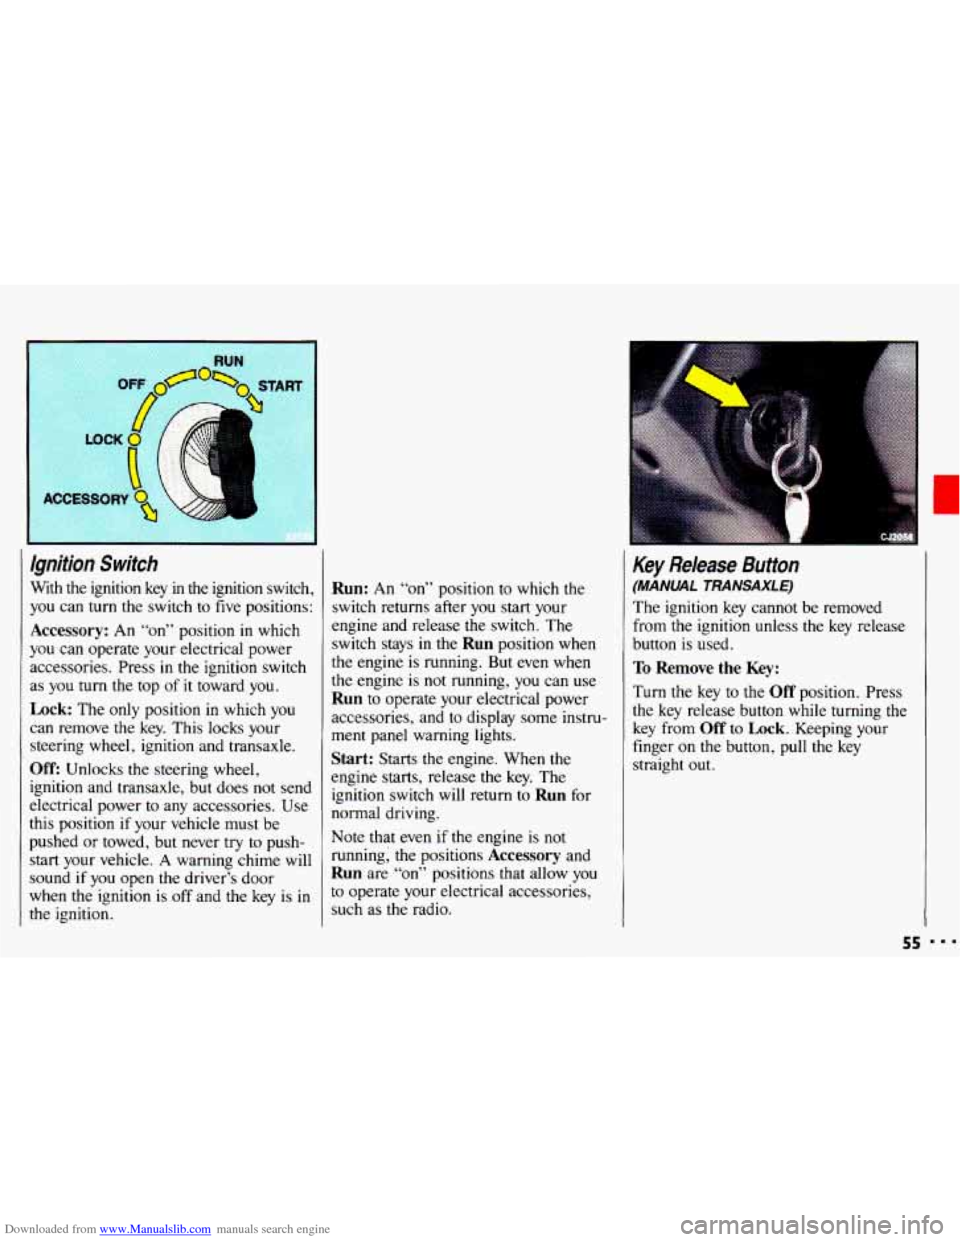
With the ignition key in the ignition switch,
you can
turn the switch to five positions:
Accessory: An “on” position in which
you can operate your electrical power
accessories. Press in the ignition switch
as
you turn the top of it toward you.
Lock: The only position in which you
can remove the key. This locks your
steering wheel, ignition and transaxle.
Off: Unlocks the steering wheel,
ignition and transaxle, but does not send
electrical power
to any accessories. Use
this position
if your vehicle must be
pushed
or towed, but never try to push-
start your vehicle.
A warning chime will
sound
if you open the driver’s door
when the ignition is
off and the key is in
the ignition.
Run: An “on” position to which the
switch returns after
you start your
engine and release the switch. The
switch stays in
the Run position when
the engine is running. But even when
the engine is not running, you can use
Run to operate your electrical power
accessories, and to display some instru-
ment panel warning lights.
Start: Starts the engine. When the
engine starts, release the key. The
ignition switch will return to
Run for
normal driving.
Note that even
if the engine is not
running; the positions
Accessory and
Run are “on” positions that allow you
to operate your electrical accessories,
such as the radio.
Key Release Button
(MANUAL TRANSAXLE)
The ignition key cannot be removed
from
the ignition unless the key release
button is used.
To Remove the Key:
Turn the key to the Off position. Press
the key release button while turning the
key from
Off to Lock. Keeping your
finger
on the button, pull the key
straight
out.
55
Page 74 of 308
Downloaded from www.Manualslib.com manuals search engine Features & Controls
I Power Windows (opTIoN)
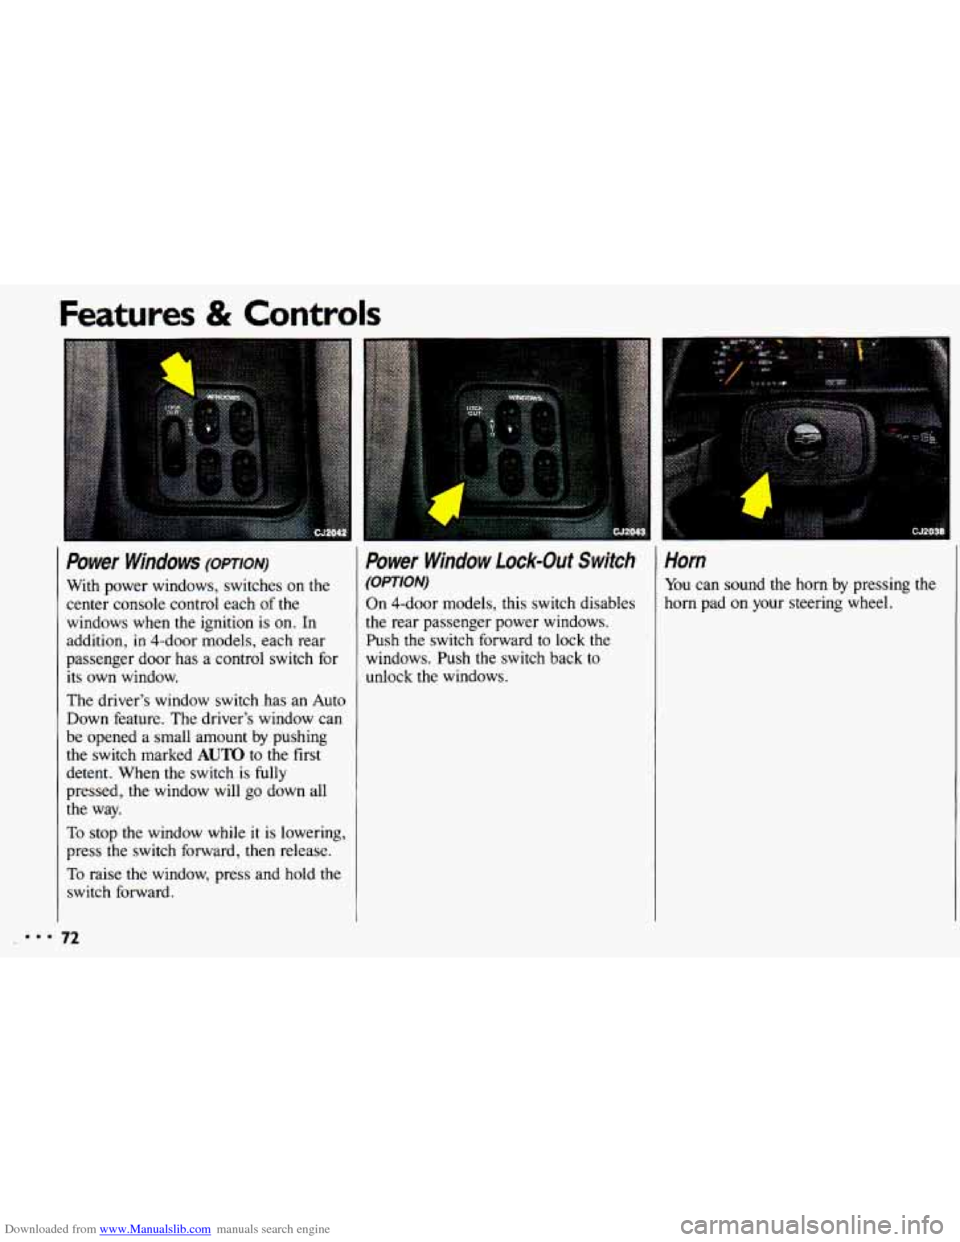
With power windows, switches on the
center console control each
of the
windows when the ignition is
on. In
addition, in 4-dOOr models, each rear
passenger door has a control switch for
its own window.
The driver’s window switch has an Auto
Down feature. The driver’s window can
be opened a small amount by pushing
the switch marked
AUTO to the first
detent. When the switch
is fully
pressed, the window will go down all
the way.
To stop the window while it is lowering,
press the switch forward, then release.
To raise the window, press and hold the
switch forward.
Power Window Lock-Out Switch
(OPTION)
On 4-dOOr models, this switch disables
the rear passenger power windows.
Push the switch forward to lock the
windows. Push the switch back to
unlock the windows.
1
i . :i .............. : ....... ,~,.
Horn
You can sound the horn by pressing the
horn pad
on your steering wheel.
:.. 72
Page 88 of 308
Downloaded from www.Manualslib.com manuals search engine Features & Controls
il
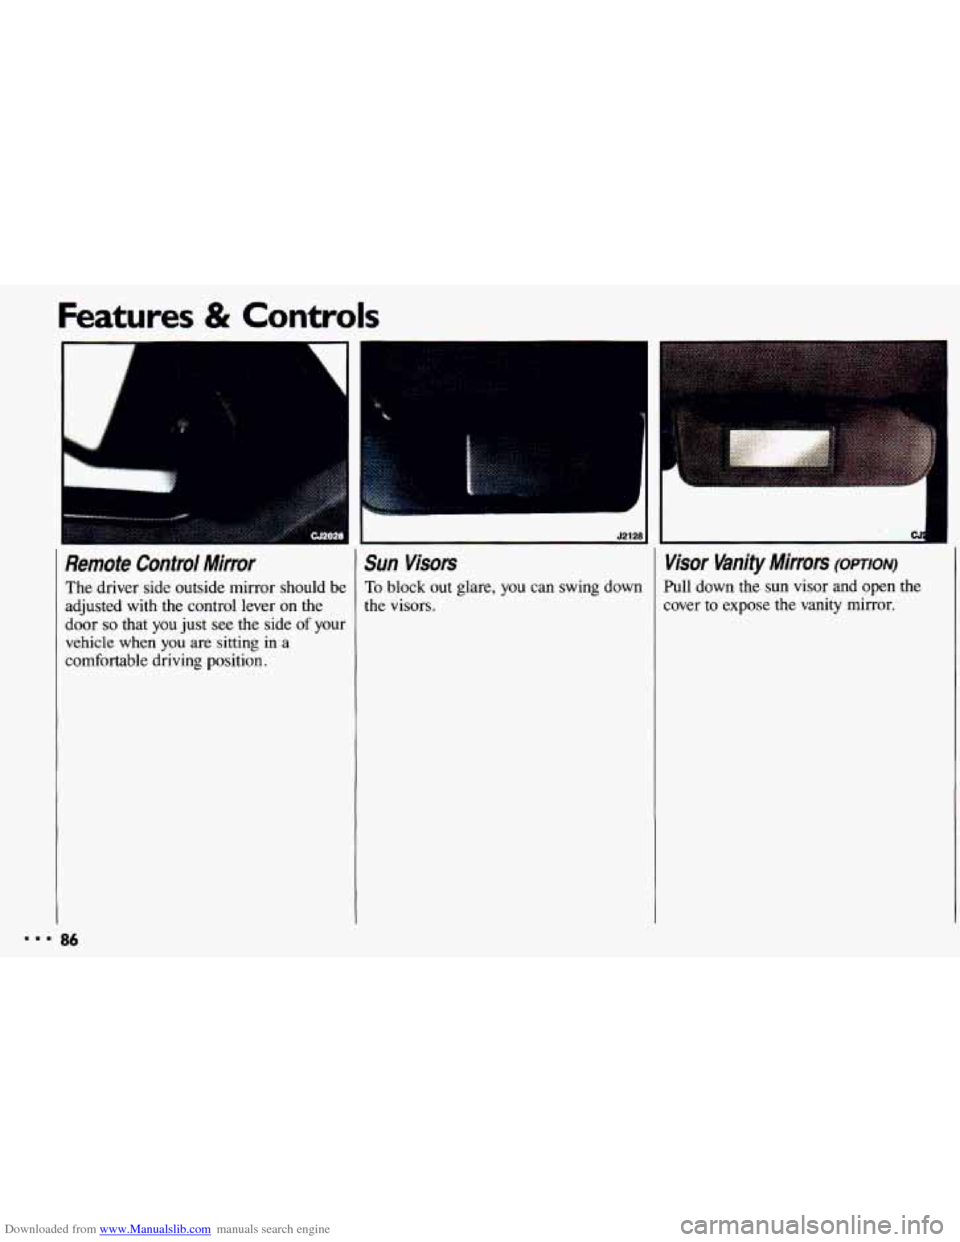
Remote Contra/ Mirror Sun Visors
The driver side outside mirror should be To block out glare, you can swing down
adjusted
with the control lever on the the visors.
door
so that you just see the side of your
vehicle
when you are sitting in a
comfortable driving position.
Visor Vanity Mirrors (opTIoN)
Pull down the sun visor and open the
cover to expose the vanity mirror.
Page 202 of 308
Downloaded from www.Manualslib.com manuals search engine Service & Appearance Care
..I
F
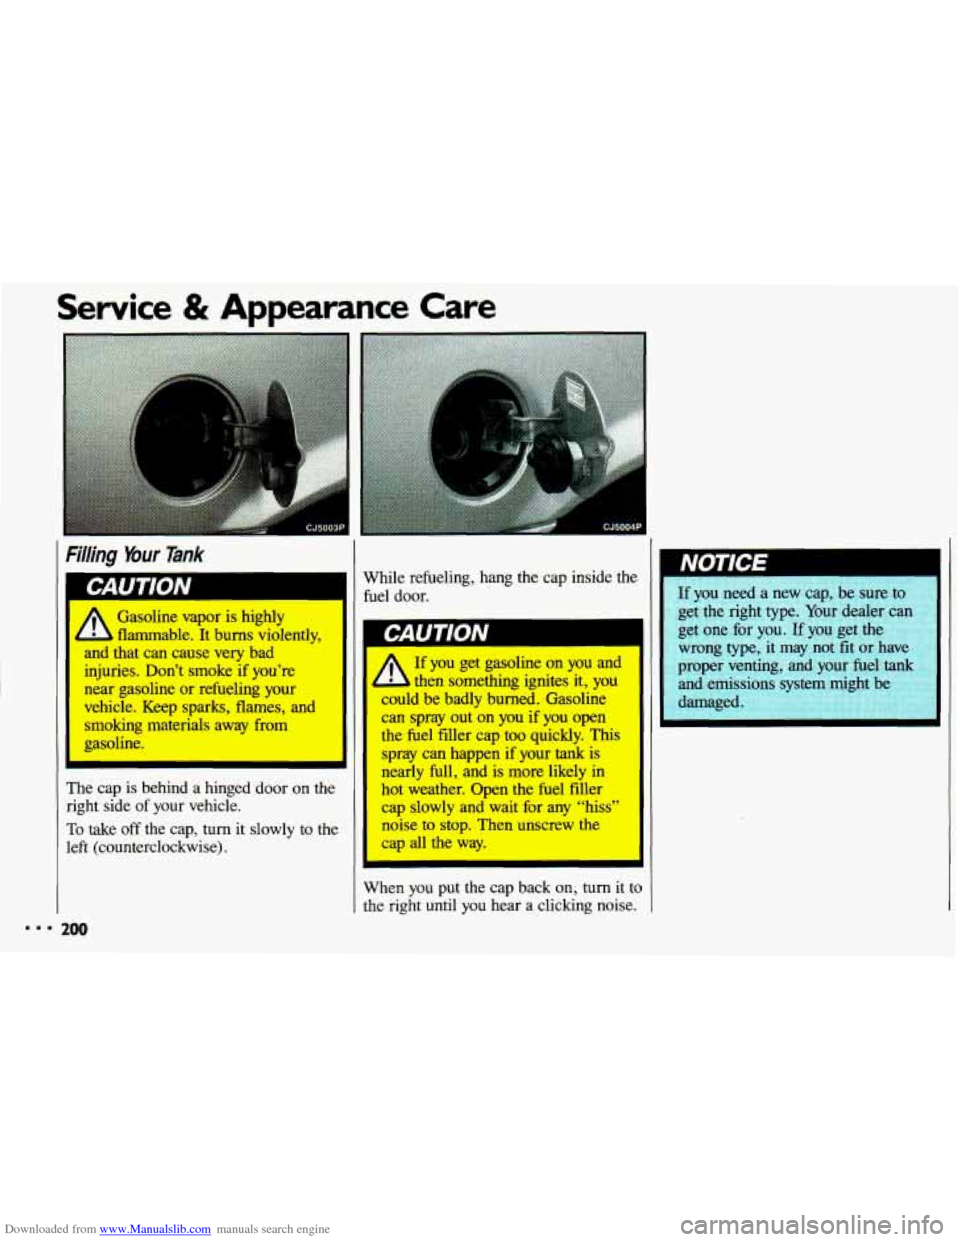
Filling Your lank
I 4Knu l”’”
I
Gasoline vapor is highly
- flammable. It bums violently,
and that can cause very bad
injuries. Don’t smoke if you’re
ar gasoline or refueling your
hicle. Keep sparks, flames, and
loking materials away from
,,soline.
The cap
is behind a hinged door on the
right side of your vehicle.
To take off the cap, turn it slowly to the
left (counterclockwise).
200
rhile refueling, hang the cap inside the
le1 door.
If you get gasoline on you and
then something ignites it, you
could be badly burned. Gasoline
can spray out on you if you open
the fuel filler cap too quickly. This
spray can happen if your
tank is
nearly full, and is more likely in
hot weather. Open the fuel filler
cap slowly and wait for any “hiss”
noise
to stop. Then unscrew the
cap all the way.
{hen you put the cap back on,
turn it to
le right until you hear a clicking noise.
Page 210 of 308
Downloaded from www.Manualslib.com manuals search engine Service & Appearance Care
When to Change Engine Oil
See if any one of these is true for you:
Most trips are less than 4 miles (6 km).
It’s below freezing outside and most
trips are less than 10 miles
(16 km).
The engine is at low speed most of the
time (as in door-to-door delivery,
or in
stop-and-go traffic).
Most trips are through dusty places.
If any one
of these is true for your
vehicle, then you need to change your
oil and filter every 3,000 miles
(5 OOO km) or 3 months-whichever
comes first.
If none of them is true, change the oil
every
7,500 miles (12 500 km) or 12
months-whichever comes first. Change
the filter at the first oil change and at
every other oil change after that.
208
Engine Block Heater
An engine block heater can be a big
help if you have to park outside in very
cold weather,
0°F (-18°C) or colder. If
your vehicle has this option, see the
index under Engine Block Heater.
What to Do with Used Oil
CAUTION
A
Used engine oil contains
things that have caused skin
cancer in laboratory animals. Don’t
let used
oil stay on your skin for
very long. Clean your skin and
nails with soap and water, or a
good hand cleaner. Wash or
properly throw away clothing or
rags containing used engine oil.
Page 227 of 308
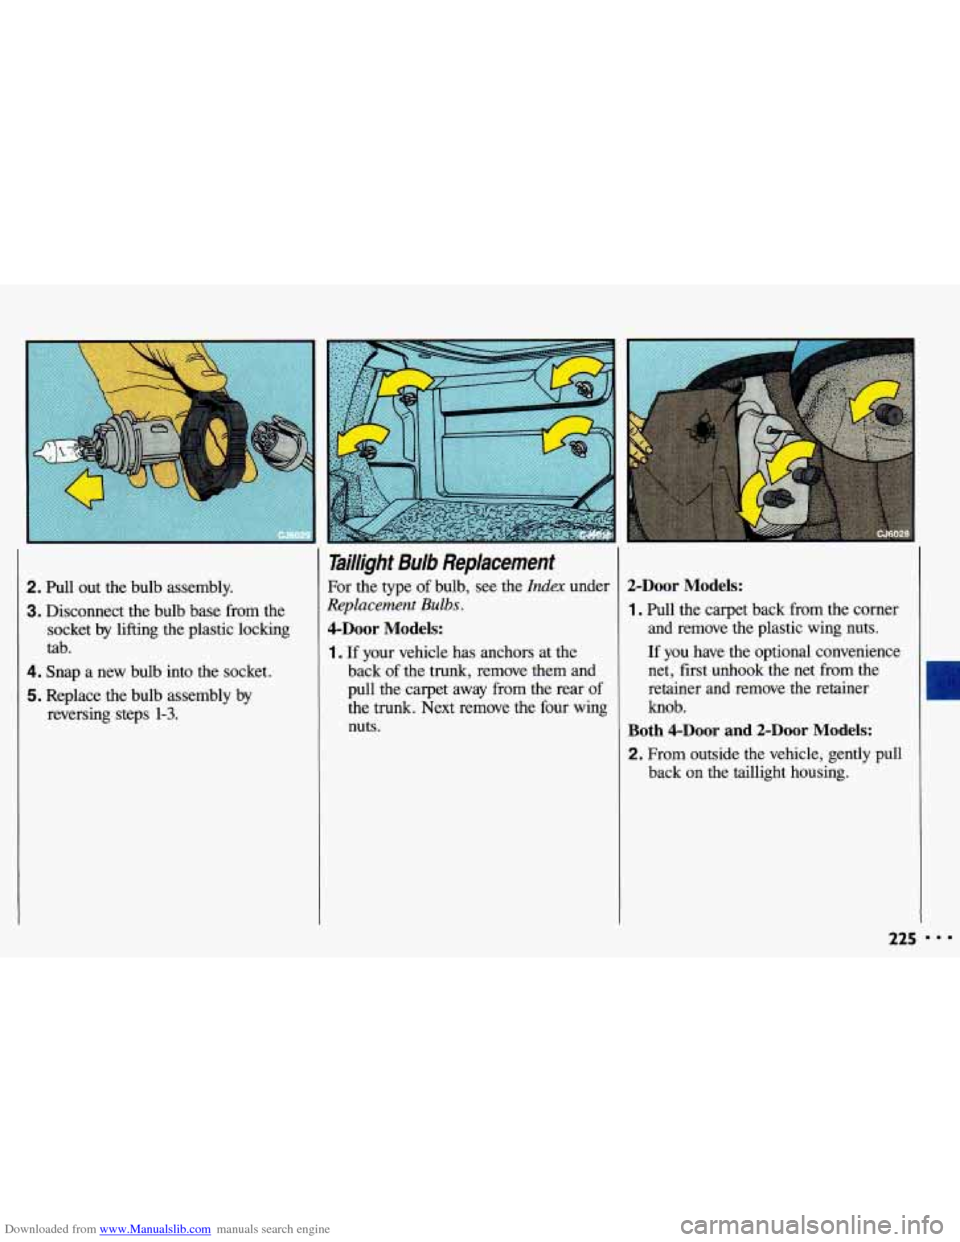
Downloaded from www.Manualslib.com manuals search engine 2. Pull out the bulb assembly.
3. Disconnect the bulb base from the
socket
by lifting the plastic locking
tab.
4. Snap a new bulb into the socket.
5. Replace the bulb assembly by
reversing steps
1-3.
Taillight Bulb Replacement
For the type of bulb, see the Idex under
Replacement Bulbs.
4-Door Models:
1 . If your vehicle has anchors at the
back
of the trunk, remove them and
pull the carpet away from the rear of
the trunk. Next remove the four wing
nuts.
2-Door Models:
1. Pull the carpet back from the comer
and remove the plastic wing nuts.
If you have the optional convenience
net, first unhook the net from the
retainer and remove the retainer
knob.
Both 4-Door and 2-Door Models:
2. From outside the vehicle, gently pull back
on the taillight housing.
Page 229 of 308
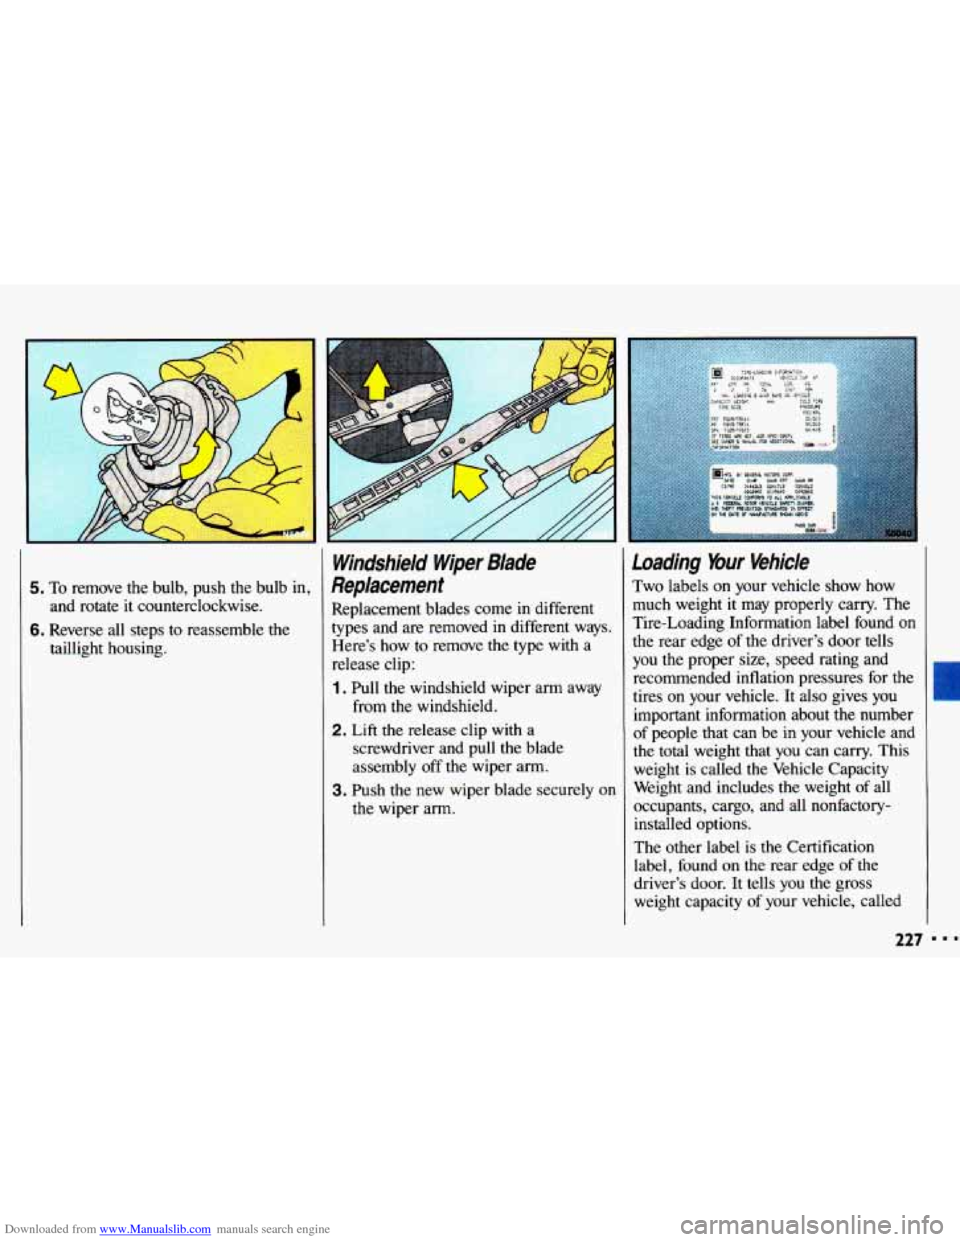
Downloaded from www.Manualslib.com manuals search engine 5. To remove the bulb, push the bulb in,
and rotate it counterclockwise.
6. Reverse all steps to reassemble the
taillight housing.
Windshield Wiper Blade
Replacement
Replacement blades come in different
types and are removed in different ways.
Here’s how
to remove the type with a
release clip:
1. Pull the windshield wiper arm away
2. Lift the release clip with a
from the windshield.
screwdriver and pull the blade
assembly
off the wiper arm.
the wiper arm.
3. Push the new wiper blade securely on
Loading %ur Vehicle
Two labels on your vehicle show how
much weight it may properly carry. The
Tire-Loading Information label found
on
the rear edge of the driver’s door tells
you the proper size, speed rating and
recommended inflation pressures for the
tires on your vehicle. It also gives
you
important information about the number
of people
that can be in your vehicle and
the total weight that you can carry. This
weight
is called the Vehicle Capacity
Weight and includes the weight
of all
occupants, cargo, and all nonfactory- installed options.
The other label
is the Certification
label, found on the rear edge of the
driver’s door. It tells you the gross
weight capacity
of your vehicle, called
I
227
Page 274 of 308
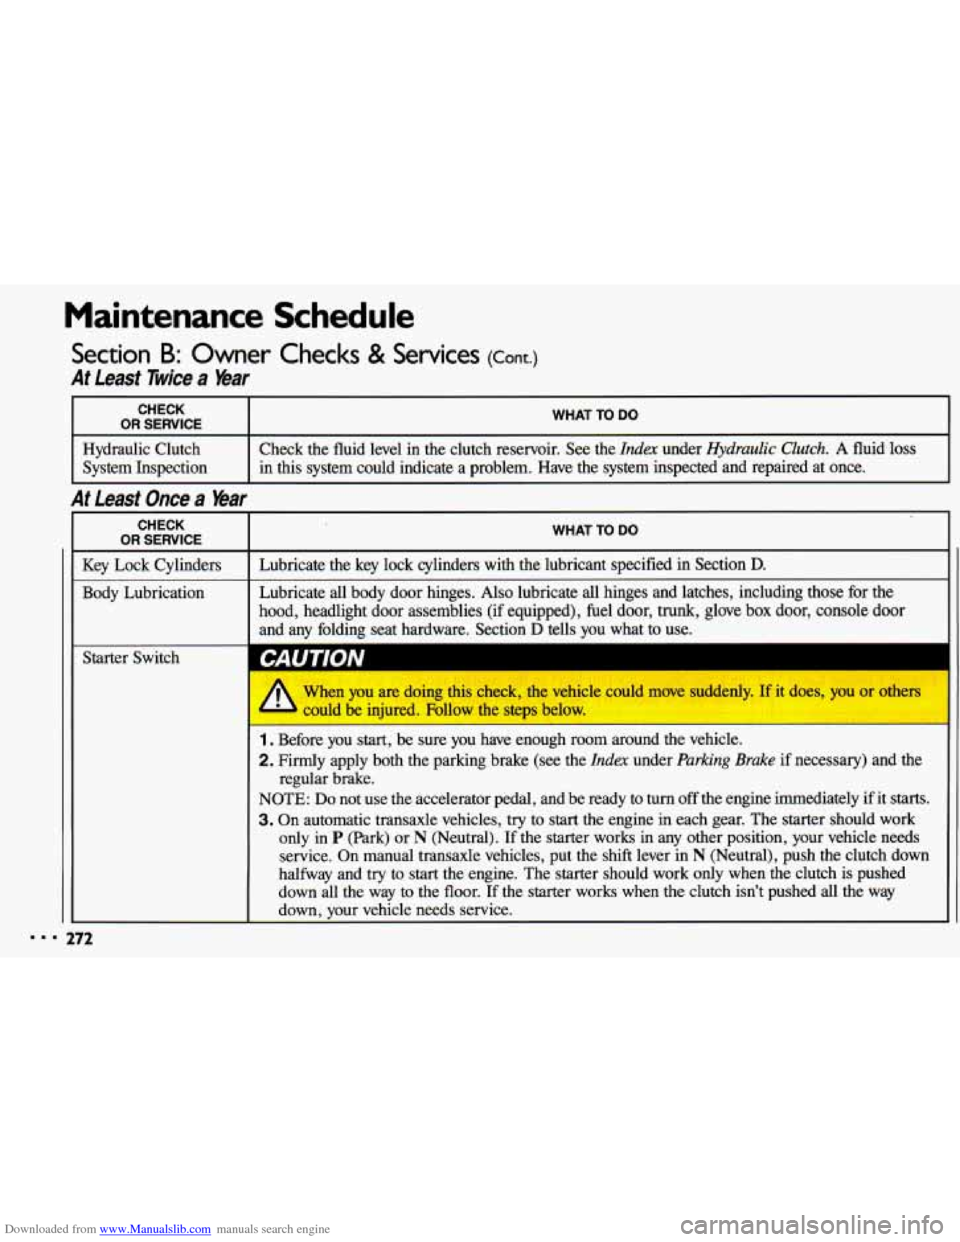
Downloaded from www.Manualslib.com manuals search engine Maintenance Schedule
Section B: Owner Checks & Services (Cont.)
At Least Twice a Year
... L
CHECK
I OR SERVICE I WHAT TO DO
Hydraulic Clutch
in this system could indicate a problem. Have the system inspected and repaired at once. System Inspection
Check
the fluid level in the clutch reservoir. See the Index under Hydraulic Clutch. A fluid loss
At Least Once a Year
CHECK
I OR SERVICE I WHAT TO DO
I
Key Lock Cylinders I Lubricate the key lock cylinders with the lubricant specified in Section D.
Body Lubrication Lubricate all body
door hinges. Also lubricate all hinges and latches, including those \
for the
hood, headlight door assemblies (if equipped), fuel door, trunk, glove box door, console door
and any folding seat hardware. Section
D tells you what to use.
L
272
I CAUTION
1. Before you start, be sure you have enough room around the vehicle.
2. Firmly apply both the parking brake (see the Index under Parking Brake if necessary) and the
NOTE:
Do not use the accelerator pedal, and be ready to turn off the engine immediately if it starts.
3. On automatic transaxle vehicles, try to start the engine in each gear. The starter should work
only in P (Park) or N (Neutral). If the starter works in any other position, your vehicle needs
service. On manual transaxle vehicles, put the shift lever in
N (Neutral), push the clutch down
halfway and
try to start the engine. The starter should work only when the clutch is pushed
down all the way to the floor. If the starter works when the clutch isn’t pushed all the way
down, your vehicle needs service.
regular brake.
I
Page 297 of 308

Downloaded from www.Manualslib.com manuals search engine Index
Adding Brake Fluid
............ .222. 252
Electrical Equipment
.......... 247
Engine Coolant
...... .217. 250. 252
Engine Oil
......... .206. 250. 252
Hydraulic Clutch Fluid
.... .2l5. 252
Power Steering Fluid
. .220. 251. 252
Transaxle Fluid Autornatic
........ .213. 250. 252
Manual
.......... .2l5. 250. 252
Windshield Washer Fluid
....... 220
Air Cleaner Filter
......... .209. 256
Air Conditioner
................ 107
Alcohol. Driving Under the Influence of
.................. 129
Alcohol in Gasoline
............. 198
Aluminum Wheels
Cleaning
.................... 243
Removing
................... 186
Antenna
...................... 122
Antifreeze
............ .216. 250. 252
Anti-Lock Brake System
......... 134
Warning Light
................ 101
Appearance Care
............... 236
Ashtrays and Lighter
............. 87
Audio Systems .................. 111
AM/FM Stereo Radio
.......... 112
AM/FM Stereo Radio with
Cassette Player
.............. 113
AM/FM Stereo Radio with Compact
Disc Player
................. 116
Care
of Audio Systems ......... 121
Radio Reception. Understanding
. . 121
Setting the Clock
.............. 111
Automatic Door Locks
........... 50
Automatic Lap-Shoulder Belt
(see
Safety Belts)
Automatic Transaxle
Adding Fluid
........ .213, 250, 252
Brake-Transaxle Shift Interlock
... 61
Checking Fluid
............... 211
Shifting
...................... 60
Starting the Engine ............. 56
Battery ...................... 223
Jump Starting
................ 164
Battery Warning
........... .167. 223
Battery Warning Light
........... 100 Blizzard. Caught
In a
............ 159
Block Heater. Engine
........ .59. 208
Blowout. Tire
.................. 184
Brake Adjustment
.................. 137
Fluid
.................. .221. 252
Master Cylinder
.............. 221
Parking
...................... 66
Pedal Travel
................. 136
Rear
....................... -136
Warning Light ................ 100
Wear Indicators-Front Brakes ... 135
Brake System Warning Light
...... 100
Brake-Transaxle Shift
Interlock
..................... 61
Brakes. Anti-Lock
.............. 134
Braking
....................... 132
Braking In Emergencies
.......... 137
Braking Technique
.............. 132
Break-In. New Vehicle
Normal Driving ............... 54
Buckling Up (see
Safety Belts)
Bulb Replacement
Headlight
.............. .224. 253
Taillight
............... .225. 253
295