instrument panel CHEVROLET CAVALIER 1993 1.G Owners Manual
[x] Cancel search | Manufacturer: CHEVROLET, Model Year: 1993, Model line: CAVALIER, Model: CHEVROLET CAVALIER 1993 1.GPages: 308, PDF Size: 15.62 MB
Page 22 of 308
Downloaded from www.Manualslib.com manuals search engine Seats & Safety Belts
I
e
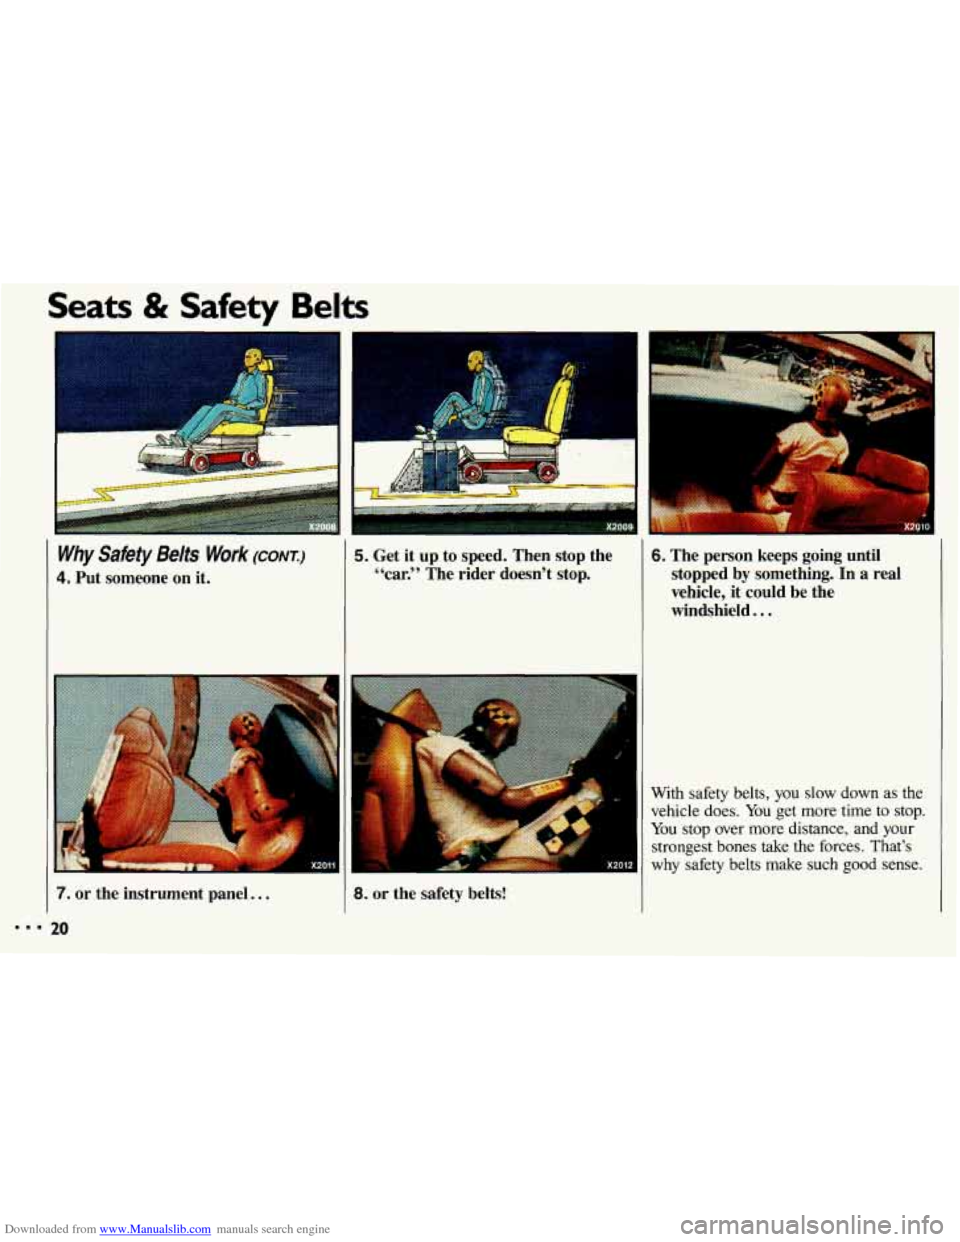
Why Safety Belts Work (CONI:)
4. Put someone on it.
6. The person keeps going until stopped by something. In a real
vehicle,
it could be the
windshield..
.
5. Get it up to speed. Then stop the
44car.” The rider doesn’t stop.
With safety belts, you slow down as the
vehicle does.
You get more time to stop.
You stop over more distance, and your
strongest bones
take the forces. That’s
why safety belts make such
good sense.
7. or the instrument panel.. .
20
8. or the safety belts!
Page 49 of 308
Downloaded from www.Manualslib.com manuals search engine ..
.; . I
Here you can learn about the
many standard and optional features
on your Chevrolet. and information
on starting. shifting and braking
.
Also explained are the instrument
panel and the warning systems that
tell you
if everything is working
properly-and what to
do if you have
a problem
.
Part 2
Features & Controls
Keys ............................................................ 48
Locks ........................................................... 49
GloveBox ....................................................... 53
Ignition ......................................................... 55
StartingYourEngine ............................................... 56
Engine Block Heater ............................................... 59
Shifting the Transaxle
.............................................. 60
ParkingBrake .................................................... 66
ShiftingintoPark .................................................. 67
Windows
........................................................ 71
Turn SignaVHeadlight Beam Lever
................................... -73
Cruisecontrol
.................................................... 74
Headlights
....................................................... 78
Interior Lights
.................................................... 81
Windshield Wipers
................................................ 83
Windshield Washer
................................................ 84
Mirrors
......................................................... 85
Ashtrays and Lighter
............................................... 87
Sunroof ......................................................... 88
Instrumentpanel .................................................. 93
Warning Lights, Gages and Indicators
.................................. 96
47
c
...
Page 54 of 308
Downloaded from www.Manualslib.com manuals search engine Features & Controls
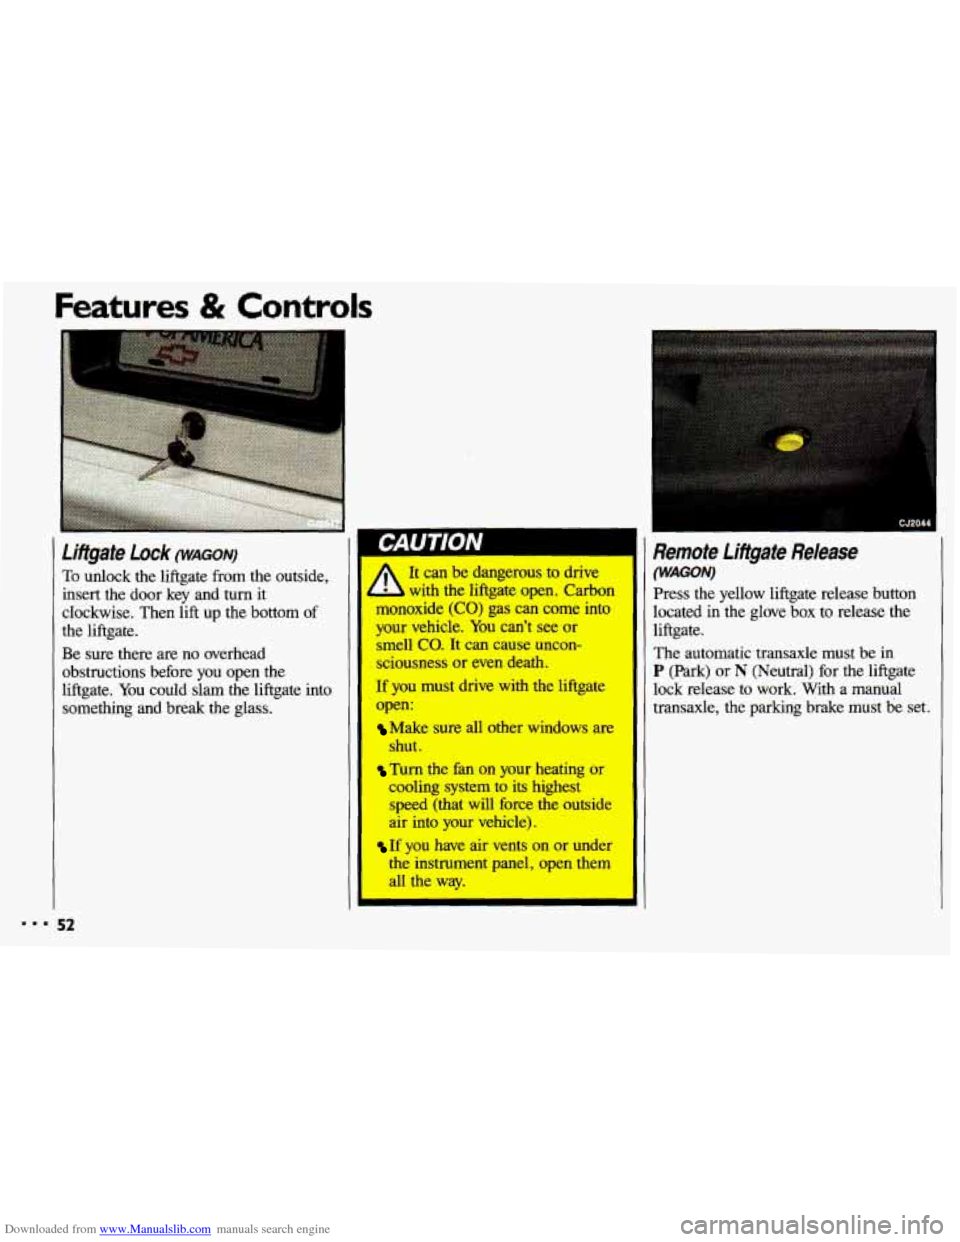
To &dock the liftgate from the outside,
insert the door key and turn it
clockwise. Then
lift up the bottom of
the liftgate.
Be sure there are no overhead
obstructions before you open the
liftgate. You could slam the liftgate into
something and break the glass.
I CJ2044
Remote Lifigate Release
(WAGON) It can be dangerous to drive
L with the liftgate open. Carbon
monoxide
(CO) gas can come into
your vehicle.
You can’t see or I smell co. It can cause uncon-
sciousness or even death.
If you must drive with the liftgate lock release to work. With a manual
open: transaxle, the parking brake must be set.
I
The automatic transaxle must be in
P (Park) or N (Neutral) for the liftgate
Make sure all other windows are
shut.
Turn the fan on your heating or
cooling system to its highest
speed (that will force the outside
air into your vehicle).
If you have air vents on or under
the instrument panel, open them
all the way. Press the
yellow liftgate release button
located in the glove box to release the
liftgate.
Page 58 of 308
Downloaded from www.Manualslib.com manuals search engine Features & Contr
Key Release Button (CONT.)
On manual transaxle vehicles,
- udng the key ta Lock will
lock the shMg column and result
in a loss of ability to steer the
vehicle. This could cause a
collision, If you need to tum the
engine off while the vehicle is
moving, turn the key only to Off.
Don’t press the key release button
while the vehicle is mcwing.
If your key seems stuck in Lock
and you can’t turn it, be sure it is
all the way in.
If it is, then turn tl
steering wheel left and right while
you
turn the key hard. But turn the
key only with your hand. Using a
tool to force it could break the
key
or the ignition switch. If none
this works,
t 1 yc vehicle needs
service.
Starting Your Engine
Engines start differently. The 8th digit of
your Vehicle Identification Number
(VIN) shows the code letter or number
for your engine. You will find the
VIN
at the top left of your instrument panel.
(See the Index under &hick
Ident@cation Number. ) Follow the
proper steps to start the engine.
56
Page 75 of 308
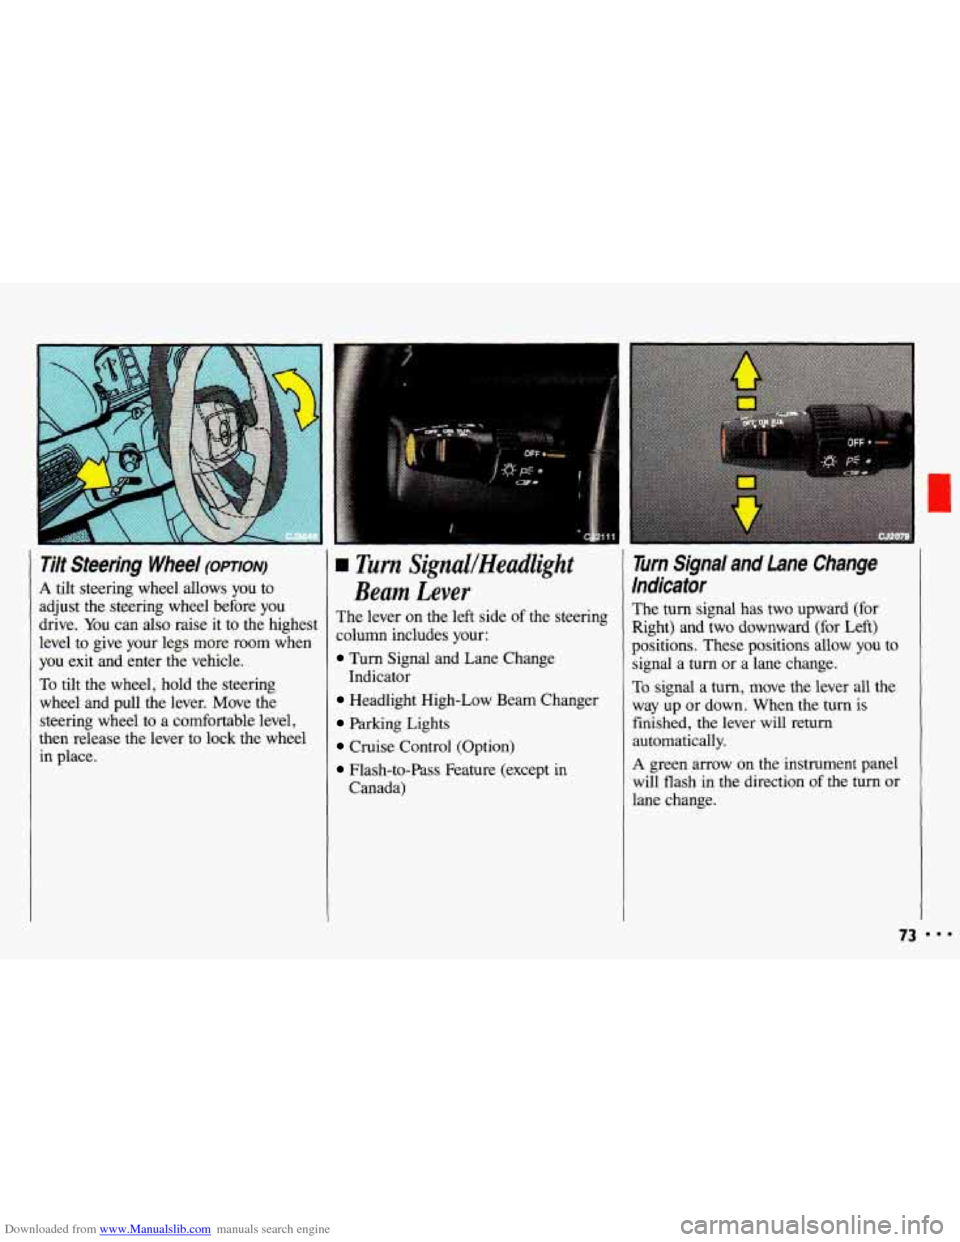
Downloaded from www.Manualslib.com manuals search engine Tilt Steering Wheel (OPTION)
A tilt steering wheel allows you to
adjust the steering wheel before you
drive. You can also raise it to the highest
level to give your legs more room when
you exit and enter the vehicle.
To tilt the wheel, hold the steering
wheel and pull the lever. Move the steering wheel to a comfortable level,
then release the lever
to lock the wheel
in place.
L rim SignuUHeadlight
Beam Lever
The lever on the left side of the steering
column includes your:
Turn Signal and Lane Change
Headlight High-Low Beam Changer
Parking Lights
Cruise Control (Option)
Flash-to-Pass Feature (except in
Indicator
Canada)
Turn Signal and Lane Change
Indicator
The turn signal has two upward (for
Right) and two downward (for Left)
positions. These positions allow you to
signal a turn or a lane change.
To signal a turn, move the lever all the
way up or down. When the turn is
finished, the lever will return
automatically.
A green arrow on the instrument panel
will flash in the direction
of the turn or
lane change.
73
Page 82 of 308
Downloaded from www.Manualslib.com manuals search engine Features & Controls
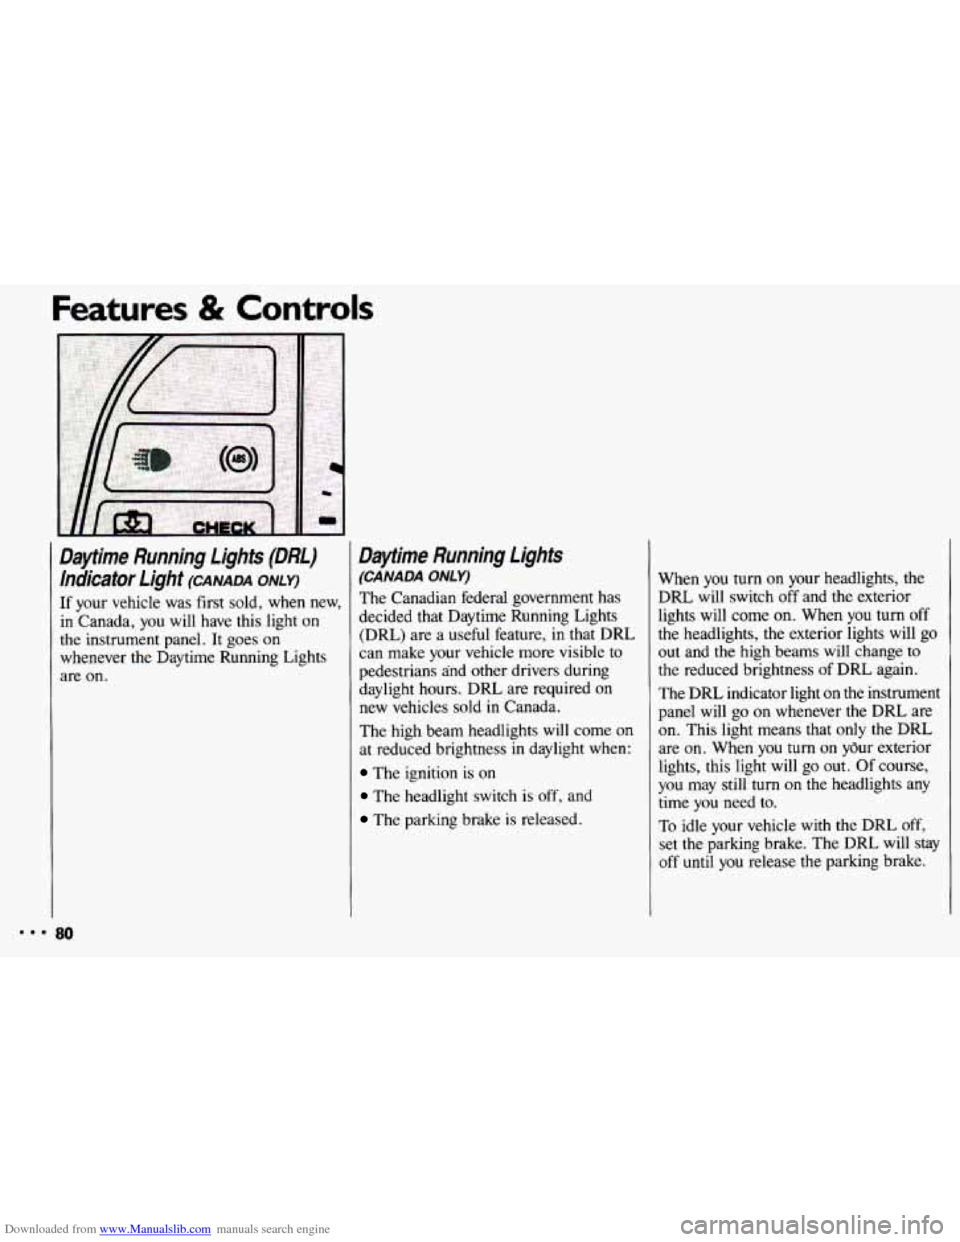
Daytime Running Lights (DRL) hdicator Light
(CANADA ONLY)
If your vehicle was first sold, when new,
in Canada, you will have this light on
the instrument panel. It goes on
whenever the Daytime Running Lights
are on.
Daflime Running Lights
(CANADA ONLY)
The Canadian federal government has
decided that Daytime Running Lights (DRL) are a useful feature,
in that DRL
can make your vehicle more visible to
pedestrians and other drivers during
daylight hours. DRL are required on
new vehicles sold
in Canada.
The high beam headlights
will come on
at reduced brightness
in daylight when:
The ignition is on
The headlight switch is off, and
The parking brake is released. When you
turn on your headlights,
the
DRL will switch off and the exterior
lights will come on. When you turn off
the headlights, the exterior lights will go out and the high beams will change to
the reduced brightness of DRL again.
The DRL indicator light on the instrument
panel will go
on whenever the DRL are
on. This light means that only the DRL
are on. When you turn
on your exterior
lights, this light will
go out. Of course,
you may still
turn on the headlights any
time
you need to.
To idle your vehicle with the DRL
off,
set the parking brake. The DRL will stay
off
until you release the parking brake.
80
Page 83 of 308
Downloaded from www.Manualslib.com manuals search engine ?;. I
I ..q
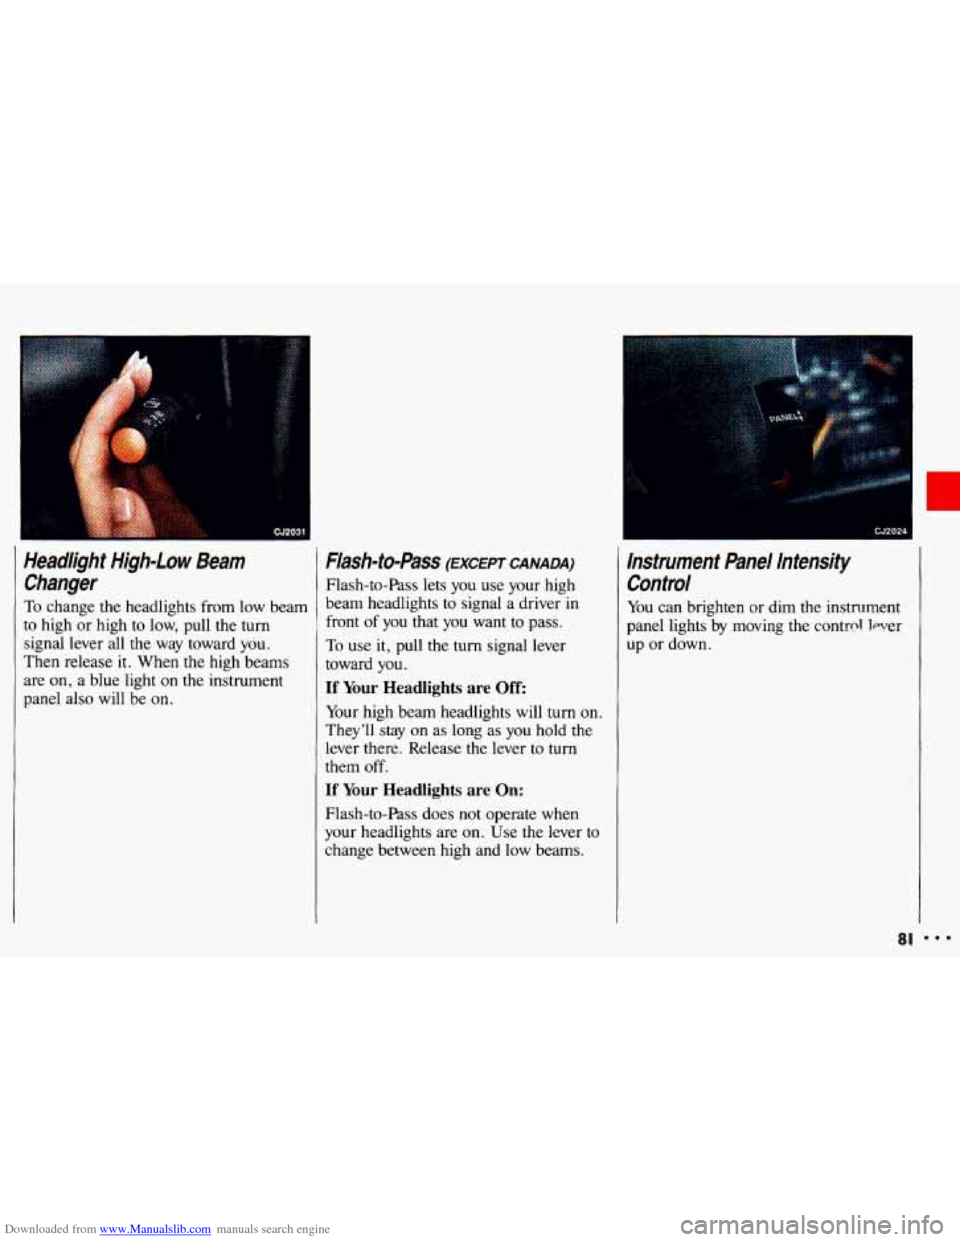
Headlight High-Low Beam Changer
To change the headlights from low beam
to high or high to low, pull the
turn
signal lever all the way toward you.
Then release it. When the high beams
are
on, a blue light on the instrument
panel also
will be on.
Flash-to-Pass (EXCEPT CANADA)
Flash-to-Pass lets you use your high
beam headlights
to signal a driver in
front of you that you want to pass.
To use it, pull the turn signal lever
toward you.
If Your Headlights are Off:
Your high beam headlights will turn on.
They'll
stay on as long as you hold the
lever there. Release the lever to turn
them
off.
If Your Headlights are On:
Flash-to-Pass does not operate when
your headlights are on. Use the lever to
change between high and low beams.
I
Instrument Panel Intensity Control
You can brighten or dim the instrument
panel lights
by moving the control. lever
up or down.
81
Page 95 of 308
Downloaded from www.Manualslib.com manuals search engine The lnstrument Panel-
Your information System
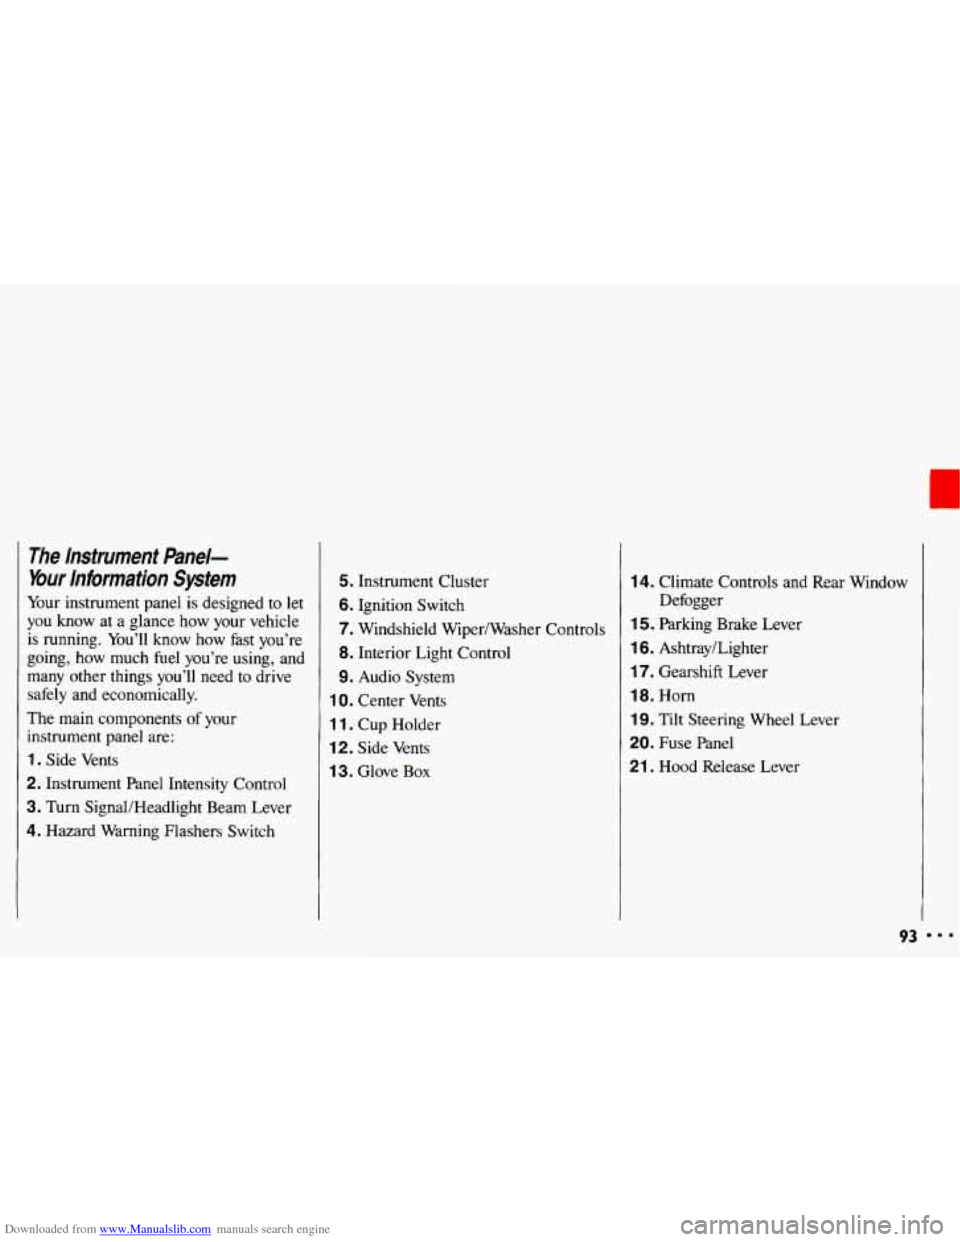
Your instrument panel is designed to let
you know at a glance how your vehicle
is running. You’ll know how fast you’re
going, how much fuel you’re using, and
many other things you’ll need to drive
safely and economically.
The main components
of your
instrument panel are:
1. Side Vents
2. Instrument Panel Intensity Control
3. Turn SignaVHeadlight Beam Lever
4. Hazard Warning Flashers Switch
5. Instrument Cluster
6. Ignition Switch
7. Windshield Wiper/Washer Controls
8. Interior Light Control
9. Audio System
1 0. Center Vents
1 1. Cup Holder
12. Side Vents
1 3. Glove Box
14. Climate Controls and Rear Window
1 5. Parking Brake Lever
16. Ashtray/Lighter
17. Gearshift Lever
18. Horn
19. Tilt Steering Wheel Lever
20. Fuse Panel
21 . Hood Release Lever Defogger
93 I..
Page 96 of 308
Downloaded from www.Manualslib.com manuals search engine Features & Controls
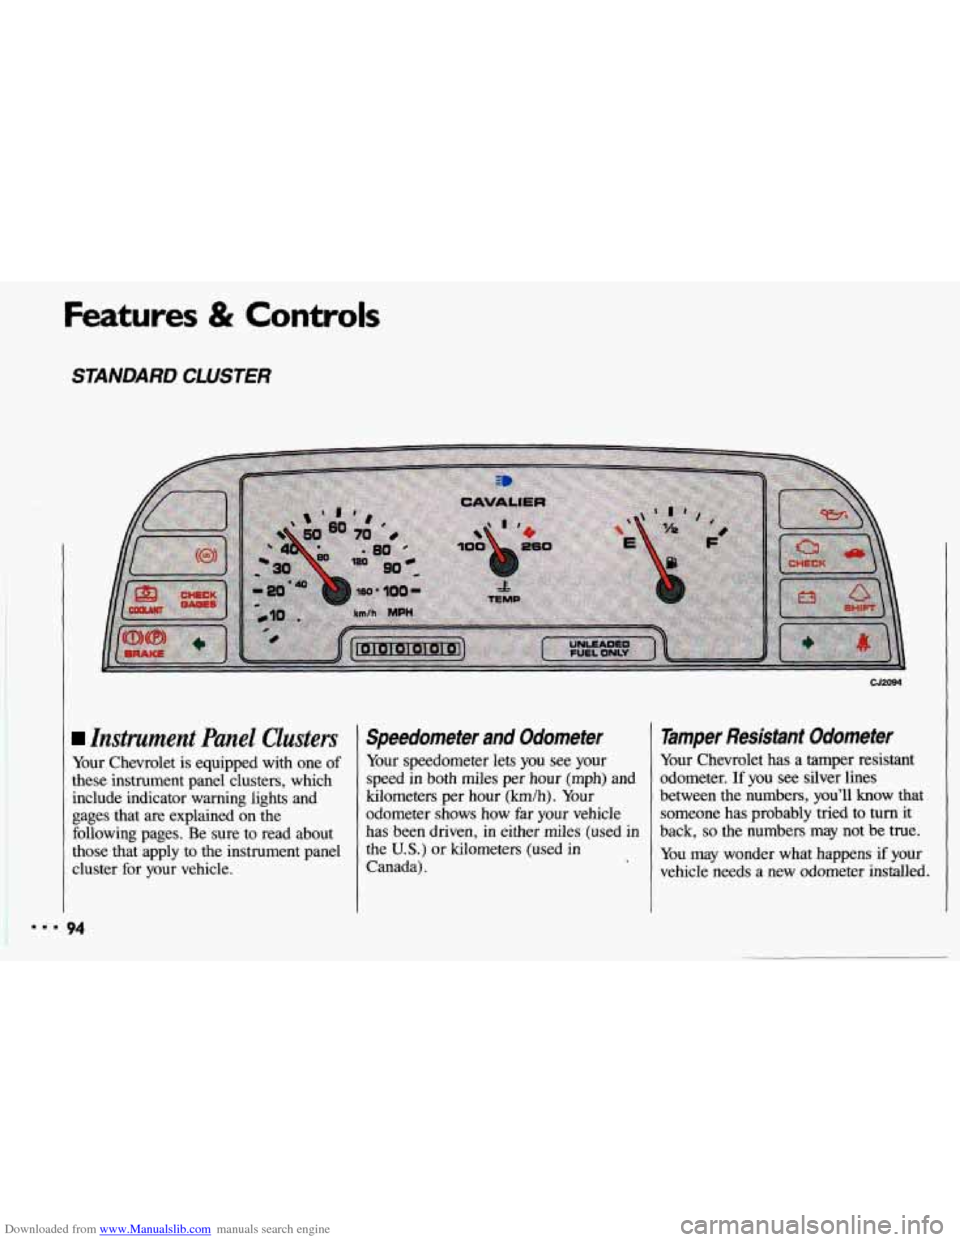
STANDARD CLUSTER
Instrument Panel Clusters
Your Chevrolet is equipped with one of
these instrument panel clusters, which
include indicator warning lights and
gages that are explained on the
following pages. Be sure to read about
those that apply to the instrument panel
cluster for your vehicle.
Speedometer and Odometer
Your speedometer lets you see your
speed in both miles per hour (mph) and
kilometers per hour (km/h). Your
odometer shows how far your vehicle
has been driven, in either miles (used in
the
U.S.) or kilometers (used in
Canada).
Tamper Resistant Odometer
Your Chevrolet has a tamper resistant
odometer. If
you see silver lines
between the numbers, you’ll
know that
someone has probably tried to
turn it
back,
so the numbers may not be true.
You may wonder what happens if your
vehicle needs a new odometer installed.
=.* 94
Page 108 of 308
Downloaded from www.Manualslib.com manuals search engine Comfort Controls & Audio Systems
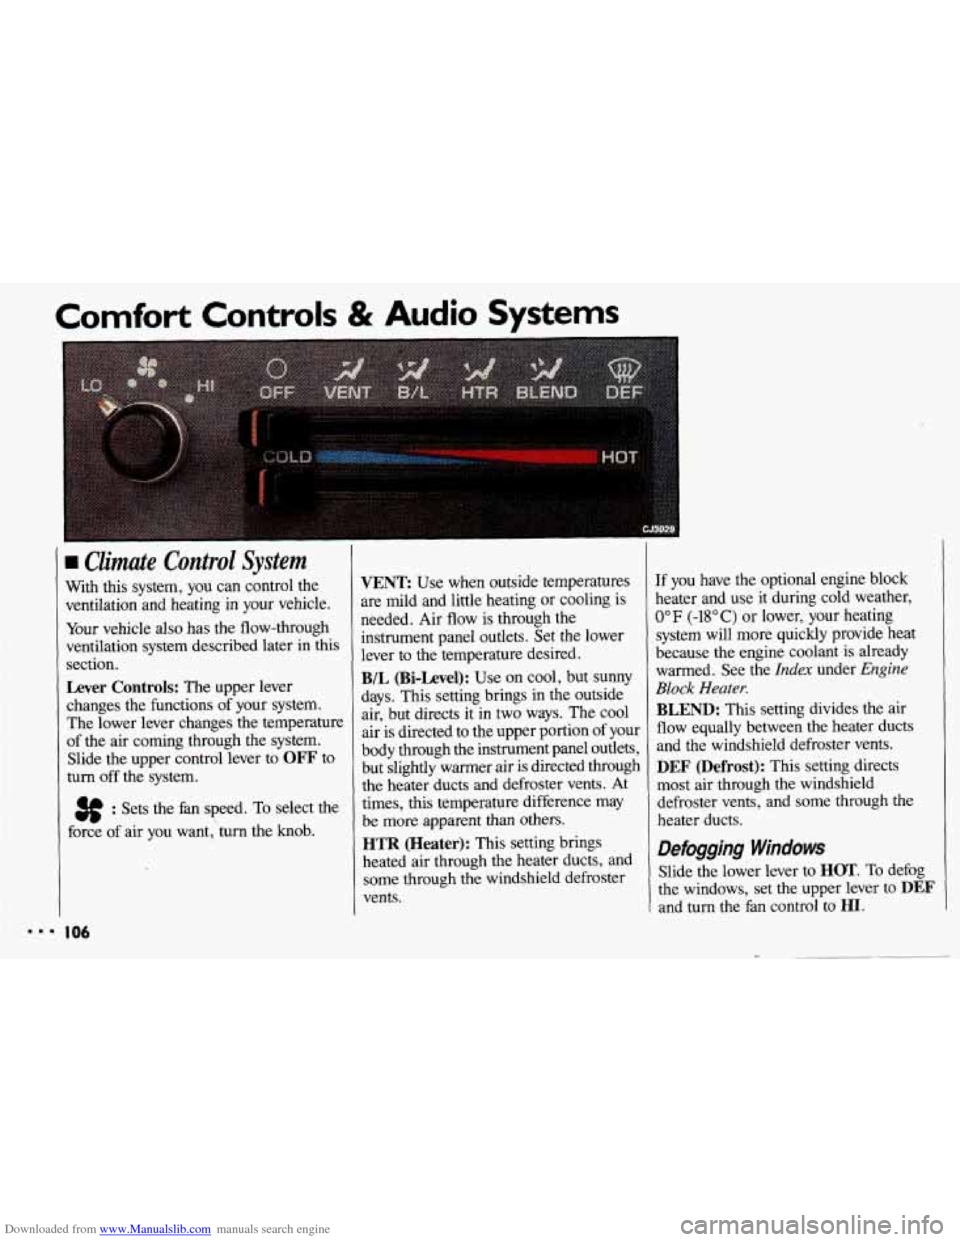
Climate Control System
With this system, you can control the
ventilation and heating in your vehicle.
Your vehicle
also has the flow-through
ventilation system described later in this
section.
Lever Controls: The upper lever
changes the functions of your system.
The lower lever changes the temperature
of the air coming through the system.
Slide the upper control lever to
OFF to
turn
off the system.
3f : Sets the fan speed. To select the
force of air you want,'turn the knob.
I06
VENT Use when outside temperatures
are mild and little heating or cooling is
needed. Air flow is through the
instrument panel outlets. Set the lower
lever to the temperature desired.
B/L (Bi-Level): Use on cool, but SUMY
days. This setting brings in the outside
air, but directs it in
two ways. The cool
air is directed to the upper portion of your
body through the instrument panel outlets,
but slightly warmer air is directed through
the heater ducts and defroster vents. At
times, this temperature difference may
be more apparent than others.
HTR (Heater): This setting brings
heated air through the heater ducts, and
some through the windshield defroster
vents.
If you have the optional engine block
heater and use it during cold weather,
0°F (-18°C) or lower, your heating
system will more quickly provide heat
because the engine coolant is already
warmed. See the
Index under Engine
Block Heater.
BLEND: This setting divides the air
flow equally between the heater ducts
and the windshield defroster vents.
DEF (Defrost): This setting directs
most air through the windshield
defroster vents, and some through the
heater ducts.
Defogging Windows
Slide the lower lever to HOT. To defog
the windows, set the upper lever to
DEF
and turn the fan control to HI.