radio controls CHEVROLET CAVALIER 1993 1.G Owners Manual
[x] Cancel search | Manufacturer: CHEVROLET, Model Year: 1993, Model line: CAVALIER, Model: CHEVROLET CAVALIER 1993 1.GPages: 308, PDF Size: 15.62 MB
Page 102 of 308
Downloaded from www.Manualslib.com manuals search engine Features & Controls
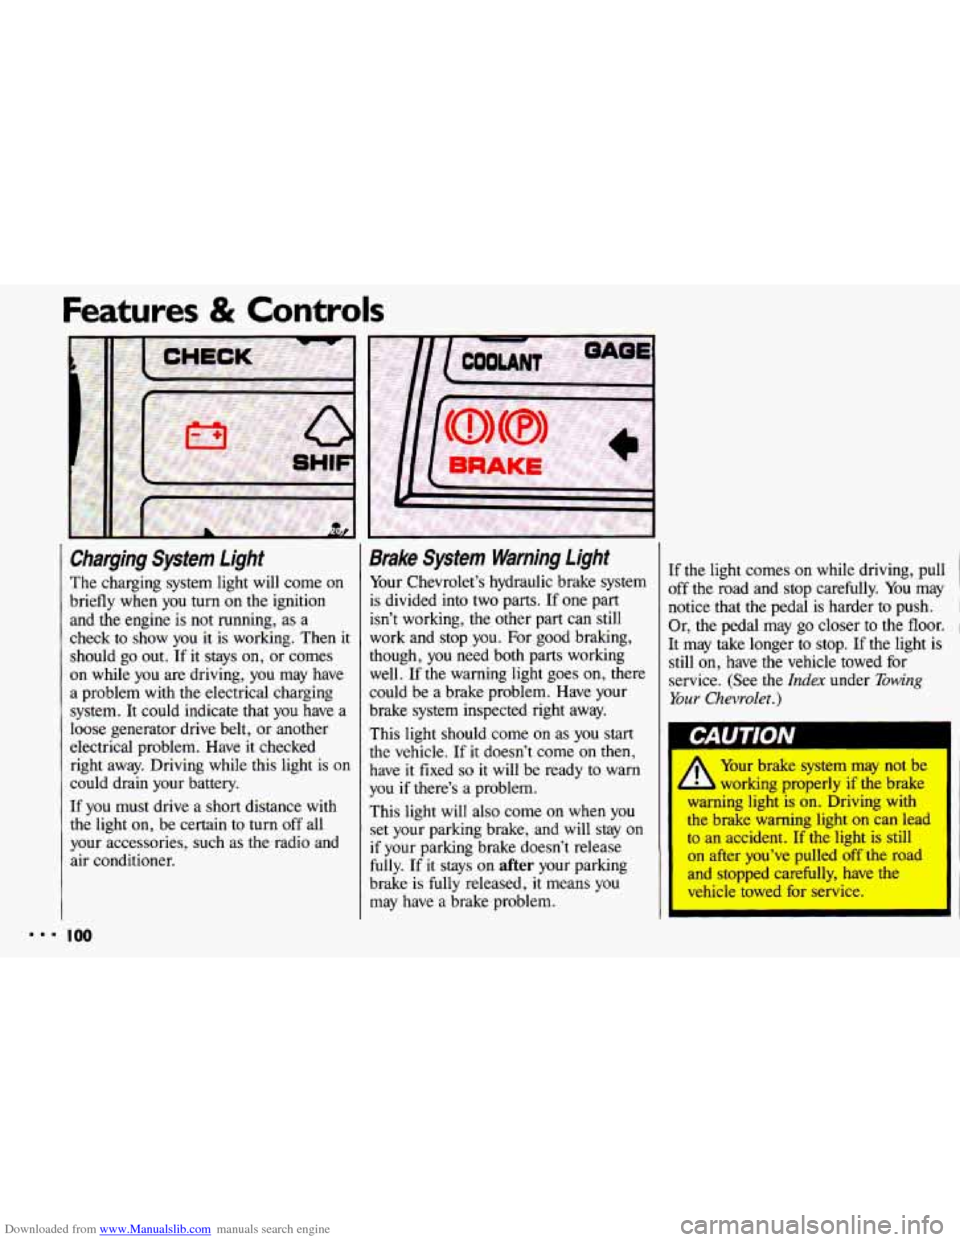
Charging System Light
The charging system light will come on
briefly when
you turn on the ignition
and the engine is not running, as a
check to show you it is working. Then it
should go out. If it stays on, or comes
on while you are driving, you may have
a problem with the electrical charging
system.
It could indicate that you have a
loose generator drive belt, or another
electrical problem. Have
it checked
right away. Driving while this light is on
could drain your battery.
If you must drive a short distance with
the light on, be certain to turn off all
your accessories, such as the radio and
air conditioner.
Brake Sysfem Warning Light
Your Chevrolet’s hydraulic brake system
is divided into two parts. If one part
isn’t working, the other part can still
work and stop you. For good braking,
though, you need both parts working
well. If the warning light goes on, there
could be a brake problem. Have your
brake system inspected right away.
This light should come on as you start
the vehicle. If it doesn’t come on then,
have
it fixed so it will be ready to warn
you if there’s
a problem.
This light will also come on when you
set your parking brake, and will stay
on
if your parking brake doesn’t release
fully. If it stays
on after your parking
brake is fully released,
it means you
may have
a brake problem. If
the light comes
on while driving, pull
off the road and stop carefully. You may
notice that the pedal is harder to push.
I
Or, the pedal may go closer to the floor. 1
It may take longer to stop. If the light is
still on, have the vehicle towed for
service. (See the
Index under Towing
Your Chevrolet.)
L-AU I IVN
I
/1 Your brake system may not be
L working properly if the brake
warning light is on. Driving with
the brake warning light
on can lead
to an accident. If the light is still
on after you’ve pulled off the road
and stopped carefully, have the
vehicle towed for service.
I
Page 107 of 308
Downloaded from www.Manualslib.com manuals search engine Part 3
In this part you’ll find out how to
operate the comfort control systems
and audio systems offered with your
Chevrolet
. Be sure to read about the
particular system supplied with your
vehicle
.
Comfort Controls &
Audio Systems
Climate Control System ............................................ 106
Air Conditioning System ........................................... 107
Rear Window Defogger
............................................ 109
Setting the Clock .................................................. 111
AM/FM Stereo Radio
.............................................. 112
AM/FM Stereo Radio with Cassette Tape Player ......................... 113
AM/FM Stereo
Radio with Compact Disc Player ......................... 116
Understanding Radio Reception
...................................... 121
Care
of Your Cassette Tape Player .................................... 121
Care
of Your Compact Discs ........................................ 122
Fixed Mast Antenna
............................................... 122
I05
Page 114 of 308
Downloaded from www.Manualslib.com manuals search engine ...
Comfort Controls & Audio Systems
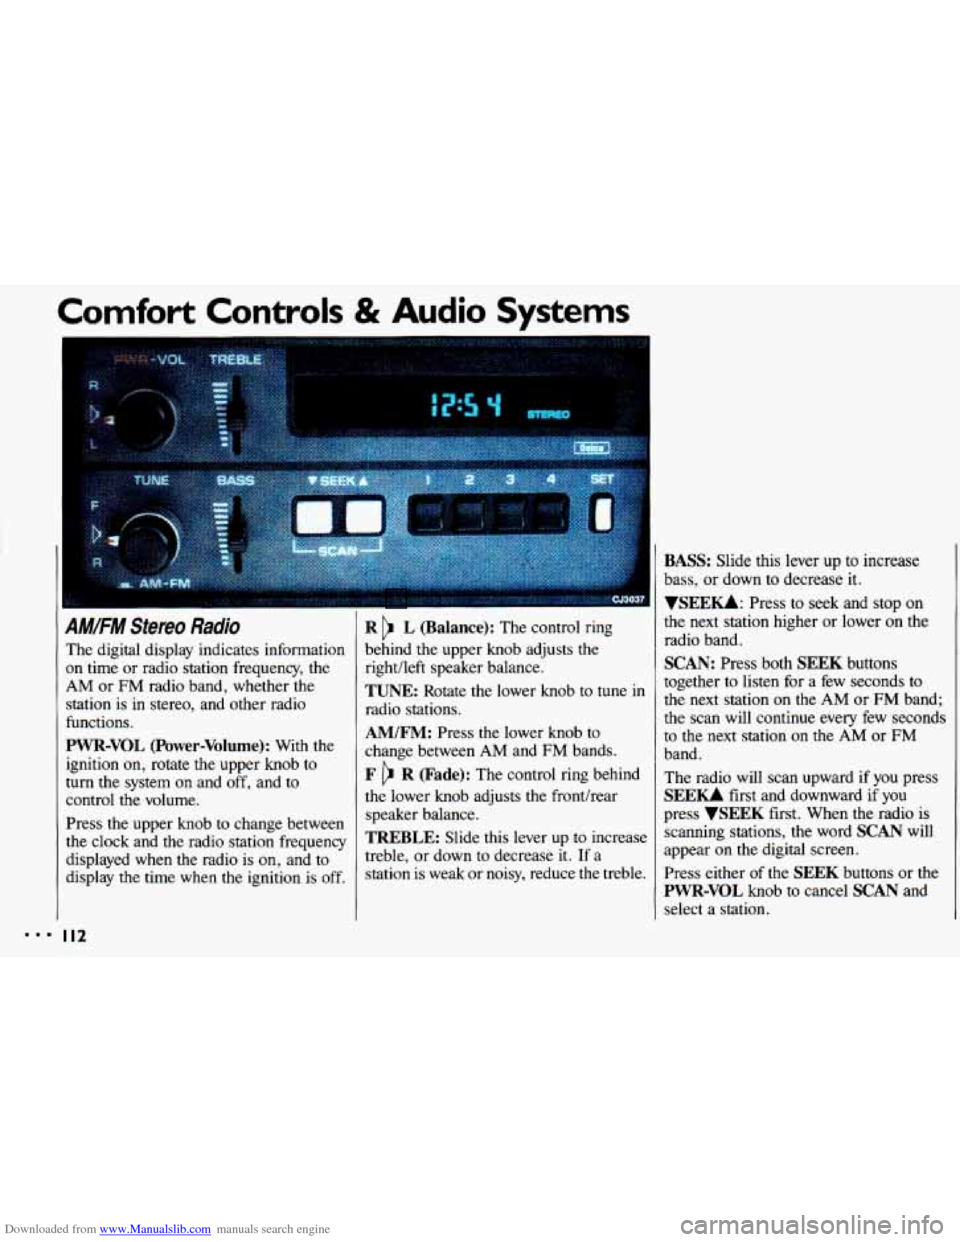
AM/FM Stereo Radio
The digital display indicates information
on time or radio station frequency, the
AM or FM radio band, whether the
station is
in stereo, and other radio
functions.
PWR-VOL (Power-Volume): With the
ignition on, rotate the upper knob to
turn the system
on and off, and to
control the volume.
Press the upper knob to change between
the clock and the radio station frequency
displayed when the radio is
on, and to
display
the time when the ignition is off.
I I2
R L (Balance): The control ring
behind the upper knob adjusts the
right/left speaker balance,
TUNE: Rotate the lower knob to tune in
radio stations.
AM/FM: Press the lower knob to
change between AM and FM bands.
F R (Fade): The control ring behind
the lower knob adjusts the fronthear
speaker balance.
TREBLE: Slide this lever up to increase
treble, or down
to decrease it. If a
station is weak or noisy, reduce the treble.
BASS: Slide this lever up to increase
bass, or down to decrease it.
YSEEKk Press to seek and stop on
the next station higher
or lower on the
radio band.
SCAN: Press both SEEK buttons
together to listen for a few seconds to
the next station
on the AM or FM band;
the scan will continue every few seconds
to the next station
on the AM or FM
band.
The radio will scan upward if you press
SEEU first and downward if you
press
VSEEK first. When the radio is
scanning stations,
the word SCAN will
appear on the digital screen.
Press either of the
SEEK buttons or the
PWR-VOL knob to cancel SCAN and
select a station.
Page 116 of 308
Downloaded from www.Manualslib.com manuals search engine Comfort Controls & Audio Systems
AM/FM Stereo Radio with
Cassette Tape PIayer (CONT.)
TREBLE: Slide this lever up to
ikrease treble, or down to decrease it.
If a station is weak or noisy, reduce the
treble.
BASS: Slide this lever up to increase
bass, or down to decrease it.
VSEEKk Press to seek and stop on
the next station higher or lower on the
radio band.
SCAN: Press both SEEK buttons
together to listen for a few seconds to
the next station
on the AM or FM band;
the scan will continue every few seconds
to the next station on the
AM or FM
band. The radio will scan upward if
you press
SEEU first and downward if
you
press
VSEEK first. When the radio is
scanning stations, the word
SCAN will
appear on the digital screen.
Press either
of the SEEK buttons or the
PWR-VOL knob to cancel SCAN and
select a station.
To Preset Radio Stations:
The four pushbuttons under the digital
display can be used to preset up to
14
radio stations (seven AM and seven FM
stations).
1. Tune in the desired station.
2. Press SET. The word SET will
appear on the digital screen for five
seconds.
3. While SET is displayed, press one of
the four pushbuttons. Whenever you
press these buttons again, the preset station will be tuned in.
and four
FM stations.
4. Repeat steps 1-3 for each of four AM
Page 119 of 308
Downloaded from www.Manualslib.com manuals search engine Radio Controls
SEEK: When you press the left side of
this button, the radio automatically
tunes to the next lower frequency on the
band. When you press the right side, it
automatically tunes to the next higher
frequency on the band.
SCAN: Press to listen for a few seconds
to the next station up or down on the
AM or FM band. Press again within
five seconds to stop scanning, or press
the
PWR-VOL knob.
To Preset Radio Stations:
The five pushbuttons can be used to
preset up to ten radio stations (five
A
and five FM stations).
1. Tune in the desired station.
LM
2. Press SET. The SET indicator will
appear on the digital screen for five
seconds.
3. While the SET indicator is displayed,
press one of the five pushbuttons.
Whenever you press this button
again, the preset station will be tuned in.
4. Repeat steps 1-3 for each of five AM
and FM stations.
Compact Disc Player
Many of the controls for the radio also
have functions for the compact disc
player, as explained here.
Don’t use mini-discs that are called
singles. They won’t eject. Use only full-
size compact discs.
1. Turn the PWR-VOL knob to turn on
2. Insert a disc part-way into the slot,
the power.
with the label side up. The player
will pull it in. Within a few seconds,
the disc should play.
I I7
Page 120 of 308
Downloaded from www.Manualslib.com manuals search engine Comfort Controls & Audio Systems
I
AM.FM Stereo Radio with
Compact Disc Player (CONT.)
If the disc comes back out and/or Err
appears on the display:
The disc may be upside down.
The disc may be dirty, scratched or
wet.
There may be too much moisture in
the air (wait about one hour and try
again).
The player may be too hot, or the road
may be too rough for the disc to play.
As soon as things get back to normal,
the disc should play.
While a disc is playing, the
CD
indicator is displayed on the digital
screen, as is
the clock.
I I8
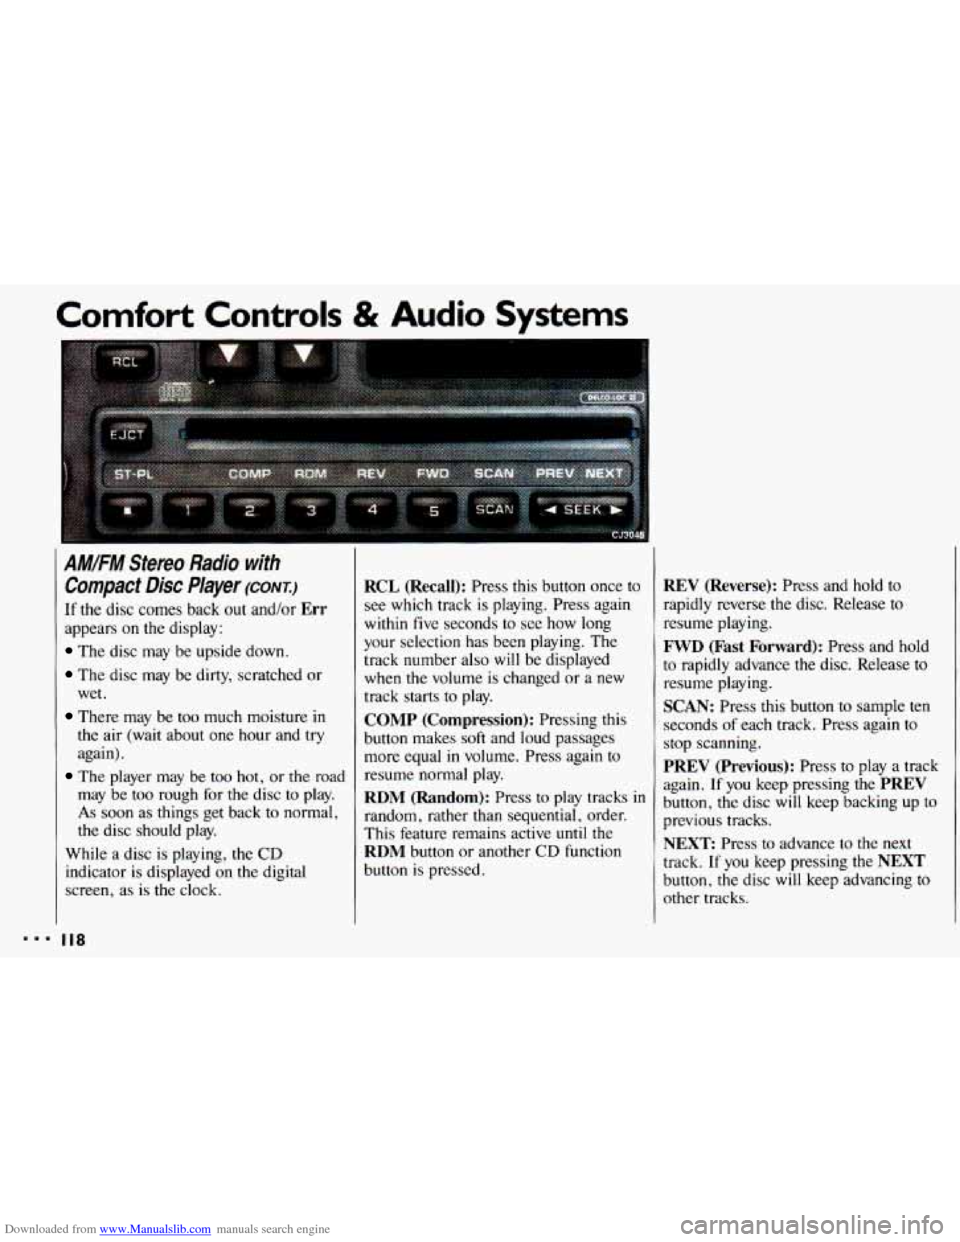
RCL (Recall): Press this button once to
see which track is playing. Press again
within five seconds to see how long
your selection has been playing. The
track number also
will be displayed
when
the volume is changed or a new
track starts to play.
COMP (Compression): Pressing this
button makes
soft and loud passages
more equal
in volume. Press again to
resume normal play.
RDM (Random): Press to play tracks in
random, rather than sequential, order.
This feature remains active
until the
RDM button or another CD function
button is pressed.
REV (Reverse): Press and hold to
rapidly reverse the disc. Release
to
resume playing.
FWD (Fast Forward): Press and hold
to rapidly advance
the disc. Release to
resume playing.
SCAN: Press this button to sample ten
seconds
of each track. Press again to
stop scanning.
PREV (Previous): Press to play a track
again.
If you keep pressing the PREV
button, the disc will keep backing up to
previous tracks.
NEXT: Press to advance to the next
track.
If you keep pressing the NEXT
button, the disc will keep advancing to
other tracks.
Page 122 of 308
Downloaded from www.Manualslib.com manuals search engine Comfort Controls & Audio Systems
CD Player Anti-Theft kature
(CONT.)
To Disable the Anti-Theft System:
Enter your secret code by following
these steps
(you will have only 15
seconds between each step).
1. Turn the ignition on and the radio
off, then press station preset buttons
1 and 4. SEC will appear, showing
the radio is secure.
2. Press SET and 000 will appear on
the display.
3. Press SCAN until the first digit of
your secret code appears.
4. Press SEEK until the second and
third digits of your code appear.
5. Press the TUNE knob (000 will
appear
on the display).
I20
6. Press SCAN until the fourth digit of
your code appears.
7. Press SEEK until the fifth and sixth
digits
of your code appear.
8. Press the TUNE knob. If the display
shows
"- - -;' the radio is unsecured
and will play again. If the display
shows
SEC, the steps were not
successful and the numbers did not
match
the secret code.
If
you lose or forget your code, see your
dealer. If you
lose battery power, when
the
battery is reconnected the radio will not
turn on and LOC will appear. Follow
steps
1-8 for disabling your system, and
the time will appear if you are
successful.
If SEC appears, the numbers
did not match and your unit is still
locked.