manual radio set CHEVROLET CAVALIER 1995 3.G Owners Manual
[x] Cancel search | Manufacturer: CHEVROLET, Model Year: 1995, Model line: CAVALIER, Model: CHEVROLET CAVALIER 1995 3.GPages: 340, PDF Size: 17.09 MB
Page 131 of 340
Downloaded from www.Manualslib.com manuals search engine Ventilation Tips
0
0
0
Keep the hood and front air inlet free of ice, snow or
any other obstruction, such
as leaves. The heater and
defroster will work far better, reducing the chance
of
fogging the inside of your windows.
When you enter
a vehicle in cold weather, adjust the
mode knob
to FLOOR and the fan to the highest
speed for
a few moments before driving off. This
helps clear the intake ducts of snow and moisture
and reduces the chance
of fogging the inside of your
windows.
Keep the air path under the front seats cle.ar of
objects. This helps air circulate throughout your
vehicle.
Audio Systems
Your Delco@ audio system has been designed to operate
easily and give years of listening pleasure.
You will get
the most enjoyment out of
it if you ac mint yourself
with
it first. Find out what your Delco 9s system can do
and how
to operate all its controls, to be sure you’re
getting the most
out of the advanced engineering that
went into
it.
Setting the Clock
No matter which audio system you have in your vehicle,
setting the clock is easy.
1.
2.
With the ignition on and the radio on or off, press
SET. The SET indicator will appear on the digital
screen for five seconds.
You must begin to set the clock to the correct hour
and minute during those five seconds.
If your audio system does not have a CD player:
0 Press the SEEK down arrow to set the hour.
Press the SEEK up arrow to set the minute.
If your audio system has
a CD player:
0 Press SCAN to set the hour.
Press the SEEK up or down arrows to decrease or
increase the minutes.
3-5
Page 133 of 340
Downloaded from www.Manualslib.com manuals search engine SCAN: The scan function uses the same two buttons as
the seek function.
Press and hold the
SEEK up arrow and then the SEEK
down arrow to go to the next higher station, stop for a
few seconds, then go on to the next station.
Press and hold the
SEEK down arrow and then the SEEK
up arrow to go to the next lower station, stop for a few
seconds,
then go on to the next station.
If
you have a compact disc player, press SCAN to listen
to the next station
for a few seconds.
The radio will continue scanning until
it has scanned around
the band twice. Press PWR-VOL to stop scanning.
Presets: The four pushbuttons under the digital display
can be used to preset up to
14 radio stations (seven AM
and seven FM stations). The compact disc player has
five pushbuttons that can be used to set five AM and
five
FM stations.
1. Press AM-FM to select the band.
2. Find the station you want.
3. Press the SET button.
4. Within five seconds, press one of the numbered
buttons.
If your radio has four pushbuttons, you can press
two side-by-side pushbuttons at the same time
to preset an additional three stations.
5. Repeat Steps 1 through 3 to set additional stations.
Whenever you press that numbered button
or pair of
buttons, the station you set will return.
Setting the Tone
BASS: Slide this lever up to increase bass, or down to
decrease it. If you have a compact disc player, press the
up or down arrow on the BASS button
to adjust the
bass.
TREBLE: Slide this lever up to increase treble, or down
to decrease it. If a station is weak or noisy, reduce the
treble.
If you have a compact disc player, press the up or
down arrow on the TREB button to adjust
the treble.
Adjusting the Speakers
BALANCE: Turn the control ring behind the upper
knob
to move the sound to the left or right speakers. The
middle position is
a detent and balances the speakers.
FADE: Turn the control ring behind the lower knob to
move
the sound to the front or rear speakers. The middle
position
is a detent and balances the speakers.
3-7
Page 134 of 340
Downloaded from www.Manualslib.com manuals search engine AM/FM Stereo Radios with Cassette Tape
Player or Compact Disc Player
Your Chevrolet may have a radio with a cassette tape
player
or a compact disc player. To play the radio,
follow the instructions earlier in this manual under
“AM/FM Stereo Radio.” For other features, see
the
following instructions for the feature your radio has.
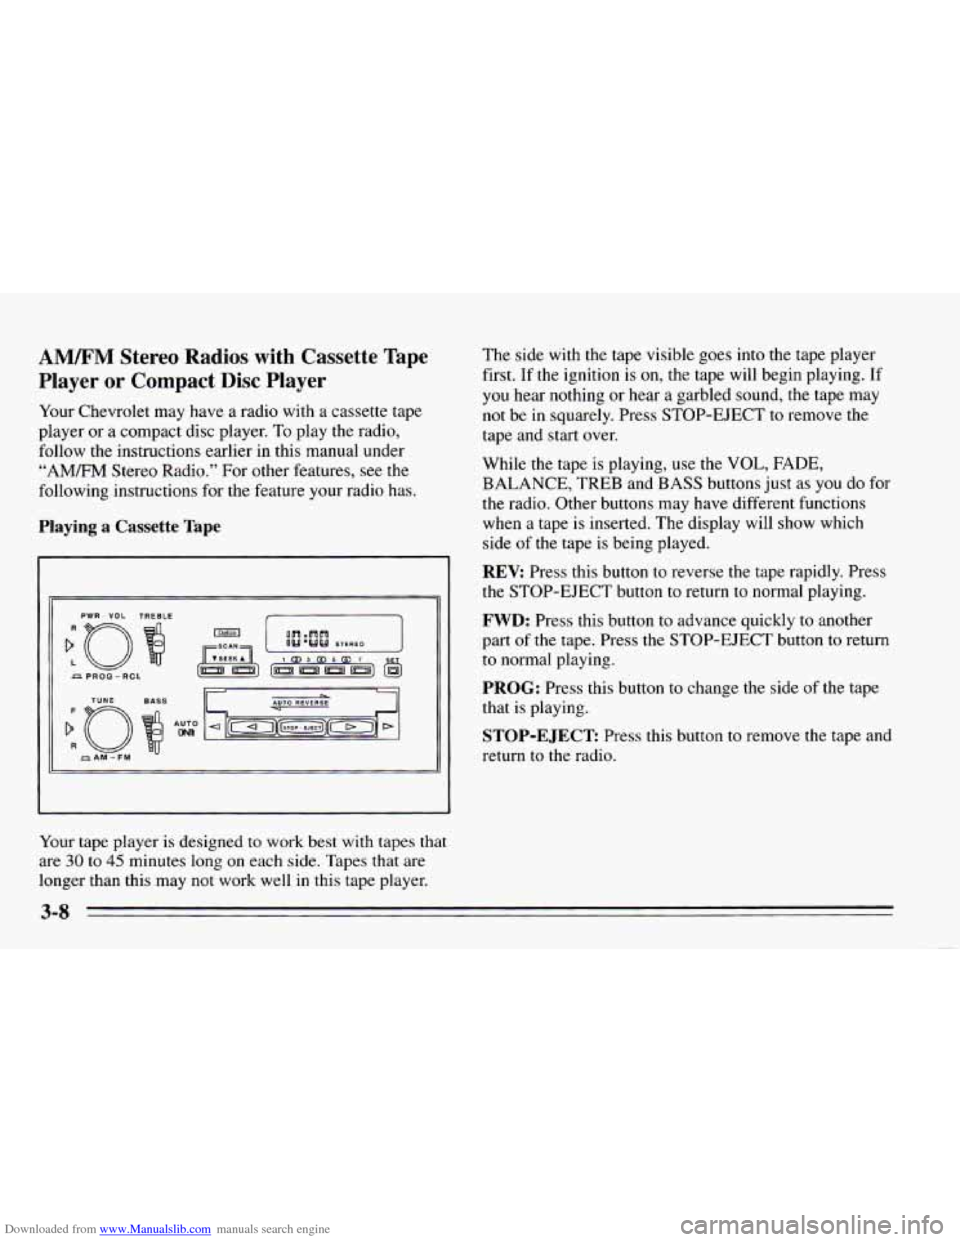
Playing a Cassette Tape
PWR - VOL TREBLE
Your tape player is designed to work best with tapes that
are 30 to 45 minutes long on each side. Tapes that are
longer than this may not work well in this tape player. The side
with the tape visible goes
into the tape player
first. If the ignition is
on, the tape will begin playing. If
you hear nothing or hear
a garbled sound, the tape may
not be in squarely. Press STOP-EJECT to remove the
tape and start over.
While the tape is playing, use the
VOL, FADE,
BALANCE, TREB and BASS buttons just as you do for
the radio. Other buttons may have different functions
when a tape is inserted. The display will show which
side
of the tape is being played.
REV: Press this button to reverse the tape rapidly. Press
the STOP-EJECT button to return to normal playing.
FWD: Press this button to advance quickly to another
part
of the tape. Press the STOP-EJECT button to return
to normal playing.
PROG: Press this button to change the side of the tape
that is playing.
STOP-EJECT Press this button to remove the tape and
return to the radio.
Page 136 of 340
Downloaded from www.Manualslib.com manuals search engine PREV Press to play a track again. If you keep pressing
the PREV button, the disc will keep backing up to
previous tracks.
NEXT: Press to advance to the next track. If you keep
pressing the NEXT button, the disc will keep advancing
to other tracks.
STPPL: Press this button to switch between the radio
and disc when a disc is
in the player.
EJECT Press this button to remove the disc. The radio
will play.
If
you turn off the ignition or radio with a disc in the
player, it will stay in the player. When
you turn on the
ignition or system, the disc will start playing where it
was stopped.
CD Player Anti-Theft Feature
Delco LOC II@ is a security feature that can be used or
ignored. If
you ignore it, the radio will play normally. If
you
use it, your radio cannot be turned on if it is stolen.
These instructions will
tell you how to enter a secret
code
into the radio. If battery power is lost for any
reason, the secret code must
be entered again before
your audio system can be turned on.
To Set the Anti-Theft System:
1. Write down any six-digit number and keep it in a
safe place. This is your secret code.
2. Turn the ignition on.
3. Rotate the PWR-VOL knob to turn the radio off.
4. Press station preset buttons 1 and 4 at the same time
and hold until
“---” shows on the display.
You now have only
I5 seconds between each of the
following steps.
5. Press SET and “000” will appear on the display.
6. Press SCAN until the first digit of your code
appears.
7. Press SEEK until the second and third digits of your
code appear.
8. Press the TUNE knob (“000” will appear on the
display).
9. Press SCAN until the fourth digit of your code
appears.
10. Press SEEK until the fifth and sixth digits of your
code appear.
3-10
Page 137 of 340
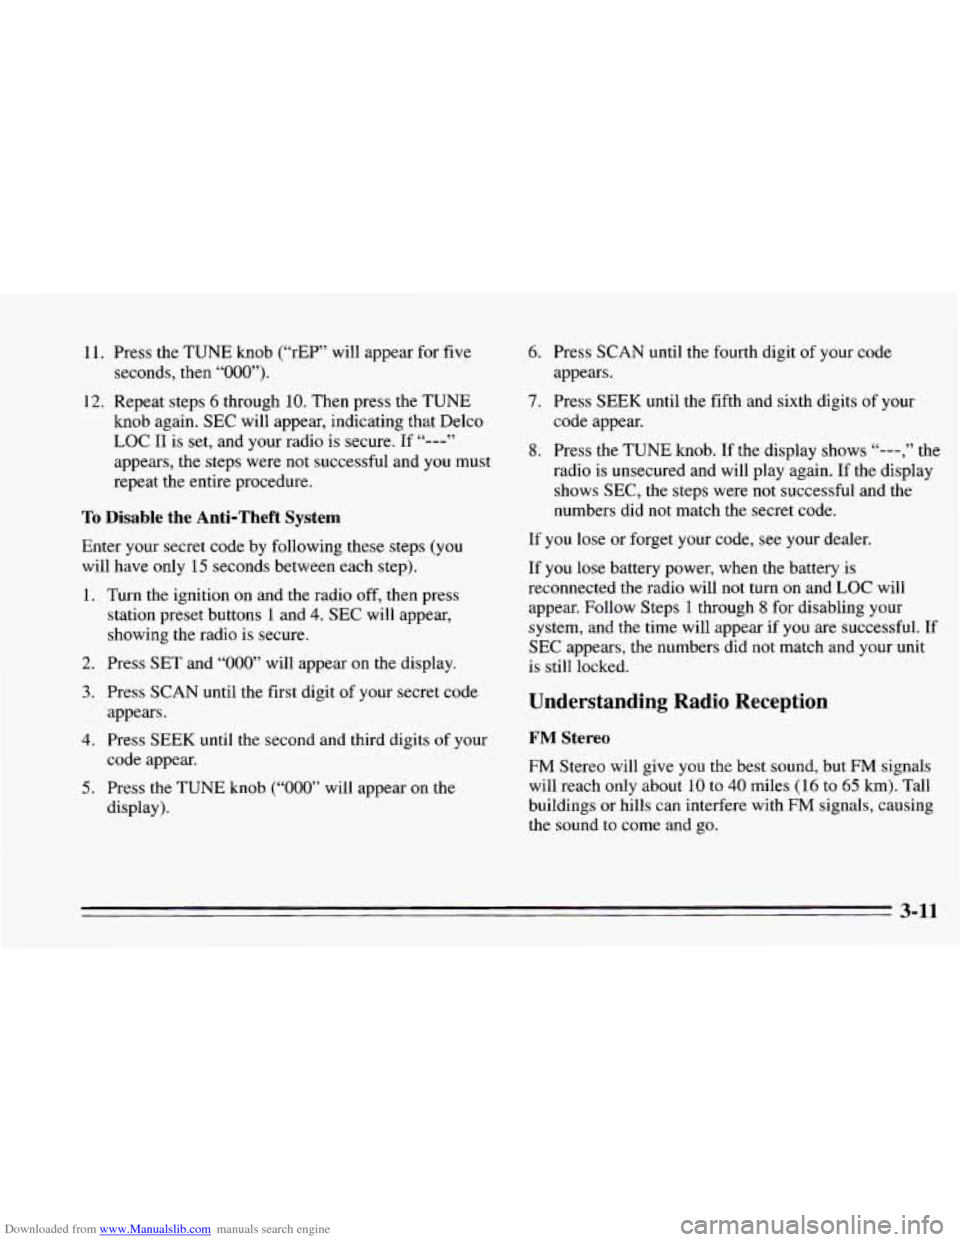
Downloaded from www.Manualslib.com manuals search engine 11. Press the TUNE knob (“rEP” will appear for five
12. Repeat steps
6 through 10. Then press the TUNE
seconds,
then
“000”).
knob again. SEC will appear, indicating that Delco
LOC
I1 is set, and your radio is secure. If “---”
appears, the steps were not successful and you must
repeat the entire procedure.
To Disable the Anti-Theft System
Enter your secret code by following these steps (you
will have only 15 seconds between each step).
1.
2.
3.
4.
5.
Turn the ignition on and the radio off, then press
station preset buttons 1 and
4. SEC will appear,
showing the radio is secure.
Press
SET and “000” will appear on the display.
Press SCAN until the first digit of your secret code
appears.
Press
SEEK until the second and third digits of your
code appear.
Press
the TUNE knob (“000” will appear on the
display). 6.
Press SCAN until the fourth digit of your code
appears.
7. Press SEEK until the fifth and sixth digits of your
code appear.
8. Press the TUNE knob. If the display shows “---,” the
radio is unsecured and will play again. If the display
shows SEC, the steps were not successful and the
numbers did not match the secret code.
If you lose or forget your code, see your dealer.
If you lose battery power, when the battery is
reconnected the radio will not turn on and
LOC will
appear. Follow Steps
1 through 8 for disabling your
system, and the time will appear if you are successful. If
SEC appears, the numbers did not match and your
unit
is still locked.
Understanding Radio Reception
FM Stereo
FM Stereo will give you the best sound, but FM signals
will reach only about
10 to 40 miles (16 to 65 km). Tall
buildings or hills can interfere with
FM signals, causing
the sound to come and go.
3-11
Page 138 of 340
Downloaded from www.Manualslib.com manuals search engine AM
The range for most AM stations is greater than for FM,
especially at night. The longer range, however, can
cause stations to interfere with each other. AM can also
pick up noise from things like storms and power lines.
To lower this noise, try reducing the treble level.
,*ps for Using Your Audio System
Hearing damage from loud noise is almost undetectable
until
it is too late. Your hearing can adapt to higher
volumes
of sound. Sound that seems normal can be loud
and harmful to your hearing. Take precautions by
adjusting the volume control
on your radio to a safe
sound level before your hearing adapts to it.
To help avoid hearing loss or damage:
Adjust the volume control to the lowest setting.
Increase volume slowly until you hear comfortably
and clearly.
’ NOTICE:
Before you add any sound equipment to your
vehicle
-- like a tape player, CB radio, mobile
telephone or two-way radio
-- be sure you can
add what you want. If you can, it’s very
important to do it properly. Added sound
equipment may interfere with the operation of
your vehicle’s engine, Delco@ radio or other
systems, and even damage them. And, your
vehicle’s systems may interfere with the
operation
of sound equipment that has been
added improperly.
So, before adding sound equipment, check with
your dealer and be sure to check Federal rules covering mobile radio and telephone units.
Page 179 of 340
Downloaded from www.Manualslib.com manuals search engine To Jump Start Your Chevrolet
1. Check the other vehicle. It must have a 12-volt
battery with
a negative ground system.
3. Turn off the ignition on both vehicles. Turn off all
lights that aren’t needed, and radios. This will avoid
sparks and help save both batteries. And it could
save your radio!
NOTICE:
If the other system isn’t a 12-volt system with a
negative ground, both vehicles can be damaged.
2. Get the vehicles close enough so the jumper cables
can reach, but be sure the vehicles aren’t touching
each other.
If they are, it could cause a ground
connection you don’t want. You wouldn’t be able to
start your Chevrolet, and the bad grounding could
damage the electrical systems.
You could be injured if the vehicles roll. Set the
parking
brake firmly on each vehicle. Put an
automatic transaxle in PARK (P) or a manual
transaxle
in NEUTRAL (N).
NOTICE:
If you leave your radio on, it could be badly
damaged. The repairs wouldn’t be covered by
your warranty.
4. Open the hoods and locate the batteries.
5-3
Page 334 of 340
Downloaded from www.Manualslib.com manuals search engine Radio Reception. Understanding .................. 3- I I
Radios ........................................ 3-5
AMRM Stereo
............................... 3-6
AMFM Stereo with Cassette Tape Player
.......... 3-8
AM/FM Stereo with Compact Disc Player
.......... 3-8
Rain. Driving In ................................ 4- I4
Rear Door Security Lock
.......................... 2-4
Rear Safety Belt Comfort Guides
.................. 1-28
Rear Seat Outside Position
........................ 1-25
Rear Seat Passengers
............................ 1-25
Rear Towing
................................... 5- 1 I
Rear Window Defogger ........................... 3-4
Rearview Mirror. Inside Day/Night
................. 2-42
Reclining Front Seatbacks
......................... 1-2
Recommended
Fluids and Lubricants ............... 7-43
Recreational Vehicle Towing
...................... 4-26
Front
...................................... 4-26
Rear
....................................... 4-28
Remote Control Mirror
.......................... 2-42
Remote Trunk Release
............................ 2-5
Replacement Bulbs
............................. 6-56
Replacement Parts
.............................. 6-57
Replacement. Wheel
............................ 6-40
Replacing Safety Belts
........................... 1-45
Replacing Seat and Restraint System Parts After a Crash 1-45
Restraints. Checking Your
........................ 1-45
Restraints. Child
................................ 1-34
Restraints. Head
................................. 1-4
Restraints. Replacing Parts After a Crash
............ 1-45
Reverse (R) Position. Automatic Transaxle
........... 2- 15
Reverse (R) Position. Manual Transaxle
............. 2- 19
Right Front Passenger Position .................... 1-25
Roadside Assistance
.............................. 8-5
Roadside Assistance. Canadian
..................... 8-8
Rocking Your Vehicle ........................... 5-28
Rotation. Tires
.................................. 6-35
Safety Belt Extender ............................ 1-45
Safety Belt Reminder Light ................... 1.6. 2.61
Safety Belts .................................... 1-5
Careof
.................................... 6-45
Adults ..................................... 1-10
Center Passenger Position ...................... 1-31
Driver Position .............................. 1 . 10
Extender ................................... 1-45
Incorrect Usage
............... 1.14. 15. 16. 17.43. 44
LapBelt
................................... 1-31
Questions People Ask
.......................... 1-9
Rear Comfort Guides ......................... 1-28
Rear Seat Passengers
......................... 1-25
Replacing After a Crash ....................... 1-45
Right Front Passenger Position
.................. 1-25
How
to Wear Properly
........................ 1 . 10
Lap-Shoulder
.......................... 1 . 10. 1-26
Rear Seat Outside Passenger Positions
............ 1-25
Shoulder Belt Height Adjuster
.................. 1 . 13
Use by Children ............................. 1-32
Use by Larger Children
........................ 1-42
Use by Smaller Children and Babies
............. 1-32
Use During Pregnancy
........................ 1-24
Why They Work
.............................. 1-6
9-8