window CHEVROLET CAVALIER 1996 3.G User Guide
[x] Cancel search | Manufacturer: CHEVROLET, Model Year: 1996, Model line: CAVALIER, Model: CHEVROLET CAVALIER 1996 3.GPages: 372, PDF Size: 19.73 MB
Page 113 of 372
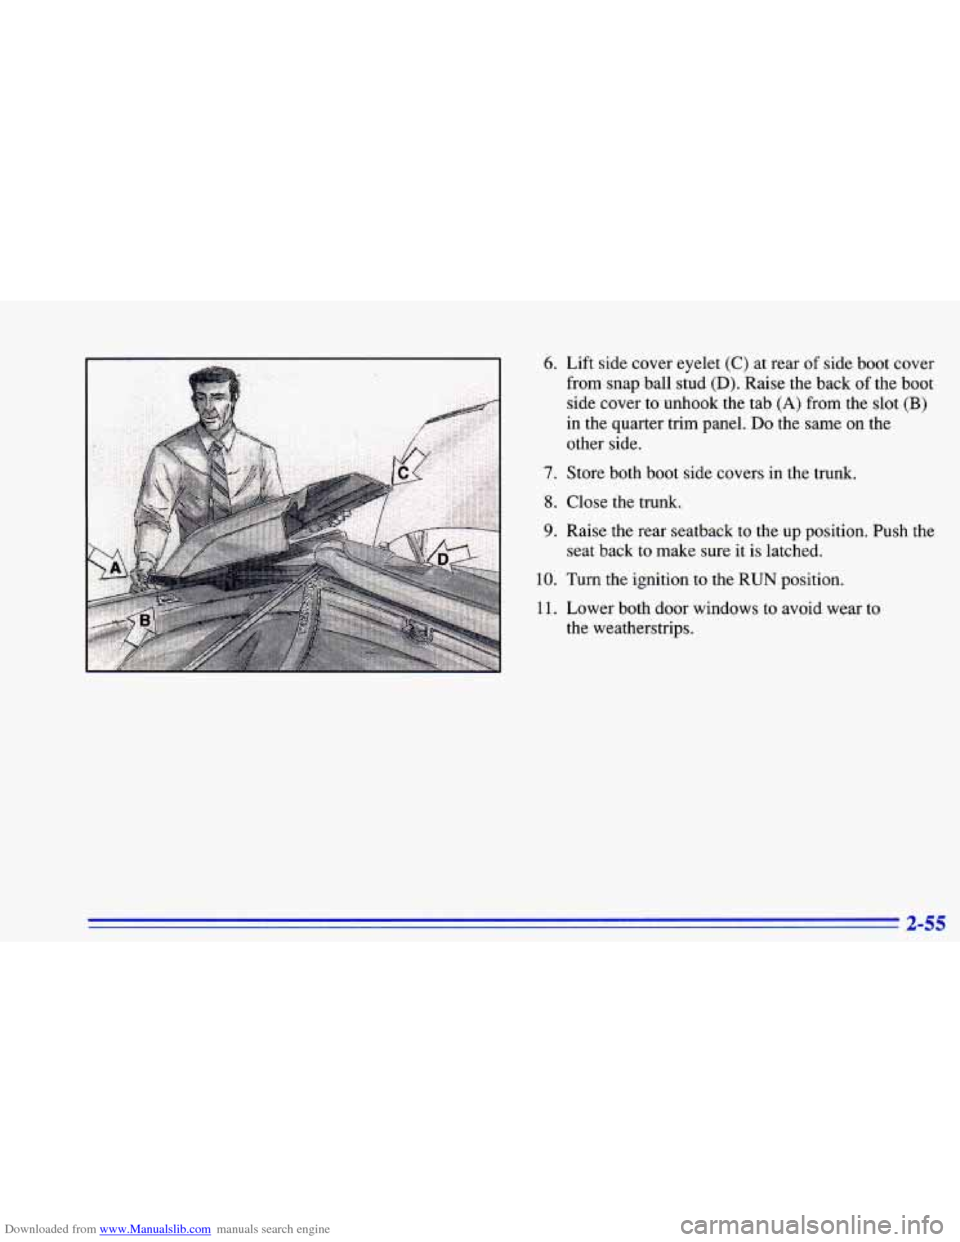
Downloaded from www.Manualslib.com manuals search engine 6. Lift side cover eyelet (C) at rear of side boot cover
from snap ball stud
(D). Raise the back of the boot
side cover to unhook the tab
(A) from the slot (B)
in the quarter trim panel. Do the same on the
other side.
7. Store both boot side covers in the trunk.
8. Close the trunk,
9. Raise the rear seatback to the up position. Push the
seat back to make sure it is latched.
10. Turn the ignition to the RUN position.
11. Lower both door windows to avoid wear to
the weatherstrips.
3 LC
Page 116 of 372
Downloaded from www.Manualslib.com manuals search engine 4.
5.
6.
7.
Press the bypass switch down to the EMERGENCY
OVERRIDE position. The switch is located under
the shelf panel on the driver’s side in the trunk.
Remove the top boot as described
in Steps 4 through 7
in “Raising Your Convertible Top” earlier in
this section.
Lower the door windows completely.
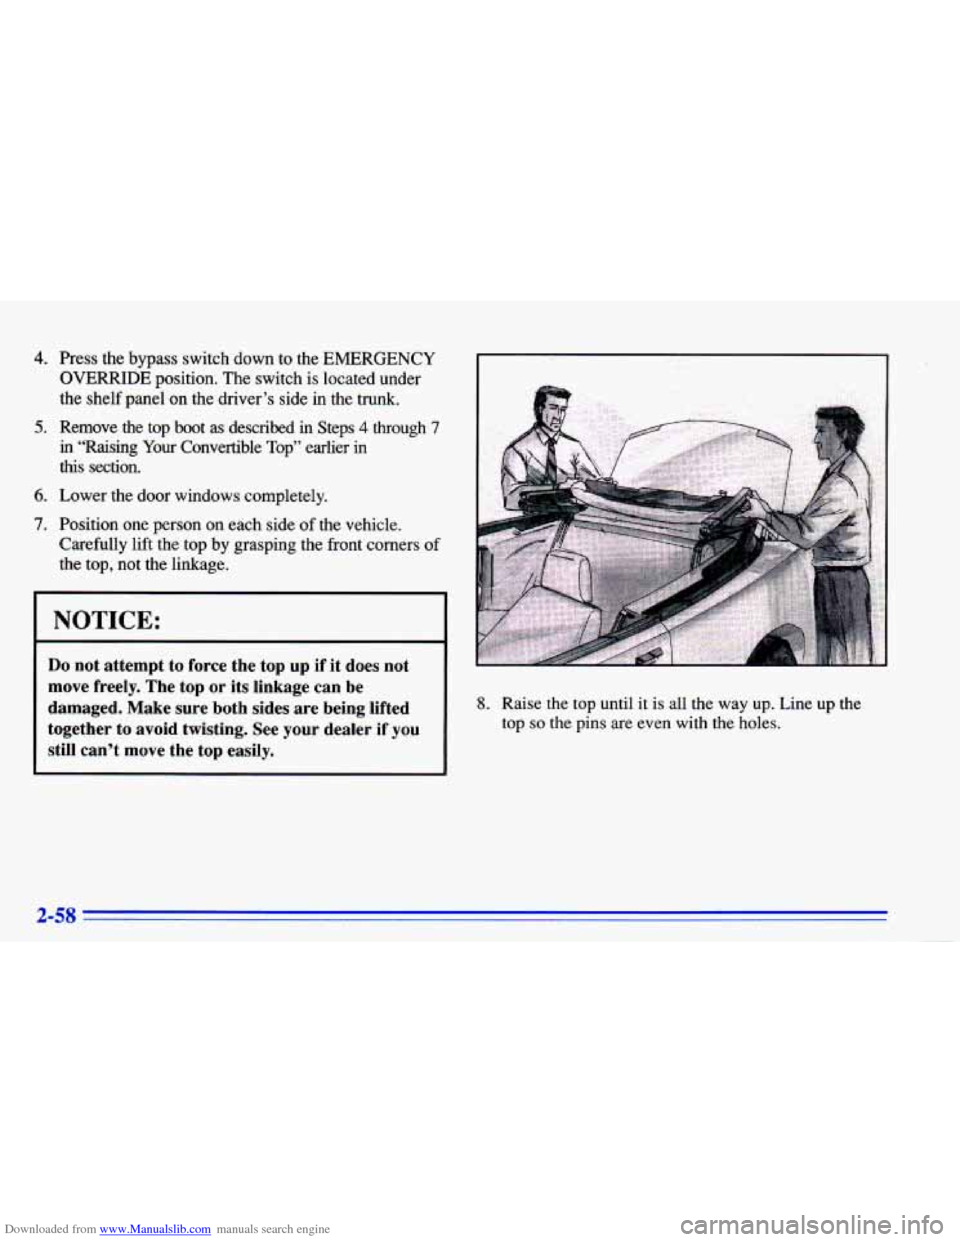
Position one person on each side of the vehicle.
Carefully lift the top by grasping the front corners of
the top,
not the linkage.
I NOTICE:
Do not attempt to force the top up if it does not
move freely. The top
or its linkage can be
damaged. Make sure both sides are being lifted
together
to avoid twisting. See your dealer if you
still can’t move the top easily.
8. Raise the top until it is all the way up. Line up the
top
so the pins are even with the holes.
Page 119 of 372
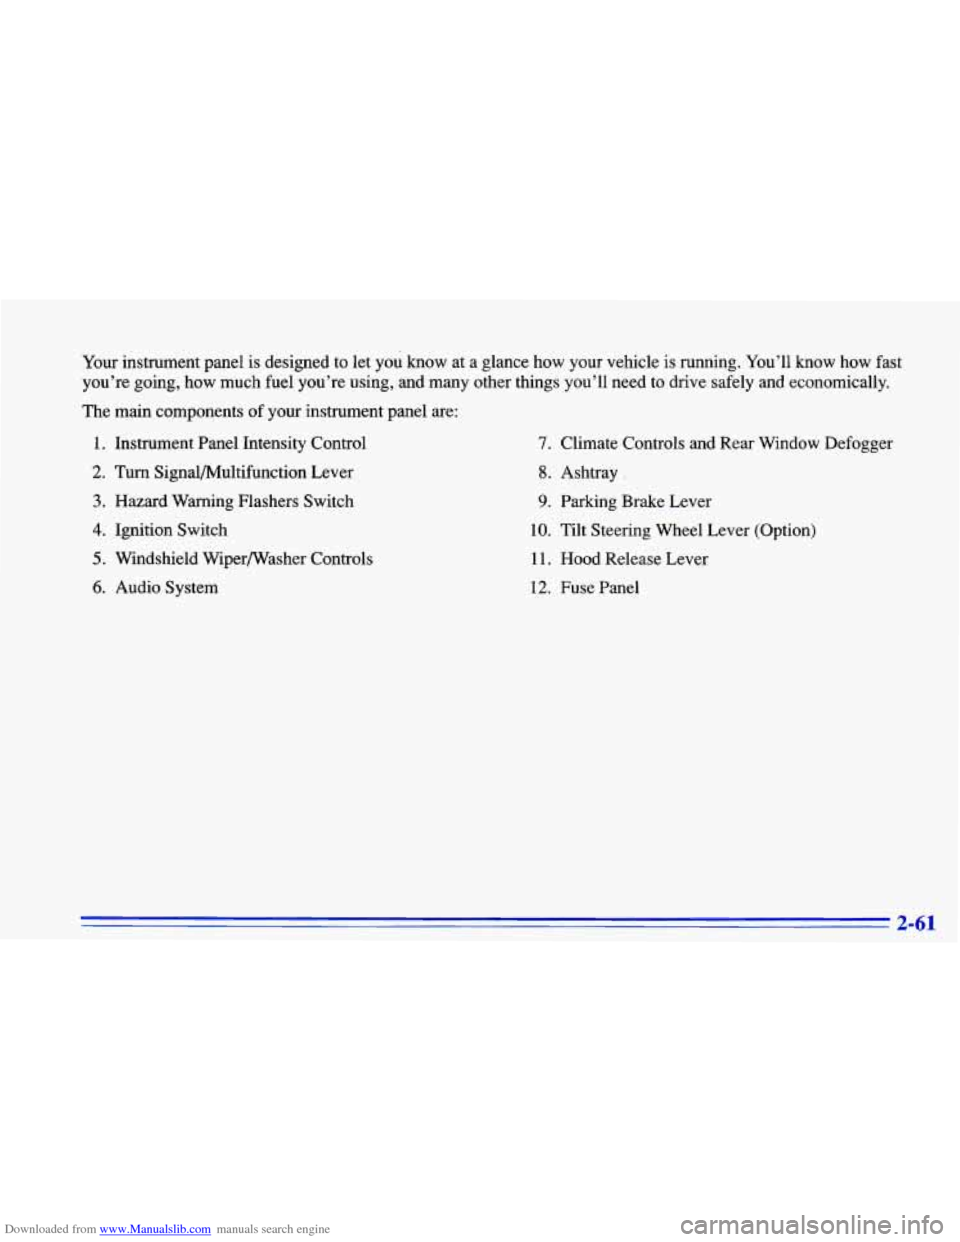
Downloaded from www.Manualslib.com manuals search engine Your instrument panel is designed to let you know at a glance how your vehicle is running. You’ll know how fast
you’re going, how much fuel you’re using, and many other things you’ll need to drive safely and economically.
The main components of your instrument panel are:
1. Instrument Panel Intensity Control
2. Turn Signal/Multifunction Lever
3. Hazard Warning Flashers Switch
4. Ignition Switch
5. Windshield Wiperwasher Controls
6. Audio System
7. Climate Controls and Rear Window Defogger
8. Ashtray .
9. Parking Brake Lever
10. Tilt Steering Wheel Lever (Option)
11. Hood Release Lever
12. Fuse Panel
2-61
Page 138 of 372
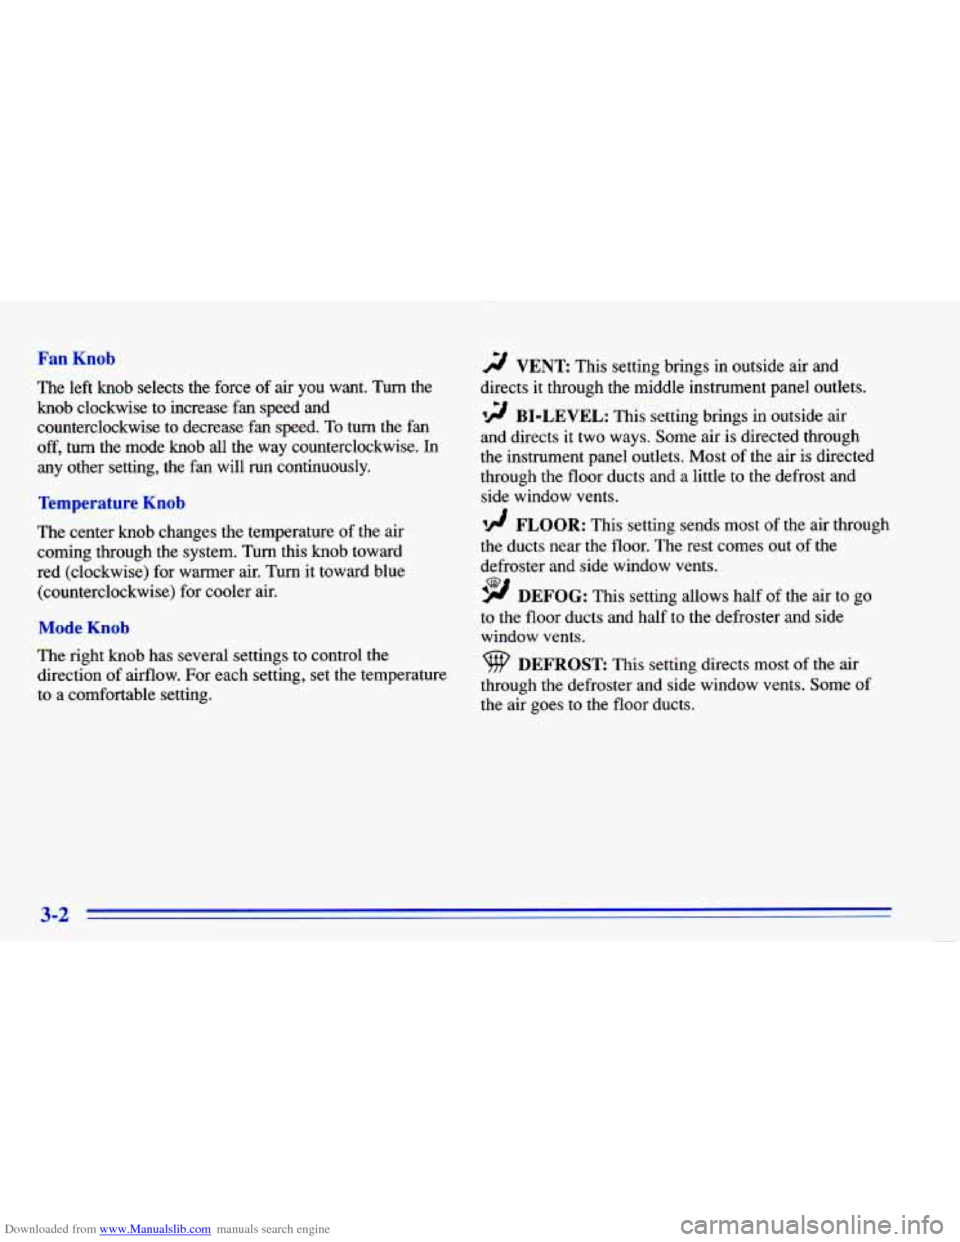
Downloaded from www.Manualslib.com manuals search engine Fan Knob
The left knob selects the force of air you want. Turn the
knob clockwise to increase fan speed and counterclockwise to decrease fan speed.
To turn the fan
off, turn the mode knob all the way counterclockwise. In
any other setting, the fan will run continuously.
Temperature Knob
The center knob changes the temperature of the air
coming through the system. Turn this knob toward
red (clockwise) for warmer air. Turn it toward blue
(counterclockwise) for cooler air.
Mode Knob
The right knob has several settings to control the
direction of airflow. For each setting, set the temperature
to a comfortable setting.
2 VENT This setting brings in outside air and
directs it through the middle instrument panel outlets.
12 BI-LEVEL: This setting brings in outside air
and directs it two ways. Some air is directed through
the instrument panel outlets. Most of the air is directed
through the floor ducts and a little to the defrost and
side window vents.
Id FLOOR: This setting sends most of the air through
the ducts near the floor. The rest comes out of the
defroster and side window vents.
9 DEFOG: This setting allows half of the air to go
to the floor ducts and half to the defroster
and side
window vents.
DEFROST This setting directs most of the air
through the defroster and side window vents. Some of
the air goes to the floor ducts.
3-2
Page 139 of 372
Downloaded from www.Manualslib.com manuals search engine Climate Control System with Air
Con g (Optiol
-. . .
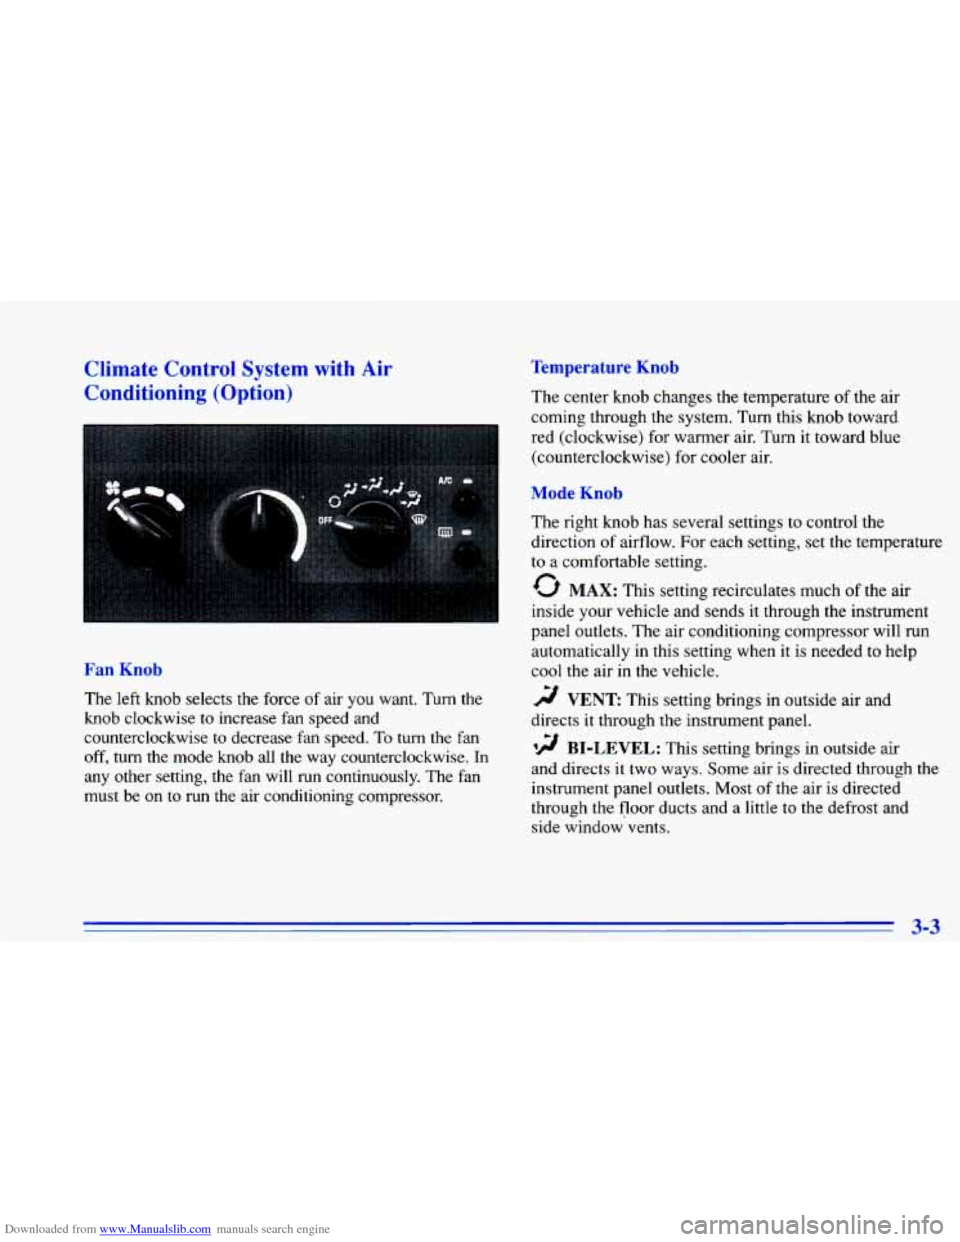
Fan Knob
The left knob selects the force of air you want. Turn the
knob clockwise to increase fan speed and
counterclockwise
to decrease fan speed. To turn the fan
off, turn the mode knob all the way counterclockwise. In
any other setting,
the fan will run continuously. The fan
must be on
to run the air conditioning compressor.
Temperature Knob
The center knob changes the temperature of the air
coming through the system.
Turn this knob toward
red (clockwise) for warmer air. Turn it toward blue
(counterclockwise) for cooler air.
Mode Knob
The right knob has several settings to control the
direction
of airflow. For each setting, set the temperature
to a comfortable setting.
0 MAX: This setting recirculates much of the air
inside
your vehicle and sends it through the instrument
panel outlets. The air conditioning compressor will run
automatically in this setting when it is needed to help
cool
the air in the vehicle.
r;/ VENT This setting brings in outside air and
directs it through the instrument panel.
'!! BI-LEVEL: This setting brings in outside air
and directs it two ways. Some air is directed through the
instrument panel outlets. Most of the air is directed
through the floor ducts and a little to the defrost and
side window vents.
3-3
Page 140 of 372
Downloaded from www.Manualslib.com manuals search engine '!! FLOOR: This setting sends most of the air through
the ducts near the floor.
The rest comes out of the
defroster and side window vents.
9 DEFOG: This setting allows half of the air to go
to the floor ducts and half to the defroster and side
window vents.
9 DEFROST This setting directs most of the air
through the defroster and side window vents. Some of
the air goes to the floor ducts. The air conditioning
compressor will run automatically in this setting when it
is needed
to help dry the air in the vehicle.
Air Conditioning Compressor Button
Press the A/C button to operate the air conditioner
compressor. The indicator light above the button
will glow when the button is pressed. You don't have
to press the button to run the compressor in
MAX
or DEFROST.
Air Conditioning (Option)
On very hot days, open the windows long enough to
let hot, inside air escape. This reduces the time it
takes for your vehicle to cool down, which should
help fuel economy.
For quick cool-down on very hot days, use
MAX with
the temperature knob all the way in the blue area. If this
setting is used for long periods
of time, the air in your
vehicle may become too dry.
For normal cooling on hot days, use
VENT with the
temperature knob
in the blue area and the A/C button
pushed in. The system will bring in outside
air and cool it.
On cool, but sunny days,
the sun may warm your upper
body, but your lower body may not be warm enough.
You can use
BI-LEVEL with the temperature knob in
the middle and the
A/C button pushed in. The system
will bring in outside air and direct slightly warmer air
to
your lower body. You may notice this temperature
difference more at some times than others.
3-4
Page 142 of 372
Downloaded from www.Manualslib.com manuals search engine Ventilation Tips
0
0
0
Keep the hood and front air inlet free of ice, snow or
any other obstruction, such as leaves. The heater and
defroster will work far better? reducing the chance of
fogging the inside of your windows.
When you enter a vehicle in cold weather, adjust the
mode knob to
FLOOR and the fan to the highest speed
for a fcw moments before driving
off. This helps clear
the intake ducts of snow and moisture and reduces the
chance
of fogging the inside of your windows.
Keep the
air path under the front seats clear of objects.
This helps air circulate throughout your vehicle.
Defogging and Defrosting Windows
Your system has two settings for clearing the front and
side windows.
To defrost the windows quickly, use
DEFROST with the temperature knob all the way in
the red area.
To warm passengers while keeping the
windows clean, use DEFOG.
To defog the side windows, set the right control to
BI-LEVEL and the fan control to the highest setting.
To defog the side windows while using the air
conditioner, set the right control to BI-LEVEL, the fan
control to the highest setting, and press the
A/C button.
For both systems, aim the side vents toward the side
windows. For increased airflow to the side vents,
close
the center vents.
3-6
Page 143 of 372
Downloaded from www.Manualslib.com manuals search engine Rear Window Defogger (Option)
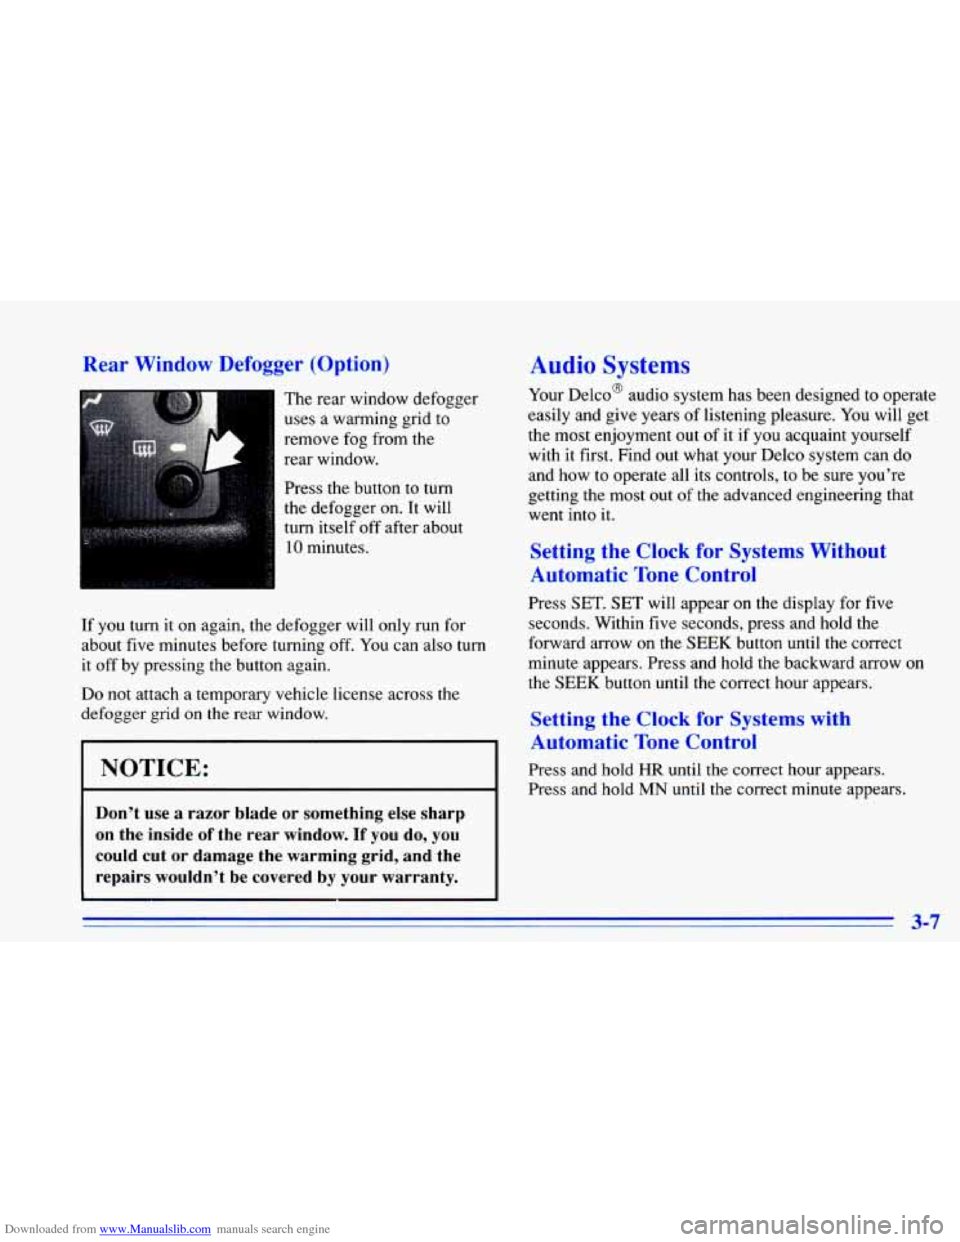
The rear window defogger
uses a warming grid to
remove fog from the
rear window.
Press the button
to turn
the defogger on. It will
turn itself off after about
10 minutes.
If you turn it on again, the defogger will only run for
about five minutes before turning off. You can also turn
it off by pressing the button again.
Do not attach a temporary vehicle license across the
defogger grid
on the rear window.
Audio Systems
Your Delco@ audio system has been designed to operate
easily and give years of listening pleasure. You will get
the most enjoyment out of
it if you acquaint yourself
with it first. Find out what your Delco system can do
and how to operate all its controls,
to be sure you’re
getting the most out
of the advanced engineering that
went into it.
Setting the Clock for Systc __ ‘. . - - -101 .
Automatic Tone Control
Press SET. SET will appear on the display for five
seconds. Within five seconds, press and hold the
forward arrow on the
SEEK button until the correct
minute appears. Press and hold the backward arrow
on
the SEEK button until the correct hour appears.
Setting the Clock for Systems with
. Automatic Tone Control
NOTICE: Press and hold HR until the correct hour appears.
Press and hold
MN until the correct minute appears.
Don’t use a razor blade or something else sharp
on the inside
of the rear window. If you do, you
could cut or damage
the warming grid, and the
repairs wouldn’t be covered by your warranty.
3-7
Page 184 of 372
Downloaded from www.Manualslib.com manuals search engine The exit speed is usually posted.
Reduce your speed according to your speedometer, not
to your sense of motion. After driving for any distance
at higher speeds, you may tend to think you are going
slower than you actually are.
Before Leaving on a Long Trip
Make sure you’re ready. Try to be well rested. If you
must start when you’re not fresh
-- such as after a day’s
work
-- don’t plan to make too many miles that first part
of the journey. Wear comfortable clothing and shoes you
can easily drive in.
Is your vehicle ready for a long trip?
If you keep it
serviced and maintained, it’s ready to
go. If it needs
service, have
it done before starting out. Of course,
you’ll find experienced and
able service experts in
Chevrolet dealerships all across North America. They’ll
be ready and willing to help if you need it. Here
are some things you can check before a trip:
0
0
0
0
0
0
0
Windshield Washer Fluid: Is the reservoir full?
Are all windows clean inside and outside?
Wiper Blades: Are they in good shape?
Fuel, Engine Oil, Other Fluids: Have you checked
all levels?
Lamps: Are they all working? Are the lenses clean?
Tires: They are vitally important to a safe,
trouble-free trip. Is the tread good enough for
long-distance driving? Are the tires all inflated to the
recommended pressure?
Weather Forecasts: What’s the weather outlook
along your route? Should you delay your trip a short
time to avoid a major storm system?
Maps: Do you have up-to-date maps?
4-22
Page 190 of 372
Downloaded from www.Manualslib.com manuals search engine Tie a red cloth to your vehicle to alert police that
you’ve been stopped by the snow.
0 Put on extra clothing or wrap a blanket around you.
If you have no blankets or extra clothing, make body
insulators from newspapers, burlap bags, rags, floor
mats
-- anything you can wrap around yourself or
tuck under your clothing to keep warm.
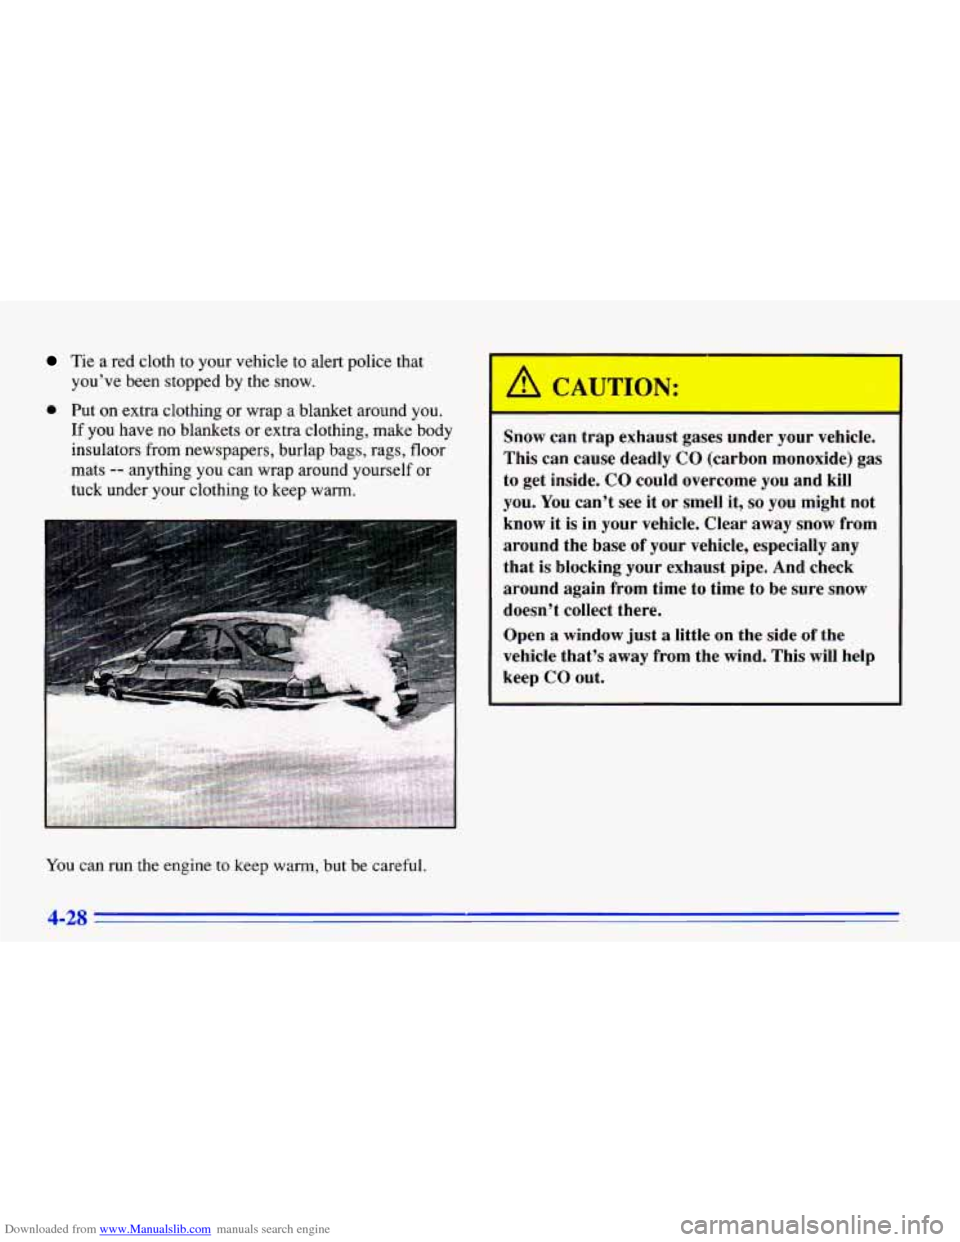
You can run the engine to keep warm, but be careful. Snow can
trap exhaust gases under your vehicle.
This can cause deadly CO (carbon monoxide) gas
to get inside.
CO could overcome you and kill
you.
You can’t see it or smell it, so you might not
know it
is in your vehicle. Clear away snow from
around the base of your vehicle, especially any
that
is blocking your exhaust pipe. And check
around again from time to time to be
sure snow
doesn’t collect there.
Open
a window just a little on the side of the
vehicle that’s away from the wind. This will help
keep
CO out.
4-28