boot CHEVROLET CAVALIER 1996 3.G Owners Manual
[x] Cancel search | Manufacturer: CHEVROLET, Model Year: 1996, Model line: CAVALIER, Model: CHEVROLET CAVALIER 1996 3.GPages: 372, PDF Size: 19.73 MB
Page 109 of 372
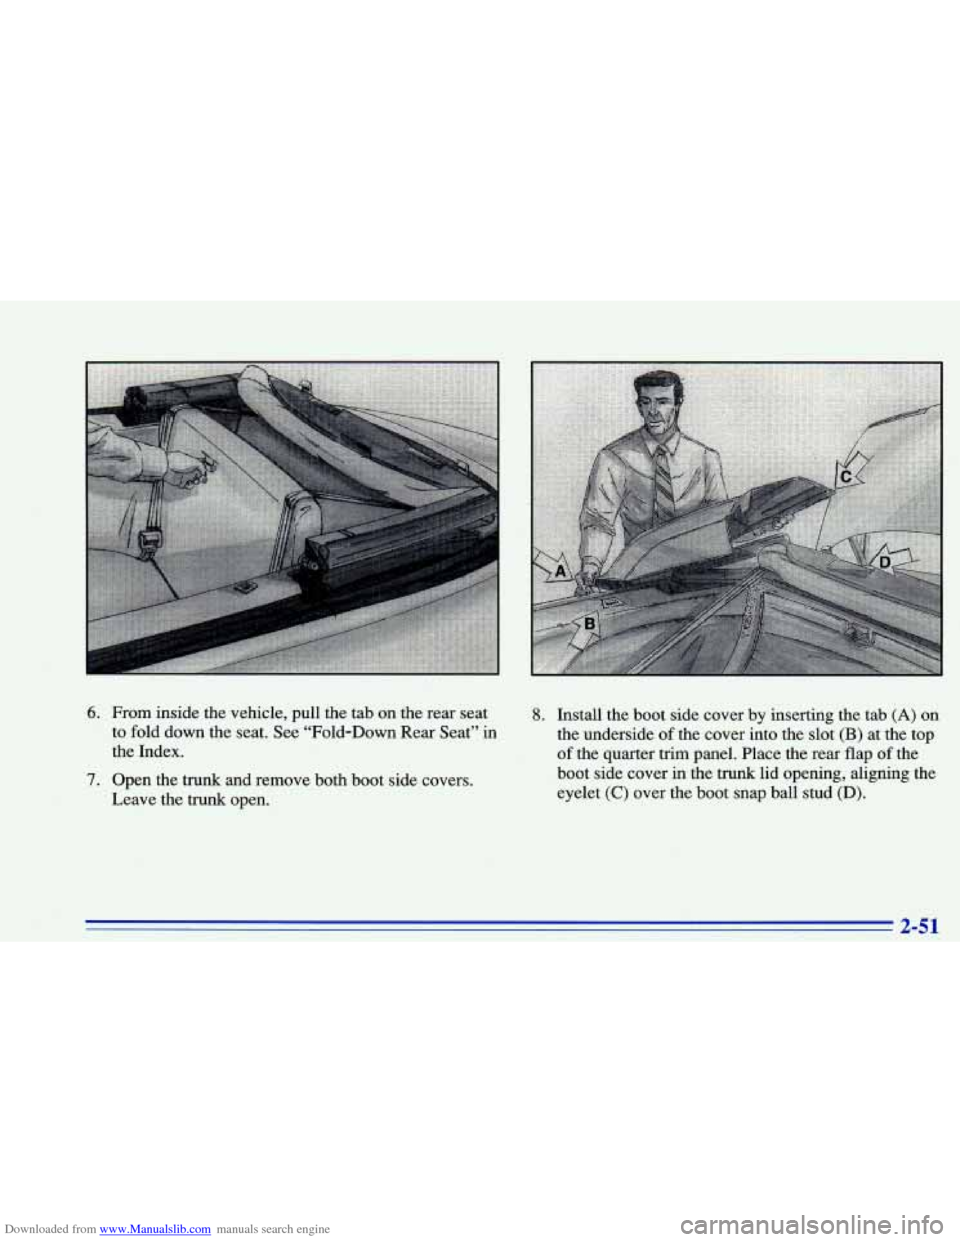
Downloaded from www.Manualslib.com manuals search engine 6. From inside the vehicle, pull the tab on the rear seat 8. Install the boot side cover by inserting the tab (A) on
to fold down the seat. See “Fold-Down Rear Seat” in
the underside
of the cover into the slot (B) at the top
the Index. of the quarter trim panel. Place the rear flap of the
7. Open the trunk and remove both boot side covers.
Leave the trunk open. boot side cover in the trunk lid
opening, aligning the
eyelet
(C) over the boot snap ball stud (D).
Page 110 of 372
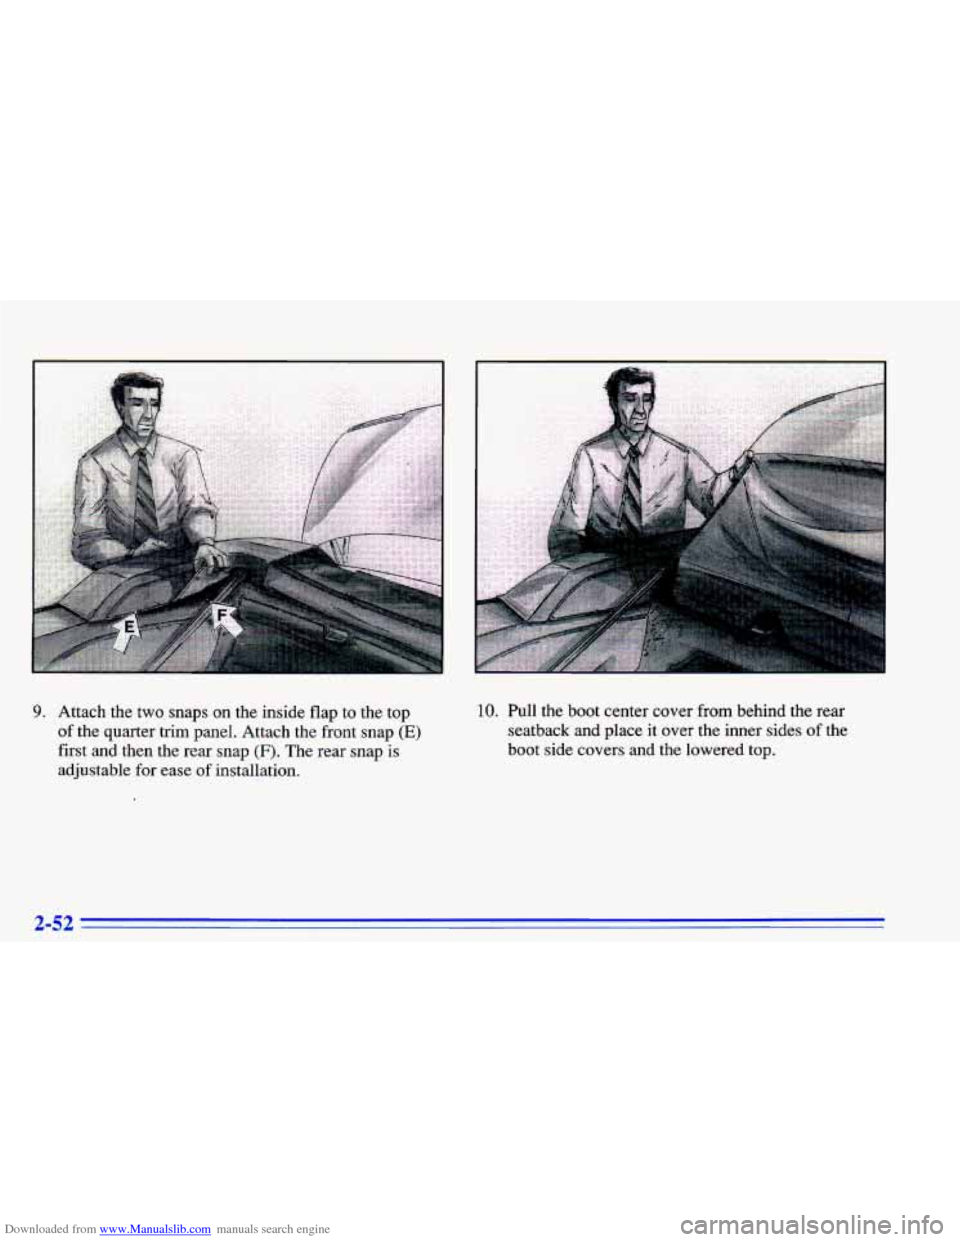
Downloaded from www.Manualslib.com manuals search engine 9. Attach the two snaps on the inside flap to the top
of the quarter trim panel. Attach the front snap (E)
first and then the rear snap (F). The rear snap is
adjustable for ease
of installation.
I
I
10. Pull the boot center cover from behind the rear
seatback and place it over the inner sides of the
boot side covers and the lowered top.
2-52
Page 111 of 372
Downloaded from www.Manualslib.com manuals search engine Raising Your Convertible Top
1. Set the parking brake and shift your automatic
transaxle to
PARK (P) or your manual transaxle to
NEUTRAL (N).
2. Open the trunk and leave it open.
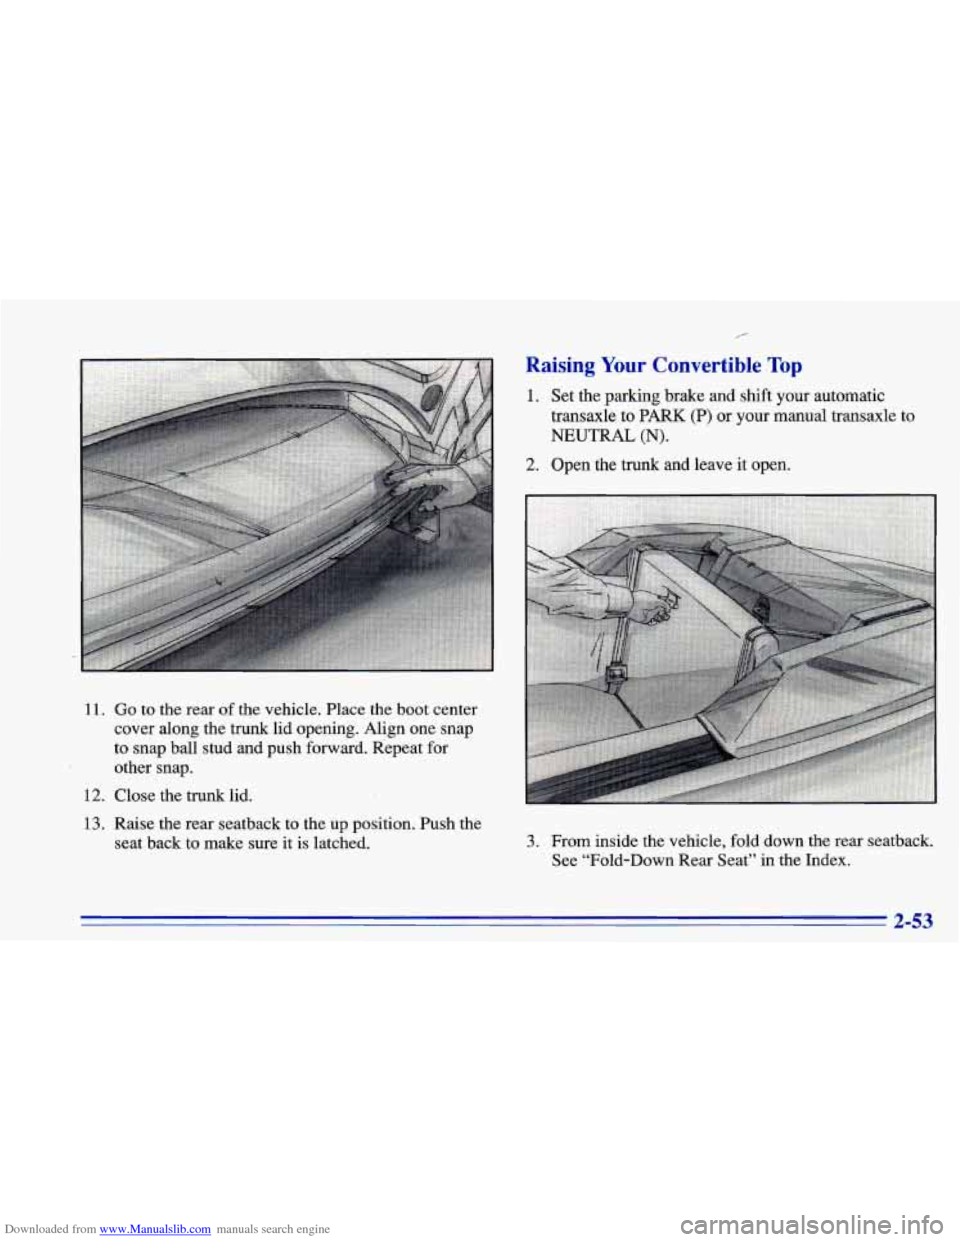
11. Go to the rear of the vehicle. Place the boot center
cover along the trunk lid opening. Align one snap
to snap ball stud and Dush forward. Repeat for
other snap.
12. Close the trunk lid.
13. Raise the rear seatback to the up position. Push the
seat back to make sure it is latched.
3. From inside the vehicle, fold down the rear seatback.
See “Fold-Down Rear Seat” in the Index.
2-53
Page 112 of 372
Downloaded from www.Manualslib.com manuals search engine t
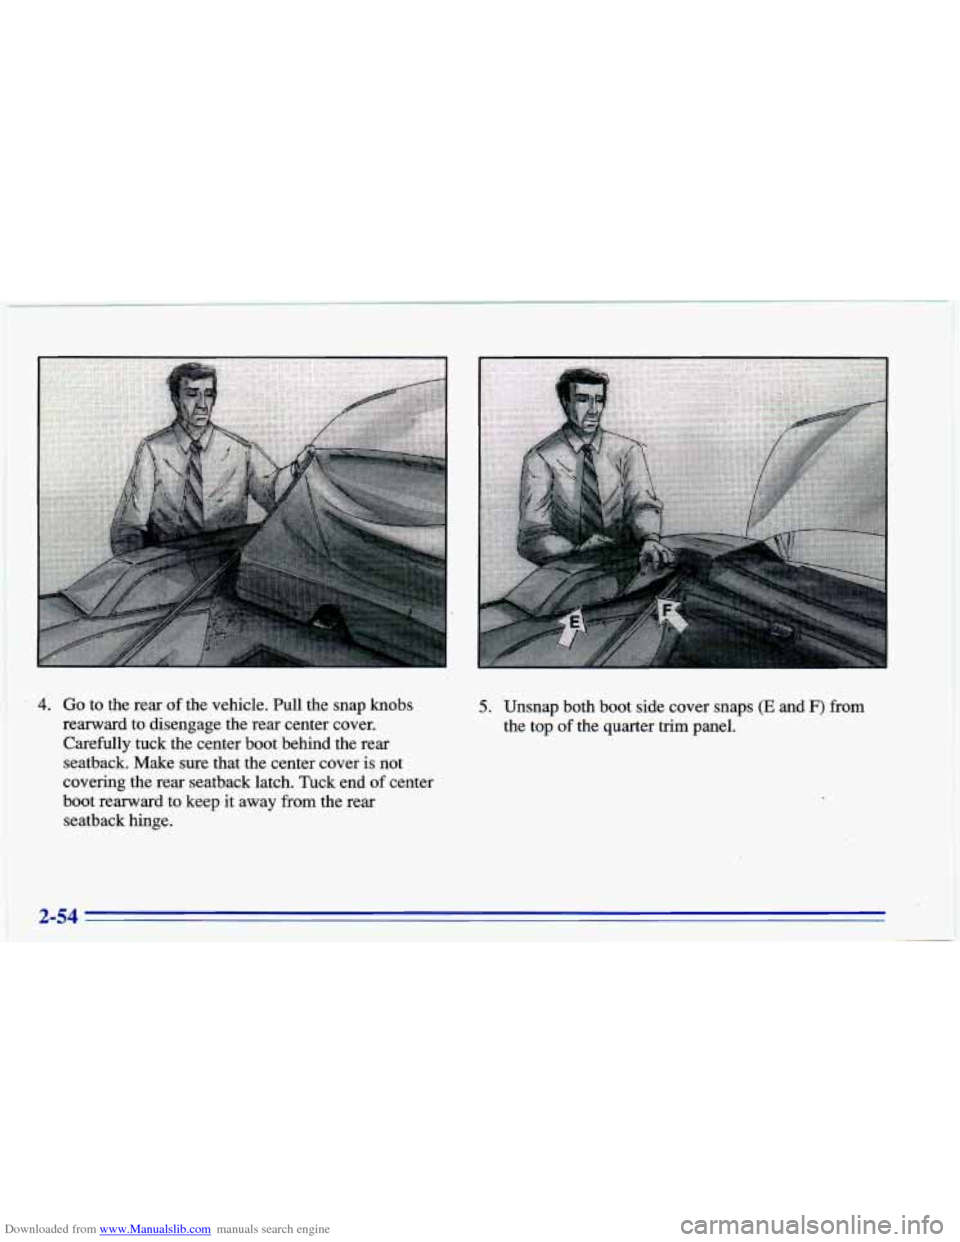
4. Go to the rear of the vehicle. mlll the snap knobs
rearward to disengage the rear center cover.
Carefully tuck the center boot behind the rear
seatback. Make sure that the center cover is not
covering the rear seatback latch. Tuck end of center
boot rearward to keep it away from the rear
seatback hinge. 5. Unsnap both boot side cover snaps (E and F) from
the top of the quarter trim panel.
'2-54
Page 113 of 372
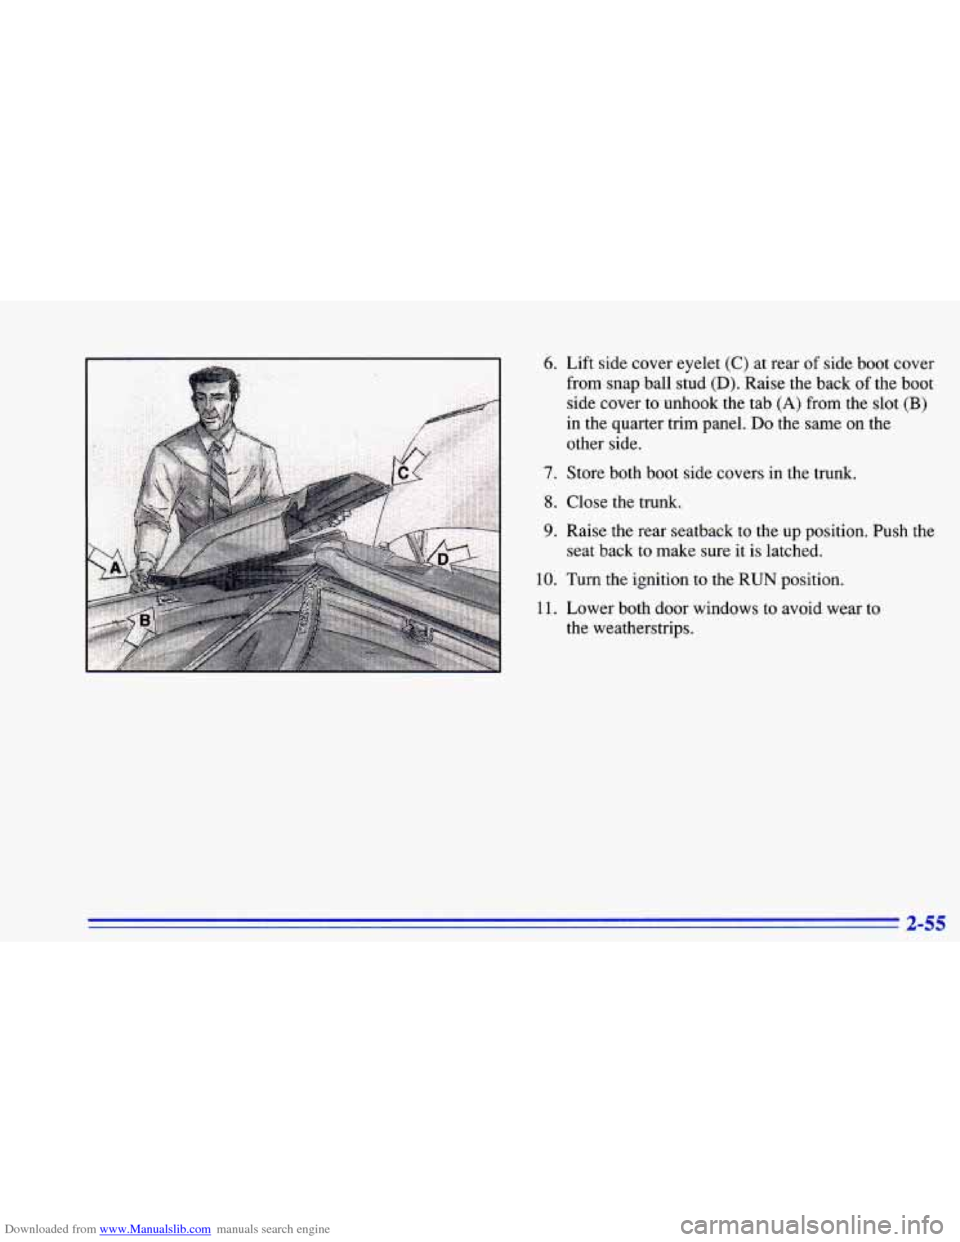
Downloaded from www.Manualslib.com manuals search engine 6. Lift side cover eyelet (C) at rear of side boot cover
from snap ball stud
(D). Raise the back of the boot
side cover to unhook the tab
(A) from the slot (B)
in the quarter trim panel. Do the same on the
other side.
7. Store both boot side covers in the trunk.
8. Close the trunk,
9. Raise the rear seatback to the up position. Push the
seat back to make sure it is latched.
10. Turn the ignition to the RUN position.
11. Lower both door windows to avoid wear to
the weatherstrips.
3 LC
Page 116 of 372
Downloaded from www.Manualslib.com manuals search engine 4.
5.
6.
7.
Press the bypass switch down to the EMERGENCY
OVERRIDE position. The switch is located under
the shelf panel on the driver’s side in the trunk.
Remove the top boot as described
in Steps 4 through 7
in “Raising Your Convertible Top” earlier in
this section.
Lower the door windows completely.
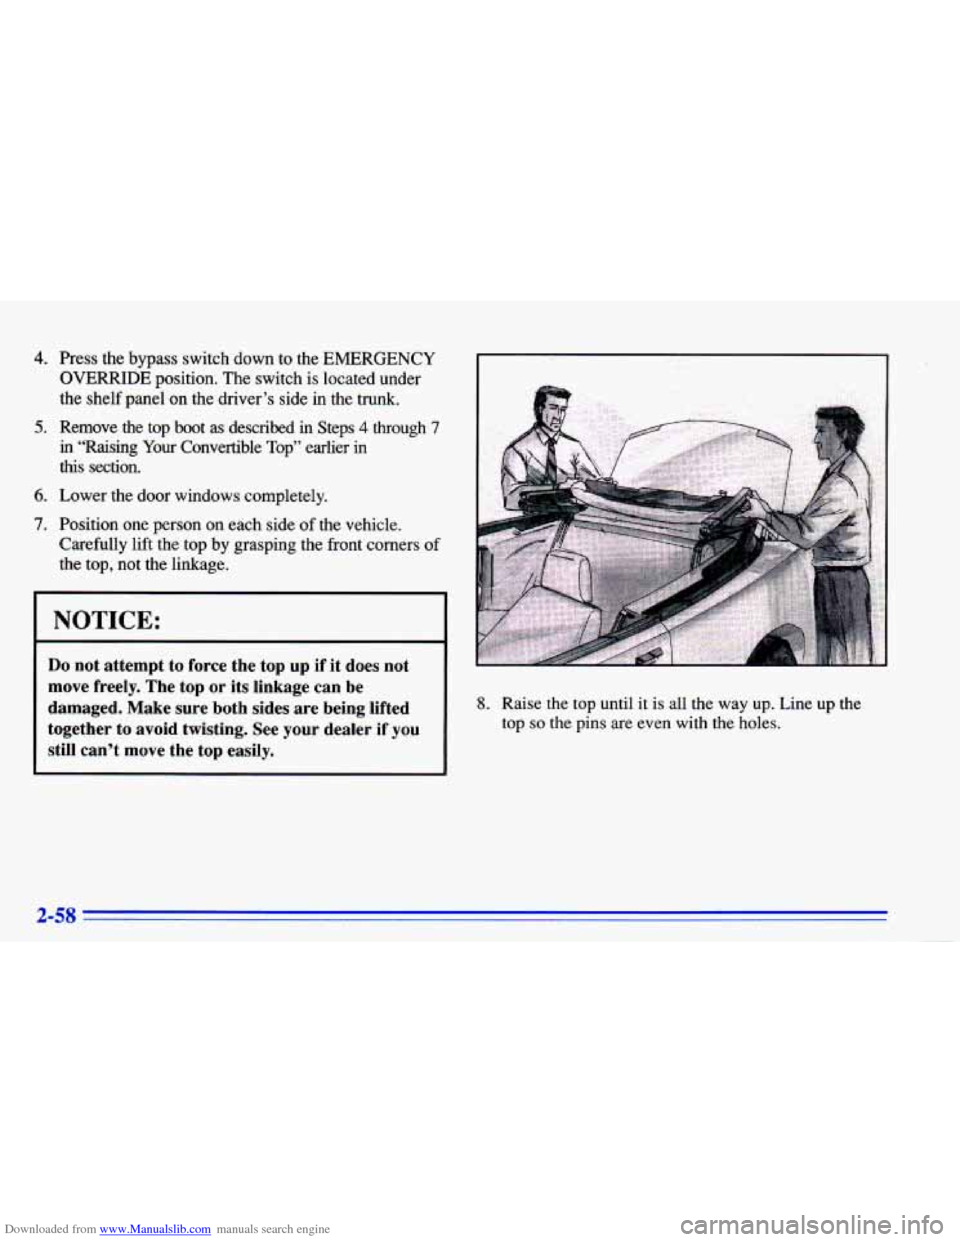
Position one person on each side of the vehicle.
Carefully lift the top by grasping the front corners of
the top,
not the linkage.
I NOTICE:
Do not attempt to force the top up if it does not
move freely. The top
or its linkage can be
damaged. Make sure both sides are being lifted
together
to avoid twisting. See your dealer if you
still can’t move the top easily.
8. Raise the top until it is all the way up. Line up the
top
so the pins are even with the holes.
Page 340 of 372
Downloaded from www.Manualslib.com manuals search engine Part C: Periodic Maintenance
Inspections
Listed below are inspections and services which should be
performed at least twice a year (for instance, each spring
and
fall). You should let your GM dealer’s service
department or other qualified service center do these jobs.
Make sure any necessary repairs are completed at once.
Proper procedures to perform these services may be
found
in a Chevrolet service manual. See “Service and
Owner Publications” in the Index.
Steering, Suspension and Front-Wheel-Drive
Axle
Boot and Seal Inspection
Inspect the front and rear suspension and steering system
for damaged, loose or missing parts, signs
of wear, or lack
of lubrication. Inspect the power steering lines and hoses
for proper hook-up, binding, leaks, cracks, chafing, etc.
Clean and then inspect the drive axle boot seals for
damage, tears or leakage. Replace seals
if necessary.
Exhaust System Inspection
Inspect the complete exhaust system. Inspect the body near
the exhaust system. Look for broken, damaged, missing or
out-of-position
parts as well as open seams, holes, loose
connections, or other conditions
which could cause a heat build-up in the floor pan or could let exhaust fumes into
the vehicle, See “Engine Exhaust”
in the Index.
Radiator and Heater Hose Inspection
Inspect the hoses and have them replaced if they are
cracked, swollen or deteriorated. Inspect all pipes,
fittings and clamps; replace as needed.
Throttle Linkage Inspection
Inspect the throttle linkage for interference or binding,
and for damage or missing parts. Replace parts as
needed. Replace any cables that have high effort or
excessive wear.
Do not lubricate accelerator and cruise
control cables.
Brake System Inspection
Inspect the complete system. Inspect brake lines and
hoses for proper hookup, binding, leaks, cracks, chafing, etc. Inspect disc brake pads for wear and rotors for
surface condition.
Also inspect drum brake linings for
wear and cracks. Inspect other brake parts, including
drums, wheel cylinders, calipers, parking brake, etc.
Check parking brake adjustment. You may need to have
your brakes inspected more often if your driving habits
or conditions result
in frequent braking.
7-42
Page 364 of 372
Downloaded from www.Manualslib.com manuals search engine Ignition Switch ................................ 2-10
Illuminated Entry
............................... 2-42
Inflation. Tire
.................................. 6-37
Inside Daymight Rearview Mirror
................. 2-43
Inspections
Brakesystem
................................ 7-42
Exhaust Systems
............................. 7-42
Front-Wheel-Drive Axle Boot
.................. 7-42
Front-Wheel-Drive Axle Seal
................... 7-42
Radiator and Heater Hose
...................... 7-42
Steering
.................................... 7-42
Suspension
.................................. 7-42
Throttle Linkage
.............................. 7-42
Instrument Panel
............................... 2-60
Brightness Control
............................. 2-4 1
Cleaning
.................................... 6-46
Cluster
................................ 2-62. 2-63
FuseBlock
.................................. 6-54
Interior Lamps
................................. 2-41
Jack. Tire
.................................... 5-21
Jump Starting
................................... 5-2
Key Lock Cylinders Service
..................... 7-39
Key Release Button
............................. 2- 11
Keyless Entry System ............................ 2-5
Keys .......................................... 2-1 Labels
.................................. 4.31. 6.52
Certification
................................. 4-32
CertificationEire
............................. 4-31
Service Parts Identification
..................... 6-52
Tire-Loading Information
...................... 4-31
Vehicle Identification Number
................... 6-52
Lamps
........................................ 2-39
Fog
........................................ 2-41
Interior
..................................... 2-41
On Reminder ................................ 2-39
Latches. Seatback
................................ 1-4
Leaving Your Vehicle
............................. 2-5
Leaving Your Vehicle with the Engine Running ....... 2-25
Lighter
....................................... 2-47
Lights Air Bag Readiness
....................... 1-20. 2-66
Anti-Lock Brake System Warning
............ 2-68. 4-6
Brake System Warning
......................... 2-67
Charging System
............................. 2-66
CheckEngine
................................ 2-71
CheckGages
................................ 2-75
CheckOil
.................................... 2-74
Enhanced Traction System Active
............ 2-69. 4-8
Enhanced Traction System Warning Light
..... 2-68. 4-9
ETS Active
.............................. 2-69. 4-8
ETS Warning
............................. 2-68. 4-9
Interior
..................................... 2-41
Low Coolant Warning
......................... 2-70
9-6