trunk release CHEVROLET CAVALIER 2003 3.G Owners Manual
[x] Cancel search | Manufacturer: CHEVROLET, Model Year: 2003, Model line: CAVALIER, Model: CHEVROLET CAVALIER 2003 3.GPages: 364, PDF Size: 2.44 MB
Page 14 of 364

Rear Seats
Rear Seat Operation
Folding the Seatback
To fold the seatback, do the following:
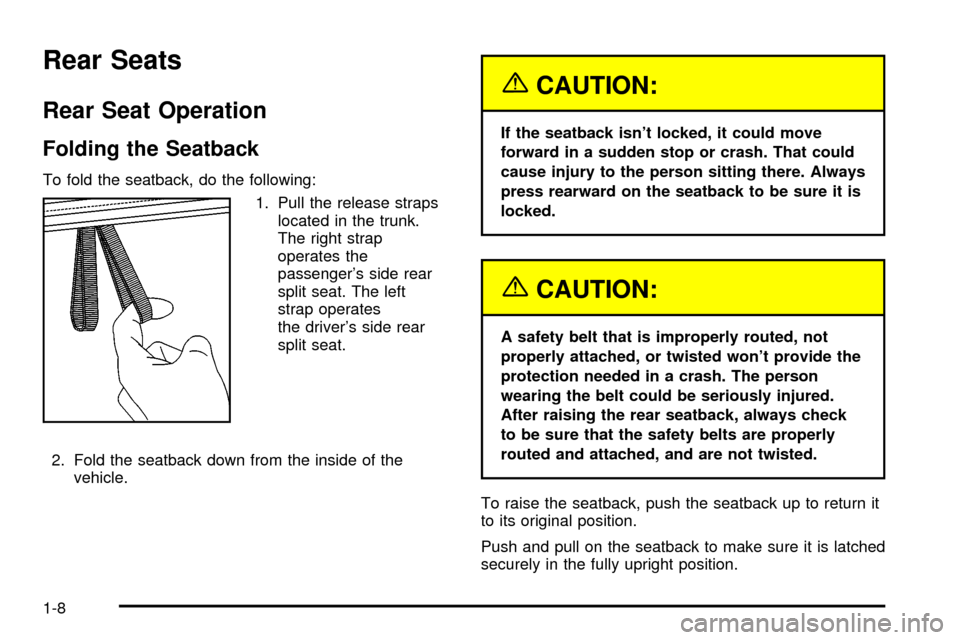
1. Pull the release straps
located in the trunk.
The right strap
operates the
passenger's side rear
split seat. The left
strap operates
the driver's side rear
split seat.
2. Fold the seatback down from the inside of the
vehicle.
{CAUTION:
If the seatback isn't locked, it could move
forward in a sudden stop or crash. That could
cause injury to the person sitting there. Always
press rearward on the seatback to be sure it is
locked.
{CAUTION:
A safety belt that is improperly routed, not
properly attached, or twisted won't provide the
protection needed in a crash. The person
wearing the belt could be seriously injured.
After raising the rear seatback, always check
to be sure that the safety belts are properly
routed and attached, and are not twisted.
To raise the seatback, push the seatback up to return it
to its original position.
Push and pull on the seatback to make sure it is latched
securely in the fully upright position.
1-8
Page 71 of 364

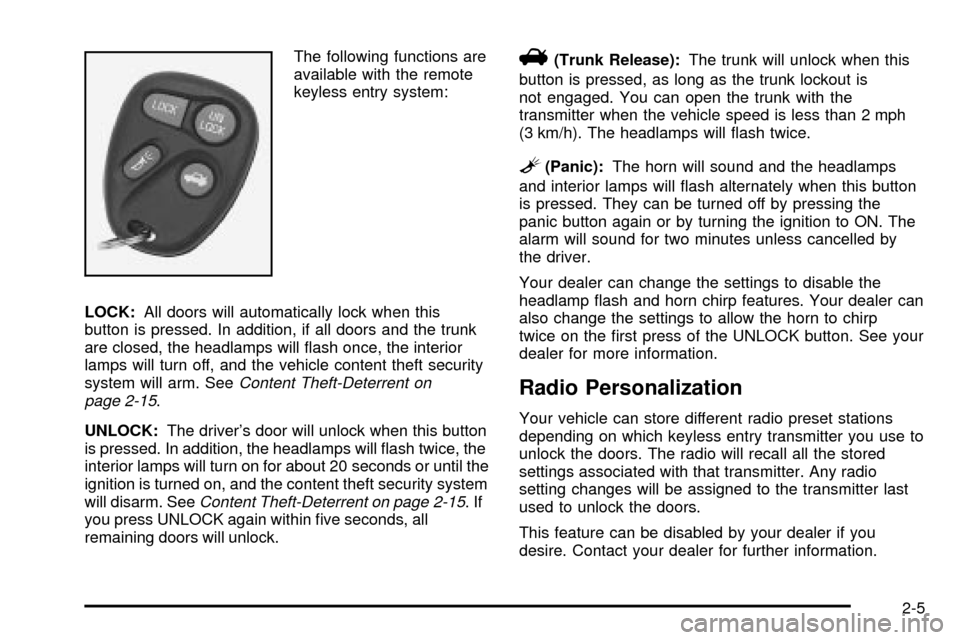
The following functions are
available with the remote
keyless entry system:
LOCK:All doors will automatically lock when this
button is pressed. In addition, if all doors and the trunk
are closed, the headlamps will ¯ash once, the interior
lamps will turn off, and the vehicle content theft security
system will arm. See
Content Theft-Deterrent on
page 2-15.
UNLOCK:The driver's door will unlock when this button
is pressed. In addition, the headlamps will ¯ash twice, the
interior lamps will turn on for about 20 seconds or until the
ignition is turned on, and the content theft security system
will disarm. See
Content Theft-Deterrent on page 2-15.If
you press UNLOCK again within ®ve seconds, all
remaining doors will unlock.
V(Trunk Release):The trunk will unlock when this
button is pressed, as long as the trunk lockout is
not engaged. You can open the trunk with the
transmitter when the vehicle speed is less than 2 mph
(3 km/h). The headlamps will ¯ash twice.
L(Panic):The horn will sound and the headlamps
and interior lamps will ¯ash alternately when this button
is pressed. They can be turned off by pressing the
panic button again or by turning the ignition to ON. The
alarm will sound for two minutes unless cancelled by
the driver.
Your dealer can change the settings to disable the
headlamp ¯ash and horn chirp features. Your dealer can
also change the settings to allow the horn to chirp
twice on the ®rst press of the UNLOCK button. See your
dealer for more information.
Radio Personalization
Your vehicle can store different radio preset stations
depending on which keyless entry transmitter you use to
unlock the doors. The radio will recall all the stored
settings associated with that transmitter. Any radio
setting changes will be assigned to the transmitter last
used to unlock the doors.
This feature can be disabled by your dealer if you
desire. Contact your dealer for further information.
2-5
Page 77 of 364

Remote Trunk Release
Press the remote trunk release button, located on the
lower left side of the instrument panel, to release
the trunk lid.
If your vehicle is equipped with the remote keyless entry
system, the daytime running lamps will ¯ash twice.
Make sure the remote trunk release lockout feature is
not activated. Also, the remote trunk release will
only work when either the ignition is in OFF or
ACCESSORY, the parking brake is engaged or the
vehicle speed is less than 2 mph (3 km/h).
Remote Trunk Release Lockout
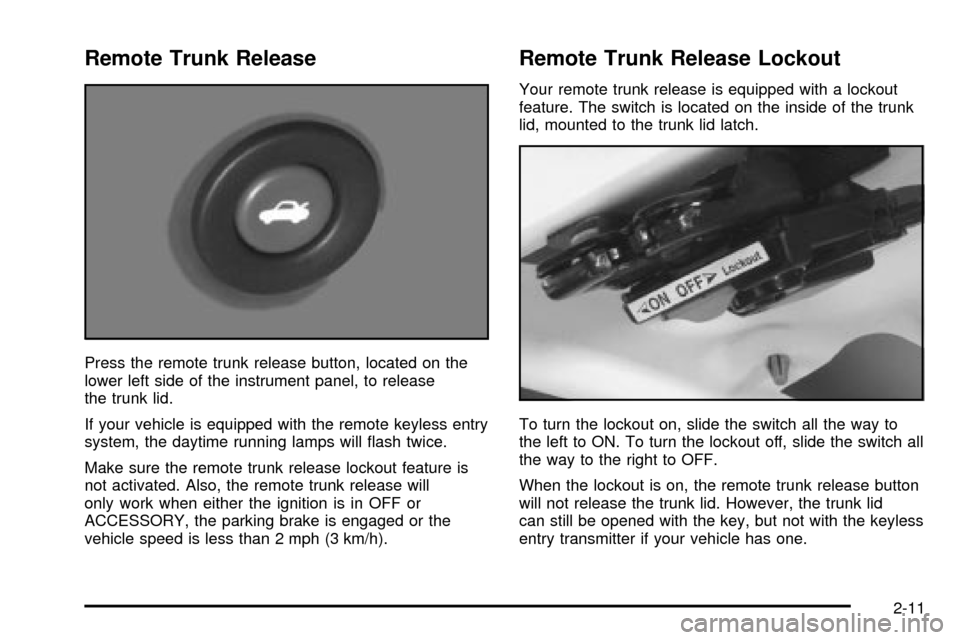
Your remote trunk release is equipped with a lockout
feature. The switch is located on the inside of the trunk
lid, mounted to the trunk lid latch.
To turn the lockout on, slide the switch all the way to
the left to ON. To turn the lockout off, slide the switch all
the way to the right to OFF.
When the lockout is on, the remote trunk release button
will not release the trunk lid. However, the trunk lid
can still be opened with the key, but not with the keyless
entry transmitter if your vehicle has one.
2-11
Page 78 of 364

Emergency Trunk Release Handle
Notice:The emergency trunk release handle is not
designed to be used to tie down the trunk lid or
as an anchor point when securing items in the trunk.
Improper use of the emergency trunk release
handle could damage it.There is a glow-in-the-dark emergency trunk release
handle located on the inside of the trunk lid of your
vehicle. This handle will glow following exposure to light.
Pull the release handle up to open the trunk from the
inside.
Trap-Resistant Trunk Kit
To help prevent a child from becoming trapped in your
trunk, you can order a trap-resistant trunk kit from
your dealer. This kit includes:
·a modi®ed trunk latch,
·a lighted release handle, and
·seatback tethers (for vehicles with folding rear
seatbacks).
See your dealer for additional information.
2-12
Page 81 of 364

Theft-Deterrent Systems
Vehicle theft is big business, especially in some cities.
Although your vehicle has a number of theft-deterrent
features, we know that nothing we put on it can make it
impossible to steal.
Content Theft-Deterrent
Arming the System
With the ignition off, pressing the remote keyless entry
transmitter LOCK button will arm the system
immediately after all doors and the trunk are closed. If
the transmitter LOCK button is pressed again within ®ve
seconds, the horn will chirp to con®rm that the system
has been armed.
Once the system is armed, the THEFT SYSTEM light
on your instrument panel will ¯ash and remain ¯ashing.
This con®rms the system is armed and monitoring
the doors and trunk. If the light is on solid, the system is
not properly activated due to either a door or the
trunk being ajar.
If you don't want to arm the system, lock the car with
the lock levers on the doors or with the power door lock
switch.
Disarming the System
If the system is armed, pressing the UNLOCK button on
the transmitter will disarm the system. The THEFT
SYSTEM light will stop ¯ashing.
If the system is armed, turning the key to START will
also disarm the system.
If the system is armed and the trunk is opened using
the trunk release button on the transmitter, the system
will temporarily disarm itself and re-arm when the
trunk has been closed. This allows the customer to exit
the vehicle, lock the doors using the transmitter, and
open the trunk using the transmitter without having
to disarm and subsequently re-arm the system.
How the System Alarm is Activated
If the system is armed, opening any door or trunk, or
using a wrong key to start the vehicle will cause a
pre-alarm chirp for 10 seconds and then a full alarm of
horn and headlights for two minutes.
If an alarm event has ®nished and all doors and trunk
are closed, the content theft security system will re-arm
itself.
2-15
Page 82 of 364

How to Turn Off the System Alarm
If the system alarm is active, it can be deactivated by:
·Pressing the transmitter LOCK or panic button to
turn off the alarm. The system will also re-arm if
all doors and trunk are later closed, or
·pressing the transmitter UNLOCK or trunk button to
turn off the alarm and disarm the system, or
·putting the key in the ignition and turning it to
START to turn off the alarm and disarm the system.
How to Detect a Tamper Condition
If you hear three horn chirps when you press the
UNLOCK, LOCK or trunk buttons on your transmitter,
that means the content theft security system alarm was
triggered while you were away.
Your dealer can change the settings to disable the
headlamp ¯ash and horn chirp features. Your dealer can
also change the settings to allow the horn to chirp
twice on the ®rst press of the UNLOCK button. See your
dealer for more information.
Passlockž
Your vehicle is equipped with the
Passlockžtheft-deterrent system.
Passlock
žis a passive theft-deterrent system.
Passlockženables fuel if the ignition lock cylinder is
turned with a valid key. If a correct key is not used or the
ignition lock cylinder is tampered with, fuel is disabled.
During normal operation, the THEFT SYSTEM light
will go off approximately ®ve seconds after the key is
turned to the RUN ignition position following an
engine start.
If the engine stalls and the THEFT SYSTEM light
¯ashes, wait until the light stops ¯ashing before trying to
restart the engine. Remember to release the key from
START as soon as the engine starts.
If the engine is running and the THEFT SYSTEM light
comes on, you will be able to restart the engine if
you turn the engine off. However, your
Passlock
žsystem is not working properly and must be
serviced by your dealer. Your vehicle is not protected
by Passlock
žat this time. You may also want to check
the fuses, seeFuses and Circuit Breakers on
page 5-81. See your dealer for service. Also, seeRoadside Assistance Program on page 7-6for more
information.
2-16
Page 102 of 364

Convenience Net
Your vehicle may have a convenience net. You'll see it
inside the back wall of the trunk. Put small loads,
like grocery bags, behind the net. It can help keep them
from falling over during sharp turns or quick starts
and stops.
Unclip a corner of the convenience net to ®t larger
objects behind the net, then reclip it to secure them in
place. The net isn't for larger, heavier loads. Store them
in the trunk as far forward as you can.
You can unhook the net so that it will lie ¯at when
you're not using it.
Sunroof
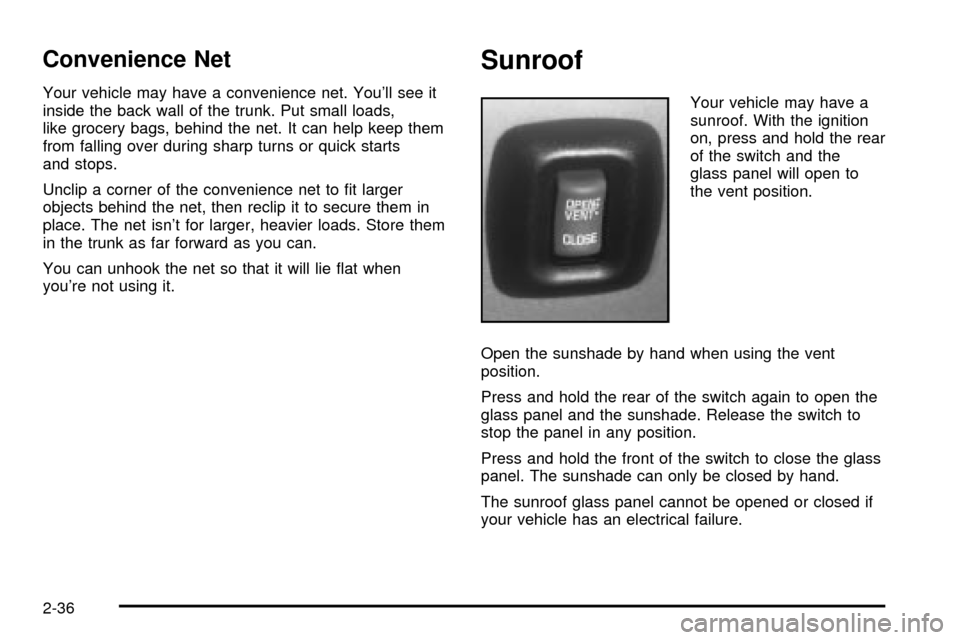
Your vehicle may have a
sunroof. With the ignition
on, press and hold the rear
of the switch and the
glass panel will open to
the vent position.
Open the sunshade by hand when using the vent
position.
Press and hold the rear of the switch again to open the
glass panel and the sunshade. Release the switch to
stop the panel in any position.
Press and hold the front of the switch to close the glass
panel. The sunshade can only be closed by hand.
The sunroof glass panel cannot be opened or closed if
your vehicle has an electrical failure.
2-36
Page 105 of 364

The main components of your instrument panel are the
following:
A. Fog Lamp Button
B. Instrument Panel Brightness Control
C. Turn Signal/Multifunction Lever
D. Instrument Panel Cluster
E. Hazard Warning Flashers Switch
F. Ignition Switch
G. Windshield Wiper/Washer Controls
H. Cigarette Lighter
I. Audio System
J. Climate Controls and Rear Window Defogger
K. Fuse Panel
L. Remote Trunk Release Button
M. Hood Release Lever
N. Tilt Steering Wheel Lever
O. Parking Brake Lever
P. Accessory Power Outlet
Q. Shift LeverHazard Warning Flashers
Your hazard warning ¯ashers let you warn others. They
also let police know you have a problem. Your front
and rear turn signal lamps will ¯ash on and off.
3-3
Page 352 of 364

Customer Assistance Information........................ 7-7
Courtesy Transportation.................................. 7-7
Customer Assistance for Text Telephone
(TTY) Users.............................................. 7-4
Customer Assistance Offices........................... 7-4
Customer Satisfaction Procedure..................... 7-2
GM Mobility Program for Persons with
Disabilities................................................ 7-5
Reporting Safety Defects to General Motors....7-10
Reporting Safety Defects to the Canadian
Government............................................7-10
Reporting Safety Defects to the United
States Government.................................... 7-9
Roadside Assistance Program......................... 7-6
Service Publications Ordering Information........7-10
D
Daytime Running Lamps..................................3-13
Defensive Driving............................................. 4-2
Defogging and Defrosting.................................3-18
Dinghy Towing................................................4-31
Disarming the System.....................................2-15
Doing Your Own Service Work........................... 5-3
Dolly Towing..................................................4-31
Door............................................................... 2-7
Locks.......................................................... 2-7
Power Door Locks......................................... 2-8
Rear Door Security Locks............................... 2-9Door (cont.)
Driver............................................................1-14
Position, Safety Belt.....................................1-14
Driving on Grades...........................................4-39
Driving on Snow or Ice....................................4-25
Driving Through Deep Standing Water...............4-18
Driving Through Flowing Water.........................4-18
Driving with a Trailer.......................................4-37
Driving..........................................................4-15
At Night.....................................................4-15
City...........................................................4-19
Defensive..................................................... 4-2
Drunken....................................................... 4-2
Freeway.....................................................4-20
Hill and Mountain Roads..............................4-22
In Rain and on Wet Roads...........................4-16
Winter........................................................4-24E
Easy Entry Seat............................................... 1-7
Electrical System............................................5-80
Add-On Equipment......................................5-80
Fuses and Circuit Breakers...........................5-81
Headlamp Wiring.........................................5-81
Power Windows and Other Power Options......5-81
Windshield Wiper Fuses...............................5-81
Emergency Trunk Release Handle.....................2-12
4
Page 359 of 364

R
Radio Data System (RDS)...............3-39, 3-49, 3-63
Radio Messages.....................3-39, 3-44, 3-54, 3-68
Radio Personalization........................................ 2-5
Radios..........................................................3-36
AM-FM Radio.............................................3-37
Care of Your Cassette Tape Player................3-77
Care of Your CD Player...............................3-78
Care of Your CDs........................................3-78
Personal Choice Radio Controls....................3-75
Radio with Cassette and CD.........................3-63
Radio with CD....................................3-39, 3-49
Setting the Time for Radios with Radio
Data Systems (RDS)................................3-36
Setting the Time for Radios without
Radio Data Systems (RDS).......................3-36
Theft-Deterrent............................................3-76
Understanding Reception..............................3-76
RDS Messages..............................3-43, 3-53, 3-67
Rear Door Security Locks.................................. 2-9
Rear Safety Belt Comfort Guides......................1-26
Rear Seat Operation......................................... 1-8
Rear Seat Passengers, Safety Belts..................1-23
Rear Window Defogger....................................3-19
Rearview Mirrors.............................................2-32
Reclining Seatbacks.......................................... 1-4
Recreational Vehicle Towing.............................4-30Remote Keyless Entry System, Operation............ 2-4
Remote Keyless Entry System............................ 2-3
Remote Trunk Release Lockout........................2-11
Remote Trunk Release....................................2-11
Removing the Flat Tire and Installing the
Spare Tire..................................................5-64
Removing the Spare Tire and Tools...................5-62
Replacement Bulbs.........................................5-49
Replacing Brake System Parts..........................5-38
Replacing Restraint System Parts
After a Crash..............................................1-59
Reporting Safety Defects.................................7-10
Canadian Government..................................7-10
General Motors...........................................7-10
United States Government.............................. 7-9
Restraint System Check...................................6-19
Checking Your Restraint Systems...................1-58
Replacing Restraint System Parts
After a Crash..........................................1-59
Restraint Systems...........................................1-58
Checking....................................................1-58
Replacing Parts...........................................1-59
Resynchronization............................................. 2-7
Retained Accessory Power (RAP)......................2-19
Right Front Passenger Position, Safety Belts......1-23
Roadside......................................................... 7-6
Assistance Program....................................... 7-6
Running Your Engine While You Are Parked.......2-31
11