oil CHEVROLET CAVALIER 2005 3.G Owners Manual
[x] Cancel search | Manufacturer: CHEVROLET, Model Year: 2005, Model line: CAVALIER, Model: CHEVROLET CAVALIER 2005 3.GPages: 354, PDF Size: 2.19 MB
Page 82 of 354
To Use the Engine Coolant Heater
1. Turn off the engine.
2. Open the hood and unwrap the electrical cord. The
electrical cord is located in front of the engine
coolant surge tank on the passenger’s side.
3. Plug it into a normal, grounded 110-volt AC outlet.
{CAUTION:
Plugging the cord into an ungrounded outlet
could cause an electrical shock. Also, the
wrong kind of extension cord could overheat
and cause a �re. You could be seriously
injured. Plug the cord into a properly grounded
three-prong 110-volt AC outlet. If the cord will
not reach, use a heavy-duty three-prong
extension cord rated for at least 15 amps.4. Before starting the engine, be sure to unplug and
store the cord as it was before to keep it away
from moving engine parts. If you do not, it could be
damaged.
How long should you keep the coolant heater plugged
in? The answer depends on the outside temperature, the
kind of oil you have, and some other things. Instead
of trying to list everything here, we ask that you contact
your dealer in the area where you will be parking
your vehicle. The dealer can give you the best advice
for that particular area.Automatic Transaxle Operation
If your vehicle is equipped with an automatic transaxle,
the shift lever is located on the console between
the seats.
There are several different positions for your shift lever.
PARK (P):This position locks your front wheels. It
is the best position to use when you start your engine
because your vehicle cannot move easily.
2-20
Page 99 of 354
Instrument Panel Overview...............................3-4
Hazard Warning Flashers................................3-6
Other Warning Devices...................................3-6
Horn.............................................................3-6
Tilt Wheel.....................................................3-6
Turn Signal/Multifunction Lever.........................3-7
Turn and Lane-Change Signals........................3-8
Headlamp High/Low-Beam Changer..................3-8
Flash-to-Pass.................................................3-8
Windshield Wipers..........................................3-9
Windshield Washer.......................................3-10
Cruise Control..............................................3-10
Exterior Lamps.............................................3-13
Headlamps on Reminder................................3-13
Daytime Running Lamps................................3-13
Fog Lamps..................................................3-15
Instrument Panel Brightness...........................3-15
Entry Lighting...............................................3-16
Front Reading Lamps....................................3-16
Map Lamps.................................................3-16
Battery Run-Down Protection..........................3-16
Accessory Power Outlets...............................3-16
Ashtrays and Cigarette Lighter........................3-17
Climate Controls............................................3-18
Climate Control System.................................3-18
Outlet Adjustment.........................................3-20Warning Lights, Gages, and Indicators............3-21
Instrument Panel Cluster................................3-22
Speedometer and Odometer...........................3-23
Trip Odometer..............................................3-23
Tachometer.................................................3-23
Safety Belt Reminder Light.............................3-24
Airbag Readiness Light..................................3-24
Charging System Light..................................3-25
Up-Shift Light...............................................3-26
Brake System Warning Light..........................3-26
Anti-Lock Brake System Warning Light.............3-27
Enhanced Traction System Warning Light.........3-28
Enhanced Traction System Active Light............3-29
Engine Coolant Temperature Gage..................3-29
Low Coolant Warning Light............................3-30
Malfunction Indicator Lamp.............................3-30
Oil Pressure Light.........................................3-33
Passlock
®Warning Light................................3-34
Highbeam On Light.......................................3-34
Check Gages Warning Light...........................3-34
Service Vehicle Soon Light............................3-35
Fuel Gage...................................................3-35
Section 3 Instrument Panel
3-1
Page 131 of 354
Your vehicle will not pass this inspection if the OBD
(on-board diagnostic) system determines that critical
emission control systems have not been completely
diagnosed by the system. The vehicle would be
considered not ready for inspection. This can happen if
you have recently replaced your battery or if your battery
has run down. The diagnostic system is designed to
evaluate critical emission control systems during normal
driving. This may take several days of routine driving. If
you have done this and your vehicle still does not pass
the inspection for lack of OBD system readiness, your
GM dealer can prepare the vehicle for inspection.
Oil Pressure Light
If you have a low engine
oil pressure problem, this
light will stay on after
you start your engine, or
come on when you
are driving. This indicates
that your engine is not
receiving enough oil.
The engine could be low on oil, or could have some
other oil problem. Have it �xed immediately.The oil light could also come on in three other situations:
When the ignition is on but the engine is not
running, the light will come on as a test to show you
it is working, but the light will go out when you
turn the ignition to START. If it does not come on
with the ignition on, you may have a problem
with the fuse or bulb. Have it �xed right away.
If you are idling at a stop sign, the light may blink
on and then off.
If you make a hard stop, the light may come on for
a moment. This is normal.
{CAUTION:
Do not keep driving if the oil pressure is low. If
you do, your engine can become so hot that it
catches �re. You or others could be burned.
Check your oil as soon as possible and have
your vehicle serviced.
Notice:Lack of proper engine oil maintenance may
damage the engine. The repairs would not be covered
by your warranty. Always follow the maintenance
schedule in this manual for changing engine oil.
3-33
Page 168 of 354
Radio Reception
AM
The range for most AM stations is greater than for FM,
especially at night. The longer range can cause
station frequencies to interfere with each other. Static
can occur on AM stations caused by things like
storms and power lines. Try reducing the treble to
reduce this noise.
FM Stereo
FM stereo will give the best sound, but FM signals will
reach only about 10 to 40 miles (16 to 65 km). Tall
buildings or hills can interfere with FM signals, causing
the sound to fade in and out.
XM™ Satellite Radio Service
XM™ Satellite Radio Service gives digital radio
reception from coast to coast. Just as with FM, tall
buildings or hills can interfere with satellite radio signals,
causing the sound to fade in and out. The radio may
display NO SIGNAL to indicate interference.
Care of Your CDs
Handle CDs carefully. Store them in their original cases
or other protective cases and away from direct
sunlight and dust. If the surface of a CD is soiled,
dampen a clean, soft cloth in a mild, neutral detergent
solution and clean it, wiping from the center to the edge.
Be sure never to touch the side without writing when
handling CDs. Pick up CDs by grasping the outer edges
or the edge of the hole and the outer edge.
Care of Your CD Player
The use of CD lens cleaners for CD players is not
advised, due to the risk of contaminating the lens of the
CD optics with lubricants internal to the CD mechanism.
3-70
Page 191 of 354
When you want to leave the freeway, move to the
proper lane well in advance. If you miss your exit, do
not, under any circumstances, stop and back up. Drive
on to the next exit.
The exit ramp can be curved, sometimes quite sharply.
The exit speed is usually posted. Reduce your speed
according to your speedometer, not to your sense
of motion. After driving for any distance at higher
speeds, you may tend to think you are going slower
than you actually are.
Before Leaving on a Long Trip
Make sure you are ready. Try to be well rested. If you
must start when you are not fresh — such as after
a day’s work — do not plan to make too many miles that
�rst part of the journey. Wear comfortable clothing
and shoes you can easily drive in.
Is your vehicle ready for a long trip? If you keep it
serviced and maintained, it is ready to go. If it needs
service, have it done before starting out. Of course, you
will �nd experienced and able service experts in GM
dealerships all across North America. They will be ready
and willing to help if you need it.Here are some things you can check before a trip:
Windshield Washer Fluid:Is the reservoir full? Are
all windows clean inside and outside?
Wiper Blades:Are they in good shape?
Fuel, Engine Oil, Other Fluids:Have you checked
all levels?
Lamps:Are they all working? Are the lenses clean?
Tires:They are vitally important to a safe,
trouble-free trip. Is the tread good enough for
long-distance driving? Are the tires all in�ated to the
recommended pressure?
Weather Forecasts:What is the weather outlook
along your route? Should you delay your trip a
short time to avoid a major storm system?
Maps:Do you have up-to-date maps?
4-21
Page 213 of 354
3. When the wheel chocks are in place, release the
regular brakes until the chocks absorb the load.
4. Reapply the regular brakes. Then apply your
parking brake, and then shift into PARK (P) for
an automatic transaxle or REVERSE (R) for
a manual transaxle.
5. Release the regular brakes.
When You Are Ready to Leave After
Parking on a Hill
1. Apply your regular brakes and hold the pedal down
while you:
Start your engine.
Shift into a gear.
Release the parking brake.
2. Let up on the brake pedal.
3. Drive slowly until the trailer is clear of the chocks.
4. Stop and have someone pick up and store the
chocks.
Maintenance When Trailer Towing
Your vehicle will need service more often when you are
pulling a trailer. SeePart A: Scheduled Maintenance
Services on page 6-4for more on this. Things that are
especially important in trailer operation are automatic
transaxle �uid (do not over�ll), engine oil, drive
belt, cooling system and brake system.
Each of these is covered in this manual, and the Index
will help you �nd them quickly. If you are trailering,
it is a good idea to review this information before you
start your trip.
Check periodically to see that all hitch nuts and bolts
are tight.
Engine Cooling When Trailer Towing
Your cooling system may temporarily overheat during
severe operating conditions. SeeEngine Overheating
on page 5-23.
Towing a Trailer (Manual Transaxle)
Do not tow a trailer if your vehicle is equipped with a
manual transaxle.
4-43
Page 215 of 354
Service............................................................5-3
Doing Your Own Service Work.........................5-4
Adding Equipment to the Outside of Your
Vehicle......................................................5-5
Fuel................................................................5-5
Gasoline Octane............................................5-5
Gasoline Speci�cations....................................5-5
California Fuel...............................................5-5
Additives.......................................................5-6
Fuels in Foreign Countries...............................5-6
Filling Your Tank............................................5-7
Filling a Portable Fuel Container.......................5-9
Checking Things Under the Hood....................5-10
Hood Release..............................................5-10
Engine Compartment Overview.......................5-12
Engine Oil...................................................5-13
Engine Air Cleaner/Filter................................5-17
Automatic Transaxle Fluid..............................5-19
Manual Transaxle Fluid..................................5-19
Hydraulic Clutch...........................................5-19
Engine Coolant.............................................5-20
Coolant Surge Tank Pressure Cap..................5-23
Engine Overheating.......................................5-23
Cooling System............................................5-25
Power Steering Fluid.....................................5-30
Windshield Washer Fluid................................5-31Brakes........................................................5-32
Battery........................................................5-36
Jump Starting...............................................5-37
Bulb Replacement..........................................5-41
Halogen Bulbs..............................................5-41
Headlamps..................................................5-42
Front Turn Signal and Parking Lamps..............5-44
Taillamps and Turn Signal Lamps...................5-44
Back-Up Lamps............................................5-45
Replacement Bulbs.......................................5-45
Windshield Wiper Blade Replacement..............5-46
Tires..............................................................5-47
Tire Sidewall Labelling...................................5-48
Tire Terminology and De�nitions.....................5-50
In�ation - Tire Pressure.................................5-53
Tire Inspection and Rotation...........................5-54
When It Is Time for New Tires.......................5-55
Buying New Tires.........................................5-56
Uniform Tire Quality Grading..........................5-57
Wheel Alignment and Tire Balance..................5-58
Wheel Replacement......................................5-58
Tire Chains..................................................5-60
If a Tire Goes Flat........................................5-61
Changing a Flat Tire.....................................5-62
Removing the Spare Tire and Tools................5-63
Section 5 Service and Appearance Care
5-1
Page 220 of 354
Additives
To provide cleaner air, all gasolines in the United States
are now required to contain additives that will help
prevent engine and fuel system deposits from forming,
allowing your emission control system to work properly.
You should not have to add anything to your fuel.
However, some gasolines contain only the minimum
amount of additive required to meet U.S. Environmental
Protection Agency regulations. General Motors
recommends that you buy gasolines that are advertised
to help keep fuel injectors and intake valves clean. If your
vehicle experiences problems due to dirty injectors or
valves, try a different brand of gasoline.
Gasolines containing oxygenates, such as ethers and
ethanol, and reformulated gasolines may be available in
your area to contribute to clean air. General Motors
recommends that you use these gasolines, particularly if
they comply with the speci�cations described earlier.
Notice:Your vehicle was not designed for fuel that
contains methanol. Do not use fuel containing
methanol. It can corrode metal parts in your fuel
system and also damage the plastic and rubber
parts. That damage would not be covered under
your warranty.Some gasolines that are not reformulated for low
emissions may contain an octane-enhancing additive
called methylcyclopentadienyl manganese tricarbonyl
(MMT); ask the attendant where you buy gasoline
whether the fuel contains MMT. General Motors does
not recommend the use of such gasolines. Fuels
containing MMT can reduce the life of spark plugs and
the performance of the emission control system may
be affected. The malfunction indicator lamp may turn on.
If this occurs, return to your authorized GM dealer for
service.
Fuels in Foreign Countries
If you plan on driving in another country outside the
United States or Canada, the proper fuel may be hard
to �nd. Never use leaded gasoline or any other fuel
not recommended in the previous text on fuel. Costly
repairs caused by use of improper fuel would not
be covered by your warranty.
To check the fuel availability, ask an auto club, or
contact a major oil company that does business in the
country where you will be driving.
5-6
Page 224 of 354
Checking Things Under
the Hood
{CAUTION:
An electric fan under the hood can start up
and injure you even when the engine is not
running. Keep hands, clothing and tools away
from any underhood electric fan.
{CAUTION:
Things that burn can get on hot engine parts
and start a �re. These include liquids like fuel,
oil, coolant, brake �uid, windshield washer and
other �uids, and plastic or rubber. You or
others could be burned. Be careful not to drop
or spill things that will burn onto a hot engine.
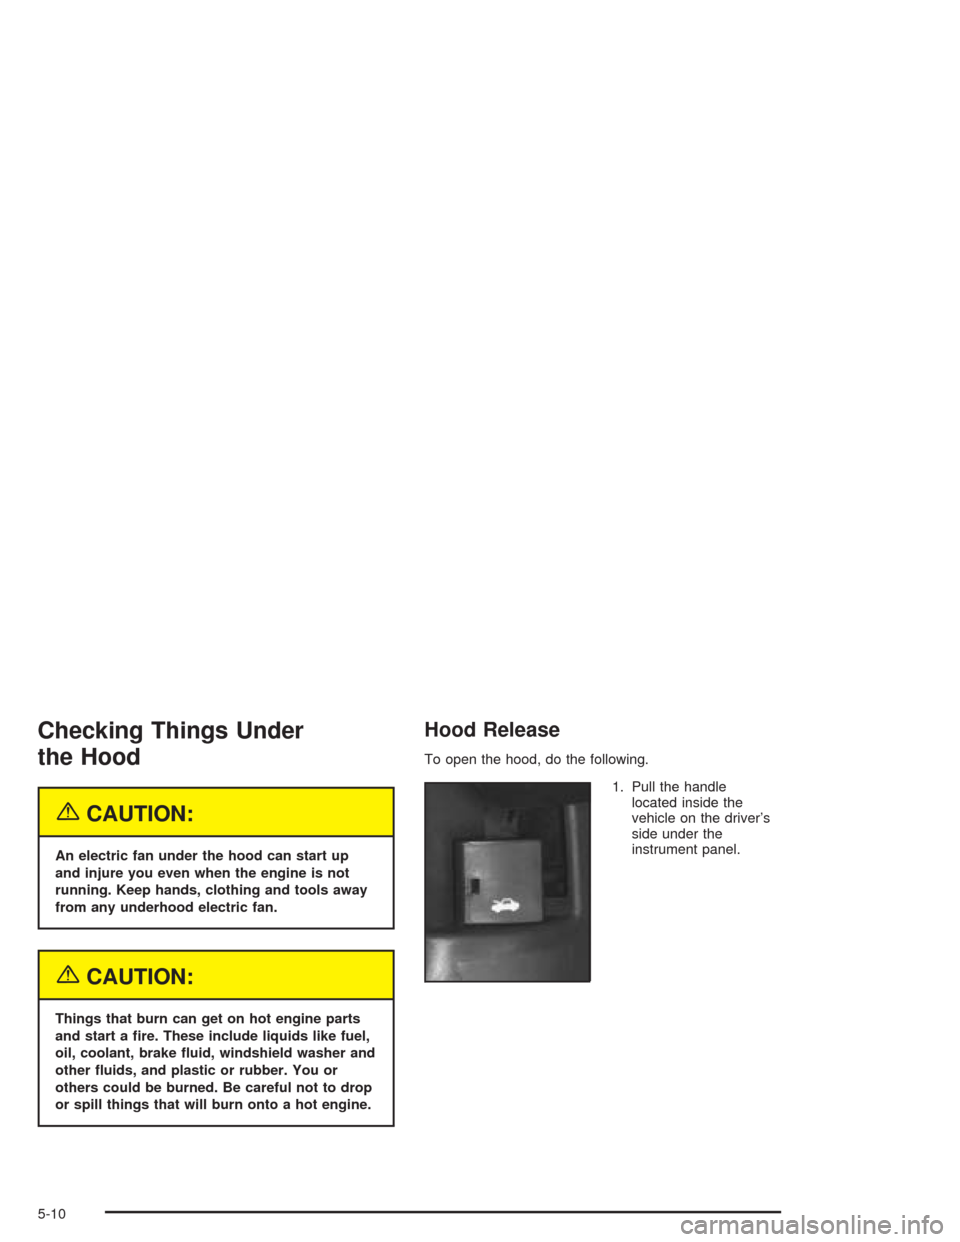
Hood Release
To open the hood, do the following.
1. Pull the handle
located inside the
vehicle on the driver’s
side under the
instrument panel.
5-10
Page 227 of 354
A. Coolant Surge Tank. SeeCooling System on
page 5-25.
B. Engine Oil Dipstick. See “Checking Engine Oil”
underEngine Oil on page 5-13.
C. Engine Oil Fill Cap. See “When to Add Engine Oil”
underEngine Oil on page 5-13.
D. Brake Fluid Reservoir. See “Brake Fluid” under
Brakes on page 5-32.
E. Power Steering Fluid Reservoir. SeePower Steering
Fluid on page 5-30.
F. Clutch Master Cylinder Reservoir (If Equipped)
(Not Shown). SeeHydraulic Clutch on page 5-19.
G. Battery. SeeBattery on page 5-36.
H. Engine Air Cleaner/Filter. SeeEngine Air
Cleaner/Filter on page 5-17.
I. Windshield Washer Fluid Reservoir. See “Adding
Washer Fluid” underWindshield Washer Fluid
on page 5-31.
J. Engine Compartment Fuse Block. SeeEngine
Compartment Fuse Block on page 5-84.Engine Oil
If the oil pressure light
appears on the instrument
cluster, it means you
need to check your engine
oil level right away.
For more information, seeOil Pressure Light on
page 3-33.
You should check your engine oil level regularly; this
is an added reminder.
Checking Engine Oil
It is a good idea to check your engine oil every time
you get fuel. In order to get an accurate reading,
the oil must be warm and the vehicle must be on
level ground.
5-13