weight CHEVROLET CITATION 1980 1.G Owners Manual
[x] Cancel search | Manufacturer: CHEVROLET, Model Year: 1980, Model line: CITATION, Model: CHEVROLET CITATION 1980 1.GPages: 95, PDF Size: 21.48 MB
Page 7 of 95
Downloaded from www.Manualslib.com manuals search engine CAUTION: For safety's s~ke, always lock the doors and any hatchback when driving. Along with using the seat belts properly, locking the doors, etc. helps prevent occupants from being thrown from the vehicl~ during accidents. It also helps prevent unintended opening of the doors and helps keep out intruders when stopped.
STOWING THINGS IN (OR ON) THE CAR
CAUTION: luggage or other cargo should not be piled higher than the seatbacks. When at all possible. luggage or cargo should be carried in the trunk area. The filler panel or cargo cover, betWeen the rear seatback and the rear window should not be used to carry objects-.even those that are small and light. All items should be secured in place. This will help keep such things from being thrown about and iniurying people in the car during an accident. Cargo weight. whether inside or on the roof, should be positioned as evenly as possible from front to rear.
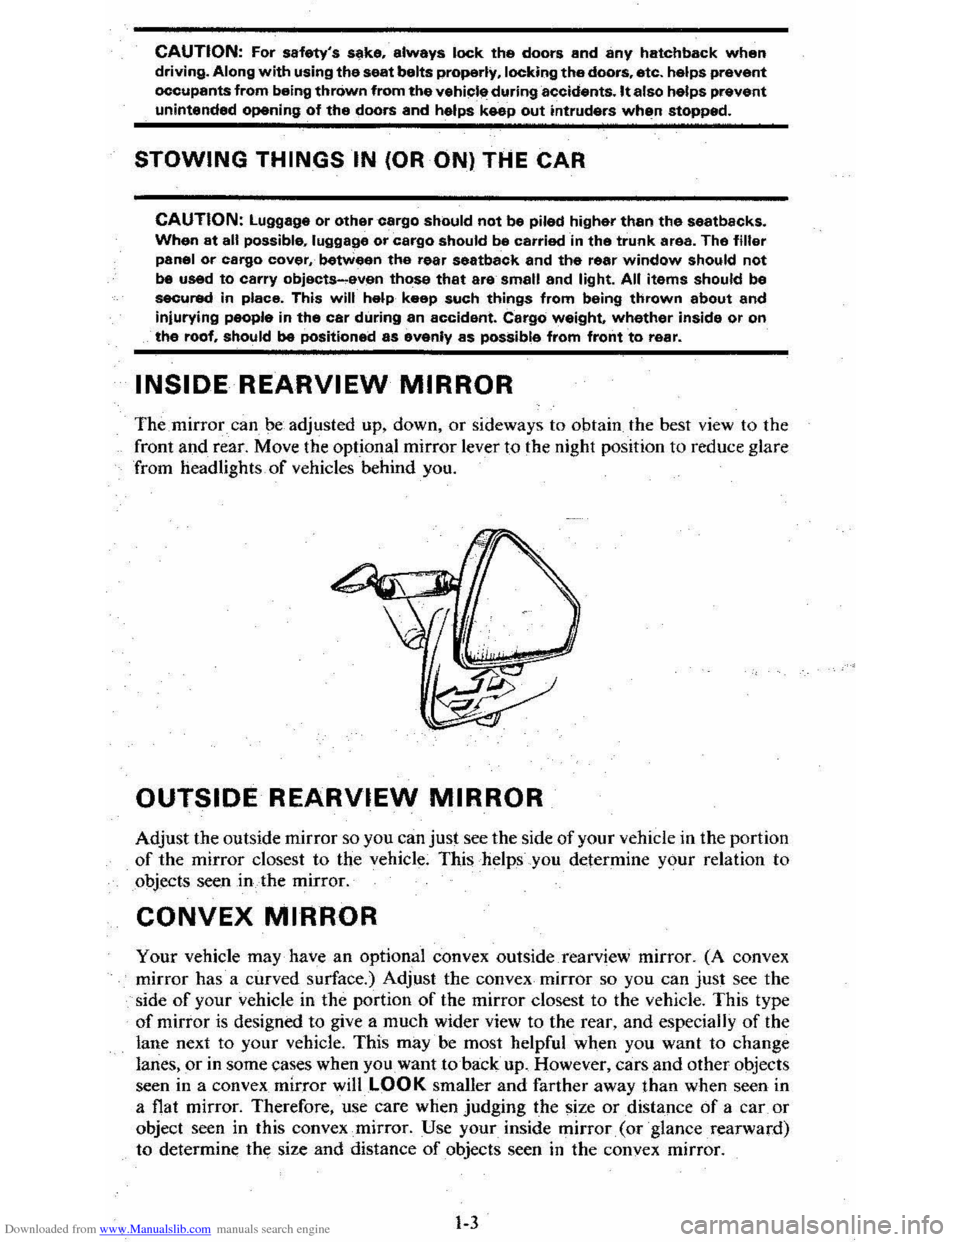
INSIDE REARVIEW MIRROR
The mirror can be adjusted up, down, or sideways to obtain the best view to the
front
and rear. Move the optional mirror lever to the night position to reduce glare
from headlights of vehicles behind you.
OUTSIDE REARVIEW MIRROR
Adjust the outside mirror so you can just see the side of your vehicle in the portion of the mirror closest to the vehicle; This helps you determine your relation to
objects seen
in the mirror.
CONVEX MIRROR
Your vehicle may have an optional convex outside rearview mirror. (A convex
mirror has a curved surface.) Adjust the convex mirror so you can
just see the
side of your vehicle in the portion of the mirror closest to the vehicle. This type
of mirror is designed to give a much wider view to the rear, and especially of the
lane next to your vehicle. This
may· be most helpful when you want to change
lanes, or in some cases when you want to back up. However, cars and other objects
seen in a convex mirror
willLOOK smaller and farther away than when seen in
a flat mirror. Therefore, use care when Judging the size or distance of a car or
object seen in this convex
.. mirror. Use your inside mirror. (or ·glance .rearward)
to determine the size and distance of objects seen in the convex mirror.
1-3
Page 15 of 95
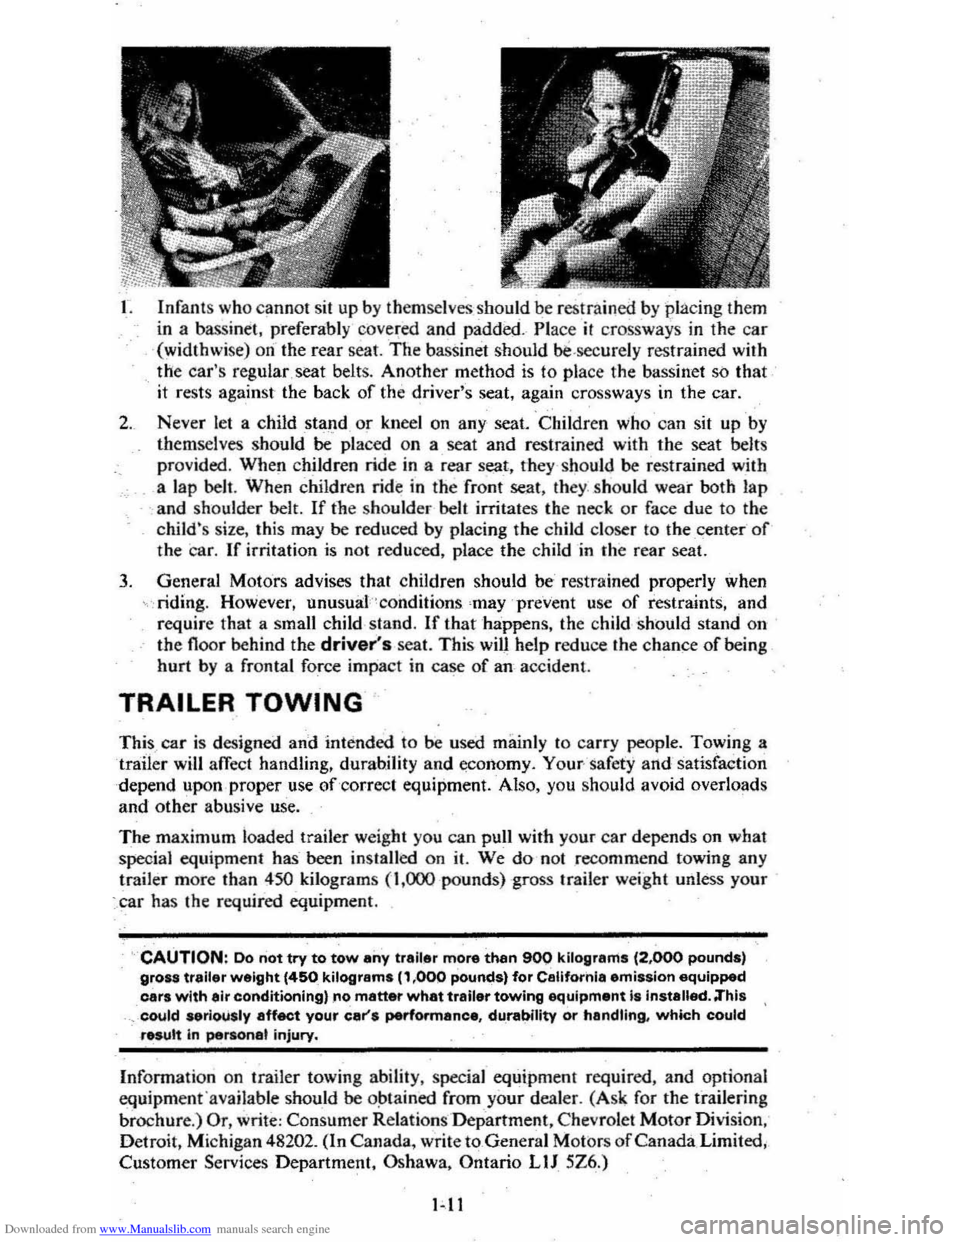
Downloaded from www.Manualslib.com manuals search engine L Infants who cannot sit up by themselves should be restr~ined b y placing them
in a bassinet, preferably cove~ed and padded .- Pl ace il crossways in the car
(widthwise) on-the rear seat.
The bassi net should bi!.secure ly restrained with
the car's reg ular seat belt
s. Another method is to pla ce the bassinet so that
it rests aga,inst the back of the driver's seat, again crossways in the car.
2. Never let a child sta~d or kneel on any seat. Children who can sit up by
them selves should be placed on a seat and restrained with the seat belts
provided. When children ride in a rear se:at, they should be restrained with
a lap
belt. When children ride in the fronf seat, they . ,should wear both lap
and
shou'lder belt. If the shoulder bell irritates the neck or face due to th e
child's size, this may be reduced by placing the child closer to the center of the car. If irritation is not red uced, place the child in the rear seat.
3. General Motors advises that children should be restr ained properly when
riding . However, unusual'~conditions 'may prevent use of restraints, and
requir e that a small child,
sland. If that happens, the c hild should stand on
the floo r behind the driver's seat. This will help reduce the chance of being
hurt
by a frontal force impact in case of an accident.
TRAILER TOWING
This car is designed and intended to be used mainly to car ry people. Towing a
trailer will affect handling, durability and economy_ Your'"safcty and satisfaction
depend upon,proper use
of correct equipment. Also. you should avoid overloads
and other abusive use.
The maximum loaded trailer weight you can pull with your car depends
on what special equipment has-been inst alled o n it. We do-n o t recommend towing any
trailer more than 450
kilograms (1,000 pounds) -gross trailer weight unless your
'car ha s .he required equipment.
CAUTION: Do not try to tow any trailer more than 900 kilograms (2.000 pounds)
gross trailer weight (450 kilograms (' .000 pounds) for California emission equipped
cars with air conditioning) no matter what trailer towing equipment is installed. ;This ,could .eriously affect your car'S performance. durability or handling. which could
result in personel injury.
Infonnati on on trailer towing ability, special equipment requir ed, and optional
equipm e
nfavailable should be o~lained from your dea ler . (Ask for the trailering
brochur e.)
Or, write: Consumer Relat ions Department , Chevrolet Motor Division ,
Detroit , Mi chigan
48202. (In Canada, write to General Motors of Canada Limited .
Custom
er Services Department, Oshawa. Ontario LlJ 5Z6.)
Page 16 of 95
Downloaded from www.Manualslib.com manuals search engine Tir,s
When lowing trailers using a dead-weight hitch, inflate tires to the "Cold Tire
Pressure" for ·'Max . Load" show n on the Tire Placard on the left front door.
The allowable passenger and cargo load for this car,
also sh o wn on· the Tire
Placard, is reduced by the trailer tongue weight whenever the trailer is attached
t o the car.
Maintenance
More frequen.t servic e is requi red when using your car to pull a trailer. See Section
A of the Maint enance Schedule folder for Tran saxle Fluid and Engine Oil chang e
requirement~ for traitering.
Now and then. check that all trailer hitch bolts an d nuts are tight. Also see
"the Maintenance Schedule rol_def, and the Index in this manual , for important facts
o n
belts, coo ling system care and brake adjustment.
Break-In Schedule
See the new car break~in instru ctions in this manual. Also,. we recommend you
drive your new car for
500 mil es (800 kilometer s) before trailer tOwing. At the
" end
of this 500 mile (800 kilome te r) break-in period, avoid speeds over 50 mph (80 km/h) and full throttl e start s during the first 500 miles (800 kilometers) of
trailer towing.
If a new engine or transaxle is ins talled in you r car, observe the
same
care.
CAUTIONS:
Brakes -To help avoid personal injury due to poor braking action:
• Trailer brakes of adequate size are required on trailer s over 450 kilograms
(1,000 pounds) loaded weight.
• If you use trailer brakes with this car, follow the installation and balan ce
instructi ons
of the trailer brake maker.
• Do nol lap into the car's brake system if the trailer brake system uses more than 0.3 cubic centimeter (0.02 cubic inch) of nuid from the ca r's master
cylinder. In this case, the car's brake fluid capacity will not be enough to
operate
both the car and trailer brakes under all kind s, of use.
• All brak e fluid parts must be able to stand 20 685 kPa (3,000 psi). The brake
fluid tap must be made al th e upper rear master cylinder port. Copper tubing is subject to fatigue failure and must no t be used.
• Before going down a sleep or long grade , reduce speed and shift the tran saxle
into a lower gear to control your car's speed.
Try not to hold the brake pedal
down too long or too often. This could cause the brake s to get hot and not
work
as well.
Hitches -To help avoid personal injury due to sway caused by such things as
c rosswind
s, big trucks passing or road roughn ess, or due to sepa ration of the
trailer :
• Keep the trailer tongue load at 10% of the loaded trailer weight for
dead-w eight hitches. Tongue loads can be adjusted by proper distribution of the load in the trailer. This can be checked by weighing separately the loaded
trailer and then the tongue,
• When you remove a frailer hitch, be sure to seal any mountin g h'oles in the
body . This will help prevent entry of exhaust fumes, dirt or water. (See
"Engine Exhaust Gas Caution (Carbon Monoxide) " at the beginning of "Starting and Operating," Section 2 of this manual.)
1-12
Page 17 of 95
Downloaded from www.Manualslib.com manuals search engine NOTICE: Use only trailer hitches which permit normal operation of the Energy Absorbing Bumper System. if so equipped. For example. a rigid fore and .iUt connection between the bumper and any other part.of. the car may increase .damage in the event of II collision.
TRAILER TOWING TIPS
Getting Started
Before entering traffic with a frailer that has electric brakes, start the car and
trailer moving and apply the trailer brakes
by hand to be sure the trailer brakes
are working and the trailer electrical system
is connected .
. Engine Cooling
:
When going up long grades, you, can reduce the chance 'of engine overheating by
turning
off the air conditioner, if so equipped.
Transaxle
,See the method for checking the transaxle fluid le ve l. in "Service and
,.;.Maintenance," Section 5 of this manual .
Parking
You should not park cars with trailers on a grade (hill). However, if you must
park on a grade, these steps must be followed:
1. Apply the regular brakes.
2. Have someone place wheel' chocks under the trailer wheels.
3. When the wheel chocks are in place, release the regular brakes until the
chocks absorb the load .
4; Apply Ihe parking brake.
S. Shift Ihe transaxle 10 ··P"(Park).
If the car is parked on a grade. don't shift the transaxle 10 "P"(Park) until the
trailer wheels
are chocked and the parkinghrake, is set~ If you do, the weight of . the car and trailer may put so much force on the parking pawl in the transaxle
.
that it may be hard to shift oul of "P"(Park).
When starting , after being parked ' on a grade:
(; Apply the regular brakes and hold.
2 .
Stan th e engine in ··P"(Park) .
-3. Shift into gear and release the parking brake.
4. Release the regular brakes and drive until the chock s are free.
5. Apply the regular brakes and have your helper remove the chocks.
J.]3
Page 22 of 95
Downloaded from www.Manualslib.com manuals search engine Air Conditioner
If your vehicle has an optional air cOnditioner , use the "Economy;' (" Vent" or
"Heater") position s whenever possible, The air conditioner compr essor is not on in these positions and the reduced engine load can improve fuel eco nomy.
Engine Maintenance
An engine that is properly maintained wjJl provide better fuel economy than .one
thai is not . One misfirin g spa rk plu g will cut fuel economy quite a bit , and will
make a difference in the amount of pollution _emitted fro m your vehicle .
Excess Weight
Fuel economy is related to the work the engine must do. The heavier the load,
the more fuel
it takes to run your vehicle. Keep weight to a minimum by taking o~t any luggage or cargo when it is not needed. .
Tire Inflation
Underinflation not only causes needLess wear of the tires, but can also waste fuel. It's a good idea to check tire pressures often and, for the best fuel econ omy, keep
your tires inflated to the highest
pr~suresshown on the Tire Placard on'the left
front doo r of your car.
Wheel Alignment
Improper toe alignment will cause the tires to roll at an angle, which will result
in faster tire wear.
It takes power to ove rcome this improper alignment which,
in tum, wastes fuel.
STEERING COLUMN CONTROLS
ANTI-THEFT STEERING COLUMN LOCK
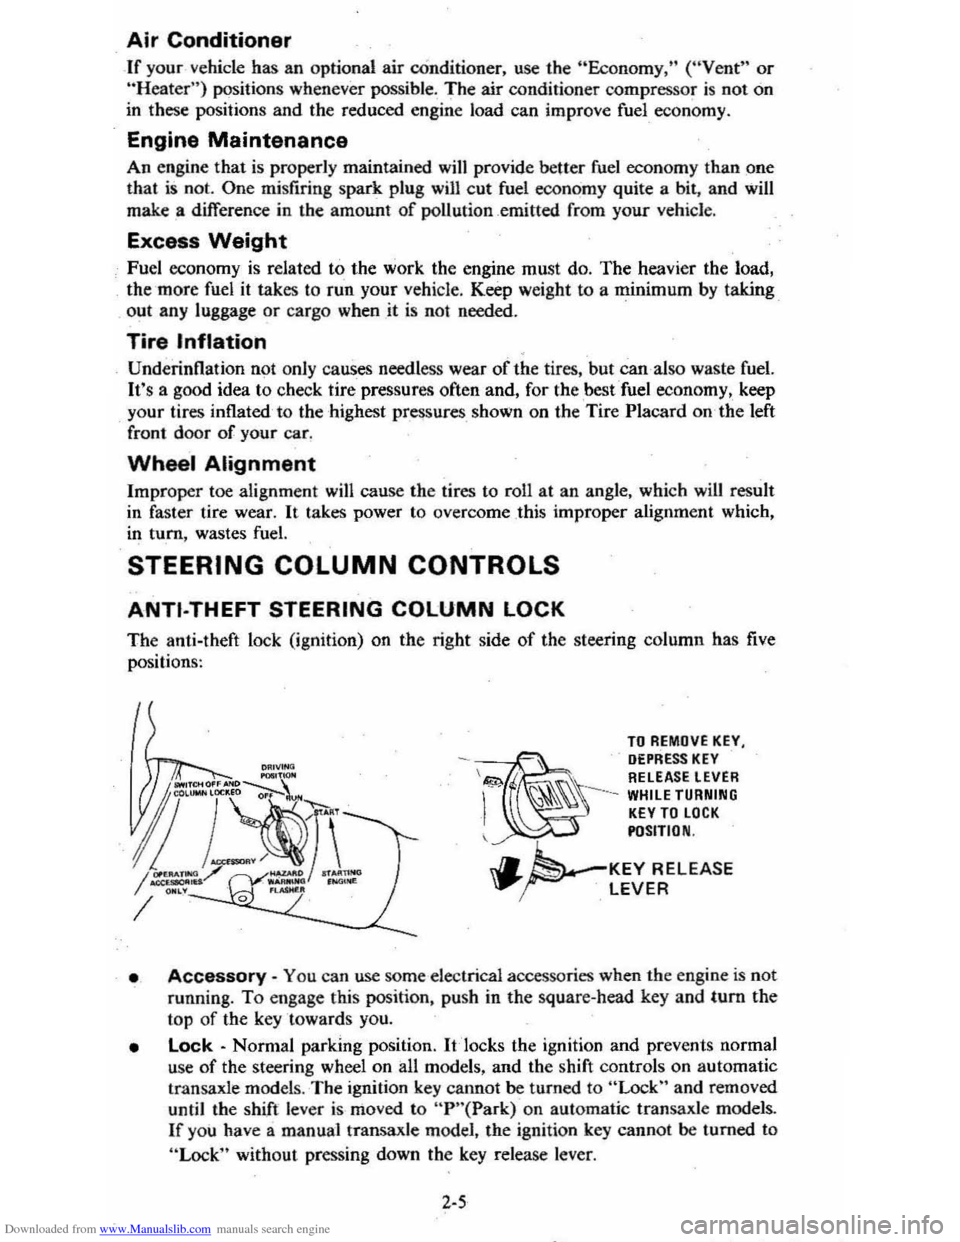
The anti-theft lock (ignition) on the right side of the steering column has five
positi on
s:
TO REMOVE KEY, DEPRESS KEY \&!;;>. RELEASE LEVER
-~ I
~~~ --WHILE TURNING KEY TO LOCK POSITION
.. ~'-KEY RELEASE "..~ LEVER
• Accessory -You ca n use some elec trical a ccessories when the e ngin e is not
running.
To engage this position, push in the square-head key and tum the
top of the key towards you.
• Lock -Norm al parking position. It 'locks the ignition and prev en ts normal
use
of the steering wheel on all models, and the shift controls on automatic
transaxl e model
s. The ignition key canno t be turned to "Lock" and removed
until the shift lever is mo ved to "P "( Park) on automatic transaxle mode1s .
If you have a manual transaxle model, the ignition key cannot be turned to
"Lock" without pressing down the key release leve r.
2-5
Page 36 of 95
Downloaded from www.Manualslib.com manuals search engine Engine Temperature Gage
This gage indicat~cCX?lant temperature which will vary with air temperature and
operating condition~, The ignition must be on for accurate readings. Hard driving
or prolonged idling In very hot weather will cause the pointer to move beyond the center of the band; Should pointer move to the Red Zone, see "Engine Cooling
System" on page 3-3.
Oil Pressure Gage
The oil pressure gage indicates the pn;ssure at which oil is being delivered 10 the various parts of the engine requiring lubrication. Pressures registered by the gage
I11.!lY vary according to outside air temperatures or weight of oil being used. Oil
pressure of a cold engine ~ing operated at a given speed will be somewhat higher
than when the engine is at normal operating temperature at the same speed .
. Prolonged high speed operation on a hot day at the given speed will result in somewhat lower oil pressure readings. Readings of 30 to 40 psi (205 to 275 kPa)
mny
be considered normal during moderate road speeds of 35 to 40 mph (55 to
60 km/h) \\lith the engine at proper operating temperature. Gage readings which
are
consistently high or Im\l under these conditions may indicate lubrication system
When the engine is operating, the voltmeter indicates the electrical system voltage.
During minimum electrical load, the pointer will read to the right of the center.
As the electrical load is increased,
or in stop-and-go driving, the pointer will rotate
to the left. A meter reading continuously in
the left or right red zone indicates
an electrical system
failure .. Cause of the failure should be determined and corrected~
Light Switch
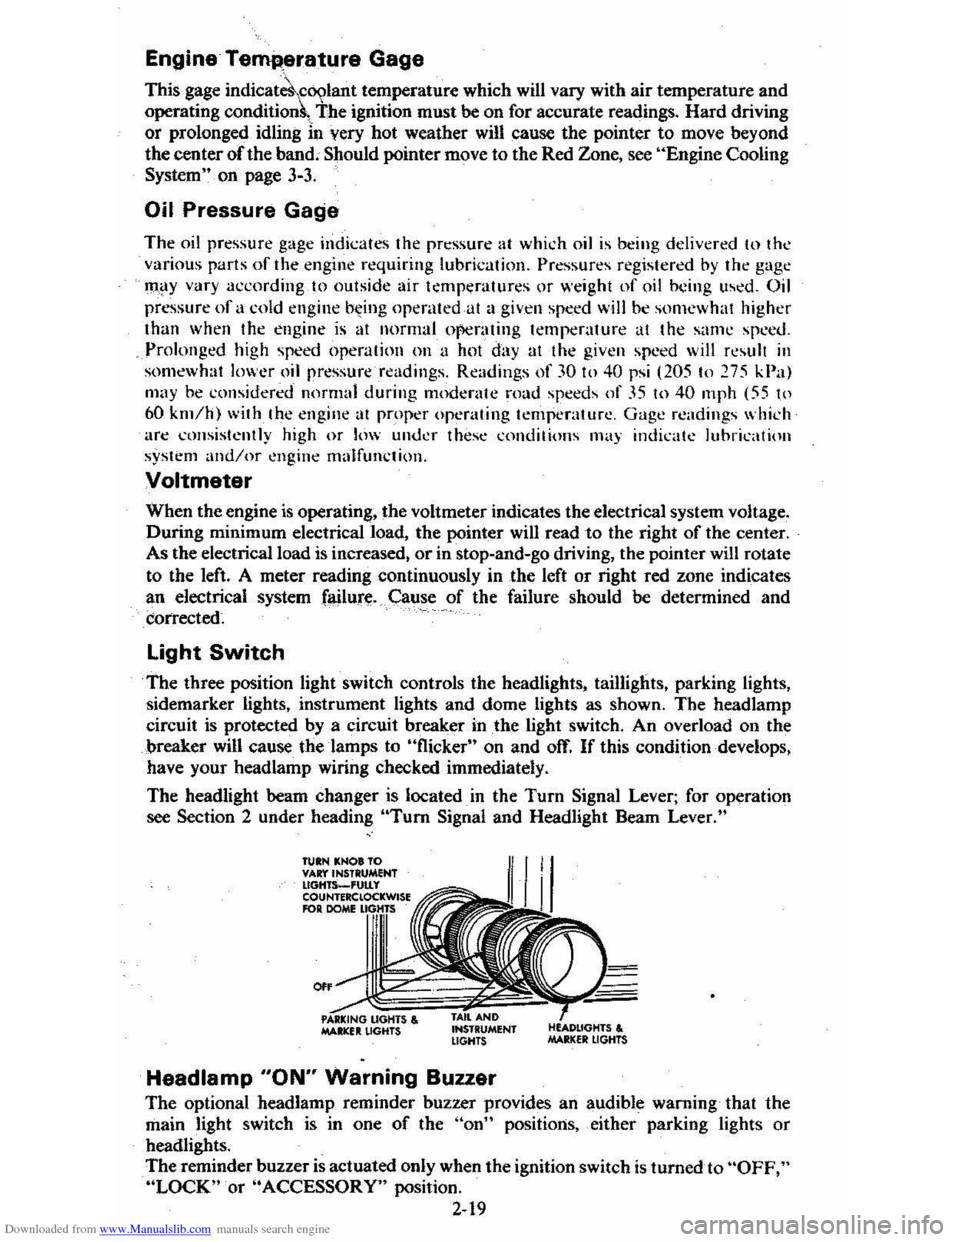
The three position light switch controls the headlights, taillights, parking lights,
sidemarker lights, instrument lights and dome lights as shown. The headlamp
circuit is protected by a circuit breaker in
the light switch. An overload on the
breaker will cause the lamps to "flicker" on and off. If this condition develops,
have your headlamp wiring checked immediately.
The headlight beam changer is located. in the
Turn Signal Lever; for operation
see Section 2 under heading "Tum Signal and Headlight Beam Lever."
TUIN KNOt TO VAr:t'INSTRUMENT lIGHTS_'UtLy COUNTERClOCKWISE RlR DOME
0"
MAltlCfIt LIGHTS , INSTRUMENT LIGHTS
Headlamp "ON" Warning Buzzer
The optional headlamp reminder buzzer provides an audible warning that the
main light switch is in one
of the "on" positions, either parking lights or
headlights.
The reminder buzzer
is actuated only when the ignition switch is turned to "OFF," "LOCK" or "ACCESSORY" position.
2-19
Page 46 of 95
Downloaded from www.Manualslib.com manuals search engine Insta"ation
To install the cargo cover:
1. Insert the left hinge pin in the bracket attached to the body of the car.
2. Slide the release lever to the right to engage hinge pin in the 'bracket. See figure
B.
3. Move the lever up to lock the cover in place.
4. Reconnect the rubber 'lifting cords.
STOWING THINGS IN (OR ON) THE CAR
CAUTION: luggage or other cergo should not be piled higher than the seatbacks, When at all possible, luggage or cargo should be C8rrifHj in the trunk area. The filler panel or cargo cover, between the rear 88atback and the rear window should not be used to carry objects-even those that are small and light. All nems should be secured in place. This will help keep such things from being thrown about and Injurying people in the car during an accident. Cargo weight whether inside or on the roof, should be positioned as evenly as possible from front to rear.
ROOF LUGGAGE CARRIER
The optional roof luggage carrier is designed to allow loading of items onto the
roof
of your car. The roof luggage carrier does not increase the total load carrying
capacity of th e car , as shown opposite "Max Load" on the Tire Placard located
on the left front door. Be sure the total weight of the cargo on the roof, plus the
weight
of the cargo and passe ngers inside the car, plus the tongue load of any
trailer you are towing does
,1;10t exc_eed this "Max Load" vehicle capacity weight. See Section 5, page "5-11 for more information on Vehicle Loading . Also see the
infonnation on Trailer Towing
in Section 1 of this manual . if needed .
NOTICE:To helpayoid pOSSible damage, do not exceed 70 kilograms (1 50 pounds), cargo weight on the roof. Position the cargo in the luggage carrier as evenly as: pOssible. If carrying long items, never exceed car length and fasten such loads securely at the front and rear of the car, as well as to the luggage rack.
The roof luggage carrier consists of: five roof slats bolted to the top of the car,
two crossrails with knobs at each end th~t allow the crossrails to be adjusted or removed, and six' adjustable tie-downs.
The operation
of each item is as follows: the crossrails are easily adjusted forward
or rearward in order to help position your load. To move the crossrails , rotate
the large adjustable knob, ··No. 3" in the figure above. counterclockwise to loosen
(or remove) the crossrails and 'clockwise to tighten down the cros srails. Attached
to the top
of the crossrails are two adjustable tie-downs, "No.4" in the figure.
Ther e is also one adjustable lie-down located in the center of each outer roof slat
assembly (also called
"No.4" in the figure) . The tie-downs may be easily moved
forward and rearward within the outer slat assembly and across the top
of the
crossrails to the desired position.
To move the tie-down . rotate it countetclockwise
to loosen and clockwise to tighten down. If needed to sec ure a certain type of lead,
the tie-downs on the
crossratls may be removed and repos itioned on the outer roof
slat assemblies. While underway, periodically check to make sure that
the crossrails and the tie-downs are securely fastened to help
prevent loss of cargo, or the roof rack equipment itself.
The crossrails may be removed when not in use and stowed in the trunk or behind
the second seat on the rear load floor (with the carg o cover installed) in hatchback
style
s. When stowing the cressrails, al5..1 attach the tie-downs from the outer roof
2-29
Page 72 of 95
Downloaded from www.Manualslib.com manuals search engine LUGGAGE/CARGO LOAO CAPACITY
Maximum Luggage Compartment Load
Coupe 155 Pounds/70.2 Kilograms
Sedan 142 Pounds/64.5 Kilograms
NOTICE: Total combined weight of luggage compartment
load, luggage rack load (when-equipped) •. and passengers must not exceed the vehicle capacity weight (shown on the Tire Placard lOcated on the.left front door).
Inflation Pressure
The: cold inflation pressures listed on the Tire Placard provide for the best balance
of tire life, riding comfort. and vehicle handling under normal driving conditions.
If only one inflation pressure is recommended on the Tire Placard, this pressure
should be used for aU vehicle loading conditions. If your vehicle has two inflation
pressures listed on the placard, the "Max LDad" pressures can be used any time,
but must be used when you carry more passengers and cargo than is allowed in
the "Optional Pressures" section. The "Optional Pressures" can be used in lightly
loaded conditions by
'those who prefer the utmost in comfort. In all loading
conditions, use of the "Max Load" pressures will result in improved fuel economy.
Incorrect tire inflation pressures
can have adverse effects on tire life and_vehicle performance. Too Iowan" air pressure·"causes increased tire flexing and heat
build-up. This weakens the tire and increases the chance of damage or failure. It
can result in tire overloading, abnormal tire wear, adverse vehicle handling, and
reduced fuel mileage. 'I'oohigh
an air pressure can result in abnormal wear, harsh
ride, and also increase the chance of dar:nage from road hazards.
Tire inflation pressures should be checked (this includes the spare tire, unless it
is a stowaway spare) and whenever your vehicle is serviced. Always checJ<.,tire
inflation pressures when tires are "cold."
1. The "cold" tire inflation pressure applies to the tire pressure when a vehicle
has
not· been driven more than-one mile (1.6 kilometers) after sitting for three
hours or more.
2. It is normal for tire pressures to increase 30 to 60 kilopascals (4 to 8 pounds
per square inch)
or more when the tires become hot from driving. Do not "bleed" or reduce tire inflation pressures after driving your vehicle. Bleeding
reduces the
"cold" inflation pressure and increase tire flexing, which can
result in tire damage and failure.
3. FOr sustained driving at speeds of 75 mph to 85 mph (120 km/h to 140 km/h),in countries where such speeds are permitted by law, cold
inflation pressures must be increased
30 kPa (4 psi) above the cold inflation
pressures stated on the Tire Placard up to the maximum for each load
range stated in
the_ chart below.
Sustained speeds of 75 mph to 85 mph (120 km/h to 140 km/h) ARE
NOT ADVISED when the 30 kPa (4 psi) adjustment would require pressures greater than the maximum for each load range stated on the chart. Sustained
driving at speeds over 85 mph (140 km/h), where permitted by law. IS NOT ADVISED unless your vehicle is equipped with special high speed tires
available from many tire dealers.
4. Forproper inflation pressures when towing trailers, see page 1-11 in this
manuat
5-11
Page 91 of 95
Downloaded from www.Manualslib.com manuals search engine ,
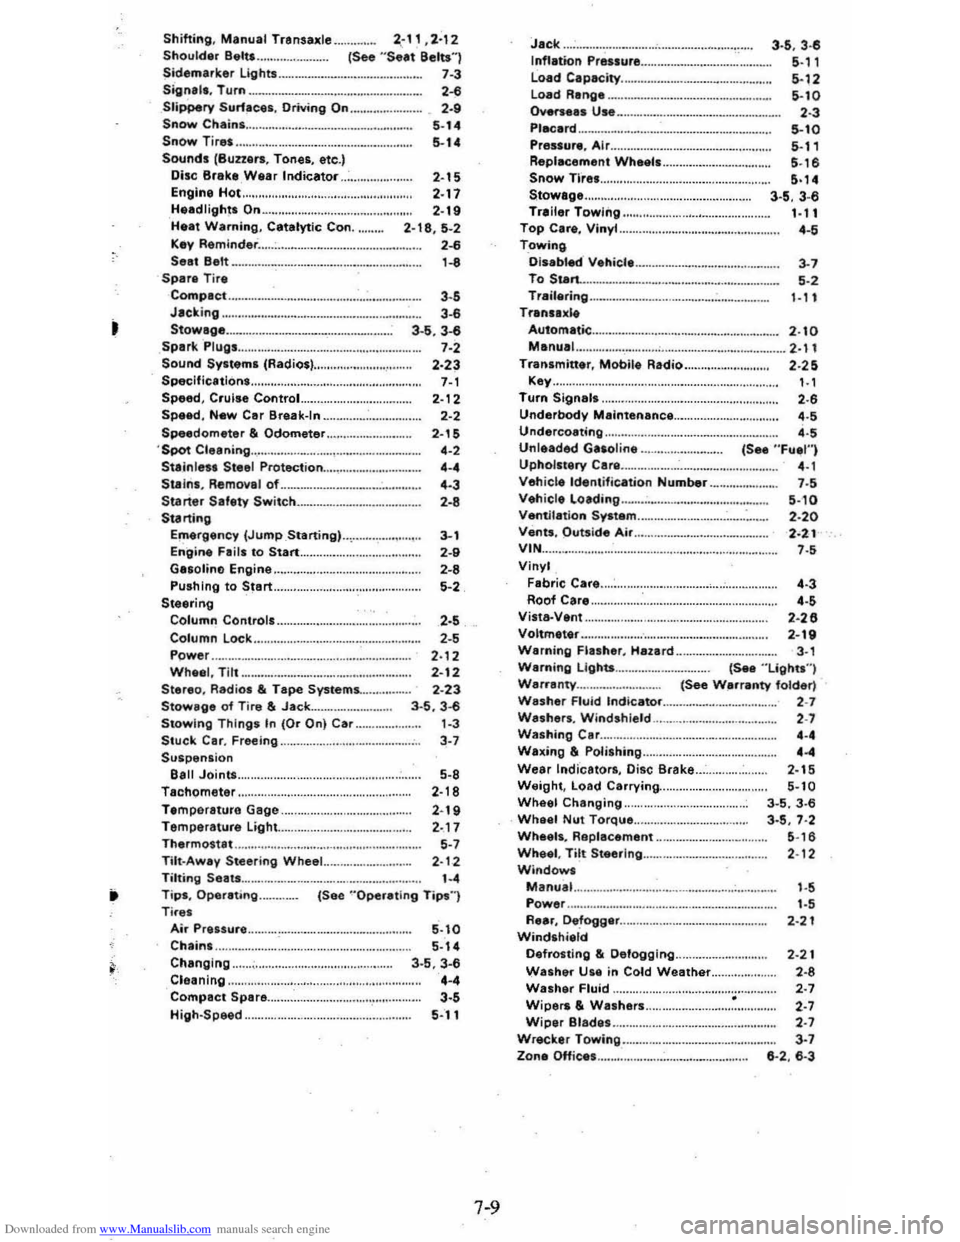
Shifting, Manual Transaxle .. Shoulder Beltt .. 2~1 1 ,2'12 (See "Seat Belt$"J Sidematker lights Signala, Turn ...................... 7·3 ......... ... . . ..........•...•. 2-6 Slippery SUffices. Driving On .. Snow Chains Snow Tires Sounds (Buzzers, Tones, etc.)
, .. 5·14 5-14
Disc Brake Wear Indicator .... 2-15 Engine Hot... 2-17 Headlights On ................. ....................... .... 2-19 H .. t Warning, Catalytic Con. 2·18 ,5-2 Kay Reminder . .................................. ...... 2-6 Sell eelt 1-8 Spar. Tire Compact .......................... 3 .5 Jaeking .... ............................. .. . 3-6 Stowage ...................... _ ....... ........ .......... 3·5. 3-6 Spark Plugs .. .......... .......................... ........... 7-2 Sound Systems (Radios). 2.23 Speclficllions.. ...................... 7-1 Speed, Cruise Control.................... . 2-I 2 Sp .. d, New Car Break-In ............................. 2-2 Speedometar & Odometar ... 'Spot Cleaning
Staln le .. Steal Prtltect ion ........ .. S .. ln •• Removel of Staner Safety Switch .............. _ ..... . Starting E",ergency (Jump Staning) Engine F.ill to Stan ................ .............. ..
2-15 ,.,
,.,
'·3 ' ·8
Ga.olino Engine.. . .......................... .
3·, , ..
'·8 5·' Pushing to Start .. Steering Column Contrail ..................... .................. . '·S '·5 2·12 2 -12 2·23
Column Lock .. Power ......................... . Whee l, Tilt ......... ........................ ....... .. Siereo, Radiol & Tape Systems. Stowage of Tire & Jack ... Stowing Things In (Or On) Car .. Stuck Car. Freeing .. Suspenlion eall Joints ................................ ....... .. Tachometer ........ ................................ ....... .
3 ·5 . 3-6 ,·3 3·'
5·8 2·18 Temperature Gage .................. ............... 2-19 Temperature Light. .. 2 ·17 Thermostat ......... ....... ....... 5-7 TiIt·Away Steering Wheel.. 2 ·12 Tilting Seats... '·4 T ip', Operating.. (See "Oper.tlng Tips ") Tire.
Air Preuure ..... ......... ................................ . Ch.in •... Ch.nglng .. Cle.nlng .. Compacl Spara ......................... ....... . High·Speed ..
5·10 5-14 3·5,3-6 '·4 3·S 5-11
7-9
Jack 3-5 , 3·~ Inflation Pre .. ure ................. .... ......... ........ 5·" Load Capacity ............................. 5-12 Load Range 5-10 Overse •• Use ... 2-3 Placard ... Pres.u,., A ir ..................... ....................... . Repl.cement Wh.ell ............................ . . Snow nte ........... . Stow.ge ............... . Trailer Towing .. Top C.r., Vinyl ..
TowinQ
Disabl-.:t V.hicle To S .. rt. Tr.il.ring ....... . Tr.n.ax'"
5·10 5 ·1, 5,,6 5·14 3·$ ,3-6 1 ·11 4.'
3·'
S ·'
1·11
Autom.tic...... .......... .. .............. ....... 2.10 Manu.l.. . ...... ; . ................... .................. 2 .' 1 Tr.nlmitt.r, Mobile Radio 2 .25 Key. . ..................................... . ..... 1.1 Turn Signall.... ................................................. 2.6 Underbody Maintenance ............................... 4.5
Undercoating... ... ................................. ............ 4.5 Unleaded G •• oline (See "Fu~1") Uphollt.ry Care ................... ... 4 .1 Vehicle ldentifi~tion Number ._............. 7 .5 Vehicl. Lo.ding .. _ Ventil.tion System .. Vents , Outside Air ... V'N Vinyl F.bric C.r •.
5·10 2·20 2 .21 ' ·S
Roof Care ................. ................................. ..... . '·3 ,., Vilta-V.nt ....... . Voltm.t.r .. 2 ·26 2·'V 3 ·' Warning Flasher , Hazard .. Warning Lights ... W.rr.nty .... (See "Light.")
Washer Fluid Indicator W.shers. W indshield. Washing C.r ....
(See W.rranty folder) ,.,
, .,
, ., W.xing & P olilhing .. Wear lndi'c.tor., Disc Srake .. Weight, Load Carrying ... Wheel Changing .. Whaal Nut Torque .. Wh.el., Repllcement ........................ _ .. Wheal, Tilt Sleerlng ... Windows M.nu. 1 Power , ... , ............................. ..................... . . RUr, De.fogg.r .. . Windshi.ld Defrosting &; Defogging .. W.sher Ule in Cold Weather ... Walh.r Fluid .. Wipers & Wa.hers .. Wiper Blades .. Wreck.r Towing .. Zona OHic.s ......... " ............... ....... .
'·4 2·15 5 ·10 3 ·5 ,3 ·6 3 ·5 , 7·2 5 ·16
2 ·12
'·S
' ·S
2 ·2t
2·21
2 ·8
,., , ., , .,
3 ·' 6 ·2 . 6·3