door lock CHEVROLET CITY EXPRESS 2017 Owner's Manual
[x] Cancel search | Manufacturer: CHEVROLET, Model Year: 2017, Model line: CITY EXPRESS, Model: CHEVROLET CITY EXPRESS 2017Pages: 348, PDF Size: 4.84 MB
Page 88 of 348
Chevrolet Express Owner Manual (GMNA-Localizing-U.S./Canada/Mexico-
9967827) - 2017 - crc - 9/26/16
Instruments and Controls 87
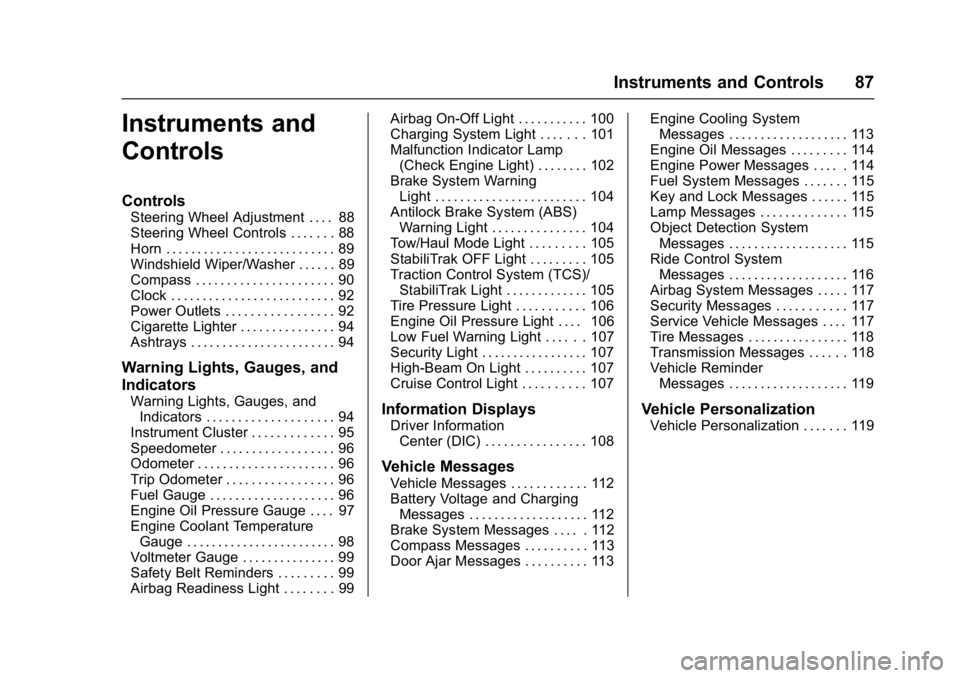
Instruments and
Controls
Controls
Steering Wheel Adjustment . . . . 88
Steering Wheel Controls . . . . . . . 88
Horn . . . . . . . . . . . . . . . . . . . . . . . . . . . 89
Windshield Wiper/Washer . . . . . . 89
Compass . . . . . . . . . . . . . . . . . . . . . . 90
Clock . . . . . . . . . . . . . . . . . . . . . . . . . . 92
Power Outlets . . . . . . . . . . . . . . . . . 92
Cigarette Lighter . . . . . . . . . . . . . . . 94
Ashtrays . . . . . . . . . . . . . . . . . . . . . . . 94
Warning Lights, Gauges, and
Indicators
Warning Lights, Gauges, andIndicators . . . . . . . . . . . . . . . . . . . . 94
Instrument Cluster . . . . . . . . . . . . . 95
Speedometer . . . . . . . . . . . . . . . . . . 96
Odometer . . . . . . . . . . . . . . . . . . . . . . 96
Trip Odometer . . . . . . . . . . . . . . . . . 96
Fuel Gauge . . . . . . . . . . . . . . . . . . . . 96
Engine Oil Pressure Gauge . . . . 97
Engine Coolant Temperature Gauge . . . . . . . . . . . . . . . . . . . . . . . . 98
Voltmeter Gauge . . . . . . . . . . . . . . . 99
Safety Belt Reminders . . . . . . . . . 99
Airbag Readiness Light . . . . . . . . 99 Airbag On-Off Light . . . . . . . . . . . 100
Charging System Light . . . . . . . 101
Malfunction Indicator Lamp
(Check Engine Light) . . . . . . . . 102
Brake System Warning
Light . . . . . . . . . . . . . . . . . . . . . . . . 104
Antilock Brake System (ABS) Warning Light . . . . . . . . . . . . . . . 104
Tow/Haul Mode Light . . . . . . . . . 105
StabiliTrak OFF Light . . . . . . . . . 105
Traction Control System (TCS)/ StabiliTrak Light . . . . . . . . . . . . . 105
Tire Pressure Light . . . . . . . . . . . 106
Engine Oil Pressure Light . . . . 106
Low Fuel Warning Light . . . . . . 107
Security Light . . . . . . . . . . . . . . . . . 107
High-Beam On Light . . . . . . . . . . 107
Cruise Control Light . . . . . . . . . . 107Information Displays
Driver Information Center (DIC) . . . . . . . . . . . . . . . . 108
Vehicle Messages
Vehicle Messages . . . . . . . . . . . . 112
Battery Voltage and ChargingMessages . . . . . . . . . . . . . . . . . . . 112
Brake System Messages . . . . . 112
Compass Messages . . . . . . . . . . 113
Door Ajar Messages . . . . . . . . . . 113 Engine Cooling System
Messages . . . . . . . . . . . . . . . . . . . 113
Engine Oil Messages . . . . . . . . . 114
Engine Power Messages . . . . . 114
Fuel System Messages . . . . . . . 115
Key and Lock Messages . . . . . . 115
Lamp Messages . . . . . . . . . . . . . . 115
Object Detection System Messages . . . . . . . . . . . . . . . . . . . 115
Ride Control System Messages . . . . . . . . . . . . . . . . . . . 116
Airbag System Messages . . . . . 117
Security Messages . . . . . . . . . . . 117
Service Vehicle Messages . . . . 117
Tire Messages . . . . . . . . . . . . . . . . 118
Transmission Messages . . . . . . 118
Vehicle Reminder Messages . . . . . . . . . . . . . . . . . . . 119
Vehicle Personalization
Vehicle Personalization . . . . . . . 119
Page 121 of 348
Chevrolet Express Owner Manual (GMNA-Localizing-U.S./Canada/Mexico-
9967827) - 2017 - crc - 9/26/16
120 Instruments and Controls
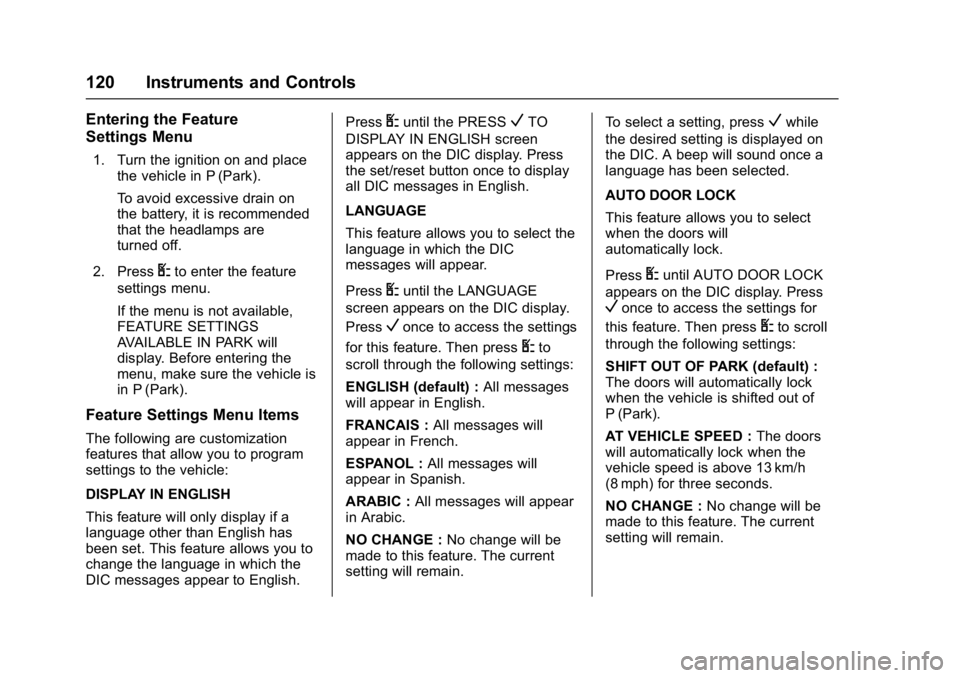
Entering the Feature
Settings Menu
1. Turn the ignition on and placethe vehicle in P (Park).
To avoid excessive drain on
the battery, it is recommended
that the headlamps are
turned off.
2. Press
Uto enter the feature
settings menu.
If the menu is not available,
FEATURE SETTINGS
AVAILABLE IN PARK will
display. Before entering the
menu, make sure the vehicle is
in P (Park).
Feature Settings Menu Items
The following are customization
features that allow you to program
settings to the vehicle:
DISPLAY IN ENGLISH
This feature will only display if a
language other than English has
been set. This feature allows you to
change the language in which the
DIC messages appear to English. Press
Uuntil the PRESSVTO
DISPLAY IN ENGLISH screen
appears on the DIC display. Press
the set/reset button once to display
all DIC messages in English.
LANGUAGE
This feature allows you to select the
language in which the DIC
messages will appear.
Press
Uuntil the LANGUAGE
screen appears on the DIC display.
Press
Vonce to access the settings
for this feature. Then press
Uto
scroll through the following settings:
ENGLISH (default) : All messages
will appear in English.
FRANCAIS : All messages will
appear in French.
ESPANOL : All messages will
appear in Spanish.
ARABIC : All messages will appear
in Arabic.
NO CHANGE : No change will be
made to this feature. The current
setting will remain. To select a setting, press
Vwhile
the desired setting is displayed on
the DIC. A beep will sound once a
language has been selected.
AUTO DOOR LOCK
This feature allows you to select
when the doors will
automatically lock.
Press
Uuntil AUTO DOOR LOCK
appears on the DIC display. Press
Vonce to access the settings for
this feature. Then press
Uto scroll
through the following settings:
SHIFT OUT OF PARK (default) :
The doors will automatically lock
when the vehicle is shifted out of
P (Park).
AT VEHICLE SPEED : The doors
will automatically lock when the
vehicle speed is above 13 km/h
(8 mph) for three seconds.
NO CHANGE : No change will be
made to this feature. The current
setting will remain.
Page 122 of 348
Chevrolet Express Owner Manual (GMNA-Localizing-U.S./Canada/Mexico-
9967827) - 2017 - crc - 9/26/16
Instruments and Controls 121
To select a setting, pressVwhile
the desired setting is displayed on
the DIC.
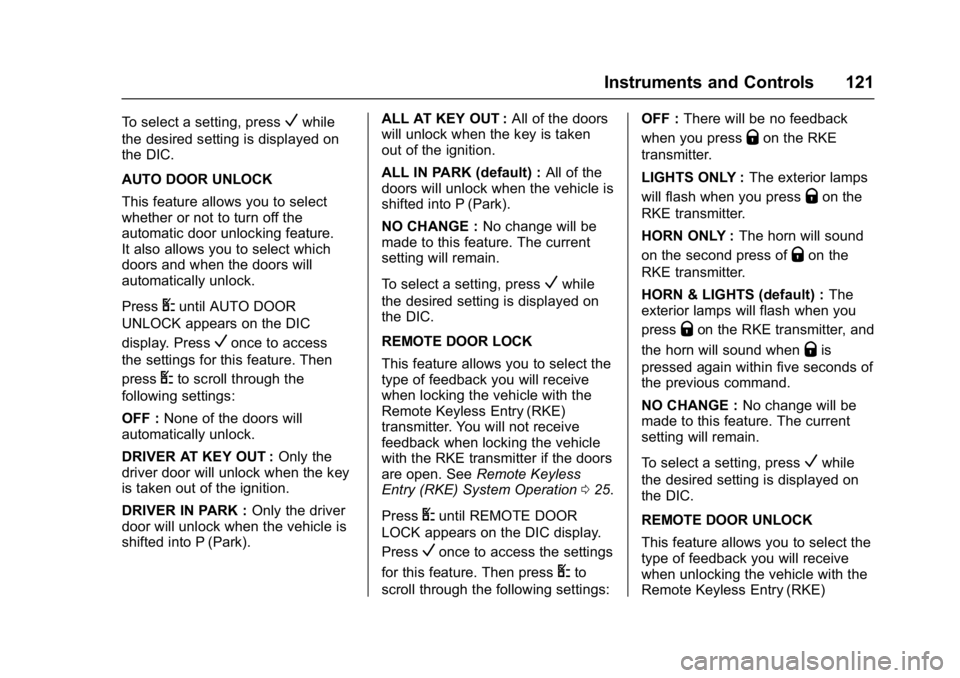
AUTO DOOR UNLOCK
This feature allows you to select
whether or not to turn off the
automatic door unlocking feature.
It also allows you to select which
doors and when the doors will
automatically unlock.
Press
Uuntil AUTO DOOR
UNLOCK appears on the DIC
display. Press
Vonce to access
the settings for this feature. Then
press
Uto scroll through the
following settings:
OFF : None of the doors will
automatically unlock.
DRIVER AT KEY OUT : Only the
driver door will unlock when the key
is taken out of the ignition.
DRIVER IN PARK : Only the driver
door will unlock when the vehicle is
shifted into P (Park). ALL AT KEY OUT :
All of the doors
will unlock when the key is taken
out of the ignition.
ALL IN PARK (default) : All of the
doors will unlock when the vehicle is
shifted into P (Park).
NO CHANGE : No change will be
made to this feature. The current
setting will remain.
To select a setting, press
Vwhile
the desired setting is displayed on
the DIC.
REMOTE DOOR LOCK
This feature allows you to select the
type of feedback you will receive
when locking the vehicle with the
Remote Keyless Entry (RKE)
transmitter. You will not receive
feedback when locking the vehicle
with the RKE transmitter if the doors
are open. See Remote Keyless
Entry (RKE) System Operation 025.
Press
Uuntil REMOTE DOOR
LOCK appears on the DIC display.
Press
Vonce to access the settings
for this feature. Then press
Uto
scroll through the following settings: OFF :
There will be no feedback
when you press
Qon the RKE
transmitter.
LIGHTS ONLY : The exterior lamps
will flash when you press
Qon the
RKE transmitter.
HORN ONLY : The horn will sound
on the second press of
Qon the
RKE transmitter.
HORN & LIGHTS (default) : The
exterior lamps will flash when you
press
Qon the RKE transmitter, and
the horn will sound when
Qis
pressed again within five seconds of
the previous command.
NO CHANGE : No change will be
made to this feature. The current
setting will remain.
To select a setting, press
Vwhile
the desired setting is displayed on
the DIC.
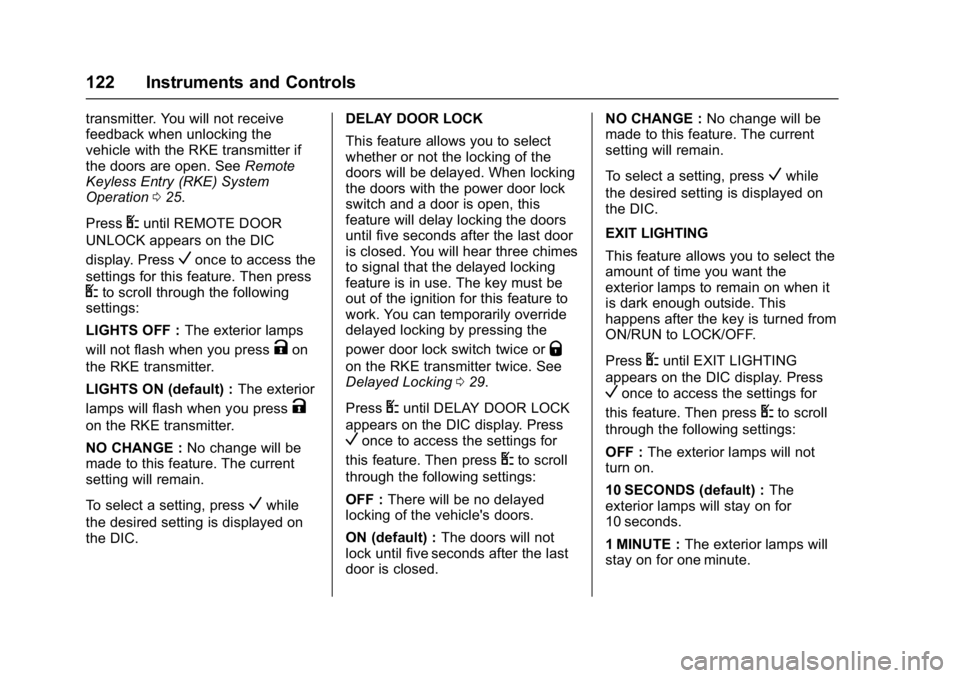
REMOTE DOOR UNLOCK
This feature allows you to select the
type of feedback you will receive
when unlocking the vehicle with the
Remote Keyless Entry (RKE)
Page 123 of 348
Chevrolet Express Owner Manual (GMNA-Localizing-U.S./Canada/Mexico-
9967827) - 2017 - crc - 9/26/16
122 Instruments and Controls
transmitter. You will not receive
feedback when unlocking the
vehicle with the RKE transmitter if
the doors are open. SeeRemote
Keyless Entry (RKE) System
Operation 025.
Press
Uuntil REMOTE DOOR
UNLOCK appears on the DIC
display. Press
Vonce to access the
settings for this feature. Then press
Uto scroll through the following
settings:
LIGHTS OFF : The exterior lamps
will not flash when you press
Kon
the RKE transmitter.
LIGHTS ON (default) : The exterior
lamps will flash when you press
K
on the RKE transmitter.
NO CHANGE : No change will be
made to this feature. The current
setting will remain.
To select a setting, press
Vwhile
the desired setting is displayed on
the DIC. DELAY DOOR LOCK
This feature allows you to select
whether or not the locking of the
doors will be delayed. When locking
the doors with the power door lock
switch and a door is open, this
feature will delay locking the doors
until five seconds after the last door
is closed. You will hear three chimes
to signal that the delayed locking
feature is in use. The key must be
out of the ignition for this feature to
work. You can temporarily override
delayed locking by pressing the
power door lock switch twice or
Q
on the RKE transmitter twice. See
Delayed Locking
029.
Press
Uuntil DELAY DOOR LOCK
appears on the DIC display. Press
Vonce to access the settings for
this feature. Then press
Uto scroll
through the following settings:
OFF : There will be no delayed
locking of the vehicle's doors.
ON (default) : The doors will not
lock until five seconds after the last
door is closed. NO CHANGE :
No change will be
made to this feature. The current
setting will remain.
To select a setting, press
Vwhile
the desired setting is displayed on
the DIC.
EXIT LIGHTING
This feature allows you to select the
amount of time you want the
exterior lamps to remain on when it
is dark enough outside. This
happens after the key is turned from
ON/RUN to LOCK/OFF.
Press
Uuntil EXIT LIGHTING
appears on the DIC display. Press
Vonce to access the settings for
this feature. Then press
Uto scroll
through the following settings:
OFF : The exterior lamps will not
turn on.
10 SECONDS (default) : The
exterior lamps will stay on for
10 seconds.
1 MINUTE : The exterior lamps will
stay on for one minute.
Page 127 of 348
Chevrolet Express Owner Manual (GMNA-Localizing-U.S./Canada/Mexico-
9967827) - 2017 - crc - 9/26/16
126 Lighting
Exterior Lamps Off
Reminder
If a door is open, a reminder chime
sounds when the headlamps or
parking lamps are manually turned
on and the key is out of the ignition.
To turn off the chime, turn the
headlamp switch to
Oor AUTO and
then back on, or close and re‐open
the door. In the auto mode, the
headlamps turn off once the ignition
is in LOCK/OFF or may remain on
until the headlamp delay ends,
if enabled in the Driver Information
Center (DIC). See “Exit Lighting”
under Vehicle Personalization
0 119.
Headlamp High/
Low-Beam Changer
2 3
(Headlamp High/Low-Beam
Changer) : Pull the turn signal lever
all the way toward you to change
the headlamps from low to high
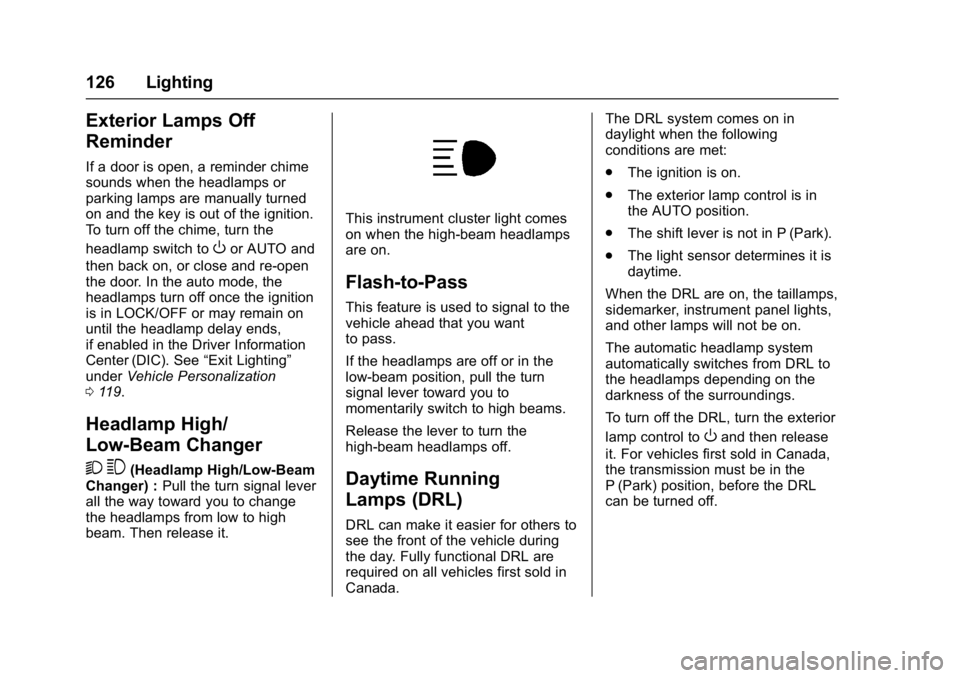
beam. Then release it.
This instrument cluster light comes
on when the high-beam headlamps
are on.
Flash-to-Pass
This feature is used to signal to the
vehicle ahead that you want
to pass.
If the headlamps are off or in the
low‐beam position, pull the turn
signal lever toward you to
momentarily switch to high beams.
Release the lever to turn the
high-beam headlamps off.
Daytime Running
Lamps (DRL)
DRL can make it easier for others to
see the front of the vehicle during
the day. Fully functional DRL are
required on all vehicles first sold in
Canada. The DRL system comes on in
daylight when the following
conditions are met:
.
The ignition is on.
. The exterior lamp control is in
the AUTO position.
. The shift lever is not in P (Park).
. The light sensor determines it is
daytime.
When the DRL are on, the taillamps,
sidemarker, instrument panel lights,
and other lamps will not be on.
The automatic headlamp system
automatically switches from DRL to
the headlamps depending on the
darkness of the surroundings.
To turn off the DRL, turn the exterior
lamp control to
Oand then release
it. For vehicles first sold in Canada,
the transmission must be in the
P (Park) position, before the DRL
can be turned off.
Page 130 of 348
Chevrolet Express Owner Manual (GMNA-Localizing-U.S./Canada/Mexico-
9967827) - 2017 - crc - 9/26/16
Lighting 129
Interior Lighting
Instrument Panel
Illumination Control
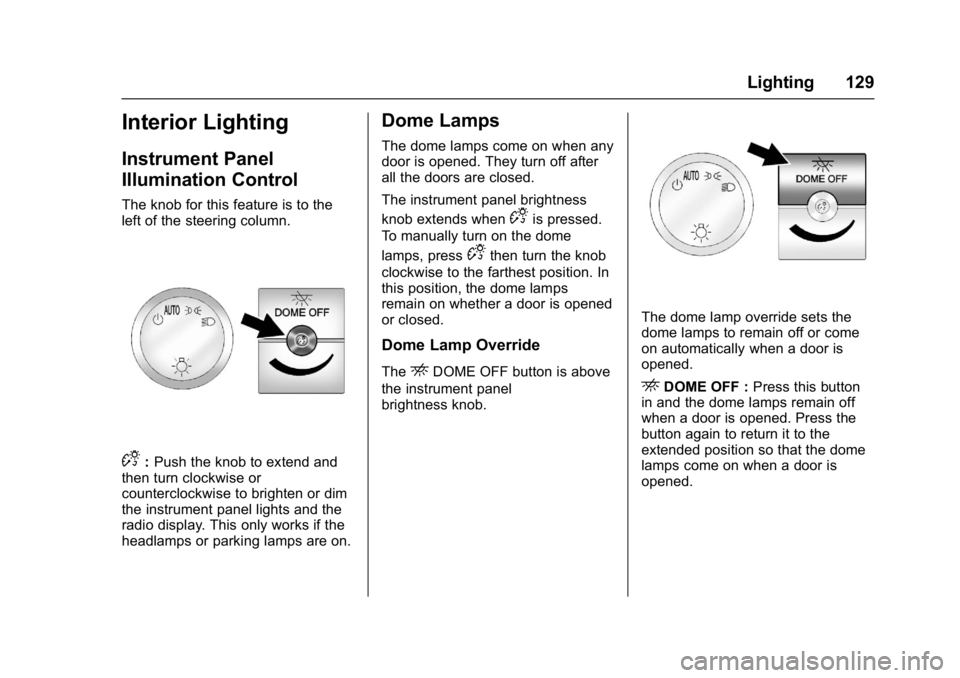
The knob for this feature is to the
left of the steering column.
D:Push the knob to extend and
then turn clockwise or
counterclockwise to brighten or dim
the instrument panel lights and the
radio display. This only works if the
headlamps or parking lamps are on.
Dome Lamps
The dome lamps come on when any
door is opened. They turn off after
all the doors are closed.
The instrument panel brightness
knob extends when
Dis pressed.
To manually turn on the dome
lamps, press
Dthen turn the knob
clockwise to the farthest position. In
this position, the dome lamps
remain on whether a door is opened
or closed.
Dome Lamp Override
TheEDOME OFF button is above
the instrument panel
brightness knob.
The dome lamp override sets the
dome lamps to remain off or come
on automatically when a door is
opened.
EDOME OFF : Press this button
in and the dome lamps remain off
when a door is opened. Press the
button again to return it to the
extended position so that the dome
lamps come on when a door is
opened.
Page 178 of 348
Chevrolet Express Owner Manual (GMNA-Localizing-U.S./Canada/Mexico-
9967827) - 2017 - crc - 9/26/16
Driving and Operating 177
A warning tone will sound when the
driver door is opened, the ignition is
in ACC/ACCESSORY or LOCK/OFF
and the key is in the ignition.
Starting the Engine
If the vehicle has a diesel engine,
see the Duramax diesel
supplement.
To place the transmission in the
proper gear:
Move the shift lever to P (Park) or
N (Neutral). The engine will not start
in any other position. To restart the
engine when the vehicle is already
moving, use N (Neutral) only.
Caution
If you add electrical parts or
accessories, you could change
the way the engine operates. Any
resulting damage would not be
covered by the vehicle warranty.
SeeAdd-On Electrical Equipment
0 212.
Caution
Do not try to shift to P (Park) if the
vehicle is moving. If you do, you
could damage the transmission.
Shift to P (Park) only when the
vehicle is stopped.
Caution
If the steering wheel is turned
until it reaches the end of its
travel, and is held in that position
while starting the vehicle, damage
may occur to the hydraulic power
steering system and there may be
loss of power steering assist.
Starting Procedure 1. With your foot off the accelerator pedal, turn the
ignition key to START. When
the engine starts, let go of the
key. The idle speed will go
down as your engine gets
warm. Do not race the engine
immediately after starting it. Operate the engine and
transmission gently to allow the
oil to warm up and lubricate all
moving parts.
When the Low Fuel warning
lamp is on and the FUEL
LEVEL LOW message is
displayed in the Driver
Information Center (DIC), the
Computer-Controlled Cranking
System is disabled to prevent
possible vehicle component
damage. When this happens,
hold the ignition switch in the
START position to continue
engine cranking.
Caution
Cranking the engine for long
periods of time, by returning the
ignition to the START position
immediately after cranking has
ended, can overheat and damage
the cranking motor, and drain the
battery. Wait at least 15 seconds
between each try, to let the
cranking motor cool down.
Page 180 of 348
Chevrolet Express Owner Manual (GMNA-Localizing-U.S./Canada/Mexico-
9967827) - 2017 - crc - 9/26/16
Driving and Operating 179
Retained Accessory
Power (RAP)
These vehicle accessories can be
used for up to 10 minutes after the
engine is turned off:
.Audio System
. Power Windows (if equipped)
These features will work when the
ignition key is in ON/RUN or ACC/
ACCESSORY. Once the key is
turned from ON/RUN to LOCK/OFF,
power to the radio and power
windows will continue to work
10 minutes or until the driver door is
opened.
Engine Coolant Heater
If the vehicle has a diesel engine,
see the Duramax diesel
supplement.
{Warning
Do not plug in the engine block
heater while the vehicle is in
parked in a garage or under a (Continued)
Warning (Continued)
carport. Property damage or
personal injury may result. Always
park the vehicle in a clear open
area away from buildings or
structures.
The engine coolant heater can
provide easier starting and better
fuel economy during engine
warm-up in cold weather conditions
at or below −18 °C (0 °F). Vehicles
with an engine coolant heater
should be plugged in at least four
hours before starting. An internal
thermostat in the plug end of the
cord may exist which will prevent
engine coolant heater operation at
temperatures above −18 °C (0 °F).
To Use the Engine Coolant
Heater
1. Turn off the engine.
2. Open the hood and unwrap the
electrical cord. The cord for the engine coolant
heater is on the driver side of
the engine compartment and is
attached to the hose for the
power steering reservoir.
Check the heater cord for
damage. If it is damaged, do
not use it. See your dealer for
a replacement. Inspect the
cord for damage yearly.
3. Plug it into a normal, grounded 110-volt AC outlet.
{Warning
Improper use of the heater cord
or an extension cord can damage
the cord and may result in
overheating and fire.
. Plug the cord into a
three-prong electrical utility
receptacle that is protected
by a ground fault detection
(Continued)
Page 198 of 348
Chevrolet Express Owner Manual (GMNA-Localizing-U.S./Canada/Mexico-
9967827) - 2017 - crc - 9/26/16
Driving and Operating 197
During any of these fault conditions,
the display will be blank and the
indicator will flash while the vehicle
is in R (Reverse) or until the
conditions return to normal.
Parking Assist
If equipped, the Rear Parking Assist
(RPA) system uses sensors on the
rear bumper to assist with parking
and avoiding objects while in
R (Reverse).
{Warning
The parking assist system does
not detect children, pedestrians,
bicyclists, animals, or objects
below the bumper or that are too
close or too far from the vehicle.
It is not available at speeds
greater than 8 km/h (5 mph). To
prevent injury, death, or vehicle
damage, even with parking assist,
always check the area around the
vehicle and check all mirrors
before backing.
How the System Works
RPA comes on automatically when
the shift lever is moved into
R (Reverse). A single beep sounds
to indicate the system is working.
RPA operates only at speeds less
than 8 km/h (5 mph).
An obstacle detection is indicated
by beeps. The time between beeps
gets shorter as the vehicle
approaches the obstacle. Repeated
beeps are heard when the distance
is less than 30 cm (12 in).
To be detected, objects must be at
least 25 cm (10 in) off the ground
and below rear door level. Objects
must also be within 2.5 m (8 ft) from
the rear bumper. This distance may
be less during warmer or humid
weather.
Turning the System On and Off
The system can be disabled through
the Driver Information Center (DIC).
See“Park Assist” underDriver
Information Center (DIC) 0108. RPA defaults to the on setting each
time the vehicle is started.
Turn RPA off when towing a trailer.
When the System Does Not
Seem to Work Properly
The following messages may be
displayed on the DIC:
SERVICE PARK ASSIST :
If this
message occurs, take the vehicle to
your dealer for repair.
PARK ASSIST OFF : This message
occurs if the driver disables the
system or if the vehicle is driven
above 8 km/h (5 mph) in
R (Reverse).
PARK ASST BLOCKED SEE
OWNERS MANUAL : This
message can occur under the
following conditions:
. The sensors are not clean. Keep
the rear bumper free of mud,
dirt, snow, ice, slush, and frost.
The message may not clear until
frost or ice has melted all around
and inside the sensor.
Page 202 of 348
Chevrolet Express Owner Manual (GMNA-Localizing-U.S./Canada/Mexico-
9967827) - 2017 - crc - 9/26/16
Driving and Operating 201
Warning (Continued)
.Fuel can spray out if the fuel
cap is opened too quickly.
This spray can happen if the
tank is nearly full, and is
more likely in hot weather.
Open the fuel cap slowly
and wait for any hiss noise
to stop, then unscrew the
cap all the way.
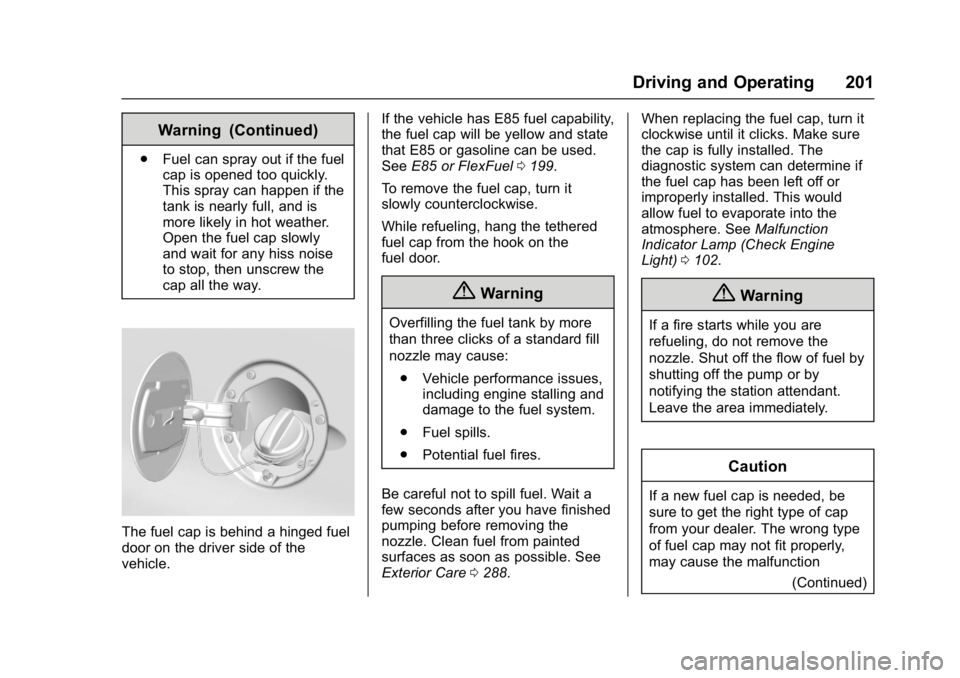
The fuel cap is behind a hinged fuel
door on the driver side of the
vehicle. If the vehicle has E85 fuel capability,
the fuel cap will be yellow and state
that E85 or gasoline can be used.
See
E85 or FlexFuel 0199.
To remove the fuel cap, turn it
slowly counterclockwise.
While refueling, hang the tethered
fuel cap from the hook on the
fuel door.
{Warning
Overfilling the fuel tank by more
than three clicks of a standard fill
nozzle may cause: . Vehicle performance issues,
including engine stalling and
damage to the fuel system.
. Fuel spills.
. Potential fuel fires.
Be careful not to spill fuel. Wait a
few seconds after you have finished
pumping before removing the
nozzle. Clean fuel from painted
surfaces as soon as possible. See
Exterior Care 0288. When replacing the fuel cap, turn it
clockwise until it clicks. Make sure
the cap is fully installed. The
diagnostic system can determine if
the fuel cap has been left off or
improperly installed. This would
allow fuel to evaporate into the
atmosphere. See
Malfunction
Indicator Lamp (Check Engine
Light) 0102.
{Warning
If a fire starts while you are
refueling, do not remove the
nozzle. Shut off the flow of fuel by
shutting off the pump or by
notifying the station attendant.
Leave the area immediately.
Caution
If a new fuel cap is needed, be
sure to get the right type of cap
from your dealer. The wrong type
of fuel cap may not fit properly,
may cause the malfunction
(Continued)