instrument cluster CHEVROLET CLASSIC 2004 Owners Manual
[x] Cancel search | Manufacturer: CHEVROLET, Model Year: 2004, Model line: CLASSIC, Model: CHEVROLET CLASSIC 2004Pages: 348, PDF Size: 5.32 MB
Page 103 of 348
Instrument Panel Overview...............................3-2
Hazard Warning Flashers................................3-4
Other Warning Devices...................................3-5
Horn.............................................................3-5
Tilt Wheel.....................................................3-5
Turn Signal/Multifunction Lever.........................3-6
Windshield Wiper Lever...................................3-8
Cruise Control..............................................3-10
Exterior Lamps.............................................3-13
Interior Lamps..............................................3-15
Accessory Power Outlets...............................3-16
Ashtrays and Cigarette Lighter........................3-17
Climate Controls............................................3-18
Climate Control System.................................3-18
Outlet Adjustment.........................................3-21
Warning Lights, Gages and Indicators.............3-22
Instrument Panel Cluster................................3-23
Speedometer and Odometer...........................3-24
Tachometer.................................................3-25
Safety Belt Reminder Light.............................3-25
Air Bag Readiness Light................................3-26
Charging System Light..................................3-27
Brake System Warning Light..........................3-27
Anti-Lock Brake System Warning Light.............3-28Engine Coolant Temperature Gage..................3-29
Low Coolant Warning Light............................3-29
Malfunction Indicator Lamp.............................3-30
Oil Pressure Light.........................................3-33
Passlock
®Warning Light................................3-34
Low Washer Fluid Warning Light.....................3-34
Door Ajar Light.............................................3-34
Service Vehicle Soon Light............................3-35
Fuel Gage...................................................3-35
Audio System(s).............................................3-36
Setting the Time for Radios without Radio
Data Systems (RDS)..................................3-37
Setting the Time for Radios with Radio Data
Systems (RDS).........................................3-37
Radio with CD..............................................3-38
Radio with Cassette and CD..........................3-43
Theft-Deterrent Feature (Non-RDS Radios).......3-54
Theft-Deterrent Feature (RDS Radios).............3-54
Understanding Radio Reception......................3-54
Care of Your Cassette Tape Player.................3-55
Care of Your CDs.........................................3-56
Care of Your CD Player................................3-56
Fixed Mast Antenna......................................3-56
Chime Level Adjustment................................3-56
Section 3 Instrument Panel
3-1
Page 105 of 348
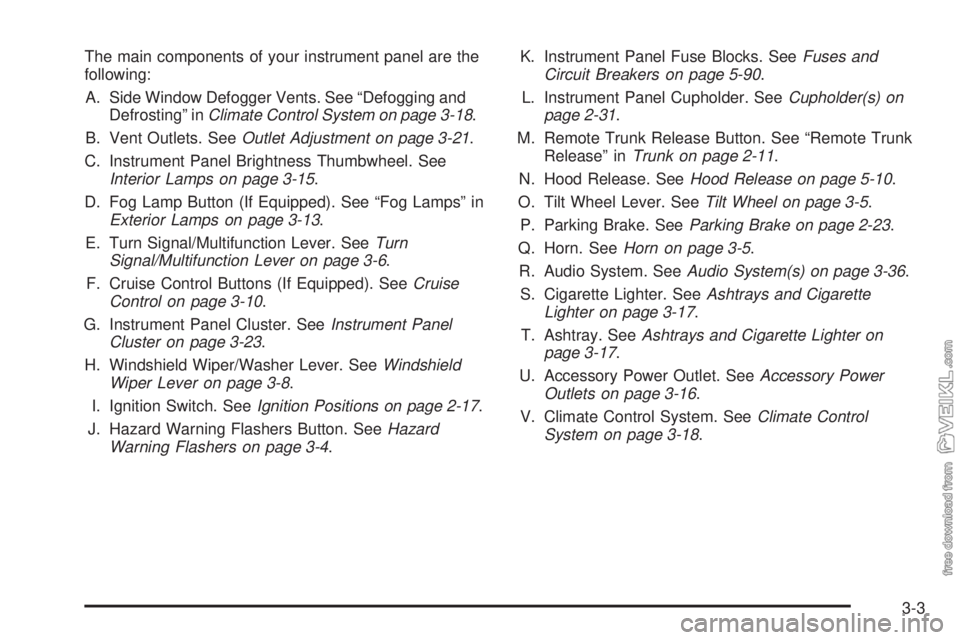
The main components of your instrument panel are the
following:
A. Side Window Defogger Vents. See “Defogging and
Defrosting” inClimate Control System on page 3-18.
B. Vent Outlets. SeeOutlet Adjustment on page 3-21.
C. Instrument Panel Brightness Thumbwheel. See
Interior Lamps on page 3-15.
D. Fog Lamp Button (If Equipped). See “Fog Lamps” in
Exterior Lamps on page 3-13.
E. Turn Signal/Multifunction Lever. SeeTurn
Signal/Multifunction Lever on page 3-6.
F. Cruise Control Buttons (If Equipped). SeeCruise
Control on page 3-10.
G. Instrument Panel Cluster. SeeInstrument Panel
Cluster on page 3-23.
H. Windshield Wiper/Washer Lever. SeeWindshield
Wiper Lever on page 3-8.
I. Ignition Switch. SeeIgnition Positions on page 2-17.
J. Hazard Warning Flashers Button. SeeHazard
Warning Flashers on page 3-4.K. Instrument Panel Fuse Blocks. SeeFuses and
Circuit Breakers on page 5-90.
L. Instrument Panel Cupholder. SeeCupholder(s) on
page 2-31.
M. Remote Trunk Release Button. See “Remote Trunk
Release” inTrunk on page 2-11.
N. Hood Release. SeeHood Release on page 5-10.
O. Tilt Wheel Lever. SeeTilt Wheel on page 3-5.
P. Parking Brake. SeeParking Brake on page 2-23.
Q. Horn. SeeHorn on page 3-5.
R. Audio System. SeeAudio System(s) on page 3-36.
S. Cigarette Lighter. SeeAshtrays and Cigarette
Lighter on page 3-17.
T. Ashtray. SeeAshtrays and Cigarette Lighter on
page 3-17.
U. Accessory Power Outlet. SeeAccessory Power
Outlets on page 3-16.
V. Climate Control System. SeeClimate Control
System on page 3-18.
3-3
Page 108 of 348
Turn Signal/Multifunction Lever
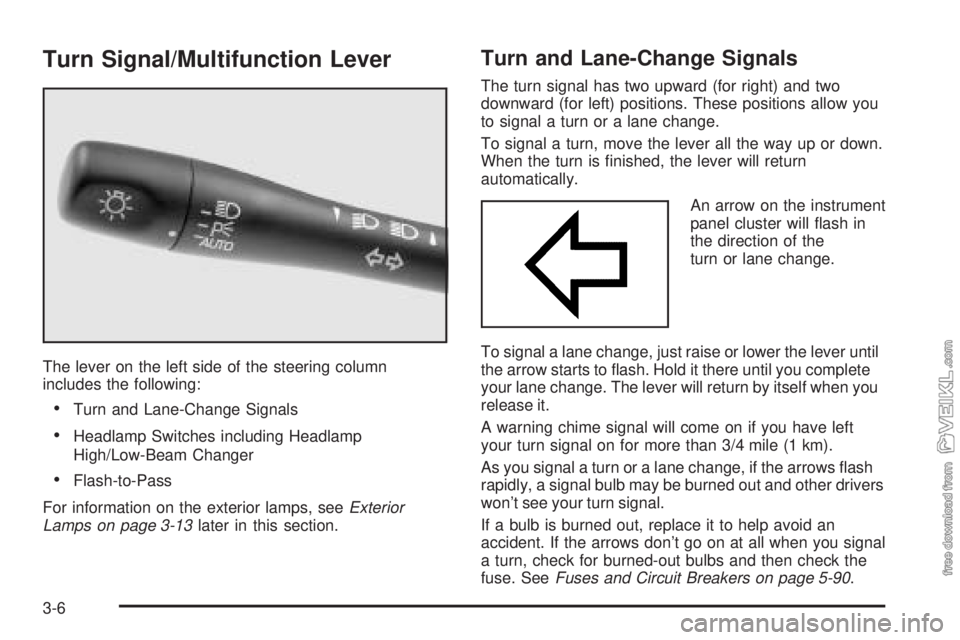
The lever on the left side of the steering column
includes the following:
•Turn and Lane-Change Signals
•Headlamp Switches including Headlamp
High/Low-Beam Changer
•Flash-to-Pass
For information on the exterior lamps, seeExterior
Lamps on page 3-13later in this section.
Turn and Lane-Change Signals
The turn signal has two upward (for right) and two
downward (for left) positions. These positions allow you
to signal a turn or a lane change.
To signal a turn, move the lever all the way up or down.
When the turn is finished, the lever will return
automatically.
An arrow on the instrument
panel cluster will flash in
the direction of the
turn or lane change.
To signal a lane change, just raise or lower the lever until
the arrow starts to flash. Hold it there until you complete
your lane change. The lever will return by itself when you
release it.
A warning chime signal will come on if you have left
your turn signal on for more than 3/4 mile (1 km).
As you signal a turn or a lane change, if the arrows flash
rapidly, a signal bulb may be burned out and other drivers
won’t see your turn signal.
If a bulb is burned out, replace it to help avoid an
accident. If the arrows don’t go on at all when you signal
a turn, check for burned-out bulbs and then check the
fuse. SeeFuses and Circuit Breakers on page 5-90.
3-6
Page 109 of 348
Headlamps
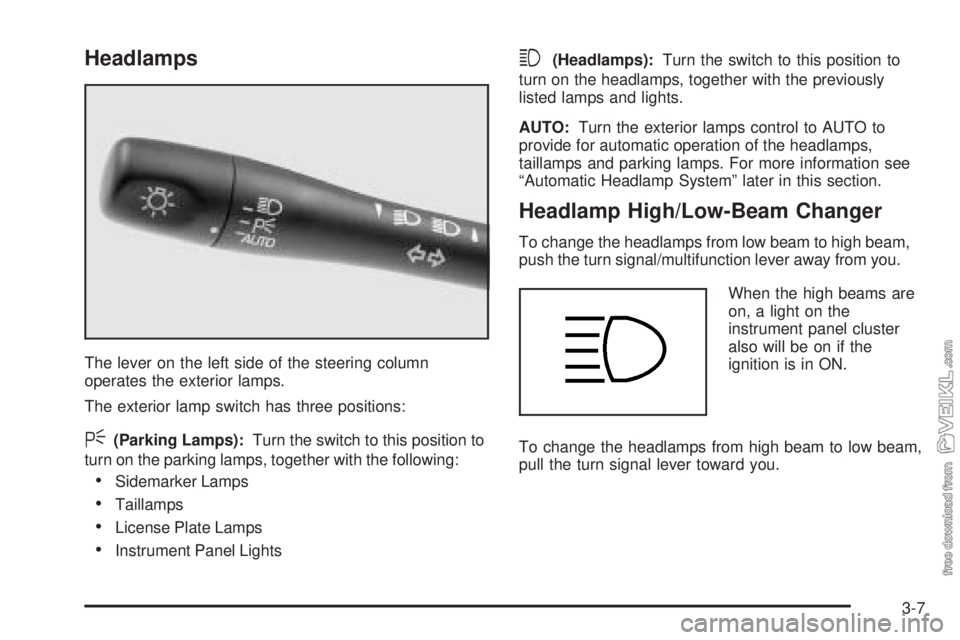
The lever on the left side of the steering column
operates the exterior lamps.
The exterior lamp switch has three positions:
<(Parking Lamps):Turn the switch to this position to
turn on the parking lamps, together with the following:
•Sidemarker Lamps
•Taillamps
•License Plate Lamps
•Instrument Panel Lights
3(Headlamps):Turn the switch to this position to
turn on the headlamps, together with the previously
listed lamps and lights.
AUTO:Turn the exterior lamps control to AUTO to
provide for automatic operation of the headlamps,
taillamps and parking lamps. For more information see
“Automatic Headlamp System” later in this section.
Headlamp High/Low-Beam Changer
To change the headlamps from low beam to high beam,
push the turn signal/multifunction lever away from you.
When the high beams are
on, a light on the
instrument panel cluster
also will be on if the
ignition is in ON.
To change the headlamps from high beam to low beam,
pull the turn signal lever toward you.
3-7
Page 116 of 348
There is a delay in the transition between the daytime
and nighttime operation of the DRL and the Automatic
Headlamp System so that driving under bridges or bright
overhead street lights does not affect the system. The
DRL and Automatic Headlamp System will only be
affected when the light sensor sees a change in lighting
lasting longer than this delay.
If you start your vehicle in a dark garage, the automatic
headlamp system will come on immediately. Once
you leave the garage, it will take approximately
one minute for the automatic headlamp system to
change to DRL if it is light outside. During that delay,
your instrument panel cluster may not be as bright
as usual. Make sure your instrument panel brightness
control is in the full bright position. See “Instrument
Panel Brightness Control” underInterior Lamps
on page 3-15.
To idle your vehicle with the system off, set the park
brake while the ignition is off. Then start the vehicle. The
system will stay off until you release the park brake.
As with any vehicle, you should turn on the regular
headlamps when you need them.Headlamps Off in Park (P)
This feature works when the ignition is on and it is dark
outside. To turn the headlamps off when it is dark outside,
turn the exterior lamp control to the parking lamp position.
In this position, the parking lamps, sidemarker lamps,
taillamps, license plate lamps and instrument panel lights
will be on, but the headlamps will be off.
To turn on the headlamps along with the other lamps
when it is dark outside, turn the exterior lamp control to
the AUTO or headlamp position.
Delayed Headlamps
The delayed headlamps feature will continue to
illuminate the headlamps for 20 seconds after the key is
turned to OFF at night. Then the headlamps will
automatically turn off.
To override the 20 second delayed headlamp feature
while it is active turn the switch at the end of the
turn signal/multifunction lever up one position and then
back to AUTO.
3-14
Page 125 of 348
Instrument Panel Cluster
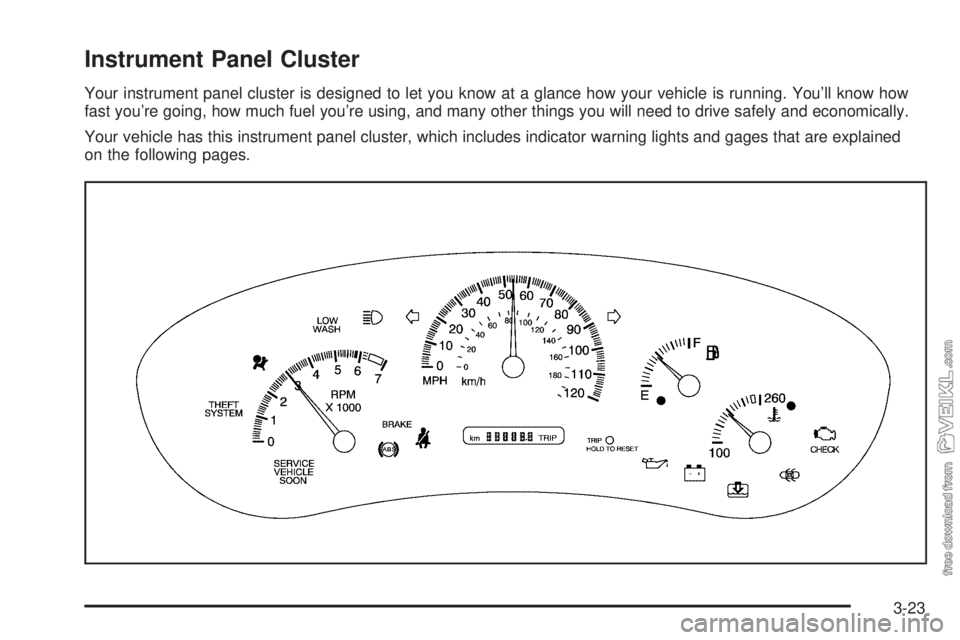
Your instrument panel cluster is designed to let you know at a glance how your vehicle is running. You’ll know how
fast you’re going, how much fuel you’re using, and many other things you will need to drive safely and economically.
Your vehicle has this instrument panel cluster, which includes indicator warning lights and gages that are explained
on the following pages.
3-23
Page 126 of 348
Speedometer and Odometer
Your speedometer lets you see your speed in miles per
hour (mph).
Your odometer shows how far your vehicle has been
driven in miles.
Your vehicle has a tamper resistant odometer. The
digital odometer will read 999,999 if someone tries to
turn it back.
Repair or replacement of you instrument panel cluster
should only be performed by an authorized GM
service center.
Trip Odometer
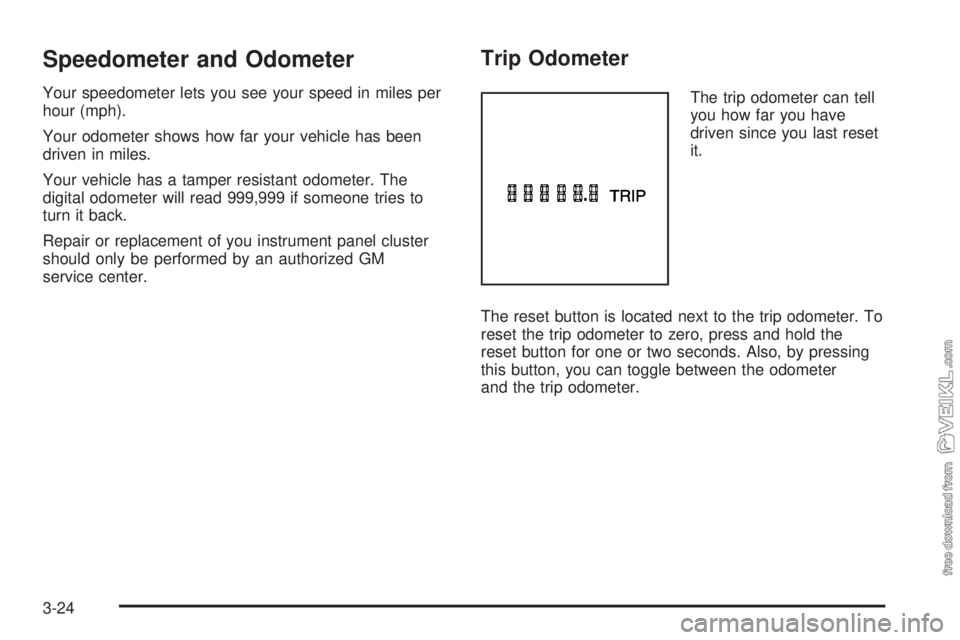
The trip odometer can tell
you how far you have
driven since you last reset
it.
The reset button is located next to the trip odometer. To
reset the trip odometer to zero, press and hold the
reset button for one or two seconds. Also, by pressing
this button, you can toggle between the odometer
and the trip odometer.
3-24
Page 293 of 348
Instrument Panel Fuse Block
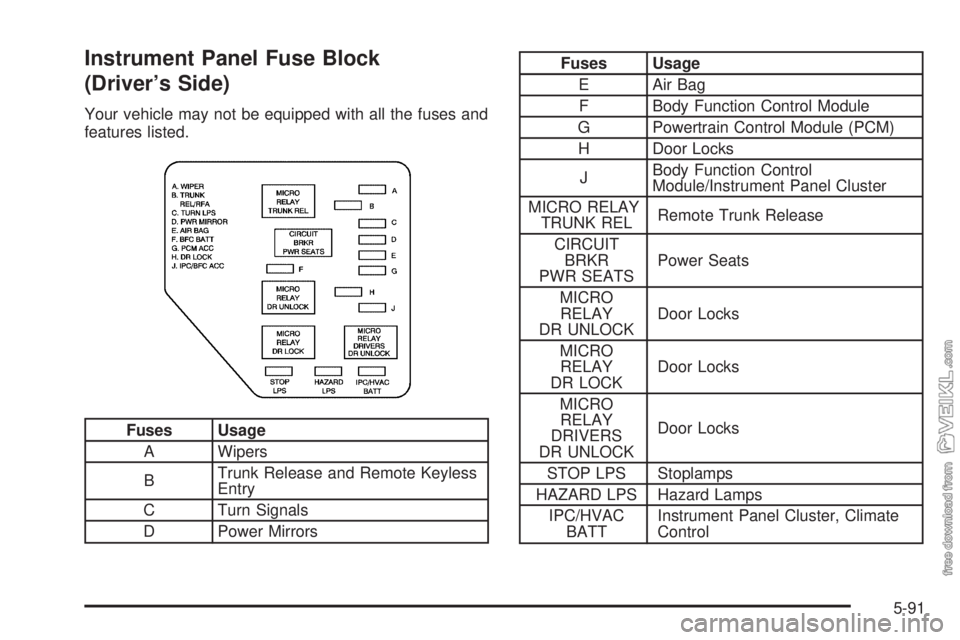
(Driver’s Side)
Your vehicle may not be equipped with all the fuses and
features listed.
Fuses Usage
A Wipers
BTrunk Release and Remote Keyless
Entry
C Turn Signals
D Power Mirrors
Fuses Usage
E Air Bag
F Body Function Control Module
G Powertrain Control Module (PCM)
H Door Locks
JBody Function Control
Module/Instrument Panel Cluster
MICRO RELAY
TRUNK RELRemote Trunk Release
CIRCUIT
BRKR
PWR SEATSPower Seats
MICRO
RELAY
DR UNLOCKDoor Locks
MICRO
RELAY
DR LOCKDoor Locks
MICRO
RELAY
DRIVERS
DR UNLOCKDoor Locks
STOP LPS Stoplamps
HAZARD LPS Hazard Lamps
IPC/HVAC
BATTInstrument Panel Cluster, Climate
Control
5-91
Page 341 of 348
Inspection
Brake System.............................................6-21
Engine Cooling System................................6-21
Exhaust System..........................................6-20
Fuel System...............................................6-20
Part C - Periodic Maintenance.......................6-20
Steering, Suspension and Front Drive Axle
Boot and Seal.........................................6-20
Throttle System...........................................6-21
Instrument Panel
Cluster.......................................................3-23
Overview..................................................... 3-2
Instrument Panel Brightness.............................3-15
Instrument Panel Fuse Block
(Passenger’s Side).......................................5-92
Instrument Panel Fuse Block
(Driver’s Side).............................................5-91
Interior Lamps................................................3-15
J
Jump Starting.................................................5-39
K
Key Lock Cylinders Service..............................6-17
Keyless Entry System....................................... 2-3
Keys............................................................... 2-2
L
Lamps
Exterior......................................................3-13
Interior.......................................................3-15
Lap Belt........................................................1-28
Lap-Shoulder Belt...................................1-14, 1-24
LATCH System
Child Restraints...........................................1-45
Securing a Child Restraint Designed for the
LATCH System........................................1-48
Leaving Your Vehicle.......................................2-11
Leaving Your Vehicle With the Engine
Running.....................................................2-25
Light
Air Bag Readiness.......................................3-26
Anti-Lock Brake System Warning...................3-28
Brake System Warning.................................3-27
Charging System.........................................3-27
Door Ajar...................................................3-34
Low Coolant Warning...................................3-29
Low Washer Fluid Warning...........................3-34
Malfunction Indicator....................................3-30
Oil Pressure...............................................3-33
Passlock
®Warning.......................................3-34
Safety Belt Reminder...................................3-25
Service Vehicle Soon...................................3-35
Loading Your Vehicle.......................................4-32
Lockout Protection..........................................2-11
7