low beam CHEVROLET CLASSIC 2004 Owners Manual
[x] Cancel search | Manufacturer: CHEVROLET, Model Year: 2004, Model line: CLASSIC, Model: CHEVROLET CLASSIC 2004Pages: 348, PDF Size: 5.32 MB
Page 108 of 348
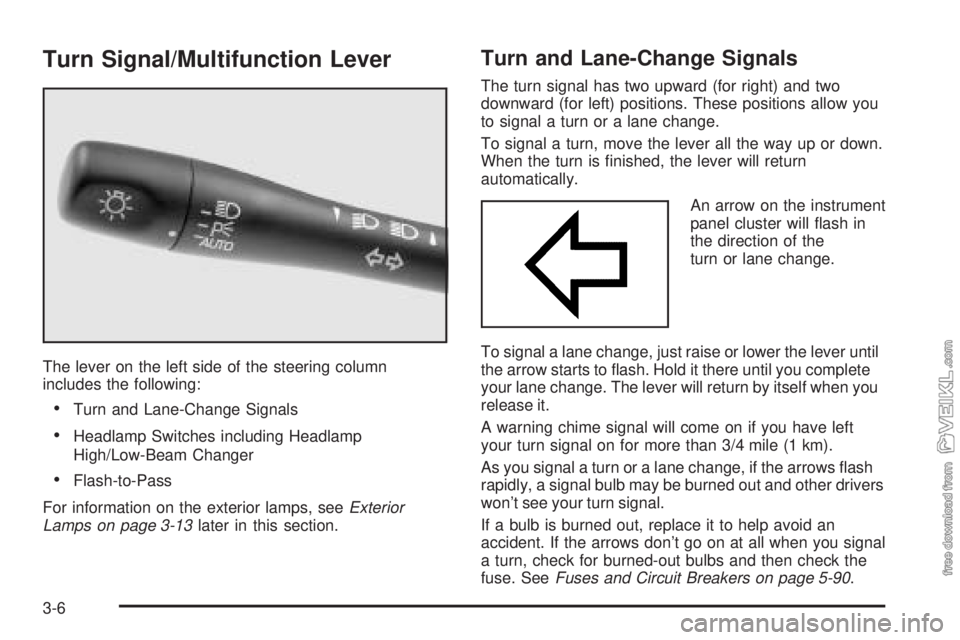
Turn Signal/Multifunction Lever
The lever on the left side of the steering column
includes the following:
•Turn and Lane-Change Signals
•Headlamp Switches including Headlamp
High/Low-Beam Changer
•Flash-to-Pass
For information on the exterior lamps, seeExterior
Lamps on page 3-13later in this section.
Turn and Lane-Change Signals
The turn signal has two upward (for right) and two
downward (for left) positions. These positions allow you
to signal a turn or a lane change.
To signal a turn, move the lever all the way up or down.
When the turn is finished, the lever will return
automatically.
An arrow on the instrument
panel cluster will flash in
the direction of the
turn or lane change.
To signal a lane change, just raise or lower the lever until
the arrow starts to flash. Hold it there until you complete
your lane change. The lever will return by itself when you
release it.
A warning chime signal will come on if you have left
your turn signal on for more than 3/4 mile (1 km).
As you signal a turn or a lane change, if the arrows flash
rapidly, a signal bulb may be burned out and other drivers
won’t see your turn signal.
If a bulb is burned out, replace it to help avoid an
accident. If the arrows don’t go on at all when you signal
a turn, check for burned-out bulbs and then check the
fuse. SeeFuses and Circuit Breakers on page 5-90.
3-6
Page 109 of 348
Headlamps
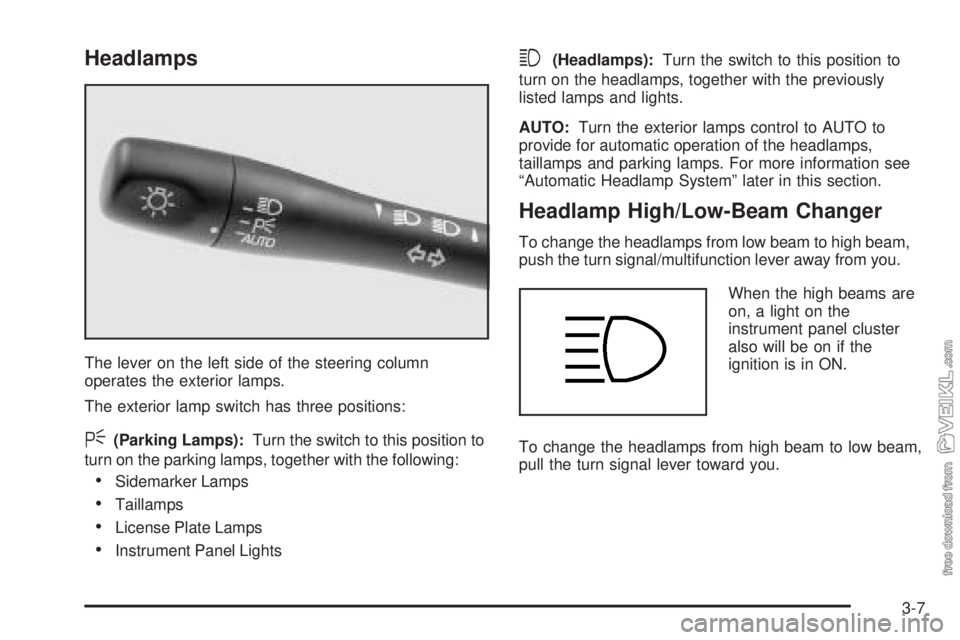
The lever on the left side of the steering column
operates the exterior lamps.
The exterior lamp switch has three positions:
<(Parking Lamps):Turn the switch to this position to
turn on the parking lamps, together with the following:
•Sidemarker Lamps
•Taillamps
•License Plate Lamps
•Instrument Panel Lights
3(Headlamps):Turn the switch to this position to
turn on the headlamps, together with the previously
listed lamps and lights.
AUTO:Turn the exterior lamps control to AUTO to
provide for automatic operation of the headlamps,
taillamps and parking lamps. For more information see
“Automatic Headlamp System” later in this section.
Headlamp High/Low-Beam Changer
To change the headlamps from low beam to high beam,
push the turn signal/multifunction lever away from you.
When the high beams are
on, a light on the
instrument panel cluster
also will be on if the
ignition is in ON.
To change the headlamps from high beam to low beam,
pull the turn signal lever toward you.
3-7
Page 115 of 348
Exterior Lamps
Headlamps
See “Headlamps” underTurn Signal/Multifunction Lever
on page 3-6.
Daytime Running Lamps (DRL)
Daytime Running Lamps (DRL) can make it easier for
others to see the front of your vehicle during the
day. DRL can be helpful in many different driving
conditions, but they can be especially helpful in the short
periods after dawn and before sunset.
The DRL system will make your low-beam headlamps
come on at a reduced brightness when the following
conditions are met:
•The ignition is on,
•the exterior lamp control is turned to AUTO or you
have turned on your parking lamps,
•the light sensor detects daytime light,
•the parking brake is released, and
•the shift lever is not in PARK (P).When the DRL system is on, the taillamps, sidemarker
lamps, parking lamps and instrument panel lights
will not be illuminated unless you have turned the
exterior lamps control to the parking lamp or headlamp
position.
The DRL system will remain off any time your vehicle is
in PARK (P) or the parking brake is engaged and the
vehicle speed is less than 8 mph (13 km/h), for
United States vehicles only.
As with any vehicle, you should turn on the regular
headlamp system when you need it.
Automatic Headlamp System
When it is dark enough outside, your Automatic
Headlamp System will turn on your headlamps at the
normal brightness along with other lamps such as
the taillamps, sidemarker, parking lamps and the
instrument panel lights. The radio lights will also be dim.
Your vehicle is equipped with a light sensor on the
top of the instrument panel under the defroster grill, so
be sure it is not covered which will cause the system
to be on whenever the ignition is on.
The system may also be on when driving through a
parking garage, heavy overcast weather or a tunnel.
This is normal.
3-13
Page 173 of 348
You can be temporarily blinded by approaching
headlamps. It can take a second or two, or even several
seconds, for your eyes to readjust to the dark. When
you are faced with severe glare (as from a driver
who does not lower the high beams, or a vehicle with
misaimed headlamps), slow down a little. Avoid
staring directly into the approaching headlamps.
Keep your windshield and all the glass on your vehicle
clean — inside and out. Glare at night is made much
worse by dirt on the glass. Even the inside of the glass
can build up a film caused by dust. Dirty glass makes
lights dazzle and flash more than clean glass would,
making the pupils of your eyes contract repeatedly.
Remember that your headlamps light up far less of a
roadway when you are in a turn or curve. Keep
your eyes moving; that way, it is easier to pick out dimly
lighted objects. Just as your headlamps should be
checked regularly for proper aim, so should your eyes
be examined regularly. Some drivers suffer from
night blindness — the inability to see in dim light — and
are not even aware of it.Driving in Rain and on Wet Roads
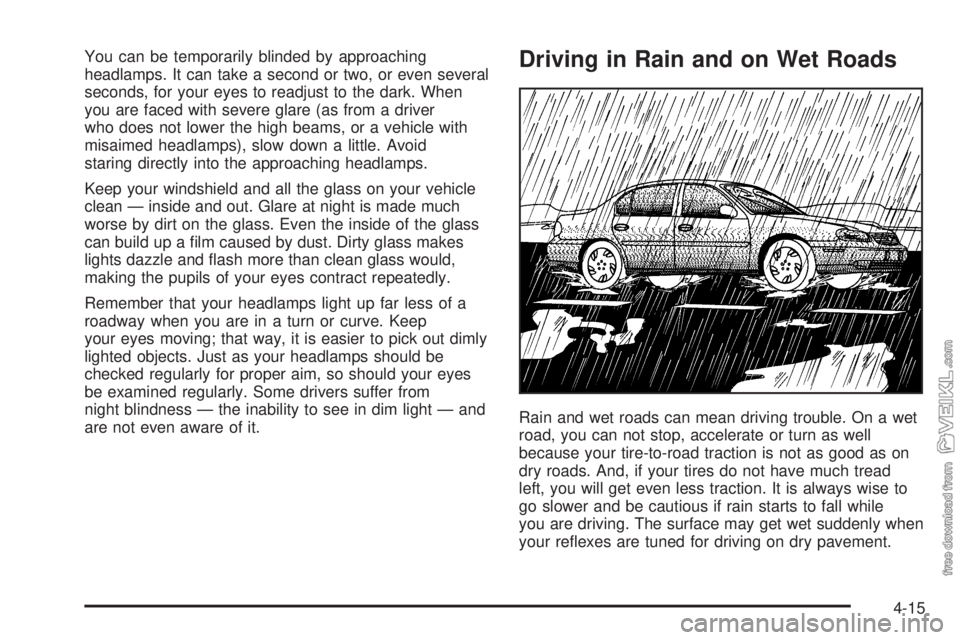
Rain and wet roads can mean driving trouble. On a wet
road, you can not stop, accelerate or turn as well
because your tire-to-road traction is not as good as on
dry roads. And, if your tires do not have much tread
left, you will get even less traction. It is always wise to
go slower and be cautious if rain starts to fall while
you are driving. The surface may get wet suddenly when
your reflexes are tuned for driving on dry pavement.
4-15
Page 247 of 348
Bulb Replacement
For bulb types, seeReplacement Bulbs on page 5-50.
For any bulb changing procedures not listed in this
section, contact your dealer.
Halogen Bulbs
{CAUTION:
Halogen bulbs have pressurized gas inside
and can burst if you drop or scratch the bulb.
You or others could be injured. Be sure to read
and follow the instructions on the bulb
package.
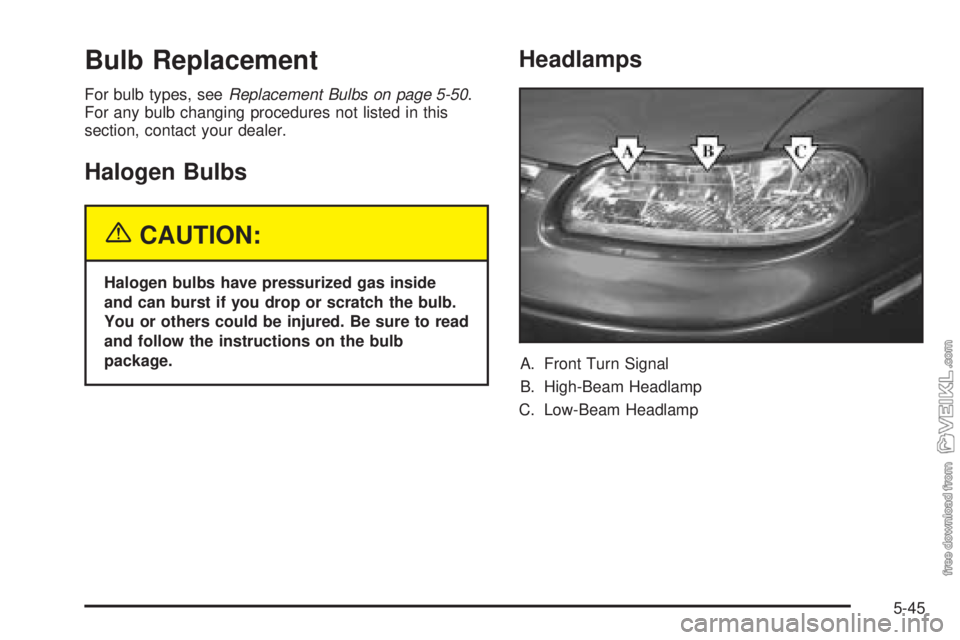
Headlamps
A. Front Turn Signal
B. High-Beam Headlamp
C. Low-Beam Headlamp
5-45
Page 252 of 348
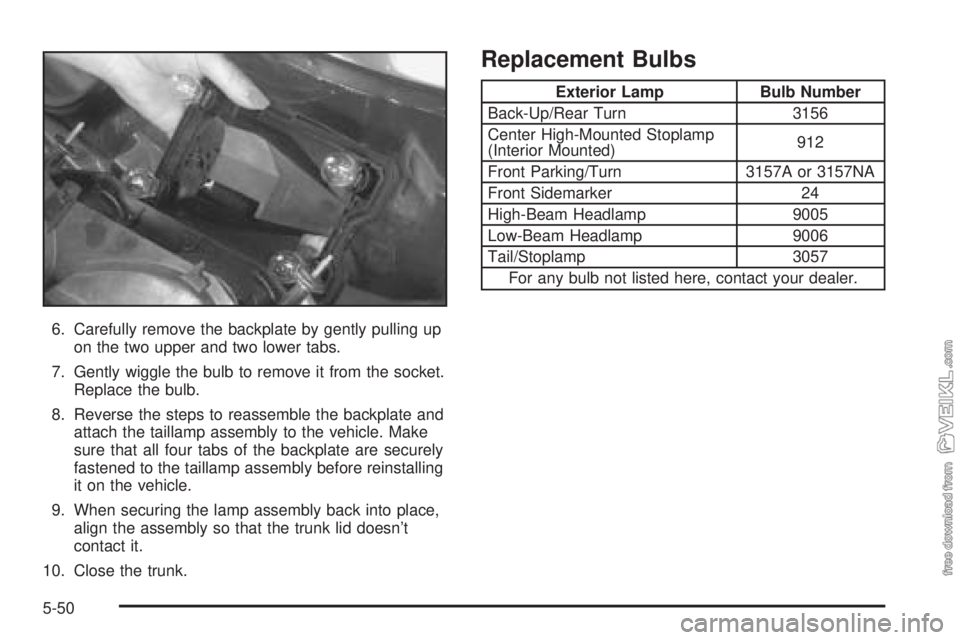
6. Carefully remove the backplate by gently pulling up
on the two upper and two lower tabs.
7. Gently wiggle the bulb to remove it from the socket.
Replace the bulb.
8. Reverse the steps to reassemble the backplate and
attach the taillamp assembly to the vehicle. Make
sure that all four tabs of the backplate are securely
fastened to the taillamp assembly before reinstalling
it on the vehicle.
9. When securing the lamp assembly back into place,
align the assembly so that the trunk lid doesn’t
contact it.
10. Close the trunk.
Replacement Bulbs
Exterior Lamp Bulb Number
Back-Up/Rear Turn 3156
Center High-Mounted Stoplamp
(Interior Mounted)912
Front Parking/Turn 3157A or 3157NA
Front Sidemarker 24
High-Beam Headlamp 9005
Low-Beam Headlamp 9006
Tail/Stoplamp 3057
For any bulb not listed here, contact your dealer.
5-50
Page 340 of 348
G
Gage
Engine Coolant Temperature.........................3-29
Fuel..........................................................3-35
Speedometer..............................................3-24
Tachometer.................................................3-25
Garment Hooks..............................................2-31
Gasoline
Octane........................................................ 5-4
Specifications............................................... 5-5
Glove Box.....................................................2-31
GM Mobility Program for Persons with
Disabilities.................................................... 7-5
H
Hazard Warning Flashers................................... 3-4
Head Restraints............................................... 1-6
Headlamp High/Low-Beam Changer.................... 3-7
Headlamp Wiring............................................5-89
Headlamps......................................3-7, 3-13, 5-45
Bulb Replacement.......................................5-45
Front Turn Signal Lamps..............................5-47
Halogen Bulbs............................................5-45
Headlamps Off in Park (P)...............................3-14
Headlamps On Reminder................................... 3-8Highway Hypnosis...........................................4-21
Hill and Mountain Roads..................................4-22
Hitches..........................................................4-41
Hood
Release.....................................................5-10
Horn............................................................... 3-5
How to Add Coolant to the Coolant Surge Tank......5-27
How to Check................................................5-60
How to Check Power Steering Fluid..................5-32
How to Inspect the Engine Air Cleaner/Filter.......5-18
How to Use This Manual...................................... ii
How to Wear Safety Belts Properly...................1-13
Hydroplaning..................................................4-17
I
If No Steam Is Coming From Your Engine..........5-24
If Steam Is Coming From Your Engine...............5-23
If the Light Is Flashing.....................................3-31
If the Light Is On Steady.................................3-31
If You Are Caught in a Blizzard.........................4-26
If You Are Stuck in Sand, Mud, Ice or Snow.......4-28
If You Do Decide To Pull a Trailer.....................4-39
Ignition Positions.............................................2-17
Ignition Transaxle Lock Check..........................6-19
Infants and Young Children, Restraints...............1-35
Inflation - Tire Pressure...................................5-59
6