parking brake CHEVROLET CLASSIC 2005 User Guide
[x] Cancel search | Manufacturer: CHEVROLET, Model Year: 2005, Model line: CLASSIC, Model: CHEVROLET CLASSIC 2005Pages: 320, PDF Size: 4.86 MB
Page 102 of 320
3(Headlamps):Turn the switch to this position to
turn on the headlamps, together with the previously
listed lamps and lights.
AUTO:Turn the exterior lamps control to AUTO to
provide for automatic operation of the headlamps,
taillamps and parking lamps. For more information see
“Automatic Headlamp System” later in this section.
Headlamps on Reminder
If you open the driver’s door and turn off the ignition
while leaving the lamps on, you will hear a warning
chime.
Headlamps Off in PARK (P)
This feature works when the ignition is on and it is dark
outside. To turn the headlamps off when it is dark
outside, turn the exterior lamp control to the parking
lamp position. In this position, the parking lamps,
sidemarker lamps, taillamps, license plate lamps and
instrument panel lights will be on, but the headlamps
will be off.
To turn on the headlamps along with the other lamps
when it is dark outside, turn the exterior lamp control to
the AUTO or headlamp position.
Delayed Headlamps
The delayed headlamps feature will continue to illuminate
the headlamps for 20 seconds after the key is turned to
OFF at night. Then the headlamps will automatically
turn off.
To override the 20 second delayed headlamp feature
while it is active turn the switch at the end of the
turn signal/multifunction lever up one position and then
back to AUTO.
Daytime Running Lamps (DRL)
Daytime Running Lamps (DRL) can make it easier for
others to see the front of your vehicle during the
day. DRL can be helpful in many different driving
conditions, but they can be especially helpful in the short
periods after dawn and before sunset.
The DRL system will make your low-beam headlamps
come on at a reduced brightness when the following
conditions are met:
•The ignition is on,
•the exterior lamp control is turned to AUTO or you
have turned on your parking lamps,
•the light sensor detects daytime light,
•the parking brake is released, and
•the shift lever is not in PARK (P).
3-14
Page 103 of 320
When the DRL system is on, the taillamps, sidemarker
lamps, parking lamps and instrument panel lights
will not be illuminated unless you have turned the
exterior lamps control to the parking lamp or headlamp
position.
The DRL system will remain off any time your vehicle is
in PARK (P) or the parking brake is engaged and the
vehicle speed is less than 8 mph (13 km/h), for
United States vehicles only.
As with any vehicle, you should turn on the regular
headlamp system when you need it.
Automatic Headlamp System
When it is dark enough outside, your Automatic
Headlamp System will turn on your headlamps at the
normal brightness along with other lamps such as
the taillamps, sidemarker, parking lamps and the
instrument panel lights. The radio lights will also be dim.
Your vehicle is equipped with a light sensor on the
top of the instrument panel under the defroster grill, so
be sure it is not covered which will cause the system
to be on whenever the ignition is on.
The system may also be on when driving through a
parking garage, heavy overcast weather or a tunnel.
This is normal.There is a delay in the transition between the daytime
and nighttime operation of the DRL and the Automatic
Headlamp System so that driving under bridges or bright
overhead street lights does not affect the system. The
DRL and Automatic Headlamp System will only be
affected when the light sensor sees a change in lighting
lasting longer than this delay.
If you start your vehicle in a dark garage, the automatic
headlamp system will come on immediately. Once
you leave the garage, it will take approximately
one minute for the automatic headlamp system to
change to DRL if it is light outside. During that delay,
your instrument panel cluster may not be as bright
as usual. Make sure your instrument panel brightness
control is in the full bright position. See “Instrument
Panel Brightness Control” underInstrument Panel
Brightness on page 3-16.
To idle your vehicle with the system off, set the park
brake while the ignition is off. Then start the vehicle.
The system will stay off until you release the park brake.
As with any vehicle, you should turn on the regular
headlamps when you need them.
3-15
Page 115 of 320
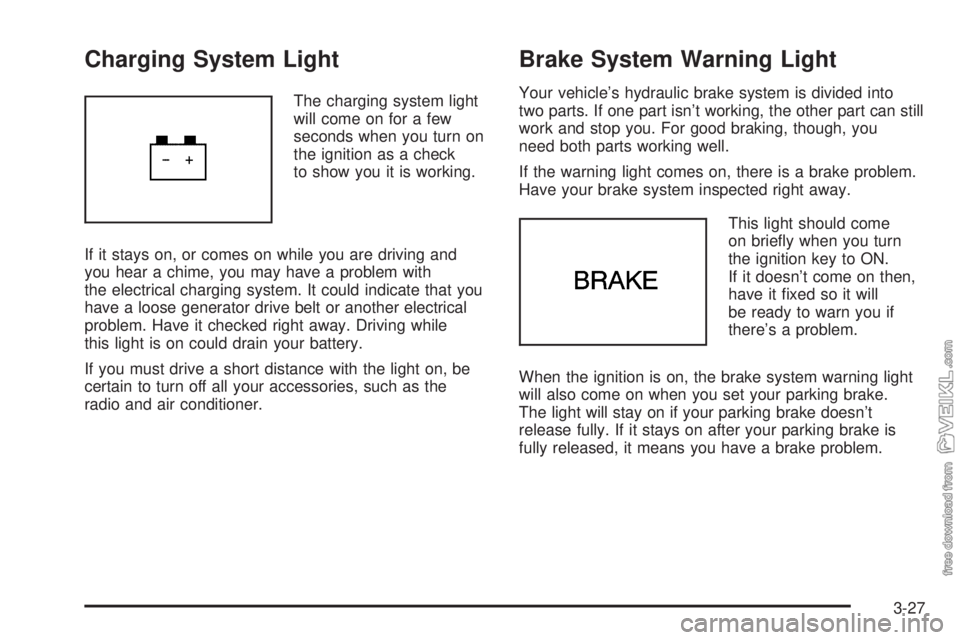
Charging System Light
The charging system light
will come on for a few
seconds when you turn on
the ignition as a check
to show you it is working.
If it stays on, or comes on while you are driving and
you hear a chime, you may have a problem with
the electrical charging system. It could indicate that you
have a loose generator drive belt or another electrical
problem. Have it checked right away. Driving while
this light is on could drain your battery.
If you must drive a short distance with the light on, be
certain to turn off all your accessories, such as the
radio and air conditioner.
Brake System Warning Light
Your vehicle’s hydraulic brake system is divided into
two parts. If one part isn’t working, the other part can still
work and stop you. For good braking, though, you
need both parts working well.
If the warning light comes on, there is a brake problem.
Have your brake system inspected right away.
This light should come
on briefly when you turn
the ignition key to ON.
If it doesn’t come on then,
have it fixed so it will
be ready to warn you if
there’s a problem.
When the ignition is on, the brake system warning light
will also come on when you set your parking brake.
The light will stay on if your parking brake doesn’t
release fully. If it stays on after your parking brake is
fully released, it means you have a brake problem.
3-27
Page 175 of 320
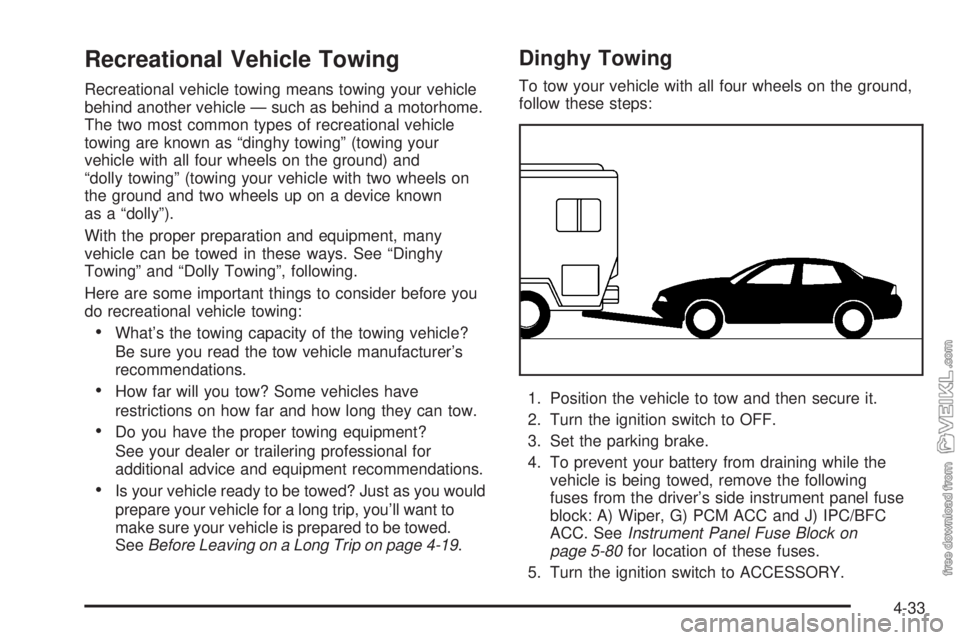
Recreational Vehicle Towing
Recreational vehicle towing means towing your vehicle
behind another vehicle — such as behind a motorhome.
The two most common types of recreational vehicle
towing are known as “dinghy towing” (towing your
vehicle with all four wheels on the ground) and
“dolly towing” (towing your vehicle with two wheels on
the ground and two wheels up on a device known
as a “dolly”).
With the proper preparation and equipment, many
vehicle can be towed in these ways. See “Dinghy
Towing” and “Dolly Towing”, following.
Here are some important things to consider before you
do recreational vehicle towing:
•What’s the towing capacity of the towing vehicle?
Be sure you read the tow vehicle manufacturer’s
recommendations.
•How far will you tow? Some vehicles have
restrictions on how far and how long they can tow.
•Do you have the proper towing equipment?
See your dealer or trailering professional for
additional advice and equipment recommendations.
•Is your vehicle ready to be towed? Just as you would
prepare your vehicle for a long trip, you’ll want to
make sure your vehicle is prepared to be towed.
SeeBefore Leaving on a Long Trip on page 4-19.
Dinghy Towing
To tow your vehicle with all four wheels on the ground,
follow these steps:
1. Position the vehicle to tow and then secure it.
2. Turn the ignition switch to OFF.
3. Set the parking brake.
4. To prevent your battery from draining while the
vehicle is being towed, remove the following
fuses from the driver’s side instrument panel fuse
block: A) Wiper, G) PCM ACC and J) IPC/BFC
ACC. SeeInstrument Panel Fuse Block on
page 5-80for location of these fuses.
5. Turn the ignition switch to ACCESSORY.
4-33
Page 176 of 320
6. Shift your transaxle to NEUTRAL (N).
7. Release the parking brake.
Remember to install the fuses once you reach your
destination. To reinstall a fuse:
1. Set the parking brake.
2. Remove the key from the ignition switch.
3. Reinstall the fuse.
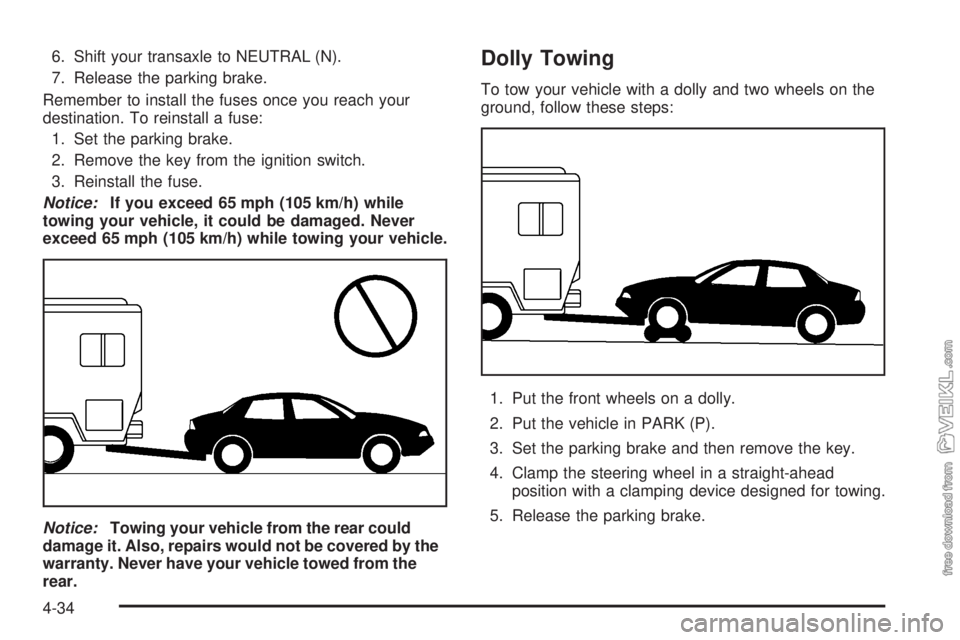
Notice:If you exceed 65 mph (105 km/h) while
towing your vehicle, it could be damaged. Never
exceed 65 mph (105 km/h) while towing your vehicle.
Notice:Towing your vehicle from the rear could
damage it. Also, repairs would not be covered by the
warranty. Never have your vehicle towed from the
rear.Dolly Towing
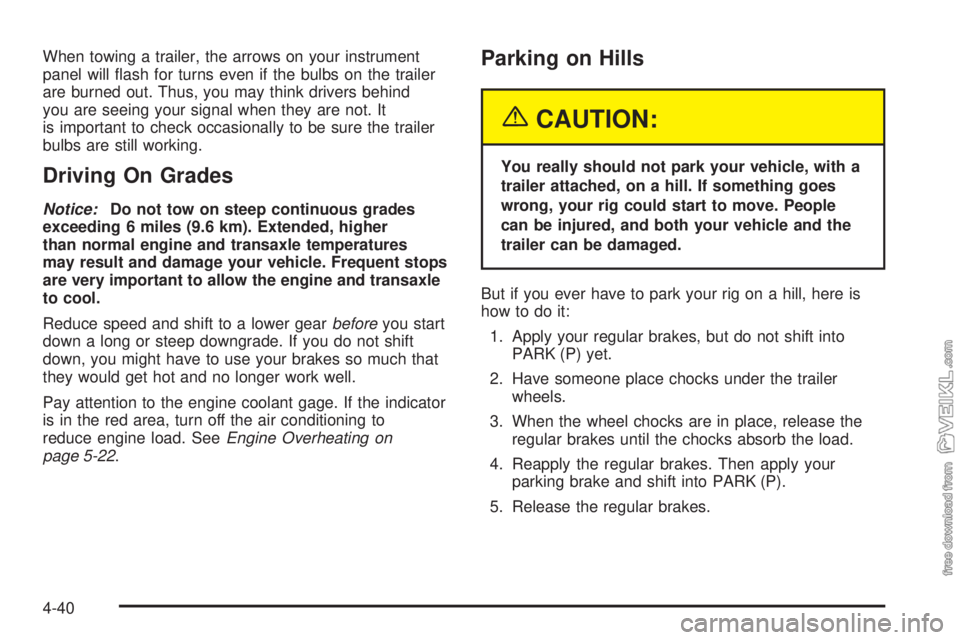
To tow your vehicle with a dolly and two wheels on the
ground, follow these steps:
1. Put the front wheels on a dolly.
2. Put the vehicle in PARK (P).
3. Set the parking brake and then remove the key.
4. Clamp the steering wheel in a straight-ahead
position with a clamping device designed for towing.
5. Release the parking brake.
4-34
Page 182 of 320
When towing a trailer, the arrows on your instrument
panel will flash for turns even if the bulbs on the trailer
are burned out. Thus, you may think drivers behind
you are seeing your signal when they are not. It
is important to check occasionally to be sure the trailer
bulbs are still working.
Driving On Grades
Notice:Do not tow on steep continuous grades
exceeding 6 miles (9.6 km). Extended, higher
than normal engine and transaxle temperatures
may result and damage your vehicle. Frequent stops
are very important to allow the engine and transaxle
to cool.
Reduce speed and shift to a lower gearbeforeyou start
down a long or steep downgrade. If you do not shift
down, you might have to use your brakes so much that
they would get hot and no longer work well.
Pay attention to the engine coolant gage. If the indicator
is in the red area, turn off the air conditioning to
reduce engine load. SeeEngine Overheating on
page 5-22.
Parking on Hills
{CAUTION:
You really should not park your vehicle, with a
trailer attached, on a hill. If something goes
wrong, your rig could start to move. People
can be injured, and both your vehicle and the
trailer can be damaged.
But if you ever have to park your rig on a hill, here is
how to do it:
1. Apply your regular brakes, but do not shift into
PARK (P) yet.
2. Have someone place chocks under the trailer
wheels.
3. When the wheel chocks are in place, release the
regular brakes until the chocks absorb the load.
4. Reapply the regular brakes. Then apply your
parking brake and shift into PARK (P).
5. Release the regular brakes.
4-40
Page 183 of 320
When You Are Ready to Leave After
Parking on a Hill
1. Apply your regular brakes and hold the pedal down
while you:
•start your engine,
•shift into a gear, and
•release the parking brake.
2. Let up on the brake pedal.
3. Drive slowly until the trailer is clear of the chocks.
4. Stop and have someone pick up and store the
chocks.
Maintenance When Trailer Towing
Your vehicle will need service more often when you
are pulling a trailer. SeePart A: Scheduled Maintenance
Services on page 6-4for more on this. Things that
are especially important in trailer operation are
automatic transaxle fluid (do not overfill), engine oil,
drive belt, cooling system and brake system.
Each of these is covered in this manual, and the Index
will help you find them quickly. If you’re trailering, it
is a good idea to review this information before you
start your trip.
Check periodically to see that all hitch nuts and bolts
are tight.
Engine Cooling When Trailer Towing
Your cooling system may temporarily overheat during
severe operating conditions. SeeEngine Overheating
on page 5-22.
4-41
Page 194 of 320
Checking Things Under
the Hood
{CAUTION:
An electric fan under the hood can start up
and injure you even when the engine is not
running. Keep hands, clothing and tools away
from any underhood electric fan.
{CAUTION:
Things that burn can get on hot engine parts
and start a re. These include liquids like fuel,
oil, coolant, brake uid, windshield washer and
other uids, and plastic or rubber. You or
others could be burned. Be careful not to drop
or spill things that will burn onto a hot engine.
Hood Release
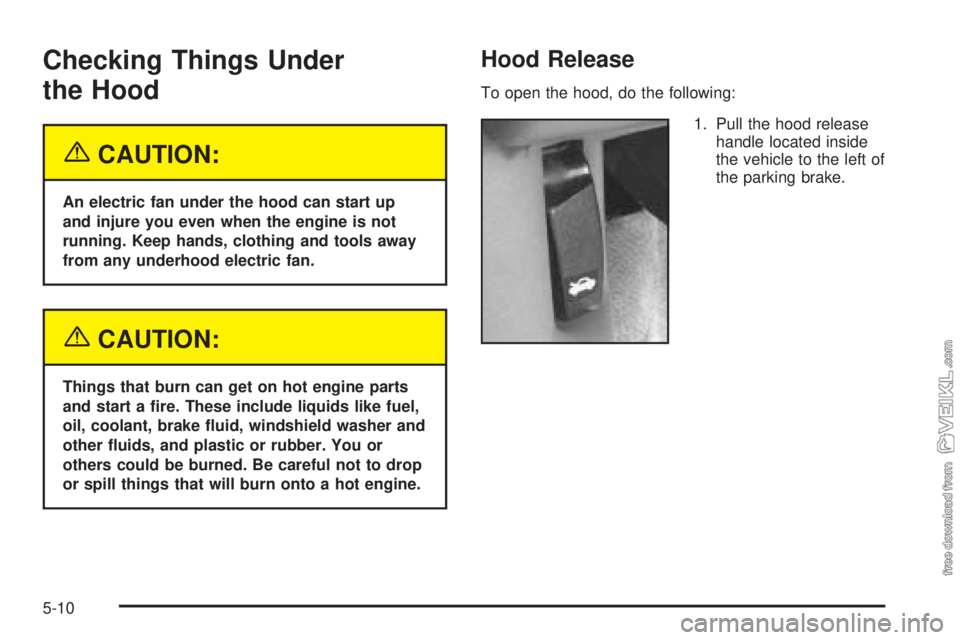
To open the hood, do the following:
1. Pull the hood release
handle located inside
the vehicle to the left of
the parking brake.
5-10
Page 219 of 320
{CAUTION:
Batteries can hurt you. They can be dangerous
because:
They contain acid that can burn you.
They contain gas that can explode or
ignite.
They contain enough electricity to
burn you.
If you do not follow these steps exactly, some
or all of these things can hurt you.
Notice:Ignoring these steps could result in costly
damage to your vehicle that would not be covered
by your warranty.Trying to start your vehicle by pushing or pulling it
will not work, and it could damage your vehicle.
1. Check the other vehicle. It must have a 12-volt
battery with a negative ground system.
Notice:If the other vehicle’s system is not a 12-volt
system with a negative ground, both vehicles can
be damaged. Only use vehicles with 12-volt systems
with negative grounds to jump start your vehicle.
2. Get the vehicles close enough so the jumper cables
can reach, but be sure the vehicles are not touching
each other. If they are, it could cause a ground
connection you do not want. You would not be able
to start your vehicle, and the bad grounding
could damage the electrical systems.
To avoid the possibility of the vehicles rolling, set
the parking brake firmly on both vehicles involved in
the jump start procedure. Put an automatic
transaxle in PARK (P) or a manual transaxle in
NEUTRAL before setting the parking brake.
5-35
Page 245 of 320
{CAUTION:
Changing a tire can be dangerous. The vehicle
can slip off the jack and roll over or fall on you
or other people. You and they could be badly
injured or even killed. Find a level place to
change your tire. To help prevent the vehicle
from moving:
1. Set the parking brake rmly.
2. Put the shift lever in PARK (P).
3. Turn off the engine and do not restart
while the vehicle is raised.
4. Do not allow passengers to remain in
the vehicle.
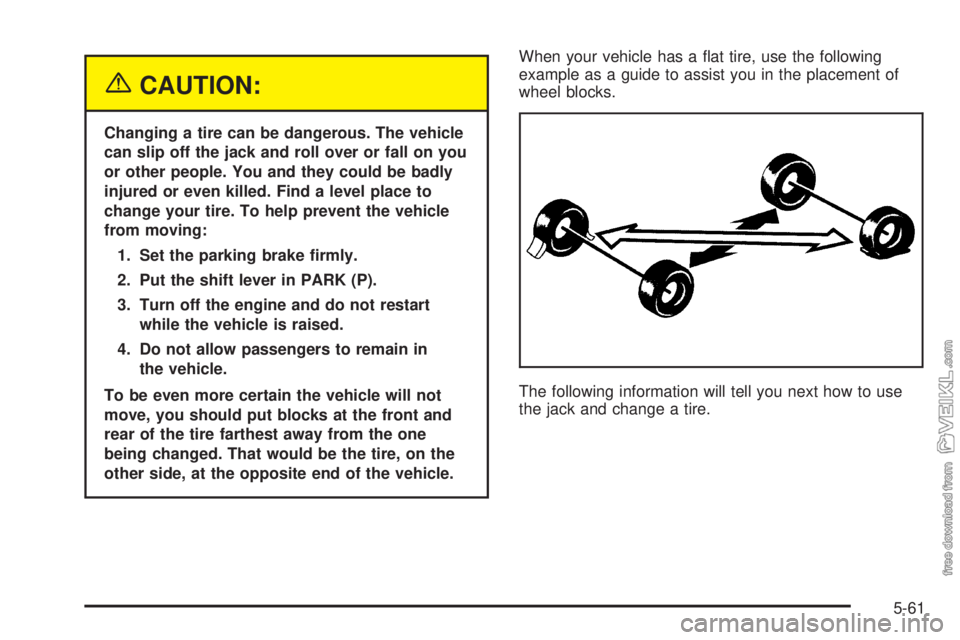
To be even more certain the vehicle will not
move, you should put blocks at the front and
rear of the tire farthest away from the one
being changed. That would be the tire, on the
other side, at the opposite end of the vehicle.When your vehicle has a flat tire, use the following
example as a guide to assist you in the placement of
wheel blocks.
The following information will tell you next how to use
the jack and change a tire.
5-61