radio CHEVROLET CLASSIC 2005 Owners Manual
[x] Cancel search | Manufacturer: CHEVROLET, Model Year: 2005, Model line: CLASSIC, Model: CHEVROLET CLASSIC 2005Pages: 320, PDF Size: 4.86 MB
Page 63 of 320
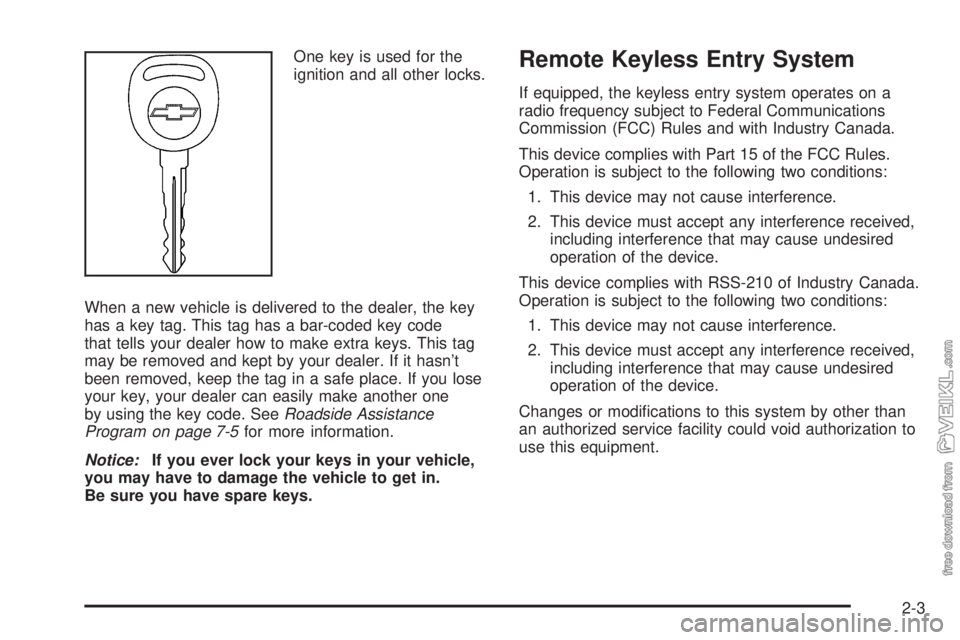
One key is used for the
ignition and all other locks.
When a new vehicle is delivered to the dealer, the key
has a key tag. This tag has a bar-coded key code
that tells your dealer how to make extra keys. This tag
may be removed and kept by your dealer. If it hasn’t
been removed, keep the tag in a safe place. If you lose
your key, your dealer can easily make another one
by using the key code. SeeRoadside Assistance
Program on page 7-5for more information.
Notice:If you ever lock your keys in your vehicle,
you may have to damage the vehicle to get in.
Be sure you have spare keys.Remote Keyless Entry System
If equipped, the keyless entry system operates on a
radio frequency subject to Federal Communications
Commission (FCC) Rules and with Industry Canada.
This device complies with Part 15 of the FCC Rules.
Operation is subject to the following two conditions:
1. This device may not cause interference.
2. This device must accept any interference received,
including interference that may cause undesired
operation of the device.
This device complies with RSS-210 of Industry Canada.
Operation is subject to the following two conditions:
1. This device may not cause interference.
2. This device must accept any interference received,
including interference that may cause undesired
operation of the device.
Changes or modifications to this system by other than
an authorized service facility could void authorization to
use this equipment.
2-3
Page 76 of 320
Ignition Positions
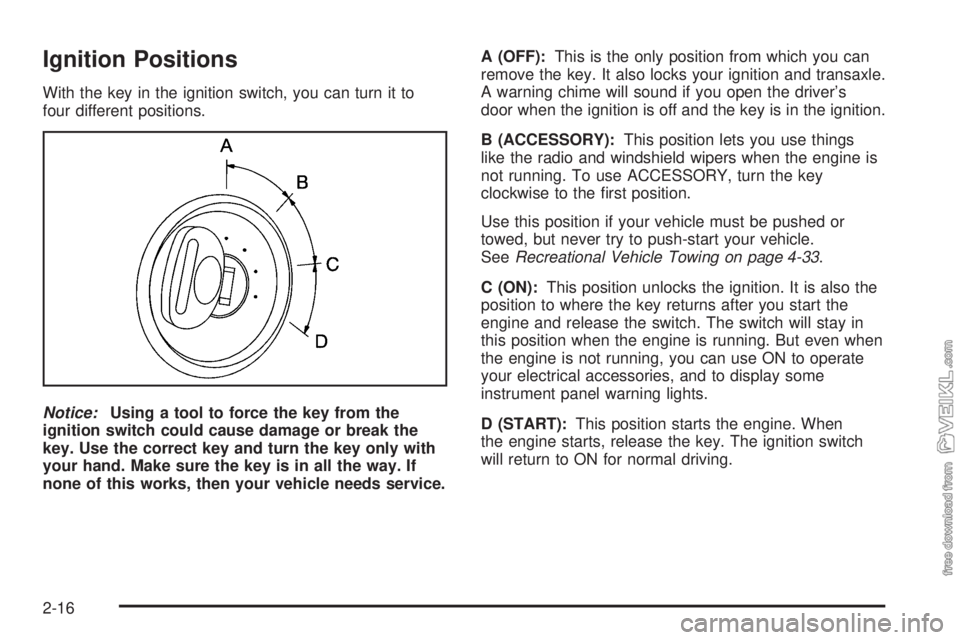
With the key in the ignition switch, you can turn it to
four different positions.
Notice:Using a tool to force the key from the
ignition switch could cause damage or break the
key. Use the correct key and turn the key only with
your hand. Make sure the key is in all the way. If
none of this works, then your vehicle needs service.A (OFF):This is the only position from which you can
remove the key. It also locks your ignition and transaxle.
A warning chime will sound if you open the driver’s
door when the ignition is off and the key is in the ignition.
B (ACCESSORY):This position lets you use things
like the radio and windshield wipers when the engine is
not running. To use ACCESSORY, turn the key
clockwise to the first position.
Use this position if your vehicle must be pushed or
towed, but never try to push-start your vehicle.
SeeRecreational Vehicle Towing on page 4-33.
C (ON):This position unlocks the ignition. It is also the
position to where the key returns after you start the
engine and release the switch. The switch will stay in
this position when the engine is running. But even when
the engine is not running, you can use ON to operate
your electrical accessories, and to display some
instrument panel warning lights.
D (START):This position starts the engine. When
the engine starts, release the key. The ignition switch
will return to ON for normal driving.
2-16
Page 77 of 320
Retained Accessory Power (RAP)
Your vehicle is equipped with a Retained Accessory
Power (RAP) feature which will allow the radio to
continue to work up to 10 minutes after the ignition is
turned to OFF.
Your radio will work when the ignition key is in ON or
ACCESSORY. Once the key is turned from ON to OFF,
the radio will continue to work for up to 10 minutes or
until any door is opened.
Starting the Engine
Move your shift lever to PARK (P) or NEUTRAL (N).
Your engine will not start in any other position — that
is a safety feature. To restart when you are already
moving, use NEUTRAL (N) only.
Notice:Shifting into PARK (P) with the vehicle
moving could damage the transaxle. Shift into
PARK (P) only when your vehicle is stopped.1. With your foot off the accelerator pedal, turn your
ignition key to START. When the engine starts, let
go of the key. The idle speed will go down as
your engine gets warm.
Notice:Holding your key in START for longer
than 15 seconds at a time will cause your battery
to be drained much sooner. And the excessive
heat can damage your starter motor. Wait about
15 seconds between each try to help avoid draining
your battery or damaging your starter.
2. If your engine will not start, or starts but then stops,
it could be flooded with too much gasoline. Try
pushing your accelerator pedal all the way to the
floor and holding it there as you hold the key
in START for not more than 15 seconds at a time.
This clears the extra gasoline from the engine.
Notice:Your engine is designed to work with the
electronics in your vehicle. If you add electrical
parts or accessories, you could change the way the
engine operates. Before adding electrical equipment,
check with your dealer. If you do not, your engine
might not perform properly. Any resulting damage
would not be covered by your vehicle’s warranty.
2-17
Page 90 of 320
Audio System(s).............................................3-36
Setting the Time for Radios without Radio
Data Systems (RDS)..................................3-36
Setting the Time for Radios with Radio
Data Systems (RDS)..................................3-36
Radio with CD..............................................3-37
Radio with Cassette and CD..........................3-41
Theft-Deterrent Feature
(Non-RDS Radios).....................................3-51Theft-Deterrent Feature
(RDS Radios)...........................................3-51
Radio Reception...........................................3-51
Care of the Cassette Tape Player...................3-51
Care of Your CDs.........................................3-53
Care of the CD Player...................................3-53
Fixed Mast Antenna......................................3-53
Chime Level Adjustment................................3-53
Section 3 Instrument Panel
3-2
Page 103 of 320
When the DRL system is on, the taillamps, sidemarker
lamps, parking lamps and instrument panel lights
will not be illuminated unless you have turned the
exterior lamps control to the parking lamp or headlamp
position.
The DRL system will remain off any time your vehicle is
in PARK (P) or the parking brake is engaged and the
vehicle speed is less than 8 mph (13 km/h), for
United States vehicles only.
As with any vehicle, you should turn on the regular
headlamp system when you need it.
Automatic Headlamp System
When it is dark enough outside, your Automatic
Headlamp System will turn on your headlamps at the
normal brightness along with other lamps such as
the taillamps, sidemarker, parking lamps and the
instrument panel lights. The radio lights will also be dim.
Your vehicle is equipped with a light sensor on the
top of the instrument panel under the defroster grill, so
be sure it is not covered which will cause the system
to be on whenever the ignition is on.
The system may also be on when driving through a
parking garage, heavy overcast weather or a tunnel.
This is normal.There is a delay in the transition between the daytime
and nighttime operation of the DRL and the Automatic
Headlamp System so that driving under bridges or bright
overhead street lights does not affect the system. The
DRL and Automatic Headlamp System will only be
affected when the light sensor sees a change in lighting
lasting longer than this delay.
If you start your vehicle in a dark garage, the automatic
headlamp system will come on immediately. Once
you leave the garage, it will take approximately
one minute for the automatic headlamp system to
change to DRL if it is light outside. During that delay,
your instrument panel cluster may not be as bright
as usual. Make sure your instrument panel brightness
control is in the full bright position. See “Instrument
Panel Brightness Control” underInstrument Panel
Brightness on page 3-16.
To idle your vehicle with the system off, set the park
brake while the ignition is off. Then start the vehicle.
The system will stay off until you release the park brake.
As with any vehicle, you should turn on the regular
headlamps when you need them.
3-15
Page 105 of 320
To reactivate the interior lamps, do one of the following:
•Turn on the ignition,
•turn the exterior lamp control off and then on,
•open a door,
•press any remote keyless entry transmitter button
(if equipped),
•press the remote trunk release button, or
•press the power door lock switch.
The battery run-down feature will also be activated
when any door on the vehicle is left open and the
ignition is in OFF.
Accessory Power Outlets
With accessory power outlets you can plug in auxiliary
electrical equipment such as a cellular telephone or
CB radio.
The accessory power outlet is located to the right of
the ashtray.
Notice:Leaving electrical equipment on for
extended periods will drain the battery. Always turn
off electrical equipment when not in use and do
not plug in equipment that exceeds the maximum
amperage rating.Certain electrical accessories may not be compatible
with the accessory power outlet and could result
in blown vehicle or adapter fuses. If you experience a
problem see your dealer for additional information
on accessory power outlets.
Notice:Adding any electrical equipment to your
vehicle may damage it or keep other components
from working as they should. The repairs would not
be covered by your warranty. Do not use equipment
exceeding maximum amperage rating. Check
with your dealer before adding electrical equipment.
When adding electrical equipment, be sure to follow
the proper installation instructions included with
the equipment.
Notice:Improper use of the power outlet can cause
damage not covered by your warranty. Do not
hang any type of accessory or accessory bracket
from the plug because the power outlets are
designed for accessory power plugs only.
3-17
Page 115 of 320
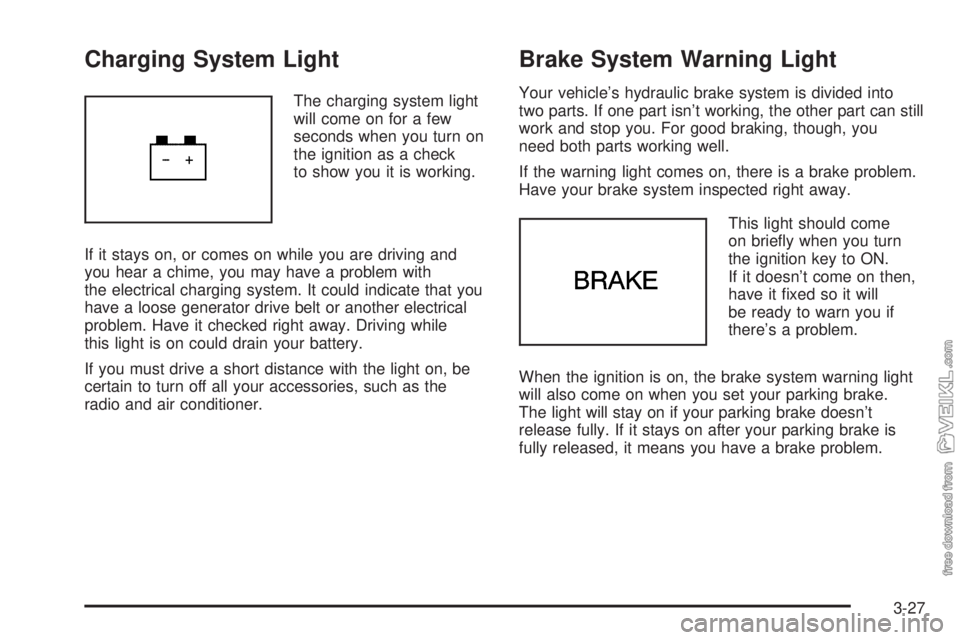
Charging System Light
The charging system light
will come on for a few
seconds when you turn on
the ignition as a check
to show you it is working.
If it stays on, or comes on while you are driving and
you hear a chime, you may have a problem with
the electrical charging system. It could indicate that you
have a loose generator drive belt or another electrical
problem. Have it checked right away. Driving while
this light is on could drain your battery.
If you must drive a short distance with the light on, be
certain to turn off all your accessories, such as the
radio and air conditioner.
Brake System Warning Light
Your vehicle’s hydraulic brake system is divided into
two parts. If one part isn’t working, the other part can still
work and stop you. For good braking, though, you
need both parts working well.
If the warning light comes on, there is a brake problem.
Have your brake system inspected right away.
This light should come
on briefly when you turn
the ignition key to ON.
If it doesn’t come on then,
have it fixed so it will
be ready to warn you if
there’s a problem.
When the ignition is on, the brake system warning light
will also come on when you set your parking brake.
The light will stay on if your parking brake doesn’t
release fully. If it stays on after your parking brake is
fully released, it means you have a brake problem.
3-27
Page 124 of 320
Audio System(s)
Notice:Before adding any sound equipment to
your vehicle, such as an audio system, CD player,
CB radio, mobile telephone, or two-way radio, make
sure that it can be added by checking with your
dealer. Also, check federal rules covering mobile
radio and telephone units. If sound equipment can
be added, it is very important to do it properly.
Added sound equipment may interfere with
the operation of your vehicle’s engine, radio, or
other systems, and even damage them. Your
vehicle’s systems may interfere with the operation
of sound equipment that has been added.
Figure out which audio system is in your vehicle, find
out what your audio system can do, and how to operate
all of its controls.
Your vehicle has a feature called Retained Accessory
Power (RAP). With RAP, the audio system can be
played even after the ignition is turned off. SeeRetained
Accessory Power (RAP) on page 2-17for more
information.
Setting the Time for Radios without
Radio Data Systems (RDS)
Press and hold the HR or MIN arrow for two seconds.
Then press HR until the correct hour appears on
the display. Press and hold MIN until the correct minute
appears on the display. The time can be set with the
ignition on or off.
Setting the Time for Radios with
Radio Data Systems (RDS)
Press and hold the HR or MN buttons for two seconds.
The clock symbol will appear on the display. Press
and hold HR until the correct hour appears on the
display. AM or PM will appear for morning or evening
hours. Press and hold MN until the correct minute
appears on the display. The time can be set with the
ignition on or off.
To synchronize the time with an FM station broadcasting
Radio Data System (RDS) information, press and hold
HR and MN at the same time for two seconds until
UPDATED and the clock symbol appear on the display.
If the time is not available from the station, NO UPDAT
will appear on the display.
RDS time is broadcast once a minute. After tuning to an
RDS broadcast station, it may take a few minutes for
the time to update.
3-36
Page 125 of 320
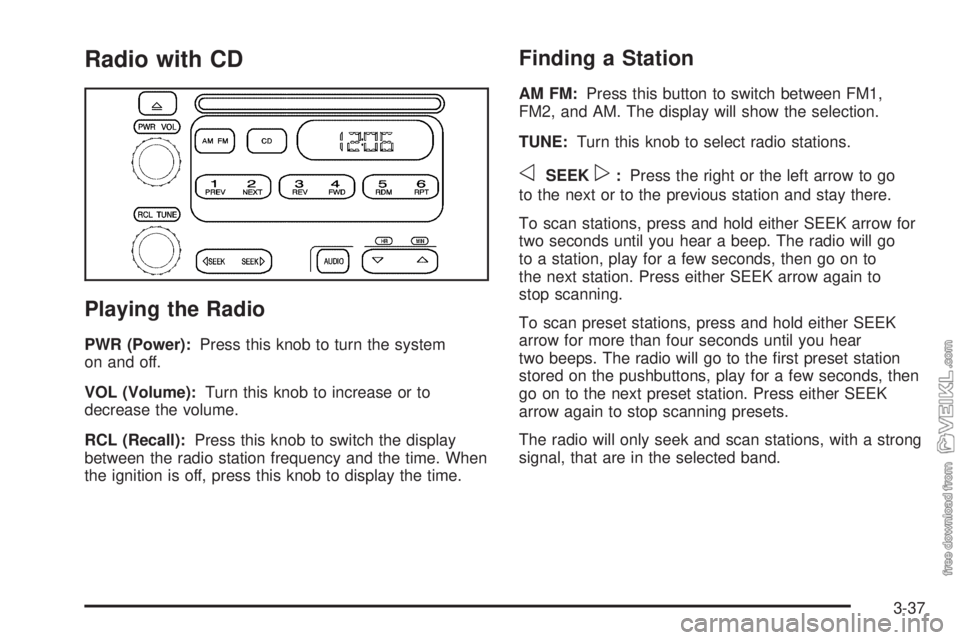
Radio with CD
Playing the Radio
PWR (Power):Press this knob to turn the system
on and off.
VOL (Volume):Turn this knob to increase or to
decrease the volume.
RCL (Recall):Press this knob to switch the display
between the radio station frequency and the time. When
the ignition is off, press this knob to display the time.
Finding a Station
AM FM:Press this button to switch between FM1,
FM2, and AM. The display will show the selection.
TUNE:Turn this knob to select radio stations.
oSEEKp:Press the right or the left arrow to go
to the next or to the previous station and stay there.
To scan stations, press and hold either SEEK arrow for
two seconds until you hear a beep. The radio will go
to a station, play for a few seconds, then go on to
the next station. Press either SEEK arrow again to
stop scanning.
To scan preset stations, press and hold either SEEK
arrow for more than four seconds until you hear
two beeps. The radio will go to the first preset station
stored on the pushbuttons, play for a few seconds, then
go on to the next preset station. Press either SEEK
arrow again to stop scanning presets.
The radio will only seek and scan stations, with a strong
signal, that are in the selected band.
3-37
Page 126 of 320
Setting Preset Stations
Up to 18 stations (six FM1, six FM2, and six AM), can
be programmed on the six numbered pushbuttons,
by performing the following steps:
1. Turn the radio on.
2. Press AM FM to select FM1, FM2, or AM.
3. Tune in the desired station.
4. Press and hold one of the six numbered
pushbuttons until you hear a beep. Whenever that
numbered pushbutton is pressed, the station
that was set will return.
5. Repeat the steps for each pushbutton.
Setting the Tone (Bass/Treble)
AUDIO:To adjust the bass or the treble, press and
release the AUDIO button until BAS or TRE appears on
the display. Then press and hold the up or the down
arrow to increase or to decrease. If a station is weak or
noisy, decrease the treble.
To adjust bass or treble to the middle position, select
BAS or TRE. Then press and hold the AUDIO button for
more than two seconds until you hear a beep. B and
a zero or T and a zero will appear on the display.To adjust both tone controls and both speaker controls
to the middle position, first end out of audio mode
by pressing another button, causing the radio to perform
that function, or by waiting five seconds for the display
to return to the time of day. Then press and hold
the AUDIO button for more than two seconds until you
hear a beep. CEN will appear on the display.
Adjusting the Speakers (Balance/Fade)
AUDIO:To adjust the balance between the right
and the left speakers, press and release the AUDIO
button until BAL appears on the display. Then press and
hold the up or the down arrow to move the sound
toward the right or the left speakers.
To adjust the fade between the front and the rear
speakers, press and release the AUDIO button until
FAD appears on the display. Then press and hold the up
or the down arrow to move the sound toward the front
or the rear speakers.
To adjust balance or fade to the middle position, select
BAL or FAD. Then press and hold AUDIO for more
than two seconds until you hear a beep. L and a zero
or F and a zero will appear on the display.
3-38