turn signal CHEVROLET COBALT 2006 1.G User Guide
[x] Cancel search | Manufacturer: CHEVROLET, Model Year: 2006, Model line: COBALT, Model: CHEVROLET COBALT 2006 1.GPages: 390, PDF Size: 2.34 MB
Page 165 of 390
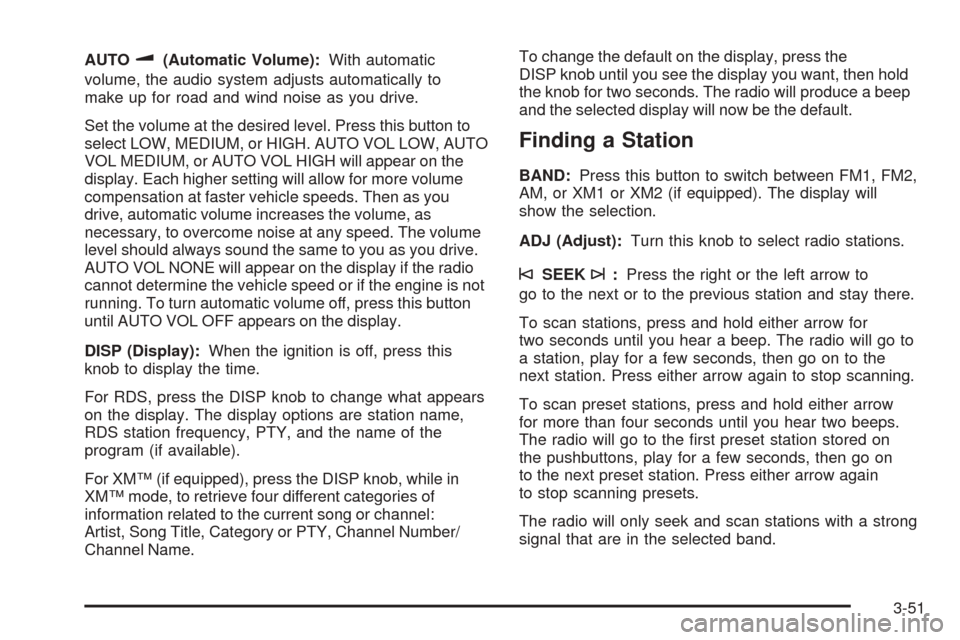
AUTOu(Automatic Volume):With automatic
volume, the audio system adjusts automatically to
make up for road and wind noise as you drive.
Set the volume at the desired level. Press this button to
select LOW, MEDIUM, or HIGH. AUTO VOL LOW, AUTO
VOL MEDIUM, or AUTO VOL HIGH will appear on the
display. Each higher setting will allow for more volume
compensation at faster vehicle speeds. Then as you
drive, automatic volume increases the volume, as
necessary, to overcome noise at any speed. The volume
level should always sound the same to you as you drive.
AUTO VOL NONE will appear on the display if the radio
cannot determine the vehicle speed or if the engine is not
running. To turn automatic volume off, press this button
until AUTO VOL OFF appears on the display.
DISP (Display):When the ignition is off, press this
knob to display the time.
For RDS, press the DISP knob to change what appears
on the display. The display options are station name,
RDS station frequency, PTY, and the name of the
program (if available).
For XM™ (if equipped), press the DISP knob, while in
XM™ mode, to retrieve four different categories of
information related to the current song or channel:
Artist, Song Title, Category or PTY, Channel Number/
Channel Name.To change the default on the display, press the
DISP knob until you see the display you want, then hold
the knob for two seconds. The radio will produce a beep
and the selected display will now be the default.
Finding a Station
BAND:Press this button to switch between FM1, FM2,
AM, or XM1 or XM2 (if equipped). The display will
show the selection.
ADJ (Adjust):Turn this knob to select radio stations.
©SEEK¨:Press the right or the left arrow to
go to the next or to the previous station and stay there.
To scan stations, press and hold either arrow for
two seconds until you hear a beep. The radio will go to
a station, play for a few seconds, then go on to the
next station. Press either arrow again to stop scanning.
To scan preset stations, press and hold either arrow
for more than four seconds until you hear two beeps.
The radio will go to the �rst preset station stored on
the pushbuttons, play for a few seconds, then go on
to the next preset station. Press either arrow again
to stop scanning presets.
The radio will only seek and scan stations with a strong
signal that are in the selected band.
3-51
Page 173 of 390
The radio will only seek and scan stations with a strong
signal that are in the selected band.
Setting Preset Stations
Up to 30 stations (six FM1, six FM2, and six AM,
six XM1 and six XM2 (if equipped)), can be programmed
on the six numbered pushbuttons, by performing the
following steps:
1. Turn the radio on.
2. Press BAND to select FM1, FM2, AM, or XM1
or XM2.
3. Tune in the desired station.
4. Press AUTO EQ to select the equalization.
5. Press and hold one of the six numbered
pushbuttons until you hear a beep. Whenever
that numbered pushbutton is pressed, the station
that was set will return and the equalization that was
selected will be stored for that pushbutton.
6. Repeat the steps for each pushbutton.
Setting the Tone (Bass/Treble)
EQ (Tone):To adjust the bass or the treble, press and
release the EQ button until BASS or TREBLE appears
on the display. Turn the ADJ knob to increase or to
decrease. The display will show the bass or treble level.
If a station is weak or noisy, decrease the treble.
To adjust bass or treble to the middle position, select
BASS or TREBLE. Then press and hold the EQ button
for more than two seconds. You will hear a beep
and the level will be adjusted to the middle position.
To adjust the tone controls to the middle position,
�rst end out of tone by pressing another button,
causing the radio to perform that function, or by waiting
�ve seconds for the display to return to the default
display. Then press and hold the EQ button for more than
two seconds until you hear a beep. ALL CENTERED will
appear on the display.
AUTO EQ (Automatic Equalization):Press this button
to select customized equalization settings designed
for country, jazz, talk, pop, rock, and classical.
3-59
Page 176 of 390
XM™ Radio Messages
Radio Display
MessageCondition Action Required
XL (Explicit Language
Channels)XL on the radio display,
after the channel name,
indicates content with
explicit language.These channels, or any others, can be blocked at a
customer’s request, by calling 1-800-852-XMXM (9696).
XM Updating Updating
encryption codeThe encryption code in the receiver is being updated, and
no action is required. This process should take no longer
than 30 seconds.
No XM Signal Loss of signal The system is functioning correctly, but the vehicle is in a
location that is blocking the XM™ signal. When you move
into an open area, the signal should return.
Loading XM Acquiring channel audio
(after 4 second delay)The audio system is acquiring and processing audio and
text data. No action is needed. This message should
disappear shortly.
Channel Off Air Channel not in service This channel is not currently in service. Tune to another
channel.
Channel Unavail Channel no longer
availableThis previously assigned channel is no longer assigned.
Tune to another station. If this station was one of the
presets, choose another station for that preset button.
No Artist Info Artist Name/Feature not
availableNo artist information is available at this time on this
channel. The system is working properly.
No Title Info Song/Program Title not
availableNo song title information is available at this time on this
channel. The system is working properly.
3-62
Page 185 of 390
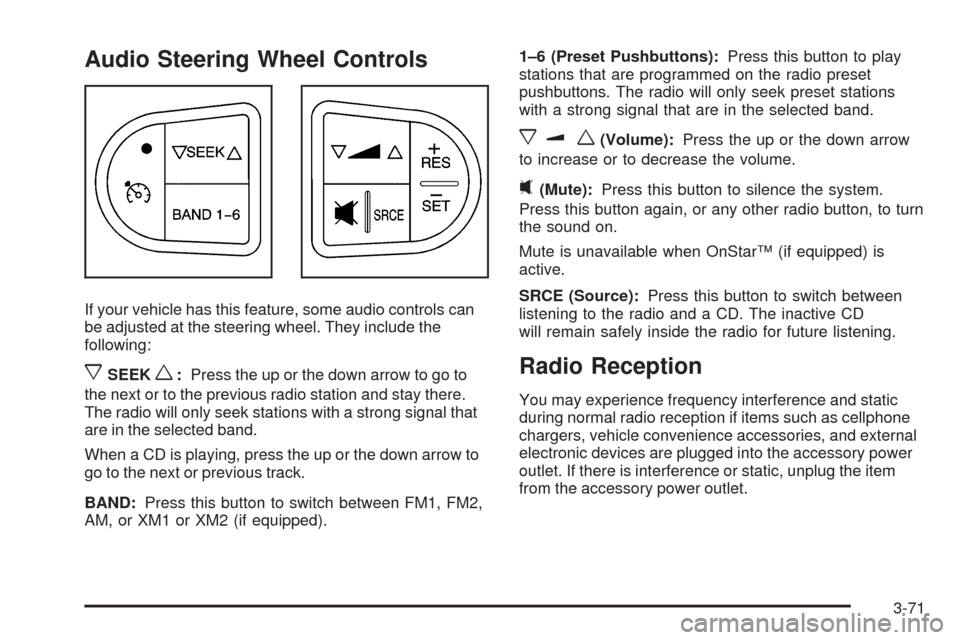
Audio Steering Wheel Controls
If your vehicle has this feature, some audio controls can
be adjusted at the steering wheel. They include the
following:
xSEEKw:Press the up or the down arrow to go to
the next or to the previous radio station and stay there.
The radio will only seek stations with a strong signal that
are in the selected band.
When a CD is playing, press the up or the down arrow to
go to the next or previous track.
BAND:Press this button to switch between FM1, FM2,
AM, or XM1 or XM2 (if equipped).1–6 (Preset Pushbuttons):Press this button to play
stations that are programmed on the radio preset
pushbuttons. The radio will only seek preset stations
with a strong signal that are in the selected band.
xuw(Volume):Press the up or the down arrow
to increase or to decrease the volume.
0(Mute):Press this button to silence the system.
Press this button again, or any other radio button, to turn
the sound on.
Mute is unavailable when OnStar™ (if equipped) is
active.
SRCE (Source):Press this button to switch between
listening to the radio and a CD. The inactive CD
will remain safely inside the radio for future listening.
Radio Reception
You may experience frequency interference and static
during normal radio reception if items such as cellphone
chargers, vehicle convenience accessories, and external
electronic devices are plugged into the accessory power
outlet. If there is interference or static, unplug the item
from the accessory power outlet.
3-71
Page 203 of 390
Check your mirrors, glance over your shoulder, and
start your left lane change signal before moving out
of the right lane to pass. When you are far enough
ahead of the passed vehicle to see its front in your
inside mirror, activate your right lane change signal
and move back into the right lane. Remember that
your passenger side outside mirror is convex. The
vehicle you just passed may seem to be farther away
from you than it really is.
Try not to pass more than one vehicle at a time on
two-lane roads. Reconsider before passing the next
vehicle.
Do not overtake a slowly moving vehicle too rapidly.
Even though the brake lamps are not �ashing, it may
be slowing down or starting to turn.
If you are being passed, make it easy for the
following driver to get ahead of you. Perhaps you
can ease a little to the right.
Loss of Control
Let us review what driving experts say about what
happens when the three control systems — brakes,
steering, and acceleration — do not have enough friction
where the tires meet the road to do what the driver
has asked.
In any emergency, do not give up. Keep trying to steer
and constantly seek an escape route or area of less
danger.
Skidding
In a skid, a driver can lose control of the vehicle.
Defensive drivers avoid most skids by taking reasonable
care suited to existing conditions, and by not overdriving
those conditions. But skids are always possible.
The three types of skids correspond to your vehicle’s
three control systems. In the braking skid, your wheels
are not rolling. In the steering or cornering skid, too much
speed or steering in a curve causes tires to slip and lose
cornering force. And in the acceleration skid, too much
throttle causes the driving wheels to spin.
4-15
Page 209 of 390
Here are ways to increase your safety in city driving:
Know the best way to get to where you are
going. Get a city map and plan your trip into
an unknown part of the city just as you would for
a cross-country trip.
Try to use the freeways that rim and crisscross
most large cities. You will save time and energy.
SeeFreeway Driving on page 4-21.
Treat a green light as a warning signal. A traffic
light is there because the corner is busy enough
to need it. When a light turns green, and just before
you start to move, check both ways for vehicles
that have not cleared the intersection or may
be running the red light.
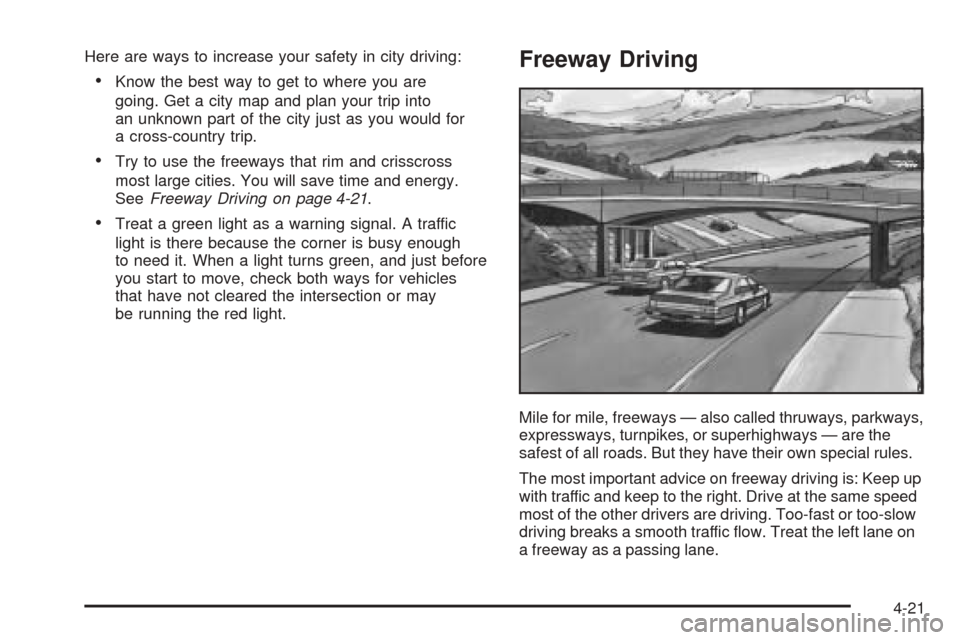
Freeway Driving
Mile for mile, freeways — also called thruways, parkways,
expressways, turnpikes, or superhighways — are the
safest of all roads. But they have their own special rules.
The most important advice on freeway driving is: Keep up
with traffic and keep to the right. Drive at the same speed
most of the other drivers are driving. Too-fast or too-slow
driving breaks a smooth traffic �ow. Treat the left lane on
a freeway as a passing lane.
4-21
Page 210 of 390

At the entrance, there is usually a ramp that leads to the
freeway. If you have a clear view of the freeway as you
drive along the entrance ramp, you should begin to check
traffic. Try to determine where you expect to blend with
the �ow. Try to merge into the gap at close to the
prevailing speed. Switch on your turn signal, check your
mirrors, and glance over your shoulder as often as
necessary. Try to blend smoothly with the traffic �ow.
Once you are on the freeway, adjust your speed to the
posted limit or to the prevailing rate if it is slower.
Stay in the right lane unless you want to pass.
Before changing lanes, check your mirrors. Then use
your turn signal.
Just before you leave the lane, glance quickly over your
shoulder to make sure there is not another vehicle in
your blind spot.
Once you are moving on the freeway, make certain you
allow a reasonable following distance.
Expect to move slightly slower at night.
When you want to leave the freeway, move to the
proper lane well in advance. If you miss your exit, do
not, under any circumstances, stop and back up. Drive
on to the next exit.The exit ramp can be curved, sometimes quite sharply.
The exit speed is usually posted. Reduce your speed
according to your speedometer, not to your sense
of motion. After driving for any distance at higher
speeds, you may tend to think you are going slower
than you actually are.
Before Leaving on a Long Trip
Make sure you are ready. Try to be well rested. If you
must start when you are not fresh — such as after a day’s
work — do not plan to make too many miles that �rst part
of the journey. Wear comfortable clothing and shoes you
can easily drive in.
Is your vehicle ready for a long trip? If you keep it
serviced and maintained, it is ready to go. If it needs
service, have it done before starting out. Of course, you
will �nd experienced and able service experts in GM
dealerships all across North America. They will be ready
and willing to help if you need it.
4-22
Page 232 of 390

Making Turns
Notice:Making very sharp turns while trailering
could cause the trailer to come in contact with the
vehicle. Your vehicle could be damaged. Avoid
making very sharp turns while trailering.
When you are turning with a trailer, make wider turns
than normal. Do this so your trailer will not strike
soft shoulders, curbs, road signs, trees or other objects.
Avoid jerky or sudden maneuvers. Signal well in
advance.
Turn Signals When Towing a Trailer
When you tow a trailer, your vehicle may need a different
turn signal �asher and/or extra wiring. Check with your
dealer. The arrows on your instrument panel will �ash
whenever you signal a turn or lane change. Properly
hooked up, the trailer lamps will also �ash, telling other
drivers you are about to turn, change lanes or stop.
When towing a trailer, the arrows on your instrument
panel will �ash for turns even if the bulbs on the trailer
are burned out. Thus, you may think drivers behind
you are seeing your signal when they are not. It
is important to check occasionally to be sure the trailer
bulbs are still working.
Driving on Grades
Notice:Do not tow on steep continuous grades
exceeding 6 miles (9.6 km). Extended, higher
than normal engine and transaxle temperatures may
result and damage your vehicle. Frequent stops
are very important to allow the engine and transaxle
to cool.
Reduce speed and shift to a lower gearbeforeyou start
down a long or steep downgrade. If you do not shift down,
you might have to use your brakes so much that they
would get hot and no longer work well.
Pay attention to the engine coolant gage. If the indicator
is in the red area, turn off the air conditioning to
reduce engine load. SeeEngine Overheating on
page 5-29.
4-44
Page 235 of 390
Service............................................................5-3
Accessories and Modi�cations..........................5-3
California Proposition 65 Warning.....................5-3
Doing Your Own Service Work.........................5-4
Adding Equipment to the Outside of
Your Vehicle..............................................5-5
Fuel................................................................5-5
Gasoline Octane............................................5-5
Gasoline Speci�cations....................................5-6
California Fuel...............................................5-6
Additives.......................................................5-6
Fuels in Foreign Countries...............................5-7
Filling the Tank..............................................5-8
Filling a Portable Fuel Container.....................5-10
Checking Things Under the Hood....................5-10
Hood Release..............................................5-11
Engine Compartment Overview.......................5-12
Engine Oil...................................................5-15
Engine Oil Life System..................................5-20
Engine Air Cleaner/Filter................................5-21
Automatic Transaxle Fluid..............................5-23
Manual Transaxle Fluid..................................5-23
Hydraulic Clutch...........................................5-23
Engine Coolant.............................................5-24
Coolant Surge Tank Pressure Cap..................5-29
Engine Overheating.......................................5-29Cooling System............................................5-31
Windshield Washer Fluid................................5-37
Brakes........................................................5-38
Battery........................................................5-41
Jump Starting...............................................5-42
Headlamp Aiming...........................................5-46
Bulb Replacement..........................................5-49
Halogen Bulbs..............................................5-49
Headlamps, Front Turn Signal, Sidemarker,
and Parking Lamps....................................5-50
Center High-Mounted Stoplamp (CHMSL).........5-51
Taillamps and Turn Signal Lamps (Coupe).......5-52
Taillamps, Turn Signal, Stoplamps and
Back-up Lamps (Sedan).............................5-53
Back-Up Lamps (Coupe)................................5-54
Replacement Bulbs.......................................5-55
Windshield Wiper Blade Replacement..............5-55
Tires..............................................................5-56
Tire Sidewall Labeling...................................5-58
Tire Terminology and De�nitions.....................5-60
In�ation - Tire Pressure.................................5-63
Tire Inspection and Rotation...........................5-65
When It Is Time for New Tires.......................5-66
Buying New Tires.........................................5-66
Different Size Tires and Wheels......................5-68
Section 5 Service and Appearance Care
5-1
Page 284 of 390
Headlamps, Front Turn Signal,
Sidemarker, and Parking Lamps
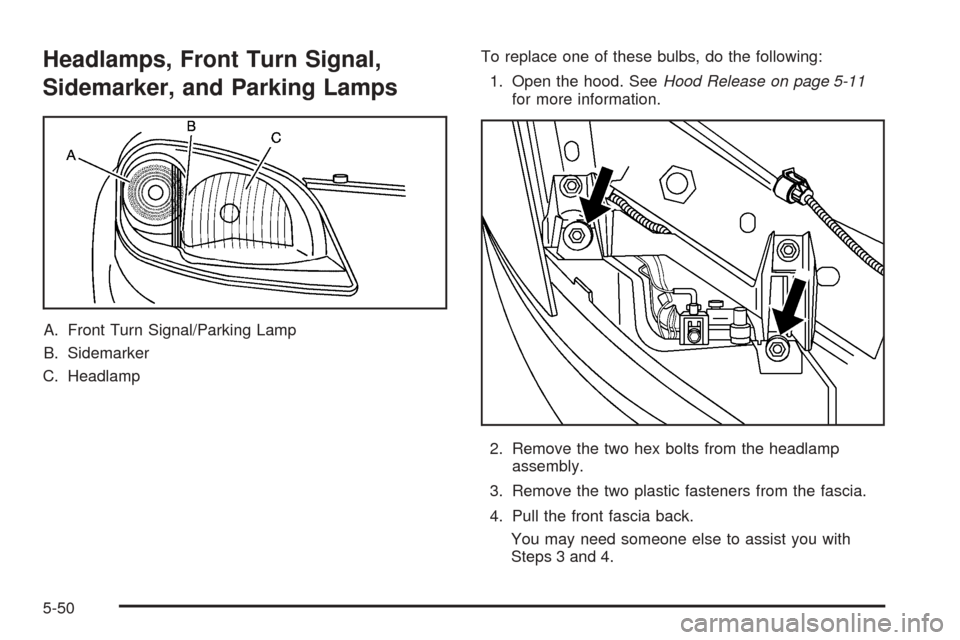
A. Front Turn Signal/Parking Lamp
B. Sidemarker
C. HeadlampTo replace one of these bulbs, do the following:
1. Open the hood. SeeHood Release on page 5-11
for more information.
2. Remove the two hex bolts from the headlamp
assembly.
3. Remove the two plastic fasteners from the fascia.
4. Pull the front fascia back.
You may need someone else to assist you with
Steps 3 and 4.
5-50