change wheel CHEVROLET COBALT 2006 1.G Owners Manual
[x] Cancel search | Manufacturer: CHEVROLET, Model Year: 2006, Model line: COBALT, Model: CHEVROLET COBALT 2006 1.GPages: 390, PDF Size: 2.34 MB
Page 115 of 390
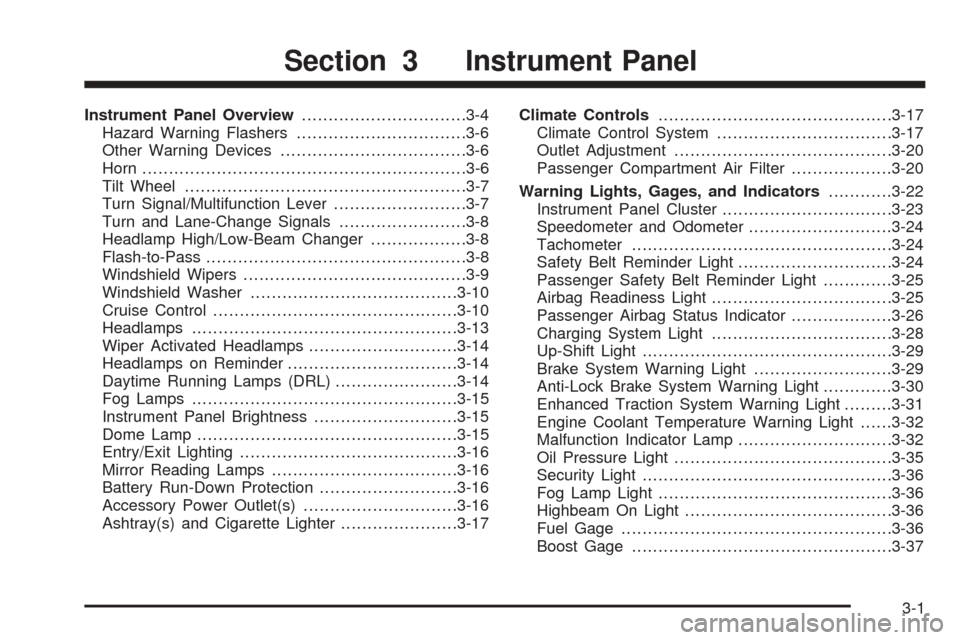
Instrument Panel Overview...............................3-4
Hazard Warning Flashers................................3-6
Other Warning Devices...................................3-6
Horn.............................................................3-6
Tilt Wheel.....................................................3-7
Turn Signal/Multifunction Lever.........................3-7
Turn and Lane-Change Signals........................3-8
Headlamp High/Low-Beam Changer..................3-8
Flash-to-Pass.................................................3-8
Windshield Wipers..........................................3-9
Windshield Washer.......................................3-10
Cruise Control..............................................3-10
Headlamps..................................................3-13
Wiper Activated Headlamps............................3-14
Headlamps on Reminder................................3-14
Daytime Running Lamps (DRL).......................3-14
Fog Lamps..................................................3-15
Instrument Panel Brightness...........................3-15
Dome Lamp.................................................3-15
Entry/Exit Lighting.........................................3-16
Mirror Reading Lamps...................................3-16
Battery Run-Down Protection..........................3-16
Accessory Power Outlet(s).............................3-16
Ashtray(s) and Cigarette Lighter......................3-17Climate Controls............................................3-17
Climate Control System.................................3-17
Outlet Adjustment.........................................3-20
Passenger Compartment Air Filter...................3-20
Warning Lights, Gages, and Indicators............3-22
Instrument Panel Cluster................................3-23
Speedometer and Odometer...........................3-24
Tachometer.................................................3-24
Safety Belt Reminder Light.............................3-24
Passenger Safety Belt Reminder Light.............3-25
Airbag Readiness Light..................................3-25
Passenger Airbag Status Indicator...................3-26
Charging System Light..................................3-28
Up-Shift Light...............................................3-29
Brake System Warning Light..........................3-29
Anti-Lock Brake System Warning Light.............3-30
Enhanced Traction System Warning Light.........3-31
Engine Coolant Temperature Warning Light......3-32
Malfunction Indicator Lamp.............................3-32
Oil Pressure Light.........................................3-35
Security Light...............................................3-36
Fog Lamp Light............................................3-36
Highbeam On Light.......................................3-36
Fuel Gage...................................................3-36
Boost Gage.................................................3-37
Section 3 Instrument Panel
3-1
Page 121 of 390
Tilt Wheel
A tilt wheel allows you to adjust the steering wheel
before you drive. You can raise the steering wheel to
the highest level to give your legs more room when you
enter and exit the vehicle.
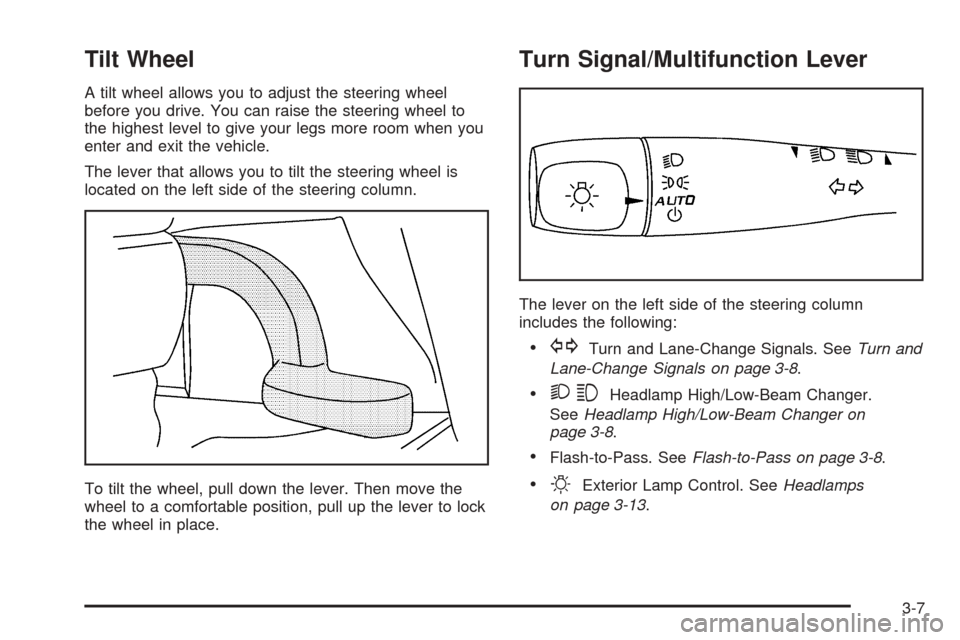
The lever that allows you to tilt the steering wheel is
located on the left side of the steering column.
To tilt the wheel, pull down the lever. Then move the
wheel to a comfortable position, pull up the lever to lock
the wheel in place.
Turn Signal/Multifunction Lever
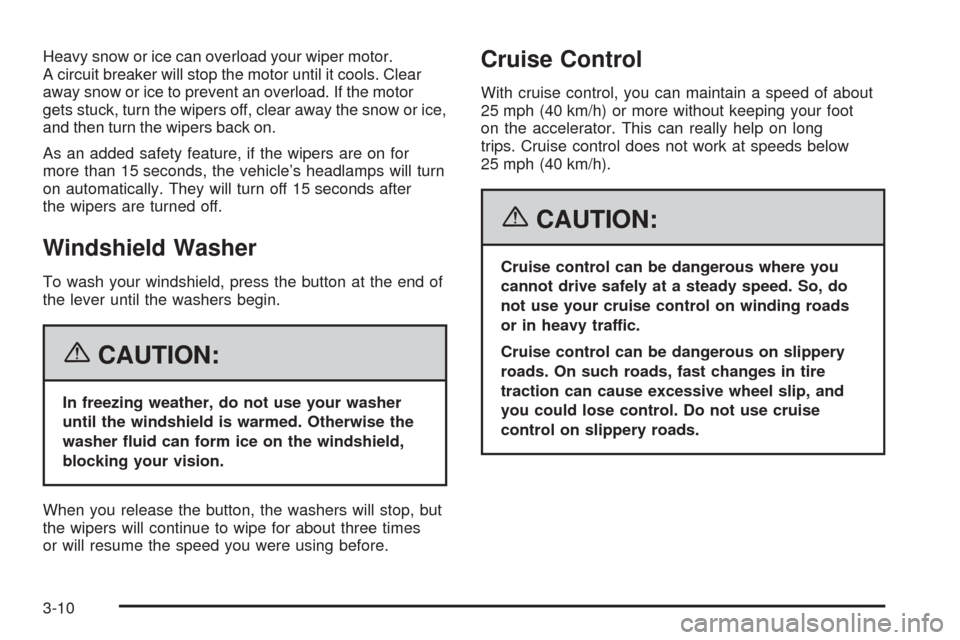
The lever on the left side of the steering column
includes the following:
GTurn and Lane-Change Signals. SeeTurn and
Lane-Change Signals on page 3-8.
23Headlamp High/Low-Beam Changer.
SeeHeadlamp High/Low-Beam Changer on
page 3-8.
Flash-to-Pass. SeeFlash-to-Pass on page 3-8.
OExterior Lamp Control. SeeHeadlamps
on page 3-13.
3-7
Page 124 of 390
Heavy snow or ice can overload your wiper motor.
A circuit breaker will stop the motor until it cools. Clear
away snow or ice to prevent an overload. If the motor
gets stuck, turn the wipers off, clear away the snow or ice,
and then turn the wipers back on.
As an added safety feature, if the wipers are on for
more than 15 seconds, the vehicle’s headlamps will turn
on automatically. They will turn off 15 seconds after
the wipers are turned off.
Windshield Washer
To wash your windshield, press the button at the end of
the lever until the washers begin.
{CAUTION:
In freezing weather, do not use your washer
until the windshield is warmed. Otherwise the
washer �uid can form ice on the windshield,
blocking your vision.
When you release the button, the washers will stop, but
the wipers will continue to wipe for about three times
or will resume the speed you were using before.
Cruise Control
With cruise control, you can maintain a speed of about
25 mph (40 km/h) or more without keeping your foot
on the accelerator. This can really help on long
trips. Cruise control does not work at speeds below
25 mph (40 km/h).
{CAUTION:
Cruise control can be dangerous where you
cannot drive safely at a steady speed. So, do
not use your cruise control on winding roads
or in heavy traffic.
Cruise control can be dangerous on slippery
roads. On such roads, fast changes in tire
traction can cause excessive wheel slip, and
you could lose control. Do not use cruise
control on slippery roads.
3-10
Page 134 of 390
Rear Window Defogger
The rear window defogger uses a warming grid to
remove fog from the rear window.
The rear window defogger will only work when the
ignition is in RUN.
<(Rear):Press the button to turn the rear window
defogger on or off. Be sure to clear as much snow from
the rear window as possible. An indicator light above
the button will come on to let you know that the
rear window defogger is activated.
The rear window defogger will turn off approximately
15 minutes after the button is pressed. If turned
on again, the defogger will only run for approximately
seven minutes before turning off. If the vehicle is moving
faster than 50 mph (80 kph), the rear defogger will stay
on. The defogger can also be turned off by pressing the
button again or by turning off the engine.
Notice:Do not use anything sharp on the inside of
the rear window. If you do, you could cut or damage
the warming grid, and the repairs would not be
covered by your warranty. Do not attach a temporary
vehicle license, tape, a decal or anything similar to
the defogger grid.
Outlet Adjustment
Use the thumbwheels located next to and below the air
outlets to change the direction of the air�ow and to
open and close the outlets.
Operation Tips
Clear away any ice, snow or leaves from the air
inlets at the base of the windshield that may
block the �ow of air into your vehicle.
Use of non-GM approved hood de�ectors may
adversely affect the performance of the system.
Keep the path under the front seats clear of objects
to help circulate the air inside of your vehicle more
effectively.
Passenger Compartment Air Filter
Passenger compartment air, both outside air and
recirculated air, is routed through a passenger
compartment �lter. The �lter removes certain particles
from the air, including pollen and dust particles.
Reductions in air�ow, which may occur more quickly
in dusty areas, indicate that the �lter needs to be
replaced early.
3-20
Page 152 of 390
Driver Information Center (DIC)
The Driver Information Center (DIC) display gives you the
status of many of your vehicle’s systems. The DIC is also
used to display driver personalization menu modes and
warning/status messages. All messages will appear in
the DIC display, located at the bottom of the tachometer
on the instrument panel cluster.
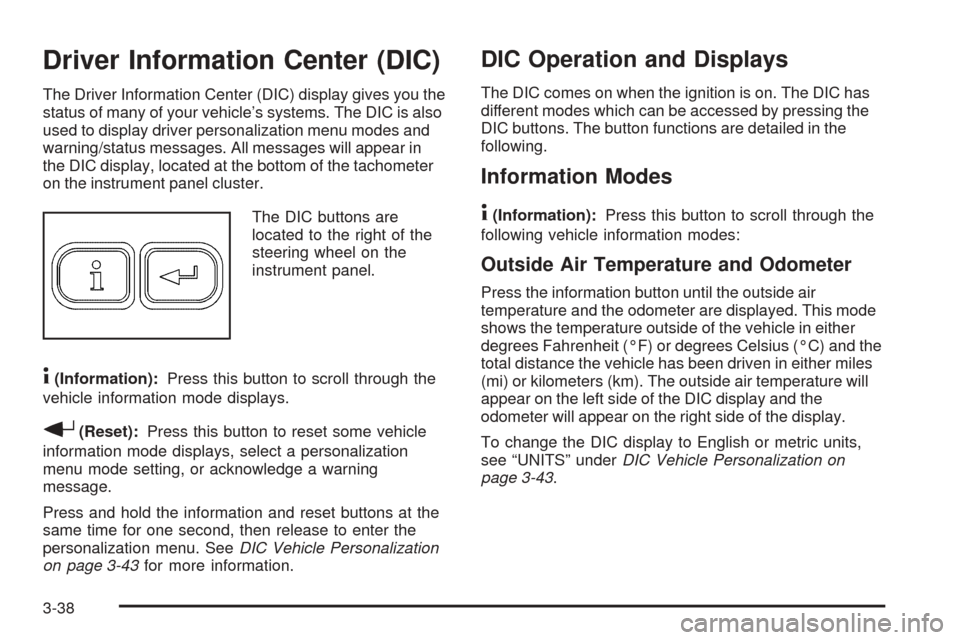
The DIC buttons are
located to the right of the
steering wheel on the
instrument panel.
4(Information):Press this button to scroll through the
vehicle information mode displays.
r(Reset):Press this button to reset some vehicle
information mode displays, select a personalization
menu mode setting, or acknowledge a warning
message.
Press and hold the information and reset buttons at the
same time for one second, then release to enter the
personalization menu. SeeDIC Vehicle Personalization
on page 3-43for more information.
DIC Operation and Displays
The DIC comes on when the ignition is on. The DIC has
different modes which can be accessed by pressing the
DIC buttons. The button functions are detailed in the
following.
Information Modes
4
(Information):Press this button to scroll through the
following vehicle information modes:
Outside Air Temperature and Odometer
Press the information button until the outside air
temperature and the odometer are displayed. This mode
shows the temperature outside of the vehicle in either
degrees Fahrenheit (°F) or degrees Celsius (°C) and the
total distance the vehicle has been driven in either miles
(mi) or kilometers (km). The outside air temperature will
appear on the left side of the DIC display and the
odometer will appear on the right side of the display.
To change the DIC display to English or metric units,
see “UNITS” underDIC Vehicle Personalization on
page 3-43.
3-38
Page 196 of 390
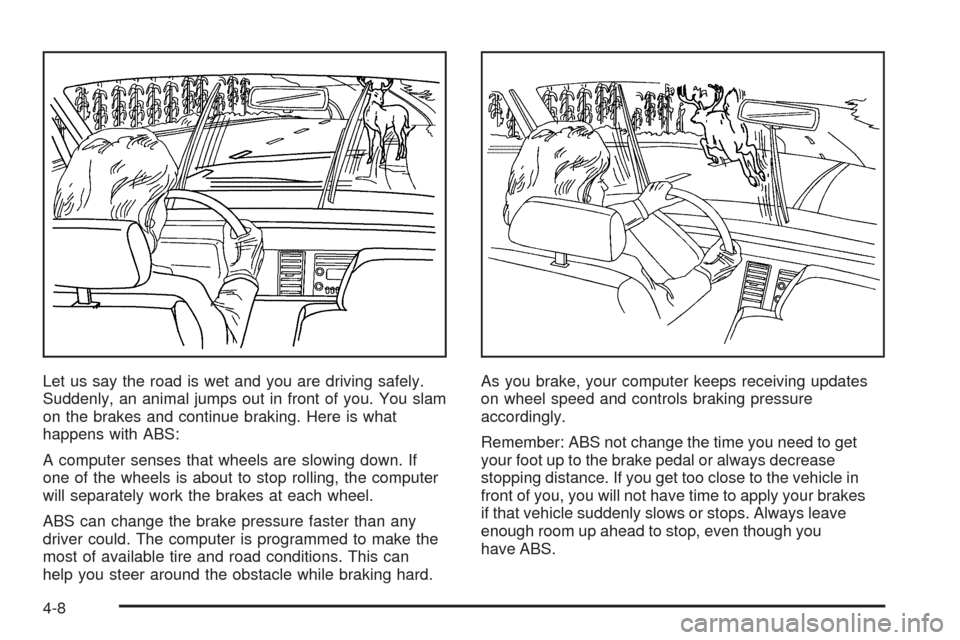
Let us say the road is wet and you are driving safely.
Suddenly, an animal jumps out in front of you. You slam
on the brakes and continue braking. Here is what
happens with ABS:
A computer senses that wheels are slowing down. If
one of the wheels is about to stop rolling, the computer
will separately work the brakes at each wheel.
ABS can change the brake pressure faster than any
driver could. The computer is programmed to make the
most of available tire and road conditions. This can
help you steer around the obstacle while braking hard.As you brake, your computer keeps receiving updates
on wheel speed and controls braking pressure
accordingly.
Remember: ABS not change the time you need to get
your foot up to the brake pedal or always decrease
stopping distance. If you get too close to the vehicle in
front of you, you will not have time to apply your brakes
if that vehicle suddenly slows or stops. Always leave
enough room up ahead to stop, even though you
have ABS.
4-8
Page 199 of 390
Limited-Slip Differential
Your vehicle may have this feature. A limited-slip
transaxle can give you additional traction on snow, mud,
ice, sand or gravel. It works like a standard transaxle
most of the time, but when one of the front wheels loses
traction, this feature will allow the wheel with traction
to move the vehicle.
Steering
Electric Power Steering
If the engine stalls while you are driving, the power
steering assist system will continue to operate until you
are able to stop your vehicle. If you lose power steering
assist because the electric power steering system is not
functioning, you can steer, but it will take more effort.
If you turn the steering wheel in either direction several
times until it stops, or hold the steering wheel in the
stopped position for an extended amount of time, you
may notice a reduced amount of power steering
assist. The normal amount of power steering assist
should return shortly after a few normal steering
movements.
The electric power steering system does not require
regular maintenance. If you suspect steering system
problems and/or the POWER STEERING message
comes on, contact your dealer for service repairs.
SeeDIC Warnings and Messages on page 3-40.
Steering Tips
It is important to take curves at a reasonable speed.
A lot of the “driver lost control” accidents mentioned on
the news happen on curves. Here is why:
Experienced driver or beginner, each of us is subject to
the same laws of physics when driving on curves. The
traction of the tires against the road surface makes it
possible for the vehicle to change its path when you turn
the front wheels. If there is no traction, inertia will keep
the vehicle going in the same direction. If you have
ever tried to steer a vehicle on wet ice, you will
understand this.
The traction you can get in a curve depends on the
condition of your tires and the road surface, the angle at
which the curve is banked, and your speed. While you are
in a curve, speed is the one factor you can control.
Suppose you are steering through a sharp curve.
Then you suddenly apply the brakes. Both control
systems — steering and braking — have to do their
work where the tires meet the road. Unless you have
four-wheel anti-lock brakes, adding the hard braking can
demand too much of those places. You can lose control.
The same thing can happen if you are steering through a
sharp curve and you suddenly accelerate. Those two
control systems — steering and acceleration — can
overwhelm those places where the tires meet the road
and make you lose control. SeeEnhanced Traction
System (ETS) on page 4-9.
4-11
Page 203 of 390
Check your mirrors, glance over your shoulder, and
start your left lane change signal before moving out
of the right lane to pass. When you are far enough
ahead of the passed vehicle to see its front in your
inside mirror, activate your right lane change signal
and move back into the right lane. Remember that
your passenger side outside mirror is convex. The
vehicle you just passed may seem to be farther away
from you than it really is.
Try not to pass more than one vehicle at a time on
two-lane roads. Reconsider before passing the next
vehicle.
Do not overtake a slowly moving vehicle too rapidly.
Even though the brake lamps are not �ashing, it may
be slowing down or starting to turn.
If you are being passed, make it easy for the
following driver to get ahead of you. Perhaps you
can ease a little to the right.
Loss of Control
Let us review what driving experts say about what
happens when the three control systems — brakes,
steering, and acceleration — do not have enough friction
where the tires meet the road to do what the driver
has asked.
In any emergency, do not give up. Keep trying to steer
and constantly seek an escape route or area of less
danger.
Skidding
In a skid, a driver can lose control of the vehicle.
Defensive drivers avoid most skids by taking reasonable
care suited to existing conditions, and by not overdriving
those conditions. But skids are always possible.
The three types of skids correspond to your vehicle’s
three control systems. In the braking skid, your wheels
are not rolling. In the steering or cornering skid, too much
speed or steering in a curve causes tires to slip and lose
cornering force. And in the acceleration skid, too much
throttle causes the driving wheels to spin.
4-15
Page 204 of 390

A cornering skid is best handled by easing your foot off
the accelerator pedal.
If you have the Enhanced Traction System (ETS),
remember: It helps to avoid only the acceleration skid.
SeeEnhanced Traction System (ETS) on page 4-9.
If you do not have the Enhanced Traction System,
or if the system is off, then an acceleration skid is
also best handled by easing your foot off the
accelerator pedal.
If your vehicle starts to slide, ease your foot off the
accelerator pedal and quickly steer the way you want
the vehicle to go. If you start steering quickly enough,
your vehicle may straighten out. Always be ready
for a second skid if it occurs.
Of course, traction is reduced when water, snow, ice,
gravel, or other material is on the road. For safety, you
will want to slow down and adjust your driving to
these conditions. It is important to slow down on slippery
surfaces because stopping distance will be longer and
vehicle control more limited.While driving on a surface with reduced traction, try your
best to avoid sudden steering, acceleration, or braking,
including reducing vehicle speed by shifting to a lower
gear. Any sudden changes could cause the tires to slide.
You may not realize the surface is slippery until your
vehicle is skidding. Learn to recognize warning
clues — such as enough water, ice, or packed
snow on the road to make a mirrored surface — and
slow down when you have any doubt.
If you have the Anti-Lock Brake System (ABS),
remember: It helps avoid only the braking skid. If you do
not have ABS, then in a braking skid, where the wheels
are no longer rolling, release enough pressure on the
brakes to get the wheels rolling again. This restores
steering control. Push the brake pedal down steadily
when you have to stop suddenly. As long as the wheels
are rolling, you will have steering control.
4-16
Page 219 of 390
Rocking Your Vehicle to Get It Out
First, turn your steering wheel left and right. That
will clear the area around your front wheels. Then shift
back and forth between REVERSE (R) and a forward
gear, or with a manual transaxle, between FIRST (1) or
SECOND (2) and REVERSE (R), spinning the wheels
as little as possible. Release the accelerator pedal while
you shift, and press lightly on the accelerator pedal
when the transaxle is in gear. By slowly spinning your
wheels in the forward and reverse directions, you
will cause a rocking motion that may free your vehicle.
If that does not get you out after a few tries, you
may need to be towed out. If you do need to be towed
out, seeTowing Your Vehicle on page 4-36.
Loading Your Vehicle
It is very important to know how much weight your
vehicle can carry. This weight is called the vehicle
capacity weight and includes the weight of all occupants,
cargo and all nonfactory-installed options. Two labels
on your vehicle show how much weight it may properly
carry, the Tire and Loading Information label and the
Certi�cation label.
{CAUTION:
Do not load your vehicle any heavier than the
Gross Vehicle Weight Rating (GVWR), or either
the maximum front or rear Gross Axle Weight
Rating (GAWR). If you do, parts on your
vehicle can break, and it can change the way
your vehicle handles. These could cause you
to lose control and crash. Also, overloading
can shorten the life of your vehicle.
4-31