radio CHEVROLET COLORADO 2004 1.G Owners Manual
[x] Cancel search | Manufacturer: CHEVROLET, Model Year: 2004, Model line: COLORADO, Model: CHEVROLET COLORADO 2004 1.GPages: 414, PDF Size: 2.71 MB
Page 85 of 414
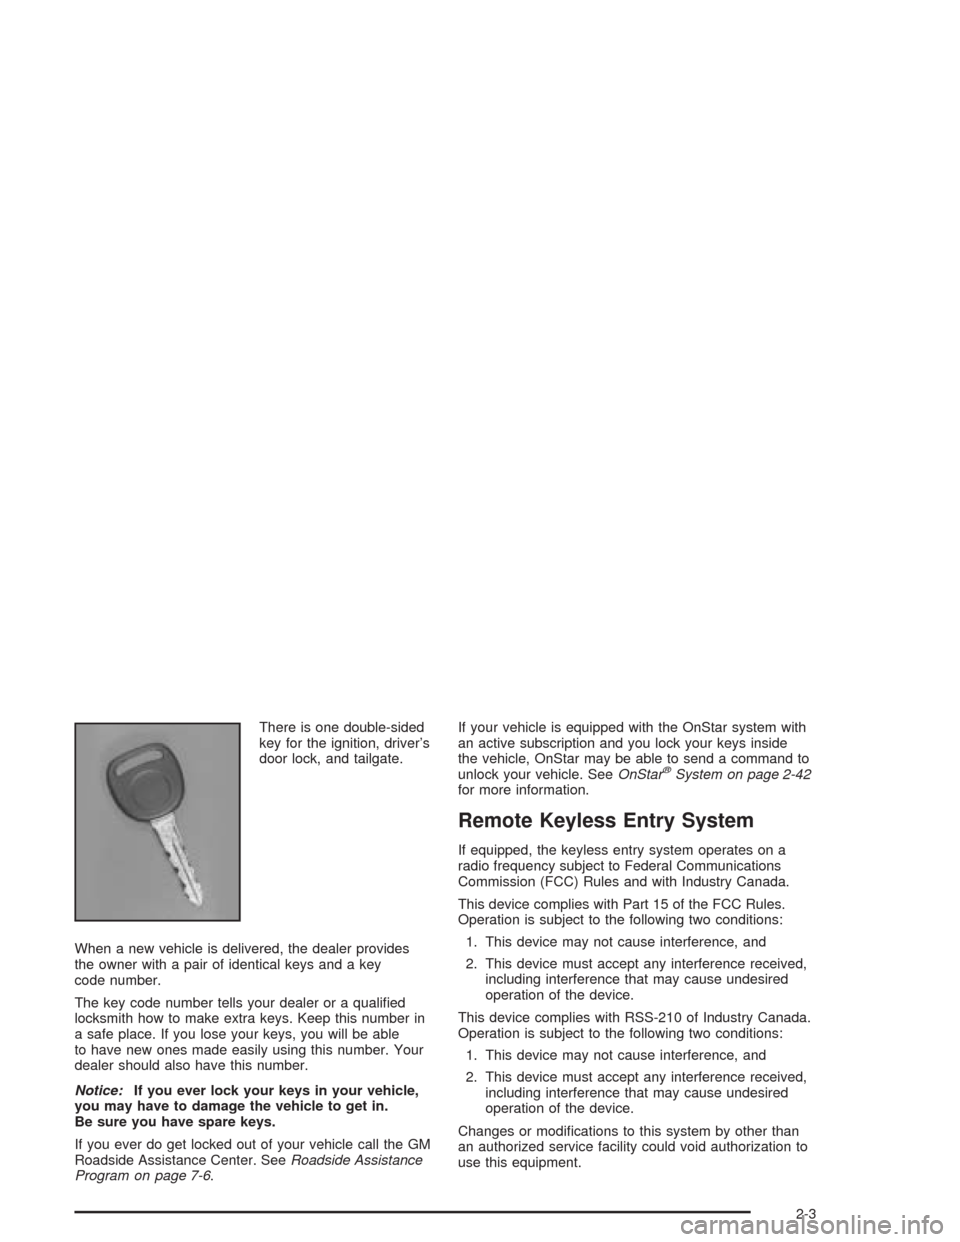
There is one double-sided
key for the ignition, driver’s
door lock, and tailgate.
When a new vehicle is delivered, the dealer provides
the owner with a pair of identical keys and a key
code number.
The key code number tells your dealer or a quali�ed
locksmith how to make extra keys. Keep this number in
a safe place. If you lose your keys, you will be able
to have new ones made easily using this number. Your
dealer should also have this number.
Notice:If you ever lock your keys in your vehicle,
you may have to damage the vehicle to get in.
Be sure you have spare keys.
If you ever do get locked out of your vehicle call the GM
Roadside Assistance Center. SeeRoadside Assistance
Program on page 7-6.If your vehicle is equipped with the OnStar system with
an active subscription and you lock your keys inside
the vehicle, OnStar may be able to send a command to
unlock your vehicle. SeeOnStar
®System on page 2-42
for more information.
Remote Keyless Entry System
If equipped, the keyless entry system operates on a
radio frequency subject to Federal Communications
Commission (FCC) Rules and with Industry Canada.
This device complies with Part 15 of the FCC Rules.
Operation is subject to the following two conditions:
1. This device may not cause interference, and
2. This device must accept any interference received,
including interference that may cause undesired
operation of the device.
This device complies with RSS-210 of Industry Canada.
Operation is subject to the following two conditions:
1. This device may not cause interference, and
2. This device must accept any interference received,
including interference that may cause undesired
operation of the device.
Changes or modi�cations to this system by other than
an authorized service facility could void authorization to
use this equipment.
2-3
Page 101 of 414
ON (C):This is the position that the switch returns to
after you start your engine and release the switch. The
switch stays in ON when the engine is running. But even
when the engine is not running, you can use ON to
operate your electrical accessories and to display some
instrument panel cluster warning and indicator lights.
START (D):This is the position that starts the engine.
When the engine starts, release the key. The ignition
switch will return to ON for normal driving.
When the engine is not running, ACC and ON allow you
to operate your electrical accessories, such as the
radio or items plugged into the accessory power outlets.
A warning tone will sound if you open the driver’s
door when the ignition is in ACC or LOCK and the key
is in the ignition.
Retained Accessory Power (RAP)
Your vehicle is equipped with Retained Accessory
Power (RAP) which will allow certain features of your
vehicle to continue working for up to 20 minutes after the
ignition key is turned to LOCK.
Your radio and power windows will work when the
ignition key is in ON or ACC. Once the key is turned
from ON to LOCK, these features will continue to work
for up to 20 minutes or until a door is opened.
Starting Your Engine
Automatic Transmission
Move your shift lever to PARK (P) or NEUTRAL (N).
Your engine will not start in any other position — that is
a safety feature. To restart when you are already
moving, use NEUTRAL (N) only.
Notice:Do not try to shift to PARK (P) if your
vehicle is moving. If you do, you could damage the
transmission. Shift to PARK (P) only when your
vehicle is stopped.
Manual Transmission
The gear selector should be in NEUTRAL and the
parking brake engaged. Hold the clutch pedal to the �oor
and start the engine. Your vehicle will not start if the
clutch pedal is not all the way down — that is a
safety feature.
2-19
Page 129 of 414
Instrument Panel Overview...............................3-2
Hazard Warning Flashers................................3-4
Other Warning Devices...................................3-5
Horn.............................................................3-5
Tilt Wheel.....................................................3-5
Turn Signal/Multifunction Lever.........................3-6
Exterior Lamps...............................................3-6
Interior Lamps..............................................3-10
Accessory Power Outlets...............................3-10
Ashtrays and Cigarette Lighter........................3-11
Climate Controls............................................3-12
Climate Control System.................................3-12
Outlet Adjustment.........................................3-14
Warning Lights, Gages, and Indicators............3-15
Instrument Panel Cluster................................3-16
Speedometer and Odometer...........................3-17
Trip Odometer..............................................3-17
Tachometer.................................................3-18
Safety Belt Reminder Light.............................3-18
Air Bag Readiness Light................................3-19
Air Bag Off Light..........................................3-20
Battery Warning Light....................................3-21
Up-Shift Light (Manual Transmission)...............3-22
Brake System Warning Light..........................3-22
Anti-Lock Brake System Warning Light.............3-23
Engine Coolant Temperature Gage..................3-24Malfunction Indicator Lamp.............................3-24
Oil Pressure Light.........................................3-27
Security Light...............................................3-28
Cruise Control Light......................................3-28
Highbeam On Light.......................................3-28
Daytime Running Lamps Indicator Light...........3-29
Fuel Gage...................................................3-29
Driver Information Center (DIC).......................3-30
DIC Controls and Displays.............................3-30
DIC Warnings and Messages.........................3-32
Audio System(s).............................................3-36
Setting the Time for Radios without Radio
Data Systems (RDS)..................................3-36
Setting the Time for Radios with Radio Data
Systems (RDS).........................................3-36
AM-FM Radio...............................................3-37
Radio with CD..............................................3-39
Radio with Six-Disc CD.................................3-47
Theft-Deterrent Feature (Non-RDS Radios).......3-58
Theft-Deterrent Feature (RDS Radios).............3-58
Radio Reception...........................................3-59
Care of Your CDs.........................................3-59
Care of Your CD Player................................3-59
Fixed Mast Antenna......................................3-59
Chime Level Adjustment................................3-59
Section 3 Instrument Panel
3-1
Page 135 of 414
AUTO:Turn the knob to this position to automatically
turn on the headlamps at normal brightness, together
with the following:
Sidemarker Lamps
Taillamps
Parking Lamps
Instrument Panel Lights
See “Automatic Headlamp System” following, for
more information.
;(Parking Lamps):Turn the knob to this position to
turn on the parking lamps, together with the following:
Sidemarker Lamps
Taillamps
License Plate Lamps
Instrument Panel Lights
2(Headlamps):Turn the knob to this position to turn
on the headlamps, together with the previously listed
lamps and lights.
You can switch your headlamps from low to high beam
by pushing the turn signal/multifunction lever toward
the instrument panel.
Automatic Headlamp System
Your vehicle may be equipped with this feature. When it
is dark enough outside, your automatic headlamp
system will turn on your headlamps at the normal
brightness along with other lamps such as the taillamps,
sidemarker, parking lamps and the instrument panel
lights. The radio lights may also be dim.
Your vehicle may have a light sensor located on the top
of the instrument panel. Be sure it is not covered, or
the system will be on whenever the ignition is on.
The system may also turn on your headlamps when
driving through a parking garage, heavy overcast
weather or a tunnel. This is normal.
There is a delay in the transition between the daytime
and nighttime operation of the Daytime Running
Lamps (DRL) and the automatic headlamp system so
that driving under bridges or bright overhead street lights
does not affect the system. The DRL and automatic
headlamp system will only be affected when the
light sensor sees a change in lighting lasting longer than
the delay.
If you start your vehicle in a dark garage, the automatic
headlamp system will come on immediately. Once
you leave the garage, it will take approximately several
seconds for the automatic headlamp system to
change to DRL if it is light outside.
3-7
Page 138 of 414
Interior Lamps
Instrument Panel Brightness
The thumbwheel for this feature is located next to the
exterior lamps control. SeeExterior Lamps on page 3-6.
D(Instrument Panel Lights):Turn the thumbwheel
up or down to brighten or dim the instrument panel lights
and the radio display. This will only work if the
headlamps or parking lamps are on.
To turn on the dome lamp, with the vehicle doors
closed, turn the thumbwheel all the way up.
Dome Lamp
The dome lamp will come on when you open a door.
You can also turn the dome lamp on by turning the
thumbwheel all the way up. In this position, the dome
lamp will remain on whether a door is opened or closed.
E(Dome Override):Press this button, located
below the exterior lamp control, to turn the dome lamp
off even when a door is opened. To return the lamp
to automatic operation, press the button again.
Exit Lighting
With exit lighting, the interior lamps will come on when
you remove the key from the ignition. The lamps
will not come on if the dome override button is
pressed in.
Battery Run-Down Protection
This feature shuts off the dome lamp if it is left on for
more than 20 minutes when the ignition is in LOCK. This
will keep your battery from running down.
Accessory Power Outlets
Your vehicle may have an accessory power outlet.
With accessory power outlets you can plug in auxiliary
electrical equipment such as a cellular telephone or
CB radio.
Your vehicle may have two accessory power outlets
located on the lower part of the instrument panel below
the climate control system and there may be one
located on the rear of the center console. A small cap
must be pulled down to access an accessory power
outlet. When not using an outlet be sure to cover it with
the protective cap.
3-10
Page 149 of 414
{CAUTION:
If the air bag readiness light ever comes on
when you have turned off the air bag, it means
that something may be wrong with the air bag
system. The right front passenger’s frontal air
bag could in�ate even though the switch is off.
If this ever happens, do not let anyone whom
the national government has identi�ed as a
member of a passenger air bag risk group sit
in the right front passenger’s position (for
example, do not secure a rear-facing child
restraint in the right front passenger’s seat)
until you have your vehicle serviced.
Battery Warning Light
This light will come on
brie�y when you start the
vehicle, as a check to
show you it is working;
then it should go out.
If it stays on, or comes on while you are driving, you
may have a problem with the electrical charging system.
Have it checked right away. Driving while this light is
on could drain your battery and result in a vehicle that
may stall.
If you must drive a short distance with the light on, be
certain to turn off all your accessories, such as the radio
and climate control system.
3-21
Page 164 of 414
Audio System(s)
Notice:Before adding any sound equipment to
your vehicle, like a tape player, CB radio, mobile
telephone, or two-way radio, make sure that it can
be added by checking with your dealer. Also,
check federal rules covering mobile radio and
telephone units. If sound equipment can be added,
it is very important to do it properly. Added
sound equipment may interfere with the operation
of your vehicle’s engine, radio, or other systems,
and even damage them. Your vehicle’s systems may
interfere with the operation of sound equipment
that has been added improperly.
Figure out which audio system is in your vehicle, �nd
out what your audio system can do, and how to operate
all of its controls.
Setting the Time for Radios without
Radio Data Systems (RDS)
Press and hold HR until the correct hour appears on the
display. Press and hold MIN until the correct minute
appears on the display. There is an initial two-second
delay before the clock goes into time-set mode.
Display the time with the ignition off, by pressing RCL,
HR, or MIN.
Setting the Time for Radios with
Radio Data Systems (RDS)
The radio may have a button marked with an H or HR to
represent hours and an M or MN to represent minutes.
Press and hold the hour button until the correct hour
appears on the display. Press and hold the minute
button until the correct minute appears on the display.
The time can be set with the ignition on or off.
To synchronize the time with an FM station broadcasting
Radio Data System (RDS) information, press and hold
the hour and minute buttons at the same time until RDS
TIME appears on the display. To accept this time, press
and hold the hour and minute buttons, at the same time,
for another two seconds. If the time is not available from
the station, NO UPDAT will appear on the display.
RDS time is broadcast once a minute. After tuning to an
RDS broadcast station, it may take a few minutes for
the time to update.
3-36
Page 165 of 414
AM-FM Radio
Playing the Radio
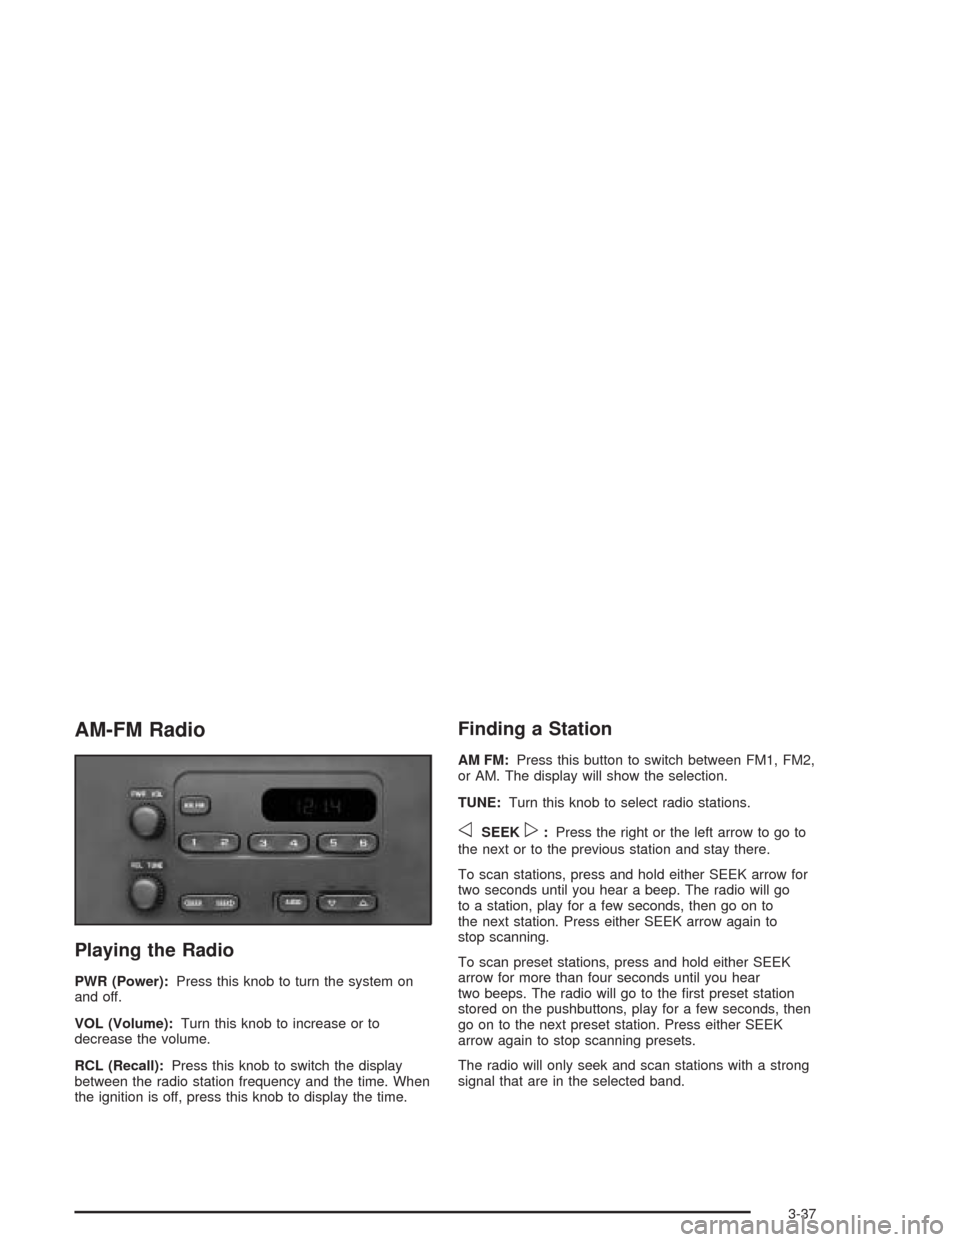
PWR (Power):Press this knob to turn the system on
and off.
VOL (Volume):Turn this knob to increase or to
decrease the volume.
RCL (Recall):Press this knob to switch the display
between the radio station frequency and the time. When
the ignition is off, press this knob to display the time.
Finding a Station
AM FM:Press this button to switch between FM1, FM2,
or AM. The display will show the selection.
TUNE:Turn this knob to select radio stations.
oSEEKp:Press the right or the left arrow to go to
the next or to the previous station and stay there.
To scan stations, press and hold either SEEK arrow for
two seconds until you hear a beep. The radio will go
to a station, play for a few seconds, then go on to
the next station. Press either SEEK arrow again to
stop scanning.
To scan preset stations, press and hold either SEEK
arrow for more than four seconds until you hear
two beeps. The radio will go to the �rst preset station
stored on the pushbuttons, play for a few seconds, then
go on to the next preset station. Press either SEEK
arrow again to stop scanning presets.
The radio will only seek and scan stations with a strong
signal that are in the selected band.
3-37
Page 166 of 414
Setting Preset Stations
Up to 18 stations (six FM1, six FM2, and six AM) can be
programmed on the six numbered pushbuttons, by
performing the following steps:
1. Turn the radio on.
2. Press AM FM to select FM1, FM2, or AM.
3. Tune in the desired station.
4. Press and hold one of the six numbered
pushbuttons until you hear a beep. Whenever that
numbered pushbutton is pressed, the station
that was set will return.
5. Repeat the steps for each pushbutton.
Setting the Tone (Bass/Treble)
AUDIO:To adjust bass and treble, press and release
AUDIO until BAS or TRE appears on the display.
Then press and hold the up or the down arrow to
increase or to decrease. If a station is weak or noisy,
decrease the treble.
To adjust bass or treble to the middle position, select
BAS or TRE. Then press and hold AUDIO for more than
two seconds until you hear a beep. B and a zero or T
and a zero will appear on the display.To adjust both tone controls and both speaker controls
to the middle position, �rst end out of audio mode
by pressing another button, causing the radio to perform
that function or by waiting �ve seconds for the display
to return to time of day. Then press and hold AUDIO for
more than two seconds until you hear a beep. CEN
will appear on the display.
Adjusting the Speakers (Balance/Fade)
AUDIO:To adjust the balance between the right
and the left speakers, press and release AUDIO until
BAL appears on the display. Then press and hold the up
or the down arrow to move the sound toward the right
or the left speakers.
To adjust the fade between the front and the rear
speakers, press and release AUDIO until FAD appears
on the display. Then press and hold the up or the
down arrow to move the sound toward the front or the
rear speakers.
To adjust balance or fade to the middle position, select
BAL or FAD. Then press and hold AUDIO for more
than two seconds until you hear a beep. L and a zero
or F and a zero will appear on the display.
3-38
Page 167 of 414
To adjust both tone controls and both speaker controls
to the middle position, �rst end out of audio mode
by pressing another button, causing the radio to perform
that function or by waiting �ve seconds for the display
to return to time of day. Then press and hold AUDIO for
more than two seconds until you hear a beep. CEN
will appear on the display.
Fade may not be available if the vehicle is a regular
cab model.
Radio Messages
CAL (Calibrated):The audio system has been
calibrated for your vehicle from the factory. If CAL
appears on the display it means that the radio has not
been con�gured properly for your vehicle and must
be returned to the dealer for service.
LOC (Locked):This message is displayed when the
THEFTLOCK
®system has locked up. Take the vehicle
to the dealer for service.
If any error occurs repeatedly or if an error cannot be
corrected, contact your dealer.
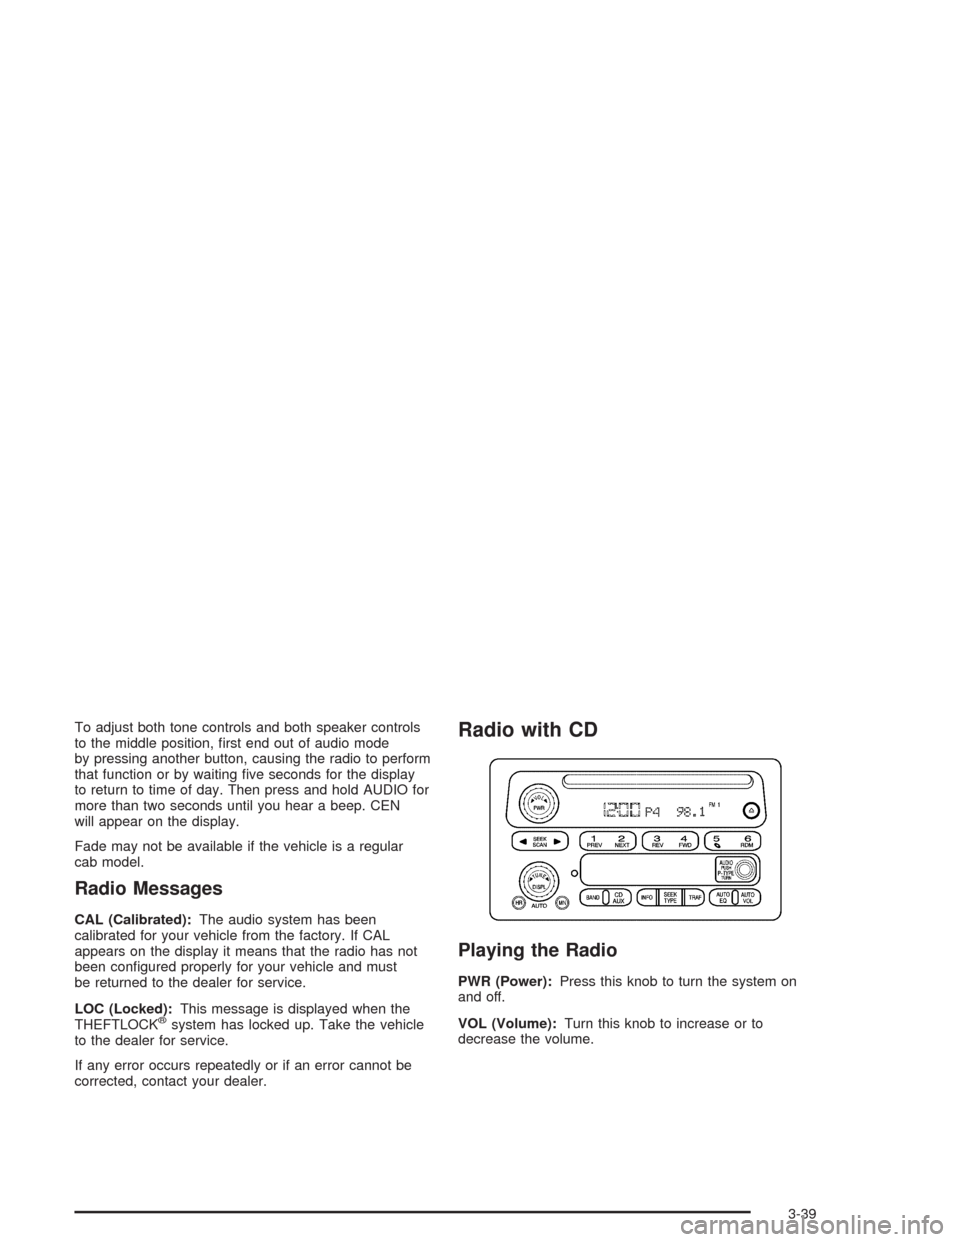
Radio with CD
Playing the Radio
PWR (Power):Press this knob to turn the system on
and off.
VOL (Volume):Turn this knob to increase or to
decrease the volume.
3-39